Motion blur often frustrates new photographers who want to take sharp images. But understanding what causes it can also allow you to control and use it for creative purposes. Let’s learn the details of motion blur photography and how to apply it in various scenarios.

- Learn to photograph waterfalls, waves, sunsets, and stars effortlessly.
- Discover how to balance movement and stillness in your shots.
- Master exposure settings easily, with or without a filter.
What Is Motion Blur?
Motion blur is a visual effect in photography in which moving objects appear blurred due to their rapid motion during exposure. It adds a sense of speed and dynamism to images and videos, enhancing their visual appeal and storytelling.
Unlike background blur, the lens is not responsible for causing motion blur in photography. Motion blurring happens when the camera shutter stays open for a long time. As the camera completes the exposure, every movement the sensor records manifests as streaks or light trails.
Typically, photographers try to avoid blurred motion at all costs. But sometimes, they can use it to convey action, much like how cartoonists draw lines to indicate their characters are moving.
Better yet, you can use motion blur in photography to create surreal scenes. They use their cameras, much like artists would use their brushes to paint abstract elements.
Camera Gear for Motion Blur Photography
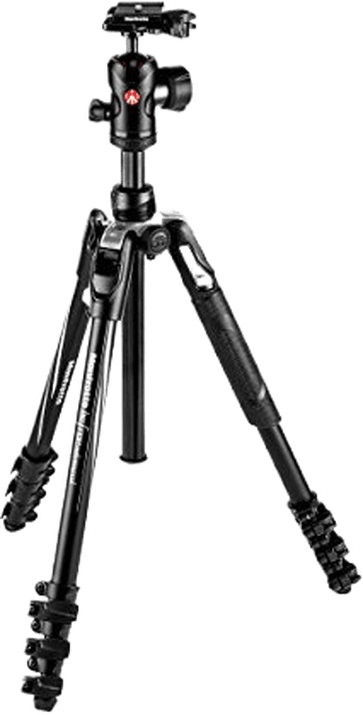
To blur motion, you need a manual-mode camera to keep the aperture open for a long time. It’s also best to use a tripod to capture creative motion blur in photography. Using it to keep your camera steady helps you control the blur in your image.
You don’t need a tripod every time. Tripods are a must in most situations but helpful in others. We’ll cover when and when not to use them.
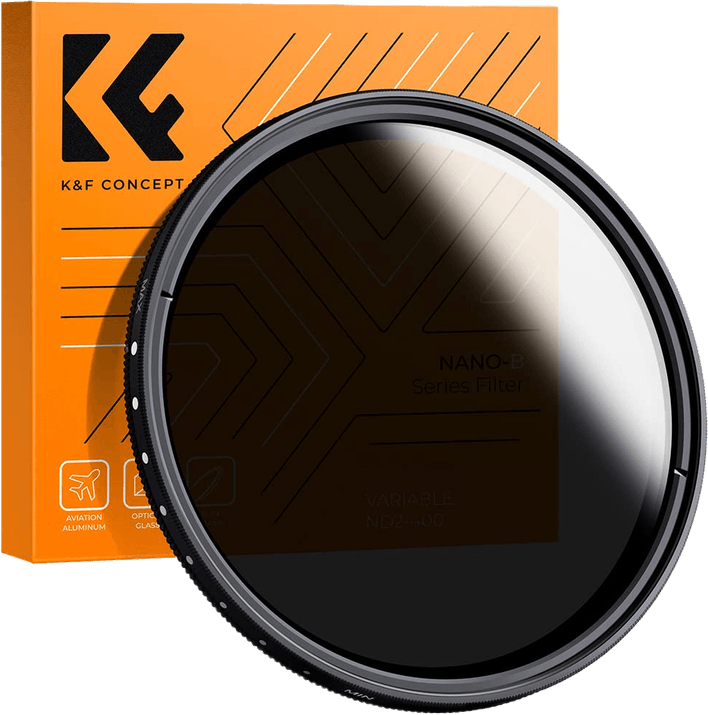
In some blurred shots, the shutter speed cannot drop low enough to create the right blur level without overexposing the image. In these cases, you need neutral density filters to cut the light coming into the lens. Doing so allows for longer exposures, even in daylight.
We have articles on the best options for buying a tripod or ND (neutral density) filter.
6 Best Ways to Capture Motion Blur
Here are six easy ways to take photos of motion blur for creative and unique pictures.
1. Set the Shutter Speed for an Intentional Blur
To create an artistic motion blur, you need to set the shutter speed low enough to blur the action in the image. Remember, the shutter is the part of the lens that opens and closes to expose the image.
Anything that moves when the shutter is open will blur. A fast shutter speed freezes action, while a slower shutter speed or longer exposure time will blur the movement.
You can set the shutter speed for motion blur shots using shutter priority or manual mode. The first is easier to learn, and the latter offers more control.
The best shutter speed to create motion blur depends on how fast the action moves and how much blur you want. A 1/60 s (second) shutter speed is often enough to create blur in fast subjects, like an athlete or a child playing.
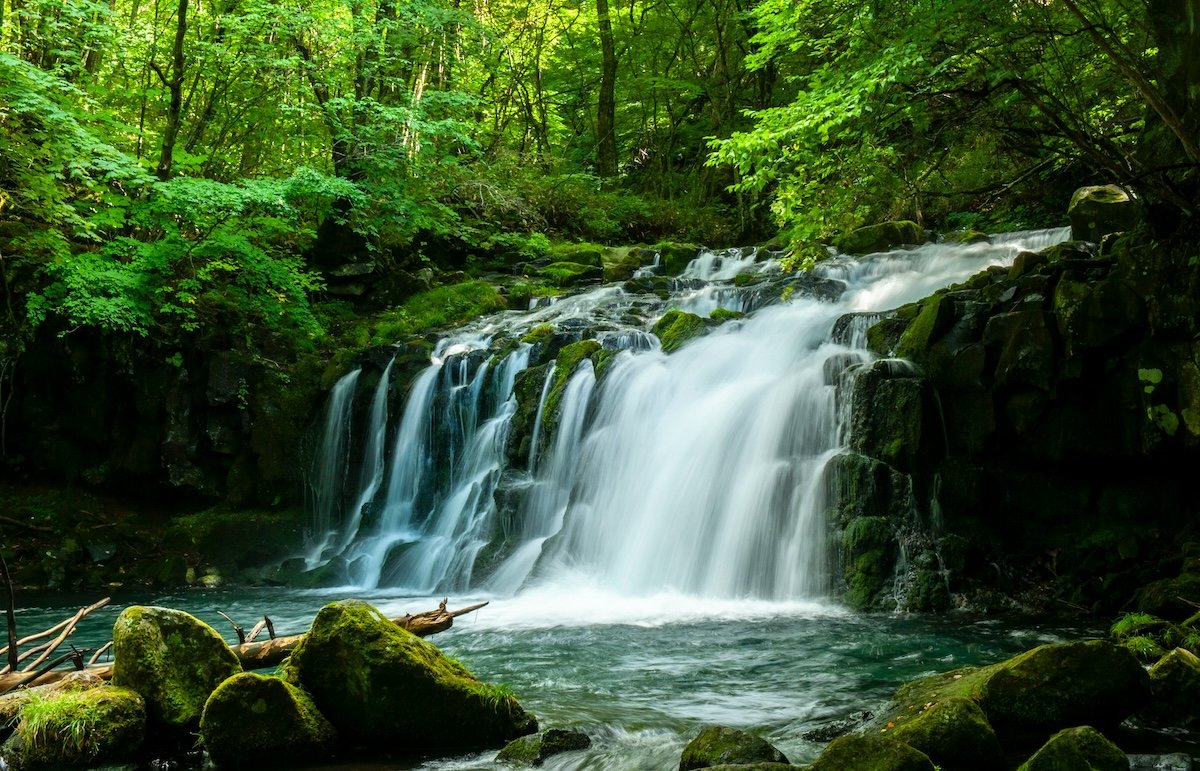
But you can also use longer exposures to create dreamy images. For instance, you can try an exposure for several seconds to display motion blur in a waterfall.
For the example below, the photographer wanted maximum blur in the water. So, they used a tripod and a shutter speed of 1/4 s. Notice how creamy the water looks!
For a long exposure landscape, I often begin with 20 seconds (if I can still get proper exposure). I then review the shot and adjust the time from there.
Creating intentional blur through shutter speed often involves experimenting. If I’m shooting a subject with rapid movement, I usually start with 1/60 s. I will then view the shot and adjust it up or down from there.
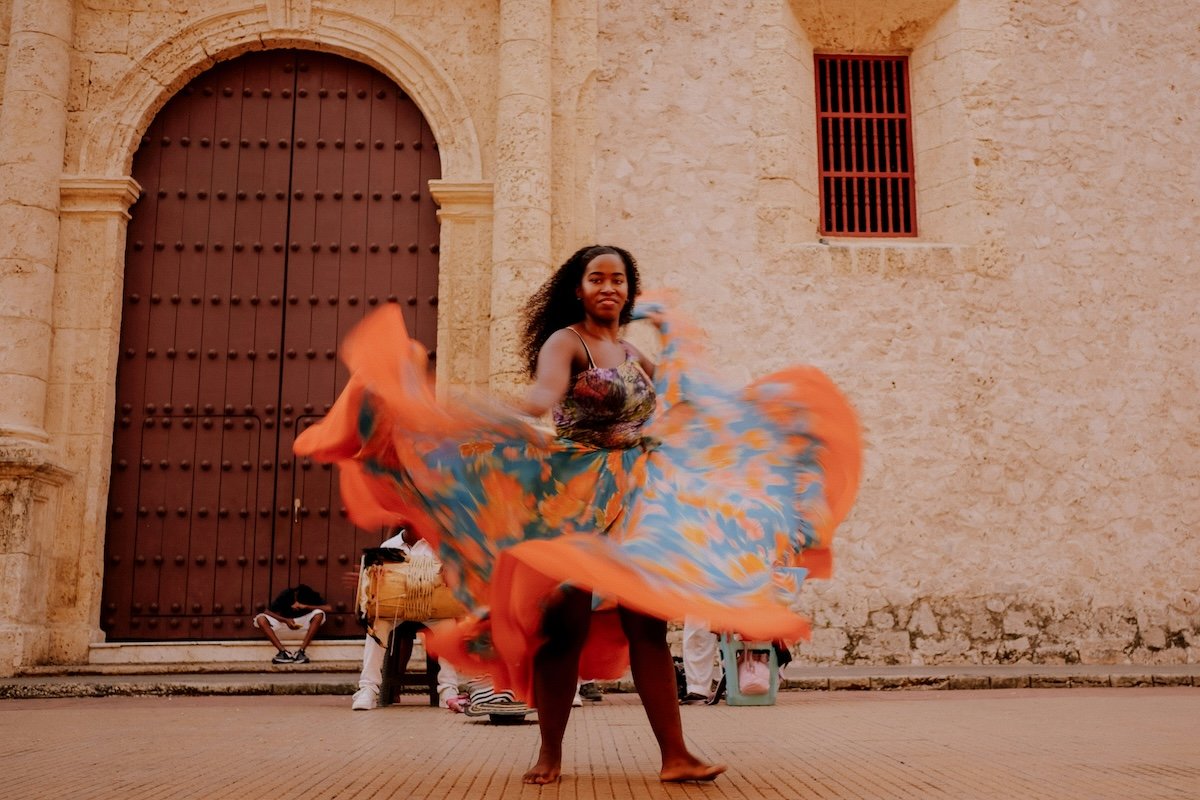
In the image below of a woman dancing, the photographer wanted to keep her face sharp while blurring the movement in her skirt. For this handheld shot, they used a shutter speed of 1/30 s.
While setting the shutter speed is essential to creating intentional, artistic blur, there’s more to consider. Do you want to blur the moving subject or blur the background?
2. Use Panning to Capture Motion Blur
Intentional camera movement (ICM) involves moving your camera in a particular direction to create a blur. Panning a shot is the best-known example of this in photography.
To execute a panning shot, you follow the direction of a moving subject with your camera. In most situations, you only have to move horizontally (left to right or vice versa).
But moving your camera isn’t enough to accomplish panning. You have to set your shutter speed to 1/30 s or slower. If you do it correctly, your subject will be in sharp focus, while the background will have an intense motion blur.
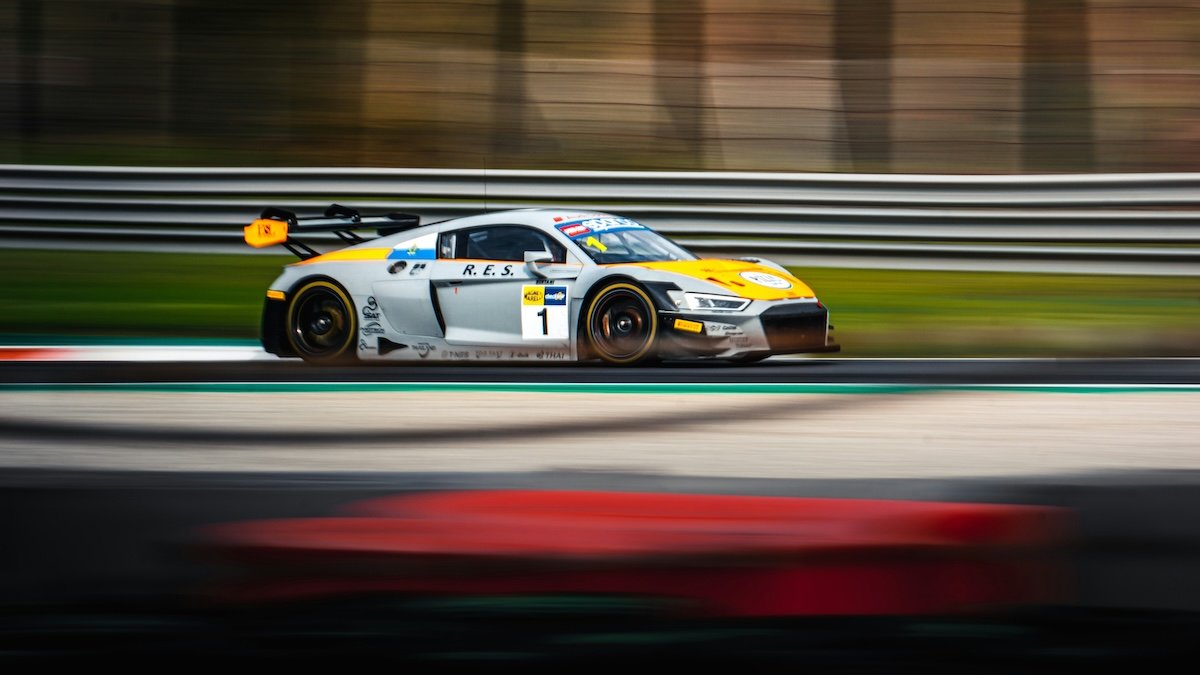
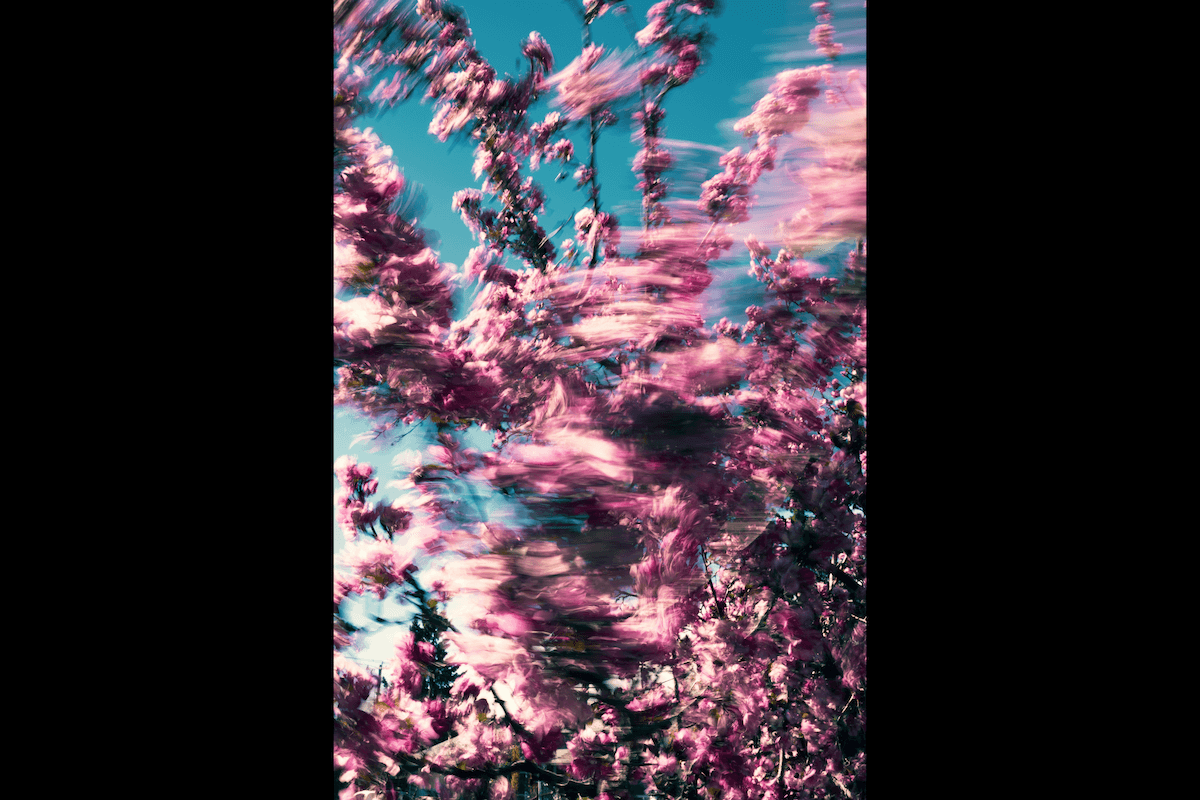
Long telephoto lenses are best for this kind of photography. They let you fill the frame with the subject while accentuating the motion blur. You can also use ICM to create fantastic abstract photos, such as the one below.
The photographer moved the camera before pressing the shutter for the photo below. You can create this kind of abstract image using the motion blur filter in Photoshop. But the effect may appear less natural.
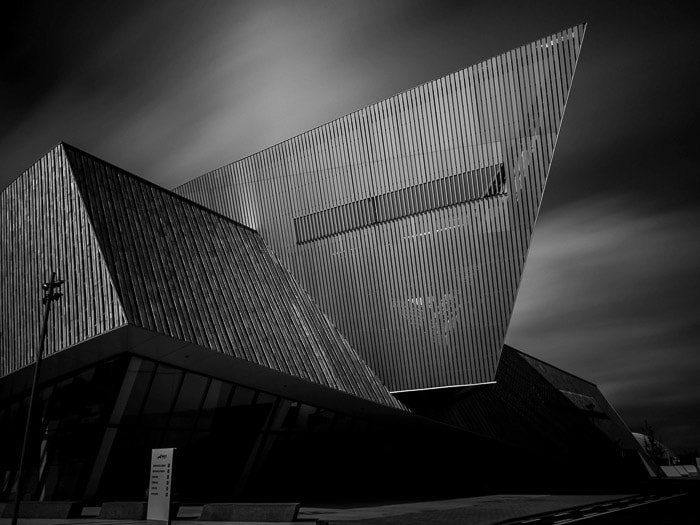
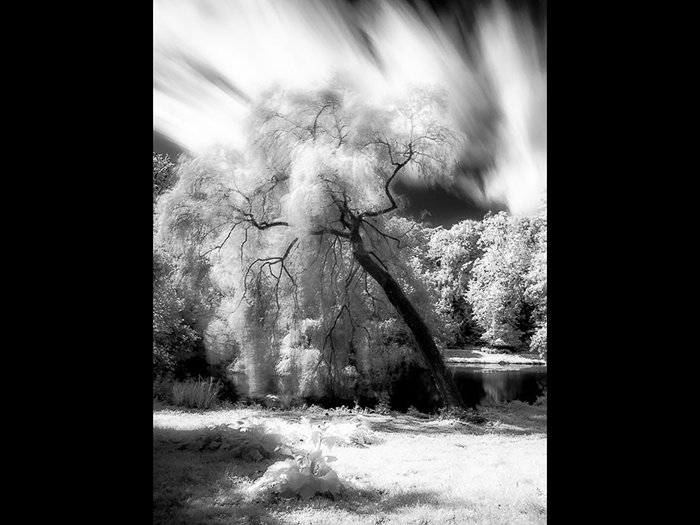
3. Capture Cloud Movement for Unique Blur
Capturing clouds is another way to add movement to architectural and landscape scenes. This technique often requires using ND filters to lower your shutter speed. That way, your camera can capture the clouds as blurry wisps as they move across the scene.
The first image below is the new congress center in Mons, Belgium. It was taken with my Olympus OM-D EM-10 using a 14-42mm kit lens with stacked B+W ND 106 and ND 110 filters.
The second image is an infrared long exposure of about 20 seconds in a city garden. I used a Panasonic Lumix DMC-GF2 Micro Four Thrids camera with a 12-42 kit lens and HOYA R-72 infrared filter.
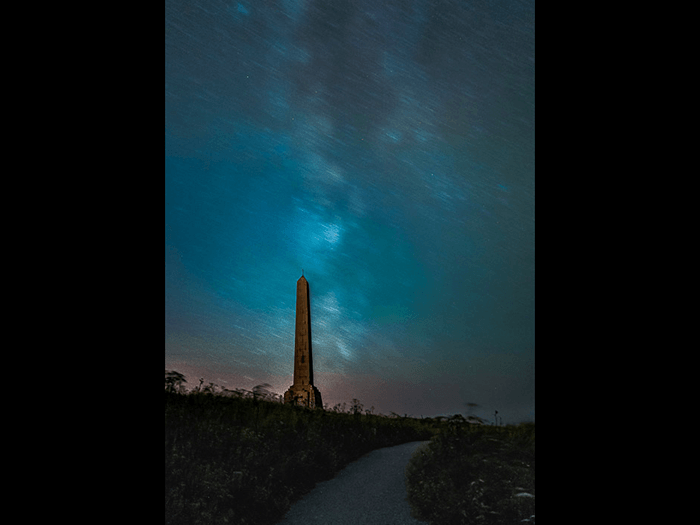
4. Use Motion Blur for Nocturnal Landscapes
Stars, planets, and galaxies move rapidly across the sky. At night, you can take excellent landscape photos. You can also use long exposures to create star trails and Milky Way timelapses.
To create star trails, it’s often best to use a shutter speed of 15 seconds or more. This process also requires a tripod since you want only certain elements to be blurry, not the entire photo. I recommend reading our how-to article on night landscape photography.
The first photo below is of the Milky Way trail above Cap-Blanc-Nez, France. It was taken with a Sony RX100 Mark II for about three minutes.
The second image shows tar trails on marshland near Turnhout, Belgium. It was taken with an Olympus OM-D EM-10 and a Samyang 7.5 f/3.5 fisheye lens. The total shooting time was about 30 minutes. The final image captures a night sky with a waterfall.

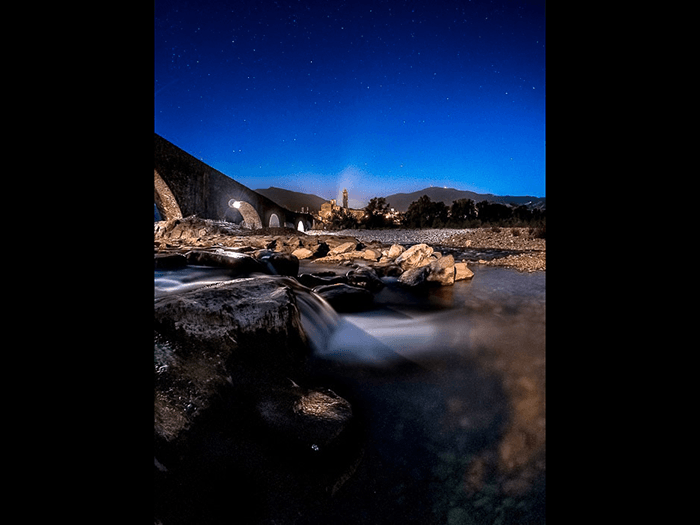
5. Experiment With Water Motion Blur
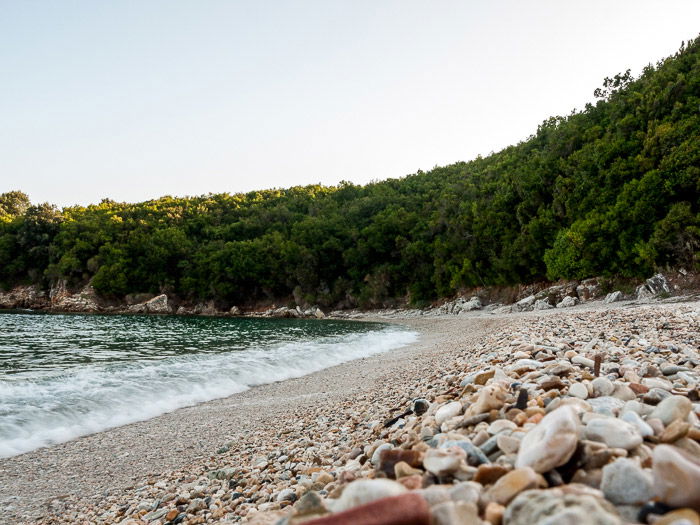
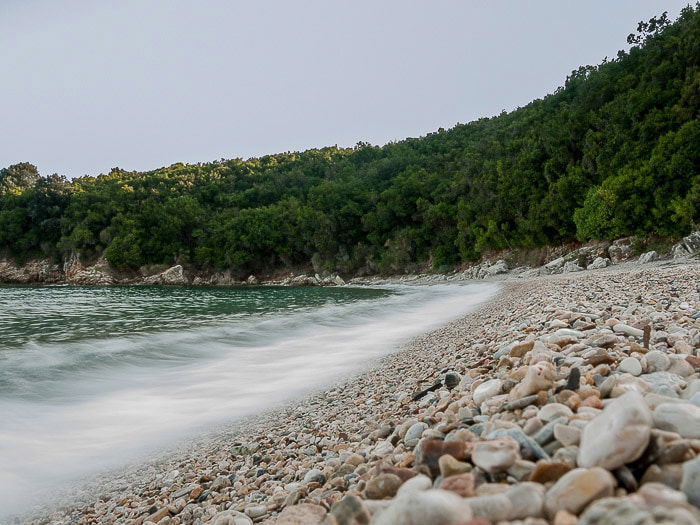
Try experimenting with your shutter speed while capturing rivers, seas, and oceans. For example, in the first photo below, you can use short shutter speeds to freeze the breaking of the waves on the shore.
You can also try a longer exposure to make them appear foamy and smooth, like in the second photo. These photos were taken at Avlaki Beach (Kerkyra, Greece). I used my Panasonic Lumix DMC-GF2 with the 14-42mm kit lens.
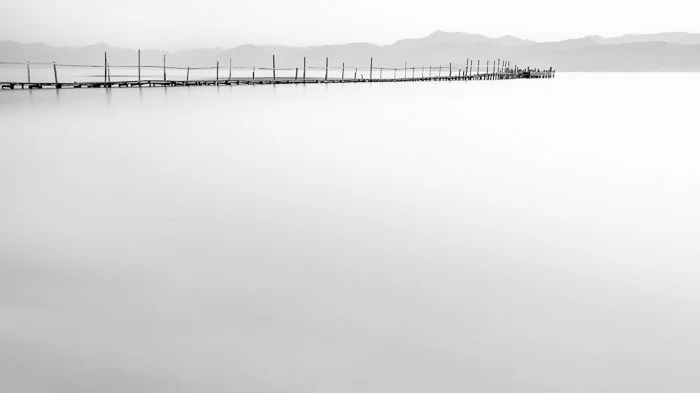
You can even use longer exposures to completely smooth the waves for a flat, static sea. If you love this effect, check out our Infinite Exposures course to create awesome long-exposure shots!
I used this technique at this dock in Kalamaki Beach at dawn. The long exposure smoothed away the waves, resulting in a motionless, zen-like, minimalist image. I used a Canon 50D with an EF-S 10-22mm f/3.5-4.5 USM lens.
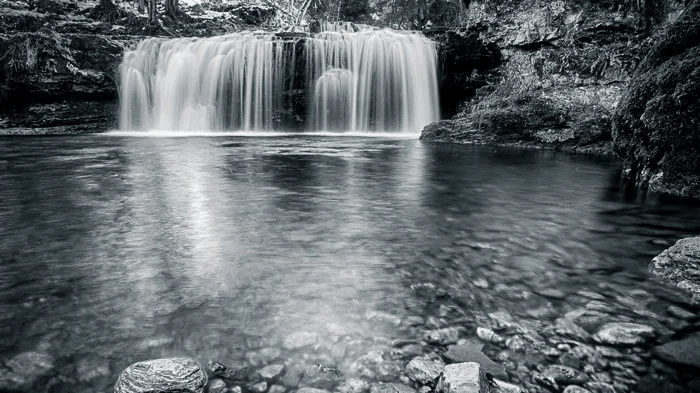
Fast-moving streams of water, like waterfalls and rivers, can also assume a silky appearance. The second image below is the Ferrera Waterfall in Italy by Alessandro Torri. He used a Canon EOS 50D with a Tokina 11-16mm f/2.8 AT-X 116 Pro DX lens.
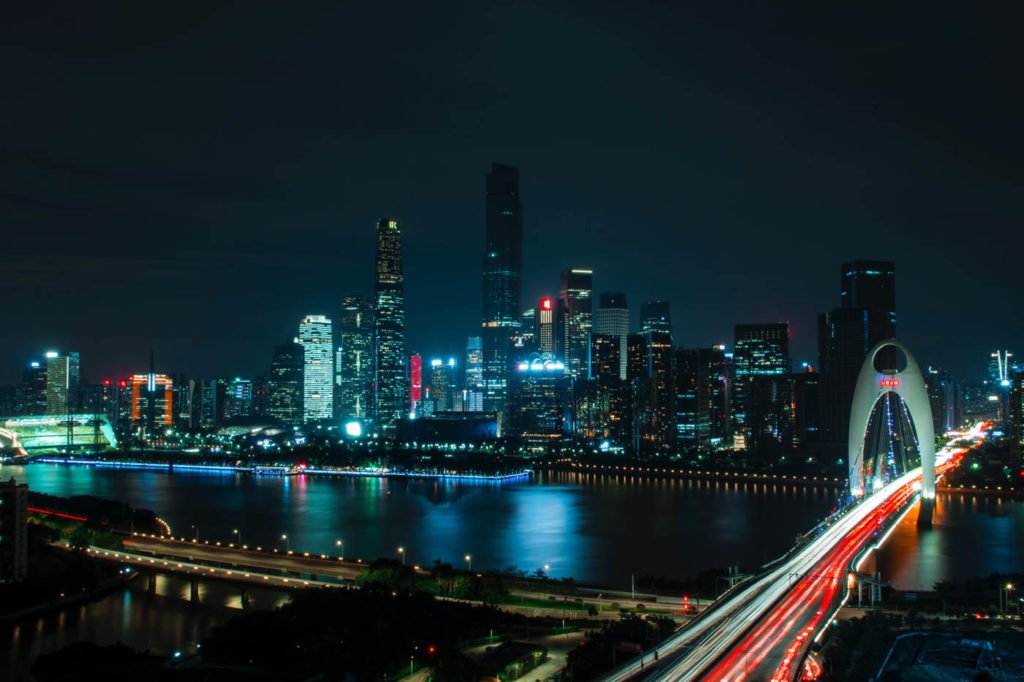
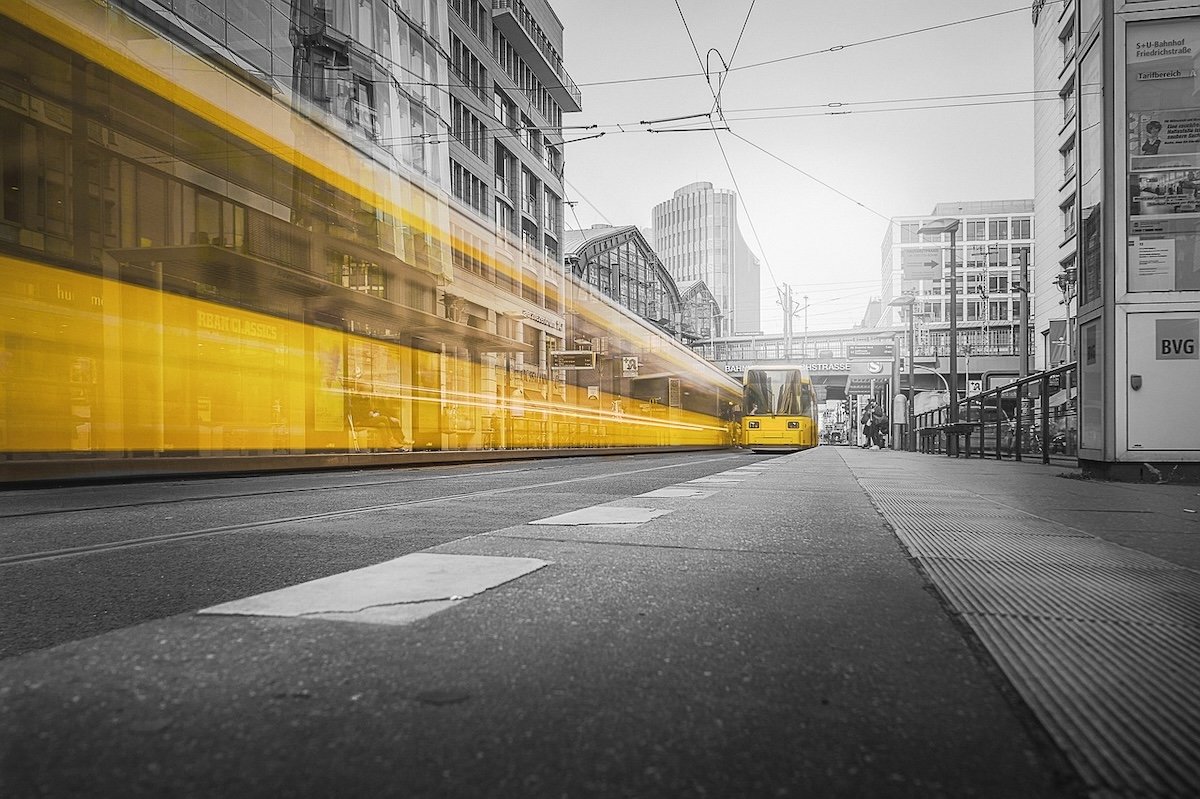
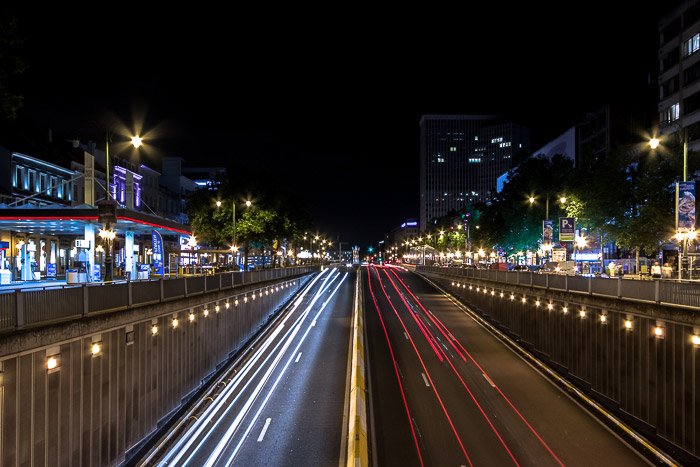
6. Capture Motion Blur With Lights
When moving elements such as cars move faster than the exposure time, they vanish in the final image and leave a trail of lights. The first image below is the Boulevard de Waterloo at night in Brussels, Belgium. I took it with a Panasonic Lumix DMC-GF2.
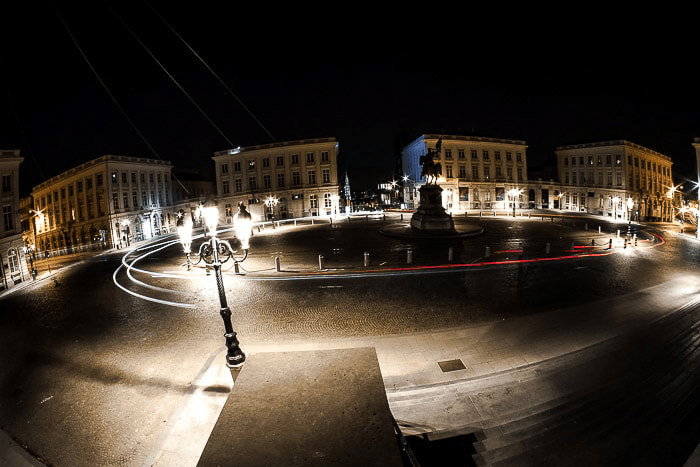
You can create an urban carousel by capturing the passing traffic framing a roundabout. I took the second photo in Place Royale in Brussels, Belgium. Again, I used the DMC-GF2. But this time, I used the Samyang 7.5 f/3.5 fisheye lens.
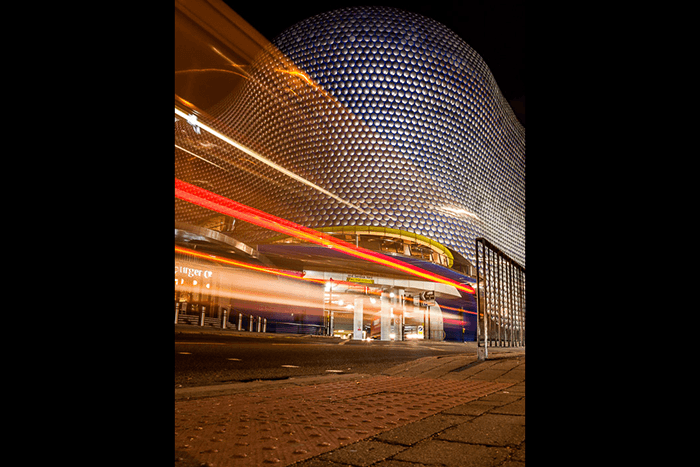
You can also uniquely present famous landmarks by capturing light trails in front of them. I shot light trails against the Bullring shopping center in Birmingham, UK (third image). I again used my Panasonic and a 14-42mm kit lens.
Conclusion: Motion Blur
Blur conveys a sense of motion in still images. Use it to draw the viewer’s eye, add interest, or even jazz up a dull background. If our outlined techniques don’t work, add motion blur with editing software like Adobe Photoshop!
- Learn to photograph waterfalls, waves, sunsets, and stars effortlessly.
- Discover how to balance movement and stillness in your shots.
- Master exposure settings easily, with or without a filter.