Product photography is everywhere. Every time you shop on Amazon, go to McDonald’s or flick through a magazine – product photography is there.
Read on for a comprehensive list of all the product photography tips you need!
What Is Product Photography?
Ninety-nine percent of all purchases (99!) come from an emotional response, not a need. People buy things based on how that product will make them feel.
This tells you that moods and feelings are important. We can use this information in creating product photos that viewers will find engaging.
If you’re reading this article, you’re probably on the other side of product photography. You might be a professional product photographer, or are looking to become one.
Or you’re trying to sell things you own or make yourself. Whether you want to sell via Amazon, eBay, Etsy, or Facebook, your product will need at least 5 shots. These images need to show your wares in the best possible light.
You could also be photographing products for advertising or marketing purposes to help companies sell products. This can be through online social media or printed materials such as adverts and billboards.
Regardless of what brought you here, read on. We’ve got all the photography tips you need to become a master of product photography.
Camera Equipment for Product Photography
The camera you use is important to a point. You can photograph objects with your smartphone for use on social media.
Yet you won’t be able to blow up the image to a large size without loss of quality or sharpness.
DSLRs or Mirrorless systems are great. They are comprehensive cameras that are versatile enough to photograph anything.
Your camera only needs to be able to shoot in raw. If you can use external objects such as lights and allow you to change lenses, that’s a huge benefit.
If you have something like that, you’re ahead of the curve and ready for product photography. If not, let’s start here.
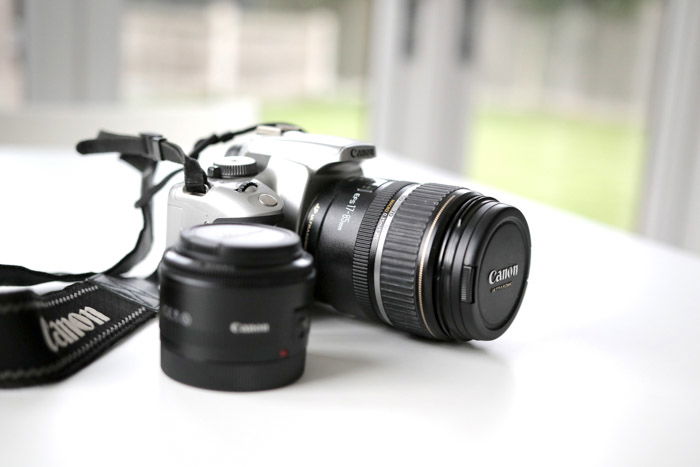
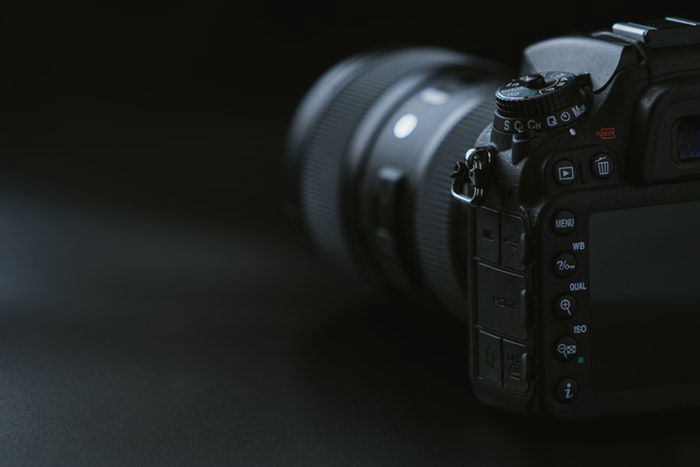
Best Camera for Product Photography
When it comes to product photography, almost anything will work. Product photographers even use their smartphones and Point & Shoot cameras.
Our recommendation is to use either a mirrorless camera or a DSLR.
This will ensure you get the best quality from your images. They will also give you a range of camera settings to help get the most out of your photography.
Depending on the purpose of the images, limitations might apply to your camera choice.
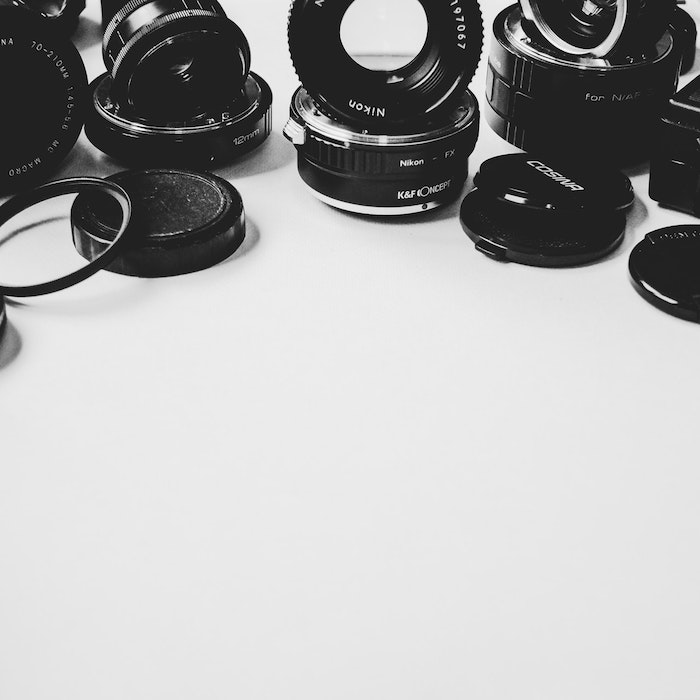
Best Choice of Lenses for Product Photography
Lenses affect your field of view, the depth of field, and the distance between objects. Your choice of lens will come down to what you would like to shoot.
A 100 mm lens, for example, is great for macro photography. It brings the foreground and background closer together.
‘Nifty fifty’ prime lenses have a very shallow depth of field. They are perfect for differential focus and will work well in low light conditions.
A standard zoom lens, such as the 24-70 mm option, will give you a great deal of versatility. This means having different fields of view without changing the lens.
Additional Equipment
The Best Tripods for Food Photography
A tripod adds stability to your creativity. A good tripod will help you out in all kinds of image capturing, especially photography.
It should be versatile enough to allow you to shoot from different angles. Different products need different perspectives.
Photographing in an aerial manner, for instance for flat lay photoshoots, is important for food and jewellery. Photographing from down-up helps bring a mood of strength.
There are many options for tripods. But the most important factors here are sturdiness, solidness, and versatility.
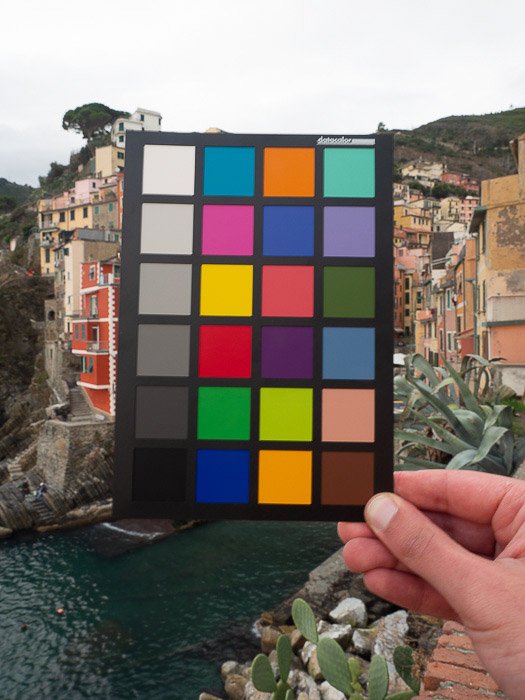
How to Use a Colour Checker – Photography Tips
Product photography is all down to the details. This is where color comes in too. Colors can either complement each other or cause an interesting juxtaposition.
To get these colors correct, you can set the camera’s white balance to the light temperature used. This becomes problematic if two different light temperatures are being used.
You can correct the white balance and color in post-processing. This is where the color checker is important.
It isn’t exactly cheap, but it helps you correct your color to the specifics of the shoot.
This little box that shows you many colors. Photograph this first before shooting any images.
During post-processing, you can correct the WB using the color checker image. Voila! It corrects everything to the colors they should be.
12 Clever Tools and Tips For DIY Product Photography
There is a multitude of tools that will help you get the best from your product photography.
These can be in the studio with you, or they can help you in post-processing the images.
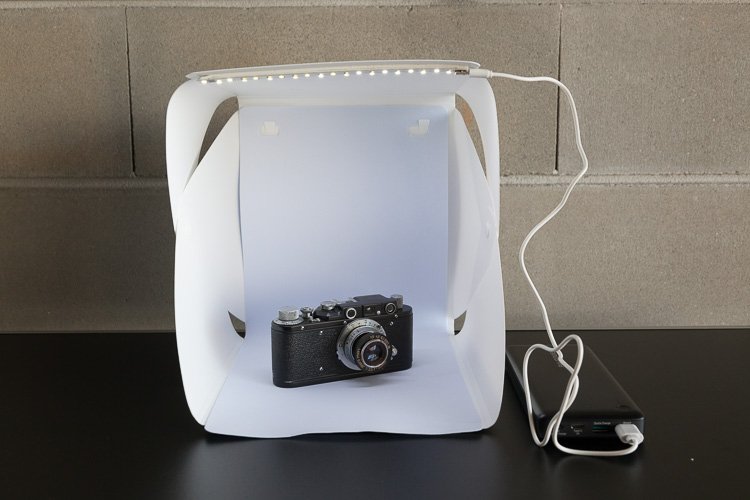
You might think of using a mini studio box to photograph your products. It is lightweight, portable, and compact. It is also cheaper than setting up a home studio, and great for small to medium-sized objects!
A folding table might also be handy. You can pack this away when finished.
The best part is no extra space needed with these two tools.
Accessories for Product Photography
The accessories you will need for product photography will come down to what you photograph.
Items such as pegs and safety pins will help keep clothing and fabric in place. A fishing line will allow you to hang items without being visible in the image.
Blue-tac, tape, and glue dots will help keep items still and in the same place.
Have a look through this article full of great accessories to make your life easier.
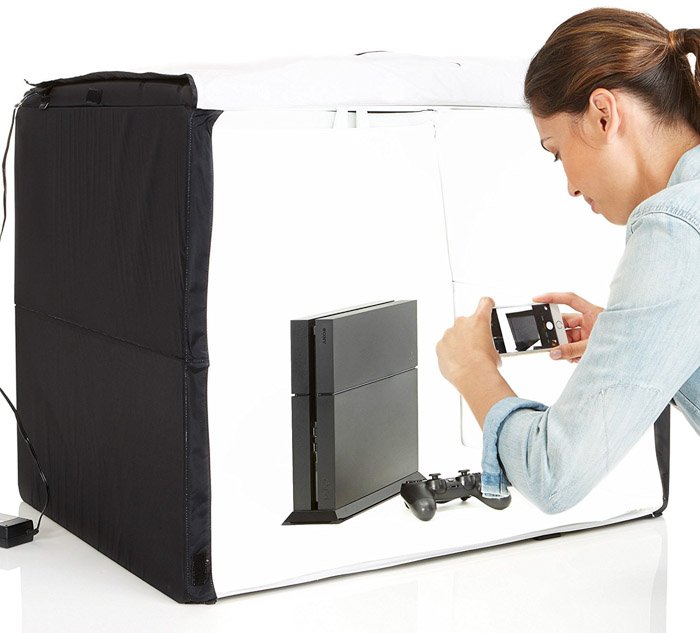
Mini Studio Boxes
A mini studio box is a great way to start photographing products. They are perfect for photographers who do not have space or budget to create a studio.
The boxes are compact and portable. Some come with their own lighting system, so you don’t have to order separately.
The boxes are usually made from a material that acts as a natural diffuser. This is perfect for natural light and flash units.
They also allow the light to hit the product without creating harsh shadows and exposures. When you finish, they are easy to pack away and store.
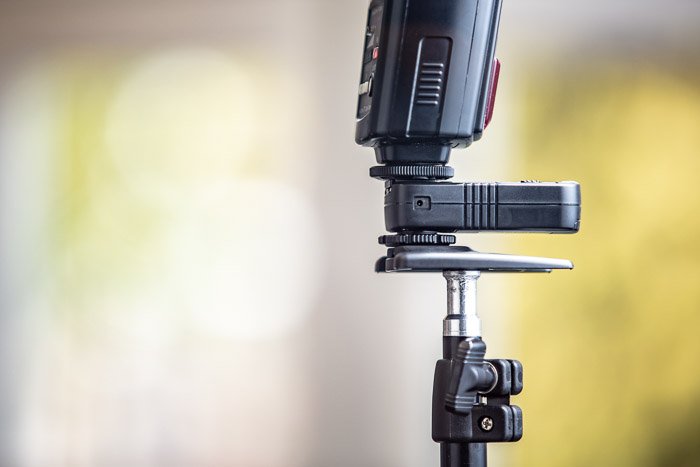
How to Use a Wireless Flash Trigger
A wireless flash trigger lets you control an off-camera flash. Here, the speedlight flash connects to a wireless hot-shoe which connects to a transmitter. This sits on your camera’s hot-shoe.
The signal is sent wirelessly, allowing you to place your flash anywhere. This is perfect for scenes where a flash on your camera is detrimental.
It is a very simple device to use, as long as you get the right one.
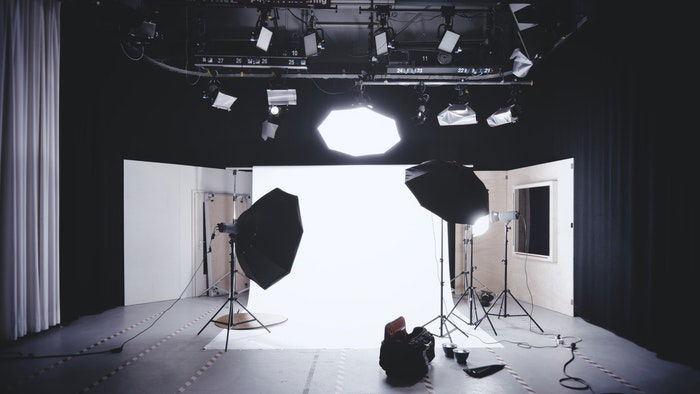
Studio Product Photography
The Essential Photography Studio Equipment List
If you are looking to start or expand your studio, we have the guide you’ve been looking for.
Whether you are starting in your home, or are creating a dedicated space, there are certain things you’ll need.
Backdrops and support systems help create the environment you want. The correct lights let you capture your subjects in the best possible light (pun intended).
Read through our guide here. You’ll find great tips on what you’ll need for any situation.
Tips for Setting Up Your Home Photography Studio
For those getting into studio photography, the lighting will be slightly different. You can of course use scores of speedlights, but they might not offer you the power you need.
Studio setups often have many different types of lights. You are likely to find softboxes, rim lights, barn doors, grids, and strobe machines. Each of these light sources has their own purpose.
Our main tip is to start small. Obtain the equipment that you know you are going to use and add to it slowly.
For all other tips on what to look for, go through our article here at your leisure. It should be your first port of call for studio photography.
DIY / Product Photography Hacks
Why buy something expensive when you can create your own version of the tools of the trade at home.
It keeps your budget light and will help you see that a lot of things can be created in similar ways. Make it until you make it.
10 Tips for Making a DIY Photo Studio
Setting up a studio doesn’t have to be expensive. There are many things that you can create yourself. It feels better knowing you saved money by making it by hand.
Softboxes and diffusers can easily be made at home. Backdrops are best made at home, as you are free to create something specific.
Check out the tips on making a DIY photo studio here.
13 DIY Photography Lighting Projects to Save You Money
There are many projects you can take on to create photography lighting. We have 10 here to whet your appetite and get you thinking outside the box.
One example is the beauty dish. It is a very expensive item to buy and is way cheaper to make yourself. You just need a few tools and a metal bowl, and you’re set.
Read here on how to make it, and also for nine other ideas.
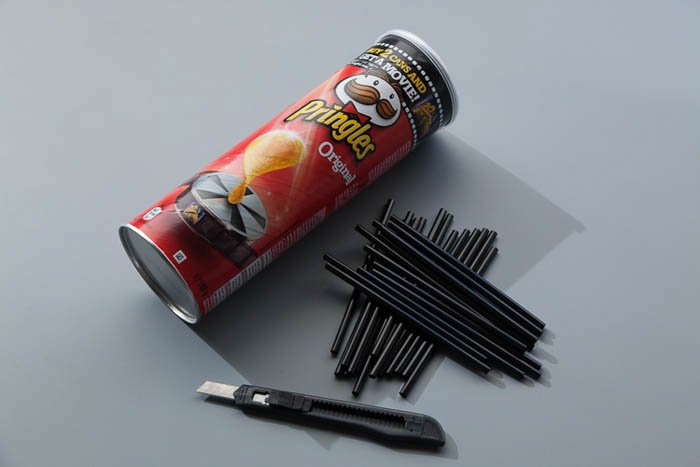
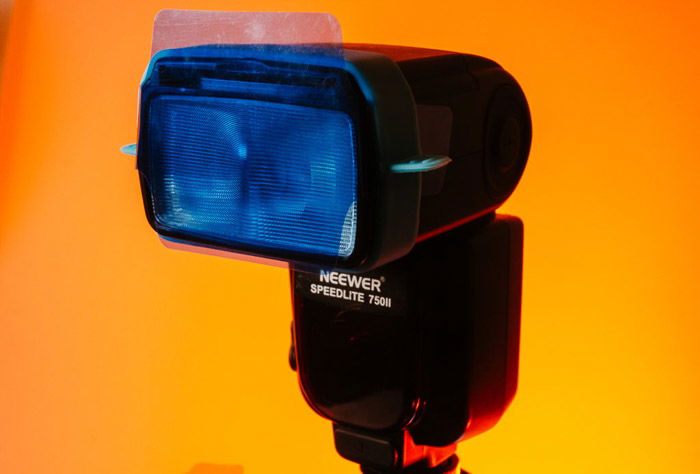
10 DIY Speedlight Flash Modifiers
Modifiers allow your source of light to change into something more tailor-made. Speedlight modifiers are ones specific to Canon and Nikon speedlights.
Here, you can use various materials to make the light source smaller and contained. This gives you more control over where the light lands.
The best thing is, these materials are easily found around the household. Read here on how they can be created.
Building a DIY Light Box
A lightbox can be an expensive item. Especially if it is something you will only use from time to time.
The cheaper models come without lights, which is perfect if you already have your own.
As a beginner, I would recommend building your own. Not only does it save you money, but also it shows you that quite a few things in the photography world can be built.
Why spend a lot of money on something that you can make, if you have the time?
This way, you can learn something. You’ll also find out if you will photograph enough to warrant an expensive lightbox.
Large Objects with One Strobe/Flash Light
This article has one simple idea. How do you photograph a large item with only one Speedlite? It follows the same idea as focus stacking.
This is where many images of different focus points combine together to create an all-over focus.
The same idea applies, but instead of changing the focus, you are changing the position of the light.
An idea like this shows you that you don’t need more than one light. Nor do you need an expensive studio to get stunning shots.
You will need some time and patience, but then again, you need these for every field of photography.
How to Take Professional Product Photography on a Tiny Budget
IKEA is a great place for shopping and an even better place for hacking photography gear.
In this article, we look at six different items that can help you in your product photography.
A pleated shade becomes a diffuser sheet – portable and cheap. A black glass sheet becomes a great reflective base on which to photograph.
A metal bowl can be a beauty dish. You will need a few tools for this one. But the time and effort definitely outweigh the cost of a professional beauty dish.
You can call it the beauty bowl.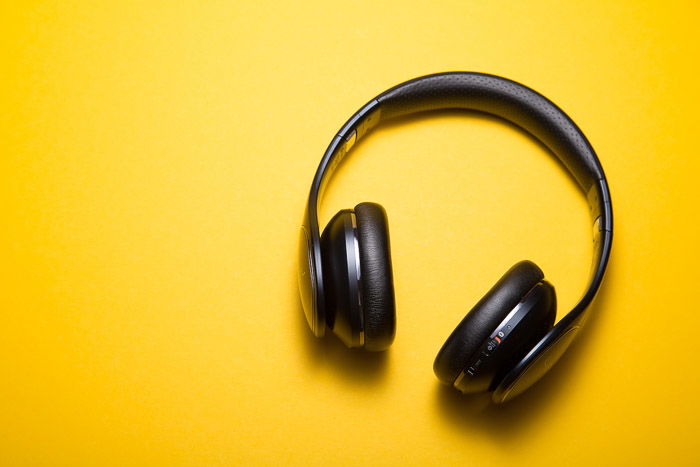
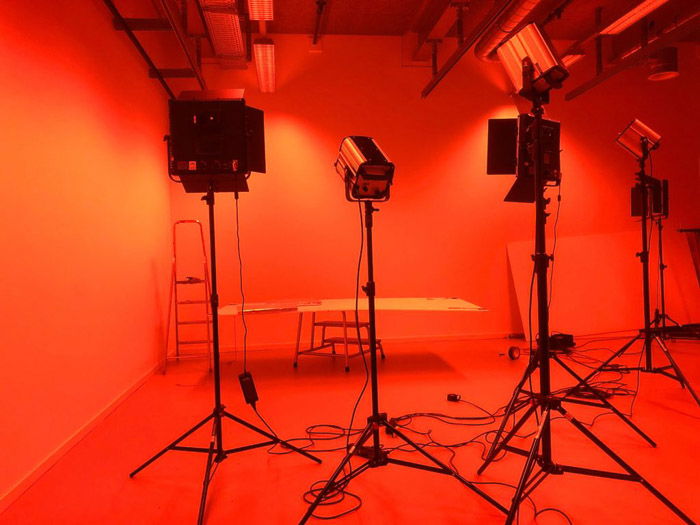
Product Photography Lighting
Without light, there can be no photographs. When it comes to product photography, lighting is very important.
It has the capacity to outline the item, give it strength, and make it stand out. The product needs to be clear and concise, and lighting helps to define it.
In some circumstances, such as photographing on-location, natural light works perfectly. If this is not an option, then studio lighting of some sort is necessary.
We can also keep the light in the frame by using reflectors. It stops it from becoming distracting by using flags.
For lighting terminology, see our article here.
Best Lighting Equipment To Get Started With
There are many different lighting systems available. A studio tends to have big, powerful units. It’s also usually plugged into the wall.
Smaller versions, known as Speedlites, are portable and run off AA battery power. This thorough article gives you all the information you need to get started.

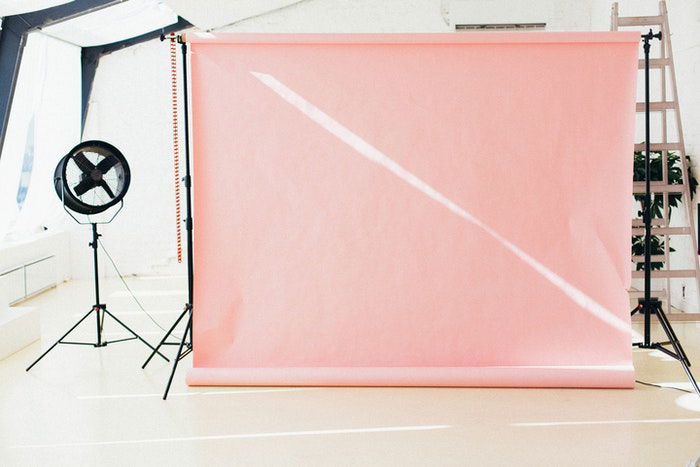
Product Photography Lighting – Studio Setup
A studio is a great way to take product photos as you have complete control over the setting and the light.
This is by far the most expensive option as you will need to buy all the equipment yourself.
An alternative could be that you rent the studio, and have access to all the equipment. This may be cheaper, but still not cheap.
Creating a portable studio with a few lights is a viable option to keep costs down.
This would allow you to pack the equipment away and take it along for an on-location photo shoot.
Read this article for a great guide to studio lighting for product photography.
Types of Artificial Studio Lights – Fluorescent, Strobe, LED or Tungsten?
There are many different types of artificial studio lights available. Every light, whether Strobe, LED, Tungsten or Fluorescent have different purposes.
For example, LED lights last a long time and rarely need replacing. Yet, their strength is sub-par when compared to strobe.
On top of this, you’ll notice that each light adds a different color cast to your subject.
Our article here gives you all the advice and tips on what you can expect from each type.
What Is a TTL Flash? TTL vs Manual Flash Modes
A TTL (Through the Lens) flash uses your cameras onboard metering system. This allows the flash to intelligently ‘judge’ how much light to pump into the scene.
This can be a hit or miss, as it really depends on your scene and metering mode used. For example, spot metering mode forces the flash to add enough light just for that single point.
When using evaluative, the flash will add enough light to bring up the exposure of all objects. This can lead to over-exposure and loss of details. Perfect for high-key photography though.
If you’re stuck between TTL and manual flash modes, we have the article for you.
Natural Light in Product Photography
Natural light is great for product shots, it is abundant, constant and free to use. A diffuser softens the light to allow it to fall upon the product evenly.
Reflectors create ‘fill light’ by bouncing the light back into the image.
It can be difficult to harness and control. Yet you can do so with a material, such as a white curtain. This softens the sun’s brightness.
Flags, which stop light, can keep sunlight from reaching certain parts of the product.
10 Cool Ways to Use Your Speedlight
A speedlight is a wonderful tool for lighting. It’s a small off-the-camera flash unit that packs a punch to any product you wish to capture.
You can change the strength and incorporate many different techniques, depending on the subject and mood.
One of the coolest ways you can use them is by placing them inside objects. As long as it can fit, you can use it.
Read here for the other nine cool ways to use your speedlight for product photography.
Speedlight vs. Strobe Photography: Which Lighting Tool Is Best?
If you are unsure what the difference is between a strobe and speedlight, this article is for you. A strobe sends off many bursts of light, like a strobe in a nightclub.
They are more advanced and tend to be bigger than speedlights. For this reason, they have more power and are mainly used in studio conditions.
Here, you’ll find which one is perfect for you and your photography.

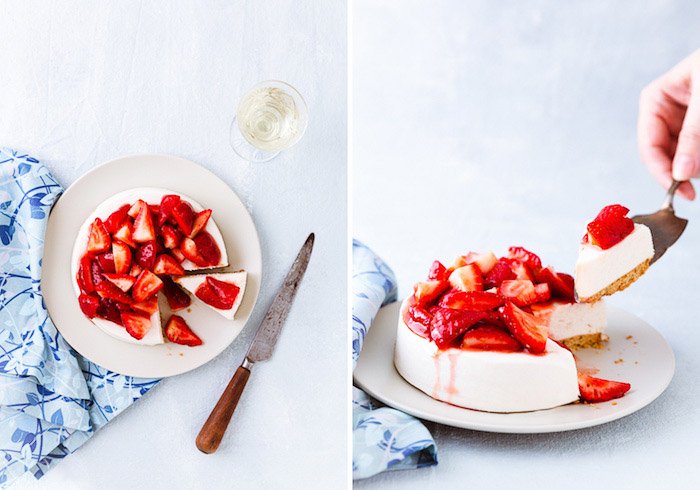
One Light Set Up for Food Photography
Rather than using natural light, a softbox is a great option. Great for studios with no windows, or times when the sun just isn’t as strong as you want it to be.
The softboxes are pretty inexpensive, easy to put up and pack away. It is a viable choice.
Using one light will leave you one set of shadows. Combining the light source with reflectors help to minimalize these harsh areas. This helps pull out the detail.
These give a constant flow of light. This tool is easily moved for different angles. It also dims the light or intensifies it.
How to Take Awesome Color Gel Photography: 10 Ideas
If you’re looking for a more interesting and creative way to capture portraits, you’re in the right place.
Color gels are pieces of colored cellophane that fit over your speedlight or strobe flash. They add a pop of color where it would otherwise be white.
They can be used in conjunction with other colors, adding depth. Let your creative side loose and use this article to create some memorable portraits.
How to Use a Ring Flash for Creative Lighting
A ring flash is easily explained as a flash that comes in the form of a ring. This lighting solution fits around your lens, rather than sitting on your camera.
This was first designed for dental photography. It allowed a complete blanket of light that created shadow-less shots.
Nowadays, photographers use them for close-up portraiture.
If you ever wondered how it can be used for creative purposes, read our article here. It has everything you need.

How to Shoot Product Photography
Product photography takes a lot of planning, effort, and patience.
There is no area of photography that you can get amazing results straight away. You’ll need some time spent finding your feet. That said, there is nothing more finicky than product photography.
Everything has to be clean and free of dust. The lights need to be the correct exposure and the item needs to look its best.
You need to be assertive by shooting test images. Assessing them and working from there lets you know if you need to adjust the item or lights.
We will give you the best information in capturing stunning product photographs.
Best Camera Settings for Product Photography
When shooting a product, it is extremely important on having a good quality shot. The product should be clear and sharp.
Your camera settings will change depending on what product you are shooting. But, some settings are universal.
For example, always try to shoot in RAW. Stick to manual mode with a low ISO and a fast shutter speed to create some very sharp, high-quality images.
The lower the ISO, the lower the amount of grain, and thus, higher quality. A fast shutter speed will also help ensure there is no blur and the photo is sharp.
The aperture will depend on the depth of field you want. A larger aperture means a shallow depth of field. This means only a tiny part of your product will be in focus.
Check out the rest of the article for more camera settings to help you take great product photos.
Product Photography Checklist for More Professional Photos
Here is a checklist that will take you from the planning stage of your product photography shoot to the very end.
Start by organizing a time where you will have a few hours to spare. Product photography is time-consuming, and you do not want to stress and rush your work. Plan your shots, get some research down, and create a mood board so you know what you are looking for.
This will help you see the angles and the light, acting and arranging accordingly. See the full checklist in our article.

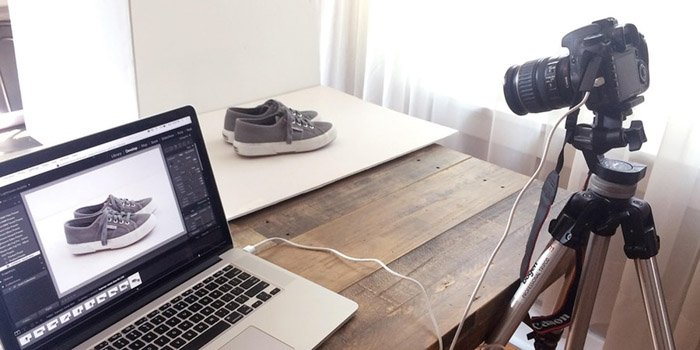
Tethering a Product Photography Shoot
Tethering your product photography session means connecting your camera to your computer as you shoot.
The product photos will pop-up on your screen instead of your LCD camera screen. This allows you to see the photo at a bigger size for analyzing.
You can see if the product is in focus, how the light affects it and if there are any adjustments you need to make. The small LCD screen doesn’t offer you a size where you can see any problems.
This is also a great way to work if you have an assistant working on edits while you photograph.
It saves your images straight to your computer, in case of card problems. It also allows clients to see the shots and offer advice or criticism.
10 Types of Product Photography
There are seven ways that you can photograph your product for e-commerce or advertising.
You could choose just to photograph the product in the studio. This is a great place to remove distractions.
Getting closer to the item gives you a detailed shot. The item could work on location, and used in someone’s daily life or routine.
This gives the product some context and a sense of scale too. Perhaps you want to show the viewers how you create the items by showing a work in progress.
This brings the viewer or purchaser closer to the product. They’ll feel involved in the intimate workings of its creation.
Have a look through our article for more!
5 Different Ways To Shoot Product Photography
Using a lightbox is the simplest way to take product photos. The sides are already diffused, so the placement of the lights is the only thing left.
To create a gradient effect, a light sits under the background facing up. The light’s intensity drops the farther away your product is from the source.
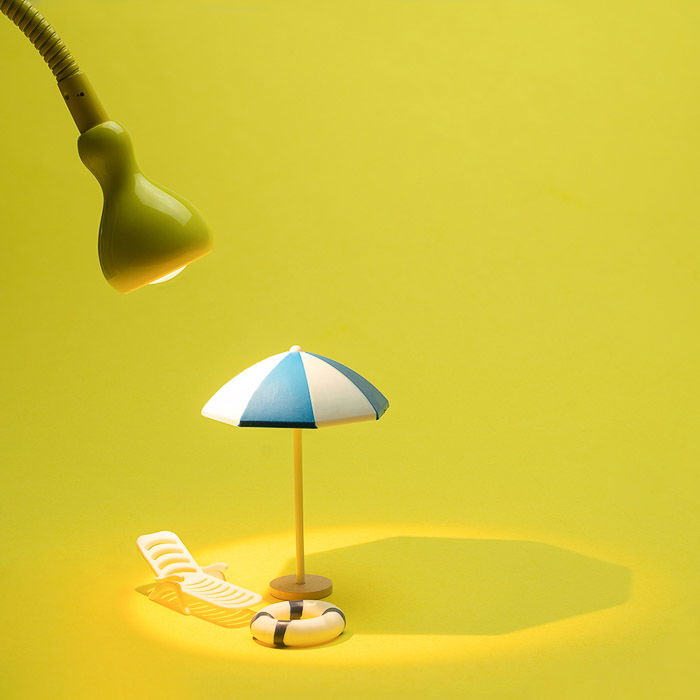
Taking advantage of your surroundings is a helpful way to show a product in a pinch.
You could even use some of the equipment you have on hand as part of the “surroundings”. Lighting a product from the bottom can add creative punch.
The last style would be to rim light the product. This helps define the edges and separate the product from the background.
Read this article for more detail on the 5 different ways for shooting product photos.
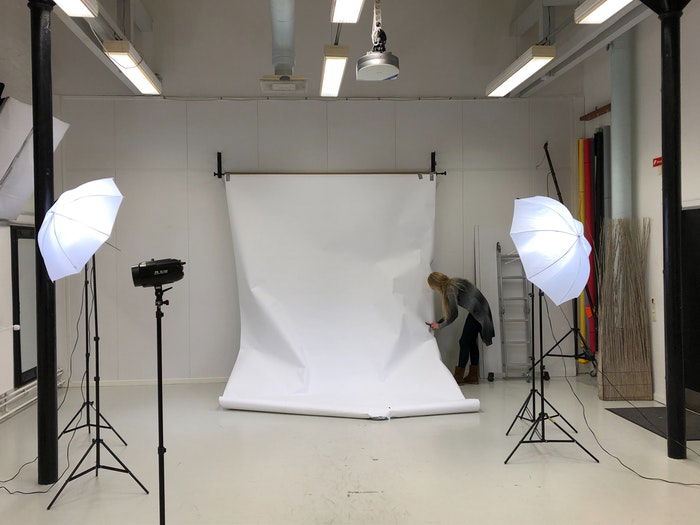
How To Use a Photography Umbrella
A photography umbrella is an essential piece of equipment for studio and product photography.
The idea is that the light bounces off the umbrella’s reflective surface, falling on your subject. By using the umbrella, the light is softened and easily controlled.
There are a few things you need to be aware of in using it correctly. Luckily for you, we have all the information here.
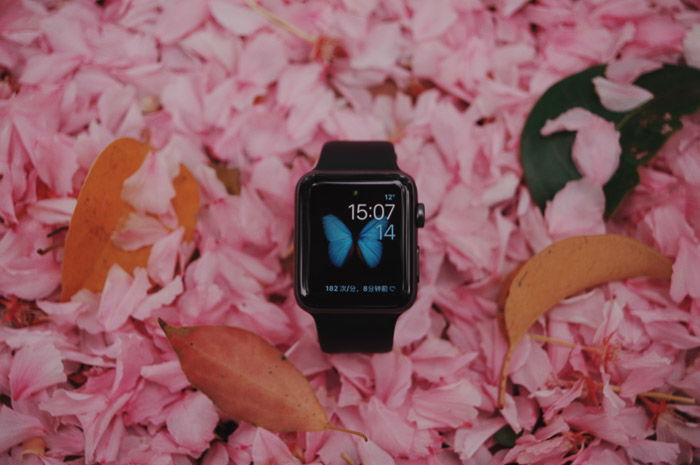
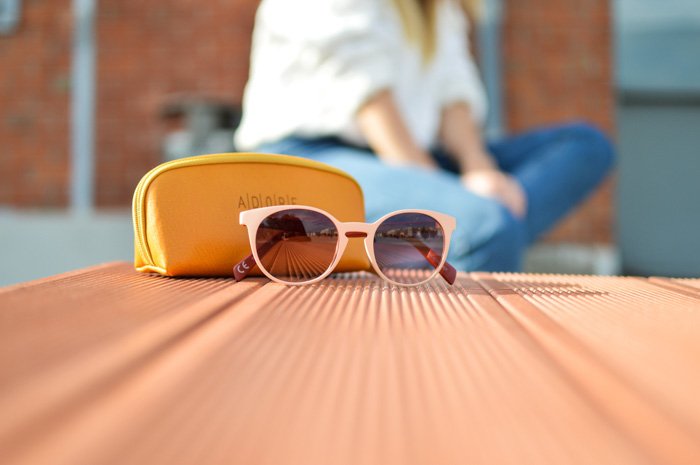
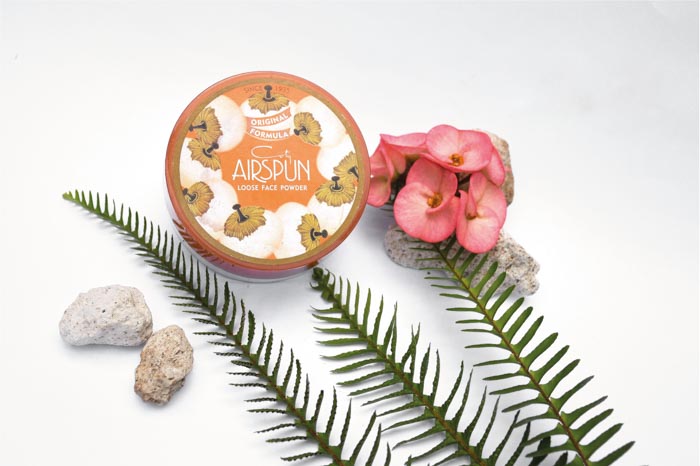
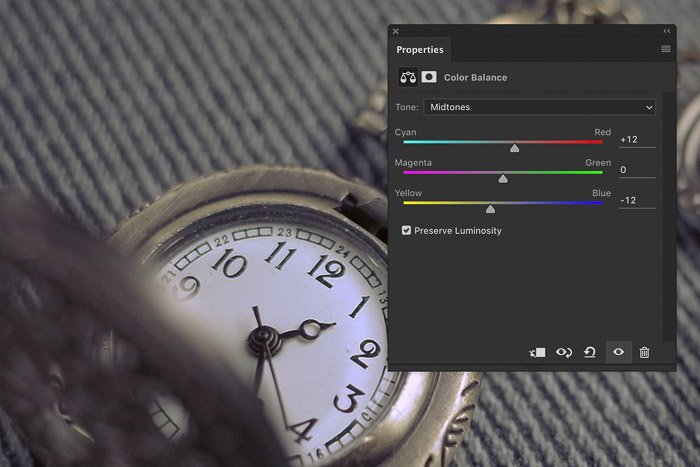
10 Tips for Styling Product Photography
Styling your product means they are shown in their best possible light. This might mean alongside other items that give the product a context or feeling.
Photographing a woolen jumper could benefit from having a specific setting.
It might mean that the watch you are photographing needs a blue tone. Something like this emphasizes the chrome elements.
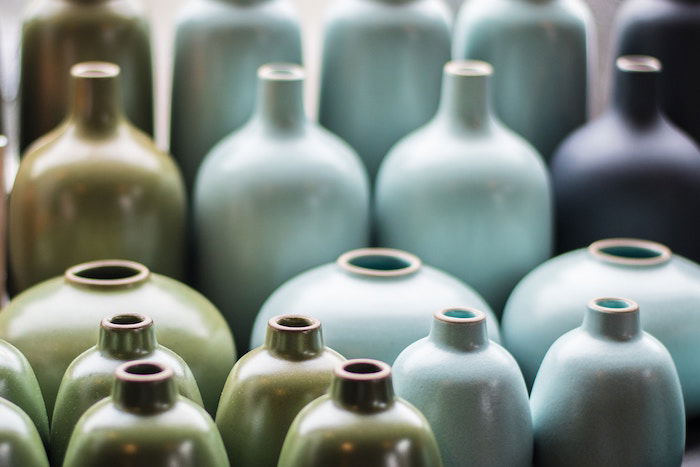
Something as simple as how you place the product can have a huge impact on its viewers. A textured background can work well for subtle colored products.
Even having the same item repeated into the background helps to create interest. This is a good place to use color theory.
Certain colors can complement each other to make an all-round, wholesome image. Read the rest of the article for all the styling product photography tips.
Using Photography Lighting Modifiers | Get the Most From Strobes and Flashes
All lighting sources could do with some help. The help comes in the form of manipulation and control, getting the best lighting for your subject.
Whether scrims, grids, barn doors or snoots, they all provide essential light directing. They let you use anything between a spot of light and a wide fallout.
All the information you need is right here, in our article.
12 Beginner Tips for Better Product Photography
As a beginner. tips and techniques are a great way to get you started.
Once you get to grips with your lighting setup, here are a few ways in which your product could work creatively.
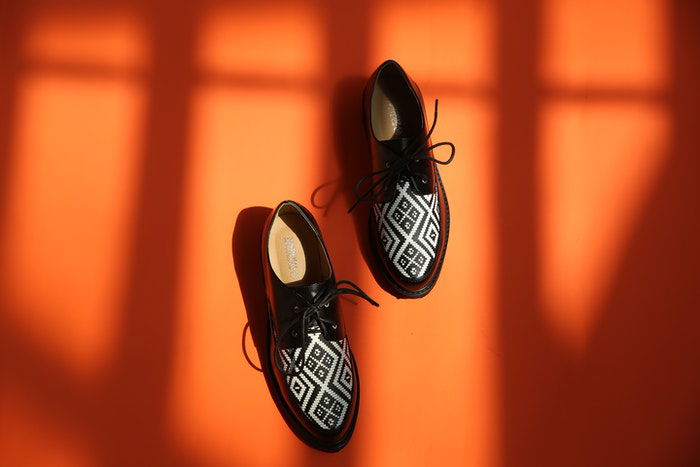
Hanging items allows you to photograph them in ways that are more appealing.
Shoes are a good example, as hanging the rear side up makes the product look like it is in mid-walk.
Showing the item in a different use than the norm. Something like this means you can break away from replicating images people have already seen.
360 Degree Product Photography
As humans, we are so used to the world in 3D. When we look at product photography, we are only given the sides that the photographer wants to show us.
Unless we are holding the object in our hand. But then the idea of product photography has failed.
Recently, we are able to see products in a 3D view, where we can turn the item and zoom in to see the finer details.
As a photographer, a special turntable allows you to take a multitude of images of the item. As the item turns, the camera photographs each new position.
You can build these turntables at home, and the 3D viewing software is free.
Using Stock Product Photography
Stock photography are images that other photographers have taken. These are purchased photographs from a huge array of websites.
They can be a viable option as their quality is often filtered, to make sure the images are professional. They can also be cheaper than hiring a studio and photographer.
But keep in mind that these images are not exclusive to you. The chances are high that they have been used before. Maybe for something similar.
This can take away that personable atmosphere of your business.
How to Get Ahead With Commercial Photography
Commercial photography is a large area of product photography. Many photographers draw to this area, as the financial rewards can be massive.
But, more photographers interested, means more competition. Your knowledge and skills are very important in this area.
The aim is to find clients, such as companies and businesses. They want to use your skills to promote their products. You need to impress them.
Start by reading our article here.
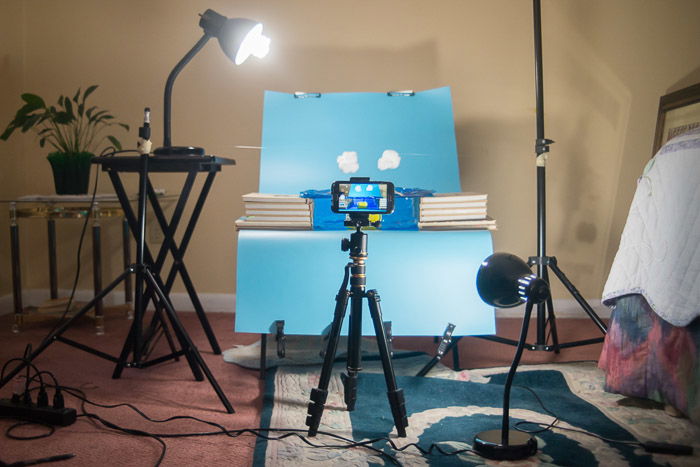
Shoot Perfect Product Photography With Your Smartphone
You may think that you need new and expensive equipment to capture product photography. Truth be told, you can do it with your smartphone.
You’ll still need a studio set-up, tripod, and backdrops. But you won’t need a costly DSLR or powerful lenses.
With a few apps, you can even edit the images on your smartphone directly. I recommend the Lightroom App.
The Easy Guide to Shooting High Key Photography
If your scene is giving your camera a lot of light, you might consider high-key photography. The high-key refers to the excessive use of lights and lighting in the photo.
This is a technique you would use for product photography. It allows you to remove most if not all detail from the background.
For all high-key photography questions, tips and techniques, read our article here.
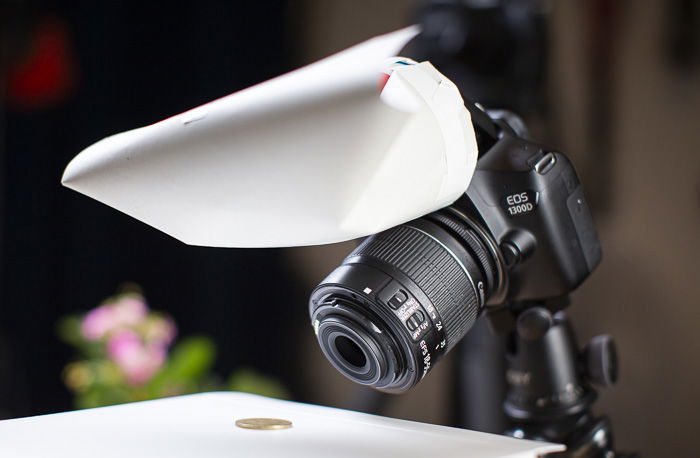
Best Tips For Bounce Flash Photography
A bounce flash is a great way to light a subject. especially if you’re looking for a soft-lighting exposure.
Harsh light isn’t the best fit for all types of photography. Perhaps the subject in front of your camera has a light color range. With bounce flash, you retain the details within it.
How do you bounce the light? As your speedlight or flash utilizes a swivel head, it can be turned many ways. This allows you to point the light source to walls, ceilings, and reflectors.
Harness the power of the bounce flash here. If might be the trick you’ve been looking for.
Types of Product Photography
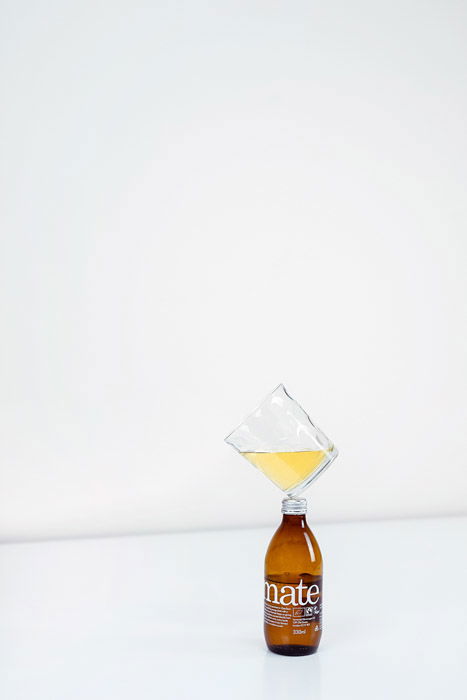
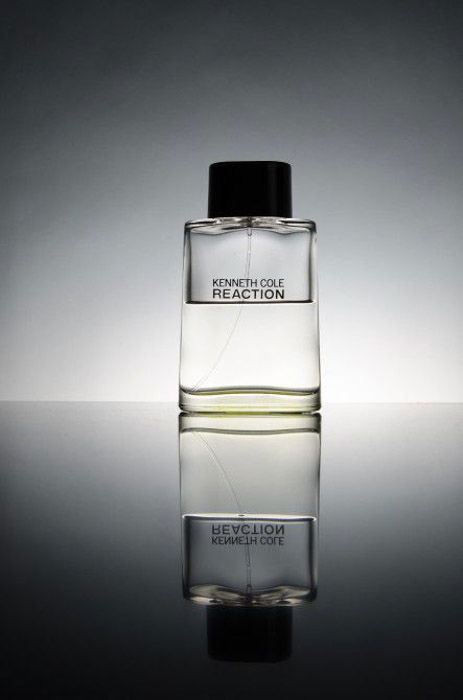
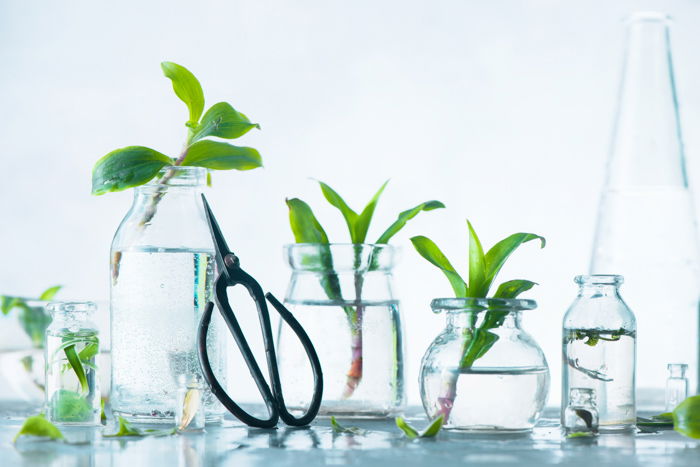
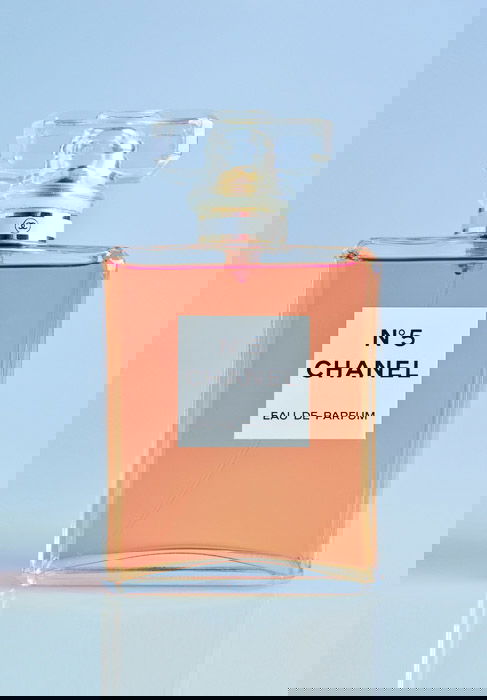
How to Photograph Glass: Step-by-Step Tutorial
Glassware is a great material in product photography. They add a certain elegance to any shoot. But, they can be difficult to capture well.
For one, they can be very reflective. They can also distort the objects that sit inside or behind the glass objects.
With the right tips and lighting techniques, you’ll have no problem. Start here with our transparent article.
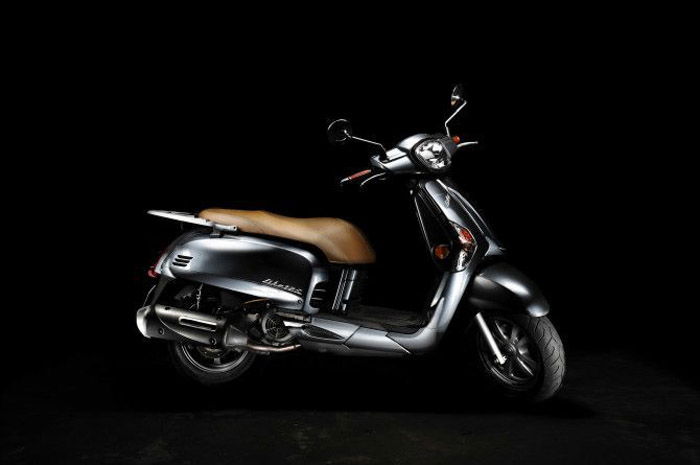
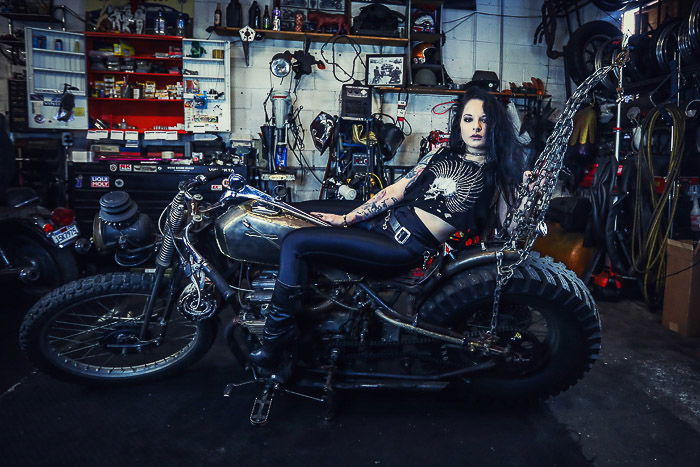
The Ultimate Guide to Taking Professional Motorbike Photography
Motorbike product photography is a very specific niche in the world of photographic imagery.
Like all niches, you need a very special focus and attention to do it well. You’ll need tips on how to capture their shape and reflective chrome in the style you want.
From outdoor environmental areas to indoors, we have everything you need.
Start Taking Perfect E-commerce Photos (Step by Step for Beginners!)
E-commerce photography is product photography for the purpose of selling online. You can sell them in many places, but eBay, Etsy, and Squarespace are some of the best.
To effectively sell your products, you need images that impress. If they don’t, you could see clients going to your competitors.
This article is designed for beginners, but even those with some experience could also gain some helpful knowledge.
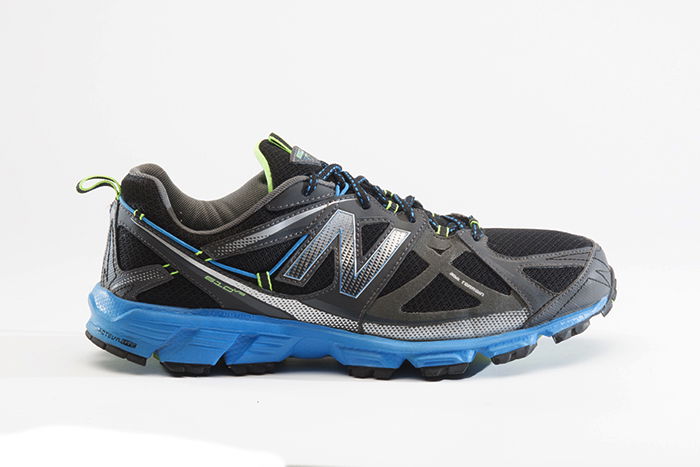
How to Take Beautiful Apparel and Clothing Photography
Clothing and apparel are one of the most photographed items for product photography. Everyone needs clothes, finding them in catalogs or online galleries.
T-shirts, trousers, shoes for both men and women need images just like anything else. Either for promotion, advertising or a way to record the clothing items exist.
We have all the tips on clothing and apparel photography you could ever need.

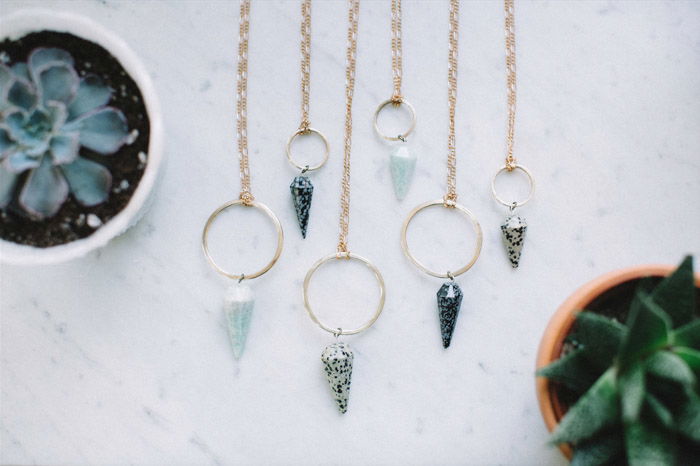
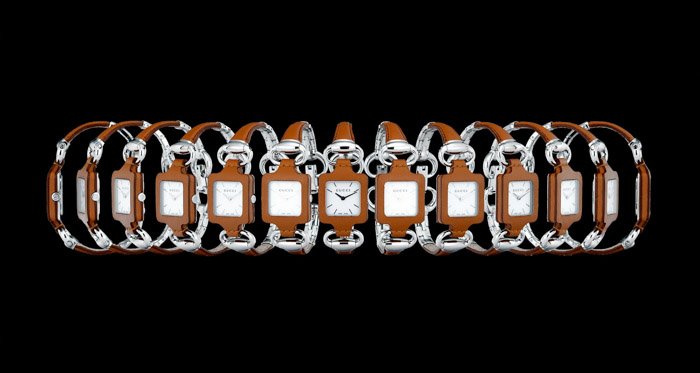
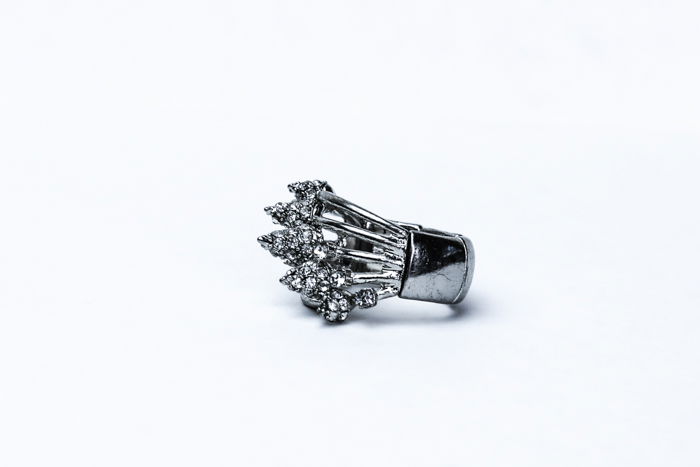
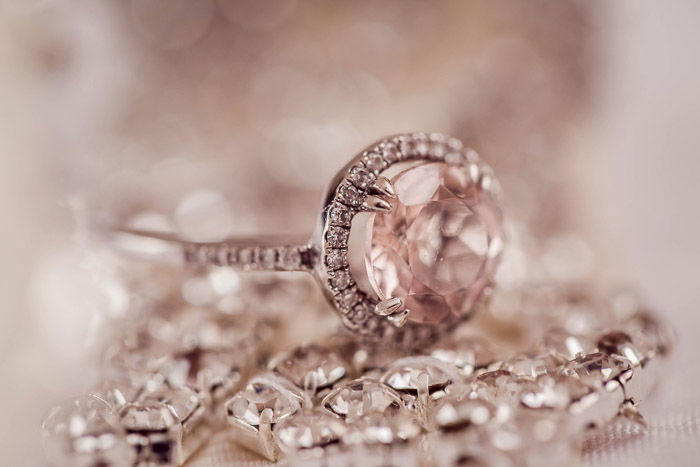
How To Photograph Jewelry: A Quick Guide
Photographing jewelry can be challenging. But it also gets your creative and problem-solving juices flowing.
Some items of jewelry will pop when photographed in a studio setting. This is because the focus falls only on the product.
Other pieces will look better photographed in natural light. Some natural stones shine when placed in the sun, and their colors come out.
If you are photographing pieces that are quite earthy, then why not try shooting outside. A location or background that emphasizes this quality helps bring the best out of your items.
For other situations, showing a model or body part can help to show the item in context and give it a sense of scale.
This is what makes the product more personable to the viewer. Give these tips a try.
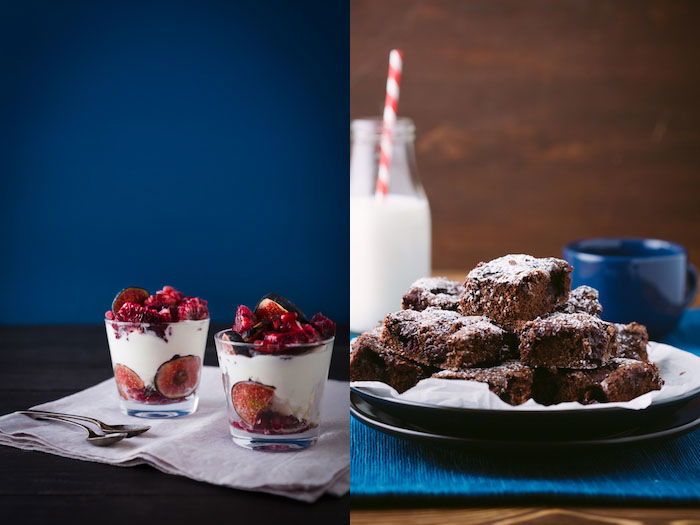
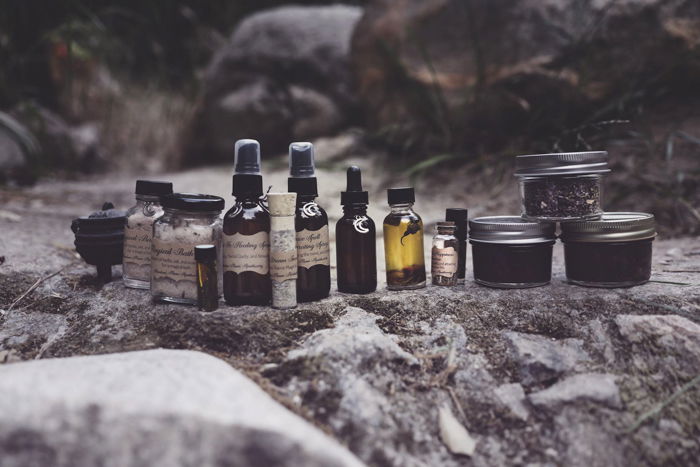
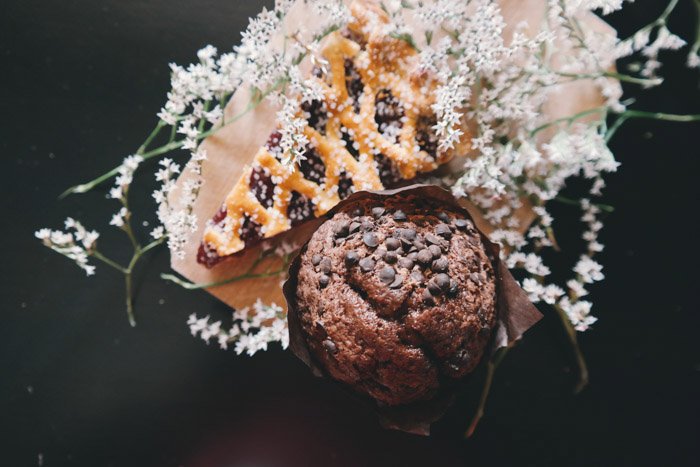
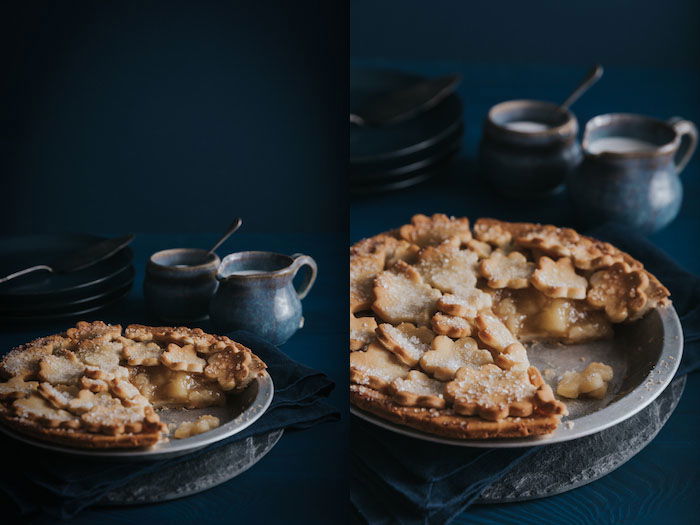
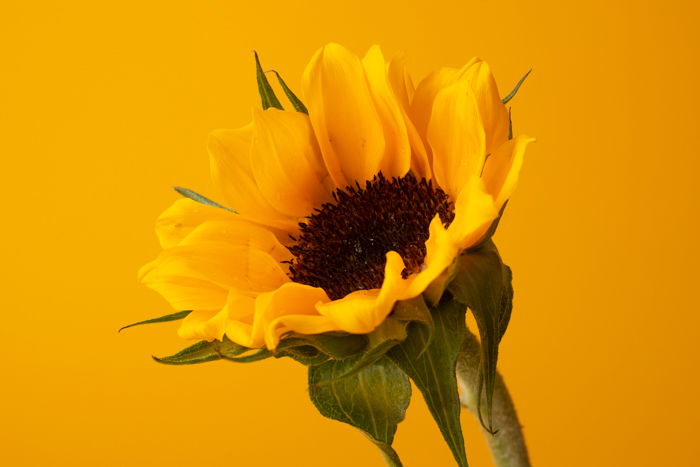
How to Shoot Dark and Moody Floral Photography
Flowers could be the subject of your product photography. Some floral compositions could look better with a moody disposition.
Here, you give off a different mood and feeling which the viewer picks up on. This is something you would use for Halloween, for example.
Read our article on how to create floral photography, fitting to your style or business idea.

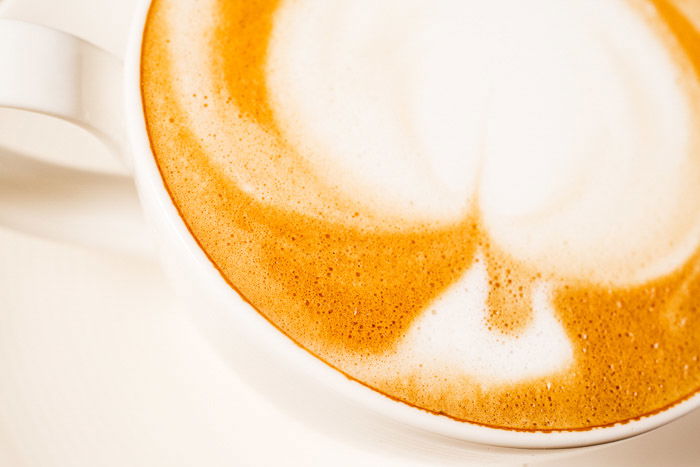
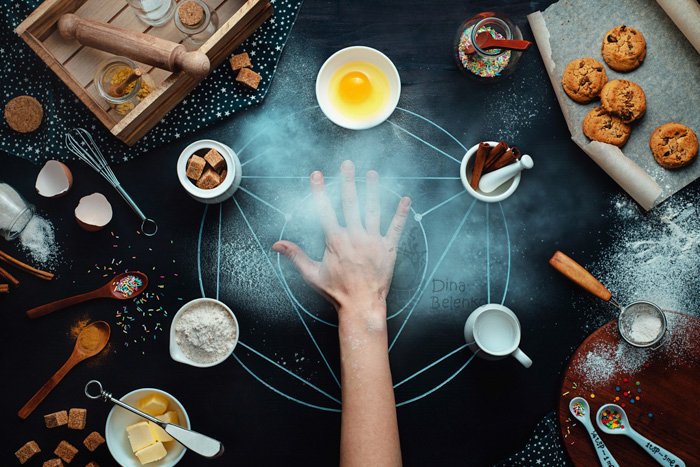
How To Photograph Food
Food is an extensive niche area of product photography. Yet, as the food has a shelf life, speed or tricks are important for a high success rate.
Natural or artificial light both give different moods and tones to the product. The items also work with color theory, where colors can complement each other.
The settings in which you photograph these products emphasize the tone of the image. They help give it context.
Read our article here for all the food photography tips you will ever need.
How To Make Money in Real Estate or Interior Photography
Interior photography, like food and apparel, is another area of product photography. It focuses on showing a property for sale or rental.
Planning and photographing these areas is a little different, yet the concept is the same. Lighting equipment such as Speedlites highlight low-lit areas.
Opposite to studio product photography, interior photography uses wide-angle lenses.
This is due to open spaces needing a wide field of view. By being farther away from the subject, there is a less obvious distortion.
Post-processing these images might also differ somewhat. Interior photographs of different exposure values could fuse together.
This allows the standardization of the light in and outside of the property.

How to Shoot DIY Furniture Photography for Product or E-Commerce Store
If you have an e-commerce store, you will need good-quality pictures of your product. Knowing how to take good images of furniture is vital to generating sales.
It is important to show your product in the most flattering way possible. This involves preparing the furniture, shooting at the right angle, and using helpful props. You should also have ample light.
To know how exactly to shoot furniture, follow the tips in this article.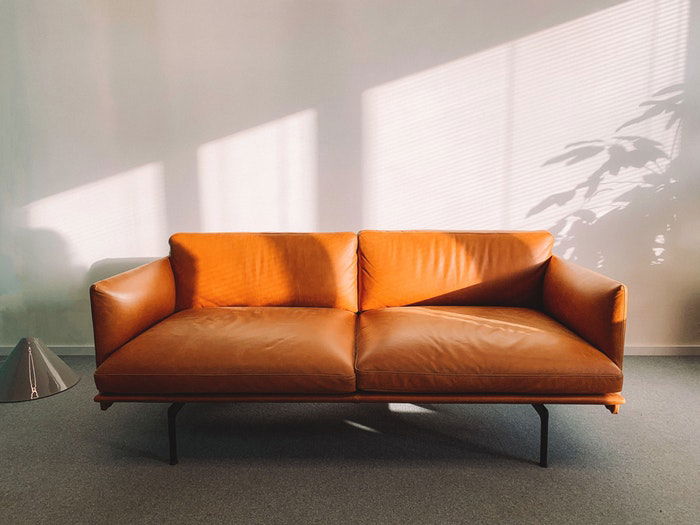
Backgrounds
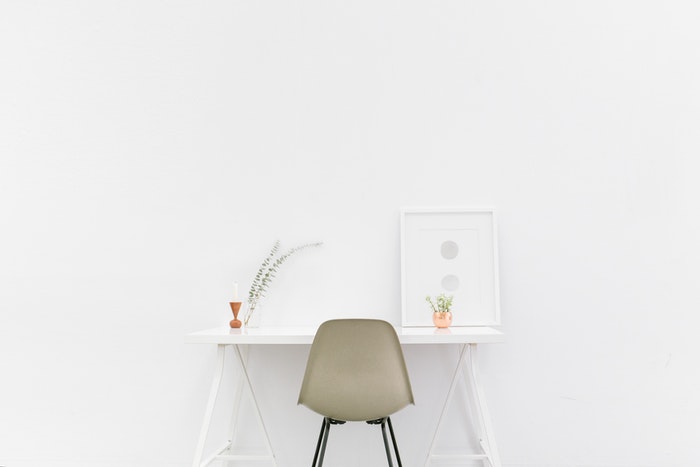
How to Create the Perfect White Background for Your Images
Most product images come with a white background. These high-key images need a clean background for many reasons.
White backgrounds are easier to cut away from the subject or object. This allows the products to be placed in any future scenario.
A clean background also stops any distractions, leaving the attention to fall on the main topic.
7 Great Alternatives to a White Photo Background
Sometimes, a white background will not bring out the best of the items you use. Food photography is one of the areas that need dedicated backgrounds.
Here, they serve to reinstate the idea and concept of the food you are using. A white background doesn’t give a dark, or moody sensation.
Read our article here on the seven best alternatives to white backgrounds.
12 Creative DIY Photography Backdrop and Background Ideas
If you photograph in a studio, you might find that constantly buying backdrops can be expensive and space-consuming.
They might also have been used many many times, and its time for a change from the norm. This is where your creativity comes in. Why not make your own?
With a piece of canvas and a few other materials, you can create unique backdrops. A little bit of your time instead of spending a lot of money. Sounds great to me.
Read here on what you need to create them, with a few ideas for inspiration.
Composition
When it comes to the composition for product photography, there is no strict formula. This will come down to a multitude of ideas.
What shape is the product? What does it do? Do you want to show the item as being powerful?
These are just a few questions that should be running through your head when you plan the composition of your product photo.
Whether the photographs are for eBay, Amazon or Etsy, you have five spaces for photographs. This gives you the chance to show five different sides of your product.
These could be a detail photographed in macro, a full shot, a lifestyle photo and two more. These can come from hundreds of different compositions and angles.
To start photographing, follow our tips below and see what works for you and your products.
8 Golden Rules for Perfect Product Photography Composition
Here is a list and description of 10 different compositions. These you can use for your product photography.
This list is not exhaustive, as there are hundreds of ways you can show off your photo. These help to add more interest to your images to help create something stunning.
Filling the frame with lots of items can create an idea that there is no scale to your products.
This can make the viewer stare at your image trying to work out the size of these items, thus creating interest. They are thinking about it.
By avoiding the middle, you are creating negative space. This pushes your viewer to your product. Negative space could be for text or another item for a counterbalance to create a weighted image.
These also cause interest as the viewer flicks from one to the other. Read more here into what else you can do to generate this interest.
The Best Camera Angles for Food Photography
Here are five angles that you can use to showcase your product, without going overboard. Variety is the spice of life.
By showing your product in a few different ways, you keep the viewer interested.
A three-quarter shot looking down diagonally works. The viewer sees it from a perspective as if they were there themselves. They see what it would be like to see your products in person.
Top-down aerial views are also great as the viewer sees it as their own objects that they could be organizing or packing.
This means they feel as if the product is already theirs. Genius.
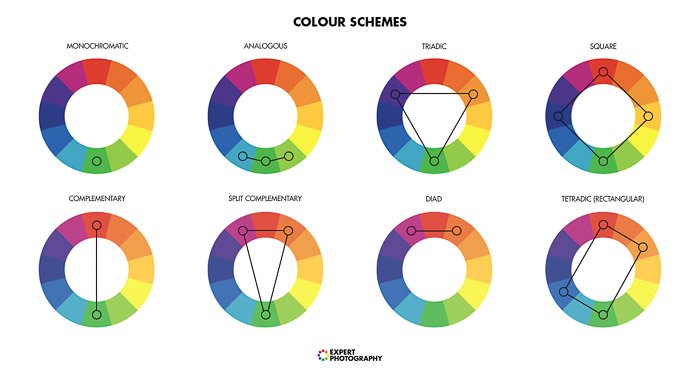
8 Great Tips for Using Color in Photography
Color theory is a great system used across all creative fields. Fashion photography, food composition, and graphic design are a few examples. Food photography is no different.
This system is a set of guidelines that look at items of colors to see what other colors they work with.
This is a great piece of advice for backgrounds, complementary foods, and props you might use when shooting your product photo. Our eyes and brains are attracted to colors that compliment or juxtapose each other.
But remember, these guidelines can be broken. Read the rest of the article for tips on how to use color in product photography.
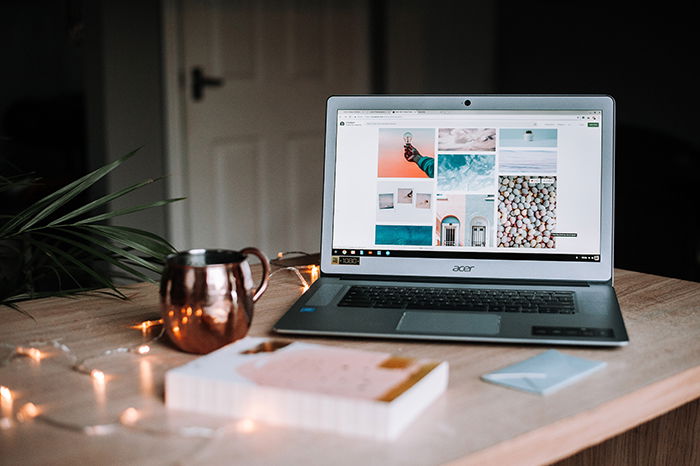
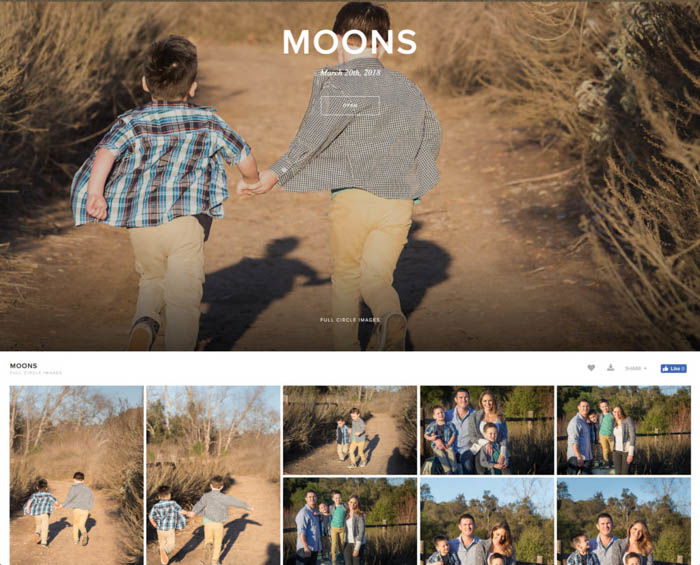
Pixieset – An Image Sharing Platform
As a professional photographer, delivering your images in a timely manner is paramount. Especially ones of high quality.
That’s where Pixieset comes in. This is a platform that allows you to share large files with your clients. This all comes at a monthly fee.
This means your clients will be happy, satisfied, and likely to work with you again! It’s definitely one of the top options for file sharing.
For the full review, and information on how to get started on this website, read our article here.
Business
How To Start Your Product Photography Business and Sell Photos
If you like shooting at your own pace in a photography studio, product photography might be for you. If you get good at it, you can earn a lot of money.
You will need patience, a keenness for details and above all, a studio of sorts. Lighting, backgrounds and an uninterrupted space are all essential.
Start capturing and get your images out there. Create a website. Start making a name for yourself, and clients will come to you.
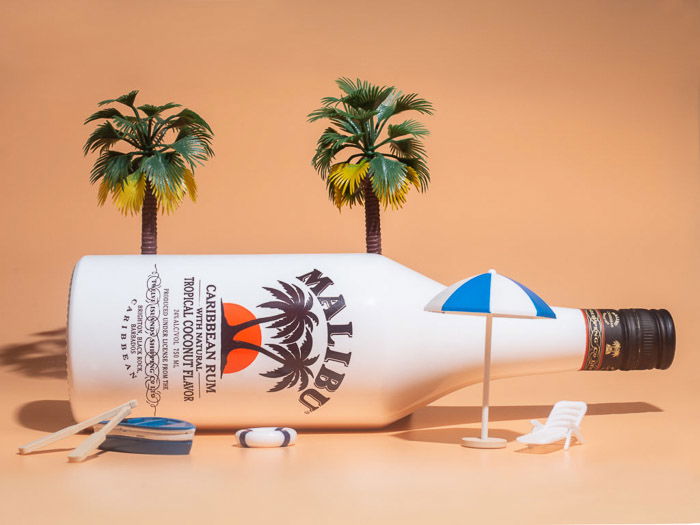
How to Shoot Lifestyle Product Photography
Lifestyle product photography is the aim of creating scenarios for the items you capture. By placing the products alongside props, you can convey a more meaningful situation.
The images can be straight forward, or they can juxtapose the product. What you use in your product photo will determine the direction you want the product to have.
Read our article here on lifestyle product photography tips
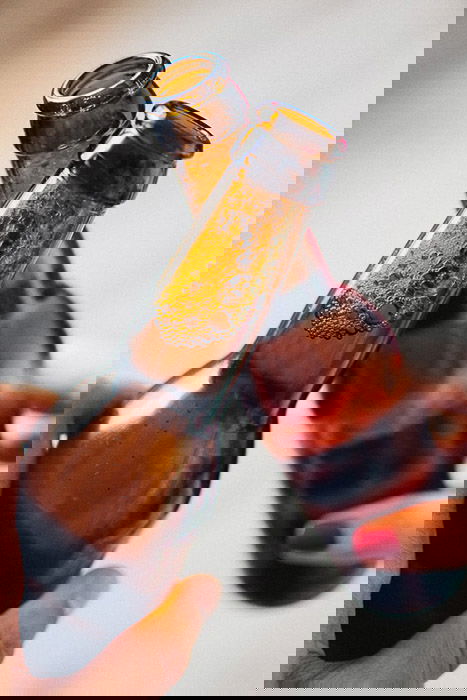
How To Photograph Beer for Advertising and Promotion
Microbreweries are popping up everywhere. Craft beer is becoming more popular easier to find.
All of these brands and types of beer need promotion. Product photography through advertising is the main way others can get a sense of the beverage without drinking it.
So, photography here is very important. Even more so if the drink relies on images rather than a full-blown advertising campaign.
Read our article here on photography tips for capturing beer in the best possible way.
Post-Processing Product Photography
Post-processing in product photography is where you make the image pop. This might be correcting the exposure or adjusting the color temperature.
It is also used to isolate the item from its background.
There are many editing software packages out there. We will concentrate on Adobe Photoshop and Lightroom.
They offer everything you might need, across all levels of photography.
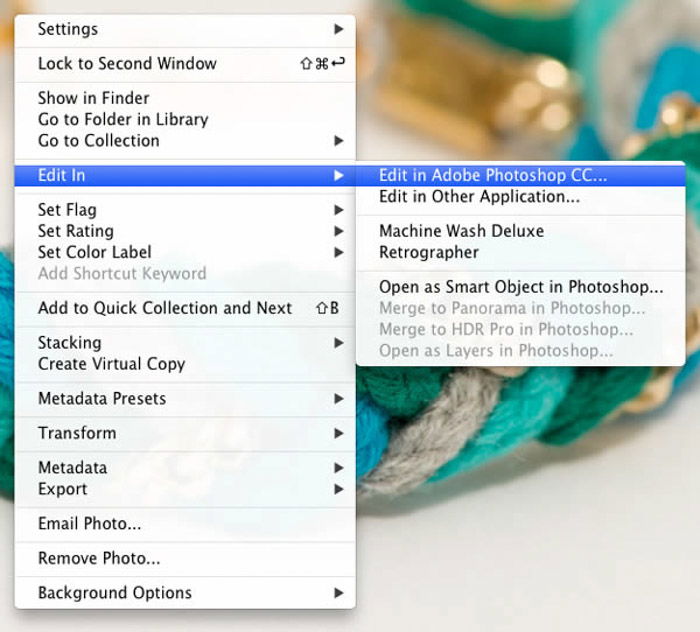
Isolating products in Adobe Lightroom & Photoshop
Isolating your product is a handy way to make the item stand out from your background. This is most commonly done with a white, well-lit background.
The final shot makes the item look like it is floating in a white space.
As a product photo, the sole focus is placed on the item.
By isolating the product, it also means you can change the background or setting as you see fit. See our article for a step-to-step guide.
What Is Focus Stacking and How to Use It Correctly
Focus stacking is a process to create a photograph of an item with an all-over focus, by using a shallow depth of field.
I know what you are thinking, a shallow depth of field gives you a slither of focus!
You are right, but the stacking part means that you take multiple images where you change the focal point, and then ‘stack’ the images together.
Many images become one final image where the item is in focus completely, and the background is out of focus. Clever stuff.
Using Lightroom to Process Product Photography
Adobe Lightroom is one of the best software packages for working with product photography.
The first reason is that it will house all of your product photos smartly, for easy access.
In this area of photography, you will take many images, which Lightroom keeps together in folders or collections.
The second reason is that it has a no-nonsense, user-friendly operating system. You can adjust your product photos any way you wish, and it is all non-destructive.
This allows you to revert back to the original shot easily, at the click of a button.
Any settings you make to one image can be copied or synced across many to save time and hassle.
You can also find out more about Lightroom with our Effortless Editing course!
Using Photoshop to Edit Product Photography
Adobe Photoshop is another software that allows you to adjust your product photography.
It differs somewhat to Lightroom, as it will only work on one image at a time. Photoshop doesn’t have a library unless you combine the program with Lightroom or Adobe Bridge.
Yet, Photoshop allows you many options that are not possible in Lightroom.
Cutting out items and replacing backgrounds are just two reasons why you would use Photoshop over Lightroom.
The beauty of both of these packages is that they can easily be used together.
Lightroom gives you organization and quick adjustments. Photoshop then gives you more intensive editing Together, they make photographic magic.
Conclusion
Every time you are buying something on an e-commerce website, browsing through a catalogue, or even ordering food on a menu, you are looking at product photos.
If you are selling a product, you need to make sure you have images that show your products in the most flattering way possible. A good product photo makes the viewer have an emotional response to the item.
For shooting your own product photos, just follow the product photography tips mentioned above!