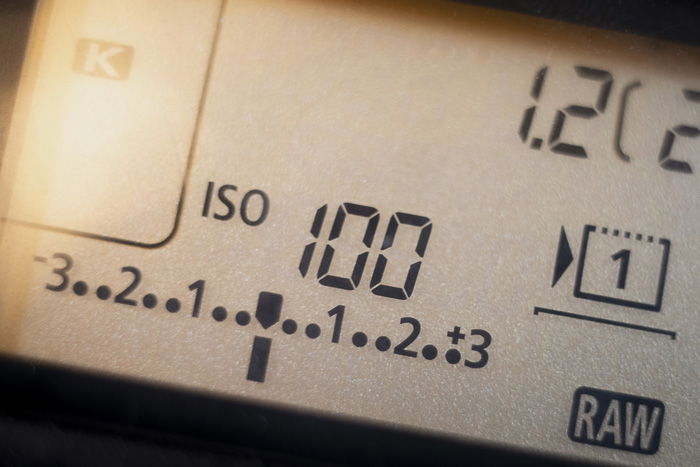
If you have a digital camera, chances are you’ve seen the exposure compensation button. It’s a weird-looking scale with numbers from -3 to +3, with a (zero) 0 in the middle. This camera setting is the exposure compensation scale.
Our article explains how and why exposure compensation works. Learn how to use exposure compensation to improve your photography workflow!
- Master manual mode to capture moments you’re proud of.
- Overcome the frustration of missed shots with quick exposure settings.
- Benefit from visuals with hundreds of images and illustrations.
Exploring the Human Eye Dynamic Range for Exposure Compensation
Let’s start with the basics, with the one attribute that defines photography—light! You need to understand lighting in detail to understand exposure. To understand exposure compensation, you need to know the concept of exposure.
Light travels in waves, like sound. But it also has a material substance—photons. It’s countable, measurable, and collectible.
Light starts to travel from the light source. It bounces off (reflects) from surfaces and continues in straight lines. It finally ends its journey at the point where it gets fully absorbed.
Light is also measurable energy. When something absorbs light, this energy transforms into other forms, like heat or electricity. That is why we can transform it into solar energy. And this is also why photography works.
How We Record Light
When light hits the camera sensor or film, its energy initiates specific processes. On film, this process is a chemical reaction. On digital sensors, the energy is converted into an electric current. More light generates a higher current, while less light generates less electricity.
What Is Exposure in Photography?
Exposure is the amount of light that a sensor or film detects. Three factors determine it:
- Scene luminance which is the intensity of light present in the scene. A bright, sunny day presents a higher scene luminance than a moonlit landscape
- Shutter speed which is the length of time when the light can pass
- Aperture, which is the relative amount of light passing through the camera lens
The above three factors determine the total amount of light in the sensor. It’s an absolute way of expressing camera exposure without considering the sensor type and size.
What Is Exposure Value?
Exposure value is the popular way of expressing aperture and shutter speed simultaneously. It also reflects the transmission of exposure settings.
You can change these two settings so the total amount of light doesn’t change. If you double the size of the aperture, you have to half the shutter speed. If you give with one hand and take with the other, the total won’t change.
A way to simplify this idea was launched in the middle of the 20th century. It later became the Exposure Value System. The point was to combine f-stop and shutter speed into one number—the exposure value (EV).
Exposure value is illustrated on an infinite scale of combinations. In the middle, 0 EV is defined as one second at f/1.0. Any other combination resulting in the same amount of light is also 0 EV.
If you double the shutter speed to 2 seconds and decrease the aperture to f/1.4, you’ll still be at 0 EV. The scale works in doubles and halves. 4 EV is a 24 times higher amount of light. -4 EV is a 24 times lower amount.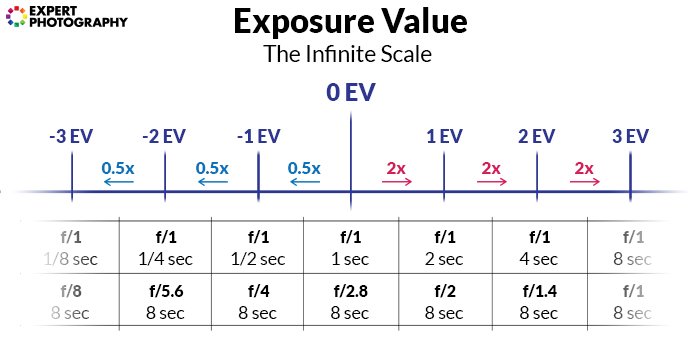
Using ISO to Increase Light Sensitivity
As we discussed, when light hits the sensor, it generates a current. That current is then converted into image data using an analog-to-digital (A/D) converter.
But your image might not look as bright as you’d wish. You can find yourself in a situation where your other parameters are fixed. You can’t play with aperture or shutter speed.
Here comes ISO. A higher ISO setting makes your sensor more “sensitive” to light. Thus, ISO becomes the third parameter that you can control in-camera.
The exposure value scale still works. Add ISO 100 everywhere in the previous diagram. You can also increase exposure using only ISO. Unlike aperture, ISO is linear, so 3,200 is 32x more “sensitive” than 100.
Understanding Dynamic Range
No camera film or sensor is capable of capturing everything. A scene contains brighter and darker elements. Brighter things emit or reflect more light than darker ones.
EVs can also express the luminance differences between these bright and dark things. I’ll explain later how. Dynamic range is the difference between these darkest and brightest parts. This range still contains valuable information.
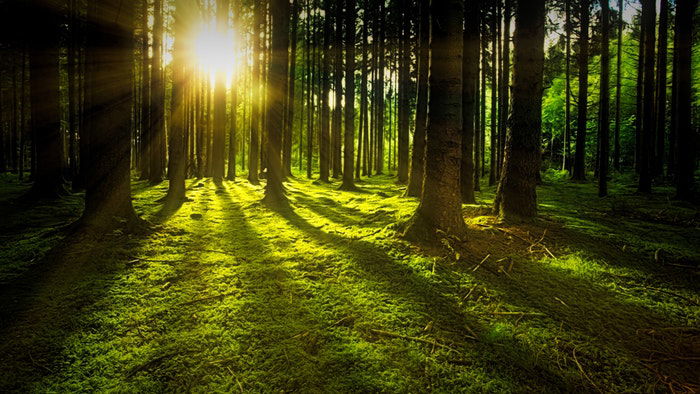
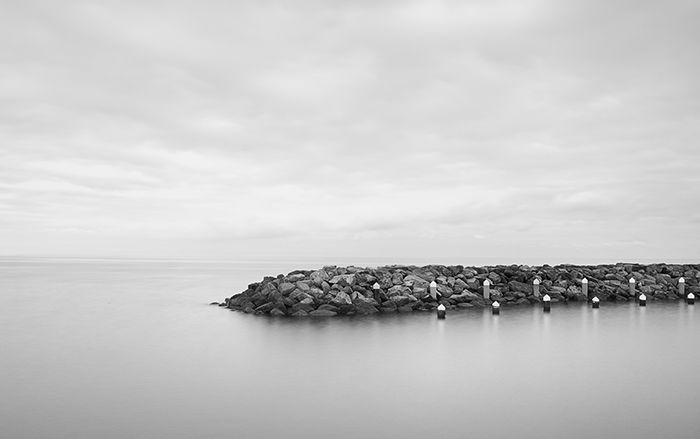
Contrasty scenes have a wide dynamic range, while misty, mild scenes are narrower. Thus, a camera sensor struggles more to capture a contrasty scene.
Today, midrange digital cameras have settings from about 10 to 12 EVs. If a scene is less dynamic than this, you have more room to “play” with exposure. If a scene has a wider range than that, you’ll either have to sacrifice data or bracket exposures.

Choosing the Correct Exposure
What Is the Correct Exposure?
Exposure is correct if you, the photographer, think it is. Your camera doesn’t have an artistic vein like you. We need to teach the camera what a correct exposure is. No matter how bright or dark it is—if that’s what you want, it’s correct.
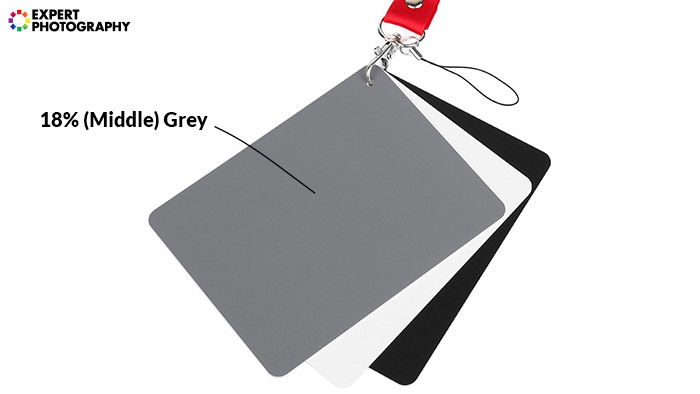
There is a standard for algorithmically correct exposure. If an area of 18% grey (middle grey) is exposed to the middle, the exposure is correct. Let me explain.
Calibrate Your Camera to Middle Grey for Correct Exposure
Middle grey is a shade our eyes perceive as halfway between black and white. It’s not a color in a scientific sense, but it has all the colors in it at the same intensity. So, we can use it for monochrome and color cameras as a reference point.
When you average the luminance levels in a usual scene (say, a cityscape in moderate sunlight), they are very close to the luminance of middle grey.
So, if we “teach” our camera that middle grey is a proper exposure, it will also expose correctly in most everyday scenes. Hence, your camera’s built-in light meter is calibrated to expose middle greys and anything with the same luminance.
You can purchase grey cards to perfect your own exposures (and colors, too, to an extent). But for most applications, it’s not necessary.
Measuring the Correct Exposure
Let’s photograph a subject with 0 EV settings like ISO 100, 2 seconds, and f/2. You measure how much brighter or darker the subject is than 18% grey. With that difference, you can express the individual exposure value of a subject.
So, if your subject is eight times darker than middle grey at EV 0 settings, you can say its luminance is -3 EV.
(Note: If you see that a camera can autofocus down to -3 EV, it’s the same thing. It can accurately catch focus on subjects brighter than -3 EV.)
Your modern camera can also do this for the whole scene.
Measuring Exposure Using Light Metering in Cameras
In the past, photographers had separate light meters. They would measure exposure by pointing the light meter toward their subjects. They would then read the measurement, set the correct exposure on the camera, and shoot.
This process is what happens in modern cameras, too. We have light meters incorporated in the camera bodies. They act as a very low-resolution, high-dynamic-range sensor.
The measurement happens after the light has passed through the lens, giving a more accurate result. This is TTL (Through The Lens) metering. There are a few metering modes you can choose from. They use various algorithms and preferences that you can set.
Metering Modes
These are the modes that almost all modern DSLR and mirrorless cameras have. You find these in your camera, no matter the brand or price point:
- Matrix or Evaluative: This is the most complex one. It meters the entire area of the scene. But it tries to figure out the actual subject and weighs it more. Often, it uses focusing distance, colors, tracking, and relative size to improve accuracy.
- Center-weighted Average: A communicative name. Indeed, this mode meters the entire scene, weighing the center parts more.
- Partial: This mode only meters a part of the scene and ignores everything else.
- Spot: This is similar to partial but measures an even smaller, point-like area. Old-school light meters are often spot meters.
When Should You Deviate from the Measured Exposure?
If your camera thinks everything should be middle-grey bright, some exposures will be wrong.
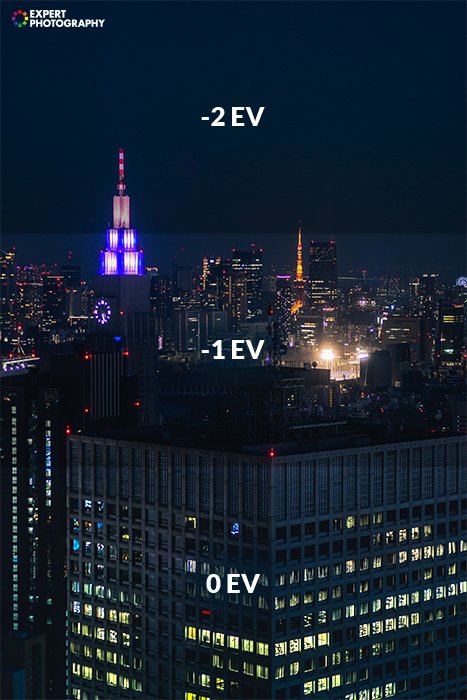
What’s the deal with bright winter landscapes full of white snow? Or with a nighttime cityscape? In these situations, your camera will probably miss the exposure by default. It will under and overexpose, in respective order.
You can also get into a situation with a well-lit subject before a dark background. The chances are that your camera will overexpose because the dark background occupies most of the frame.
But don’t give up! Here comes exposure compensation to save you.
What Does the Exposure Compensation Scale Do?
Exposure compensation is a basic setting that you can adjust to change the final exposure. You can do this in semi-automatic modes. A few cameras have it in manual mode, too.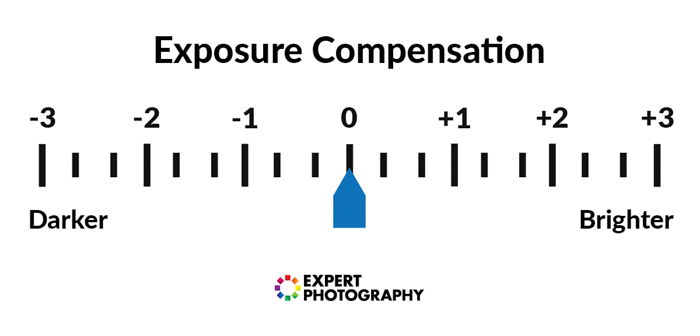
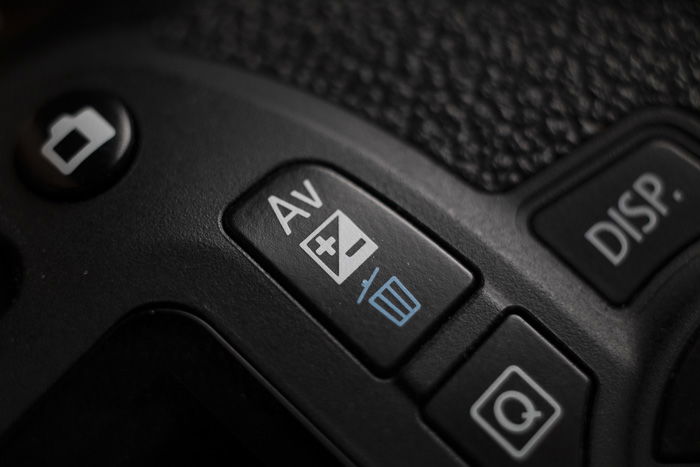
Where Can You Find Exposure Compensation?
The exposure compensation scale is located on the main interface of your camera menu. In cameras, it occupies the biggest space in the Q (Quick) menu.
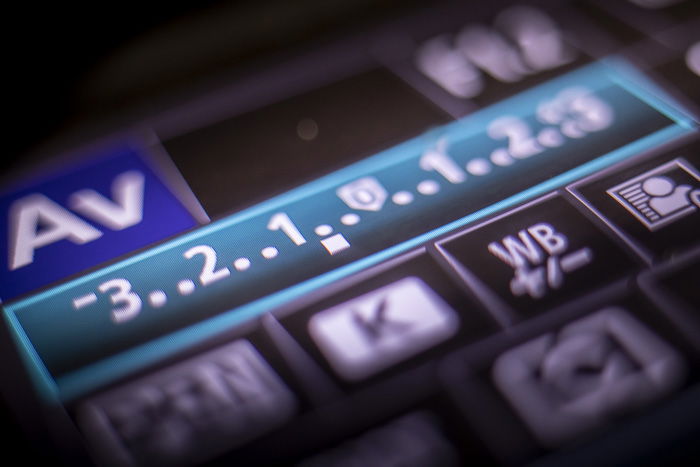
You can also find it on the top LCD screen if you have one on your camera.
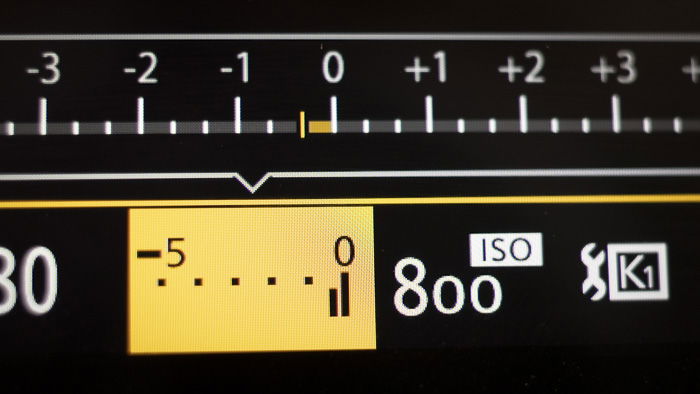
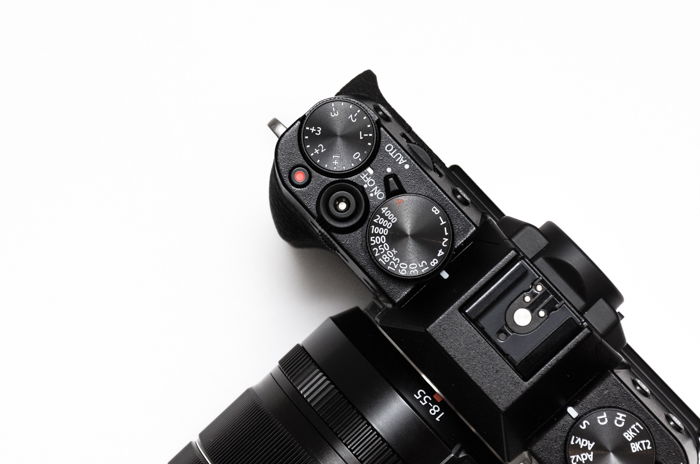
How to Adjust Exposure Compensation
On cameras with two dials, one dial controls the priority setting. The other dial controls compensation.
It’s a bit more complicated with cameras that have one dial. For instance, simultaneously press the compensation button and turn the dial on Canon’s lower-range DSLRs.
Some cameras, including most of Fujifilm’s cameras, the Nikon Df, the Sony a7 series, and others, have separate compensation dials.
Exposure Compensation in Semi-Automatic Modes
These are the semi-automatic modes:
- Program (P) sets a combination of shutter speed and aperture
- Shutter Priority (S or Tv) sets the aperture automatically
- Aperture Priority (A or Av) sets the shutter speed automatically
In these modes, the camera measures light and sets exposure automatically based on your preferences. By default, it sets it to the middle. But you can adjust it to be darker or lighter. So, it compensates for darker or lighter conditions.
Let’s go back to our previous example. Suppose you have a beautiful, snow-covered landscape before you. Your camera is set to Av (aperture priority mode) because you prefer a narrower aperture.
By default, the camera assumes that the scene is middle-grey-bright. So, it underexposes it, resulting in a middle-grey image.
Let’s set the exposure compensation to (around) +1.3 stops. If you take a shot now, it will be much closer to the scene’s real luminance.
You can also use it in the nighttime cityscape situation. If you turn down exposure compensation by one to two stops, your exposure will better represent the scene.
What Does Exposure Compensation Do in Manual Mode?
Some select cameras, such as the Canon 5D Mark IV, have compensation in manual mode, too. You can have your aperture and shutter speed fixed. Just set ISO to Auto, and you can adjust the exposure compensation. I find this to be a practical feature.
When Should I Adjust Exposure Compensation?
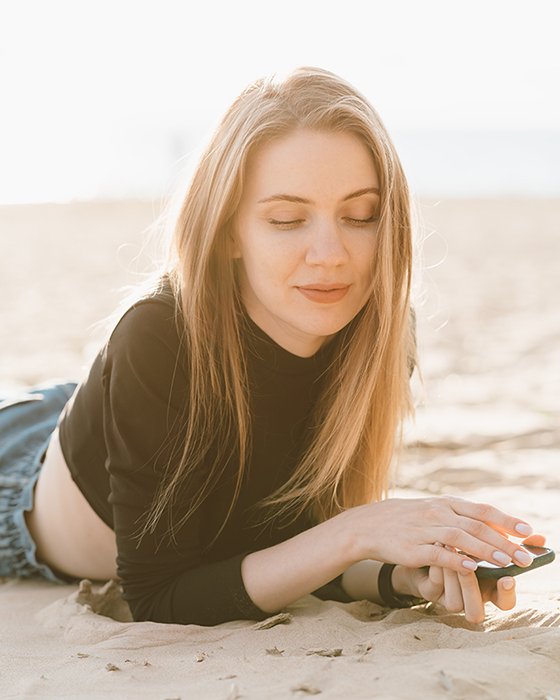
You Need to Discard Highlight or Shadow Data
In scenes that exhibit a wide dynamic range, you have two options. You can shoot more bracketed exposures and merge them in post-production.
You can only do this with very steady hands (or a tripod) and where there’s not much movement in the scene. Otherwise, you sacrifice either highlight or shadow data and must deal with clipping. But you surely have preferences on which to keep and which to discard.
In the previous portrait photograph, the artist discarded some highlight data. In turn, the subject’s face is exposed bright enough to be visible (and post-processable).
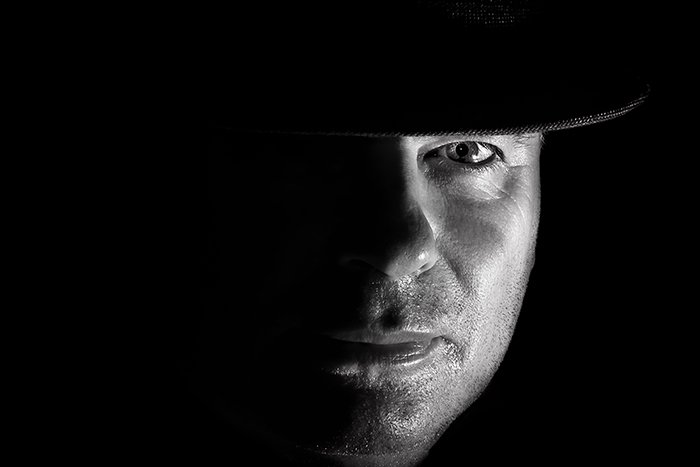
Set Exposure Compensation for High Key and Low Key Shots
There are other artistic considerations, too. High-key and low-key shots require careful lighting and overexposure or underexposure (in technical terms).
To photograph in a high-key style, you must set exposure compensation to overexpose slightly. But be aware of clipping highlights if that’s not your intention.
For low-key, you’ll need to use negative compensation, often -3 stops or more. In such scenarios, I recommend using manual mode. You can easily manage it with exposure compensation, too.
Use Manual Mode for Full Control of Exposure
It’s worth learning to nail the exposure in manual mode. Exposure compensation, however practical, doesn’t give you full control over your camera.
There are times when the lighting doesn’t allow for accurate metering. Concerts, theatres, and night shots are generally difficult to accomplish using exposure compensation.
You’re much better off using Manual mode in those situations, even with limited experience.
Conclusion: Exposure Compensation
Exposure compensation is a powerful feature that eliminates bugging with the settings. It often gives you more time to concentrate on the actual photograph.
It’s good to know how exposure compensation works, when and how to use it, and its limitations. It’s also best to recognize when it’s time to switch to manual.
Broaden your photography skills with our Photography Unlocked course!
- Master manual mode to capture moments you’re proud of.
- Overcome the frustration of missed shots with quick exposure settings.
- Benefit from visuals with hundreds of images and illustrations.