Photography is all about capturing a moment in an instant. Nothing is more instant than a bolt of lightning.
Learning how to photograph lightning is not easy. Getting that great shot at exactly the right time takes practice. But there are many strategies to help improve your lightning photography.

Photograph Lightning: Checking the Weather to Predict When Lightning Will Strike
Lightning storms tend to happen after a period of hot weather.
In Europe, for example, lightning storms are a lot more common towards the end of summer and the beginning of autumn.
There are many apps and websites to help us figure out when to get out there and shoot lightning. Windy.com is my favourite. It has detailed information on lightning strikes down to the minute.
You can also check out your national weather service website.
Choose a Suitable Location to Capture Lighting
When thinking of the location to shoot lightning from, consider the following:
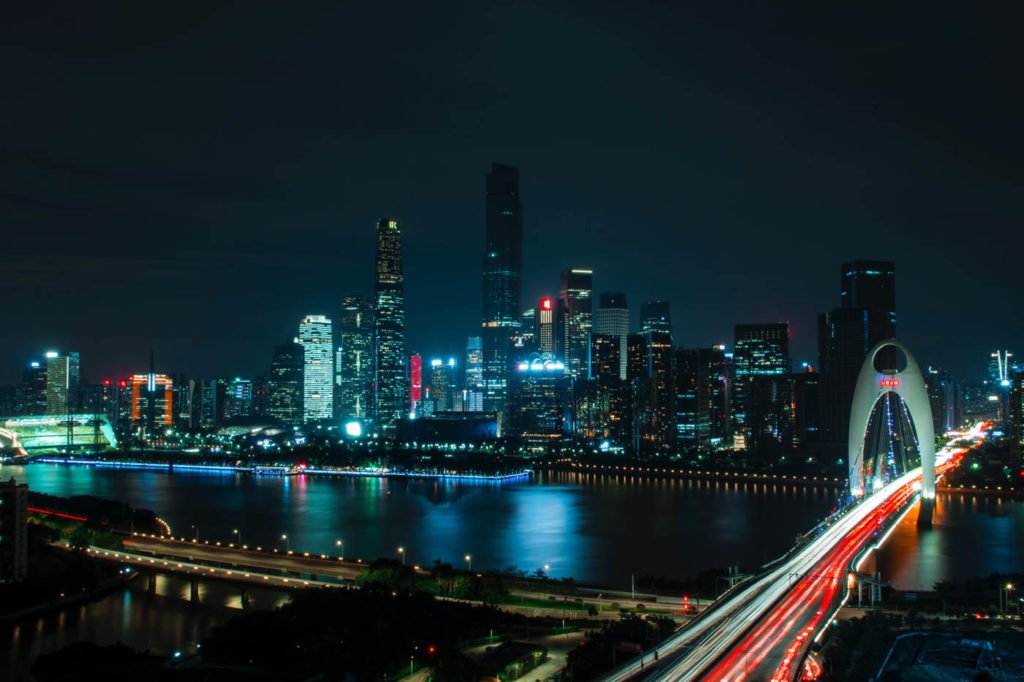
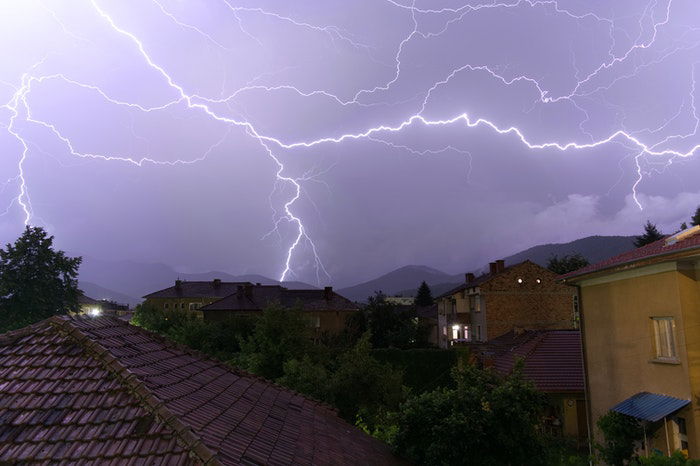
Find a good vantage point – You need a clear line of sight off into the distance for lightning shots. An ideal location may be the balcony of an apartment building a few miles away from the storm.
Face the storm – It is important to check the to know the direction of the storm. Ideally, you’ll be photographing the lightning bolt as the storm approaches. You must be quick and cautious, so you are ready to get to shelter once the storm arrives.
Stay safe – Choosing a location that ensures lightning safety is important. Focus on staying high but not on the roof or at the top of a hill. It is also important to stay away from trees, metal poles, or street cables. The balcony of a high building offers you both protection from the rain and any stray lightning bolts.
Add interesting foreground – For a stronger lightning photo, add a point of interest to compliment the lightning strike. Look for a location that gives you both a high vantage point, and a good foreground subject. Try to find a composition that looks good even without lighting. This will give you a more interesting lightning photo.
Use a Tripod to Keep Your Camera Steady During Storm Photography
You’re very likely to be standing in the strong wind while photographing lightning. You must focus on keeping your camera steady.
In a pinch, you might be able to use a wall to steady the camera. Or you can balance your camera on top of your camera bag.
A sturdy tripod is the best solution since you’ll be shooting exposures of up to 30 seconds. I recommend using an external shutter release or cable release. With these, you won’t need to touch the camera while you’re photographing lightning.
Use an Intervalometer to Ensure High-Quality Lightning Images
When photographing lightning, we want our camera to remain as still as possible. Sometimes, even pressing the shutter button might interfere in our camera steadiness and create a blurry photo.
Using an intervalometer for photographing lightning can increase the quality of your photo and make the photoshoot easier.
Here are a few benefits of using an intervalometer when photographing lightning:
Sharper images – Using an intervalometer can increase the chances of getting a good lightning photo, as it allows you to shoot without touching the camera. Once you focus, you don’t have to press the shutter button again, which might cause camera shake and reduce the quality of the image.
You can take a series of photos over a period of time – An intervalometer can also help to shoot a series of photos for several minutes. This is a huge advantage as we don’t know exactly when the lightning bolt will show up. If you don’t have a lightning trigger, using an intervalometer will increase your chances of catching the lightning.
Protect Your Gear to Avoid Water Damage
When shooting lightning, you are very likely to shoot under the rain. Even a small amount of water may damage your equipment. If the water gets onto the lens, it may distort your photo and ruin the whole shoot.
If possible, use a lens filter to keep your lens protected. For the camera, if you don’t have a rain sleeve you can use a one-time-use camera rain sleeve. These are designed to keep your gear dry. If you don’t have any time to prepare for the bad weather you can always go for a plastic bag or even a shower cap.
Make sure to bring a micro-fiber cloth with you so you can wipe the camera if needed. Be cautious and keep the rest of your gear in a waterproof case.
How to Capture That Perfect Moment When Lightning Strikes
Broadly speaking, there are two approaches you can take when photographing lightning. One uses long exposure, the other a specialised lightning trigger.
The first one takes more patience. You have to hope for a bolt of lightning to strike as you keep your shutter open. The second consists of a gadget that tells your camera to take a photo when it detects lightning.
In both cases, make sure to have your camera on a tripod, enough space on your memory card, and an extra battery.
Setting Up Your Camera
The initial setup for both approaches is the same.
First, you need to establish a storm is coming. Then, choose your location, set the camera up on a tripod, and think about your composition.
Ensure you have an appropriate focal length to capture the lightning bolt. With storms that are far into the distance, a longer focal length is better. As the storm approaches, a wide-angle lens will better capture the entire scene.
Try to include a large part of the sky in your frame. You won’t capture lightning otherwise. Make sure the lightning strikes are happening inside your frame. Otherwise, you will need to recompose your photo.
Focus your photo using the camera’s manual focus. The best way to focus lightning is to use the camera’s live view setting and choose a point in the mid-ground. Zoom in to this portion, and focus the camera to ensure sharpness. Once focused, keep the camera’s manual focus on, to ensure you keep focus.
Set your camera’s white balance to “auto”. If you want to give your photo a “blue cast” I suggest changing to a “cooler” white balance. This usually goes well with the lightning scene.
Take a photo or some test shots of the scene in front of you at f/8. In some cases, the lightning strike will leave you with an underexposed photo. But the photo you take now will allow you to blend the lightning photo and a regular photo for correct exposure.
The Long Exposure Approach
The idea behind this approach is to make your camera settings expose for an extended period. The aim is to capture a lightning strike during long exposures.
Change your camera settings to underexpose the scene at -1EV. You may need lower if the lightning strikes are nearby. You’ll want to set the shutter speed to be at least 5 seconds.
If you are close to the storm, you won’t need an exposure of more than 15 seconds. If the storm is still far, you can start with 30 seconds or try the bulb method.
Set your aperture and ISO accordingly. I would begin with an aperture between f/5.6 and f/8, and ISO 100. Of course, this will depend on the shutter speed you decide to set.
Try shooting some photos as soon as you see the first lightning. Then, change the ISO depending on the exposure. If you’re photographing during the day you may need to use a strong neutral density filter. This filter locks some of the light coming into the camera and helps to make longer exposures.
Use an external shutter release or cable release. Keep the shutter locked so the camera continues to take photos. With this, you’ll be able to take a series of photos for several minutes. Also, your chances of catching the lightning will increase.
Continue taking photos until you can capture the bolts of lightning. Taking photos this way, especially as you’ll want to use RAW, will use up space on your memory card quickly. Ensure you have a large memory card and replacements.
To learn more about long exposure, check out our Infinite Exposures course!

The Trigger Approach
The second method for lightning in photography is to use a specialised trigger. This works by detecting a big change in the light levels that will trigger an exposure.
With this method, you won’t have to leave the shutter open for ages. Once you set up the lightning trigger it will know the exact time to shoot the photo.
This instant trigger is a definite improvement on the long exposure technique. Here’s why:
One frame – You no longer have to take many photos in the hope of getting the one frame that includes a lightning strike. This saves space on your memory card. And it prevents your camera from deteriorating from taking many photos.
Better definition – With a trigger, you get a better chance of capturing the detailed elements of the bolt of lightning. Also, you’ll be able to use a larger aperture since you no longer need a long exposure.
Easy to use – Lightning triggers work well for either beginners or professionals. They are easy to use and some of them can be linked to a smartphone and be controlled wirelessly.
There are plenty of trigger systems on the market to choose from. Some of the best ones are the Pluto, and the Nero triggers. You can use these triggers for other forms of photography, not just lightning.
Let’s look at how to photograph lightning using a trigger.
- Set up your camera.
- Your camera’s shutter speed should be set to expose at around 1/15th second. Use the aperture to get the correct exposure level for the scene you’re photographing. During the day you can have your camera on shutter priority mode. At night, it’s best to have the camera in full manual mode.
- Attach the lightning trigger to your camera. Adjust the sensitivity of the sensor according to your current conditions. It’s often the case you’ll need to use some trial and error before you find the sensitivity sweet spot.
- Now, wait, and allow the camera to take exposures as the lightning storm passes by.

Conclusion
Now you know everything about taking photos of lightning. It’s time to put that knowledge into practice.
Next time you hear a storm is coming, grab your camera and tripod and find the perfect spot. You’ll need practice and patience to get the best result, but it’s very rewarding when you get it right.
Remember to stay safe. Shooting lightning is fun, and the results may be great, but your safety is the most important.
As always, please share your thoughts and any photos you have in the comments section!