Learning how to photograph the moon is a gateway niche to astrophotography. It’s easy to do and doesn’t require as much equipment as star or Milkyway photography.
This article will take you through how to photograph the moon. We’ll look at settings, gear, techniques, and tips used by professionals to help you get the best results.

The Best Gear to Photograph the Moon
You only need a handful of tools when photographing the moon. Below is a list of the essential items you’ll need as well as a few affordable alternatives.
Camera
To capture your first moon picture, you should use a DSLR or mirrorless system. APS-C and Micro Four Thirds cameras are perfect because of their cropped sensor. The Canon EOS 4000D or Olympus OMD EM-5 Mark II are excellent choices.
A 300 mm telephoto lens on a Canon APS-C camera body will give the same field of view (FOV) as a 480mm lens on a full frame camera. On a micro four-thirds camera, the same lens will give a FOV equal to that of a 600mm on full frame.
A notable exception to the DSLR/mirrorless rule are cameras like the Nikon P900. This camera has a zoom lens equivalent to a 2000+ mm lens on a full frame camera.
With the cropped cameras and P900, you will quickly fill the frame with a small part of the lunar surface.
Lenses
You can use the kit lens that comes with your camera when taking photos of night landscapes with the moon in the background. But you need to be aware that it doesn’t have the magnifying power required to shoot close-up shots of the moon.
Now you must be asking, how do I make the moon look bigger in pictures?
The simple answer is by using a telephoto lens. Think of it as a big telescope that allows you to see everything up close. You can find so many options for your camera out there with various levels of magnification.
So what’s the optimal lens to pick for moon photography? You need to find one with a focal length of, at least, 300mm. Thankfully, the moon is so bright that you do not need fast, expensive, telephoto lenses. Anything with an aperture of f/5.6 or f/8 will do.
For a DSLR, we recommend the Canon EF 75-300mm f/4-5.6 or Canon EF 100-400mm f/4.5-5.6L IS USM. You can’t go wrong with Olympus MSC ED-M 75 to 300mm II or Sigma 150-600mm 5-6.3 lenses for Micro Four Thirds systems.
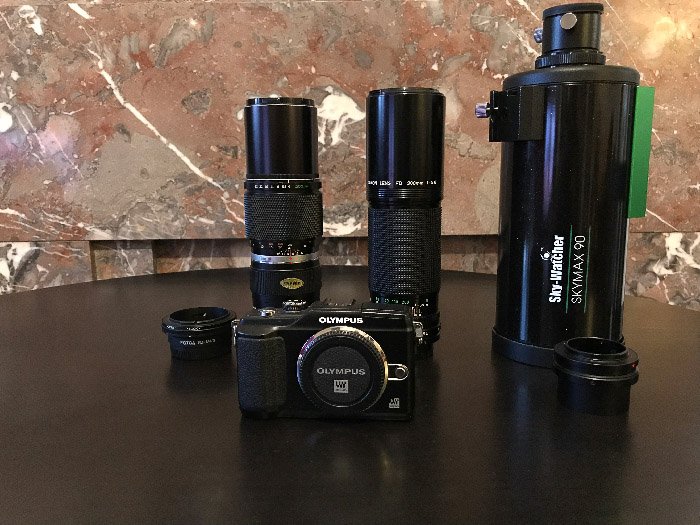
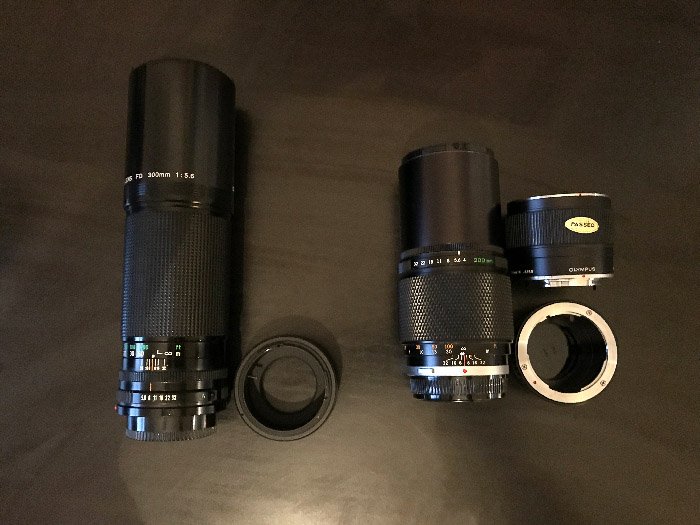
If you don’t own a telephoto lens, older vintage lenses are viable options to cut costs. You’ll only have to use an adapter to convert them.
Another cheap option is to add a teleconverter (TC). This nifty tool is an optical element which you can couple with the lens and the camera to increase the focal length.
It is essential to use a TC designed for the lens you want to use.
However, TCs reduce the amount of recorded light. A 1.4x TC will reduce your exposure by 1-stop, and a 2x TC will cut two stops.
If you are serious about moon photography and are willing to invest, then consider super-telephoto lenses. They are between 400mm and 800mm. They are the best options. Their level of magnification lets you capture the details of the lunar surface. The only downside is that they can be expensive. Their average price runs between 1000 to tens of thousands of dollars.
The best super-telephotos include the Nikon AF-S FX NIKKOR 600mm f/4E FL ED, and Canon EF 800mm f/5.6L IS USM. Then, of course, there’s also FE 200-600mm F5.6-6.3 G OSS for Sony and SP 150-600mm F/5-6.3 Di VC USD G2 from Tamron.
Telescopes/Spotting Scopes
Don’t have a telephoto lens or have one that doesn’t go close enough? Then consider using a genuine telescope instead.
If you are into bird watching or astronomy observations, you may already have a spotting scope or small telescope.
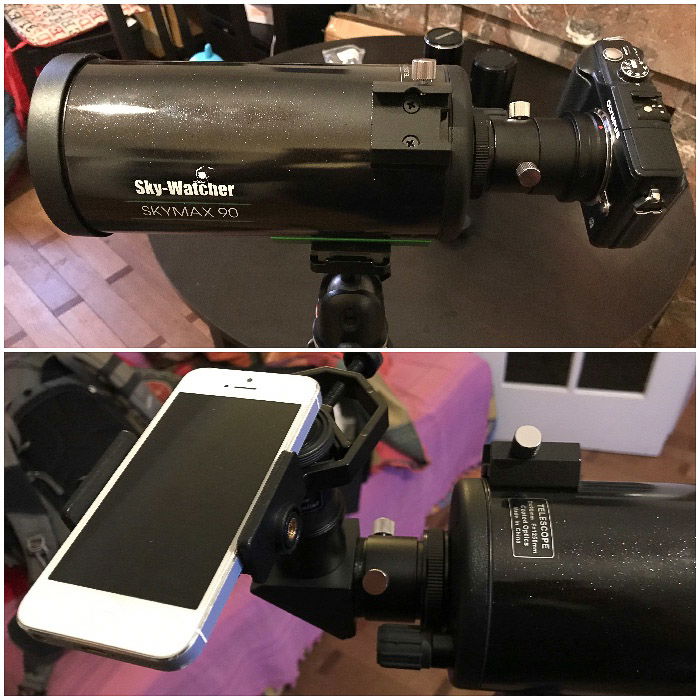 You can connect your DSLR to scope via an adapter (T-to camera mount) by removing the eyepiece. There are even adapters that allow you to use your compact camera or smartphone to photograph the moon.
We recommend the Emarth Telescope 70mm/360mm.
Accessories
Image stabilization makes it possible to take hand-held photos of the moon. But you should still use a decent tripod. I use a dated Manfrotto 055XPROB, but the Manfrotto Manfrotto MT190XPRO4 is also a great option.
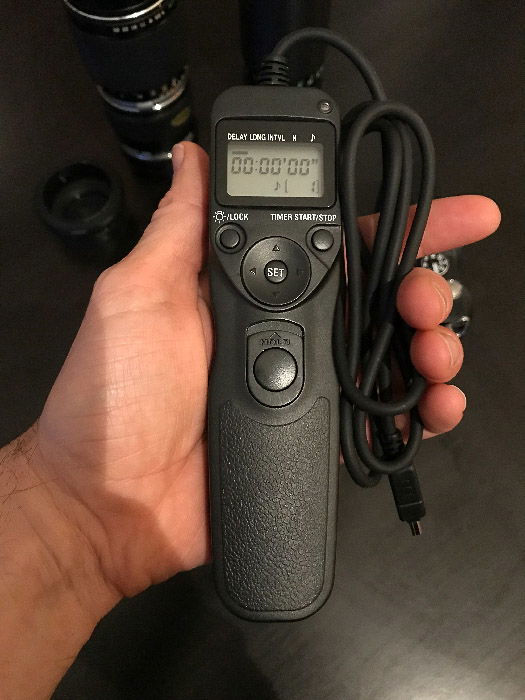
A sturdy tripod allows you to achieve a good focus and take sharper images. Use it alongside a remote shutter release with an intervalometer to prevent camera shake and create a series of images.
If you are photographing with a telescope, you need a manual or motorised astronomy mount. These mounts allow you to track the moon’s movement across the sky.
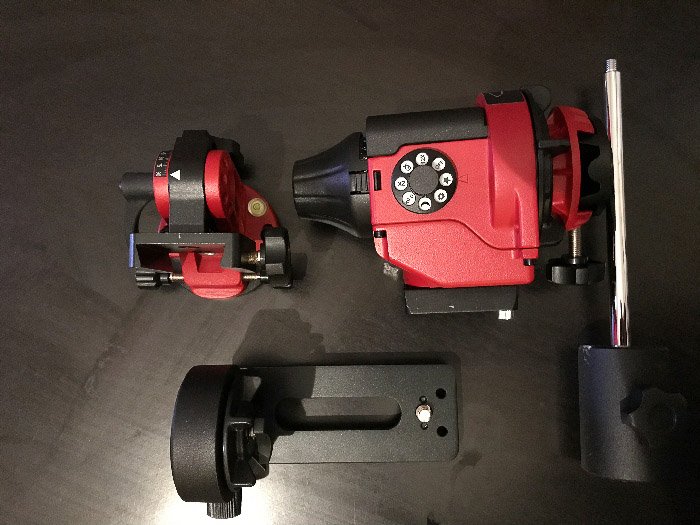 My Skywatcher Star Adventurer tracking mount is ideally suited for astrophotography with DSLR and camera lenses. Among other functions, it has a star, moon, and sun-tracking modes.
Headlamp
Even when the moon is shining, it can still be quite challenging to see everything at night. So bring a headlamp with you to make everything easier. You’ll find it useful when setting up your equipment as well as adjusting camera settings. Just remember to turn it off before you take any pictures. You don’t want to be accidentally shining a light on your lens.
Any headlamp works for night photography. But try to get one with a red LED light. Since it’s not as bright as the white light, you can use it without worrying about accidental lens flares as much.
How to Photograph the Moon for Stunning Results
The beauty of moon photography is that it is pretty easy to get a good shot. Of course, that’s if you’re not looking to capture extreme close-ups.
With standard equipment, you can capture moon shots from your house, garden, or even the city center.
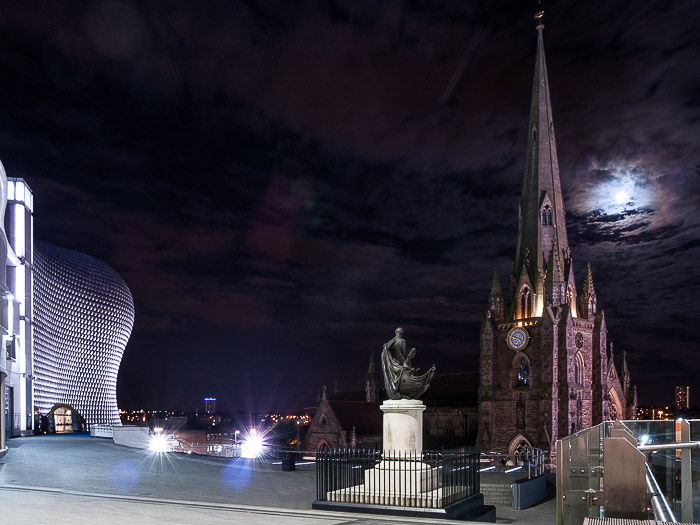
The easiest way to take pictures of the Moon is to include it in a nocturnal landscape or cityscape. While you will not get to see great details in the moon itself, it will improve your image in several ways by:
- adding a point of interest in the sky;
- helping to balance the composition;
- setting a mood for the scene;
- adding light to the landscape.
For example, St Martin’s Cathedral in Birmingham gets a dark mood thanks to the moon in the cloudy night sky.
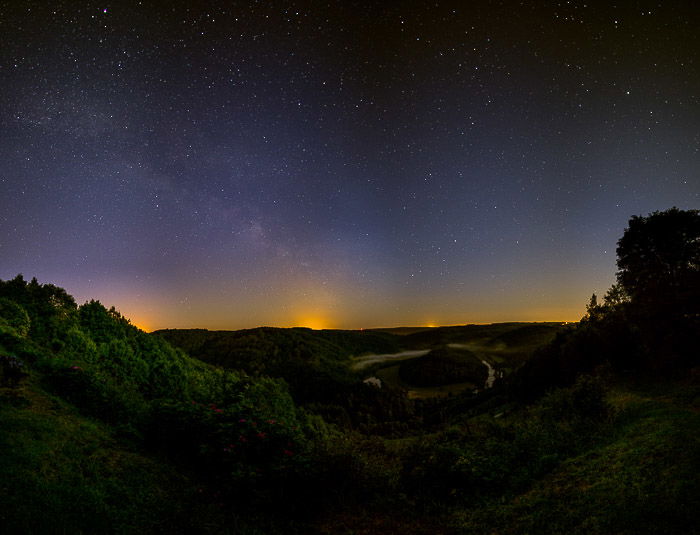
 You can also photograph natural landscapes using light from a full moon.
 The real treat is to get up close and personal.
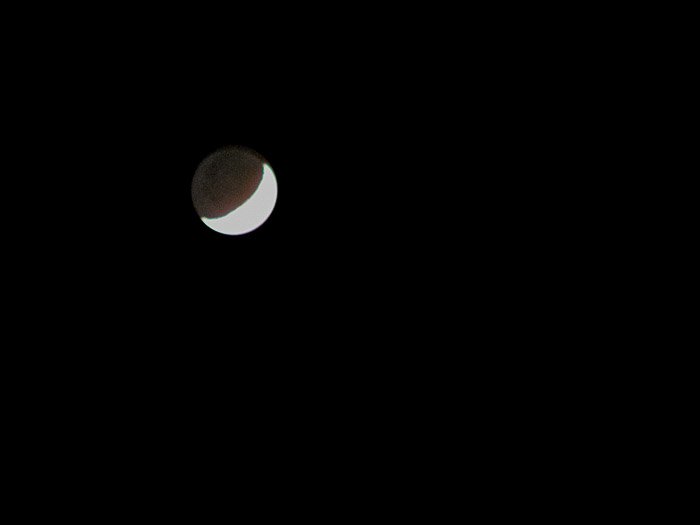
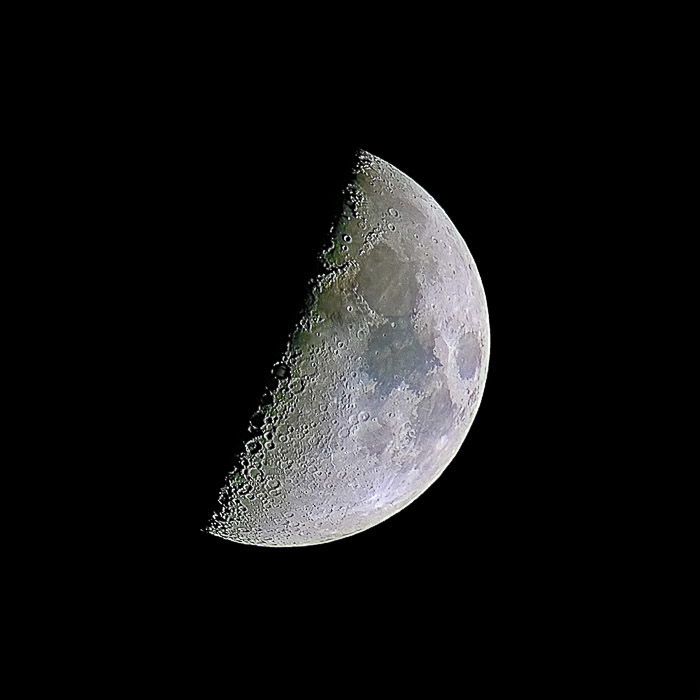
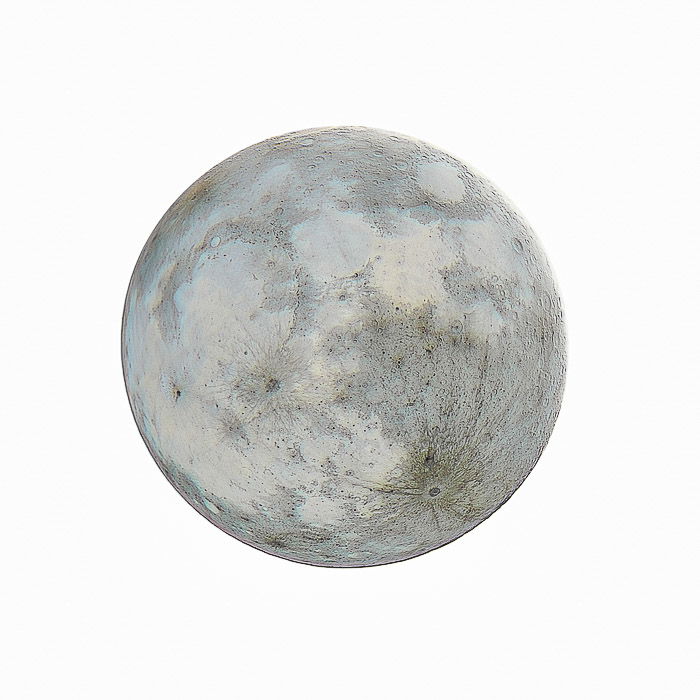
To get a shot of the moon like the one below, you’ll need a telephoto lens. An option with a focal length between 100 to 300mm is enough to get the moon look as big as this.
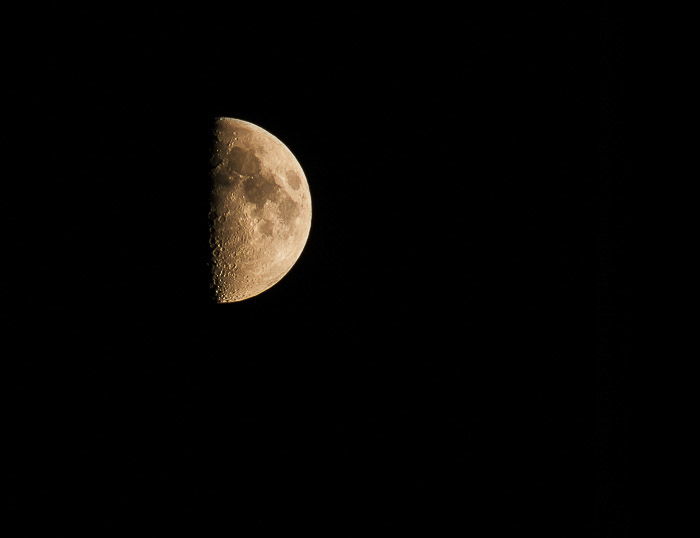 The moon in its first quarter. It is yellow because of its low altitude.
How to Focus on the Moon to Get Sharp Images
If you want to get sharp moon photos, your focus needs to be precise. Unfortunately, chances are the autofocus will have difficulty when it’s so dark. So, switch to manual focus.
Do not trust the infinite mark on your lens or the hard stop of the focusing ring because it’s not reliable. Although it comes standard on all lenses, its position is often inaccurate.
In reality, the infinity zone sits somewhere between your lens’s infinity mark and the maximum focal length mark.
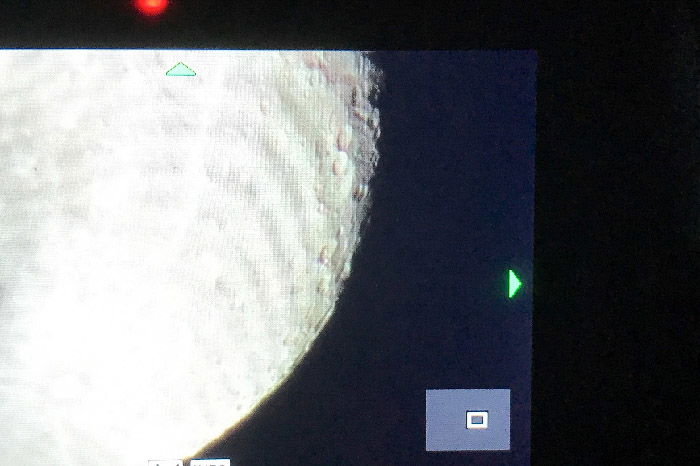
So instead of using the infinity mark, use all the advanced functions your camera has to help you focus on the moon. Features such as Live View, Magnification, and Focus Peaking will all help.
With the camera on a tripod, frame an area on the moon with contrasted craters. Now, try to get their ridges as sharp as you can by focusing back and forth until you find the sweet spot. Achieving good focus can take time.
If you can, use a white marker to mark true infinite on your lens. Doing so will speed up your future photographic sessions.
How to Compose Your Moon Shots
Even if you get the technical aspects of photographing the moon, your images won’t be as impactful if your composition is off.
But thankfully, your camera has a few tools to help you achieve the perfect composition.
The first feature you can use is the horizon or spirit level. It isn’t a composition tool per se, but it helps you ensure your camera isn’t crooked when taking pictures. This feature is especially important when capturing night landscapes. But in most cases, it’s not necessary for moon close-ups.
Now for the composition part, you’ll need to turn on your grid. Using the Rule of Thirds, place the moon and other crucial elements anywhere the lines intersect. Doing so ensures your image looks balanced and pleasing to the eyes.
Every camera has a spirit level and a grid. But activating them may vary depending on the manufacturer and the model you have. Consult your manual to turn on these features on your device.
How to Read The Sky
Standing between you and the moon is the Earth’s atmosphere. Clouds, haze, air turbulence, pollution, dust, and humidity – all of these will degrade your image.
Try to take pictures of the moon when it is high in the sky. This way, less of the atmosphere will be in-between. Clear winter nights are your best bet for excellent visibility.
But be careful. If you’re photographing the moon from a city during the winter, avoid taking photos when the moon is low. The escaping heat from the roofs will create turbulence that will further degrade your view.
For the same reason, if you want to photograph the moon from inside your house, shoot through the window. If you open it, the thermal gradient between the air inside and that outside will create turbulence.
For best results, it also helps to go to a location with minimal light pollution. That way, you get the sharpest images of the moon. Of course, considering you also meet all the other conditions we mentioned above.
How to Include Landscape in your Moon Photos
Taking pictures of both the landscape and the moon can be tricky. Especially since each one requires specific exposure settings. For the most part, moon pictures need a fast shutter speed while longer exposures are essential or nightscapes (a.k.a. night landscapes).
So it’s not surprising that there are plenty of ways to take pictures of scenes with the moon in the same shot. And each method produces a distinct effect.
The simplest way is to photograph both the moon and the nightscape is by using long exposure. The slow shutter speed lets in enough light to properly expose the landscape.
In this case, the moon will be overexposed, which would otherwise be bad news. But sometimes, it creates a beautiful hazy effect that adds mood to your pictures. This method works even better if clouds are blocking the moonbeam.
But what if you want to expose both the landscape and the moon in one shot? Then you can try boosting your ISO. These days, some cameras let you work between 3000 to 6000 ISO or more without introducing distracting image noise. With such high sensitivity, you can take pictures of anything with relatively fast shutter speed.
The only downside is that even with minimal image noise, high ISO could still drastically reduce the image quality. So use this method with caution and only apply it only if you find it necessary.
The best way to expose for the landscape and the moon separately. In other words, take two photos with different exposure times and combine them in Photoshop. Mask in the moon into your nightscape, and you got yourself the perfect image.
How to Take Moon Photos with your Smartphone
You must be wondering, why can’t I take a picture of the moon with my iPhone? Well, your smartphone’s built-in lens doesn’t have enough magnification to capture moon pictures.
But that doesn’t necessarily mean you can’t take photos of the moon. All you need are a few accessories to create impressive results.
Essential Equipment
The first essential tool is a telescope, which would act as your telephoto lens. Although any telescope would work, it would be best to pick an option that produces excellent detail and has minimal distortion.
The best telescope should have at least 25x magnification. It also needs to have an aperture of 70mm or more. Take note that the aperture value on these devices is different from cameras that use f-stops as the standard.
Next, you’ll need a phone telescope adapter which you attach your mobile device to the eyepiece of the scope. Buy one that is universal so you can easily connect it to any telescope you have.
The last piece of equipment you’ll need is a phone app. Consider uploading either ProCam or Camera + 2 to let you change your camera settings manually. These programs are essential, especially since you need to use fast shutter speed to capture moon images.
The Process
Before photographing the moon, you’ll need to attach your adapter and your phone to the telescope first. The adapter is essentially a mount that holds your device in place. When installing, make sure you align the eyepiece and the lens. Otherwise, you may end up with vignettes that obstruct the moon.
Now turn on your camera app and change your settings the way you would on a regular camera. To achieve focus, tap the screen and wait for the lens to adjust. Take some test shots to make sure the exposure is correct.
Once you’re satisfied with your settings, compose your shot and take a picture!
Feel free to edit your moon images using Lightroom, VSCO, or similar mobile editing platforms.
How to Use Cropping For Moon Closeups
The size of the moon in your photo mainly depends on the focal length of the telephoto you use. The longer it is, the better close-ups you get.
The downside is that most of us don’t have an expensive 800mm lens. And that means that super close-ups of the moon are going to be challenging to achieve.
But one trick you can try to create a super close-up is by cropping. Doing so gets rid of the unnecessary parts and enlarges the size of the moon in your photo.
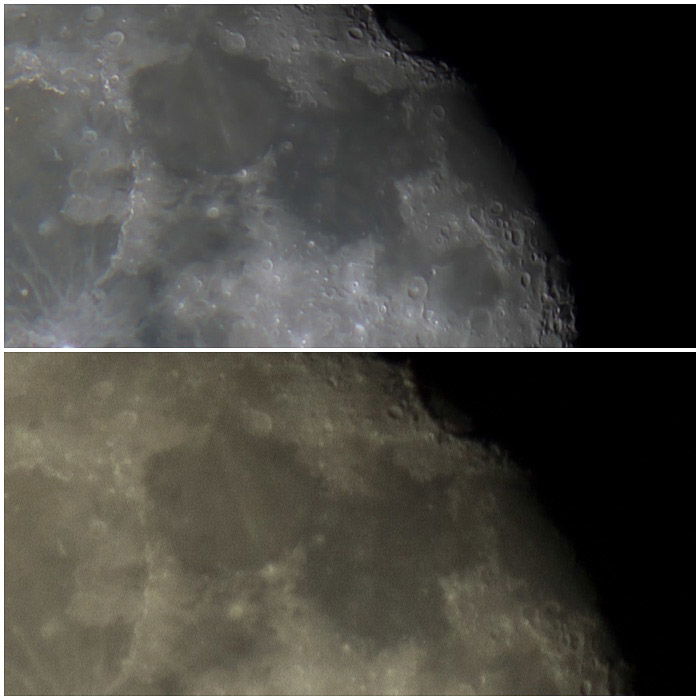
Just be careful not to crop too much, or you’ll end up with a low-quality image. To make sure your image has enough resolution, zoom in, and check the size of the pixels.
If the moon looks blurry and you can see the grain, then that means you cropped too much. So readjust everything until you see the details return.
You can do this technique using pictures from any camera. But if your device has a crop sensor, then consider cropping minimally. Why? Because the photos a crop sensor produces are small and lack the resolution that full frame sensors have.
But even if you have a full frame sensor, cropping too much can still affect the image quality. So use your judgment wisely when using this technique.
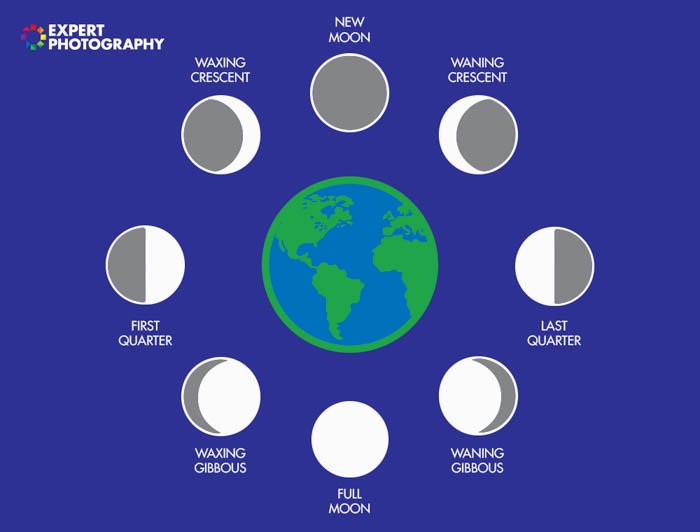
How to Photograph the Moon During Different Phases
Every month or so, the moon goes through a series of lunar phases. These go from New Moon (not visible in the sky) to Waning Moon. The moon changes by age (in days) and illumination.
 During the year, the moon is visible at different times of the day. For more information, look at a lunar calendar. Or check the weather forecasts to know when it rises, sets, and its phase.
Each lunar phase affects the moon’s shape and the number of visible details.
New Moon
If you shoot near the New Moon, very little of the lunar surface is visible. The moon will appear as a thin arch in the sky.
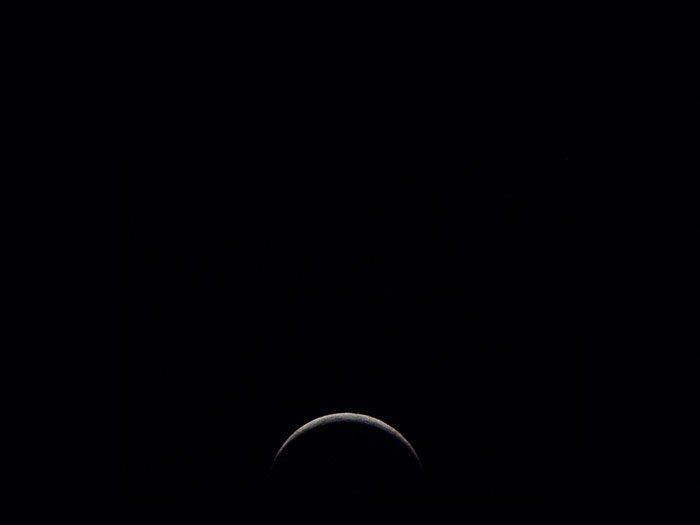
I like this phase because you can get moody moon photos. You can also easily see that the lunar surface in the shadow is visible, although faint. This effect is due to the reflected light from Earth’s atmosphere called the Earthshine.
Waxing and Waning Moon
In these phases, the light on the moon is mostly coming from the side. Between the New and Full Moon, the illumination increases during the Waxing period.
Between the Full and New Moon, the illumination decreases during the Waning phase.
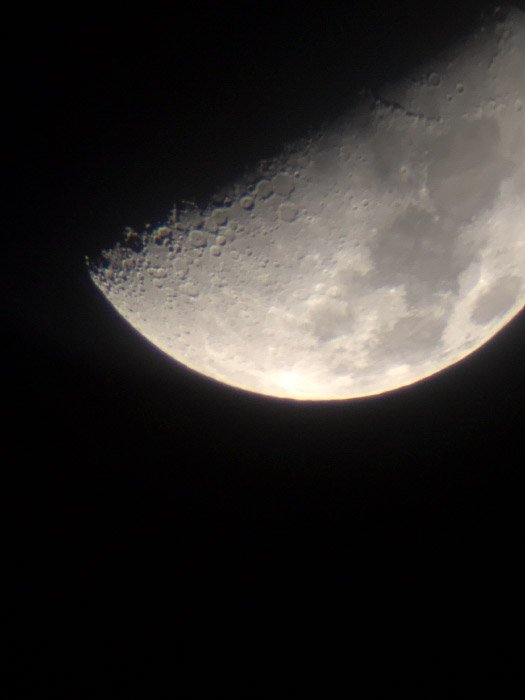
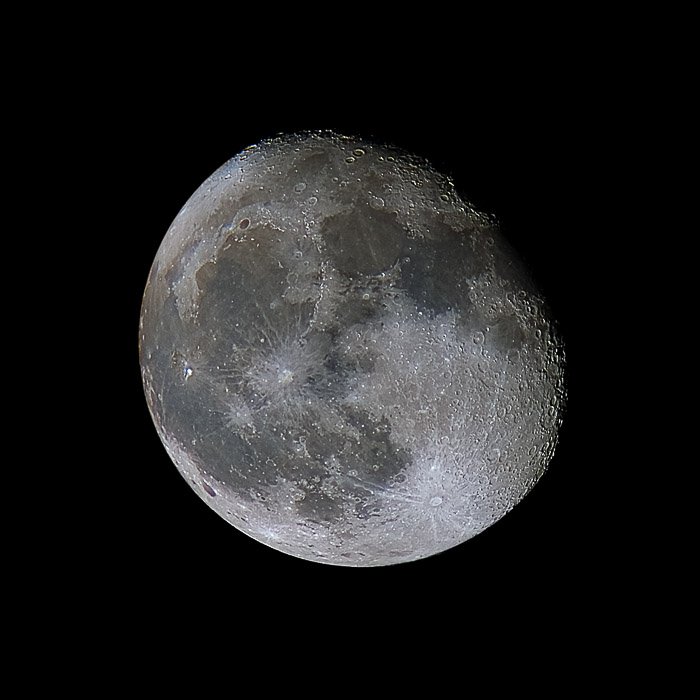 Near the line separating the dark and bright areas of the moon (terminator), you have the maximum contrast. This area is also the most detailed region of the lunar surface.
Use the terminator region to help you achieve a good focus on shooting the moon.
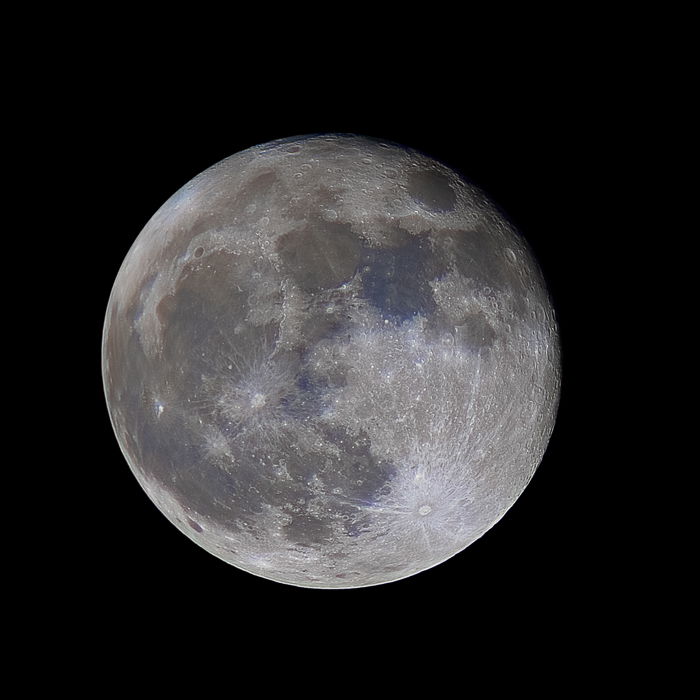
The Full Moon
During the full moon, the light is frontal. No shadows are present on the surface to enhance its morphology. The contrast across the Moon is rather flat, but overall it is still an impressive sight.
A Super Moon is a Full Moon when it’s at its closest distance to Earth in its elliptical orbit. A Super Moon looks 14% larger in the night sky and 7% brighter than a normal one.
At the farthest distance from Earth, we have a rather unimpressive Micro Moon.
Photographing and Editing Workflow for Moon Photography
What Settings Should I Use to Photograph the Moon?
Now to the most crucial question in moon photography: How do I set my camera to take a picture of the moon?
A lot of people end up with overexposed images because they think the moon requires long exposures. But the truth is that you need to photograph it using daytime settings.
So what does that mean?
First, you set your ISO to 100. Next, adjust your aperture between f/11 and f/16 for maximum sharpness. And finally, use a shutter speed of about 1/125th of a second or faster. It’s that simple.
To get the best results, you should always shoot in RAW. Take a test shot and check the histogram that you have not clipped the highlights and that the Moon is not too dark. The sky will probably be pitch black, but that is not a problem.
If you don’t have a remote shutter, use the built-in 2-second timer to avoid camera shake. When checking the exposure, be sure your moon is sharp.
Stacking
A passing cloud, haze, or air turbulence can ruin a single image. By stacking images together, you will drastically improve your final shot.
Stacking means taking a series of 50 or 100 images without moving the camera. If you don’t have an intervalometer, you can take a video clip instead. This technique is a viable option, even though the image quality may be lower.
To combine the best images (or video frames) into a final image with greater details, you can use Adobe Photoshop.
I start by loading the images into PIPP (Planetary Imaging PreProcessor). Doing so crops the images and center the moon in each shot. Then, I use Registax or Autostakkert! software to align and stack those frames into the final image.
Another great stacking program you can try is Helicon Focus, which is available on both Mac and PC. All you have to do is load the files and click Render. The software will then combine all the images for you. Once the final image is complete, save it, and you got yourself a sharp moon photo.
The last step is to edit the stacked image in Adobe Photoshop and Lightroom for the final retouches.
All of the above software is for Windows computers. For Mac users, you can try Lynkeos.
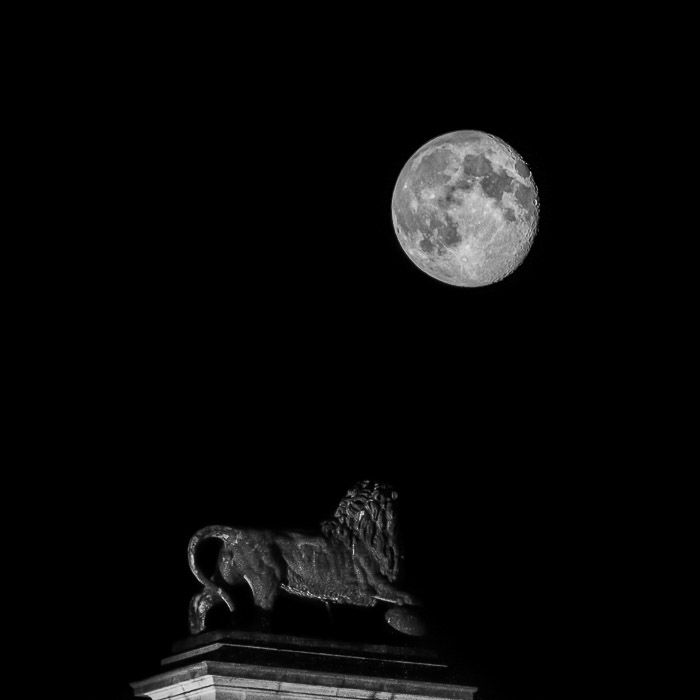
Get Creative With the Moon
After a while, you may start asking yourself what you could do differently with your moon photos. You can try to catch planes, birds, or even the International Space Station flying by in front of the full moon. For the ISS, there is software and websites to tell you when it will transit over your head.
Learn how using a telephoto lens affects perspective. In this way, you can control the proportions between the moon and the other elements in your photo.
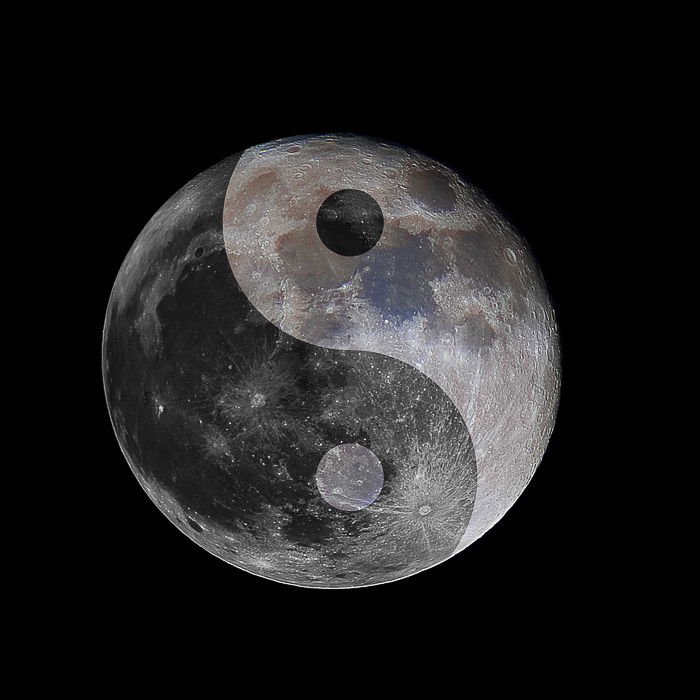
 Photos of the moon showing a negative composition are also exciting and give a fresh feeling.
 Or you can use your images to play with conceptual moon photography.
Conclusion
The moon is surprisingly the easiest celestial body to photograph. So don’t be intimidated to take it on.
Remember that unlike taking photos of stars, you don’t need long exposures when photographing the moon. Apart from supporting your telephoto lens, you don’t even need a tripod to take a decent picture.
So take your time to study this article and start preparing. Once the moon is out, and the weather is clear, try out the tips we mentioned. You’ll realize that it doesn’t take much to capture amazing moon pictures at all.
If you love taking shots of the moon, give our Milky Way Mastery course a go next!