
A crucial post-processing task you must learn is how to resize an image in Lightroom. You need this for a wide range of your photography needs, from entering photos into competitions to sending images to clients!
Today, we guide you through several approaches to resizing images in Adobe Lightroom. We also examine the differences between Lightroom’s two versions to see which offers more control. By the end, you will know how to easily resize an image in Lightroom!
- Learn to use every tool for quick, professional edits.
- Discover seamless subject selection with a single click.
- Unlock hidden details in photos with our unique method.
What Is Resizing an Image?
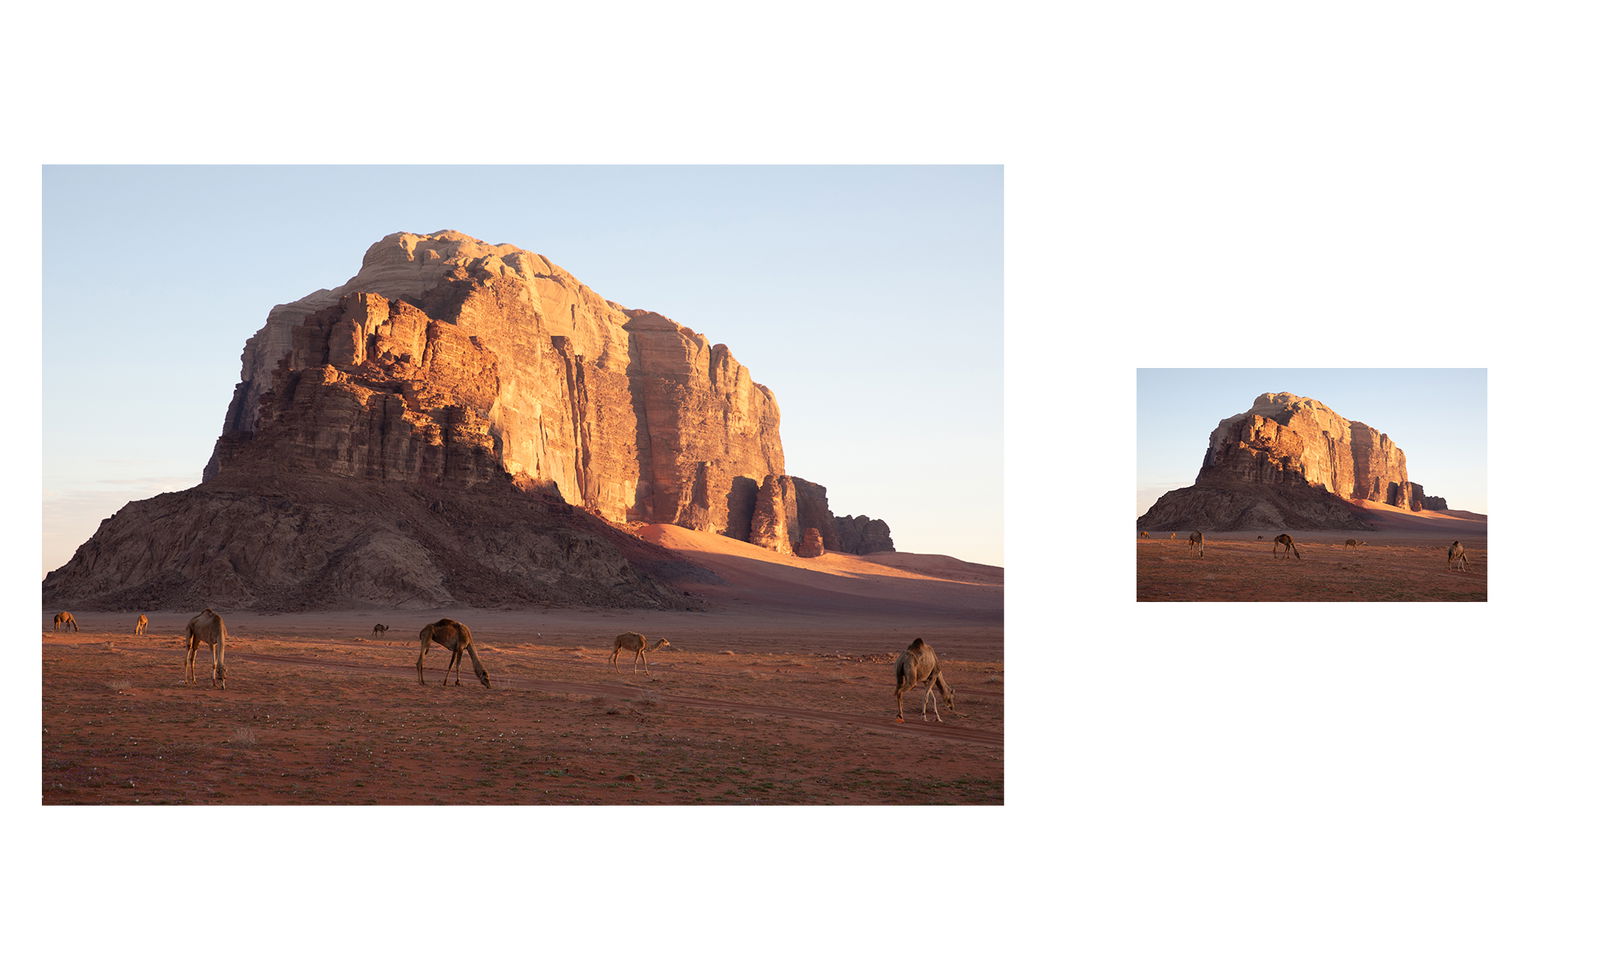
Resizing an image is a post-production process that changes the dimensions of our photographs. Every picture we take has a set size determined by the amount of megapixels (MP) in our camera. The higher the megapixel count (and the PPI), the larger our photos are.
Resizing an image is crucial to modern photography. Have you ever seen an advertisement with a very pixelated photo? The photographer or designer likely didn’t know how to resize an image properly.
Resizing is crucial for the printing process. Not only that, resizing our images is also crucial for file management. This includes sending high-resolution images to ensure the best web or social media page resolution.
How to Resize an Image in Lightroom Classic vs Lightroom (CC)
Adobe Lightroom comes in two versions—Lightroom (Creative Cloud) and Lightroom Classic. You would think both versions would have similar resizing abilities, but they do not. We will discuss the different approaches each version takes to resizing images.
The main difference is that Lightroom Classic allows much more control in the resizing process. You get a few different ways to resize your image so it turns out exactly how you want it to.
Lightroom CC still allows control over your image, but the avenues to go down are limited compared to Lightroom Classic. The CC version may still be better for you, though! It is a much simpler process, perfect for those not well-rehearsed in photo editing software or computers.
How to Resize an Image in Lightroom
Now, we walk you through how to resize an image in Lightroom. We split up the two newest Lightroom versions so you can find the process that suits you best!
The resizing process occurs while exporting in Lightroom. It is best to always leave the resizing until the end. This is because you always want to make your edits in the highest possible size and quality. We will go into detail for each method, describing its process and what it is best for.
How to Resize an Image in Lightroom Classic
Let’s look at how to resize an image in Lightroom Classic. The first thing you want to do is finish your edits. Check out our article on advanced Lightroom edits if you need help.
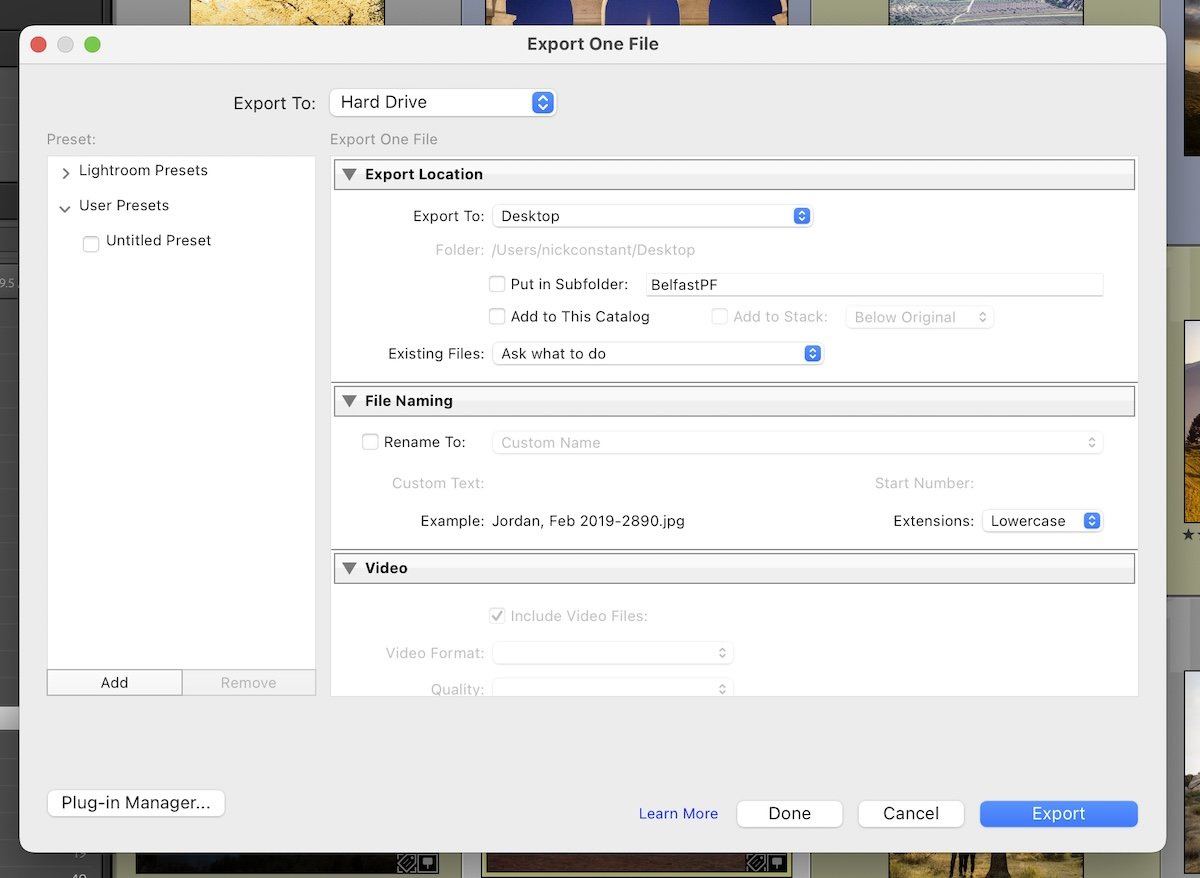
You then want to select the image or images you want to resize. Now, you can click Export in the bottom left-hand corner of the Library workspace or right-click an image and go to Export.
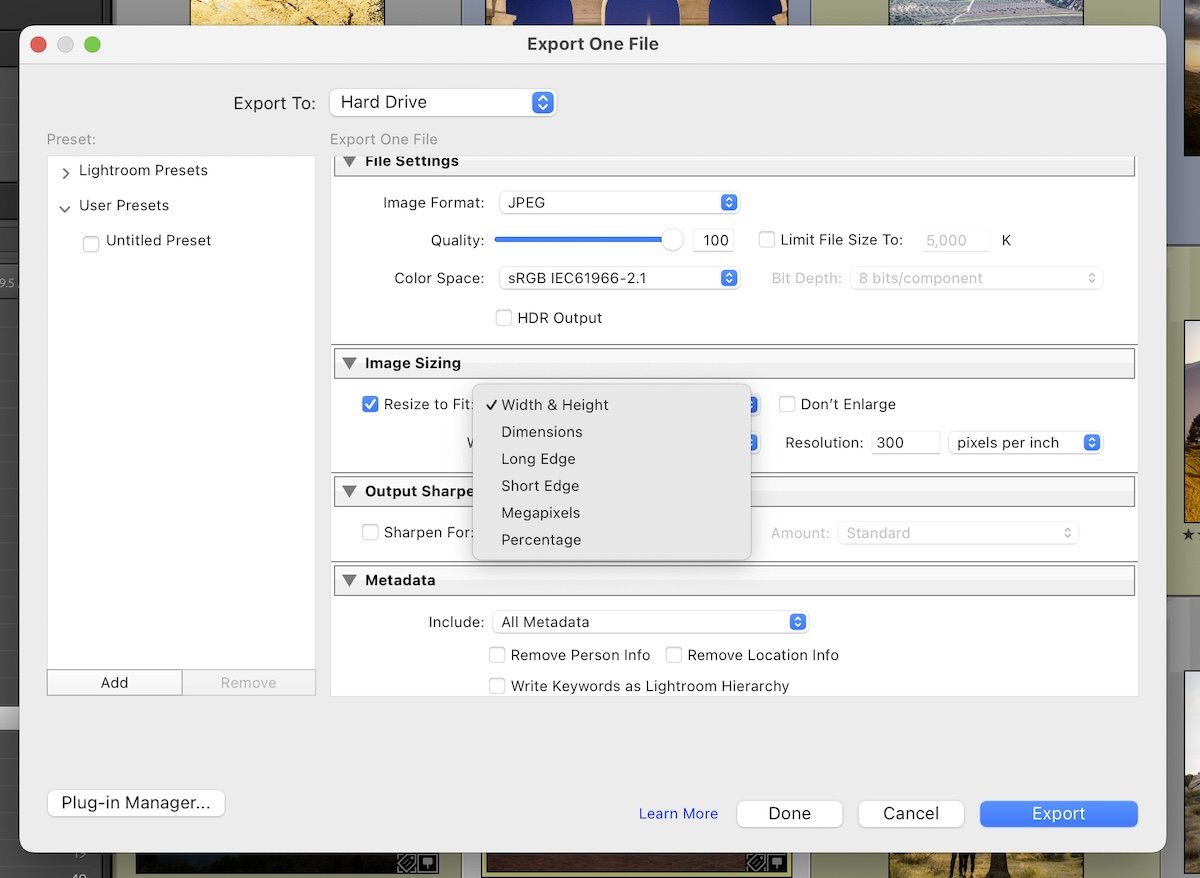
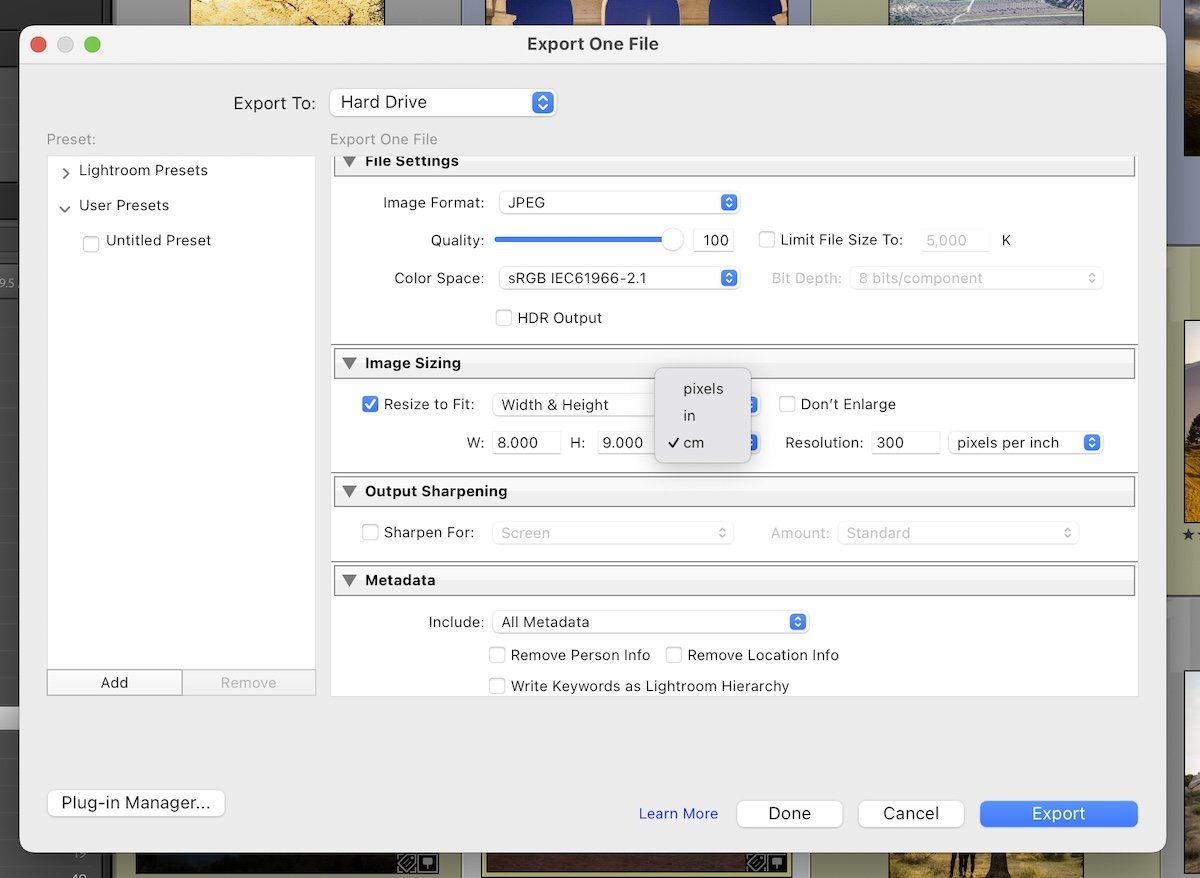
All our resizing in this window will be in the Image Sizing section, so scroll down to find it. To start resizing in Lightroom, check the Resize to Fit box. Then, you can use the dropdown menu to pick your resize method.
The Don’t Enlarge box is important because it ensures the photo’s quality is intact. Enlarging an image from its largest RAW size only pixelates it. Some photo editing software allows for AI resizing, letting you enlarge while keeping quality.
The resolution is important for your image size. It dictates the quality of your photographs and changes your desired output. A setting of 300 PPI (pixels per inch) is ideal for high-quality images, and 72 PPI is standard for web or social media images.
Let us now look at all the different methods to control Lightroom resizing.
1. Width & Height
The Width & Height method lets you resize the image to rough dimensions. You get rough dimensions because Lightroom does not skew your image. It always keeps your image in the same size ratio.
Lightroom lets you resize these dimensions in pixels, centimeters, or inches. This is helpful as different situations have different requirements. Photography competitions can be very particular about size dimensions. Lightroom understands this and offers you every option.
If the values for the Width & Height you put in do not match your photo’s ratio, Lightroom will likely follow the longest edge. So, rather than producing the exact results, Lightroom gets as close as possible to your requirements. You then have to crop your image accordingly.
2. Dimensions
The Dimensions method functions extremely similarly to the Width & Height method. The difference is that Lightroom selects which side to use for height or width.
Again, Lightroom does not rotate or skew your image. Thus, it chooses the longest dimension size and adjusts your longest edge to that size.
3. Long Edge
The Long Edge setting is one of the most helpful methods for resizing an image in Lightroom. This method is particularly useful for websites and client and competition requirements. The longest edge dictates the largest size of the image.
For this method, there is only one box to enter your measurement. You can choose between pixels, centimeters, or inches. The longest edge is the vertical measurement for portrait-oriented images. The horizontal measurement is for landscape-oriented images.
4. Short Edge
The Short Edge method is the same as the Long Edge but references the smaller dimension of your photograph. This method ensures that your image has enough detail for prints or websites.
Again, you only need to enter your measurements into one box. After exporting, Lightroom ensures that the shortest edge of your photograph has the same value you entered.
5. Megapixels
Lightroom also lets you resize your photograph in terms of megapixels. This is helpful for clients or competitions that send their requirements in megapixels.
The megapixel value resizes your image to include the set number of megapixels in your photograph. Lightroom lets you put in a decimal point to be accurate with your entry data.
6. Percentage
The last method you can use to resize your image in Lightroom is Percentage. This method increases or decreases your image size by the percentage value you put in.
This method does not produce accurate results like the other resizing methods. Instead, this method works best for those not bothered about getting exact measurements. It’s for those who want to change their image size roughly.
How to Resize an Image in Lightroom (CC)
Let’s now see how Lightroom CC lets us resize our photographs. This version does not allow us as much control as Lightroom Classic. But, it provides the essential features for us to still have complete control over our images.
The advantage of using Lightroom CC is that the interface is much simpler to work through. This is helpful for photographers who are new to photo editing software or easily overwhelmed by too much information.
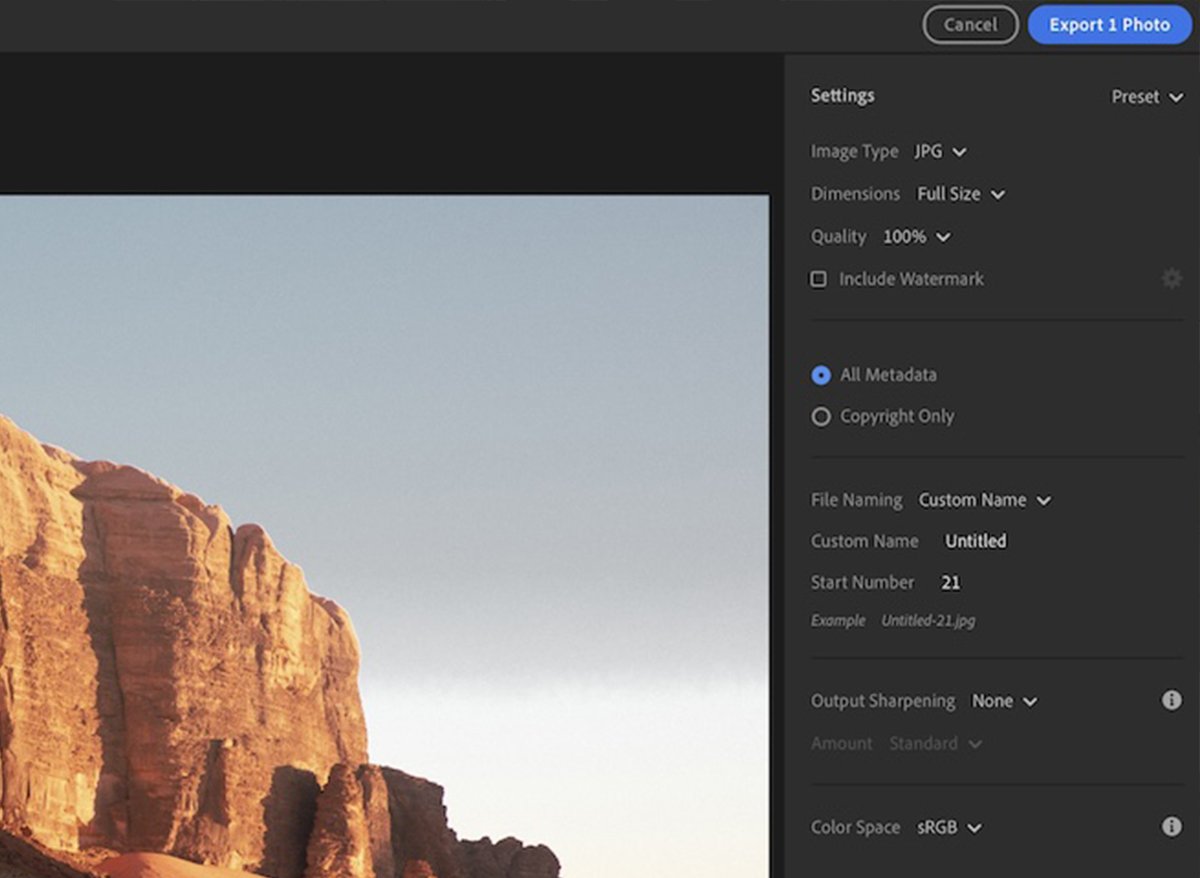
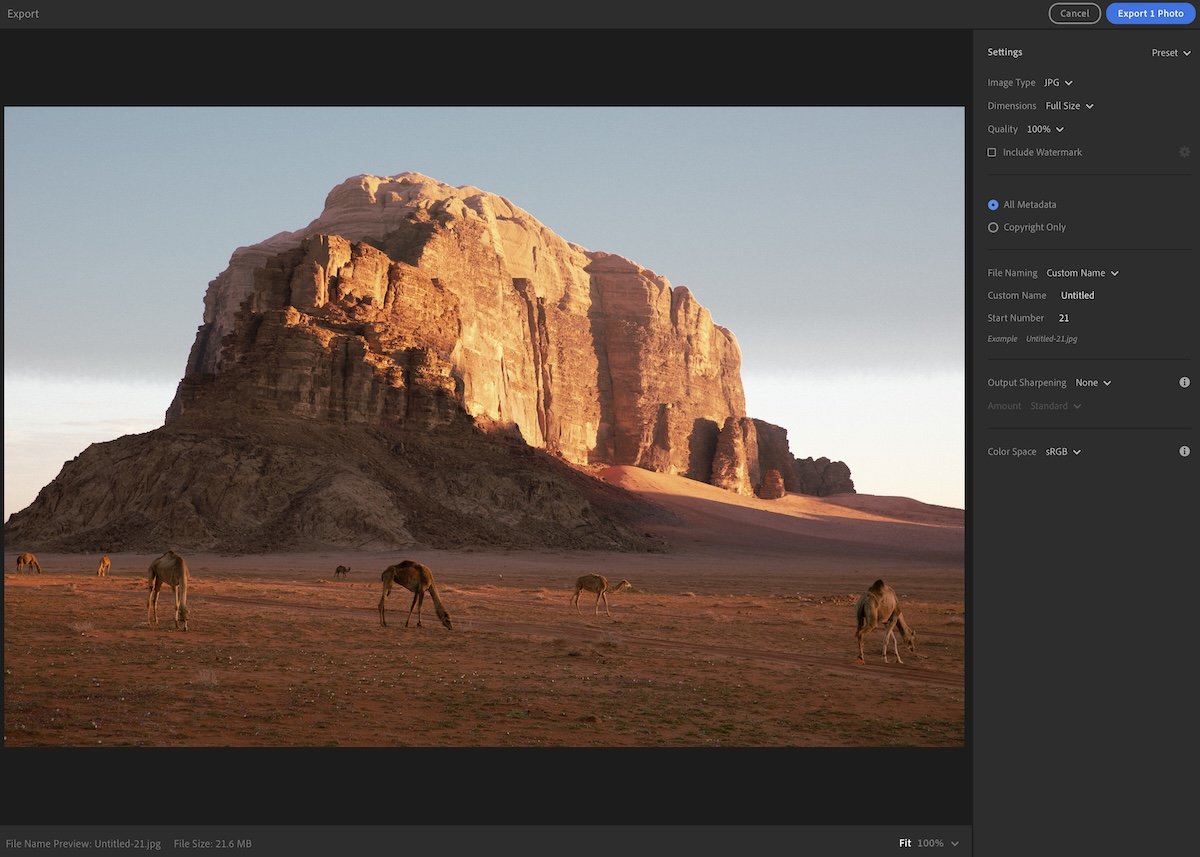
Like Lightroom Classic, you must be in the export window to resize your image. The quickest way to do this is to right-click your photo and find Export or to go to File > Export.
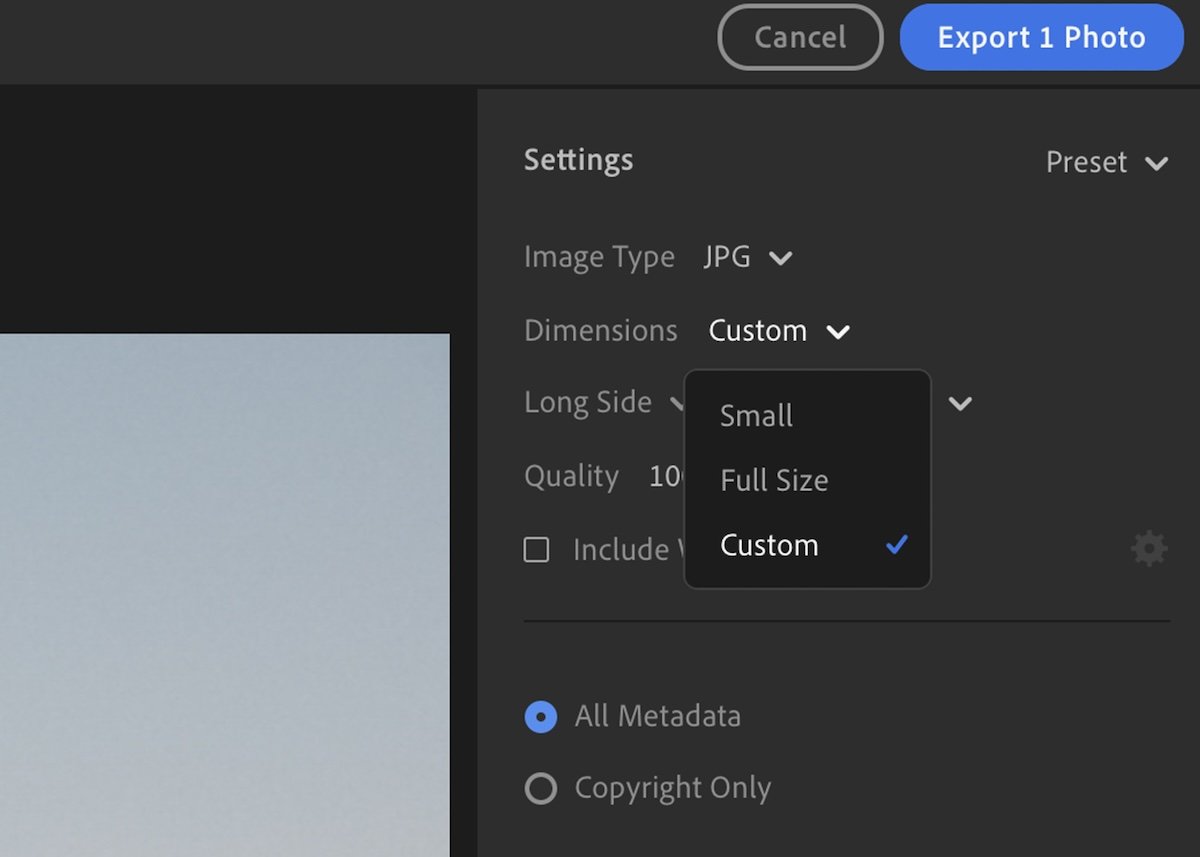
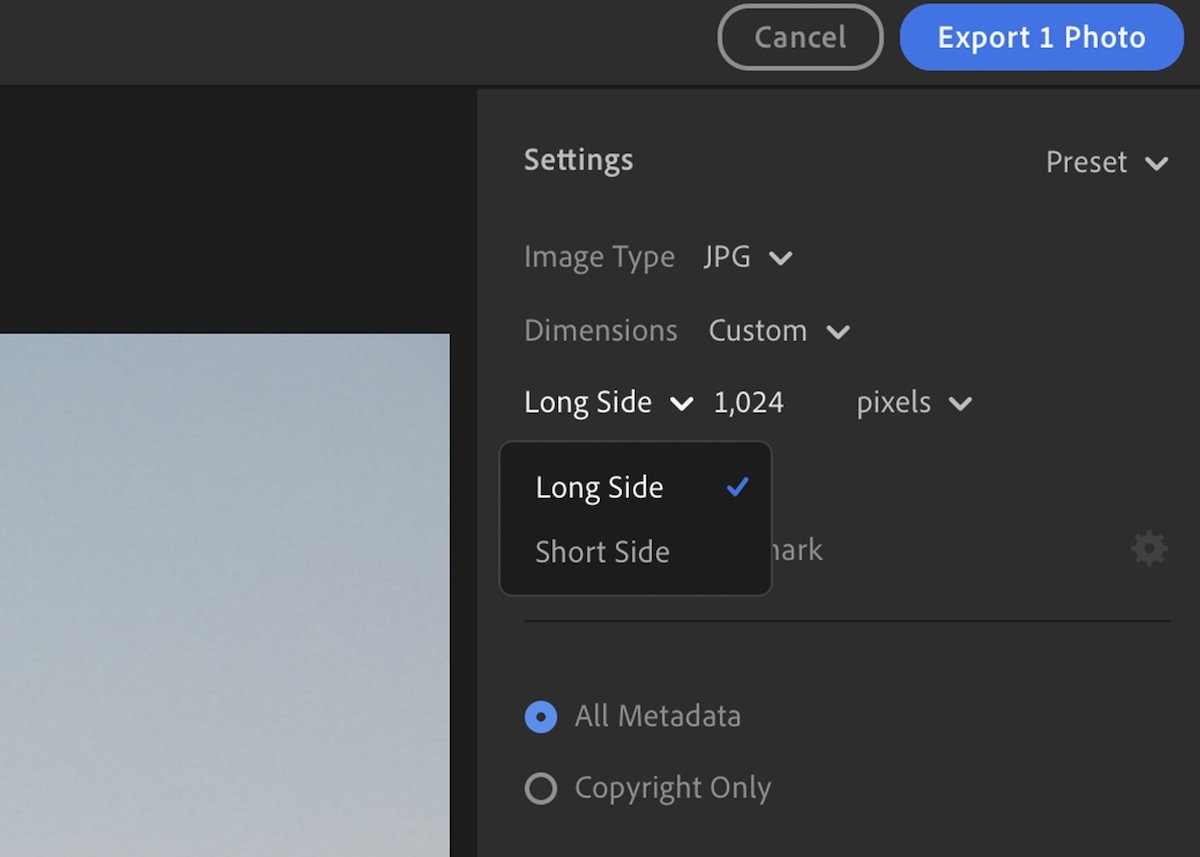
There are a few settings to the right of the export window. To begin resizing in Lightroom CC, go to dimensions and click Custom in the dropdown menu. Let’s closely examine the two options available in this version of Lightroom.
1. Long Side
Long Side is the same as Long Edge in Lightroom Classic. I’m not too sure why they changed the terminology. Maybe it is because the long side is easier for photography beginners to grasp. Regardless, it is the most useful method for resizing our photos accurately.
You can change this size to pixels, centimeters, or inches. These are the same settings in Classic. Put your desired size into the dialog box, and your photo will be resized upon export.
2. Short Side
Short Side is the equivalent of Short Edge in Lightroom Classic. This ensures that the shortest length of your image’s dimensions is the length you set. Again, you can select between pixel count, centimeters, or inches.
Although Lightroom CC has fewer choices, these two resizing methods give you plenty of control over resizing your image. Even professional photographers will be happy with these resizing options.
How to Resize an Image in Lightroom FAQs
Now that you know your options, here are answers to the most frequently asked questions about resizing an image in Lightroom. These will help you determine the best sizes and resolutions to resize your photos.
What Do Pixels Have to Do With Resizing Photos?
A pixel is the smallest information that makes up a digital image. Your photos are a lot of pixels arranged in a specific order. When you enlarge a photo, you can see the pixels as little squares.
Most cameras today capture images with many pixels (in the millions!). The number of pixels in a photo also depends on the camera model and the number of pixels in the sensor.
Having a lot of pixels is great when you’re working with large prints. It lets you have sharp images. But more pixels also mean more data in the photo, which increases the file size of your photos.
The problem with having big files is that they make websites slow. And social media platforms don’t accept them. But you can solve this problem by resizing your images in Lightroom.
How Do I Check Pixel Dimensions in Lightroom?
After you import your image into Lightroom, you can easily check it. In Lightroom Classic’s Library module, select the image in the Loupe View by clicking on its thumbnail.
If you press the shortcut key “I” on your keyboard, you start a cycle of information overview. The first time you press “I,” the file name, the date, the time you took the photo, and the pixel dimensions appear. Pixel dimensions are shown in width and height format.
Press “I” again. You can then access a few of your image settings, like aperture, shutter speed, focal length, etc. To exit from the information overview, press “I” one last time.
In Lightroom CC, the “I” shortcut brings up the Info panel on the right with pixel dimensions and other information.
How Do I Decide on the Pixel Dimensions Needed?
Websites and social media platforms have particular image sizes. It’s always a good idea to check these and resize your images. It’s also very useful to check online social media cheat sheets. They collect information from the most common social media platforms.
Take into account that you can’t add pixels to an image. Make sure the new dimensions are smaller than those of the original photo.
How Do I Choose the Right Resolution?
Your image resolution depends on how you plan to use the photo—digital or print. Resolution is the number of pixels an image has in a certain space. It is also known as pixel density and is measured in pixels per inch (PPI).
A 72-PPI image will have 72 pixels in each inch. A 300-PPI image will have 300 pixels for each inch, and so on.
Images with higher resolution are sharper. But their files are bigger. For that reason, high-resolution images are meant for printing. They are not the best option for websites and social media platforms.
What’s the Best Resolution for Digital Images?
It is generally agreed that 72 PPI is a good resolution for websites and social media photos. This is the resolution of most screens. It’s still a small enough resolution that websites can load images quickly and smoothly.
But there are screens with 100 PPI and even 150 PPI. If you prefer to use these resolutions instead, your website’s loading speed will be slower. It’s up to you to decide what is more important—higher resolution or higher speed.
What’s the Best Resolution for Prints?
If you’re going to print your image, it needs a higher resolution than for a website. For example, it could be 300 PPI. If you want to print your photo on a canvas, a lower resolution, like 150 PPI, is good enough.
The pixel dimensions of your photo and resolution determine the size in inches or centimeters of your final printed photo.
For instance, if the original photo has 4874 pixels on the long side, you want to print it at a resolution of 300 DPI. You divide the pixels (4874) by the DPI (300), which gives a final print size of 16.25 inches.
Conclusion: Resizing an Image in Lightroom
Now, you know all the best ways to resize an image in Lightroom. Different methods are beneficial for different reasons. Either way, having this feature in Lightroom is important, as we can batch-resize our images for a quicker workflow.
If you need more help, check out our other Lightroom articles. You can always return to this one to find a specific method to resize your images!
- Learn to use every tool for quick, professional edits.
- Discover seamless subject selection with a single click.
- Unlock hidden details in photos with our unique method.