If you’re looking to increase the resolution of an image in Photoshop, you’ve come to the right place. In this tutorial, we’ll show you how to do just that in a few simple steps.
So whether you’re working on a high-resolution image or just need to bump up the quality of an old one, follow along and we’ll get you there in no time.
How to Increase The Resolution of An Image in Photoshop
Resolution is the number of pixels in dimensions of height and width. Your camera produces images of a certain size depending on its sensor size and pixel density.
For example, my camera manual says the image resolution is 8256 x 6192 pixels (width x height). That means the total pixel dimensions are 8256 x 6192 = 51,121,152. Divide that number by one million. The result is the number of megapixels the camera has. In my case, that’s 51 MP.
If you crop an image, you are taking out pixels. So an image will have a lower resolution than your camera can produce. It also describes the resolution. More pixels in an image mean high resolution. This is because pixel information is denser.
High resolution gives you more detail and better image quality. This means you can print larger. The results are smooth, continuous tones and color transitions. But it usually results in larger file sizes.
The resolution of an image is measured in DPI or PPI (dots per inch or pixels per inch). The more dots (or pixels) you have per inch, the higher the resolution of your image.
How to Select the Appropriate Size
Before I show you how to resize your images, let’s briefly talk about how large or small you’d like to make your images. You can take a low-resolution image, one with fewer pixels, and increase the resolution. But there is a limit.
It becomes pixelated if you try to increase the image size too much. This means you can start to see the individual dots that make up the image. It all depends on the amount of detail in the image and its purpose. Knowing how far you can go takes some practice and trial and error.
For instance, if I’ve cropped in a lot on an image, this lowers the number of pixels in my image. But I may want to make a large print of this image. You can read our article on image resoluton to help you figure out how large you can print an image.
On the flip side, you may want to decrease the resolution of your images before putting them online. This helps your images load faster. You also don’t give your full-resolution image to others who might use it without permission.
A good rule-of-thumb is to post images no larger than 2000 pixels on the longest end and no larger than 1MB. But each social media site has its own recommendations.
How to Change Resolution in Photoshop
It is easy to increase or decrease image resolution in Adobe Photoshop. Let me take you through the steps.
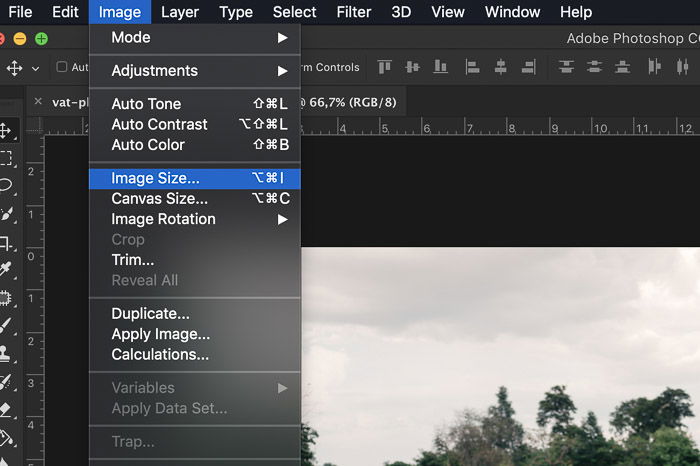
Step 1: Find the Image Size
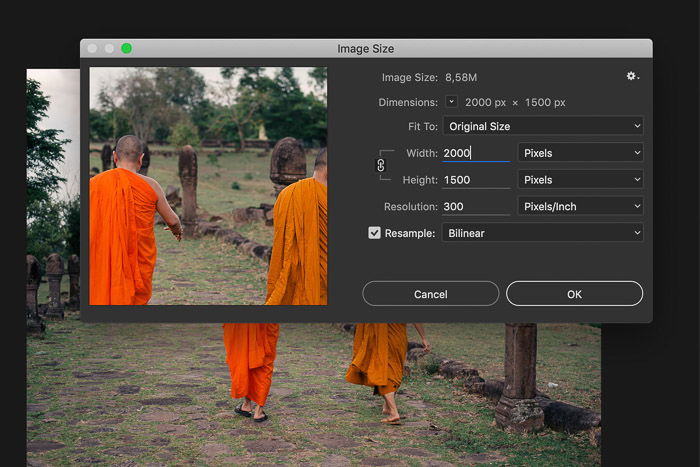
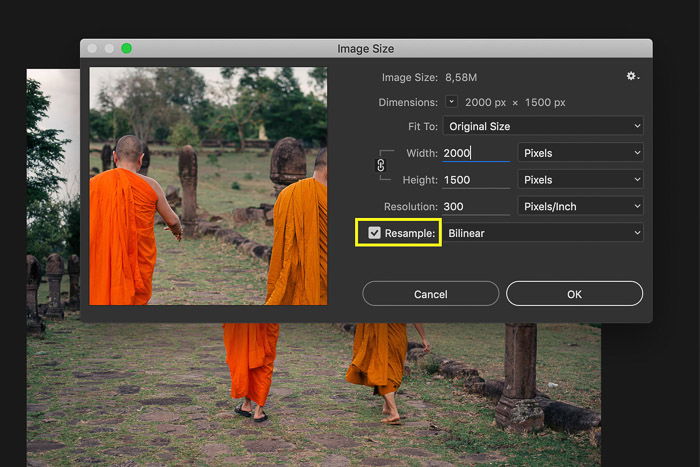
First, find the size of your image by opening the image size dialogue box.
Go to Image > Image Size… or use the shortcut Option + Command + I (Alt + I for Windows).
In this dialogue box, you find your image size. You see width and height pixel dimensions.
Adobe Photoshop defaults to giving you the size in pixels. But you can change it to inches, centimeters, or even a percentage. Your original image will be 100%. At the top, you will see the file size of your image.
We will use the tools in this window to change the resolution of your image.
Step 2: Change the Image Size
There are a few options to change the resolution of your image.
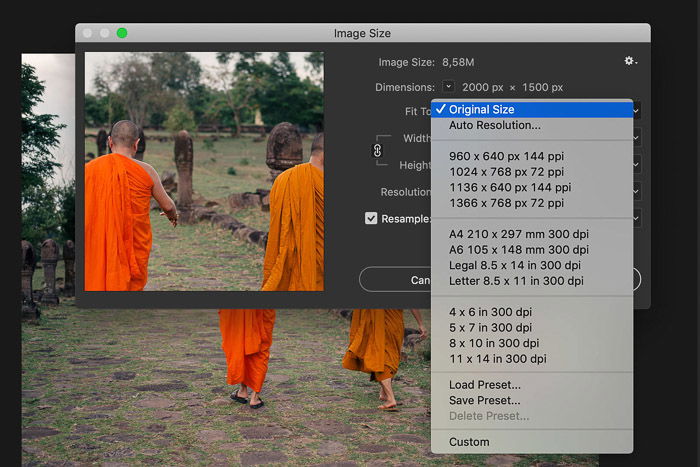
If you’re printing, you can pick one of the presets based on standard paper and print sizes.
Click the Fit To drop-down menu to pick a document size.
If you’re posting the image online, you don’t need to stick to standard print sizes. Usually, it’s better to set the size yourself. Simply type in the size you want over the current size.
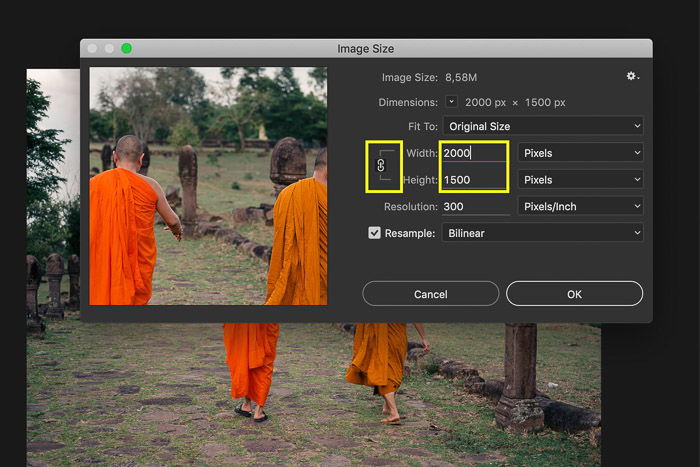
By default, Photoshop constrains the aspect ratio. If you enter a number to change the width, Photoshop automatically changes the height to keep your image looking the same.
If you want to change width and height pixel dimensions independently, click on the icon that looks like a chain linking the two dimensions. This tells Photoshop not to constrain the aspect ratio.
Type the number of pixels you want in the Height or Width box.
When you change your image size, notice the number at the top of the dialogue box showing file size. It will change. This is the document size of your image in megabytes (MB).
Step 3: Determine Image Resolution
The image resolution box sets the number of pixels per inch. Everybody says this number has to be 300 pixels per inch to save the image. But that’s not exactly true. 300 DPI is the standard used for printing images. But you can only display online images at the computer screen’s resolution. Most screens are 72 DPI.
You can leave this number as it is. It won’t matter to online images if they are 300 or 72 DPI.
Changing the DPI changes the image size. If your image is 300 and you change only the DPI field to 150, your image will be half the size. It also changes your document size.
Step 4: Selecting a Resampling Mode
The resampling mode decides which algorithm Photoshop uses to add new pixels. Two good options for increasing the resolution are Preserve Details and Bicubic Smoother.
I find that ‘Bicubic Smoother’ gets the best results. You can try both the see the difference.
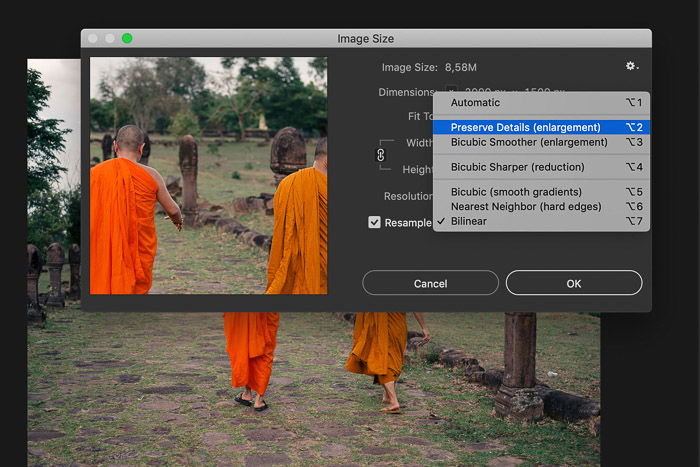
Here’s a comparison of all the resampling modes.
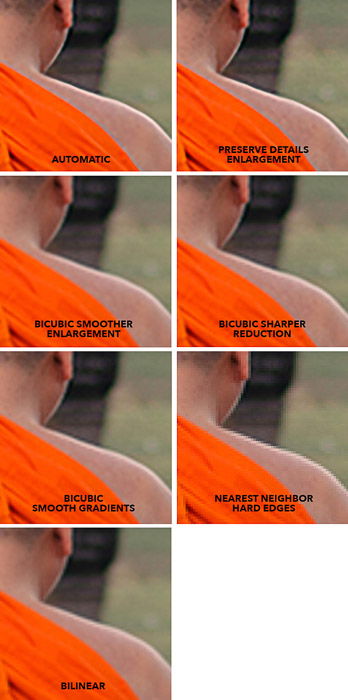
Tick the Resample box and select a resample mode that works for you.
Step 5: Sharpening the Image
It’s always a good idea to sharpen after you increase image resolution or for online viewing.
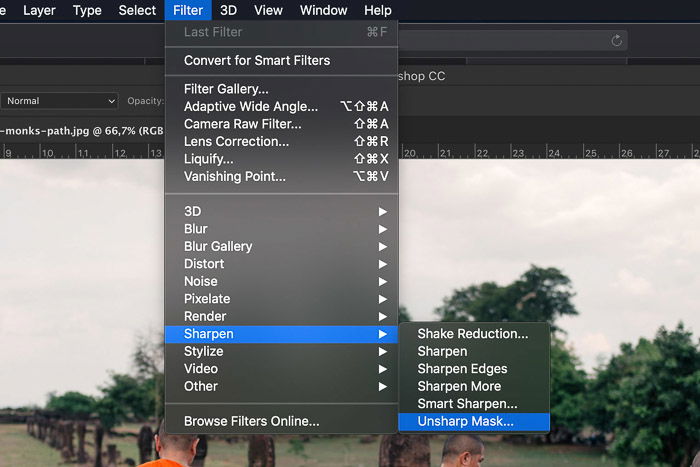
Go to Filter > Sharpen and select Unsharp Mask.
Drag the Amount slider to 100% and the Radius to 1.0. That’s a good setting to start with when enlarging an image.
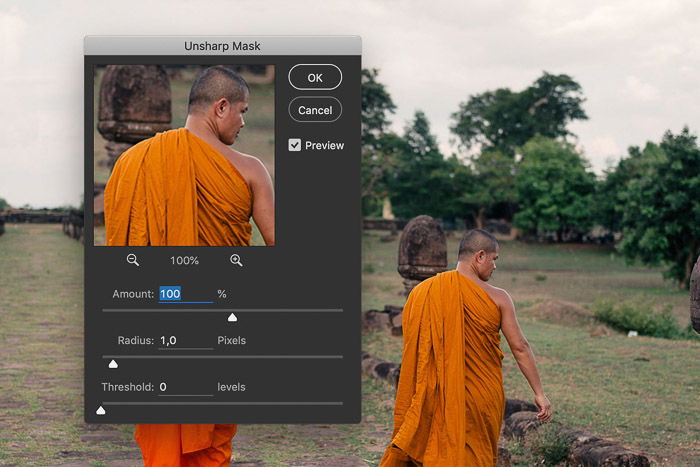
You can add more or less sharpening if the result doesn’t look right.
Conclusion
Adobe Photoshop makes it easy to increase or decrease image resolution. But it has certain limitations.
The quality and size of your starting image determine if you’ll get good results. For example, a picture with pixel dimensions of 100 x 100 at 72 pixels per inch can’t be resized to 3000 x 3000 at 300 pixels per inch and look good. That’s just too much to ask.
It also depends on the purpose of the image. Do you need a high-quality image gallery print or a banner to hang against the wall? An image for a banner doesn’t need a super high resolution to look good. But always ask the printing studio what minimum resolution they need.
Sometimes it’s best to start with a good image that doesn’t need much editing. You can try our Photography for Beginners course to learn how to take high-quality images every time.