
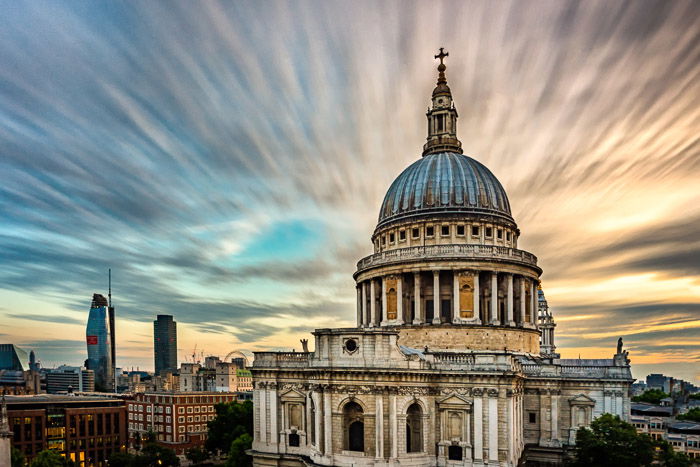
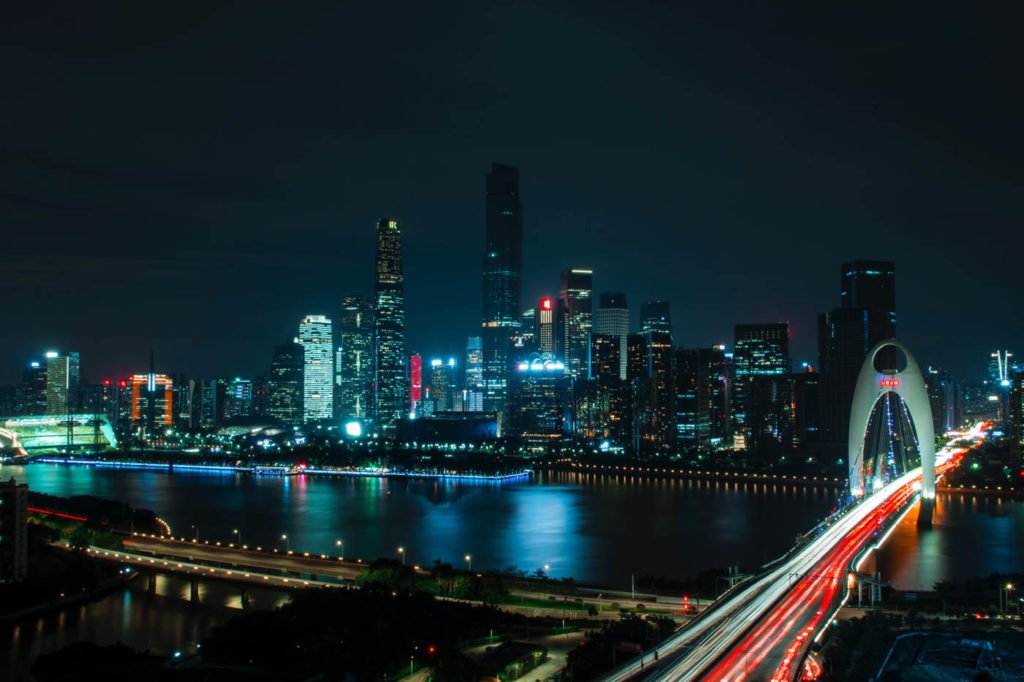
I love the look of long exposure photographs. There’s something special about smooth water, soft waterfalls and cotton candy clouds. But I find myself guessing how long I need to leave the shutter open to get these results. I hop from one neutral density (ND) filter to another, trying various shutter speeds.
In this article, I’ll show you how to skip the guesswork and calculate long exposure times.
I’ll give you a couple of tools that will make calculations a snap. I’ll show you how to use long exposure calculator apps and give you a template to help you chart long exposure times.
Long Exposure Quick Start: A Guide to Using a Long Exposure Calculator
If you don’t have a lot of background with photographing long exposures, here’s a quick primer to get you up to speed.
Creating long exposure photographs is all about shutter speed. Leaving the shutter open will blur anything moving in your scene. This includes water and clouds.
At night, this is no problem. I need longer shutter speeds to collect enough light from a dark scene. But during the day, I use ND filters to block some of the natural light. ND filters are tinted pieces of glass that let me leave my shutter open longer.
See my article “How to Shoot Daytime Long Exposure Photography” for more tips on photographing long exposures using ND filters.
ND filters come in different opacities. I have 3-, 6-, and 10-stop ND filters. I use the screw-on filters from Breakthrough Photography. I can stack the filters to block 9-, 13-, 16-, or 19-stops of light.
How long I leave my shutter open depends on the scene. A very fast-moving waterfall may blur at shutter speeds of 1/30th of a second or even faster. To smooth water into a glassy surface, I usually need to have my shutter open at least a few seconds. To blur clouds, I may open my shutter for minutes.
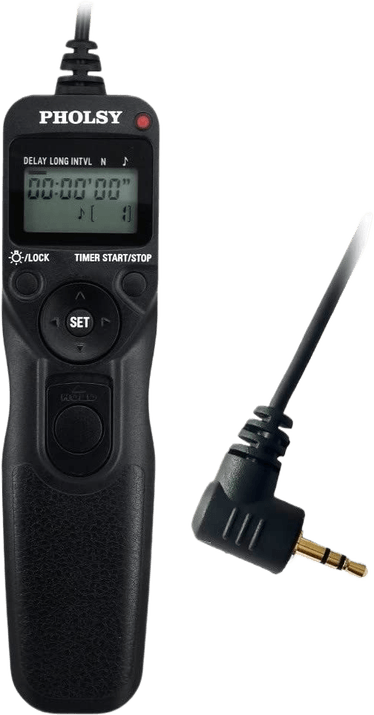
On most cameras, the slowest shutter speed is 30 seconds. If I want a longer shutter speed, I select “Bulb” mode and control the shutter manually using a remote trigger. A remote trigger allows me to leave the shutter open as long as I want.
Long Exposure Calculators
Long exposure calculator apps allow me to figure out how long to leave my shutter open. Before I use the calculator, I need to know a couple of things.
- Baseline shutter speed for correct exposure
- ND filter opacity
I use the app Long Exposure Calculator on my iPhone to calculate correct exposure.
The first thing I do is take an establishing photo of the scene in Aperture Priority Mode with my ISO at set at 100. When photographing landscapes, my selected aperture is between f11 and f16 depending on the scene.
The shutter speed my camera selected is my baseline shutter speed.
You can also use a light meter to figure out the shutter speed for correct exposure.
There are quite a few good light meter apps if you don’t have a physical light meter. Apps like Light & Exposure help me figure out the optimal exposure settings for the scene in front of me.
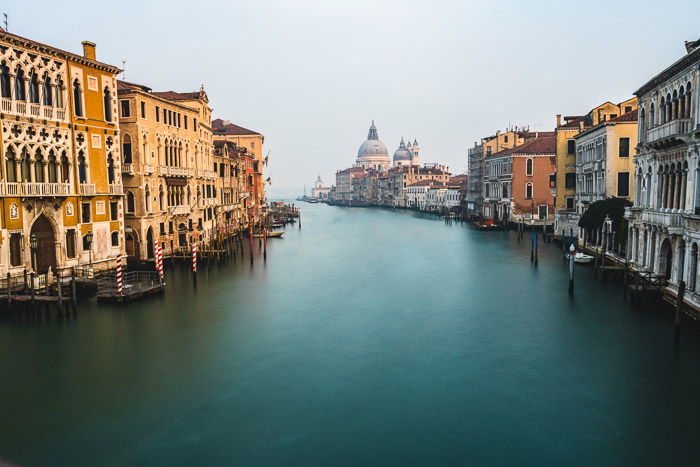
For this image, my settings for a correct exposure without an ND filter were f16 at 1/25th of a second, ISO 100.

In the Long Exposure Calculator app, I enter the shutter speed selected by my as my Base Shutter Speed.
I then select my Filter Density. The Long Exposure Calculator app told me what my shutter speed needed to be with each of my ND filters.
The app does all the background math to calculate what shutter speed I need with each of my ND filters.
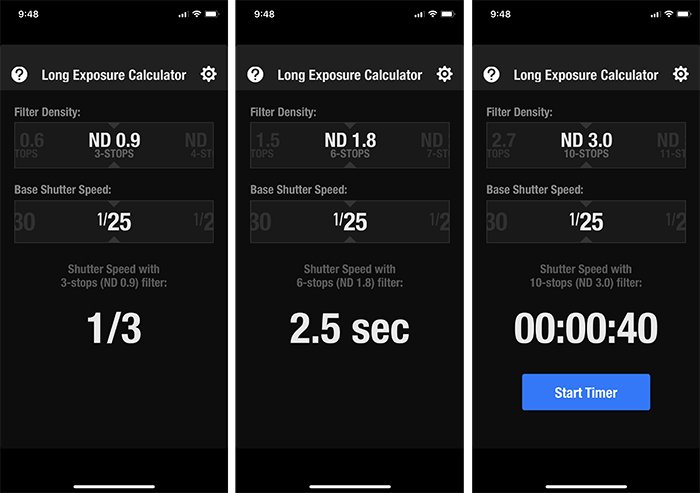
If I choose my 3-stop ND filter, my shutter speed would be 1/3 of a second. 6- stops extends my shutter speed to 2.5 seconds. With my 10-stop ND filter, I can leave the shutter open for 40 seconds.
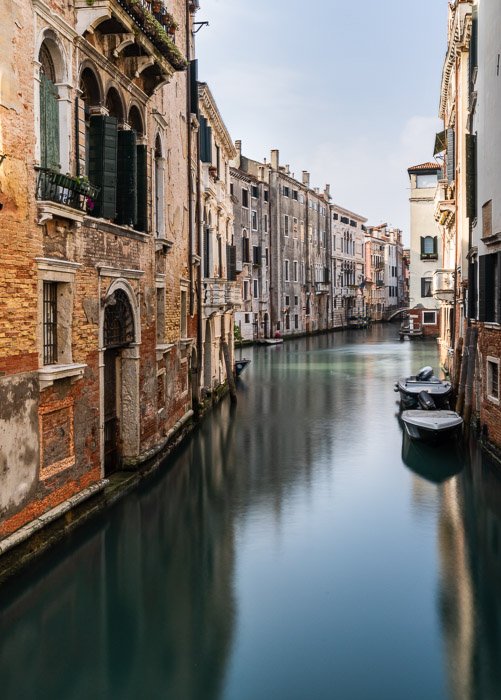
In the end, I chose to stack my 3- and 6-stop ND filters to block 9 stops of light. This extended my shutter speed to 20 seconds. Plenty of time to blur the water, but I didn’t have to use my remote trigger.
The Long Exposure Calculator app includes a timer for shutter speeds longer than 30 seconds. This helps me know when to close my shutter while I’m using my remote trigger.
I use Long Exposure Calculator app, but here are a few other popular apps:
- NiSi Filters Exposure Calculator (Free). Android and iOS
- Exposure Calculator (Free). Android
- Lee Filters – Stopper Exposure (Free). Android and iOS
Long exposure calculators also are built-in to some of my other tools. PhotoPils, for instance includes an Exposure calculator
A long exposure calculator tells me what my shutter speed needs to be depending on which ND filter I use. Another way to do this is use a Long Exposure Template.
Long Exposure Templates
So far in this article, I’ve been referring to my ND filters by how many stops of light they block (e.g., 3-stop). What I’m referring to is f-stop reduction.
Some brands of ND filters label opacity using “optical density” or “filter factor” instead of f-stop reduction.
For instance, my 10-stop ND filter has an optical density of 3 and a filter factor of 1024. Some long exposure calculators use more than one label. For instance, the Long Exposure Calculator app uses both f-stop reduction and optical density.
Long exposure templates (also known as Long Exposure charts) often include this information. Take a look at the ND Filter Shutter Speed Conversion Chart.
The three far left columns of the chart show three different ways of labelling ND filter opacity.
The chart shows baseline shutter speed listed across the top. Read down each column to find the equivalent exposure with ND filters of varying opacities. For instance, a baseline shutter speed of 1/250th of a second converts to 4 seconds using a 10-stop ND filter.
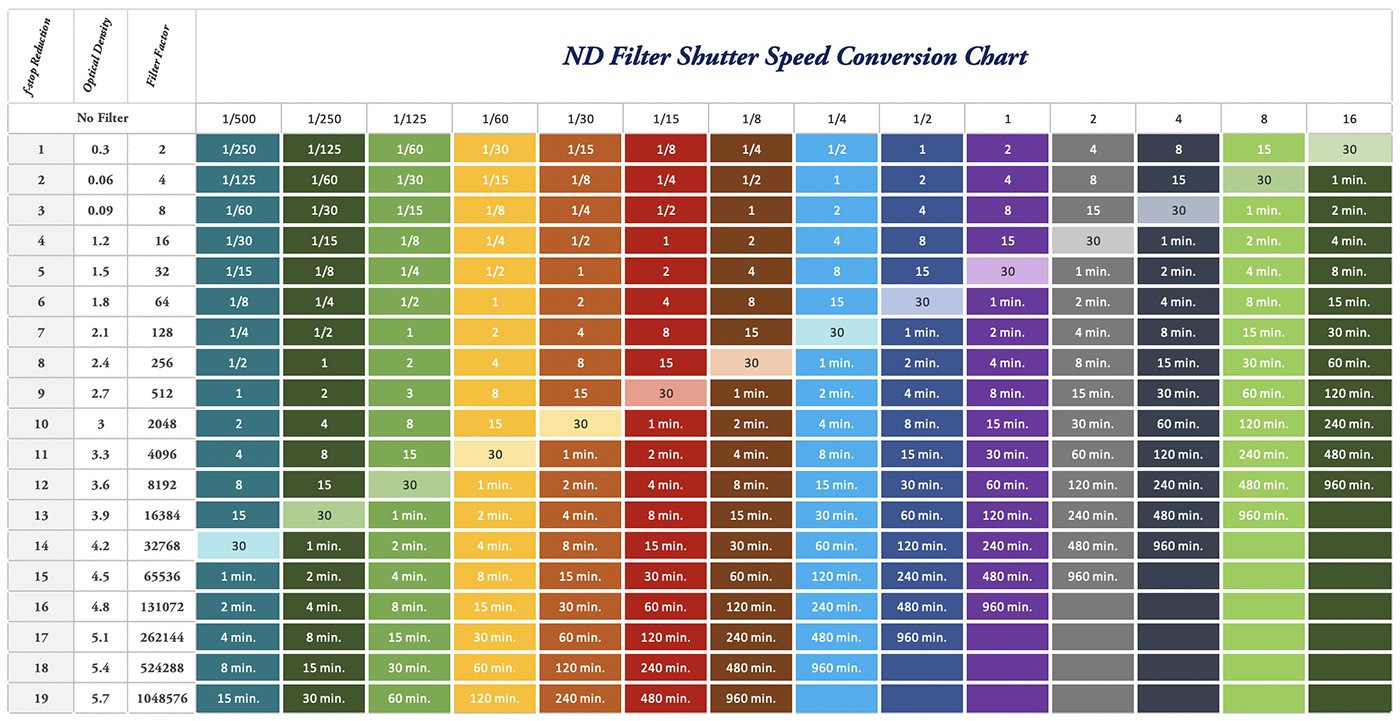
Print this chart as an easy reference in the field.
I’ve highlighted 30 second exposures because that’s the point I attach a remote trigger to my camera.
As I move into the longer exposure times expressed in minutes. I sometimes add a bit of time when I’m actually taking the photo. This chart is based on a mathematical formula, but longer exposure times calculated with this formula can sometimes be underexposed.
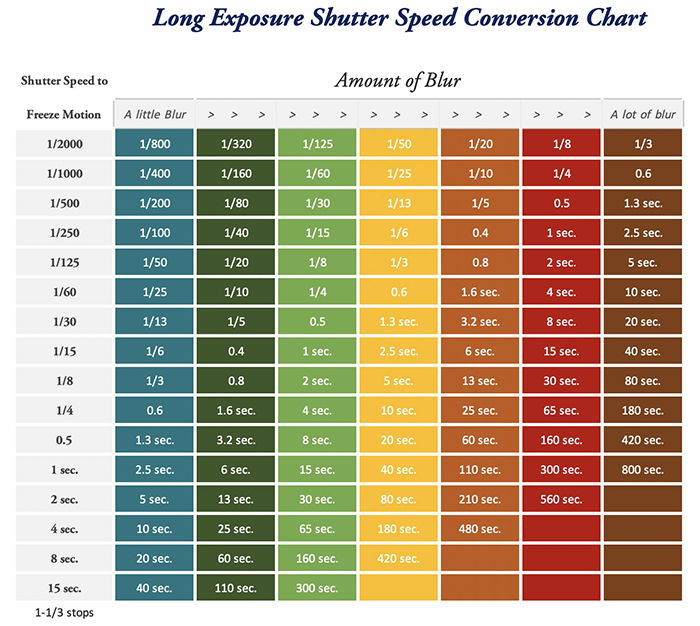
Something Extra – Approximating Blur
Let me leave you with something extra to help you create stunning long exposure images. This is my way of estimating shutter speed based on the amount of blur I want.
When blurring motion in waterfalls, shutter speed recommendations fall between 1/8th of a second and 4 seconds. But recommendations vary widely.
This is partially because the speed of the motion affects how slow my shutter needs to be. Faster moving water will blur at faster shutter speeds.
Shutter speed also depends on how much blur I want. Many landscape photographers suggest leaving at least a little bit of texture in the water. If I leave my shutter open for too long, the water loses all texture. But it’s up to you and what you like in your images.
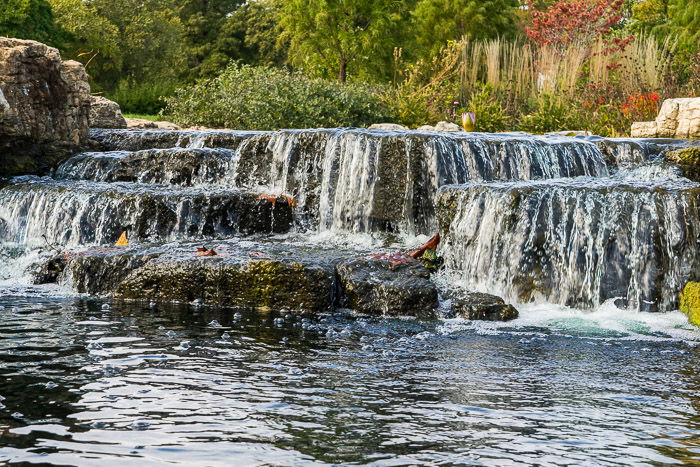
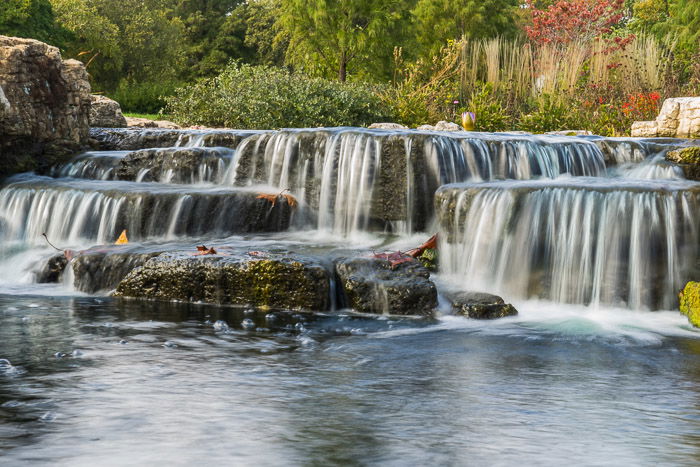
Compare these two photos of a waterfall. I took the first at 1/320th of a second. There is a slight blur in the waterfall. The second, taken at 1/5th of a second, shows a blur that I’m happy with.
I’ve created this chart to help me figure out how long I need to leave my shutter open to blur water or clouds.
I find the slowest shutter speed that allows me to freeze the motion. I listed shutter speeds down the left column. If a waterfall is moving very fast, I increase my ISO and make my shutter speed faster.
Then, depending on how much blur I want, I slow down the shutter speeds. I find that increments of 1-1/3 stops works well (4 clicks of my shutter speed dial). Most of the time, I like something in the middle.
For instance, if the motion freezes at 1/125th of a second, I might try 1/8th of a second or 0.8 seconds. I adjust until I get the amount of blur I want. There will be a point at which I won’t be able to see differences between the images. This is the most blur I’m going to get.
Clouds are tougher to estimate. Wind speed on the ground doesn’t equate to wind speed at cloud height. The slowest shutter speed I’ve included on my chart is 15 seconds. If the motion in the clouds is still frozen at 15 seconds, I won’t stick around long enough for the clouds to streak.
Print this chart as an easy reference in the field.
Conclusion
Creating stunning long exposures is knowing how long to leave your shutter open. Long exposure calculators and charts help you to figure out how long to leave your shutter open. After reading this article, you will know how to find the correct exposure without ND filters and use the tools to find an equal exposure!