
Photographing fog can be a challenge, but the results can be magical. If you want to create ethereal photos with mysterious foggy landscapes, here are a few tips to help you get started with fog photography.
Tips for Fog Photography: How to Achieve a Mystical Photoshoot
Fog and mist are both water vapor but differ from one another. Fog tends to reach ground level and is much denser than mist. Both form due to a mixture of condensation and temperature. This adds an extra element of unpredictability but can also help you plan your photos.
There are even different fog and mist types, appearing under other conditions. Have you heard of radiation fog, upslope fog, or steam fog? This might sound confusing, but don’t let this put you off.
We’ve put together a list of things to consider when taking the best fog pictures. Whether you’re a beginner or a pro, our tips are the best way to achieve a mystical fog photoshoot!
1. Be Mobile
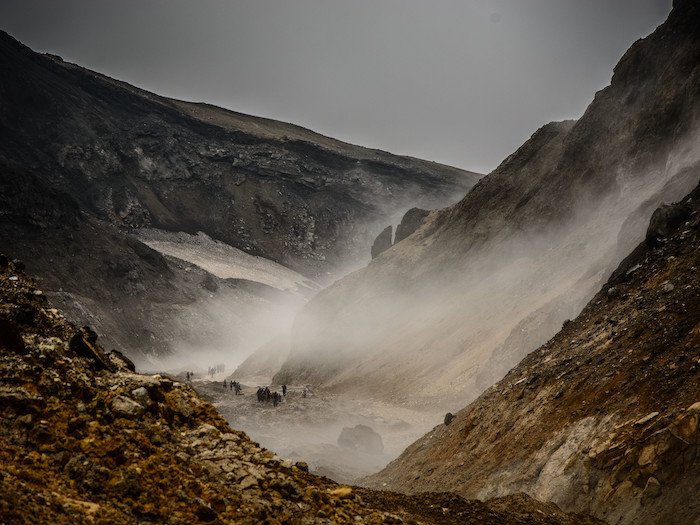
Fog is a swirling, moving mass. As atmospheric conditions change, so will the fog. You might need to wait for it to clear or form up to snap the perfect shot. Watch how the fog flows.
When shooting fog photography, your images can change second by second. Patience is vital, but so is constant shooting! It’s better to choose from a selection of pictures in which your composition changes.
You should also be prepared to move with the fog. You might find that the light hits best from a different direction or that your tripod is no longer set correctly.
If you’re shooting in a forest or overlooking a bay or cliffside, don’t be afraid to change your shooting angle. It can alter the depth, mood, and texture of your shots.
If you’re shooting a subject, it may become covered by the swirling fog. Be patient, but higher ground or a slight angle change may bring back your composition.
2. Plan Ahead
Being a weather phenomenon, fog requires certain conditions to form. However, there are ways to know when and where you’ll see fog. Some locations experience fog more often, such as coasts, valleys, and lakes.
By checking the weather ahead of time, you’ll be able to more or less predict fog appearing. Key indicators are high pressure and humidity during the night and early morning. This, in combination with low temperatures, means that fog is likely to form. Most mainstream weather apps will have this information available.
If you’re unsure what locations are foggy hotspots, check other local photographers or even television. If you’re traveling, speak to the locals. There might be a prime early morning spot for getting great wildlife shots with a foggy background.
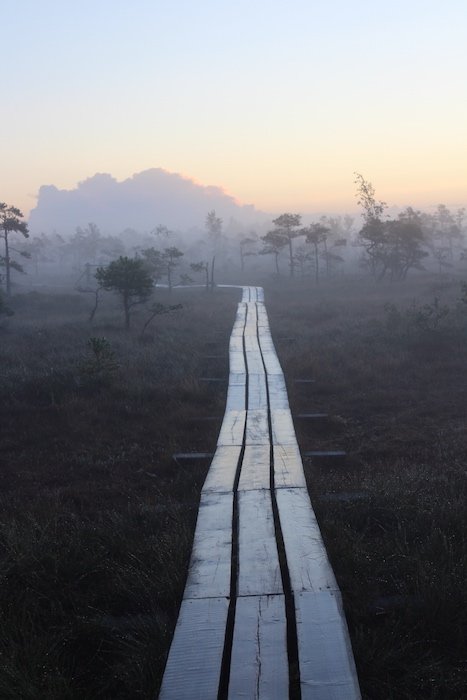
For some spots, it’s best to visit ahead of time to know precisely what you’re going to shoot. By doing this, you can pre-plan your shot composition. Things will look different in the fog and throughout the day. The best times of day to photograph fog are early morning and late afternoon. By shooting as the fog forms and begins to fade, you can take advantage of changing light and color.
3. Layer Your Shots
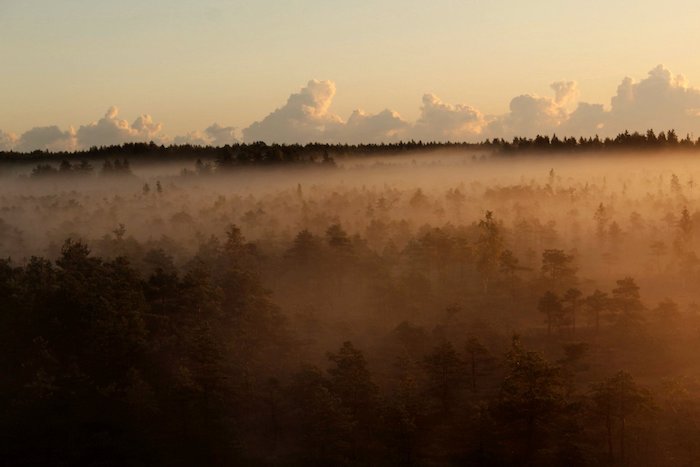
Because fog is a thick, swirling mass, objects fade in and out of view and focus. This offers an excellent opportunity to layer objects within your shots. Fog makes for great layering, especially in locations such as forests.
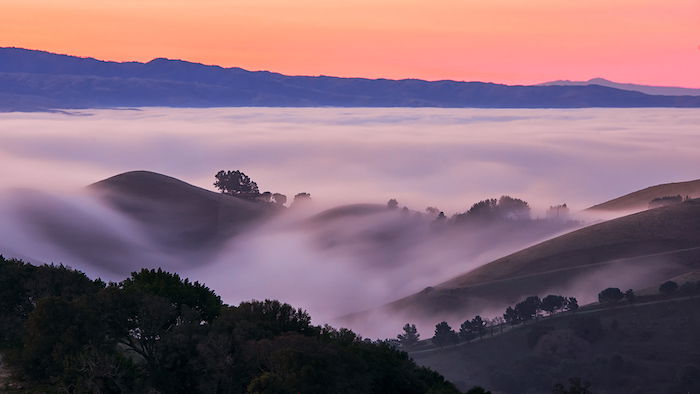
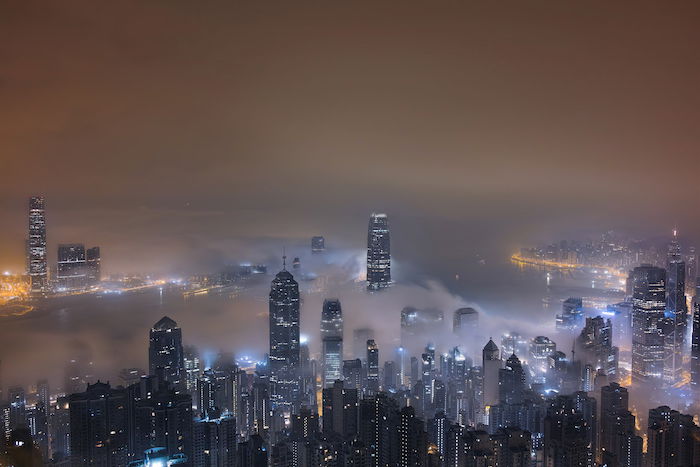
Fog can add dimension to your shots, creating distance and depth to the background. It can also create contrast between objects, making them appear sharper. You’ll draw the eye if you layer fog between objects in the foreground and the background. With saturation and light, this can look especially attractive and evocative.
You need to know your approach, as simple fog shots can appear flat, washed out, and shallow. You’ll see compelling examples of layering and depth in photos of mountain tops and trees jutting above clouds and fog.

4. Use The Light
One of your best allies in fog photography is light. Light will be scattered by fog, completely changing the properties of a shot. You can snap ethereal, cinematic photos full of drama by mastering the light.
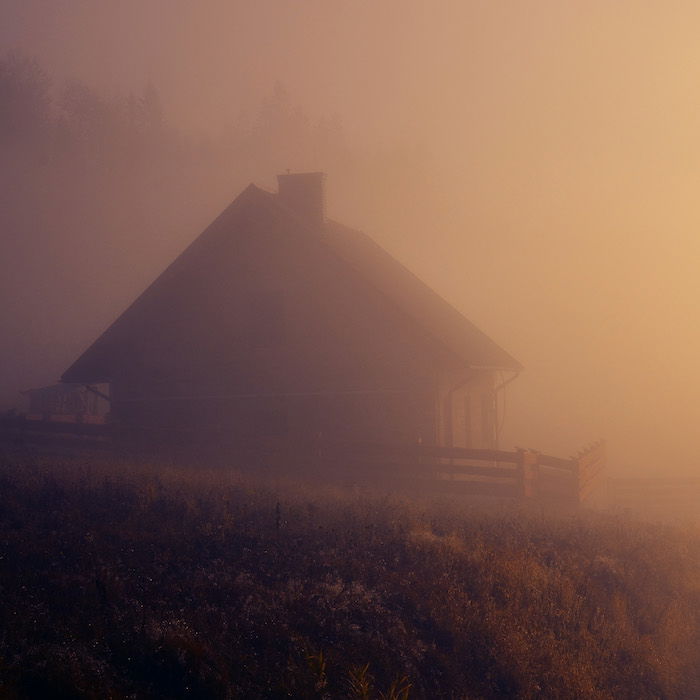
You should position yourself so that the light comes from behind the fog. This could be natural or artificial. This will ensure you get the best light properties. Your shot will change depending on the quality of light and the density of the fog. You might capture deep shadows, soft, layered light, or intense glow. You’ll notice a big difference doing this.
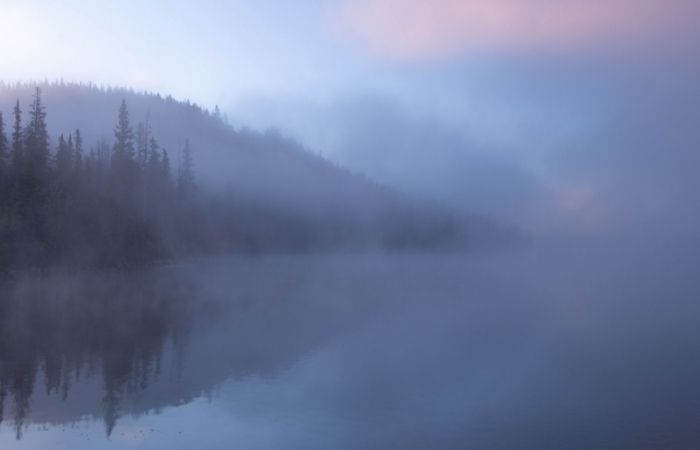
You can imbue your shots with the pink glow of dawn or a fiery sunset. As the light and color hit the fog, the whole scene will be illuminated. You’ll get a great contrast in forests, valleys, and by bodies of water. For the ultimate fantasy-esque foggy shot, early morning works best. Often, getting the perfect shot is worth getting up well before dawn.
5. Steady Yourself
Shooting from a stable platform is a must. You’ll need to be steady if you’re aiming for long exposure shots or are using manual settings. Once you become familiar with your camera, you may become more steady. For some images, you may be able to brace yourself against an object or adopt a firm position. You want to avoid camera shake.
To achieve the best results, it’s best to use a tripod. You’ll be able to get great-looking shots and adjust the angle and height. This is crucial as foggy conditions evolve. If you’re shooting manually, you’ll need as stable a platform as possible. A tripod allows you to experiment. Adjust ISO and shutter speed to enhance your shots. Shooting with lower ISO and higher shutter speeds is otherwise tricky without stability.
Fog and mist make for incredible long exposure opportunities. This is especially true for water or other moving subjects. Long exposure photography requires the use of a tripod. Opt for one, and you’ll be shooting surreal, flowing rivers of fog in no time.
6. Focus Manually
As fog constantly evolves, moves, and disperses, it can make autofocus less effective. You’ll experience focus issues, especially in dense fog. Rather than rely on automatic settings, you’ll get the best results by going manual.
Switching to manual focus can seem daunting. However, you don’t need to be an expert to make it work. Identify an object or part of the shot that remains sharp amongst the fog. You’ll avoid unfocused and low-light images once you lock your focus onto this point.
Fog will swirl and become denser as you shoot. This will effectively become a blanket for your autofocus. You’ll create a point in your shot by manually setting your focus that draws the eye and centers the image.
Don’t be nervous about going manual. Knowing your camera and familiarizing yourself with it beforehand is all you need to do. You’ll be locking in focus and shooting eye-catching, sharp shots with swirling strands of fog and mist in no time.
7. Shoot in RAW
To make editing your images more accessible, shoot in RAW. The advantage of RAW files is that they are minimally processed. They are also commonly uncompressed. This gives you much greater control when editing and in post-processing.
Using RAW allows you to adjust white balance during processing better. When you shoot in fog, white balance will be a crucial consideration. With a RAW file, you have greater control over tone, key when photographing fog. You can better adjust to get natural light and balance in your image.
You will also avoid losing image quality. A RAW file retains far more data than a JPEG. This will improve the result during editing. There’s more work involved, but it might be worth it.
8. Watch for Condensation
Remember that fog is water vapor. When you’re in the midst of the fog, the air around you will be full of moisture. You’ll likely notice a build-up of condensation and water droplets on your camera and lens as you shoot. Don’t forget your lens cloth!
This is pretty normal and something you need to expect when shooting fog photography. Be sure to check every so often, and wipe moisture from your lens.
It’s also worth stowing your camera in its bag when not using or moving between different humidity levels. Your camera can build up moisture inside, which can be more challenging to resolve. Keep your camera covered until you’re ready to shoot.
9. Explore Depth and Perspective
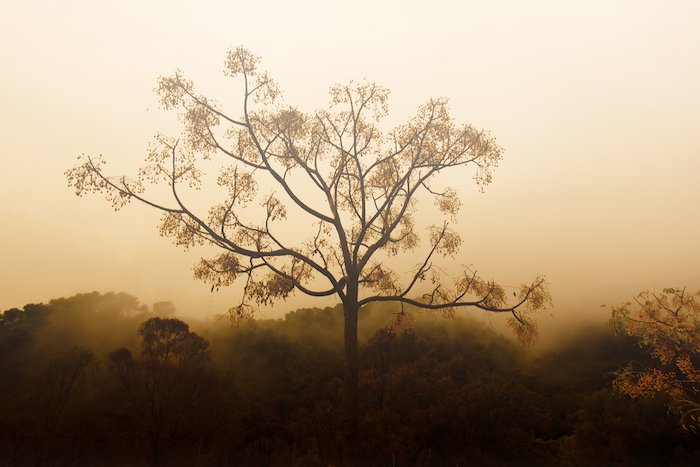
Shooting foggy scenes can result in a lack of depth in your images. At first, it can seem tricky to avoid. But, by adjusting your composition, you can create a sense of depth and perspective in your shots.
Position an object such as a tree, fence, or structure in the foreground of your shot. This helps to avoid a flat image and can create great contrast.
Combine this with other techniques such as fast shutter speed and ISO settings. You’ll get natural-looking fog with sharp, effectively contrasted elements. If your scene is backlit, this can work exceptionally well.
10. Experiment With Outlines and Shadows
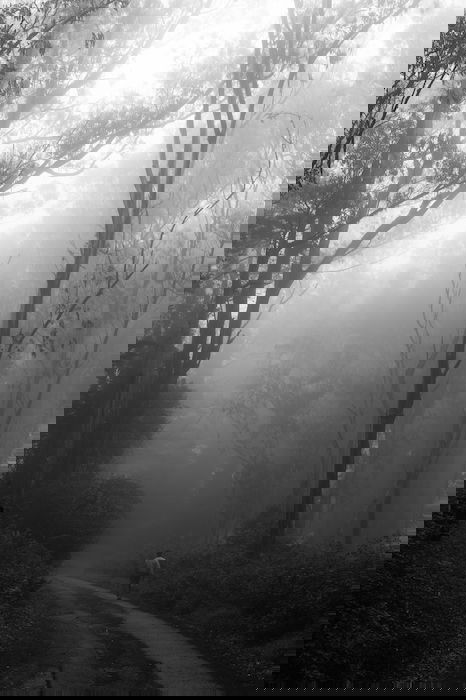
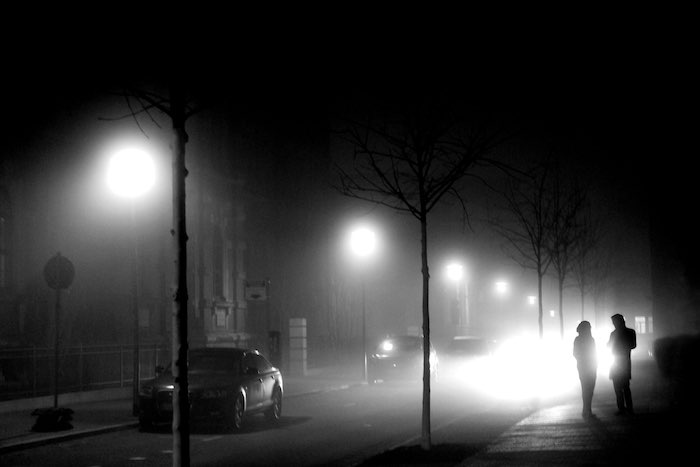
Fog obscures and surrounds objects, making it an excellent medium for experimentation. You’ll get the best results by shooting fog with light coming from behind. This is also the perfect scenario for highlighting shapes, objects, or people.
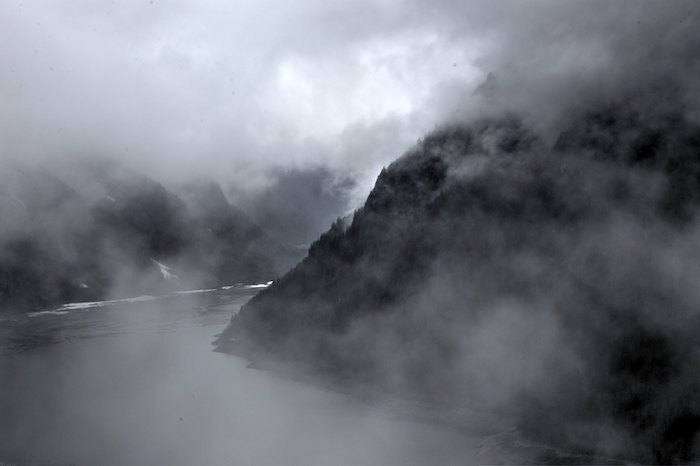
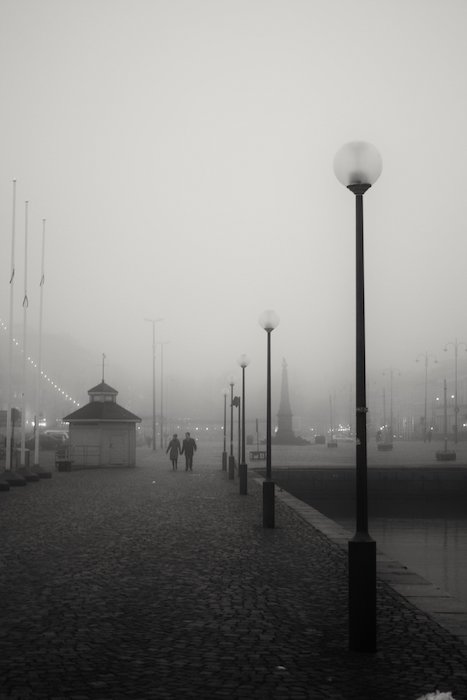
You can shoot high-contrast shots with strong light sources full of mood and tone. If you shoot in black and white, this can be an excellent approach for cinematic images. Try shooting on a city street or alleyway at night.
Try placing people or objects in the foreground. This works well with fog layered around them. Shooting with manual settings will allow you to capture great silhouettes and shadows. Foggy or misty conditions create great ambient light.
With some creative post-production, you can create all kinds of scenes. Let your imagination go wild. Natural elements such as trees look great as silhouettes. You can even achieve striking portrait photography in fog.
11. Go Completely Manual
Switching to manual mode gives you greater control when shooting fog. Going manual with ISO, shutter speed, and aperture helps compensate while shooting. You can also shoot using specific techniques and experiment with results.
Fog will confuse your camera’s light meter. You’ll get over-exposed shots as it blankets your viewfinder and light becomes scattered. In low-light situations, the opposite is true. Your camera may not be able to detect what light there is. Using a bigger aperture will let more light into your lens.
Using a low ISO will help reduce noise in your shots. Combining a slower shutter speed with a stable platform is great for longer exposure. If you’re shooting without a tripod, stick to a faster shutter speed for clear results and natural fog.
12. Practice Makes Perfect
As with all types of photography, practice makes perfect! Don’t be put off if your first attempts are unsuccessful. Shooting with such an unpredictable and changeable medium as fog can be tricky.
Some of the best techniques involve going manual, which can take some time to master. Don’t feel like you need to start getting perfect shots straight away. Feel your way into it. Some things are more challenging to shoot than others. For example, if you want to photograph wildlife in the fog, you’ll be dealing with an extra element of uncertainty.
Treat your experience as both a chance to snap beautiful shots but also as a way to get back to nature. At worst, you’ll experience inspiring and evocative locations. If, at first, you don’t succeed, try again!
Conclusion
Fog photography can be challenging, and perfecting a fog photoshoot might take a while. Don’t let this put you off. Despite requiring manual shooting, it’s not as daunting as it seems. Take time to practice, and get knowledge of your camera. You’ll be shooting perfect fog photographs in no time.
Familiarise yourself with the going manual, keep an eye on the weather, and opt for a tripod. Everything else will fall into place as you shoot. You’ll soon be snapping gorgeous photos.
Our list of fog photoshoot tips is not exhaustive. You might find that a particular approach works better for you. That’s the great thing about photography – you’re in control of your shots!
Capture stunning landscapes every time you shoot with our Simply Stunning Landscapes course!


