Finding the right photo background can be difficult. It should have the right color, right texture, be easy to lift and mount, and not cost a fortune.
Let’s see which easy and cheap photo background you can use for still life, food, and product photography. Even if you don’t have your own studio (yet!).
Photo Background: What to Look For
Over the years, I’ve used a variety of materials as shooting surfaces. Some I’ve abandoned. Some are so comfortable to work with, they are going to stay with me forever.
I work at my home studio, but often have to move to my customers’ workshop or restaurant for a shooting.
Because of this, my backgrounds should not only look nice in the frame.
They should be lightweight enough to move them around the studio. And portable enough to take on shooting locations.
Let’s look at some options.
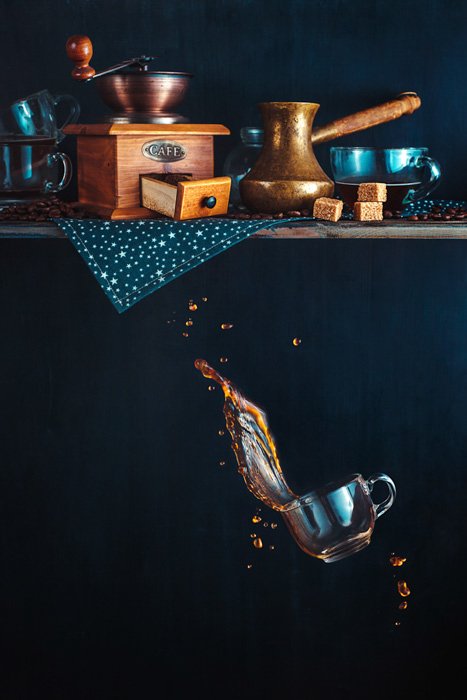
7. Wooden Boards
Food photographers are in love with wooden backgrounds. Wood gives your photos a sense of human presence, a warm and cozy feeling. It has an earthy, natural appeal.
And it can look quite different depending on the treatment you give it. Thick polished wood can convey an atmosphere of wealth and prosperity.
Shabby re-painted wooden boards are perfect for country and rustic scenes.
One-Piece or Assembled?
The first thing you should choose is which background you like best. Are you after a one piece or an assembled one?
You can use one piece wooden boards as your shooting surface. Here, you can play with tones and shades, and paint them whatever color you like.
You can paint the board with a dark color first before applying a “messy” pastel layer on top.
For this, you should work with a wide brush or a dishwashing sponge and let the darker layer show through.
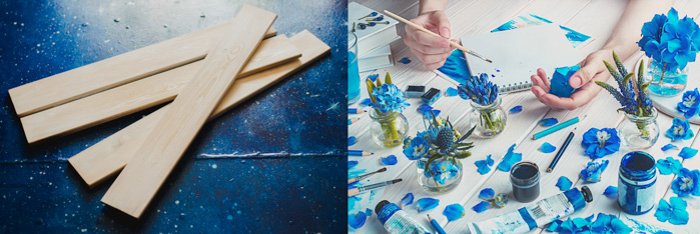
Or you can combine several narrower boards. I recommend getting some cheap pine wood boards. Give them a distressed look using wire brushes.
Move the brush over the wood along the grain. That removes softer parts and releases the texture! After that, stain it with special solutions or a combination of vinegar, steel wool, and tea.
That is a fascinating process in itself and a theme for another article.
A one piece board is the easiest to work with since you have an even surface of beautiful texture.
In the case of assembled boards, you need to think about their direction in the frame. If you place them parallel to the edges of your frame, it has to be geometrically perfect. If you want an angle, you need to carefully decide which one.
But assembled backgrounds have one great advantage. They are incredibly easy to transport. Just stack the boards together and put them in your usual bag for tripods and stands.
Wood is affordable and versatile. If you don’t want to buy it for your DIY background, look around.
Maybe you already have a suitable piece of furniture. Or you can find a barn door and turn it into your new favourite shooting surface.
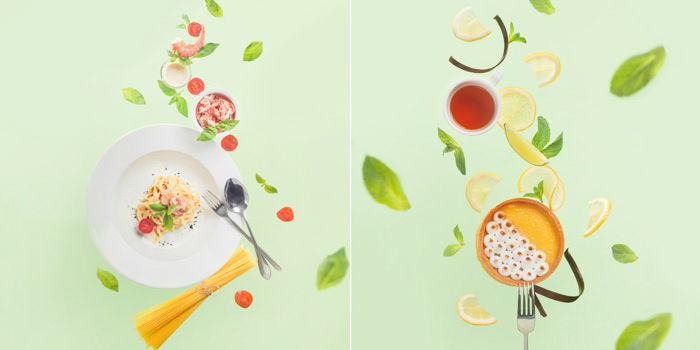
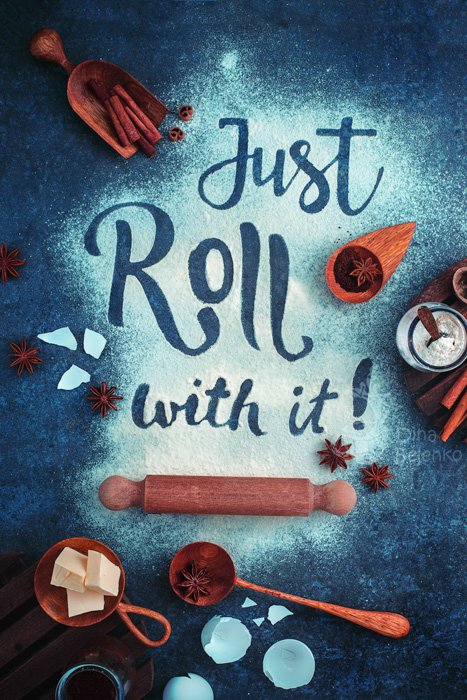
6. Paper and Vinyl Photo Background
When I want solid colors, I always go for paper. Sometimes I can’t mix the tone I like and paint a sheet of plywood with it, but I’m always able to find paper with the required shade.
Most of the time I buy paper for pastel, it is thicker than usual and not that easy to crumple up.
Colored paper comes in different sizes, the best one for me is A2 (420 × 594 mm). Small enough to keep it in sheets (not in rolls, which are a bit hard to straighten out later). And big enough to be able to work on composition and not worry about going over the edges.
You can even use craft and construction paper, especially if you’re about to photograph something like burgers and hot dogs. And parchment paper is a natural background for scenes with baking.
Vinyl works just as well. It’s more expensive, but more durable as well.
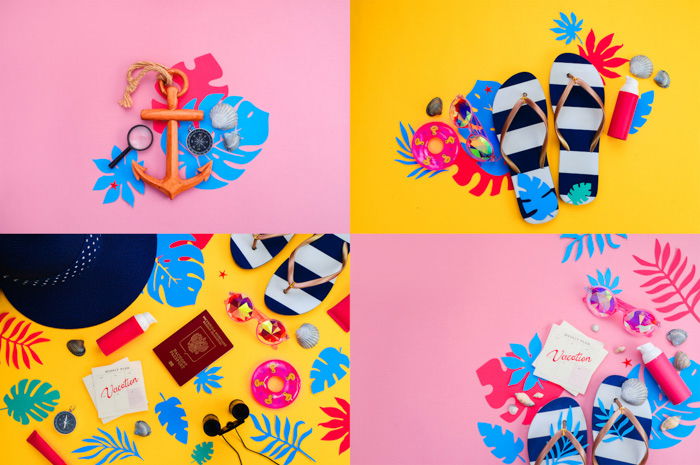
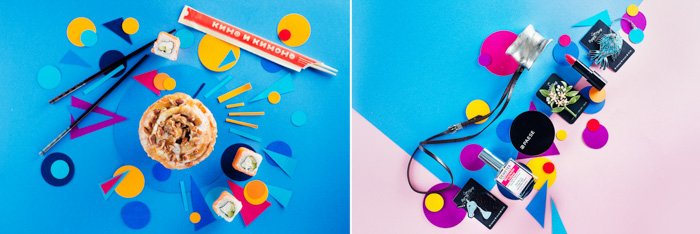
Color Blocking and Suprematism
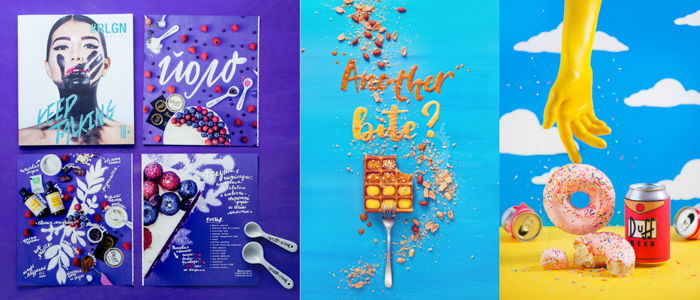
Paper works best if you want to experiment with color blocking. It could be a minimalist composition with one simple object and a contrasting photo background. Say, a monstera leaf on yellow paper.
Or it could be an elaborate scene inspired by Piet Mondrian or Kazimir Malevich. Choose a bright colored sheet of paper as your shooting surface.
Use another sheet of paper to cut out simple shapes. Arrange a simple suprematist-inspired composition. And voila!
Be Careful With Stains
The greatest disadvantage of paper: it’s not washable. If you spill anything on it, you will have to throw it out.
And if you were shooting, say, cookies, they may leave a couple of fat stains, which are impossible to remove.
But you can use sheets of vinyl multiple times.
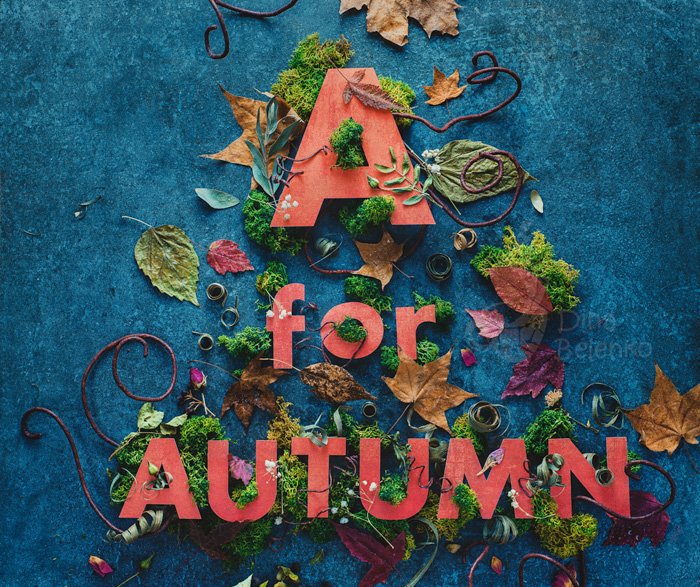
5. How to Use Paper as a Canvas Photo Background
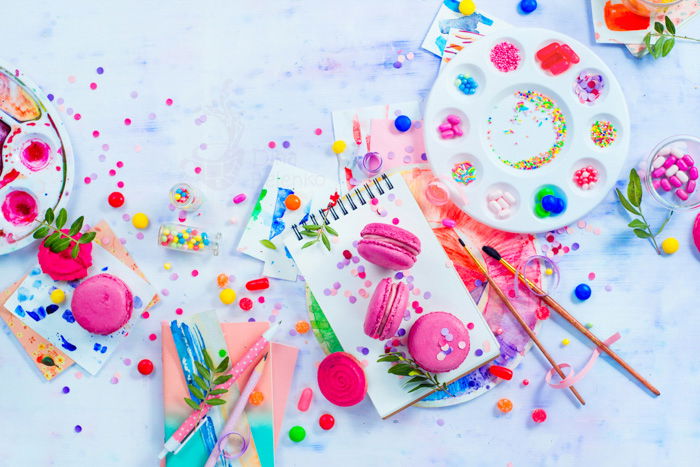
Great way to use paper is to work with it as the canvas for your avant-garde painting. I mean, you’re meant to paint on paper!
So why not do it with your food photography? There is so much room for experiment here!
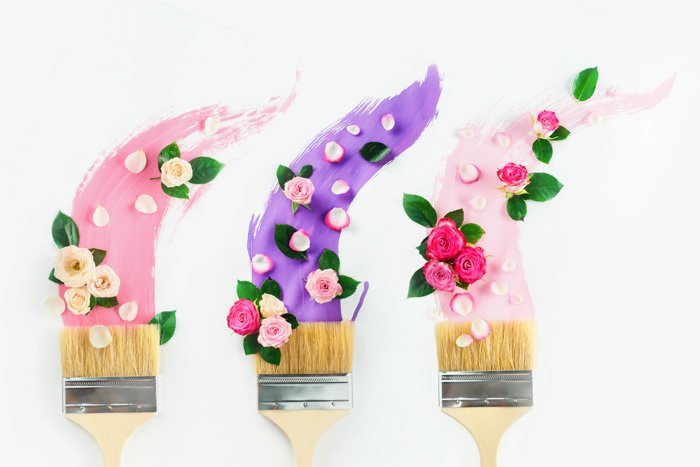
The simplest thing you can do is to make a couple of strokes with a wide brush. And place your object right on top of the resulting spot.
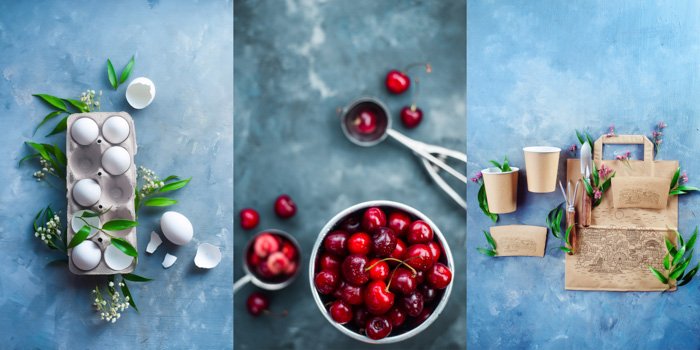
Bright colored foods like fruits and salads look great, especially if you scatter some leaves or spices around.
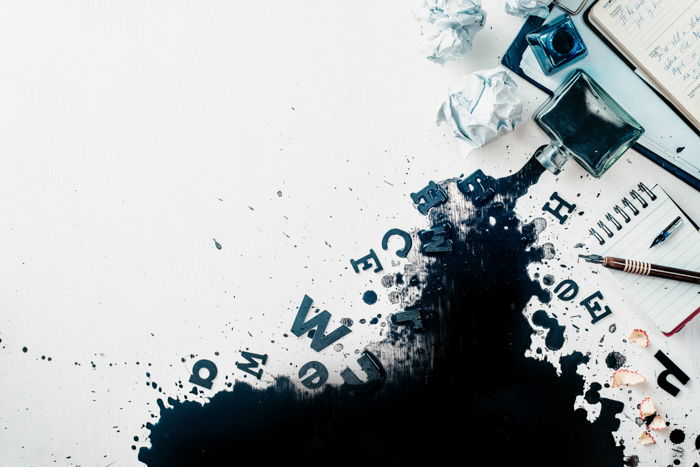
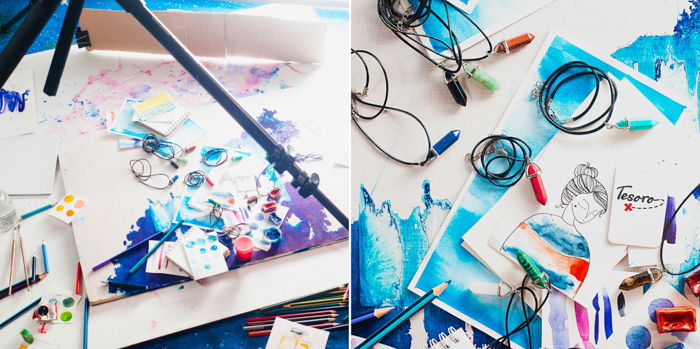
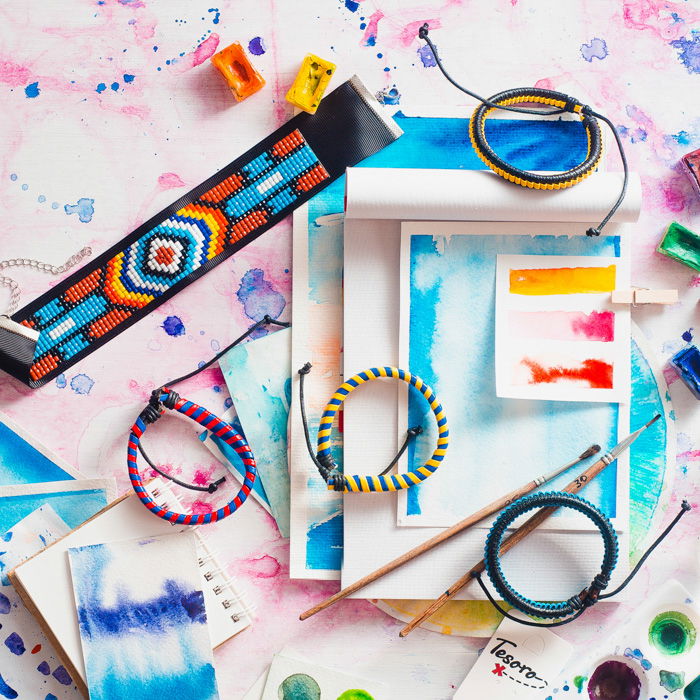
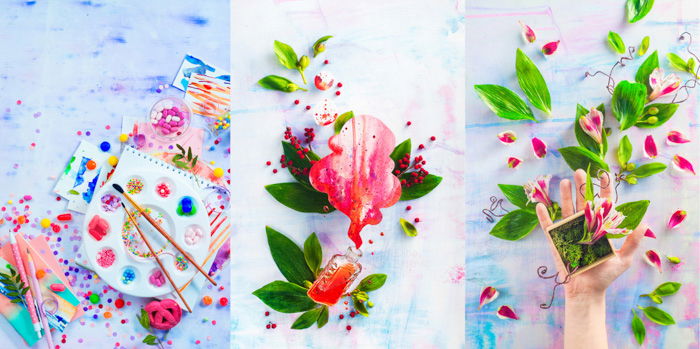
Also, you can spill some ink and create a dramatic still life as a frame for a shot of your product.
Or sprinkle wet white paper with watercolor to create tender pastel spots and smooth gradients.
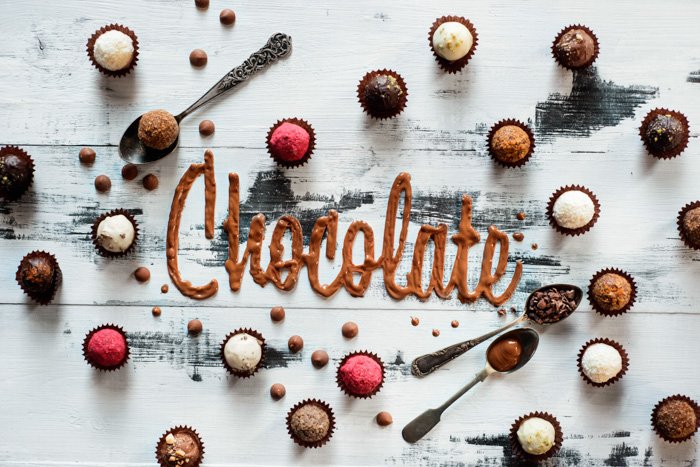
And if you’re shooting sweets, why not paint with chocolate and syrups?
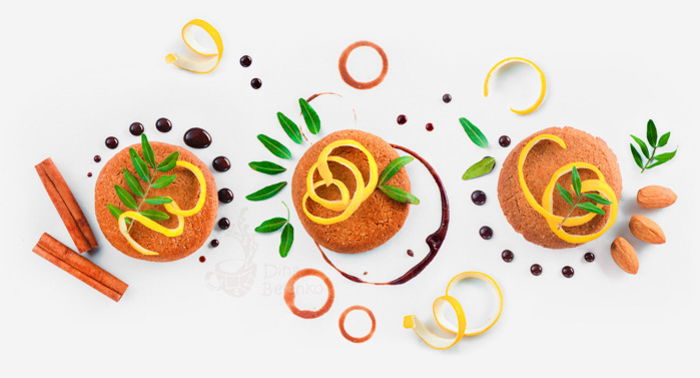
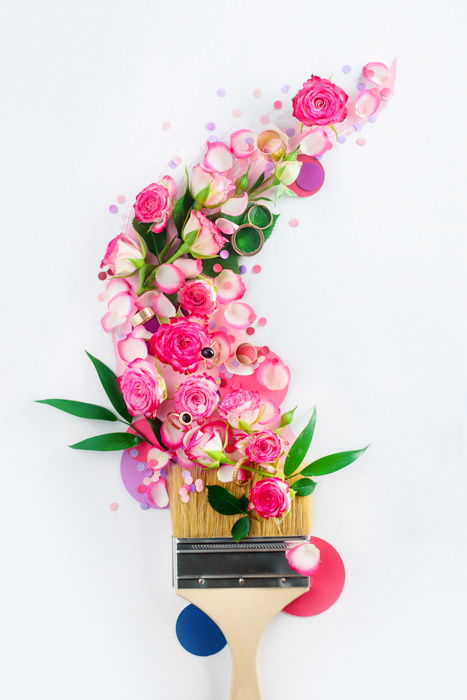
Using paper as canvas removes any need for additional props.
You can still create an elaborate composition, if you like (and I’m a sucker for complicated arrangements). But if you shoot just a spot of color and your main object, it would still look perfect.
4. Stone and Marble Alternatives
Marble surfaces entered the food photography scene several years ago and are here to stay.
Real marble is quite expensive. And to be honest, a pain to work with. If you do not happen to have a marble table for your kitchen, get ready to work with a ridiculously heavy piece of stone.
I have neither the strength nor desire to lift something that heavy every time I want to shoot a couple of carrots.
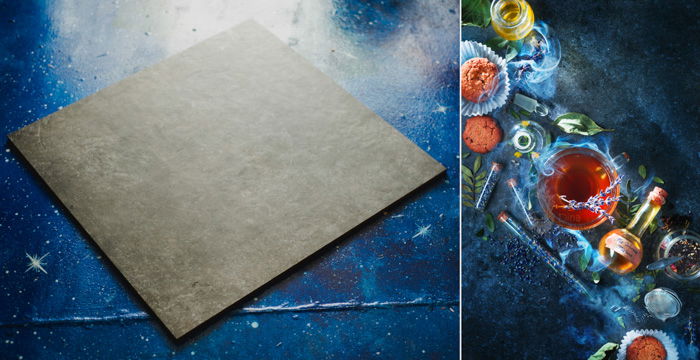
So I’m happy with ceramic floor tiles as an alternative.
Any home improvement store has a variety of floor tiles for bathrooms and kitchens. Many of them resemble natural textures quite closely.
They generally offer small surface areas to work with, but if you can find one around 24×24 in, that will work just fine.
Ceramic tiles are washable, durable and relatively cheap. They’re not as lightweight as thin sheets of wood, but significantly less heavy than stone and marble.
Also, many of them have matte finishes, which are ideal for photography, since they don’t cause unwanted glares.
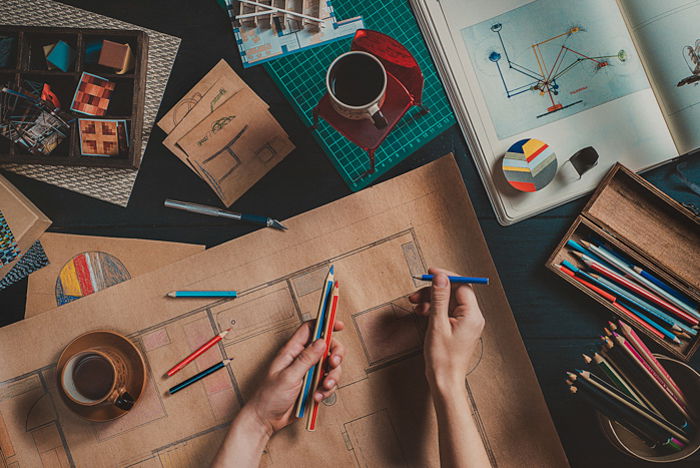
3. Plywood and Hardboard
Don’t knock it till you try it.
Hardboard may sound inelegant, but it’s actually my favorite material to work with!
Plywood and hardboard are derivative wood products. That means they don’t have the beautiful texture of natural wood. But instead, they have low manufacturing costs and low weight.
You can buy them in pretty big sizes (mine is about 32 x 32 in). That’s perfect if you want to work with still life, product, food or flat lay photography. And you can create any texture and color you like.
Here are a couple of techniques I use to create my most beloved DIY backgrounds.
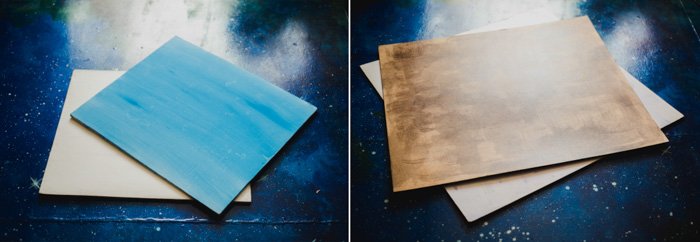
Spray Paint
The best thing about spray paint is that it dries extremely quickly. Your new photo background can be ready in minutes.
And it comes not only in lots of vibrant colors but in metallic shades too.
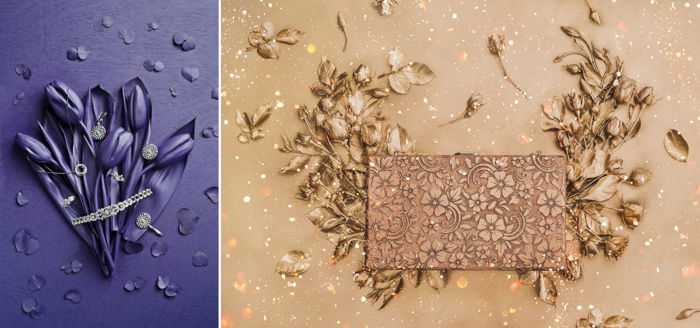
You can paint your backdrop along with the items of your still life, creating a wonderful monochromatic composition.
Or just paint some objects in the same tone as the background for interesting color harmony.
Acrylic Paint and Watercolors
Sure, you can use a variety of acrylic paint for your backgrounds. But you can go an extra mile and add a touch of watercolor.
Mix your acrylic paint with water. While it’s still wet, sprinkle watercolor right on top of it. Now slightly tilt your sheet of plywood or hardboard to create beautiful drips and stains.
I used purple and pink shades on a white base, so now I call this particular sheet of hardboard The Unicorn Backdrop.

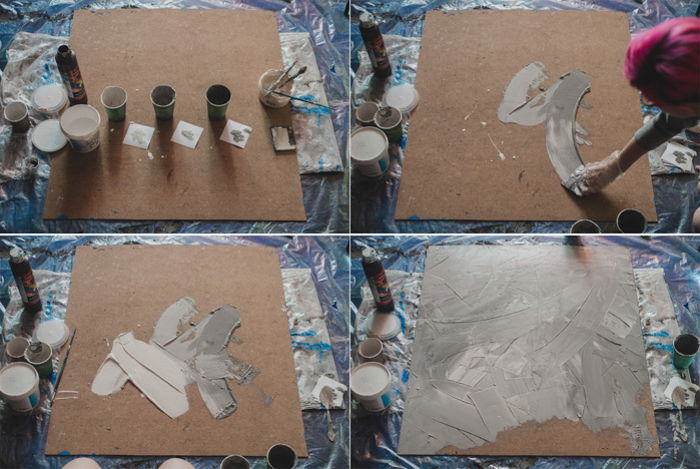
Imitating Concrete
A lightweight surface with the texture of concrete is a dream come true. It’s one of my most favourite backdrops to work with!
It looks gorgeous in photos and it’s extremely easy to make.
Get some acrylic paint, hardboard, and a dishwashing sponge. Mix different shades of the same color and pour a small amount of each one in the middle of the surface.
Blend it all over the board with a sponge.
If you want some extra texture, take an extra step. Mix your paint with white wood putty (plastic wood) and use a putty knife to distribute it over the hardboard and create tangible texture. Let it dry.
Cover it with an additional layer of matte finishing if you work mostly with staining foods like berries or spices. I usually skip this step.
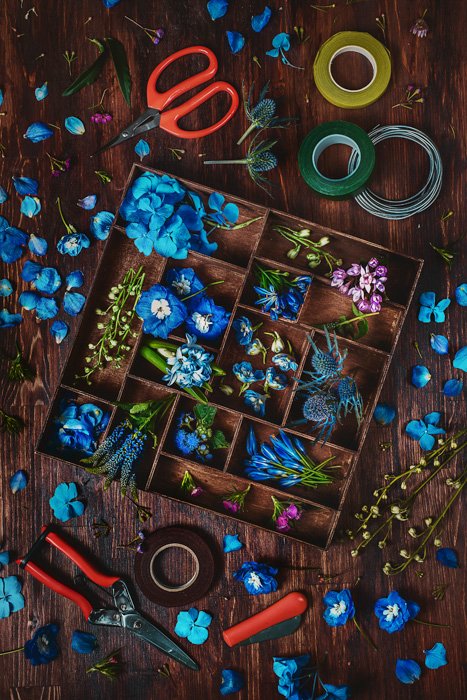
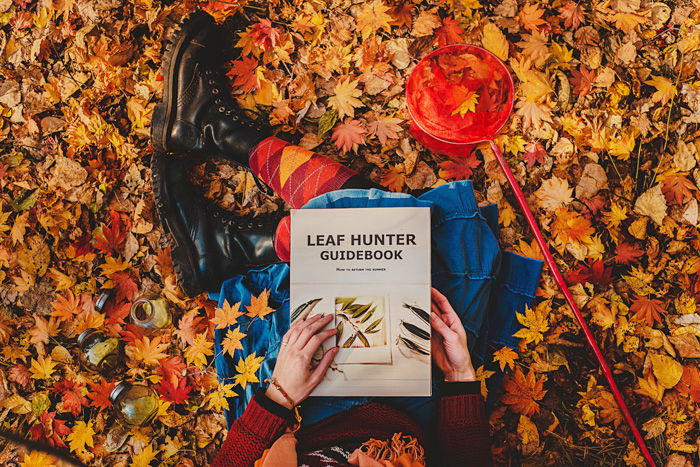
2. Natural Textures
An efficient way to complement the natural qualities of your object is to use textures like sand, moss, seashells or grass. Maybe you can even go in a garden and shoot on location.
Look closely at flower petals and tree bark. Everything can be your stage!
Meanwhile, I can recommend materials that you can use at home or in your studio.
Sand
Sand is easy to buy (every pet store has fine quality white sand for fish tanks) and interesting to work with. Make some footprints, build a castle or draw some ornaments and patterns!
It doesn’t always work with food photography but looks great with cosmetic products and even jewellery.
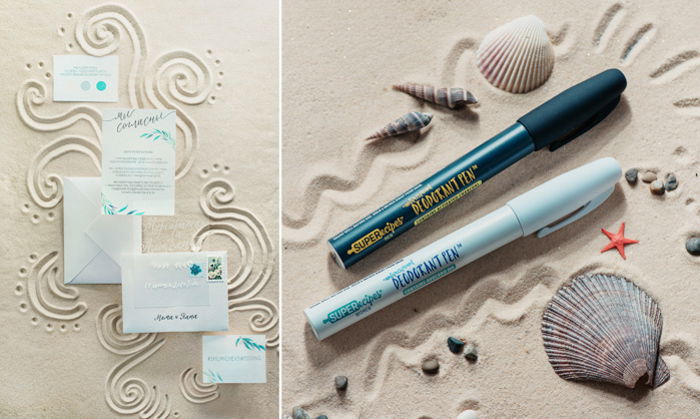
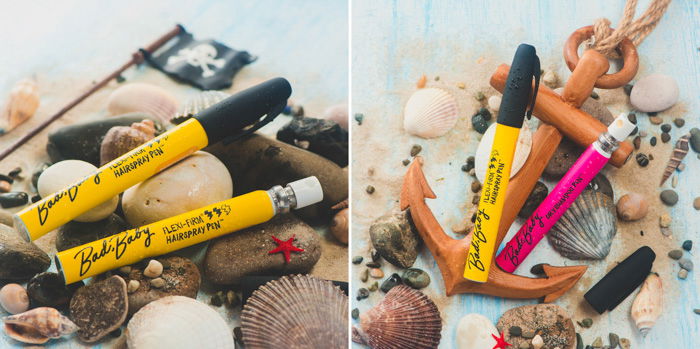
Seashells
Combine sand with seashells and you get your summer beach photo in 20 minutes!
I love how products look with a sprinkle of water (presumably the ocean spray) surrounded by seashells of different colors and textures.
You may also want to add some foam made with washing powder to create a fresh atmosphere of sea tide.
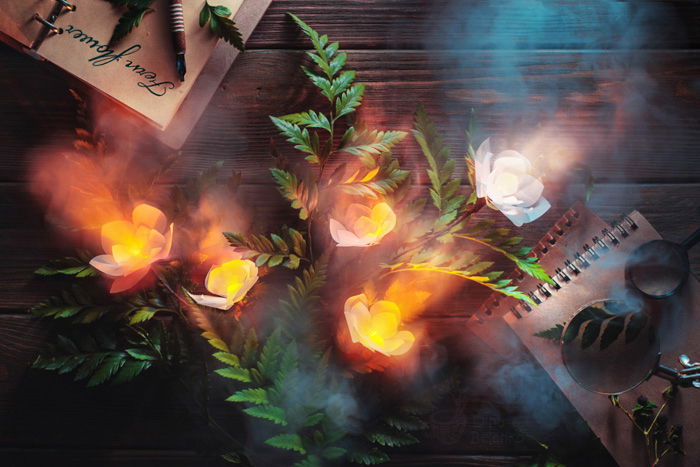
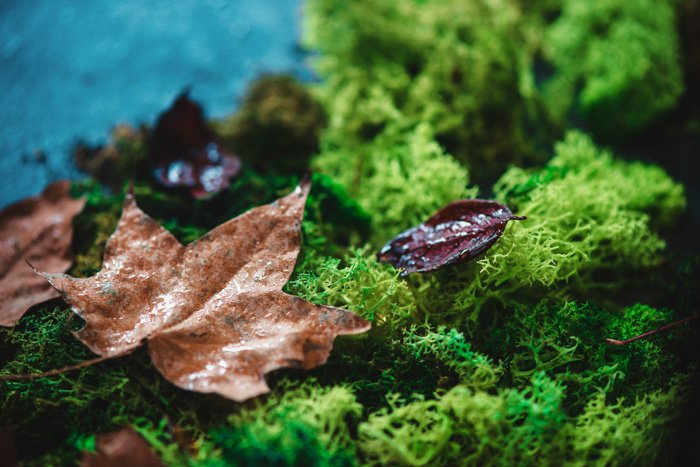
Moss
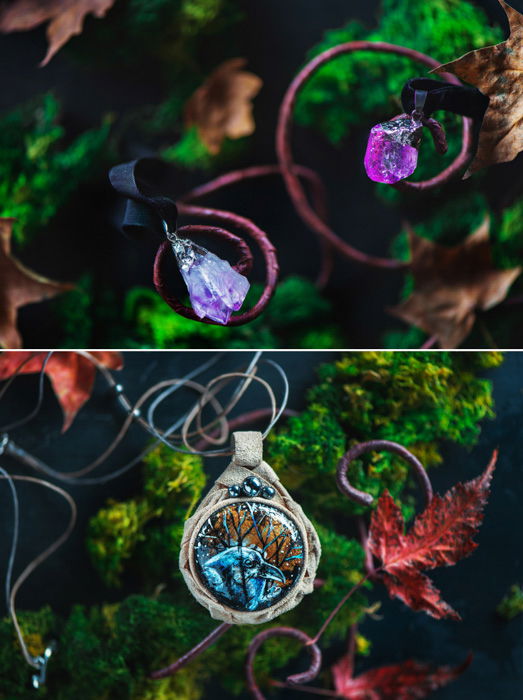
I use moss for my “magical” photos with flying spellbooks and potions. But it can create a nice photo background for product photography just by itself.
Sprinkle it with water to create dew and add a couple of leaves. If you need something more substantial to, for example, hang your jewellery, use little tree branches.
You can buy dehydrated moss in almost any craft store. Keep it in a sealed package and it will serve you for years.
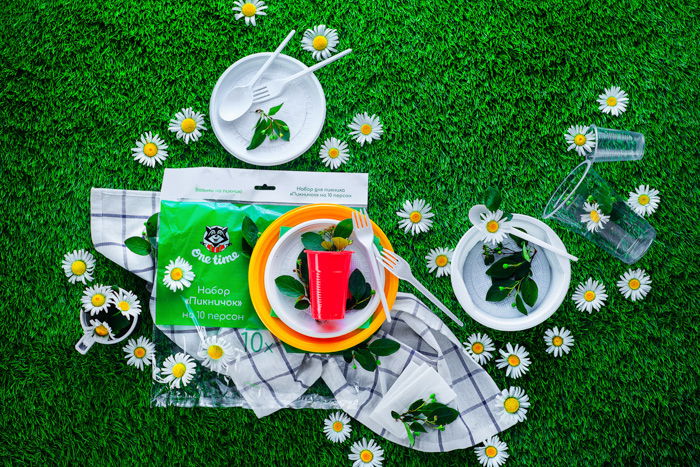
Artificial Grass
Usually, I’m not a fan of plastic grass, but sometimes it be too cold outside. Or too hard to find a suitable lawn. This is when artificial grass comes in handy!
Now you can shoot picnic scenes in the comfort of your warm room. It works best with textiles (like tablecloths and napkins). Especially when the cloth only partly covers the grass.
You can also add some truly natural elements like flowers and leaves.
The thing you need to remember: avoid close-ups. Wider shots will conceal the artificial nature of your grass much better.
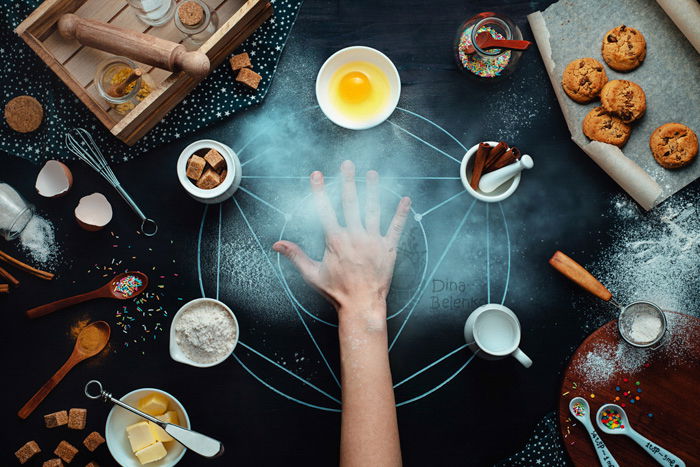
1. Use a Diffuser
And last, but not least, your own lighting equipment can serve as a fantastic photo background too! I love backlight, it gives everything shine and volume.
I’m always glad when there’s a chance to place my inanimate models in front of a large diffuser or softbox.
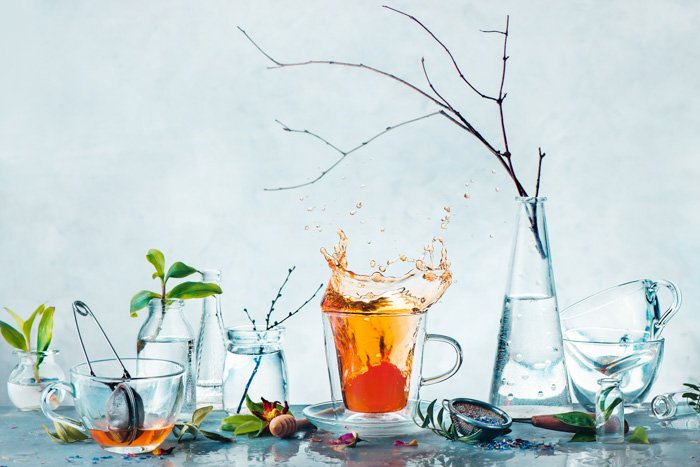
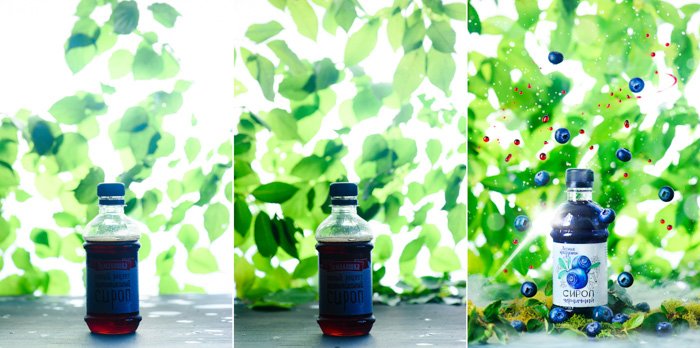
You can still make it look like a white background, but here’s a secret. You can also use it to recreate sunlight breaking through summer leaves.
Gather some tree branches with green leaves. Set the diffuser or a big softbox behind your scene. And attach branches to it using transparent adhesive tape.
It could be just one branch or an entire surface covered with leaves.
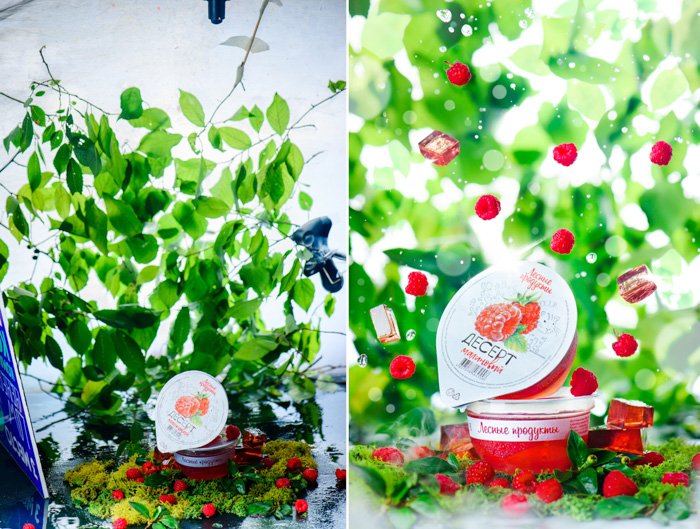
You can replace branches with cardboard silhouettes. Or cover the diffuser with a light blue cloth to imitate the sky. I bet it would look lovely with any cosmetic product!
And if the packaging is transparent, it will look like it’s literally shining.
“A little goes a long way” applies itself excellently in product and still life photography. Over the years I have created many photos using very inexpensive props and equipment.
I can say with confidence that you don’t need more stuff to create great shots. This concerns the camera lens and body as well as the photo background.
You can create gorgeous photography with backdrops under $25 and save for something more important. Best of luck with your experiments!
If you decide you need a perfect white background after all, check our article on creating one here.