
Removing objects from photos can be a difficult task, but it’s made a lot easier with the right app. In this article, we’ll introduce you to one of our favorite apps and show you how to use it to remove objects from photos.
How to Remove Objects From Photos Using TouchRetouch Options
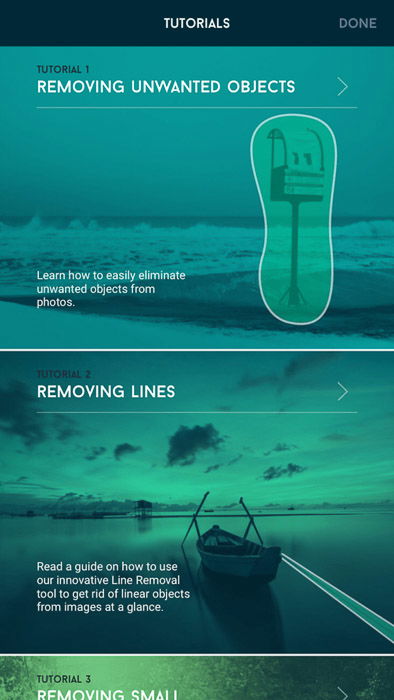
If you haven’t edited photos before, some of the TouchRetouch tools may be unfamiliar to you. So, it would help a lot if you read the short tutorials for beginners to understand how the process works.
Once you open the object remover app, tap the tutorial icon on the menu beside Albums. Then, select one of the following tutorials:
- Removing Unwanted Objects;
- Removing lines;
- Removing Small Objects Quickly;
- Removing Blemishes;
- Using Clone Stamp.
TouchRetouch also has an animated screen at the top to guide you through the process. There’s no need to press play as the video starts as soon as you open the tutorial.
It also loops so you can keep watching it until you understand how it works.
You can remove anything from street signs, unwanted items and really large objects.
Simpler Images Will Lead to Better Results
Even though TouchRetouch is a great app to remove objects from photos to get that perfect picture, it doesn’t work on all images. So how do you figure out if your file is perfect for editing?
TouchRetouch uses information in the background to rebuild the image. If everything looks disorderly, you might end up with bad pictures. To make the most of this app, choose simple photos when possible.
First, look at the spaces that surround the object you want to erase. You’d want it to look clean. It will also help if it has only one or two solid colors.
Having too many lines or patterns surrounding your subject creates a messy result.
I’m not saying you can only use certain pictures to edit. You can work on photos with crazy patterns on TouchRetouch as well. But if the app can’t fix the image, you’ll have to clean everything else yourself.
TouchRetouch Editing Features
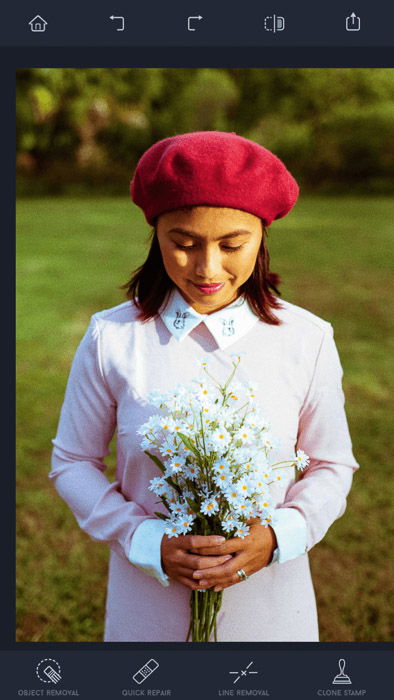
The TouchRetouch photo editor has different modes to help you work on your photos the easiest way. Let’s go through each one, so you know which to select once you’re ready to edit.
Object Removal
As the name suggests, this feature lets you remove unwanted objects from photos. It has both lasso and brush tools to allow you select areas you want to delete.
Quick Repair
Sometimes, removing an object leaves some gaps and dirty spots. This mode offers a quick brush tool and a skin blemish remover to clean up your photo with a few taps.
This is perfect for any adjustments on that new social media profile picture.
Line Removal
Thin lines can be difficult to remove if you’re using either the lasso or the brush tool. This is where the Line Remover comes in. Just trace the line you want to delete, and the app will do the rest for you. This mode also includes a segment remover that lets you erase sections of a line.
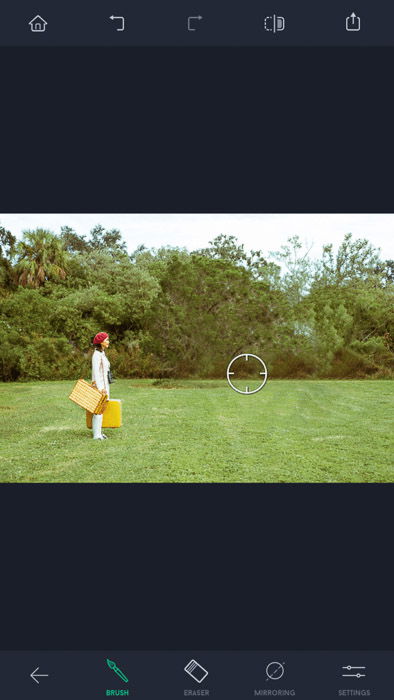
Clone tool
This is what you’ll need to clean up your image if Quick Repair doesn’t work. It lets you select this tool to manually choose a source which you can copy to fill in the holes.
It also includes Mirroring that allows it to follow your finger wherever it goes.
Now that you know how to load photos on to TouchRetouch, it’s time to learn how to use the editing tools it offers.
Let’s go through the icons you see at the bottom of the screen and find out what each of them does.
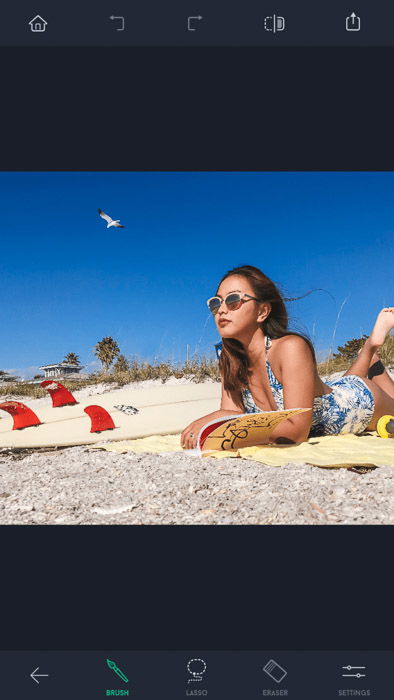
Laso and Brush
You’ll need these tools to select the part of the image that you’d like to delete. If you have a blank background such as the sky, use a lasso to draw around the object to highlight it. If your subject is around busy surroundings, choose the brush, instead. It’s the best option to help you trace the object carefully with your finger.
Eraser
In case you mess up your selection, use the selection eraser. This is useful if you accidentally include a part of the image that you don’t want to delete. Expect to use this a lot when your background is busy, and you want to create a precise selection.
Settings
Tap this icon to change the size of your brush or eraser. It determines how much surface area you want to cover, so adjust it accordingly. You should also note that this feature doesn’t work with the Lasso tool.
Removing Objects From Photos
Now that we know all the basics let’s get on with the process of removing unwanted elements from your images.
Once you load the photo, select Object Removal. Next, tap either the lasso or the brush tool to select the object you want to delete.
If you’re using the brush, tap Settings and move the slider to the left or right to adjust the brush size.
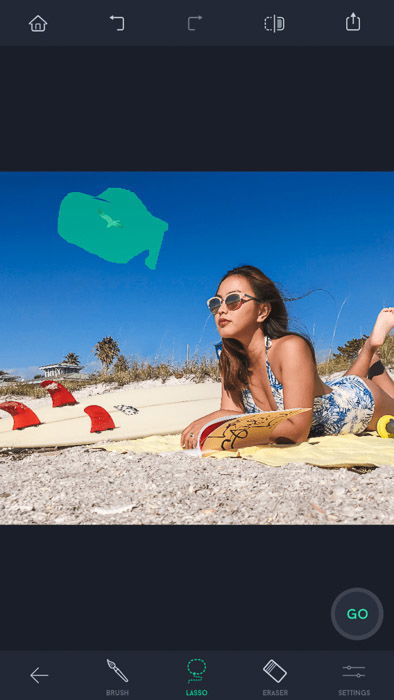
When using the lasso or brush tool, a small screen will pop up showing you the zoomed in version of your subject. It takes a while to get used to it, but it’s helpful in letting you see the selection in detail.
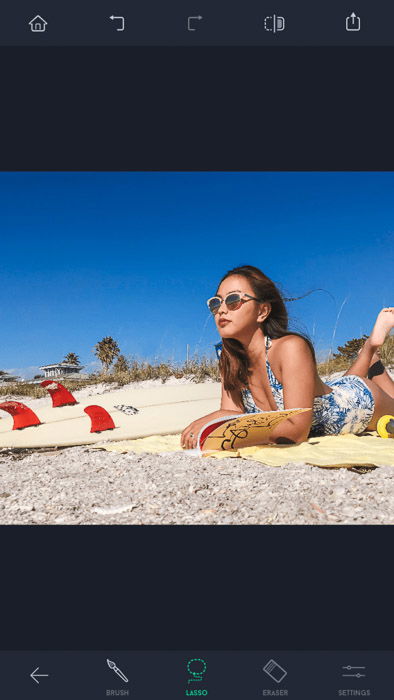
Once you finish brushing over your subject, tap the Go button. Your selected object will then disappear.
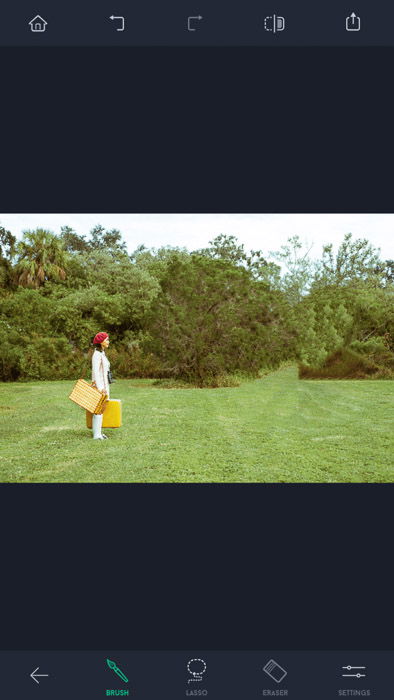
But what if you want to remove a person from a photo? Well, the same process applies no matter what you choose to delete.
All you have to do is select the human using a lasso or a brush tool, tap Go, and that’s it!
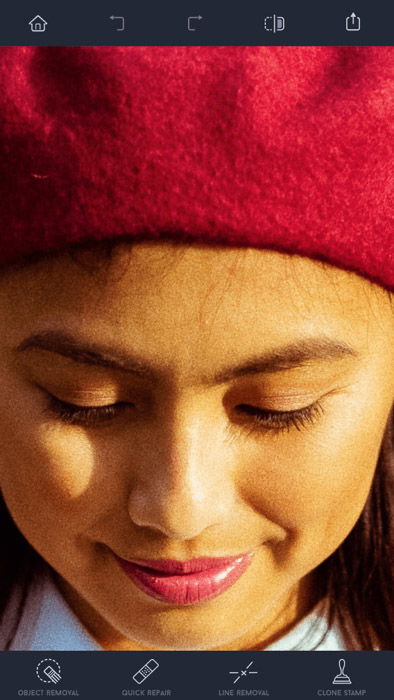
Removing Spots and Skin Blemishes
Apart from removing people and objects from photos, you can also use the app to retouch your photos. You can remove spots from dirty images with it, or even remove skin blemishes on your subject’s face.
For the most part, the method for erasing spots is the same as deleting regular objects. But we have a few tips to add to ensure you end up with good results.
The simplest way to go to Quick Repair. Then select Blemish Remover and tap the spots you want to remove to make them disappear.
If the spots are big, use the Quick Brush tool instead. Look at the size of the blemish and make your brush size big enough to cover it. You can do this by selecting Settings and adjust it using the slider.
Now all you have to do is tap what you want to remove, press Go, and you’re done.

When there are way too many spots to remove, you can use the lasso in Object Removal as an alternative. Draw around the area you want to clean, then press Go.
Keep in mind the background while you’re retouching the photo. When erasing a cluster of dirt, make sure the pattern or texture in the surrounding areas is the same.
If not, you might end up with weird blotches that don’t look appealing.
Fill the Gaps With Clone Stamp Tool
Earlier, I briefly mentioned a few things you can do with the clone stamp tool. Now, let’s get into the details and find out how we can use it in a real-life editing scenario.
Whenever you delete big objects, expect to see gaps and blotchy areas in your photo that Quick Repair can’t fix. If this happens to you, tap Clone Stamp Tool and select the Brush tool.
Then, choose an area that you want to be the source (a.k.a. The pattern you want to copy). Afterwards, start “painting” on the field that you want to cover.

If you want to fill the gaps with the same patterns from the other side of the image, select Mirroring. What this tool does is to let the source target move in sync with your brushing finger.
That way you don’t have to keep picking the source over and over again.
No matter how careful you are, you’ll mess up a lot when using the Clone Tool. So in case you use the wrong patterns, you can always tap Undo (arrow pointing to the left) at the top of the screen.
Or you can use the Eraser if you don’t want to cancel your selection altogether.
Saving Your Image
Before you save your edited image, you should always check it and make sure it’s clean. Even if the file looks fine in regular size, consider zooming in and look for any gaps or spots.
You’ll often find at least one or two ugly patches in every photo, so make your inspection a routine.
Use your two fingers to zoom in and look for any blemishes. Be meticulous especially around the areas where you deleted an object.
If you see any spots, use Quick Repair to patch them up.
Conclusion
I had low expectations when I first downloaded TouchRetouch. I was sure it wouldn’t perform as well as a Photoshop fix since it was only a phone app. But as soon as I started using it, its performance impressed me.
This photo app is not only intuitive, but it does a great job deleting objects from my photos. You don’t need any major technical skills to get that perfect shot.
Once you realize how easy it is to use this app to remove people or objects from photos, it will be an integral part of your mobile photo-editing workflow.
We have a great post on Best Photo Collage Apps or taking perfect iPhone night photography to check out next!
And for more creative apps for your smartphone, check out this article on Best Apps to Add Background to Photos!
