Selective focus uses our visual preferences to highlight elements in our composition. Our attention first goes to the brightest parts of the scene and those that are sharpest.
In this article, we will show you how to create selective focus.
What is Selective Focus?
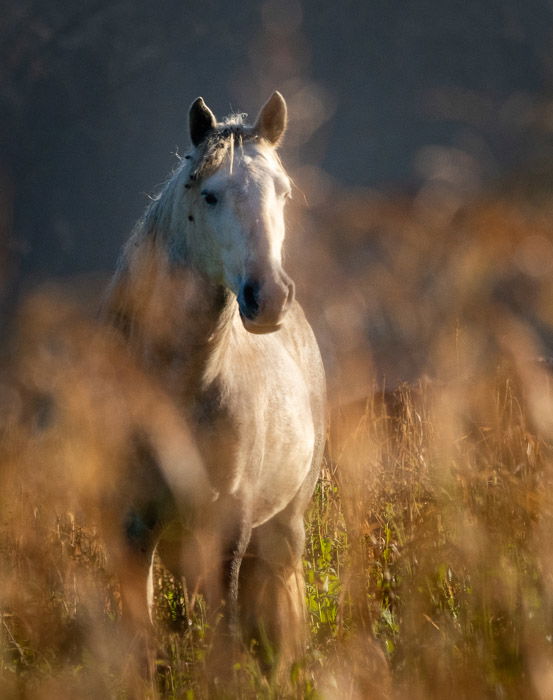
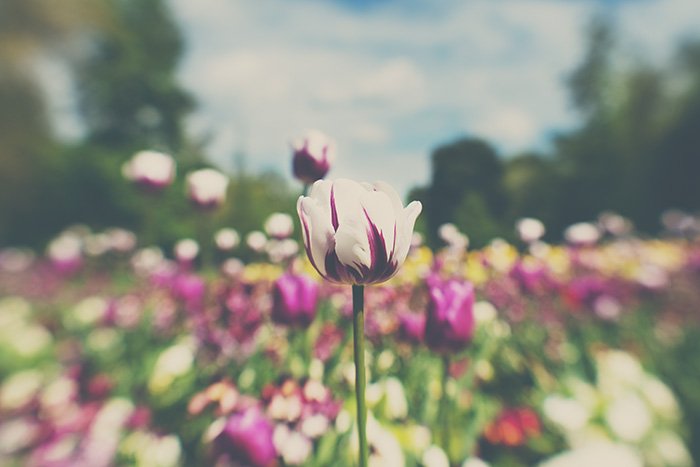
Selective focus isolates a subject. Choose a specific focus point in your image and let the other elements in your composition blur. The focal point becomes the center of attention. Photographers use selective focus for artistic effect, but it also has a practical use. You can use selective focus when the background is busy or not very attractive.
Selective focus works by creating a shallow depth of field. Depth of field is the amount of the image, foreground to background, that is in focus. In landscape photography, we often want a deep depth of field. The image has a sharp foreground and background. But other types of photography use a shallow depth of field. For instance, blur is often part of portrait or street photography.
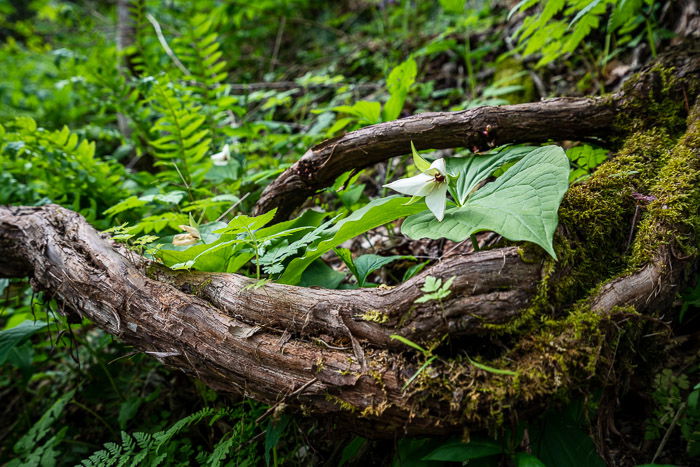
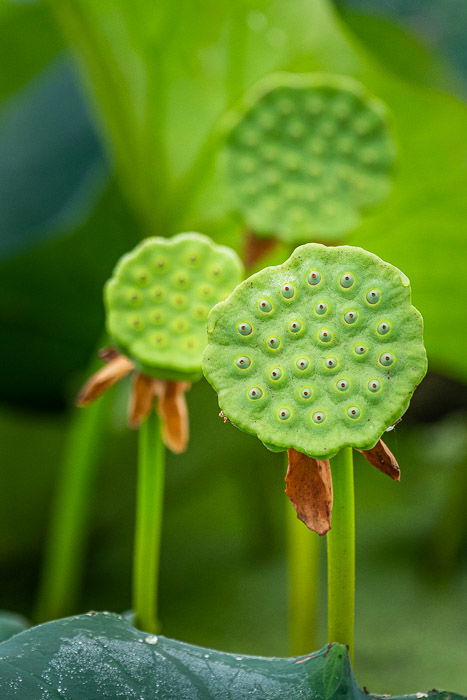
Depth of field varies along a continuum. You can blur to a point that all detail is lost. But you can also retain some background detail. Selective focus is often used in macro or close-up photography.

How to Use Selective Focus
When using selective focus, you need to control: 1) Where your focus point will be, and 2) How much blur you want. Within each step are techniques that will help you create selective focus.
Step 1: Select a Focal Point
The first step in selective focus is deciding what part of your scene you want in focus. You may select a small focal point like the stamens of a flower or a larger subject like a person or an animal. Now, you have to tell your camera to focus on this area in the scene. This means selecting a targeted focus mode.
If you use wide or zone focusing modes, you will need to change to either a Center or Flexible Spot autofocus mode. You can also use manual focus. Camera models may label the focus modes differently. You may need to refer to your owner’s manual to locate the focus modes.
Most mid-to-high level cameras allow you to select a specific focus point. Canon calls this Single-point AF. Sony terms this Flexible Spot. Your camera may have a joystick that moves the target around the frame. Or you may be able to touch the LCD screen to set a focus point. The other option is to use Center autofocus. Place your subject in the center of your frame to get focus. Then recompose before pressing the shutter button. Many selective focus images have a sharp subject in the foreground and let the background blur. A focus point deeper in the frame creates both a foreground and background blur.
Focus is a strip across your image. Any element at the same distance from you as your focus point will be in focus. This is called a focal plane. If flowers are in a straight line in front of you at the same distance, they will all be in focus. Change your position to put some flowers closer to you than others. Some flowers will blur, and others will be in focus.

If you are new to selective focus, set your camera on a tripod and practice switching to different focus points in the scene. Focus on an element near you in the foreground. Then change to focus on something further in the distance. Videographers can do this during one shot. Rack focusing is switching between focus points during one shot.
Step 2: Creating Shallow Depth of Field
Background blur is as important as the subject when using selective focus images. How much you blur the background is a personal preference. You can blur so much that the background becomes a solid wash of color with no detail or texture. This might be what you are after, though you lose context. You can also blur less and keep detail in the background.
Bokeh refers to the quality of the blur. Blur emphasises color, and shapes distort. Choose a background with colors that work well with your subject. Also, try to limit bright spots in the background. These will pull the eye and detract from your main point of interest.
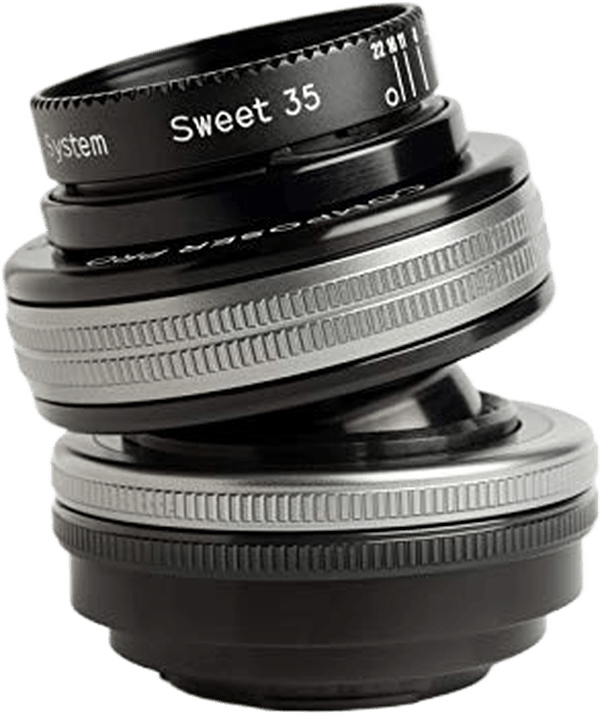
You may also find that some lenses create a more pleasing blur than others. Some photographers use speciality lenses to create blur effects. Lensbaby lenses are made for selective focus. Focus distortion is built into the lenses. Each type of lens has a different focus effect.
Blur is important in selective focus images. It is the blur that separates the subject from the background. Creating blur in a selective focus image is about controlling the depth of field. The amount of blur in your image is based on aperture, your lens, and the position of the subject. If you are new to the concept of shallow depth of field, see the Expert Photography article Lensbaby lenses These are the elements that control how much blur you get in your image:
- Aperture
- Lens focal length
- Subject’s position in the frame
Aperture
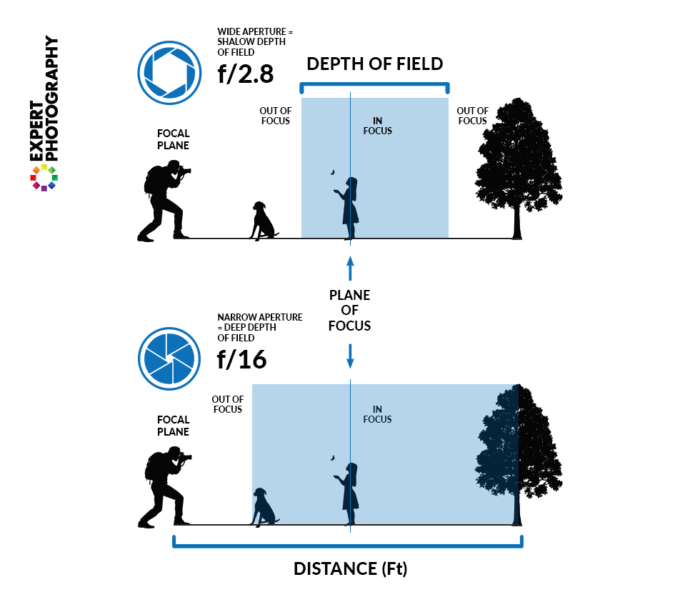
A wider aperture like f/2.8 will give you a shallow depth of field. To see aperture differences, put your camera on a tripod and set it to ‘Aperture Priority‘ mode. Focus on something close to you. Notice the change in background blur as you move through different apertures. Wider apertures create more blur. Narrow apertures keep more of the scene in focus.
When you select a focus point, about a third of the focus falls in front of the subject and two-thirds behind. Depth of field calculators help you figure out how much of the scene will be in focus at a particular aperture. Program distance from the subject, aperture, and focal length. The depth of field calculator lets you know how far in front and behind the subject is in focus.
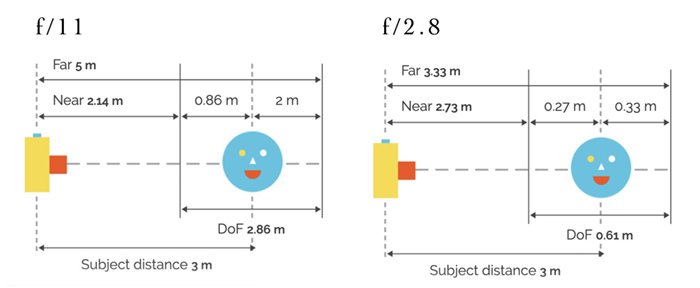
Compare focus distances at different apertures and focal lengths when I set my subject at 3 meters (about 10 feet). If I use f/11, the total depth of field is 2.86 meters (9.38 feet) with 2 meters (6.56 feet) in focus behind the subject. If I change the aperture to f/2.8 and keep everything else the same, my total depth of field is only 0.61 meters (2 feet). About half, 0.33 meters (1 foot), is in focus behind the subject.
Lens Focal Length
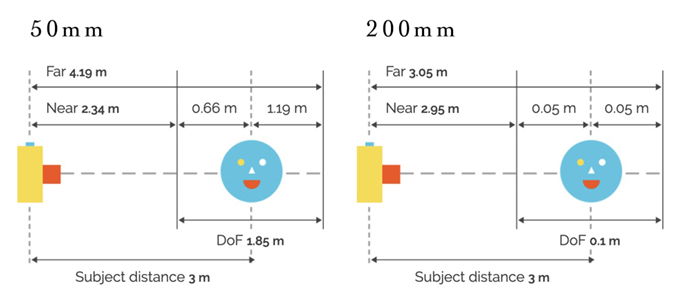
Depth of field also changes with the focal length of your lens. Using a 50mm lens at f/8.0, the depth of field is 1.85 meters (6.06 feet) with 1.19 meters (3.90 feet) in focus behind the subject. Changing my focal length to 200mm, keeping everything else the same, my depth of field reduces to 0.1 meters (4 inches). Only 0.05 meters (2 inches) is in focus behind the subject. In general, longer lenses create more blur. Wide-angle lenses create less blur.
Each lens has a minimum focusing distance. If you are closer than this distance, the lens cannot focus. This determines how close you can get to your subject. In macro photography, you want to get close. To get even closer, use an inexpensive extension tube. An extension tube shortens the focusing distance. It mounts between your lens and your camera. This pushes the lens away from the sensor. Extension tubes make the focusing distance shorter. This means you can get closer to your subject and create a more blurred effect. But the extension tubes also block light. You will need to compensate for this by slowing the shutter speed or using a higher ISO.
Subject’s Position in Frame
Blur is not only about aperture. It is also about your position to the subject and the subject’s position to the background. It is all about hyper-focal distance. In the examples so far, the camera was positioned 3 meters from the subject. Repositioning the camera closer or further away changes the depth of field. Moving closer to your subject will create a shallow depth of field. Moving further away widens the depth of field. More of the scene will be in focus if you move further away.
Adjusting Blur
Here are some steps if you want more blur:
- Widen your aperture. Start with the widest aperture (lowest number) of your lens. This allows you to see how much blur is available from your position.
- Move closer to your subject. This changes the relative position of your subject in the frame. Refocus on the subject and check the blur.
- Move your subject further from the background. This is not always possible outside the studio setting. But look for other angles. Sometimes changing your perspective by moving left or right or up or down changes the relationship to the background. For instance, shooting up will often give you a sky background.
- Change lenses. Use a telephoto lens rather than a wide-angle lens.
Selective Focus Apps
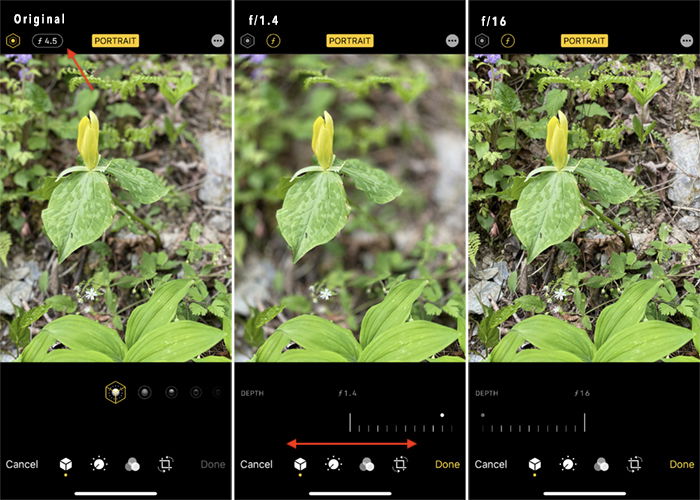
Selective focus apps allow you to create a blurred background with your smartphone. The portrait mode on iPhone X or newer simulates a shallow depth of field. Select portrait mode and adjust the lighting options. After you take a photo, adjust how much blur is in the background. Click the EDIT button and select the aperture at the top of the screen. You now have a slider tool that changes the f-stop. Your phone will simulate a wide-open aperture like f/1.4 or a narrow aperture like f/16.
Other apps allow you to control selective focus effects even on images that you have already taken.
- Focos is available on both iPhone and Android.
- EZ Blur Focus Photo Effects (IOS)
- AfterFocus (Android)
In EZ Blur, open a photo you have taken and select the point of focus. Then choose how much blur and how gradual the blur drops off from the subject. You can also change what type of blur to use. For instance, Gaussian or Motion Blur to add blur to clouds.
Conclusion
Selective focus highlights part of your image by contrasting a subject sharply in focus with blurred elements. To create selective focus, choose a point of focus and set your camera to a wide aperture.
Create a shallow depth of field in your image by using a wide aperture. Many kit lenses have f/3.5 or f/4.0 as the widest apertures. Other speciality lenses may have apertures as wide as f/1.2. In general, the wider the aperture, the more blur. You may not need to set your camera at its widest aperture. If you want detail in the blurred parts of your image, choose a narrower f-stop like f/5.6 or f/11.
You can use depth of field calculators to help you determine where to position yourself relative to the subject, what aperture and focal length to use. Or you can take a more experimental approach. Try different apertures and move position around the subject.
For more secrets to stunning Macro photography read our Macro Magic guide.