
If you want to step up your social media game, then you need to try VSCO filters.
We’ll show you how to use the VSCO app and take your smartphone photography to the next level.
What Are VSCO Filters?
VSCO is an acronym that stands for Visual Supply Company. They started in 2011 with consumers presets (VSCO filters) that emulate the look of the film.
Back in their early years, they called their app VSCOCAM. These days, they offer two main apps. The first one is VSCO (VSCOCAM’s replacement), which caters to regular consumers.
Then, there’s the VSCO X, a subscription-based app for more serious photographers who need more photo editing options.
Most VSCO presets use actual film stocks as inspiration. That’s why VSCO filters look more authentic and vivid than Instagram’s version.
The app also allows you to change the effects and save your adjustments for future edits. Here’s where to find the app for iOS on the app store and Android.
How to Navigate the App
Now that you have the VSCO cam filters on your phone, let’s go through the app and see all the features it offers.
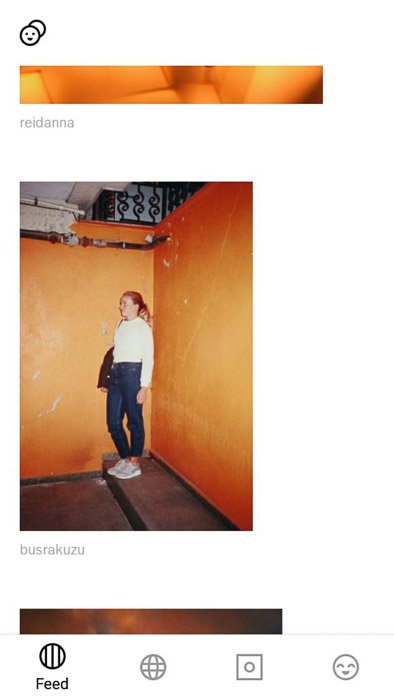
Once you open the editing app, you’ll find four icons at the bottom of the screen. The first one is the feed, which displays photos from prominent VSCO users. Think of it as Instagram’s own feed. You get to see a stream of pictures from other photographers.
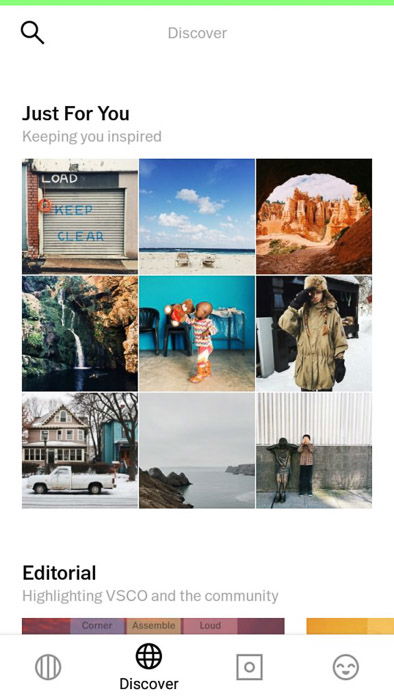
The second is Discover. It shows a curated collection of photos that you might find interesting. If you’re looking for inspiration, this is the icon to tap. It has categories such as VSCO presets and visual themes to help you stoke your creative ideas.
Then, there’s Studio where you edit your own work. This is the icon you tap if you want to take photos in-app or retouch existing pictures in your gallery.
On the top left of the screen, you’ll also see the Shop button. This is where you can buy new VSCO photo filters.
Finally, you have the Profile icon. This is where you can download or publish your personal work for others to see. Think of it as your own Instagram feed where other people can visit and enjoy your photos.
How to Look for Inspiration on Discover
Before you use the VSCO filters app, it would help to get to know it first. And the best way to familiarize yourself with it is by looking through the photos on Discover.
The most crucial section to view is the Editorial. It’s where you get to find about new features on the app and learn how to use them. It also has a Community Spotlight area with articles about other photographers.
If you’re not sure what type of look you’re after, then go to the Just for You section. It’s a collection of photos that reflect your style. It updates regularly, so you never run out of images to look at.
There’s also a revolving selection of themed photos. These are going to be useful once you start expanding your collection of presets. Feel free to go through them and take note of the pictures you like. You might want to try the VSCO filters used in those images in the future.
How to Find the Right Preset for Your Image
Now that you’re familiar with VSCO, it’s time to learn how to use VSCO filters and presets.
To edit an image, go to Studio. On the bottom right side of the screen, you’ll find two icons. The first one is the Camera which lets you take photos within the app.
The second one is a Plus sign which enables you to upload pictures from your gallery and edit them.
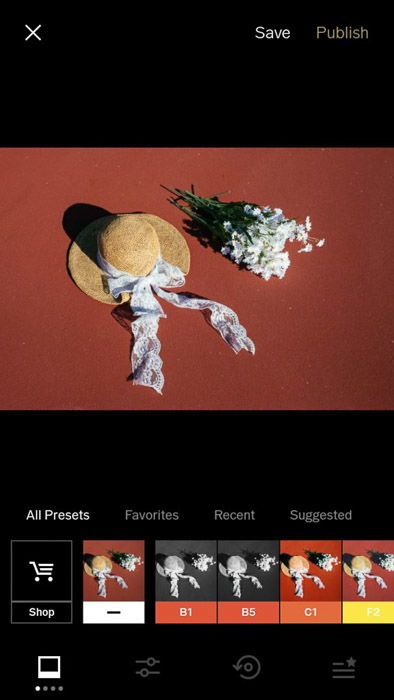
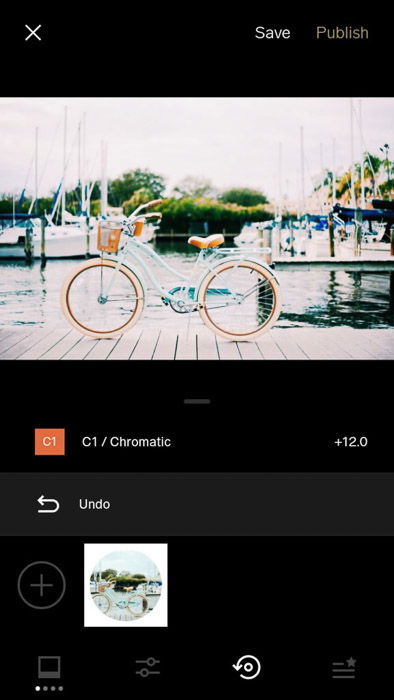
Once you have a photo available on Studio, tap it to select it. You’ll then see an icon depicting sliders at the bottom of the screen. This button takes you to the editing bay where you’ll see the presets below your main picture.
There are different VSCO filters collections to choose from. To make it easy for you, tap All Presets to see everything that’s available to you. Tap each one to see what you like.
If you’re satisfied, tap Save at the top of the screen. You also have the option to publish your image on your personal VSCO feed.
Tweak Your VSCO Filters Preset to Further Improve Your Images
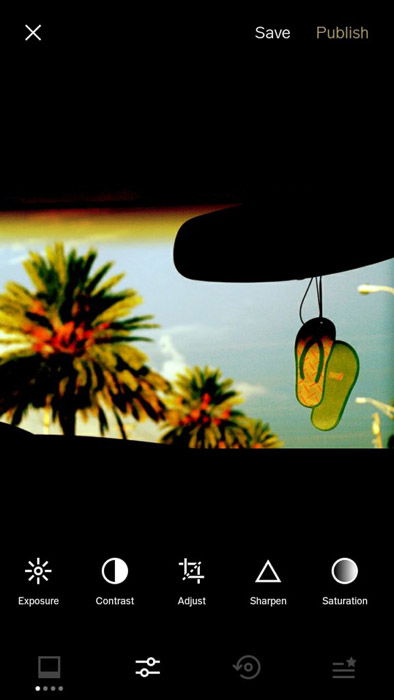
If you found an excellent preset, but it doesn’t look good enough, then consider adjusting the effect yourself. At the bottom of the screen below the presets, you’ll find the toggle switch icon once again. Once you tap it, various editing tools will show up.
You can use Exposure and Contrast to make adjustments in exposure or make your image more high contrast. To tweak the colors, you can adjust Saturation, Tone, White Balance, and Skin Tone. It also offers a cropping and sharpening tool.
But what makes VSCO perfect for iPhone photography is its film effects. Use tools such as Vignette, Grain, Fade, Split Tone to make your images look like you shot them with film.
What Are VSCO Filters ‘Recipes’
If you like the adjustments you made on your VSCO filters presets, you can save it as a “recipe” which you can use in the future. In simple terms, a recipe is a personal preset you create. You can only save one on VSCO, but you can store up to 10 if you have VSCO X.
To create a recipe, you’ll need to edit an image first. Once you adjust your settings, tap the round arrow icon beside the toggle switch. Below the photo, you’ll see a + icon that says: Create a recipe from your current edits. All you have to do is tap it to save the recipe.
To apply the recipe to your other images, tap the arrow icon again. Then select the thumbnail beside the + icon, and you’re done!
Why Stick to Two Presets
Do you know why some photographers thrive on Instagram? It’s because they have a consistent style. And that includes using a limited amount of presets when editing their images.
To help you achieve a coherent look, try to stick to two presets. That way, the colors of your photos look more or less the same.
After a while, you’ll realize that the preset you choose doesn’t work well on specific photos. Use another one that closely matches the first option. If the image still looks off, edit it on VSCO until it meets your expectations.
Even if you have the perfect preset, you should still edit it. That way you get to show the colors of your image better. Don’t think of the two-preset advice as a rule, but more of a guideline.
Of course, you can also use other presets apart from the two you use all the time. Just make sure the tones aren’t too far off from the ones you have.
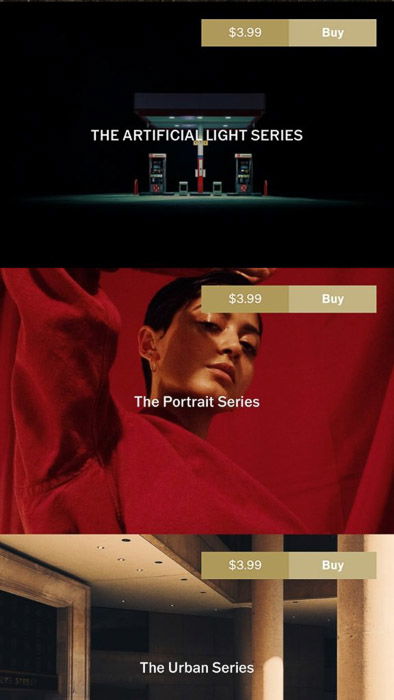
How to Buy Presets on VSCO
It’s always nice to use the free presets that VSCO offers. But after a while, it can get quite tedious to use them all the time. If you want to spice up your smartphone photography, buy new filters at the VSCO store.
First, go to Studio and tap the Shop icon at the top left corner of the screen. Then scroll down and look at the different VSCO presets you can buy.
The price of the presets varies from 0.99 to 3.99. Before you pay, tap the preset that interests you and look at some of the sample images. If you like them, select the buy button and download it onto the photo app.
The VSCO shop also offers free presets, which you can download as you build your favorite filters collection.
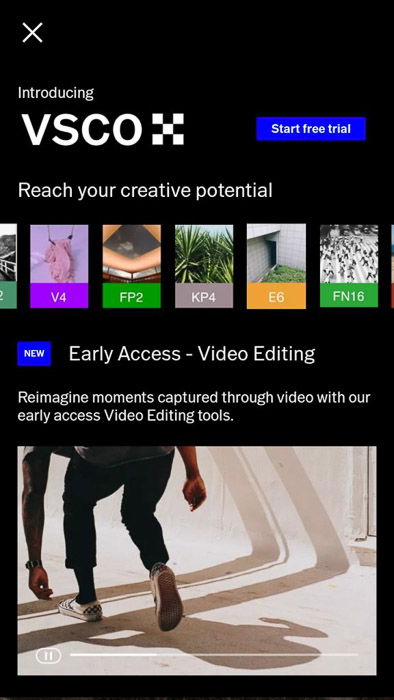
Why VSCO X Is Worth a Try
VSCO has a lot more features for the average user than Instagram. But if you want to get the most out of the app when editing photos, you should consider subscribing to VSCO X.
The subscription is about $20 for an entire year. It may seem expensive at first, but it’s worth it especially if you are planning to take social media seriously.
So what do you get with the subscription? First, you get to have access to all the VSCO filters instead of buying them one by one.
You also get to save up to ten recipes instead of just one on the free version. VSCO X also offers new features that regular VSCO doesn’t have.
It now lets you edit videos, and even create different kinds of borders for your images. These tools are going to be useful for creating stories and video content straight out of your phone.
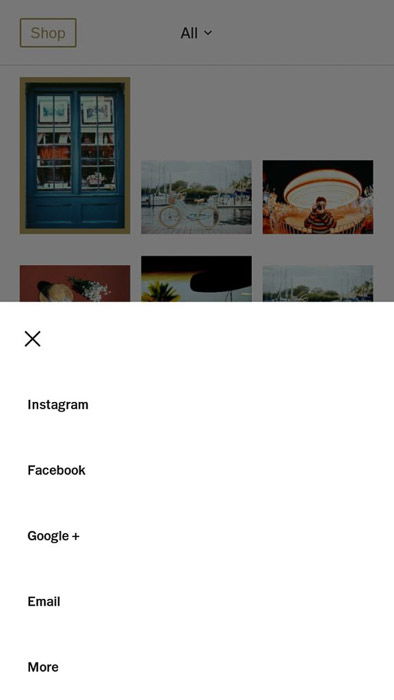
Share Your Work Directly From VSCO App
Of course, what’s the point of using VSCO filters if you can’t share it? The first step is to tap Save once you finish editing. Next, press the icon with the three bars and select Share to upload your work on social media.
You can then choose to post your work on Instagram, Facebook, or send your photo via an email. Of course, it goes without saying that you need to have those social media apps on your phone as well. Otherwise, VSCO won’t be able to post to your profile.
You also have the option to publish your work on VSCO itself. Instead of hitting Save after editing your photo, tap Publish beside it, instead.
The image will then show up on your VSCO feed.
Conclusion
VSCO filters can make a lot of difference when it comes to improving your images. So if you’re serious about social media, you should have the VSCO app on your phone.
You don’t even need to have VSCO X since the free version will cover most of your needs.
For more on mobile photo editing apps, check this article, or have a look at our guide of best instagram filters apps!
Before you go, check out this cool video we found!
