
There are two ways you can get an image from the concept to a printed copy. These are scanning film negatives or capturing scenes by using your DSLR or mirrorless system.
There are a few scanning software possibilities available for you to use. VueScan is one of these options. Let’s see if VueScan holds up to its reputation as the best film scanning software around. We’ll also compare VueScan to EPSON Scan.
Why Vuescan Scanning Negatives is Important
Scanning is often the process you use when you want to digitalise your negatives. The other option is printing your image in a darkroom and scanning it afterwards. However, with this method, you will lose more quality than by scanning negatives.
If you are shooting color negative films, you might not have the capabilities to print them yourself. This process requires you to invest time, precision, and money into a kit. Developing is also technically challenging.
Scanning and printing your images hold a lot of weight outside of capturing the image. Scanning makes it possible to edit and improve your picture for that unique print or share your work online. You should not forget to include your analog photos in your online portfolio, site, or social media feed.
Scanning is also crucial for photographers who can’t afford to have their images printed. There are increasingly fewer photo labs that have darkrooms and a workforce to print out negatives.
It’s more cost-efficient to buy a scanner and scan yourself at home than going into a lab and asking them to scan it.
Your film scanner and scanning software need to create the highest quality image possible. When it comes to scanning, you are looking to get as much detail as you can. This allows for a better base to edit the image in Lightroom, Photoshop, or any other editing software.
Your scanning software needs to have a broad capacity for making adjustments to the scene. Contrast, brightness, highlights, and shadows all play their part in photo scanning. It is up to your personal preference which adjustments you apply during the process.

First Thoughts About VueScan
The VueScan interface feels out of date. Rather than a graphic interface, you’re faced with lines of options. That said, this is true for most scanning software!
But some programs, like EPSON Scan, do use graphics to make the design more accessible.
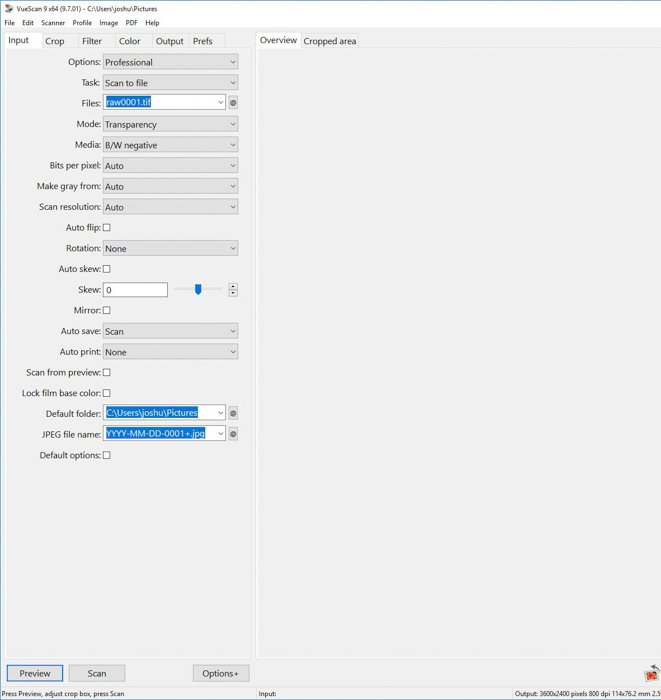
With the Vuescan interface, you’ll see six tabs. This interface is where all of your tweaking capabilities are. These are Input, Crop, Filter, Color, Output, and Prefs.
Each tab has a host of sliders and options. It does make it challenging to determine what you want to use. A lot of experimentation is needed. But, having more options allows you to take full control over every feature and element.
Overall, it is fast to use and navigate once you get the hang of it. The options are laid out in an intuitive way that becomes easier to use over time.
Which Scanning Modes Does it Offer?
There are three different modes to scan your images. These are Basic, Standard, and Professional. These can be found under the drop-down menu in the Options box in the Input panel.
Basic
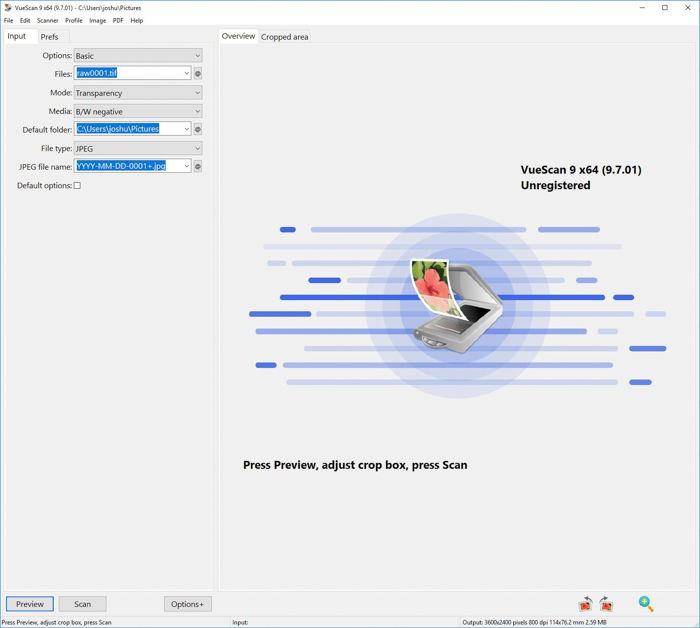
Use the basic mode to get familiar with the program and how it works. In this mode, you and Input and Prefs tabs.
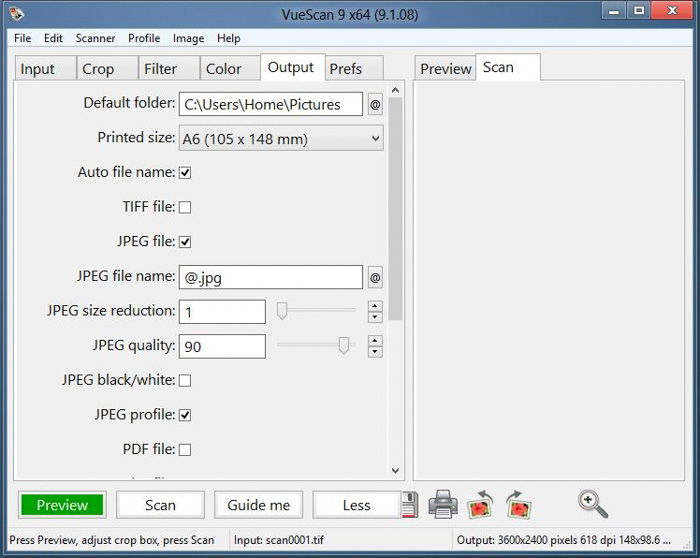
In the Input tab, you can choose the file name of the scan and where to save it. You can change the scanning mode to flatbed or transparency. When you choose flatbed, the scanner works as a document scanner in the same way it would for a normal paper or printed photo. Transparency mode is more suitable for the negatives.
By using the media drop-down, you can select Image, Slide Film, Color or Black and White film. The file type allows you to save it in JPEG, TIFF, or PDF.
You will not be able to modify the scanning resolution. But, it might be good enough for what you need. The default output is 3600 x 2400 pixels at 618 DPI, which has a file size of 2.59MB.
In Basic mode, you can easily scan images. This mode is helpful if you don’t want to edit or print large photos. It also comes in handy if you are scanning a mass amount of images and you need to do it quickly.
The Basic mode is best for enthusiasts who are starting to scan. But, it’s surprising that Vuescan also allows you to use previously scanned RAW images for editing through scanning. We’ll look at this a little later.
As a basic platform, this is a pretty good setup. It has most, if not all, the things an enthusiast needs to scan their images quickly.
Standard
The Standard mode is for those who want more options but are not ready to change all the settings on their own. You can access this with the drop-down menu in the options box or by clicking Options+ at the bottom of the options area.
Here, you get all the tools from Basic mode plus a few more. Inbetween the Input and Prefs tabs, you’ll find Crop, Filter, Color, and Output.
The Crop tool can change the area you want to scan. It allows you to keep the default area or choose a size between 6×4.5″ to 6×9″. These are more for medium format films, as they differ in image ratio from the standard 35mm.
There are options for APS films, slides, or changing the area to the maximum size. Manual mode gives you the chance to select the area best for you, whereas Auto will choose what it thinks is the best.
The Filter tab allows you to restore colors, restore fading, and sharpen. “Restore colours” means making the RGB colors more independent, allowing them to be tweaked.
If you have used slides or negative films where the color started to shift, then use the “restore fading” setting to bring it back to its former glory. “Sharpen” activates a mask that makes your image look crisp.
These tools are handy, but you don’t have a choice on the strength of these filters.
The Color tab allows you to correct the white balance, black and white points, and brightness. There are even profiles for different films, making sure your scans keep their signature look.
Output is where you save your images, in what format and at what size. You are offered a range of 3×5″ to 12×17″ and premade sizes of A3 to A6.
Professional
The Professional mode is the option that gives you all the tools and features available. This mode is for non-beginner photographers who want the full range of possibilities when scanning negatives.
Activating this mode doesn’t add more tabs, but it does expand the options you find in every tab. You get everything you need from the Standard mode and more.
In the Input Tab, you get to refine your scan to “Bits per pixel” (color depth) and “Make grey from” (using color filters to convert to black and white). These are useful options to keep in mind when thinking about post-processing an image. They help prevent further information loss when editing in different programs.
You can also rotate and skew the image in this tab, if necessary.
The Crop tab allows you to lock the aspect ratio (which saves time for same sized negatives or prints) and allows for borders. The only addition in the Filter tab is “Grain reduction”, which goes from light to heavy.
In the Color tab, you’ll find many settings you can tweak. You can now raise or lower the brightness of each RGB color. You can change the color space for the scanner, printer, or file you will use.
With the Output tab, you can add Metadata and Watermarks to your images, among other features.
This is a true professional mode for those who want full control.
Scanning in VueScan
Previewing Images
The first step in scanning your negatives or slides is the preview tool. Preview works across all types and brands of scanner. This shows you where the negatives lay, allowing you to choose which frames to select.
You won’t see the levels of color in your scene or if it is in focus. But it will give you a good idea of what will be scanned. This is the first area that will allow you to crop or apply the settings you desire for the full scan.
To start, you need to lay down your negatives directly onto the scanner bed (flatbed scanner) by using film holders. Then, set the software to scan for “Wide Transparencies”. This will show you the preview of every frame.
Then, you can either crop the areas you want to scan by removing borders and film edges. There is an Auto option where the software will attempt to select where it thinks the frames are. It is not recommended to do so, as it often results in uneven cropping, especially when scanning roll film of different ratios.
We use the EPSON V700 scanner. At the time of purchase, it was the best non-industrial solution around. It comes equipped with two lenses. One focuses on the film holders, and the other on the glass. Everything in between is sharp.
Selection size relates to the output resolution. For instance, it’s not wise to scan more frames at once because the effective resolution will be smaller than scanning just one frame.
To scan the entire section of negatives, select “Transparency” and go for the 8×10 option in VueScan. It will show you everything, even the parts you don’t want.
This works in Professional mode, which will allow you to “Marquee” and then crop out the negatives from its’ borders.
Scan From a Selection
Once the preview shows you the entire area, you need to select a shot to work with next. With VueScan, you are free to zoom into the image.
The trade-off here is that the zoomed-in image in VueScan has a low resolution. But, it is perfectly capable of letting you select your shots precisely. To do this, use the Marquee tool and Crop feature.
Once you have the image selected, we can start the real fun. This is where you decide your workflow in scanning every one of your pictures.
Most users want to scan their images without much editing—for example, printing in generic 5×7″ size for a family scrapbook.
If you’re looking to scan for more complex editing and printing, then you need more detail in your scans. There are several settings you will need to consider.
You’ll need to look at every element of the histogram, and therefore, tonal range. Just like when you capture a scene, you don’t want the shadows too dark or the highlights to be blown out.
You can always leave the scanned images a little flat and bland, as you can use your editing software of choice to bring out all the detail.
The sliders have names to make them easier to use, such as “Color Neutral” and “Brightness”. Others, such as “Curve Height”, need more time to learn to use.
Playing around with each slider will help build your knowledge base and accelerate your workflow.
VueScan seems to have it all, even if you don’t fully understand all of the tools.
VueScan also allows you to save your files as TIFFs. This is a lossless image file format that then lets you go back and reinsert it into the scanning program to make another version.
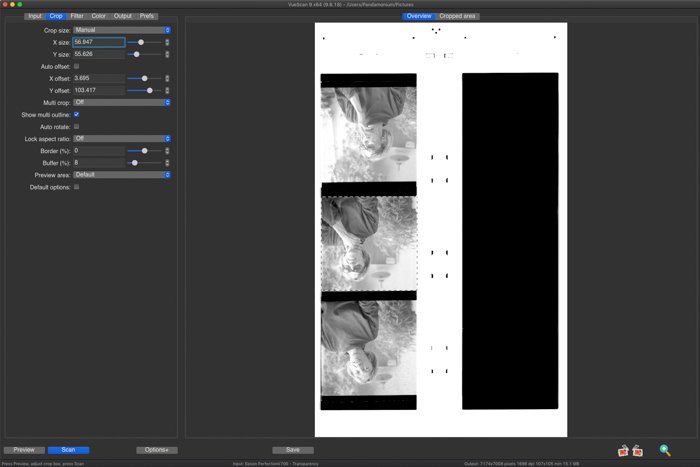
Image Quality
When it comes to image quality, you want the best you can afford. The image quality depends more on the scanner itself than the software you use to digitalise your images.
Ideally, you should complete any sharpening in your editing software for high-quality images.

Pros and Cons
VueScan is packed full of useful features. They have outdone themselves when it comes to possibilities on what you can do by using all of these options.
But, on the flip side, the interface is cluttered with too many options that can make it confusing.
We love that VueScan is great for premade color profiles. You’ll find a range of particular film profiles, such as Portra 400. This feature provides you with a filter that helps give your shots a realistic rendering for that film type.
There are limitations for editing options, and it’s likely that you will end up polishing images later in Photoshop or Lightroom.
Vuescan vs EPSON Scan
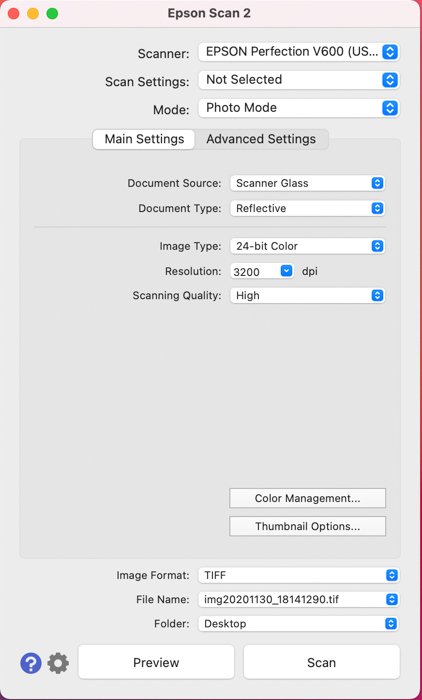
EPSON Scan has a Home mode which is comparable to VueScan’s Standard mode. Here, you can change the document type, image type, and specify the resolution for the scan.
There are Image Adjustments you can add, such as color restoration and brightness. There is also an ICE tech adjustment, which is an intuitive program that removes dust from your image.
Overall, EPSON gets a huge plus as all the options are in one window. These tabs are easy to navigate, even if the features need research. With VueScan, everything is spread over many tabs.
But, EPSON Scan offers fewer features and settings. To compensate for this, you can save files as TIFFs and then edit the images in dedicated editing software.
Value for Money
EPSON Scan comes free with your EPSON scanner, or you can download it for free from the EPSON website.
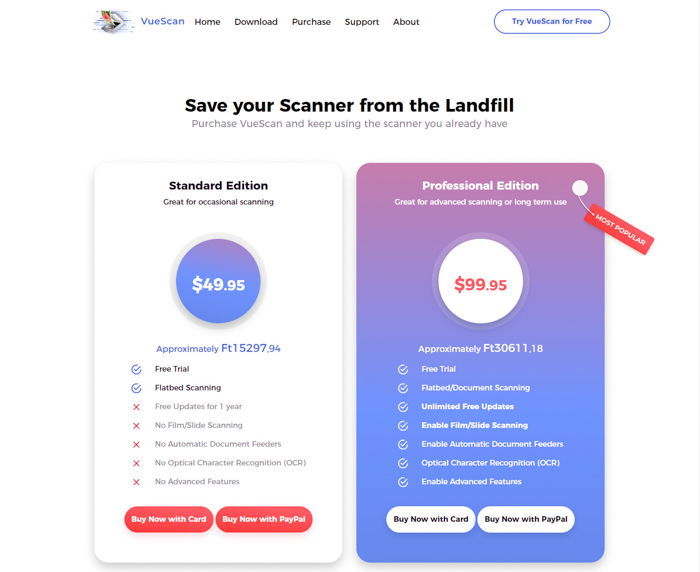
VueScan is free only for flatbed scanning. If you want to scan film, slides, or anything else in VueScan, you’ll need to pay. It’s $49.95 for the Standard Edition, or twice that for the Professional Edition.
Conclusion
If you rarely use a scanner, you’ll find that it takes longer to use VueScan over EPSON Scan. It takes some time to become familiar with the host of features available in VueScan.
But, VueScan suffers from having too many features which are rarely used. This also makes the interface overwhelming due to the sheer number of options.
If you’re looking for useful and free scanning software, look no further than EPSON Scan.
Next, why not check out our articles on where to buy film cameras or choosing the best black and white film.
Ready to edit your scanned images? Try our step-by-step guide on editing in Lightroom.
