These 30 creative photography ideas give you a technique to practice each day. Some focus on cool photoshoot ideas or still life. Others use photo editing to combine or transform images. Many can be started at home, while others need a suitable outdoor location or a more controlled setup.
Use the list as a 30-day photography project, or choose one of the experimental techniques that fits the equipment and space you have. Each idea points to a guide for the full setup.
Choose a Project for the Setup You Have
Start with one technique you can try with your current equipment. These options use ideas from the list below. The linked guide for each day explains the setup in more detail.
| If you have | Start with | What to practice |
|---|---|---|
| A tripod, a flashlight, and a dark space | Day 5: Light graffiti | Relate the movement of the light to the exposure time |
| Oil, water, and a colorful background | Day 10: Oil and water | Change the framing to find abstract shapes |
| Soap bubbles and a way to photograph them close up | Day 15: Bubble photography | Explore changing colors and curved surfaces |
| Several photos of one subject and an editor that supports layers | Day 11: Photomontage | Combine different views into one composition |
You do not have to complete the projects in order. Pick one, review your result, and change one part of the setup before trying again.
30 Creative Photography Ideas
Here are our top ideas. Bookmark this link and refer to it for the next 30 days. You can also involve your family and friends and create great wall art or gifts!
The editing projects use tools such as layers, masks, or image-distortion filters. Adobe Photoshop supports these workflows; some can also be done with free editing software. Check the linked guide before choosing your editor.
Day 1. Spiral Light Photography
For our first creative project, grab a flashlight. We’re making spirals of light!
Spiral light photography is a type of light painting. Leave the shutter open and paint swirls, twirls, and circles.
Move a small light in circles while the shutter is open to record a spiral trail. Use a colored LED or a colored gel over the flashlight to change the trail’s color.
Start with a tripod, a camera that supports a long exposure, a dark space, and one small light. Ask a friend to move the light while you operate the camera. Add more lights only after you can control the first trail.
Use the spiral light guide linked above for the setup. For another abstract project, try photographing folded paper.
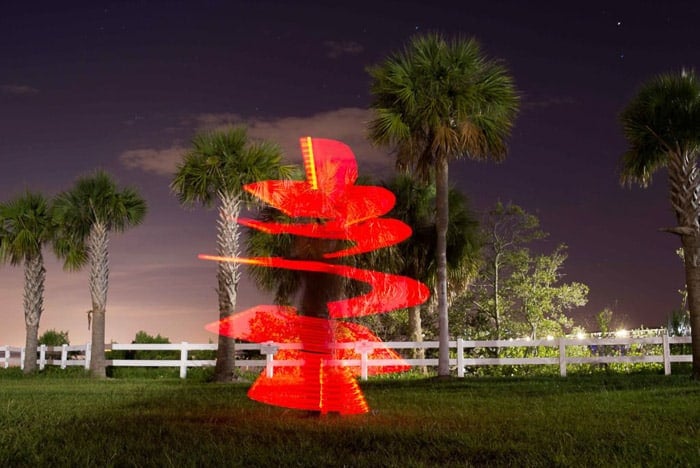
Red spiral light painting wrapped around a palm tree. © Chad Verzosa
Day 2. High-Speed Photography
Get ready. This creative photography idea is about catching a quick shot.
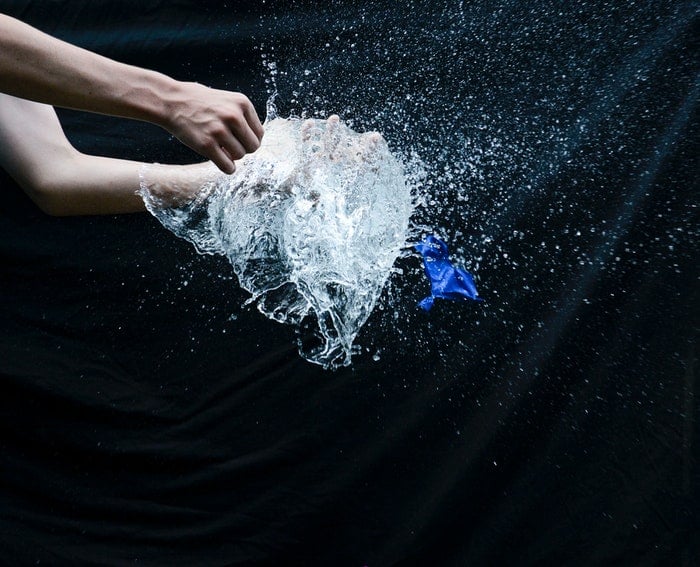
High-speed photography is about freezing motion. Look for moving vehicles, birds in flight, or children at play. Photograph something that happens in the blink of an eye.
With continuous light, use a fast shutter speed to limit motion blur. In a dark flash-lit setup, a short flash duration can freeze action such as the bursting balloon below. Shutter speed and flash duration are different parts of the exposure.
See our high-speed photo guide for our best tips on freezing motion.
Day 3. Light Trail Photography
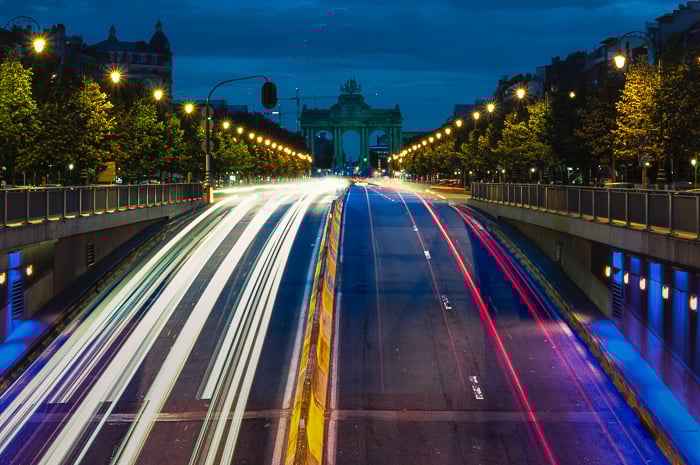
Light trail photography records moving lights as streaks. Try traffic from a safe pedestrian viewpoint or another moving light source you can photograph without entering its path.
With your camera on a tripod, set a long shutter speed. The slow shutter speed is your secret ingredient in capturing these shots. Moving lights will streak through the scene.
See our light trail guide for creative ways to capture the magical lights around us.
Day 4. Long Exposure (Daytime)
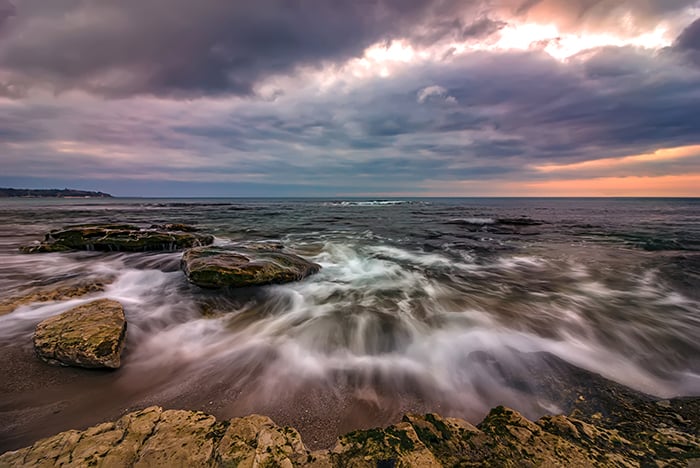
Long exposure can change the appearance of a scene. It can turn clouds into streaks and make moving water look like glass. It adds atmosphere while keeping the focus on the important parts.
This style of photography can blur moving subjects. A person passing quickly through a long exposure may become faint, but movement does not guarantee that they disappear.
In bright daylight, a neutral density (ND) filter reduces the light reaching the sensor so you can use a slower shutter speed. Keep the camera steady on a tripod. Read our daytime long exposure guide for the setup and compare different long exposure times.
Day 5. Light Graffiti
Want to send a message with your photography? Have some fun with light graffiti!
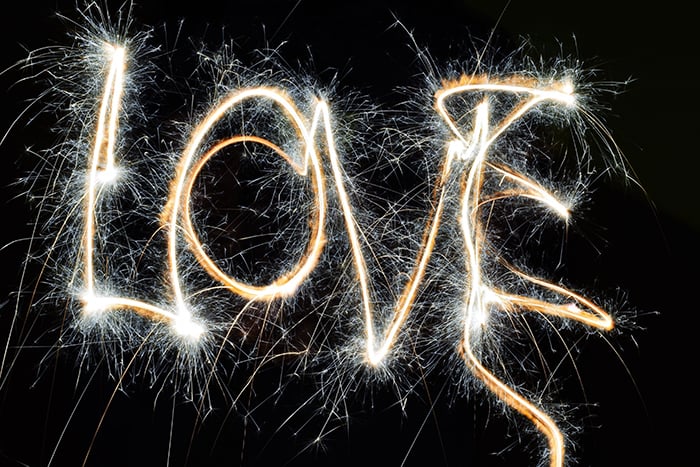
Draw a word or shape with a small LED light during a long exposure. The example below uses sparkler trails; use an LED for this practice project to avoid burning sparks.
All you need is a slow shutter speed, a tripod, a light source, and patience. Stand in front of the camera and paint away. You’ll have to complete your image or word before the exposure finishes!
You can read our article on light graffiti for all the help you need.
Day 6. Abstract Macro Photography
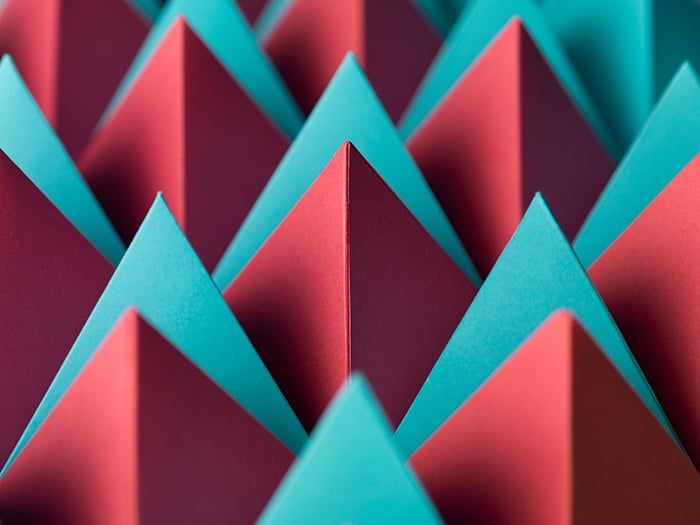
Today is the day to explore small subjects. Macro photography records fine detail at high magnification. For an abstract close-up, look for patterns, textures, or shapes that are hard to recognize out of context.
At a 1:1 reproduction ratio, the subject is recorded at life size on the camera sensor. A larger-than-life image has a higher magnification. A macro lens or extension tubes can help you focus close, but the magnification you reach depends on the setup. You can still explore abstract close-ups without reaching 1:1.
This creative idea is all about inspiring you to see your world differently. Look around the house. You can photograph anything!
Our abstract macro photo guide is full of creative photo ideas you can do in your kitchen.
Day 7. Crystal Ball
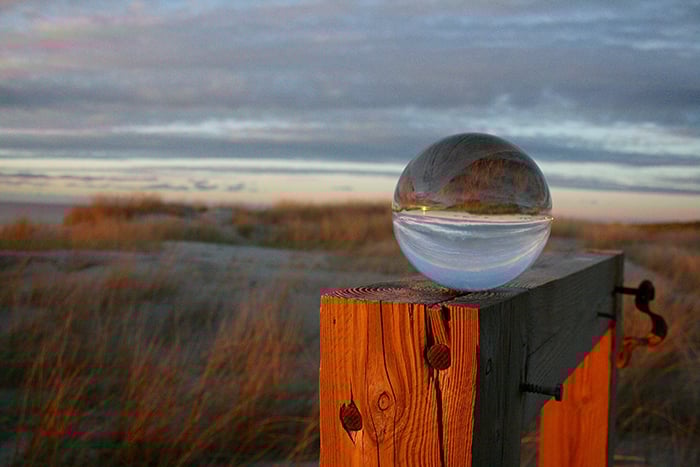
Crystal balls add a magical dimension and a new perspective to your photos.
A clear glass ball can show an inverted view of the scene within it while the surrounding view stays upright. Compare where you place the ball in the frame and what appears behind it.
A clear, water-filled wine glass can also distort the scene behind it. The result depends on the shape of the glass and your viewpoint, so compare it with the ball rather than expecting an identical image.
Read our crystal ball photography article for all the information you need and some inspiration to get you started.
Day 8. Colorful Water Drops
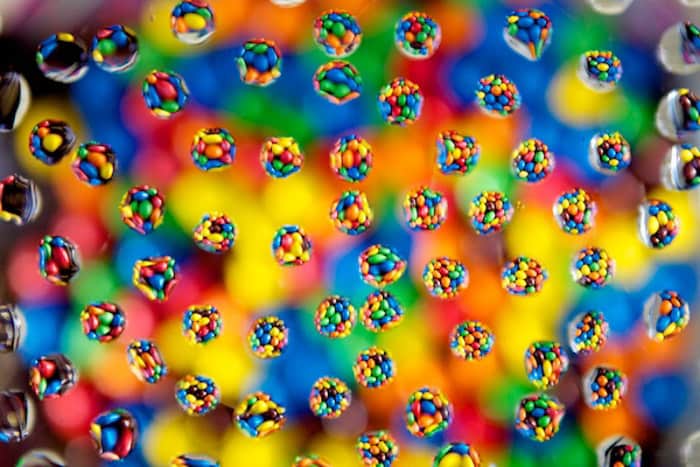
Capturing colorful waterdrops is today’s creative photography idea. This is an excellent way to bring out shape and form, color, and texture in a photo.
The water droplets act like small lenses, showing repeated views of the background. This differs from the separate oil-and-water project on Day 10.
Use a colorful background with a clear pattern. Secure a clean glass sheet above it, add water drops, and focus on the drops. Change the gap between the glass and background to compare the repeated shapes and the blur. Keep the camera and electrical equipment clear of spills.
See our water drop photography guide for more ideas.
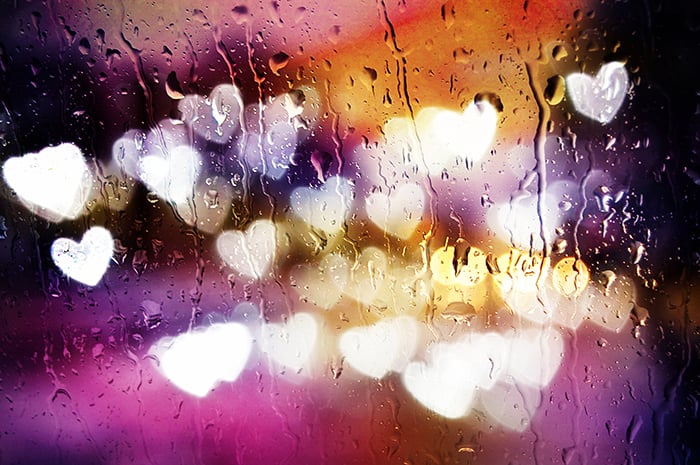
Day 9. Custom Bokeh
Make a creative photo with custom-shaped out-of-focus highlights. Bokeh refers to the appearance of the blur in a photograph, not only the shape of bright spots. A shaped opening cut into black card can change the outline of those highlights.
Bokeh can be the subject or add interest to the background. Create a still life and use Christmas lights to create bokeh in the background.
A wide aperture and creative blur are key to achieving this technique.
Get to know the simple trick of creating custom bokeh. You’ll come up with all sorts of creative photography ideas.
See our custom bokeh guide for instructions on how to create specific shapes.
Day 10. Oil and Water
Some things aren’t meant to go together, like oil and water. But this is the inspiration for our next photography idea.
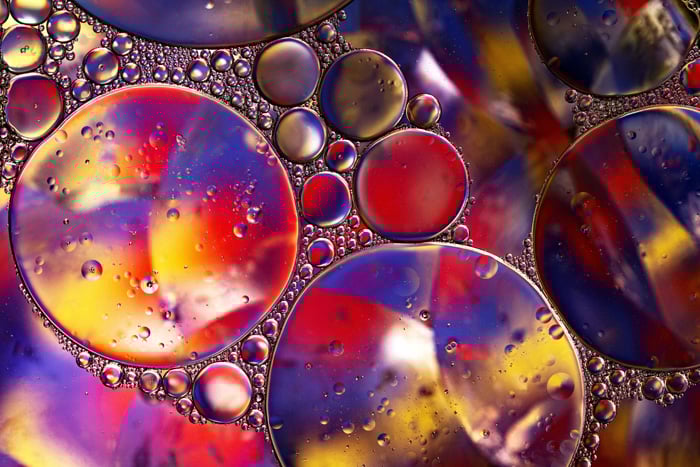
Add a little oil to water in a clear dish, then photograph the floating shapes from close up. Place a colorful background beneath the dish and light the setup. Change your framing and the distance to the backdrop to compare patterns.
Oil and water remain separate, creating rounded patches and smaller droplets. Look for an arrangement of color and shape that works as abstract photography.
Read our article on abstract oil and water photography for how to capture and perfect this idea.
Day 11. Photomontage
Today’s creative photography idea is making a photomontage.
To make one, take many photos of the same subject. Then layer them together in a post-processing program to create a single image.
The exciting and creative part is the layering of the images. You have so many choices on how you can do it!
The technique adds depth and a different perspective. You can take many images to show a wider perspective. You can even show multiple angles in one image.
Give it a try. But first, read our photomontage article for inspiration and to ensure you have everything you need.
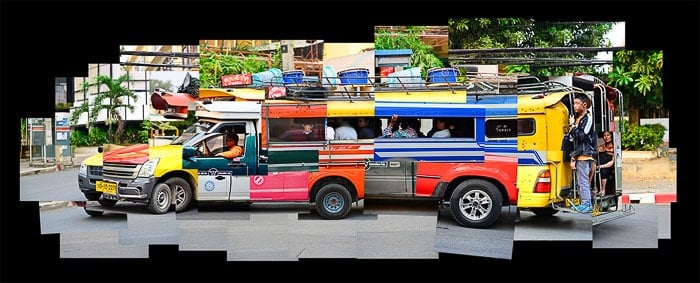
A photo montage of a brightly colored van. It’s comprised of many singular photos. © Kevin Landwer-Johan
Day 12. Photoelasticity
This project creates rainbow-like colors in clear objects using polarized light.
Photoelasticity lets you see patterns associated with stress in transparent materials. For this photography project, place a clear plastic object between a source of polarized light and a polarizing filter.
Try a clear plastic utensil or container in front of a white LCD screen, then view it through the filter. Rotate the filter to look for a dark background and colored patterns in the object.
An LCD can supply polarized light for this setup. Screen technology and the plastic object matter, so do not assume every phone or display will give the same result.
Still-life photography comes to life with this technique. The camera angles and compositions are down to you. Focus on shape and form or something very abstract.
See our photoelasticity guide for getting started. You may be surprised at how many rainbows you can photograph around the house.
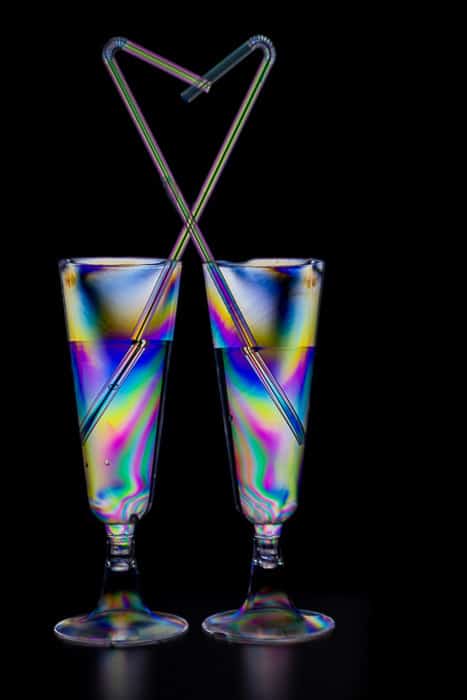
Glasses filled with a multi-colored photoelasticity effect. © Andrea Minoia
Day 13. Steel Wool Photography
Steel wool photography records trails from burning sparks. It is an advanced fire effect, not an indoor project.
The long exposure in the example below captures sparks as curved streaks. Those sparks can start a fire or damage property; a dark open space alone does not make the activity safe.
Read the hazards in our steel wool guide before considering it, and check permission and current fire restrictions for the location. For this challenge, you can practice curved trails with an LED light using Day 1 or Day 5 instead.
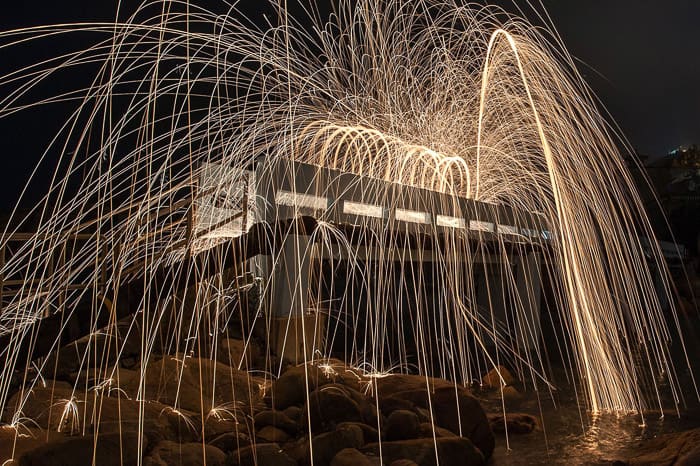
Steel wool photography around a building at night. © Kevin Choi
Day 14. Transferring Photos Onto Wood
Today, let’s do a bit of imaginative printing.
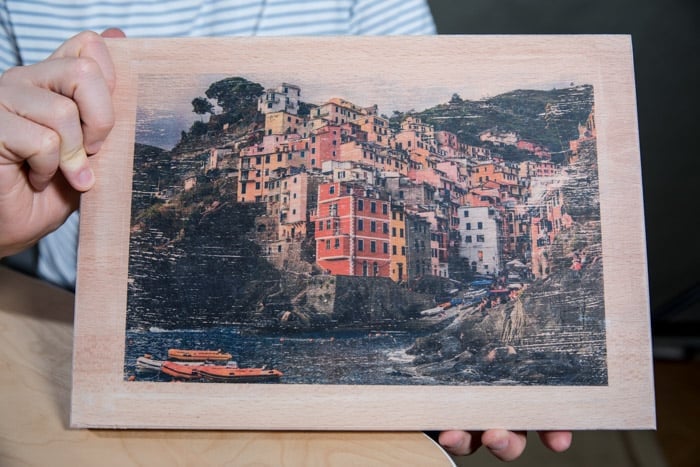
Transfer a photograph onto wood so its grain becomes part of the finished display. Choose a picture whose detail will still read against that texture.
Choose the transfer method first, then match the wood preparation, print type, and transfer medium to its instructions. Methods that use a laser print are not interchangeable with every inkjet process.
A wood transfer can make a personal photo gift. Try a small test print first to see how the wood grain and transfer affect the image.
A couple of techniques are used to get a paper print onto a piece of wood. Read our step-by-step guide on how to create wood prints.
Day 15. Bubble Photography
Bubbles aren’t only for children. They’re also great photography subjects.
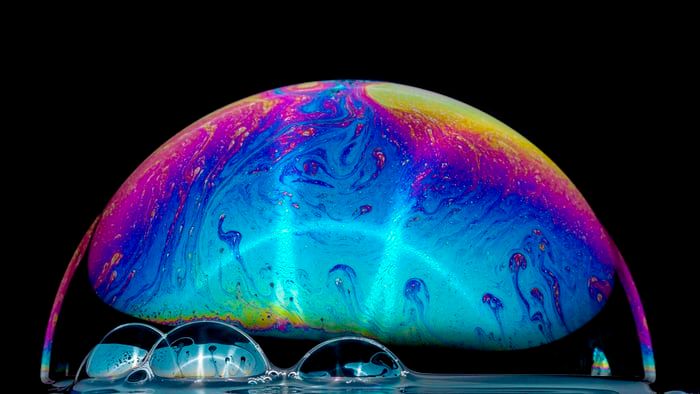
Bubbles have colors and are reflective. They are visually engaging and make for fantastic abstract images.
Focus on the curved surface and compare how the colors change. A close-up like the one below can make the bubble look unlike an everyday object.
You will need bubble solution, a way to form a bubble, suitable light, and a camera that can focus close enough for your composition. Read our article about bubble photography for the mixture and lighting setup.
Day 16. Harris Shutter Effect
Today’s photography idea focuses on creating the Harris shutter effect in post-processing.
The Harris shutter effect has roots in film photography. Its red, green, and blue records are captured at different moments. Combining them gives moving parts colored fringes while unchanged parts can line up.
For a digital version, keep the camera still and take three frames of a moving subject. Use an editor that lets you isolate and combine color channels.
See our Harris shutter effect guide for a worked editing example.
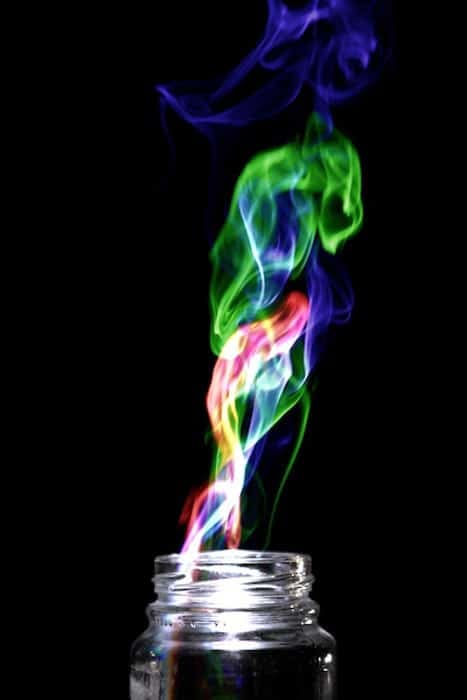
Multi-colored smoke using the Harris effect.
Day 17. Slow Sync Flash
Slow sync flash combines a long shutter exposure with a brief flash. The flash can record a sharp image of the subject, while the ambient light records the background and any motion blur.
Add flash to a long exposure and compare the two kinds of light. Use a tripod if you want the stationary background sharp. Handholding can add camera movement to the blur; flash does not remove it from the whole frame.
Our slow sync flash guide tells you everything you need to know.
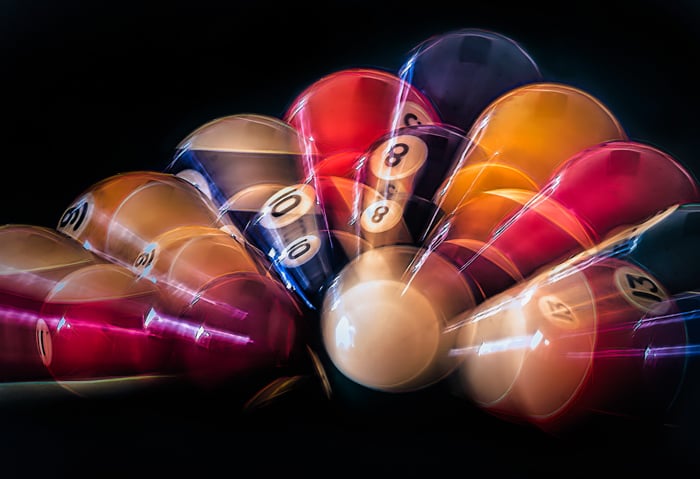
© Robert Zunikoff
Day 18. Smoke Photography
Add drama to your still-life photography by adding smoke. The idea is simple, but grabbing that particular look, shape, or form is tricky.
Think dark and mysterious, or focus on the abstract shapes of the smoke.
Incense and an extinguished candle can produce visible smoke, but they involve heat or smoldering material. Work in a ventilated area with a stable heatproof holder and keep combustible props away. Backlighting can help separate smoke from a dark background.
Everything you need to know is in our smoke photo guide. And it’s full of inspirational photography ideas.

A still-life smoke photo with glass bottles, silhouettes of a unicorn, and billowing smoke behind. © Dina Belenko
Day 19. Water Drop Photography
A water drop gives you a small moving subject to photograph. A tripod, controlled lighting, and a repeatable way to release the drop make it easier to compare attempts.
Photograph drops falling into a bowl of water. Try to freeze a drop or the shape that forms as it hits the surface. Change one part of the setup at a time, such as drop height or release timing, rather than expecting height alone to determine the splash.
Water droplets add motion and interest to product or food photography. They even work as abstract art on their own.
You can be as creative as you want! Our water drop guide is full of incredible photo ideas.
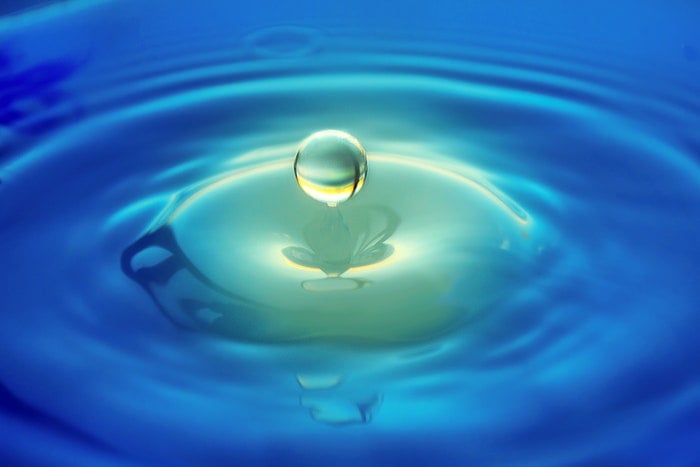
Day 20. Water Splash Photography
Water splash photography is a creative way to make your food and drink photography stand out.
But moving water adds dynamic motion to any still life. Falling water gives a feeling of a cold drink on a hot summer’s day. Or it adds a sense of surprise like a bucket of cold water.
Set the camera on a tripod, arrange the still life, and leave room for the splash. With flash as the main light, a short flash duration can help freeze the water. Keep the lights and camera outside the splash area and expect to make several attempts.
Our water splash guide gives you all the information you need to take these dynamic photos.
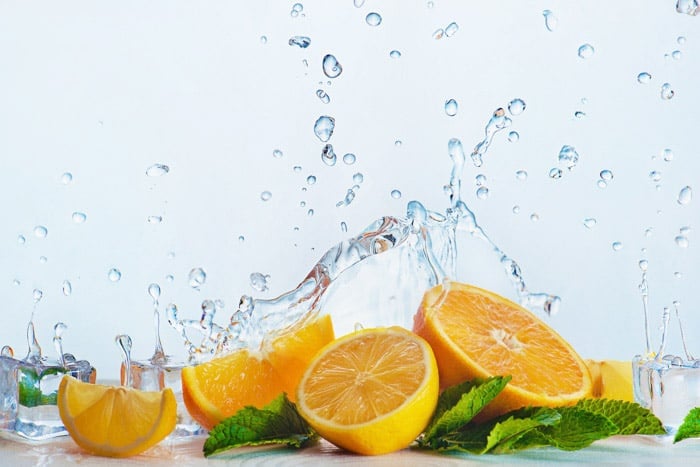
A cool water splash caught frozen in time. © Dina Belenko
Day 21. Fence Cut-Out Photography
It’s time for a photoshoot. We use a practical chain link fence to create a layered portrait.
Put your camera on a tripod and place your model behind the fence. Take one frame focused on the model and another focused on the fence, keeping the composition and pose as steady as possible. In post-processing, combine selected parts of the two frames.
This project may inspire many creative photography ideas. It mixes portrait photography with photo manipulation.
Our guide to cut-out Photoshop projects shows you how to combine the images in post-processing.
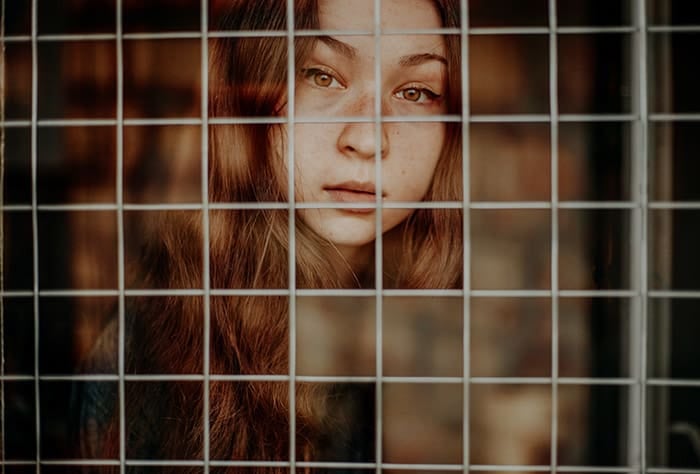
A cut-out photo portrait of a brown-haired girl behind a chain fence. © Taya Ivanova
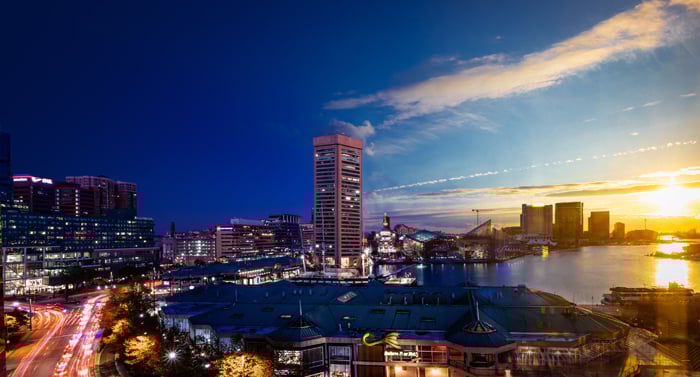
Day 22. Day-to-Night Photography
Today’s creative photography idea combines the best of two worlds—day and night photography.
Pick a scene you can photograph from the same viewpoint during the day and at night. Keep the framing consistent so the two images can be aligned and blended.
Read our full day-to-night photography article on how to combine the two.
Day 23. Double Exposure
Have you ever tried to create a double exposure? If not, today’s the day.
Double exposures creatively combine two images into one. They can add texture to a scene or tell a story by layering one image on top of another.
Capture two separate photos that you want to combine. They can be related or deliberately different. Layer and blend them into one image, comparing how their bright and dark areas interact.
You can use a post-processing program. But check to see if your camera makes double exposures. Some do!
See our double exposure article for tips and inspirational photography ideas.
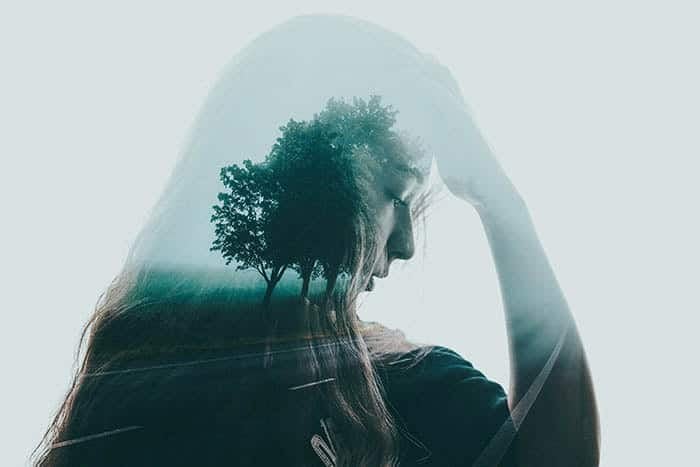
Double exposure of a girl layered with a photo of trees lining a road. © Taya Ivanova
Day 24. Hidden Camera Trick
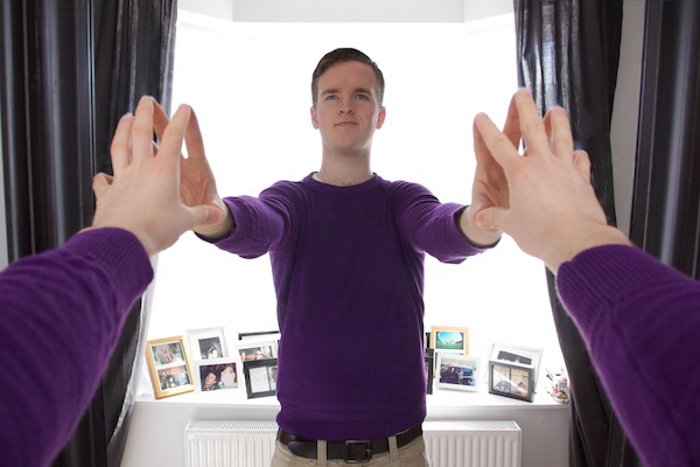
Let’s have a bit of fun today with a household mirror. In this creative photography idea, you take a self-portrait in a mirror. The twist is that we make the camera disappear!
Take several frames with the camera in different positions, then use the clear parts of each reflection to hide it in the final image. Keep the mirror and viewpoint consistent enough to align the frames.
Follow our simple step-by-step mirror selfie guide. You can create interesting self-portraits without a camera hiding your face.
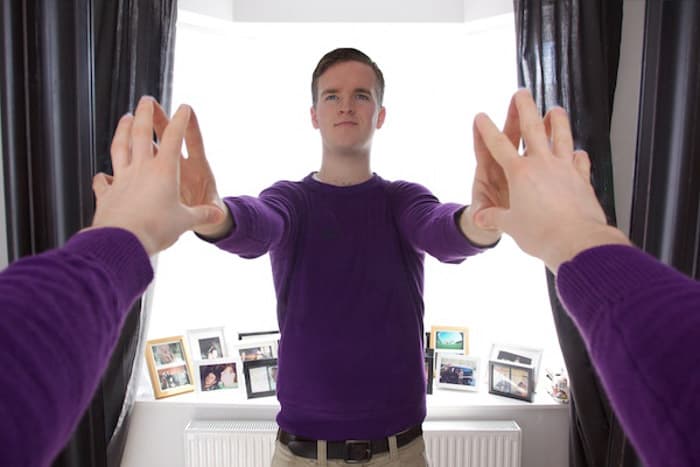
© Josh Dunlop
Day 25. Miniature Planet Panoramas
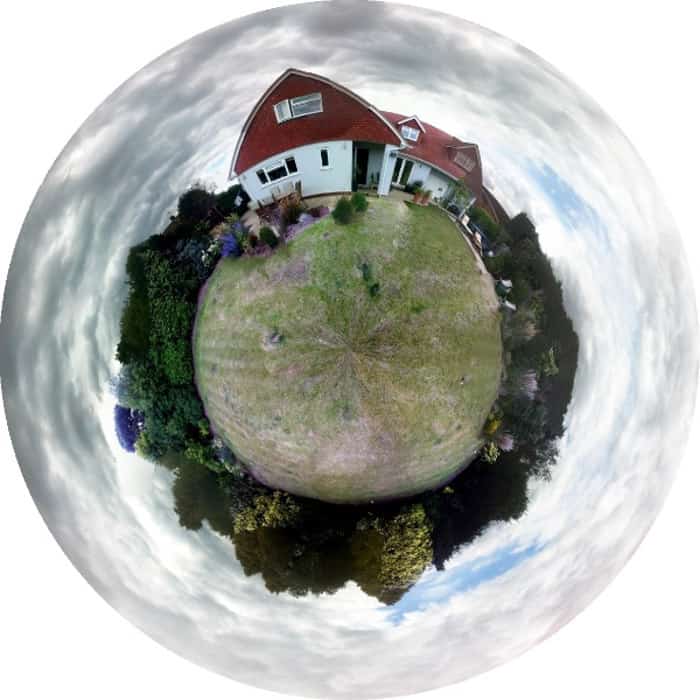
Make a little planet by wrapping a scene into a circle in post-processing. Start with a panorama or a scene whose left and right edges can meet without an obvious seam.
Both Photoshop and GIMP have a Polar Coordinates filter. The linked tutorial explains how to prepare the image before applying it. A general mobile photo editor may not include this specific effect, so check its tools first.
Some images need seam cleanup or cropping after the transformation. Our little planet photography guide walks you through the steps.
Day 26. Multiplicity Photography
Get ready to clone yourself, friends, or family members. Today’s creative photography idea is to make a multiplicity photo.
Multiplicity photography is a perfect way to show a series of the same subject in a single image. Photograph a person or a pet doing something—playing, dancing, cooking. The changing movement is important.
Keep the camera fixed between frames and leave space between the subject’s positions. This gives you cleaner areas to combine when editing.
Our step-by-step multiplicity Photoshop guide shows you how to stitch the images together into one photo.
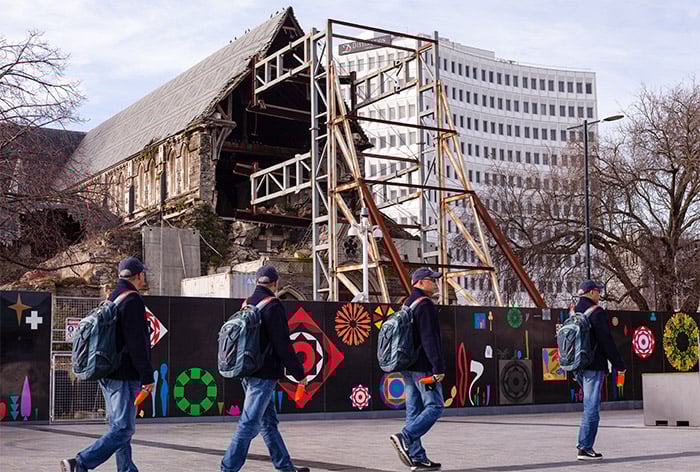
A multiplicity photography example. Four exposures of the same man walking down a street. © Heather Joy Milne
Day 27. Picasso Cross Section
The Picasso-style cross section combines front and side views of a face. The two views meet in one portrait, as in the example below.
Take two portraits: one facing the camera and one in side profile. Also photograph the empty background so you can fill areas around the combined face. Align and mask the layers in Photoshop to combine the views.
Try it as a creative self-portrait, then choose a version to share on social media.
Follow our step-by-step cross-section Photoshop guide for all the details.
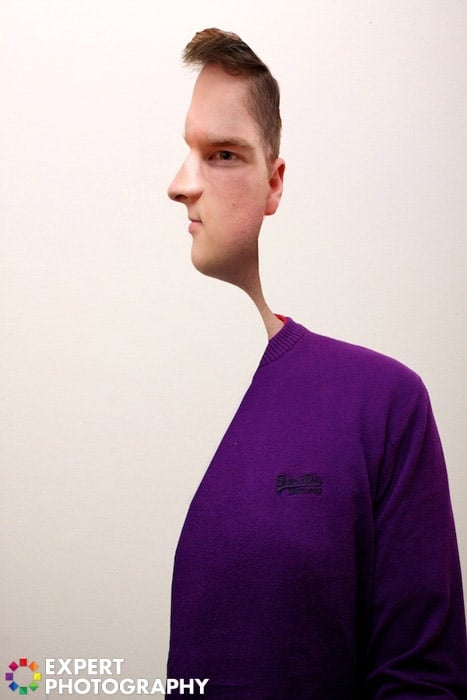
A creative cut-out effect, like a Picasso painting © Josh Dunlop
Day 28. The Droste Effect
The Droste effect repeats an image inside itself, often inside a frame or another visible boundary.
Resize and place a copy of the image inside that boundary. Repeating the process makes the picture suggest a sequence continuing inward.
Start with a clearly visible frame so you can align the smaller image. Our step-by-step Droste effect guide explains the edit.
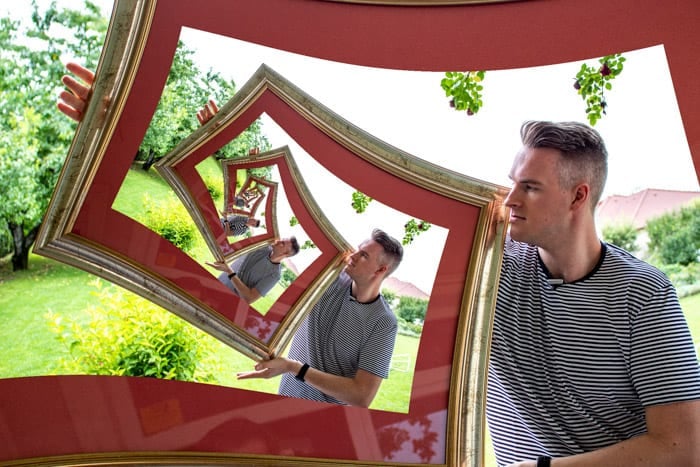
The Droste effect shot with the same image repeated within each picture frame. © Josh Dunlop
Day 29. Tilt-Shift Photography
A tilt-shift lens has two different movements: shift helps control converging lines in architectural photography, while tilt changes the plane of focus. This project simulates a selective-focus miniature look in post-processing; it does not reproduce every function of the lens.
A carefully placed band of sharpness, with blur around it, can give a scene a tilt-shift effect and suggest miniaturization. An elevated view of a street or town is a useful starting point.
Our step-by-step tilt-shift Photoshop guide shows you how to create this technique.
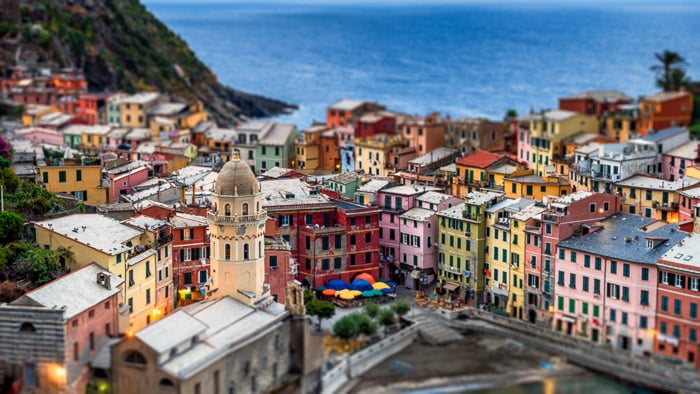
Day 30. Time-Lapse Photography
Time-lapse photography is a great way to show movement or how something changes over time.
A time-lapse shows a sequence of frames captured at intervals and played back as a video. This makes a slow change appear faster. A long exposure records one still image over a longer period; combining several moments into one still image is a different technique.
This is a great photography idea for lively cityscape photography, building projects, and blooming flowers.
Put your camera on a tripod and take a series of images over a period of time. You can use an intervalometer. It is a device that automatically takes pictures, so you don’t have to time the photos yourself.
Our guide to time-lapse photography settings helps you choose the interval and exposure for the scene.
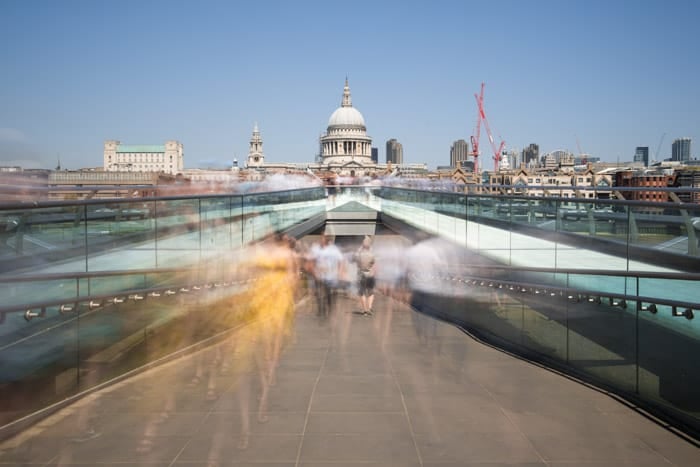
Motion-blurred pedestrians.
Conclusion: Creative Photography Ideas
Keep the results from each project so you can compare them as you practice. See our Instagram for inspiration and more creative photography ideas.
Below are some of the photos taken by students of our creative photography course. If you’d like to learn more, check out our Wow Factor Photography course.
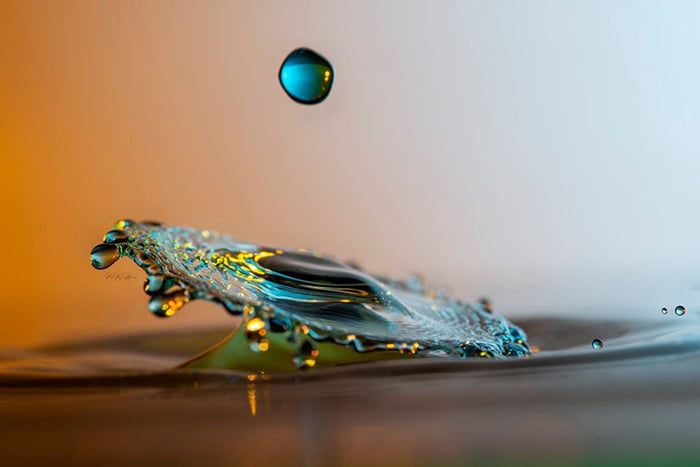
Water splash photography. © Debbie Fenton
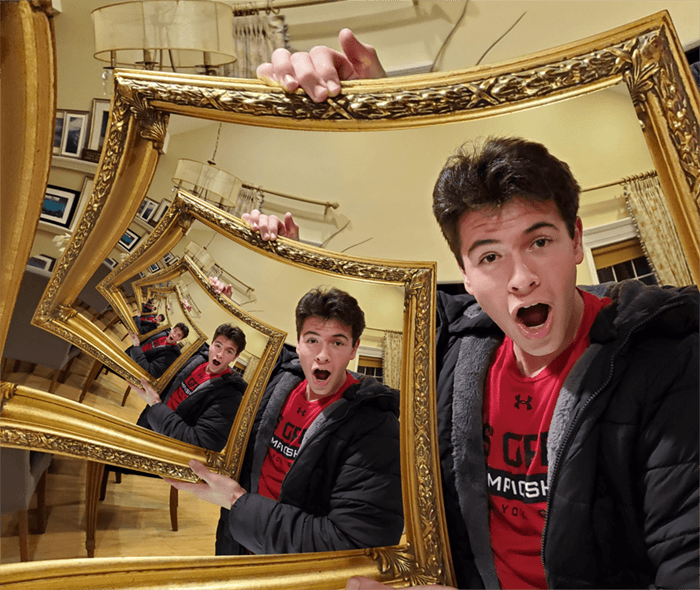
Droste effect photography. © McCormack
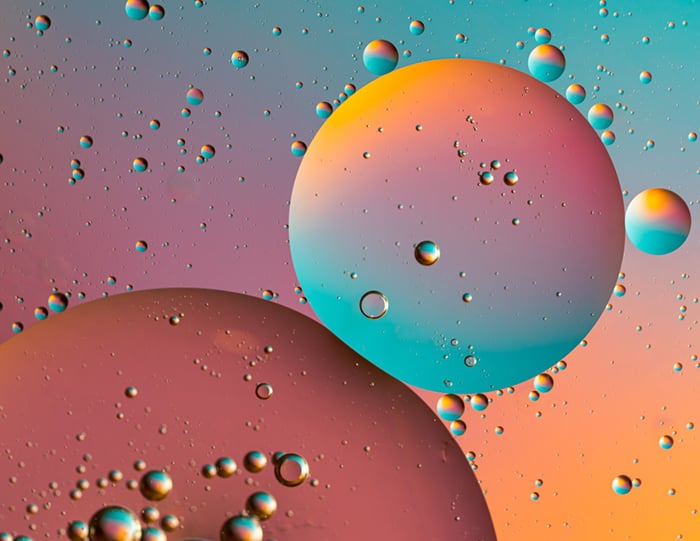
Oil and water photography. © Larry Cunningham
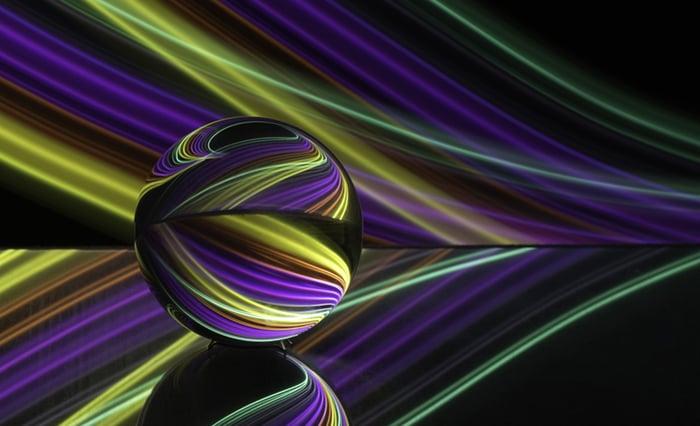
Crystal ball photography. © Joanne Luciani
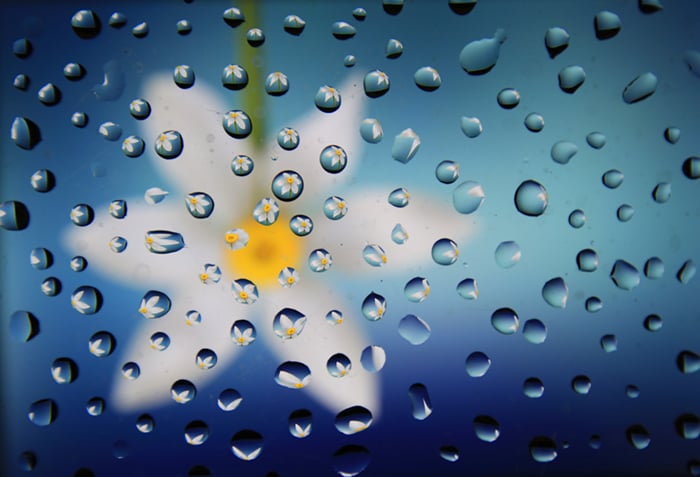
Colorful waterdrop photography. © Ersan Akarsu
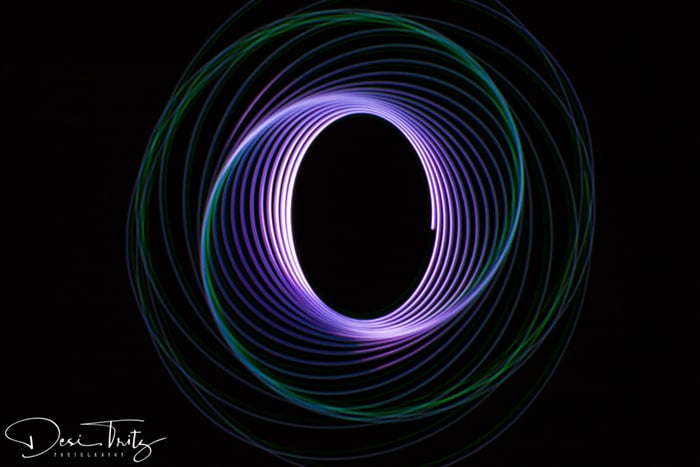
Spiral light photography. © Desirea Tritz
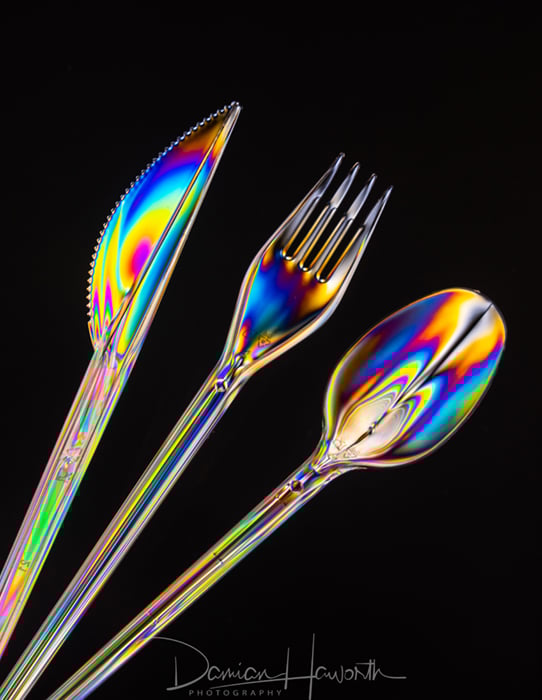
Photoelasticity. © Damian Haworth
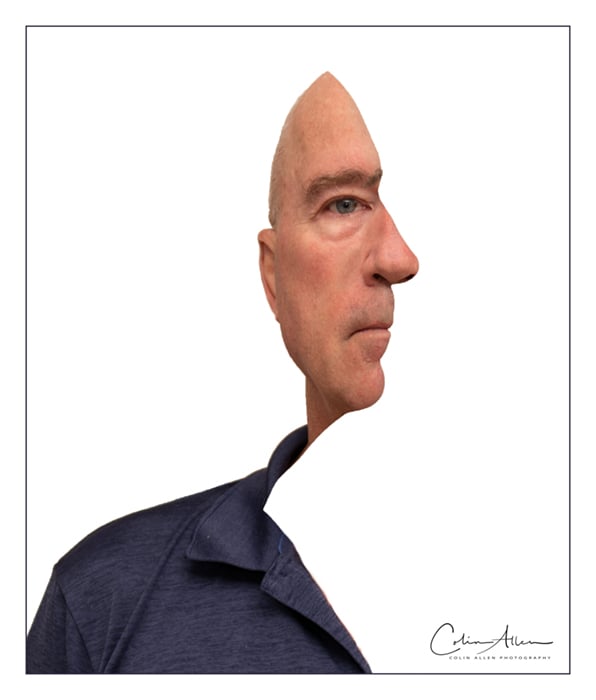
Picasso cross-section photography. © Colin Mincher-Allen
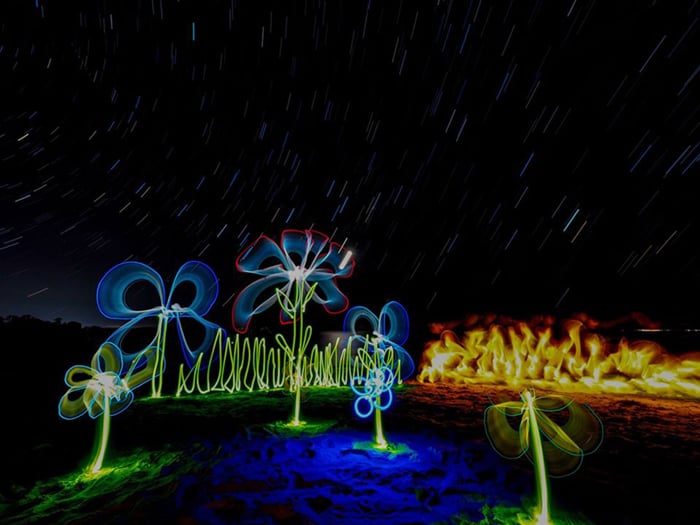
Light graffiti. © Chris Mcrobb
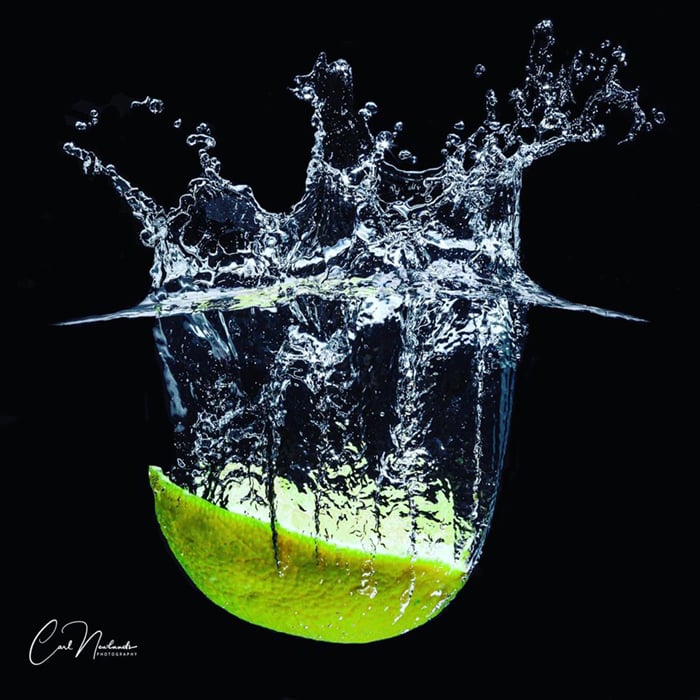
Water splash photography. © Carl Newlands
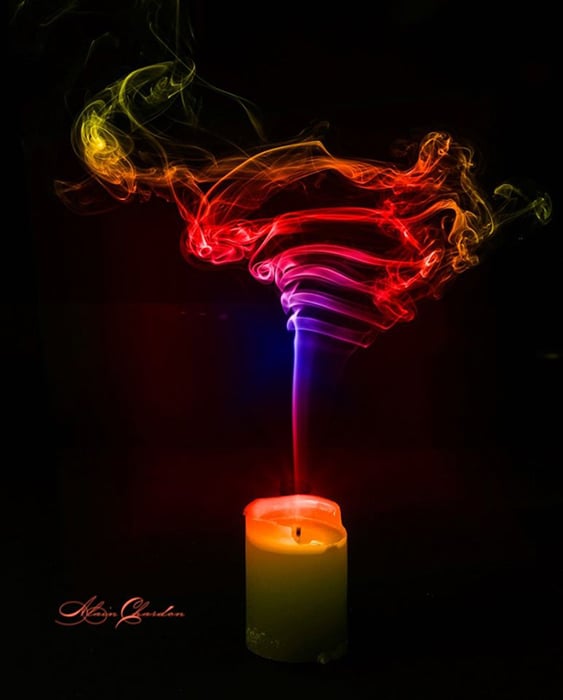
Harris shutter effect photography. © Alain Chardon