ExpertPhotography
  • Articles
  • My Learning
  • Store
  • About
  • Contact
  • Photo Quiz
ExpertPhotography

Learn Photography
  • Quick Capture Cheat Sheets
  • Photography for Beginners
  • Intuitive Composition
  • Show more...
  • Effortless Editing With Lightroom
  • Epic Landscape Editing
  • The Preset Collection
  • Show more...
  • The Magical Photography Spellbook
  • Dreamy Childhood Portraits
  • The Creative Photography Cookbook
  • Show more...
  • Simply Stunning Landscapes
  • Infinite Exposures
  • Milky Way Mastery
  • Show more...
  • Products In Focus
  • Fairytale Portraits
  • Organic Marketing for Photographers
  • Show more...
Need Help?
Contact UsCookie PolicyPrivacy PolicyTerms of Use
Connect

ExpertPhotography is part of several affiliate sales networks. This means we may receive a commission if you purchase something by clicking on one of our links.

ExpertPhotography is a participant in the Amazon Services LLC Associates Program, an affiliate advertising program designed to provide a means for sites to earn advertising fees by advertising and linking to amazon.com.

As an Amazon Associate, I earn from qualifying purchases.

Expert Photography © 2011-2024. All Rights Reserved.

Privacy Policy Terms of Use

Photoshop Processing

How to Create an Outline in Photoshop

Szilard Kovacs
by Szilard Kovacs
Last updated: 21/10/2024-3 min read
ExpertPhotography is supported by readers. Product links on ExpertPhotography are referral links. If you use one of these and buy something, we make a little money. Need more info? See how it all works here.

Creating an outline in Photoshop can enhance your images and designs, but the process might seem complex. This article simplifies the steps, providing an easy-to-follow guide that will help you master this essential skill, leading to improved designs and efficient editing.

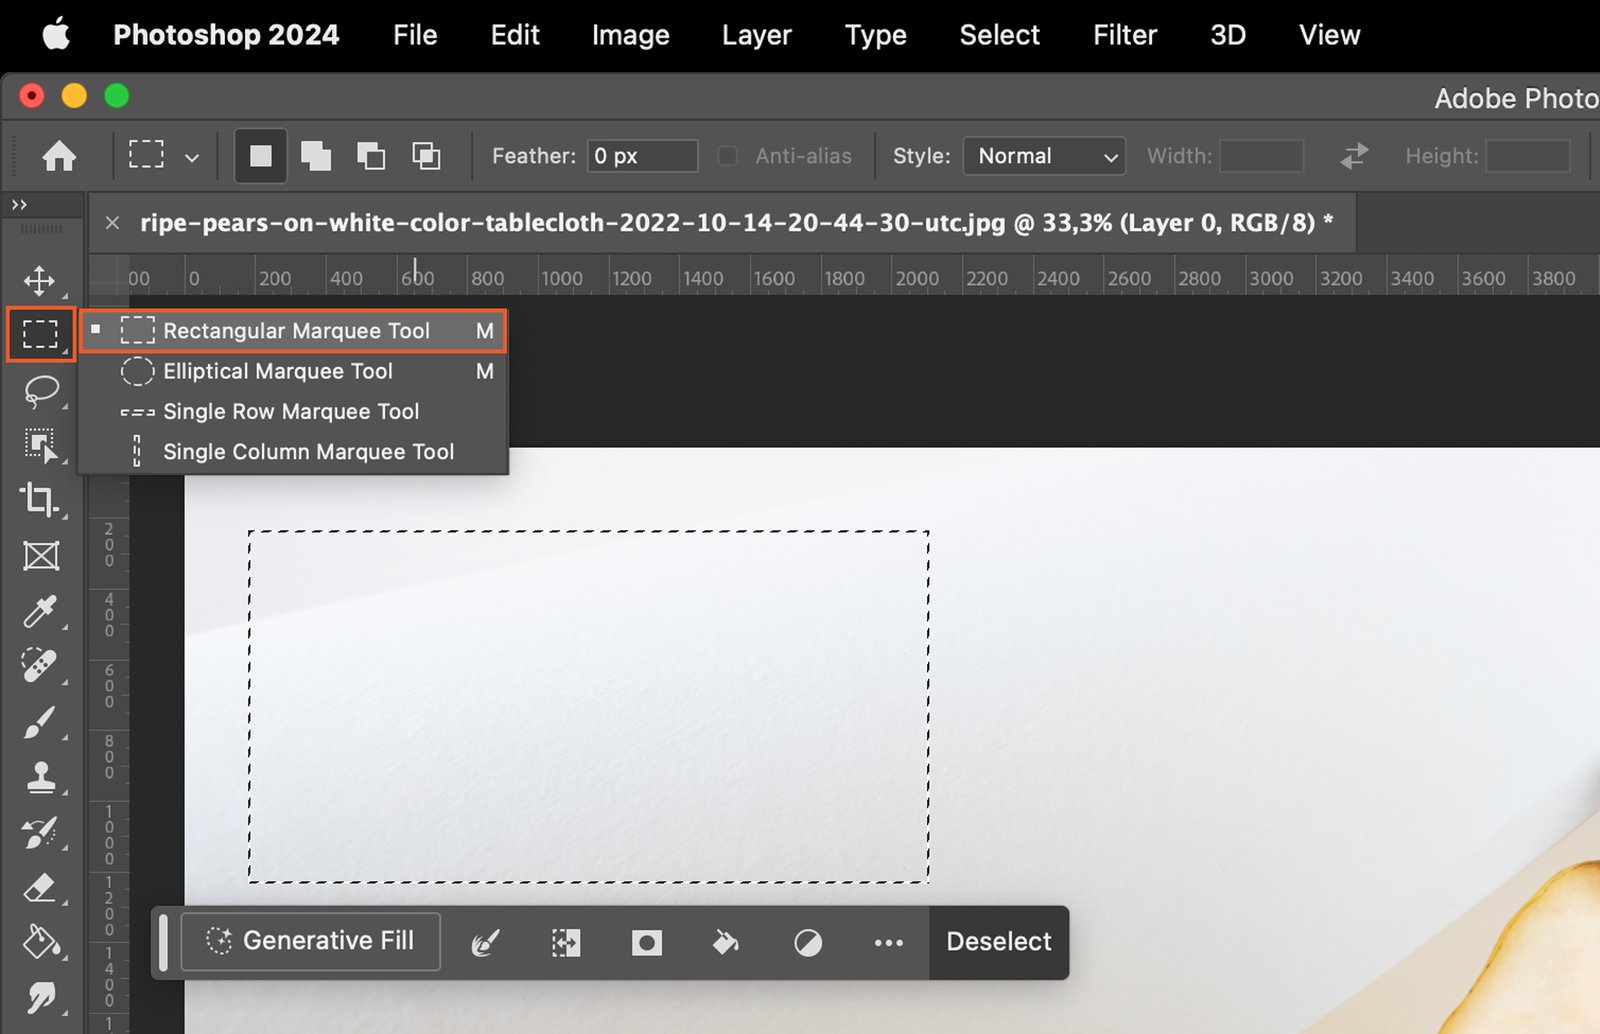
Step 1. Select the Layer

To begin, choose the layer you wish to outline. In the Layers panel, click on the layer to select it.

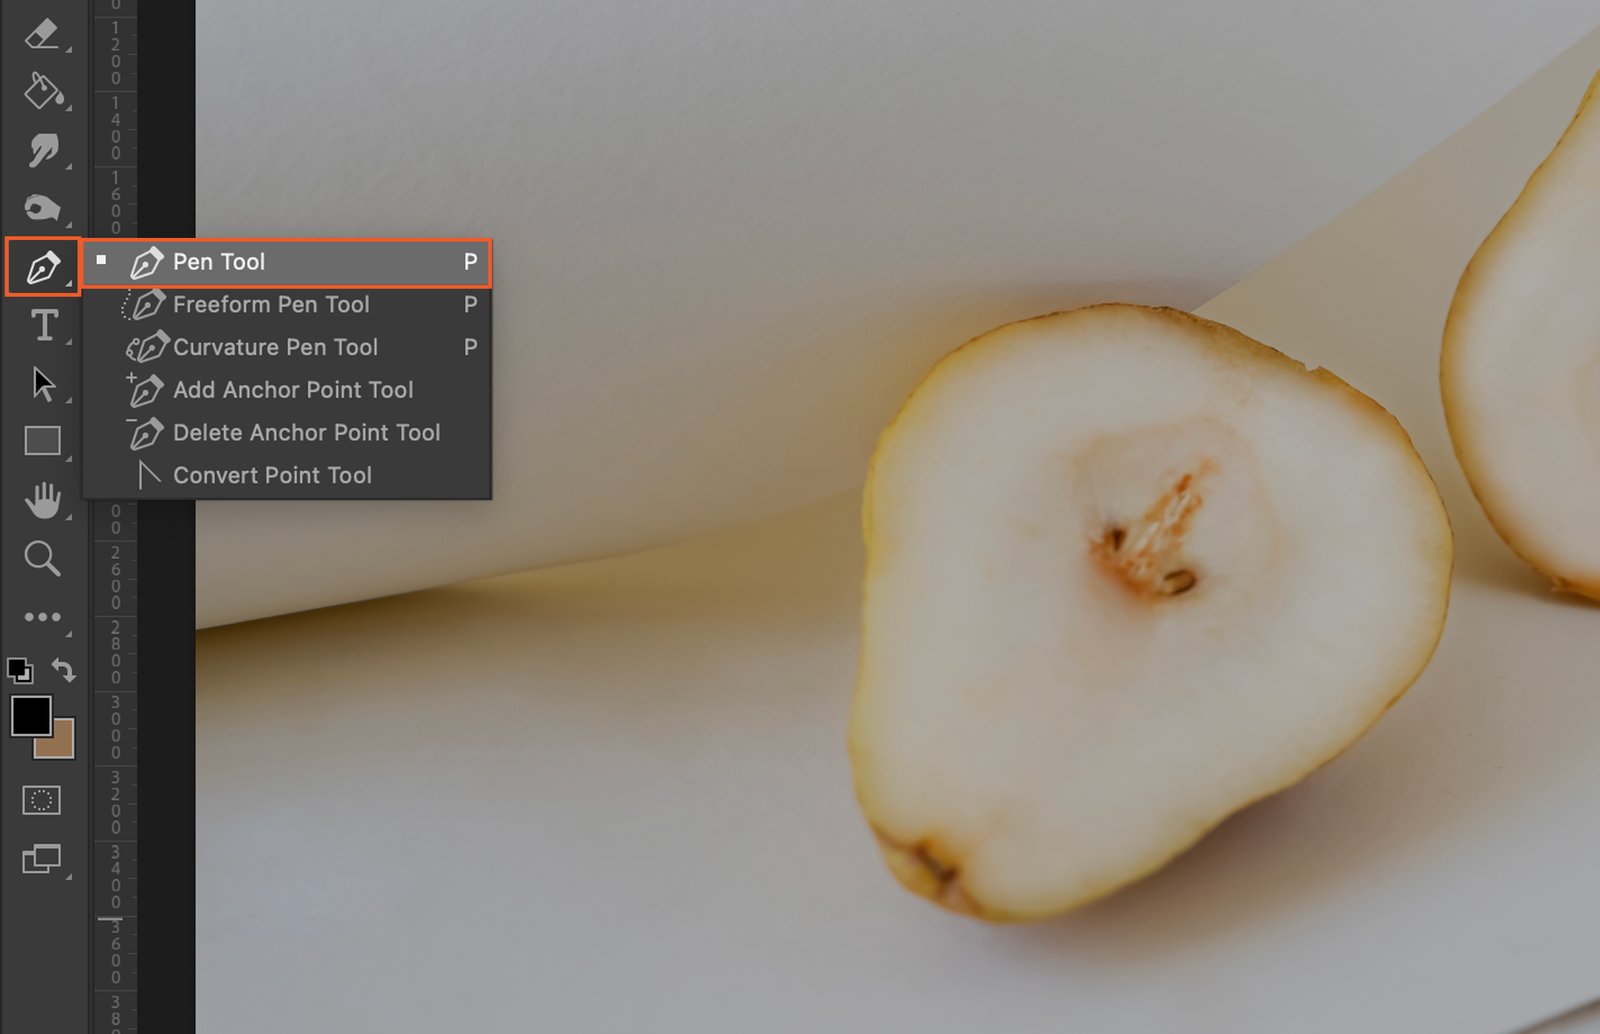
Step 2. Choose the Pen Tool

Next, select the Pen Tool from the toolbar. This tool allows you to create custom paths for your outline.

An image editing program displaying tools to transform a yellow squash into a white squash.

Step 3. Define the Outline Path

Here, you’ll establish the shape of your outline. There are several tools you can use for this.

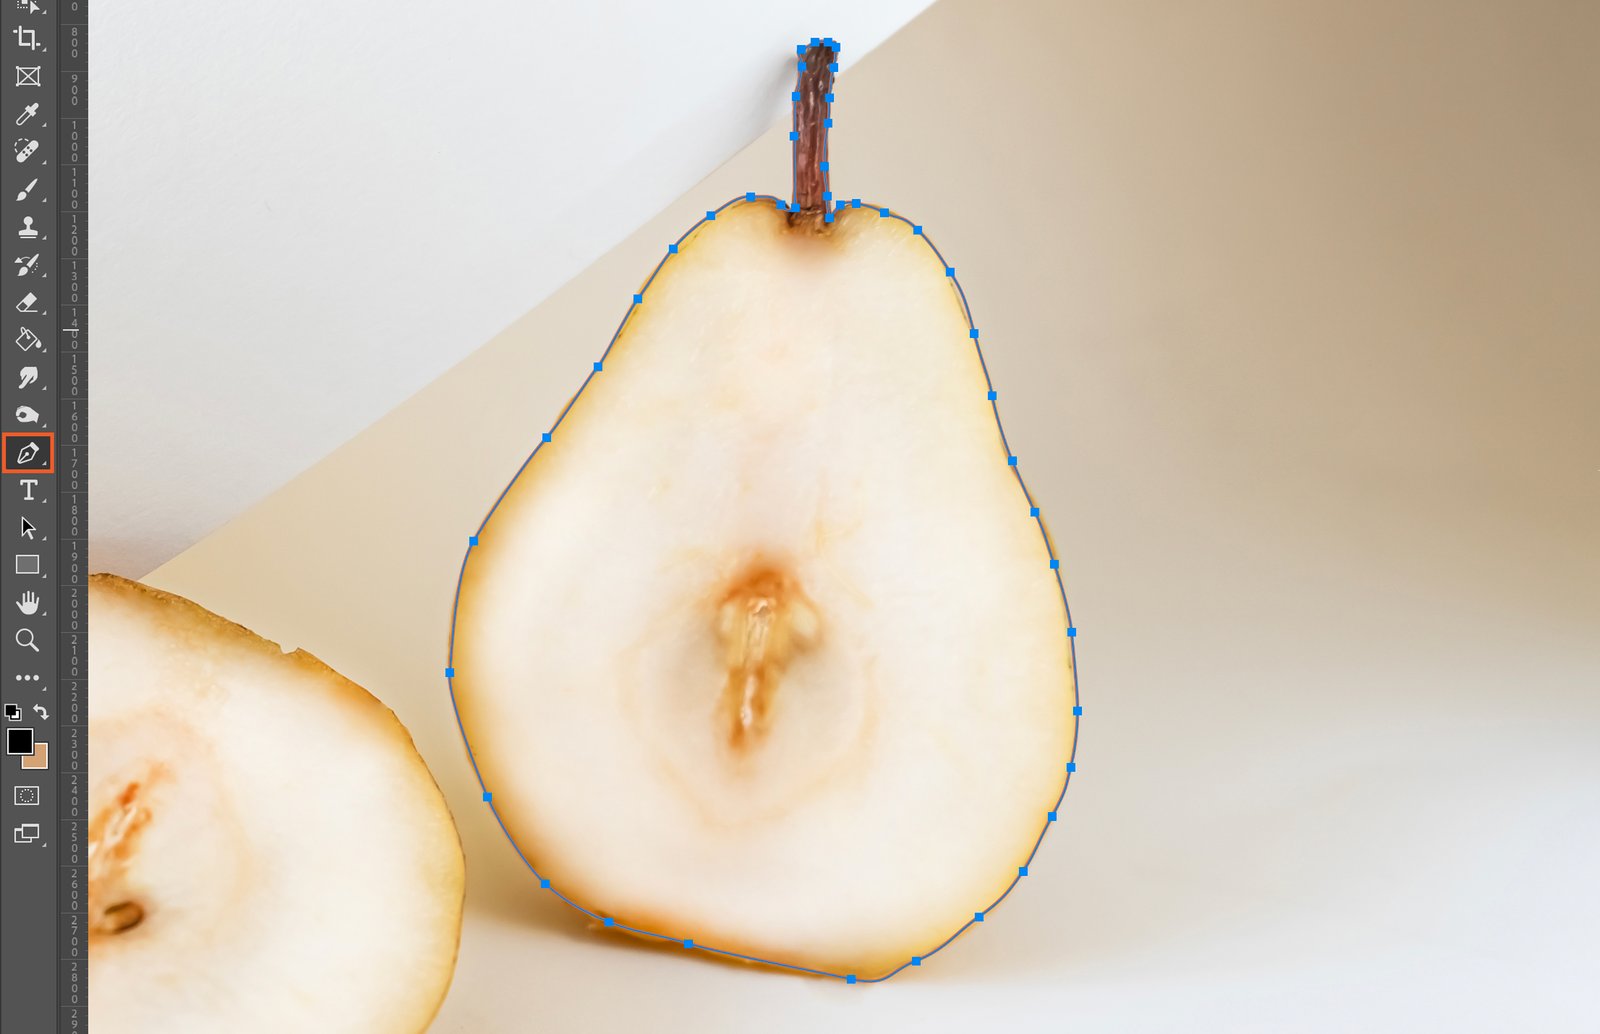
Step 3.1. Using the Pen Tool

With the Pen Tool selected, click to create a point, then click again elsewhere to create a second point. Photoshop will draw a line between these points. Continue this process to create your desired shape.

A half peeled pear is being measured by digital tools, with a cutout circle around it.

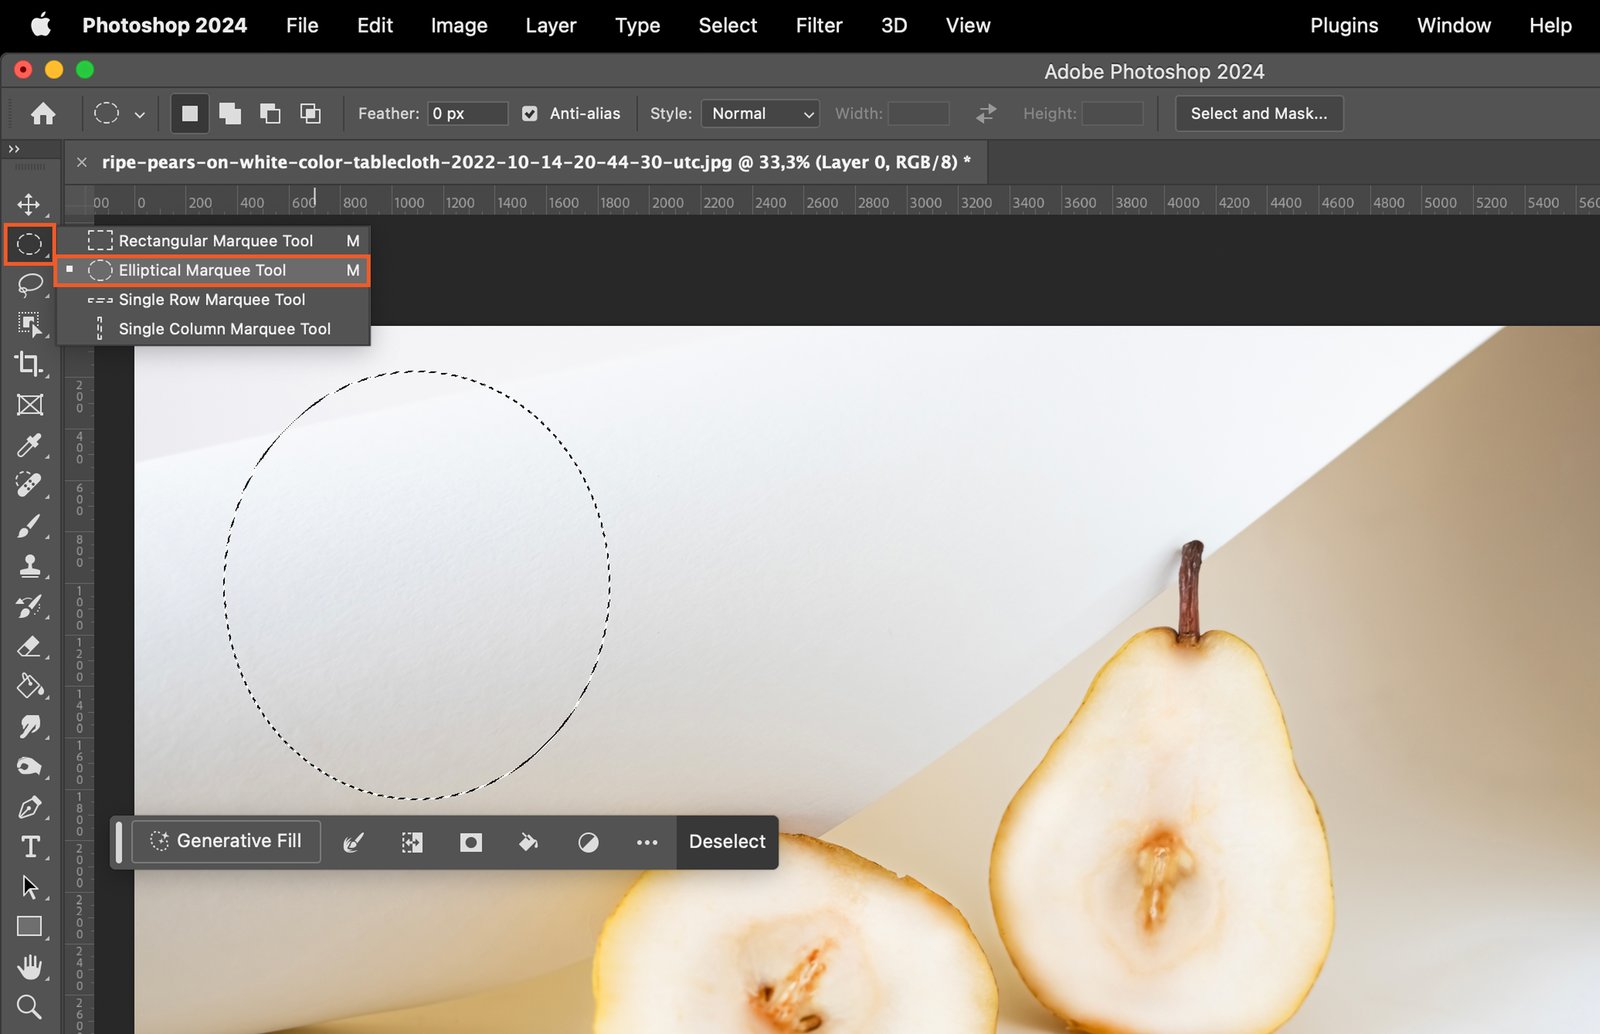
Step 3.2. Using the Ellipse Tool

For a circular or oval outline, select the Ellipse Tool from the toolbar, then click and drag on your image to create the shape.

The Adobe Photoshop interface, showing a photo editing process with visible tool settings and an apple image on the canvas.

Step 3.3. Using the Rectangle Tool

For a square or rectangular outline, choose the Rectangle Tool from the toolbar, then click and drag to create the shape.

A graphical user interface for an image editing software, with the screenshot of the software interface being manipulated in real time.

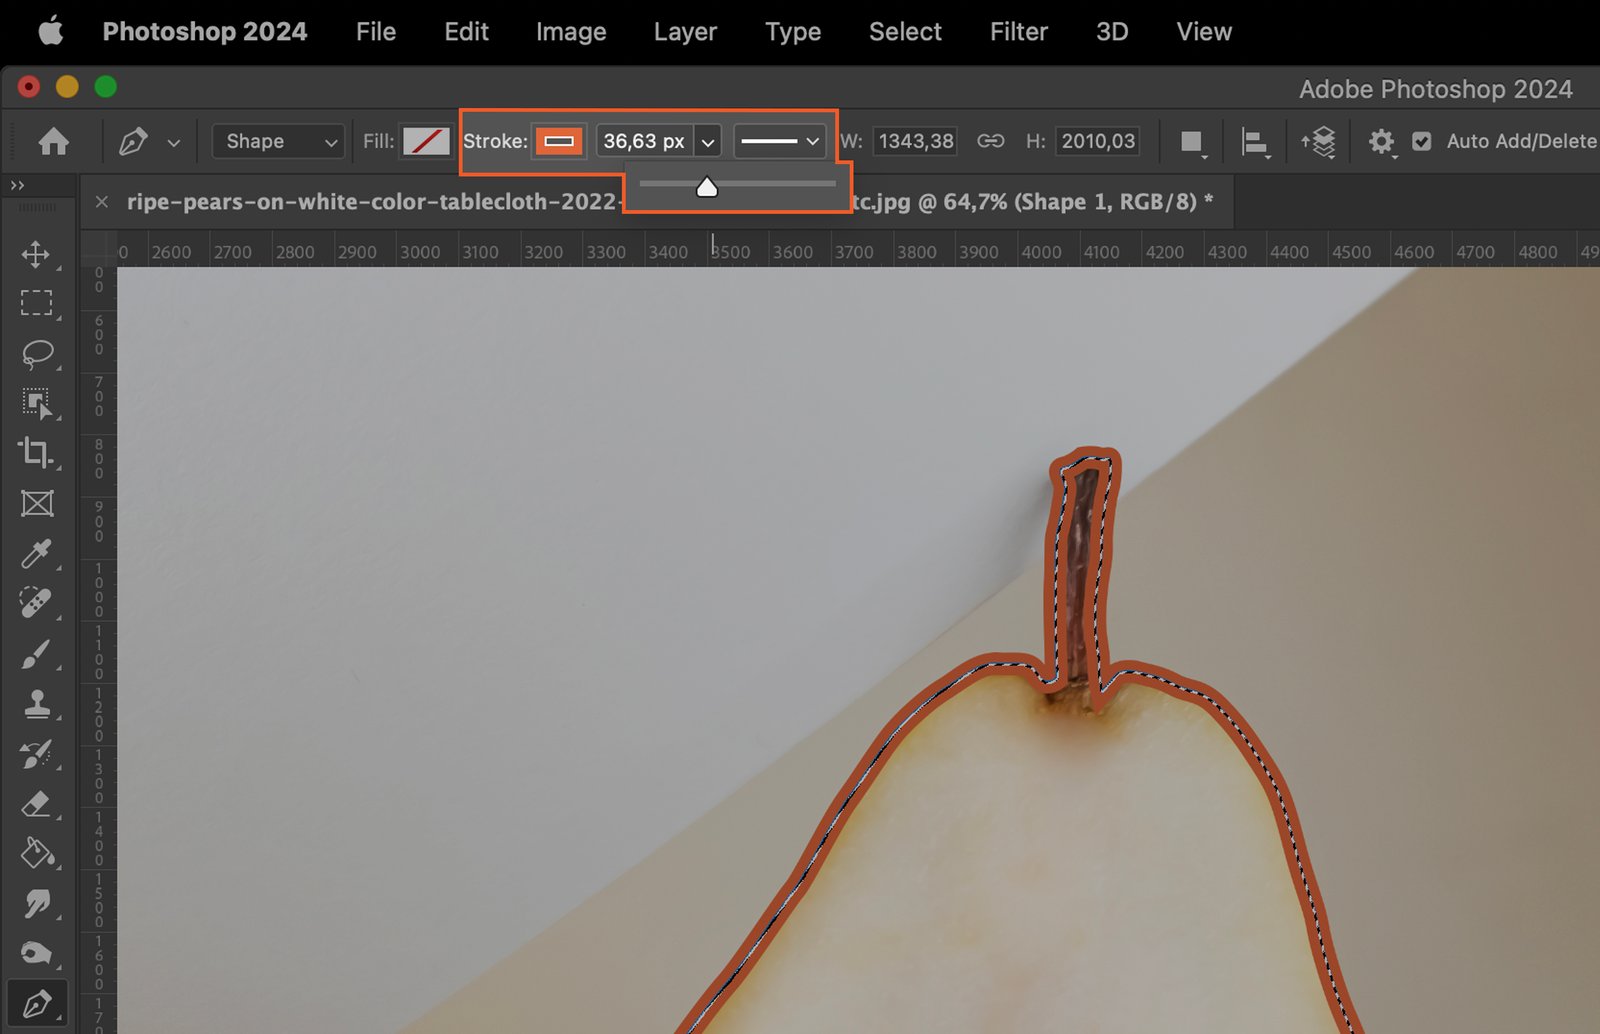
Step 4. Apply Stroke to Selection

Add a Stroke by using the Pen Tool’s menu above the image. You can adjust the width, color of the stroke.

The stroke size in Photoshop.

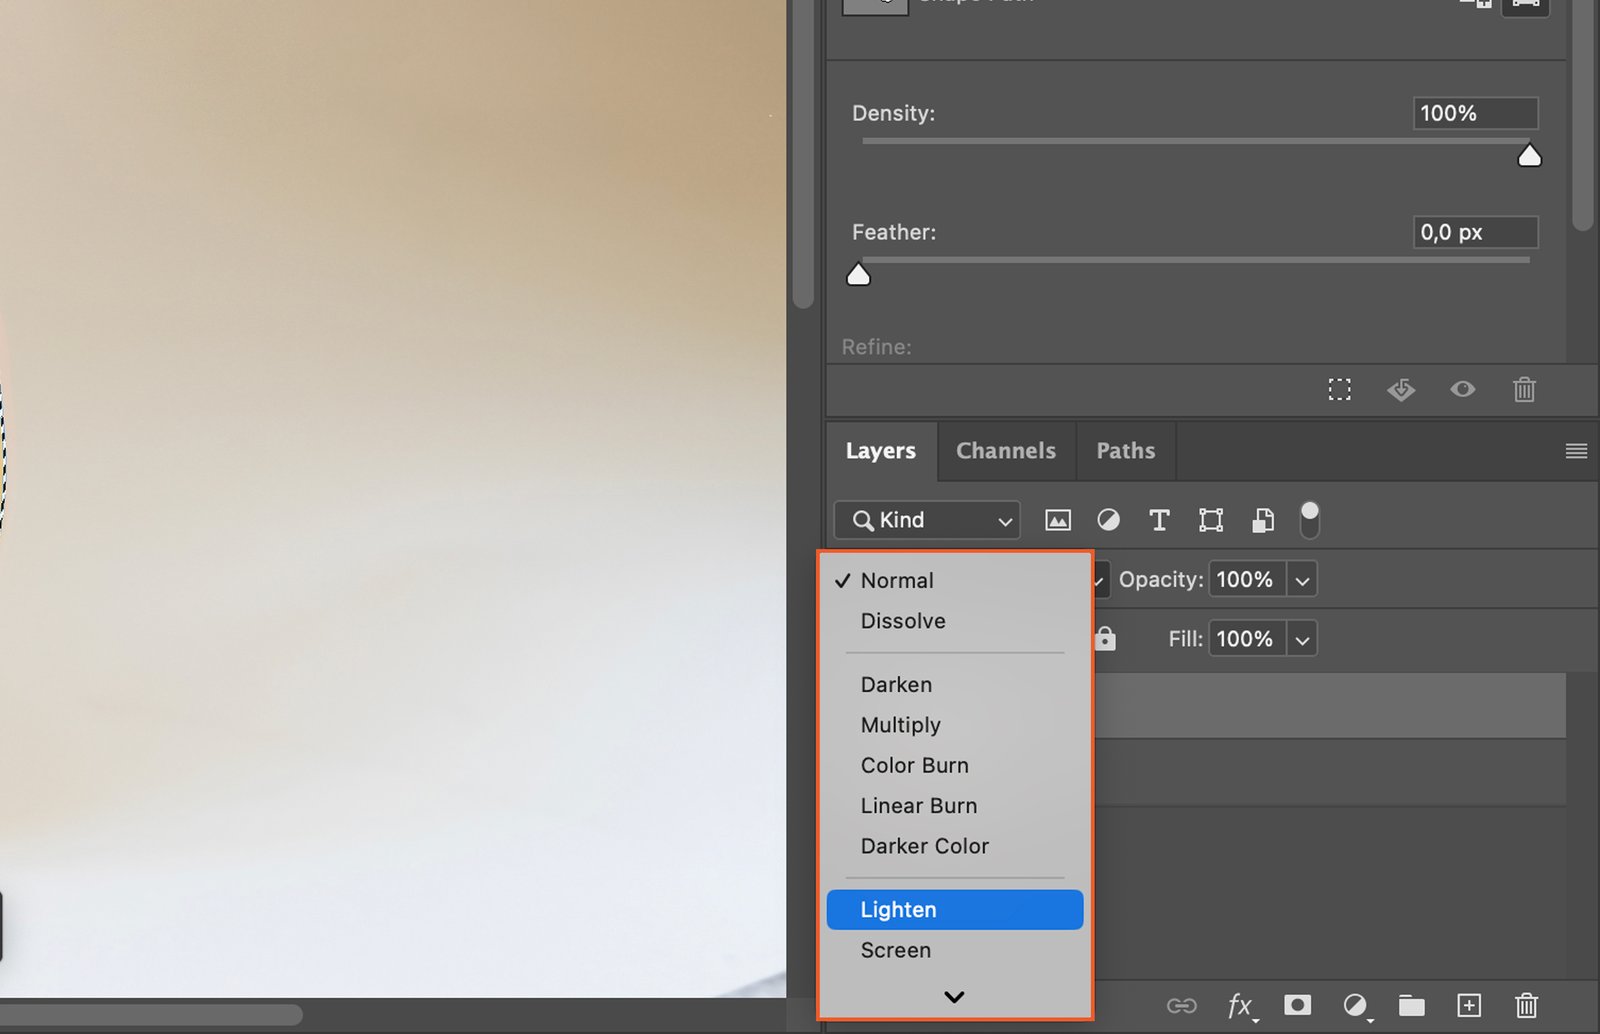
Step 5. Changing Outline Style

You can also change the outline style by adjusting the “Blend Mode” and “Opacity” options in the Stroke dialog box.

A graphic design program with various tools and settings visible.

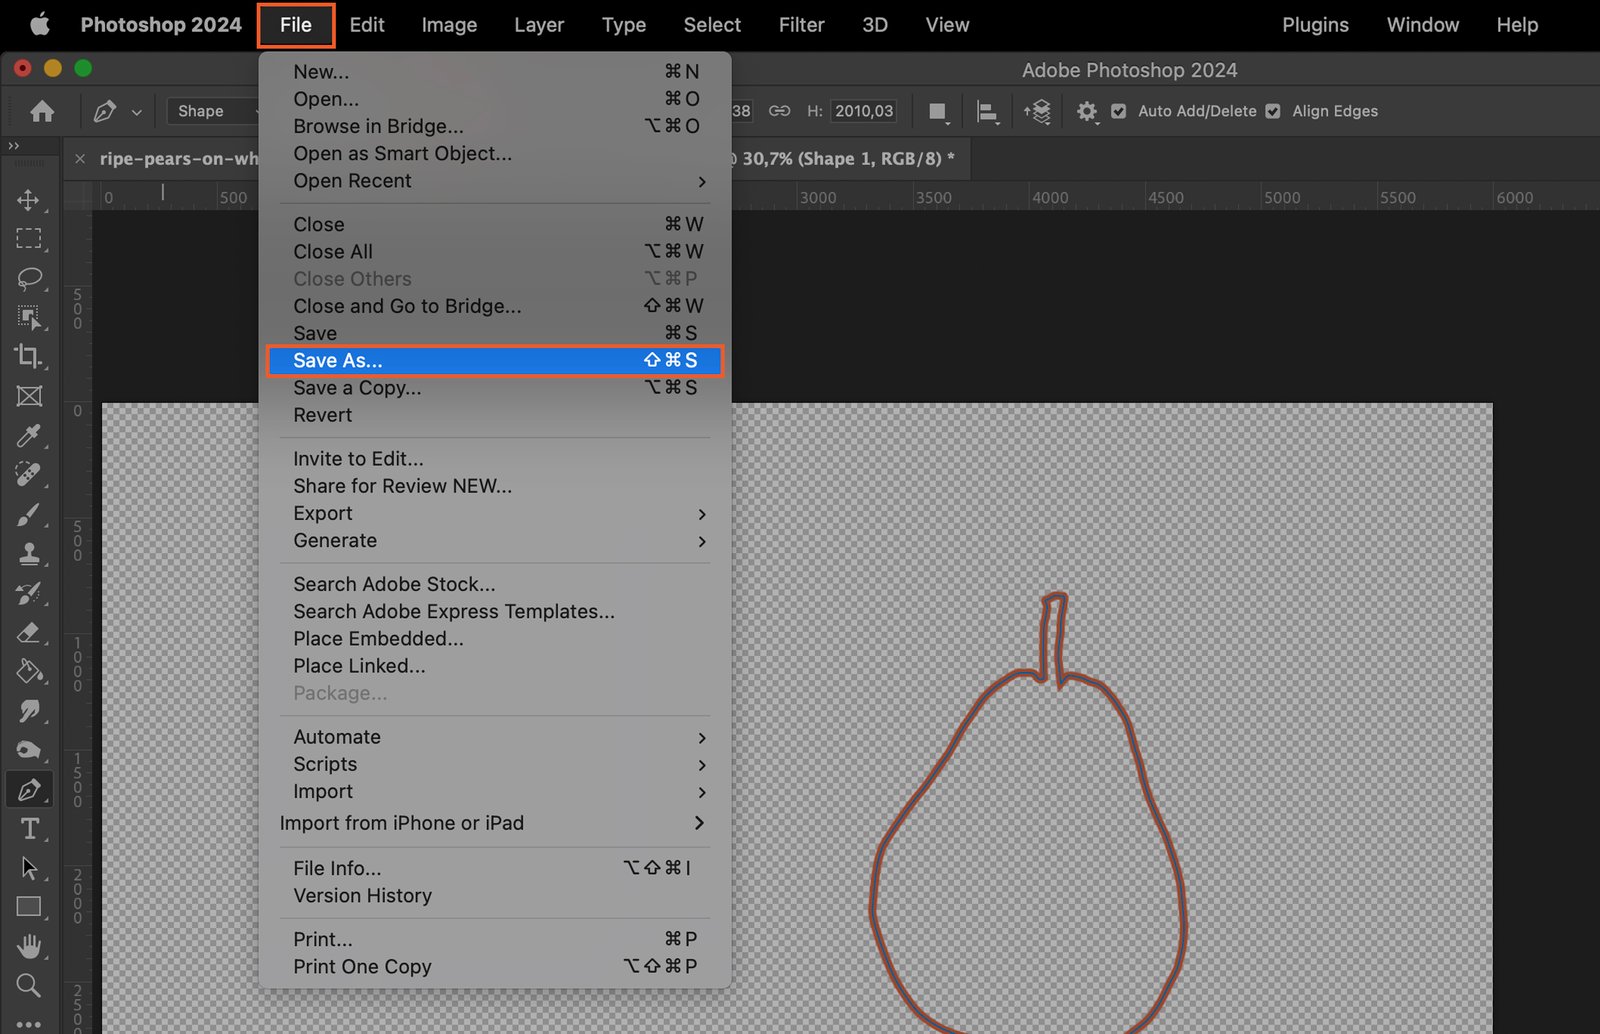
Step 6. Save the Outline

Finally, save your work. Tick off the visibility of the original layer. Go to the File menu, select “Save As”, and choose your preferred format and location.

Photoshop software open, displaying multiple options for creating a custom apple icon.

Sidebar-ad_QCC_related-product
Sidebar-ad_QCC_free-sample_
Sidebar-ad_QCC_free-download_2-posters

Popular Content

Fujifilm X-T200 Review (Should You Buy This Camera in 2024?)

Read Article