
Running out of space in Photoshop? Add a Scratch Disk to solve this issue. This article guides you through the process, ensuring smoother performance and efficient space utilization. Learn to set up and manage your Scratch Disk effectively.
Step 1. Understanding Scratch Disks
A scratch disk is a disk drive or SSD used for temporary storage while Photoshop is running. It’s essentially your computer’s virtual memory for Photoshop, used when the application runs out of RAM.
Step 2. Accessing Photoshop’s Preferences
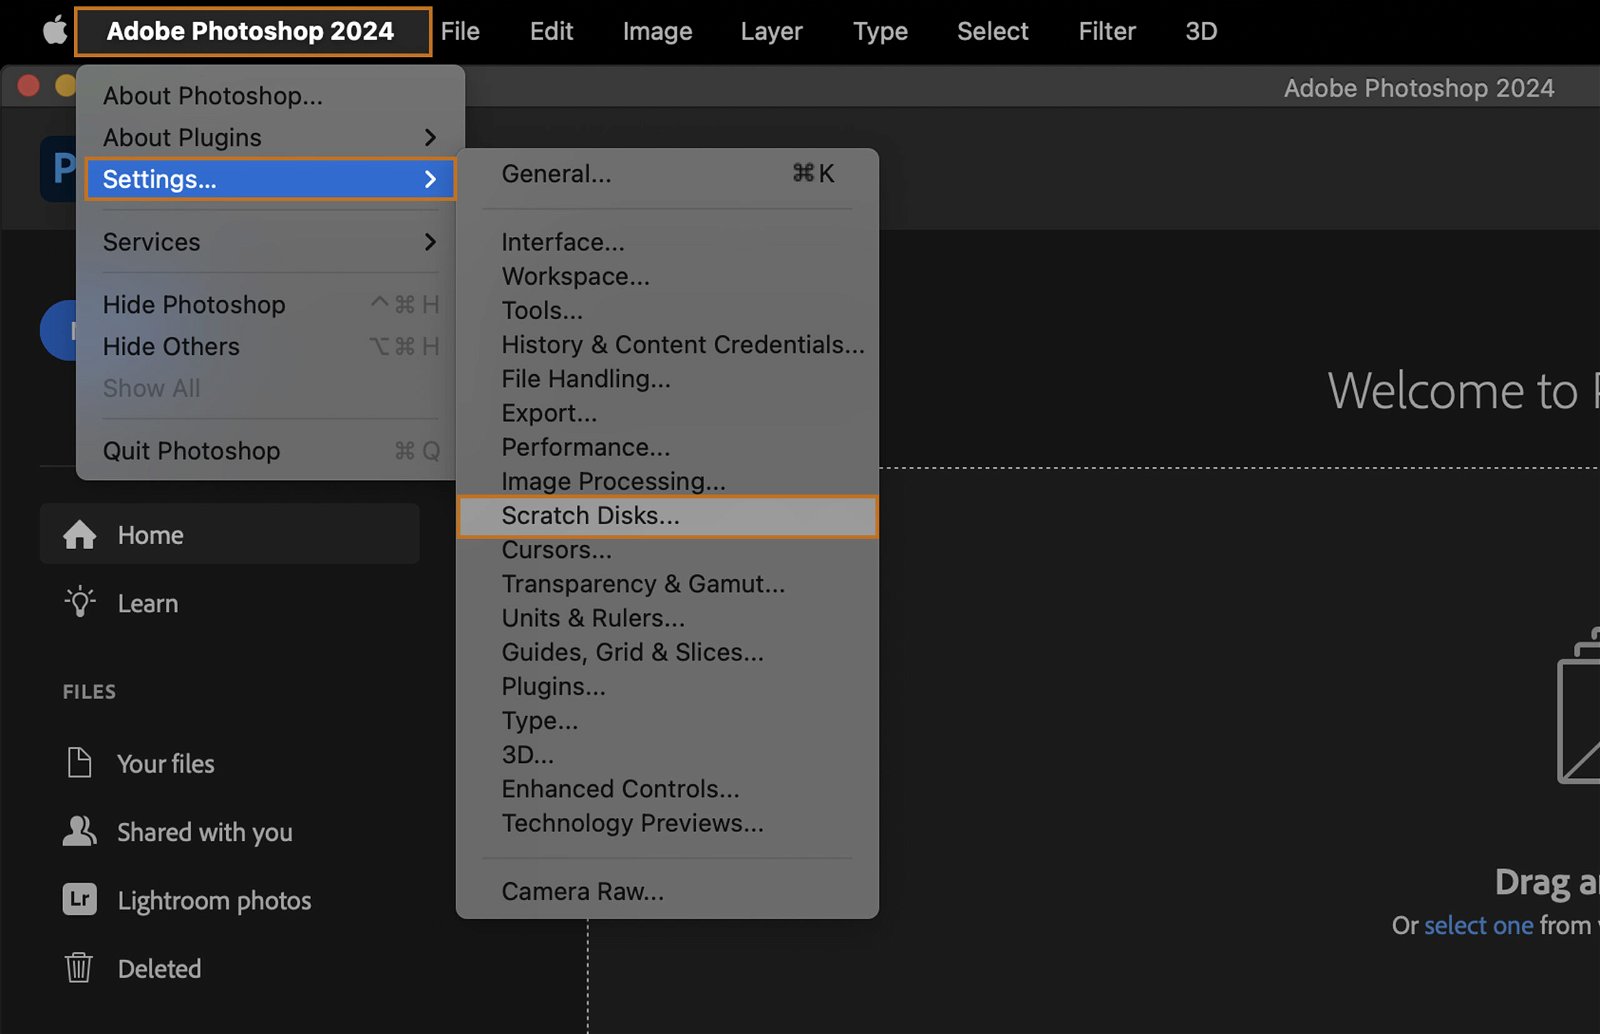
Open Photoshop. Click on the “Edit” menu (or “Photoshop” on Mac), then select “Settings”. Find and click on the “Scratch Disks” option. This will open a list of available drives that Photoshop can use as scratch disks.
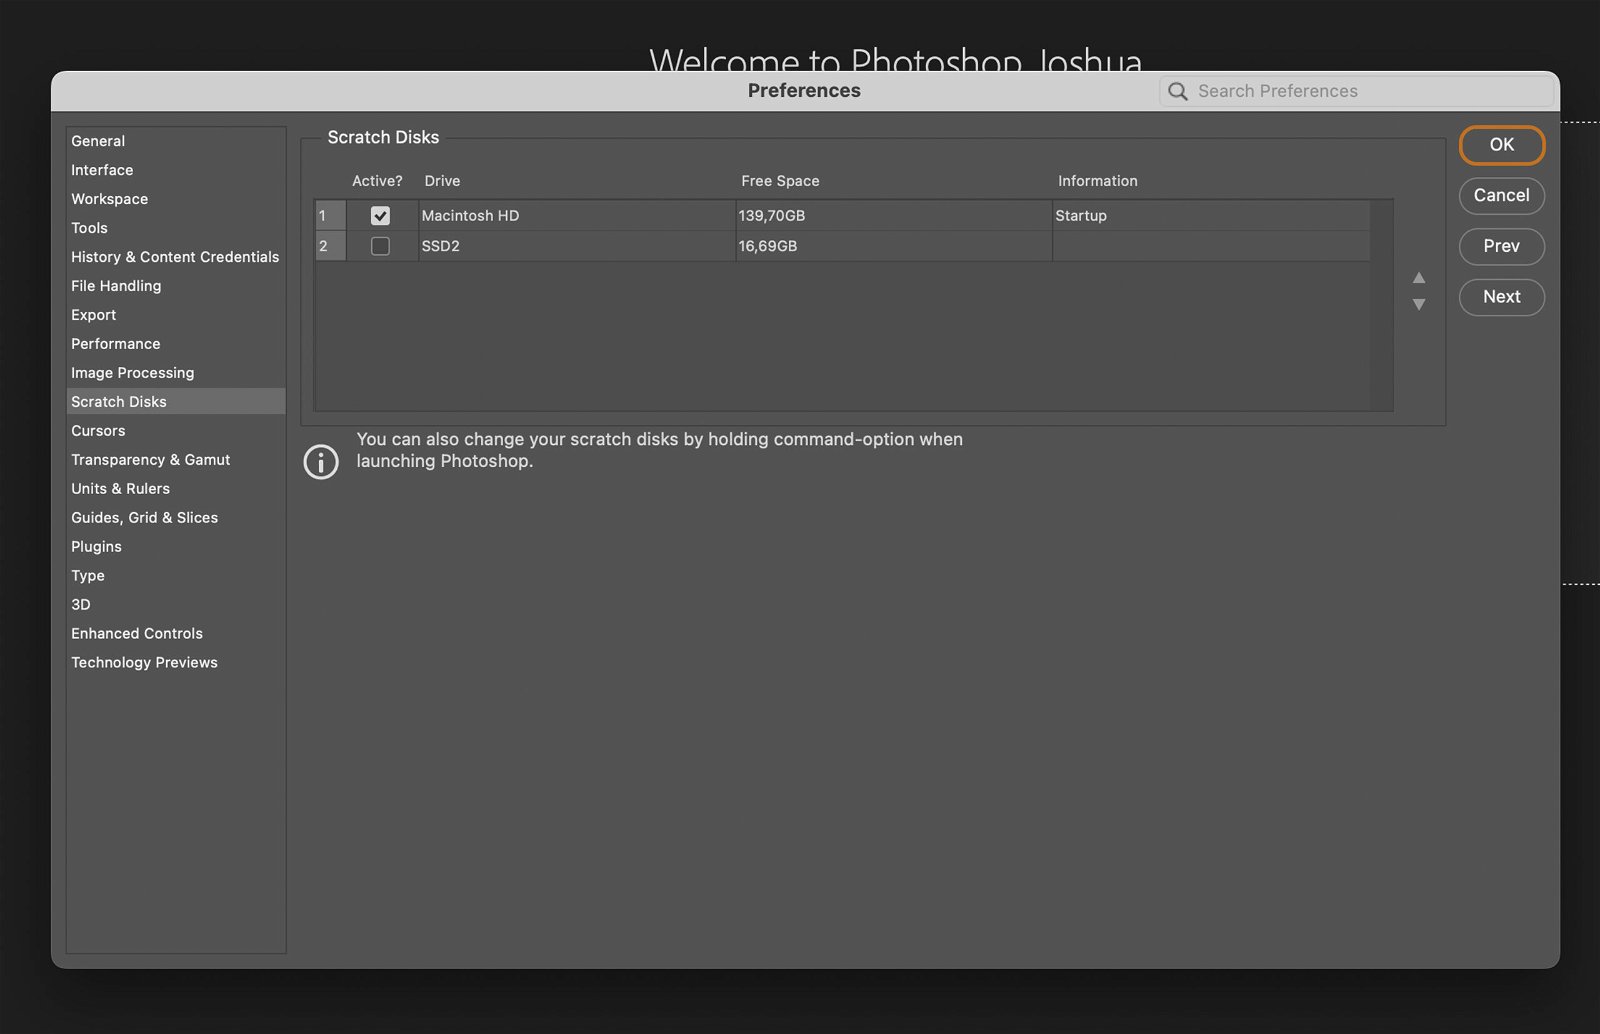
Step 3. Selecting the Right Scratch Disk
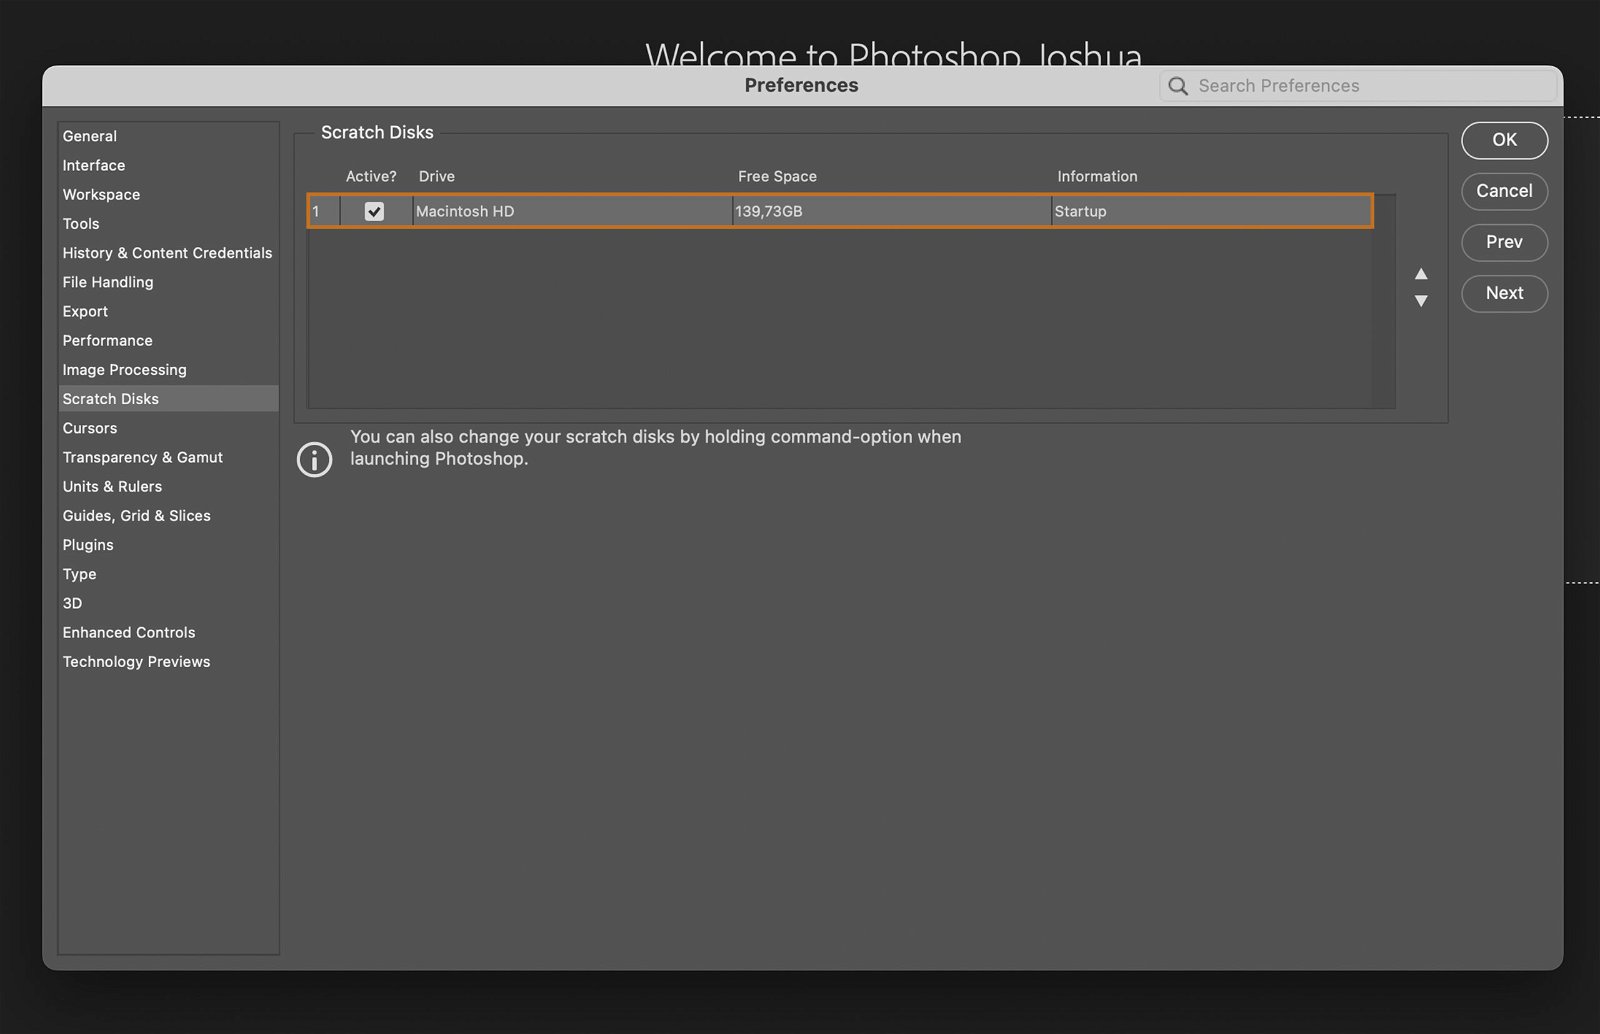
Select the disk you want to use as your scratch disk. It is recommended to use a fast drive with plenty of free space.
Step 3.1 Using an Internal SSD as a Scratch Disk
If you have an internal SSD, it can be a good choice as a scratch disk due to its speed. Simply select it from the list.
Step 3.2 Using an External SSD as a Scratch Disk
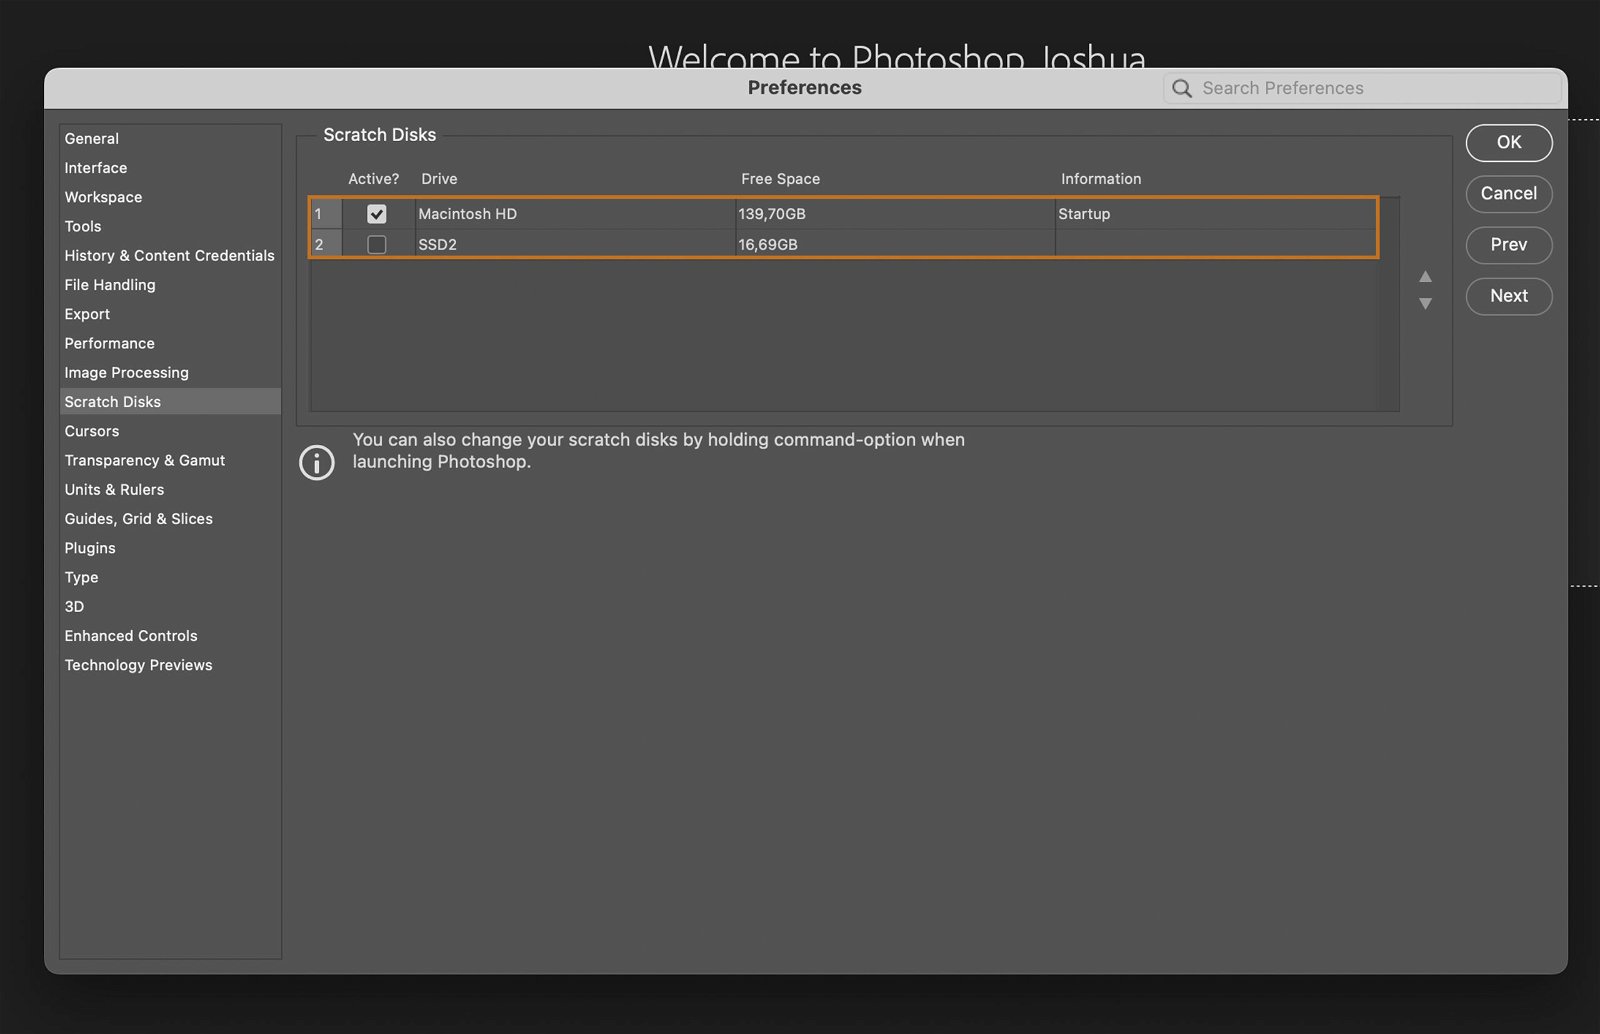
You can also use an external SSD as a scratch disk. Just make sure it’s connected before you start Photoshop, and then select it from the list.
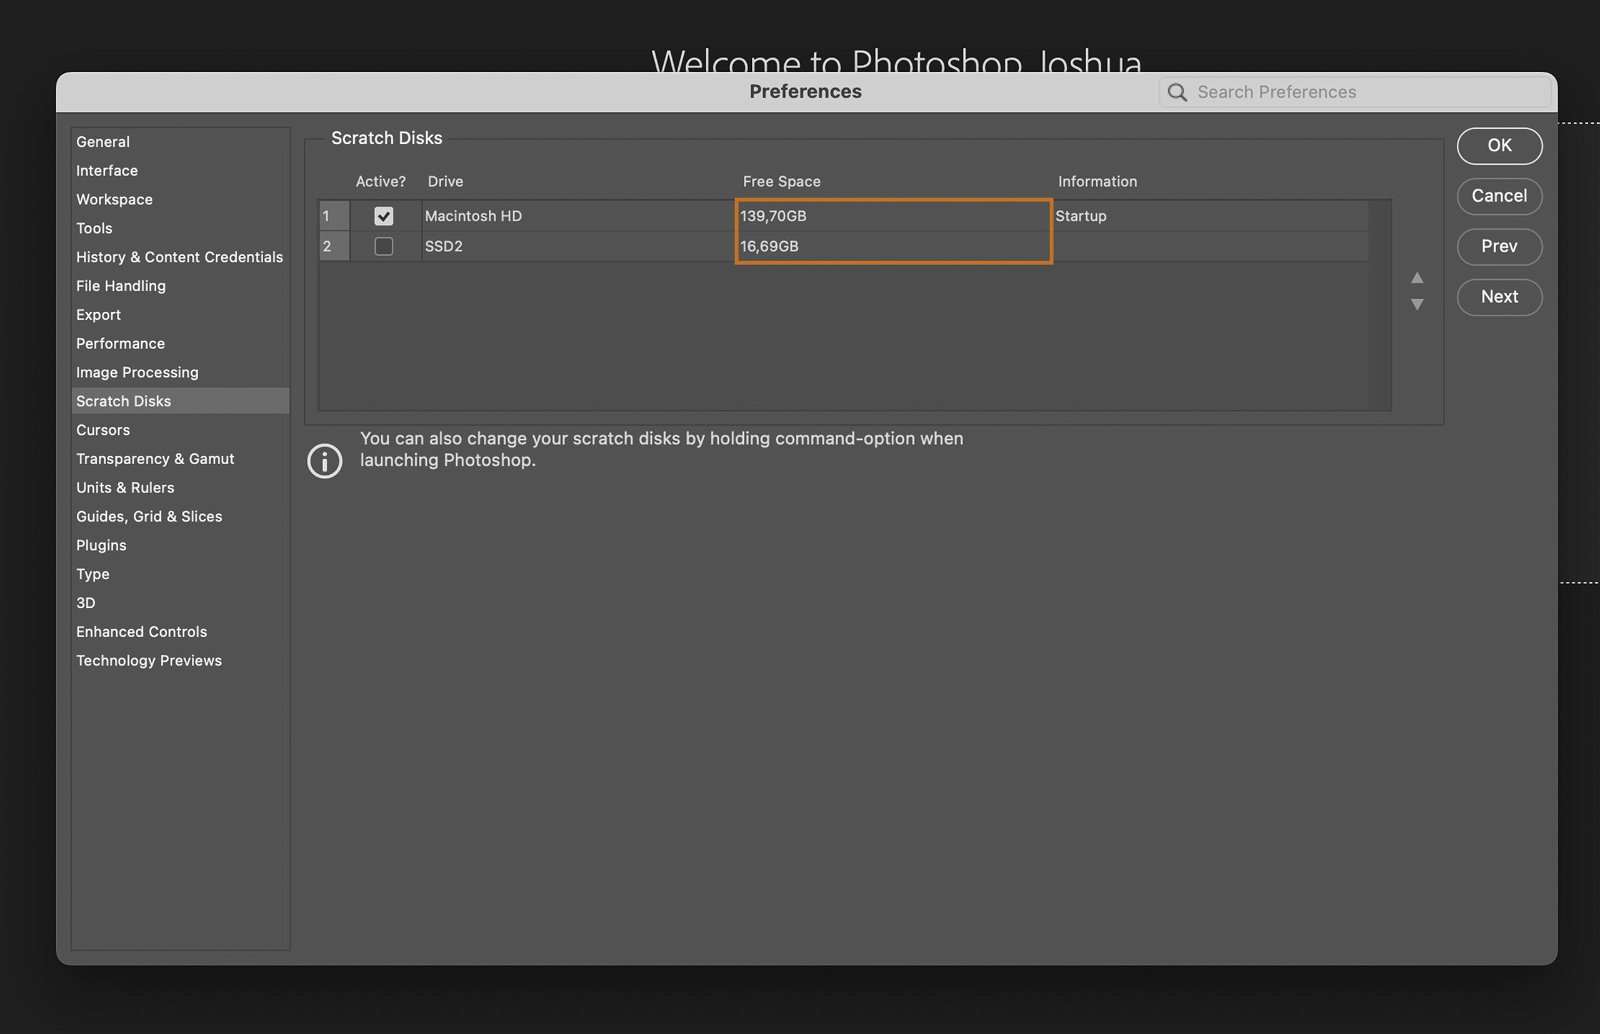
Step 4. Allocating Space for Scratch Disk
There’s no option to specify disk space for the scratch disk. Photoshop automatically uses the free space available on the selected drive.
Step 5. Setting Up Multiple Scratch Disks
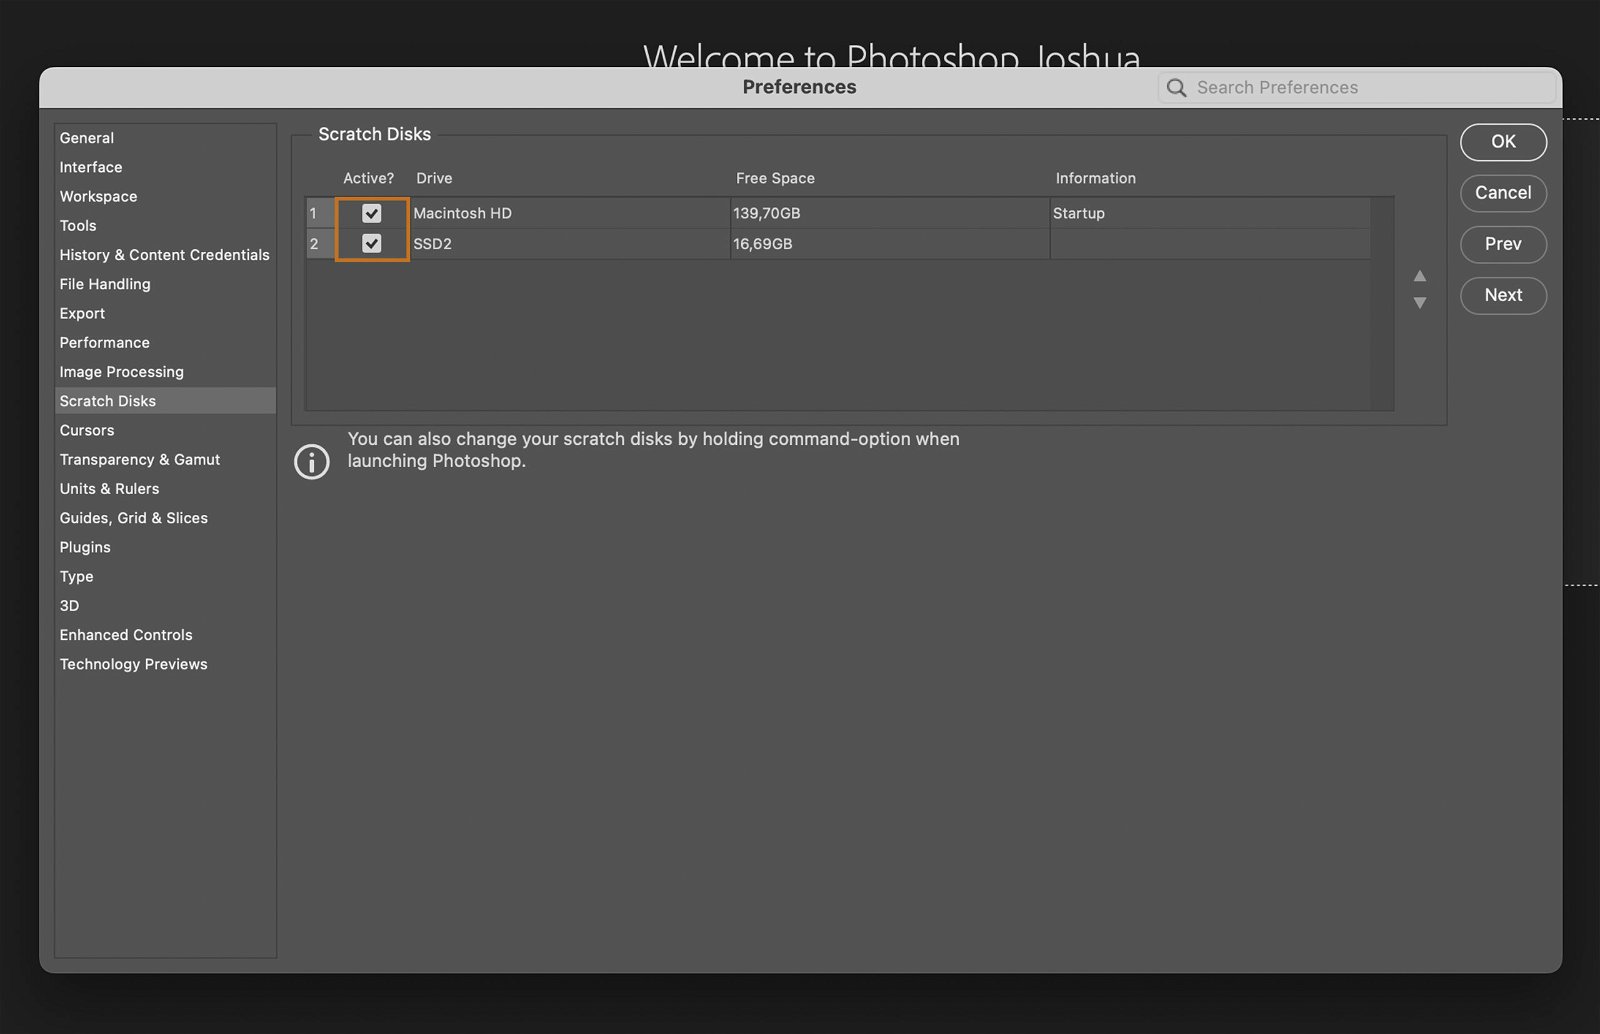
You can set up multiple scratch disks for better performance. To do this, simply check the boxes next to the drives you want to use.
Step 5.1 Ordering Multiple Scratch Disks
Photoshop uses the scratch disks in the order they are listed. Put the fastest drive at the top of the list.

Step 6. Saving and Applying Scratch Disk Settings
Click “OK” to save your settings. Photoshop will use these settings the next time it starts.
Step 7. Restarting Photoshop for Changes to Take Effect
Close and restart Photoshop for the new scratch disk settings to take effect.
Step 8. Monitoring Scratch Disk Space
Monitor your scratch disk space to avoid running out of space. You can check this in the “Scratch Disks” section of the preferences window.
Step 9. Clearing Scratch Disk Space
If your scratch disk is full, you’ll need to free up some space.
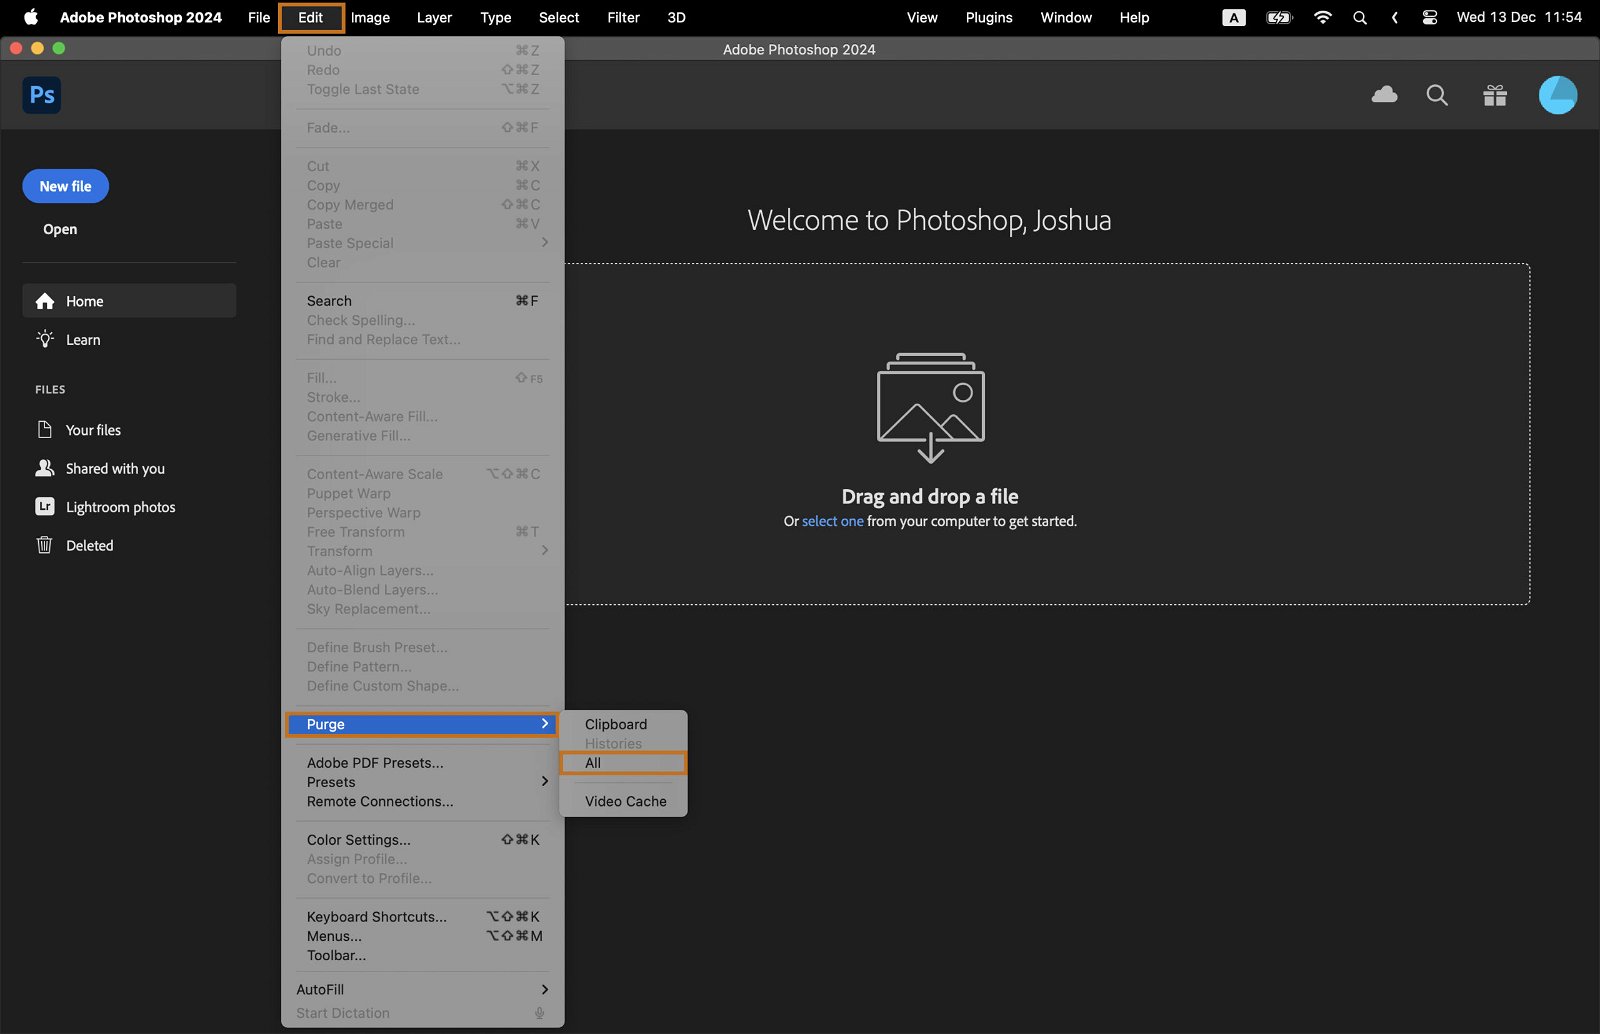
Step 9.1 Clearing Photoshop Cache
One way to do this is to clear Photoshop’s cache. Go to the “Edit” menu, select “Purge”, then “All”.
Step 9.2 Deleting Temporary Files
You can also delete temporary files. These are usually located in your system’s temp folder.
Step 9.3 Optimizing Scratch Disk Performance
To optimize performance, keep plenty of free space on your scratch disk and defragment it regularly (for HDDs).
Step 10. Troubleshooting Common Scratch Disk Issues
Common issues include full scratch disks and slow performance. These can usually be fixed by freeing up disk space, using faster or multiple scratch disks, and keeping Photoshop up to date.
