Today, we will guide you through the easiest way to batch resize images in Photoshop. You will encounter this process at some point in your photographic journey. Learning how to do this will save you a lot of time.
Adobe Photoshop is digital editing software that usually works with single images. However, there are a few methods for handling a range of images. Let’s now explore how to batch resize images in Photoshop.
© Luca Sammarco
Why Would I Batch Resize My Images In Photoshop?
Batch resizing is a method for changing the size of a group of images without having to go through each one individually. This is particularly helpful for preparing images for clients or competitions.
Photoshop provides an image processor script that can resize our images from any folder. The biggest advantage is that you do not have to upload any images into the program.
You simply set the parameters for the images’ output, including size and location, and Photoshop will open each image automatically. This process is one of the fastest ways to batch resize images on your computer.
© Jon Tyson
How to Batch Resize Images in Photoshop
Let’s now look at a simple step-by-step process to batch resize images in Photoshop.
Step 1 – Prepare Your Files
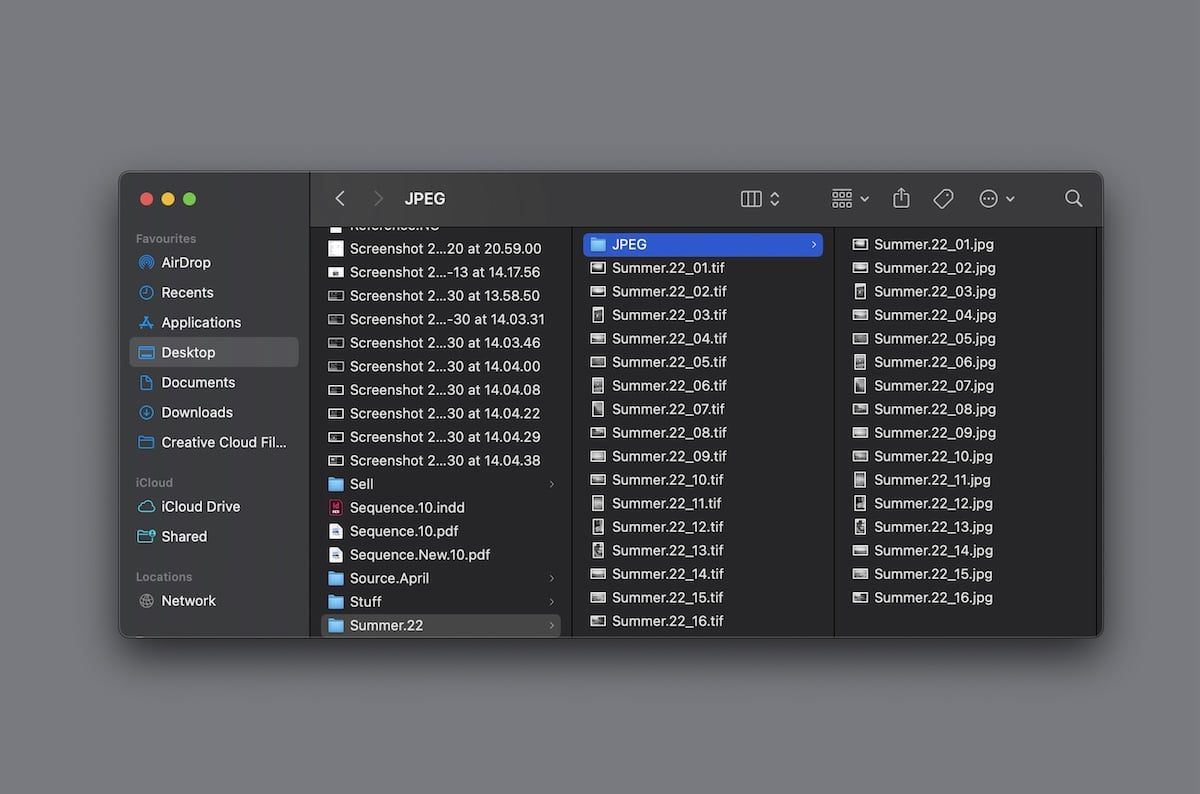
The batch resizing method in Photoshop requires all our files to be in the same folder. If not, we will have to run the image processor a couple of times, which defeats the purpose of batch resizing.
Ensure all your files are in a single folder to make the process as quick as possible. If this is not possible, there is an extra tick box to include subfolders.
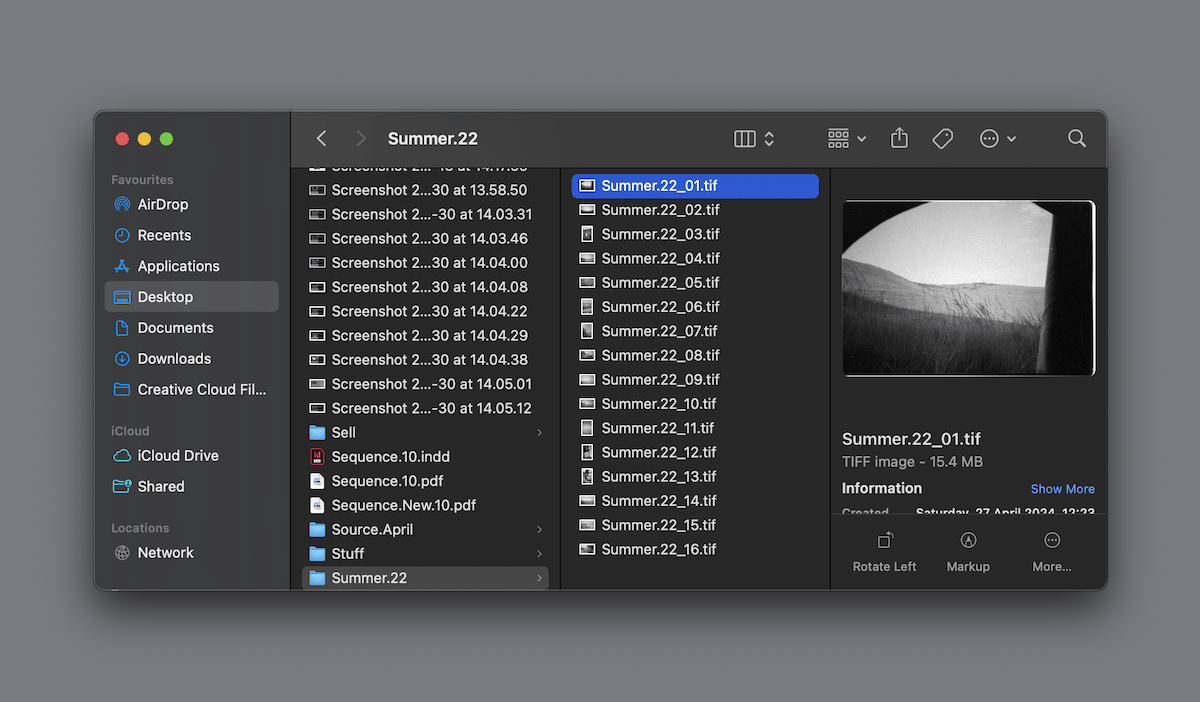
A folder conveniently prepared for the Image Processor
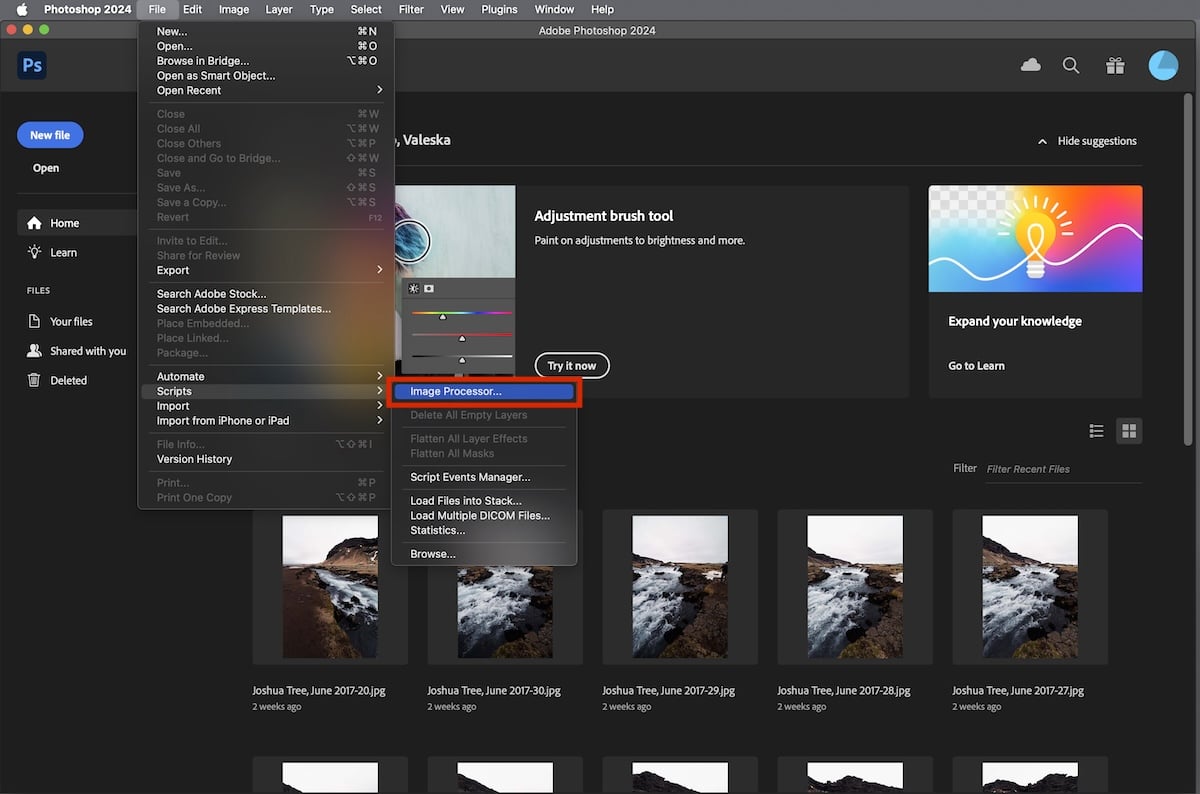
Step 2 – Open Photoshop and Find the Image Processor
Now, you’re ready to open Photoshop. This process doesn’t require opening each image individually, but Photoshop does allow you to batch resize the images you may have open.
To find the Image Processor, go to File > Scripts > Image Processor.
The Image processor allows you to perform batch edits, resize images, change the file type, and even perform basic edits.
Step 3 – Setting Parameters
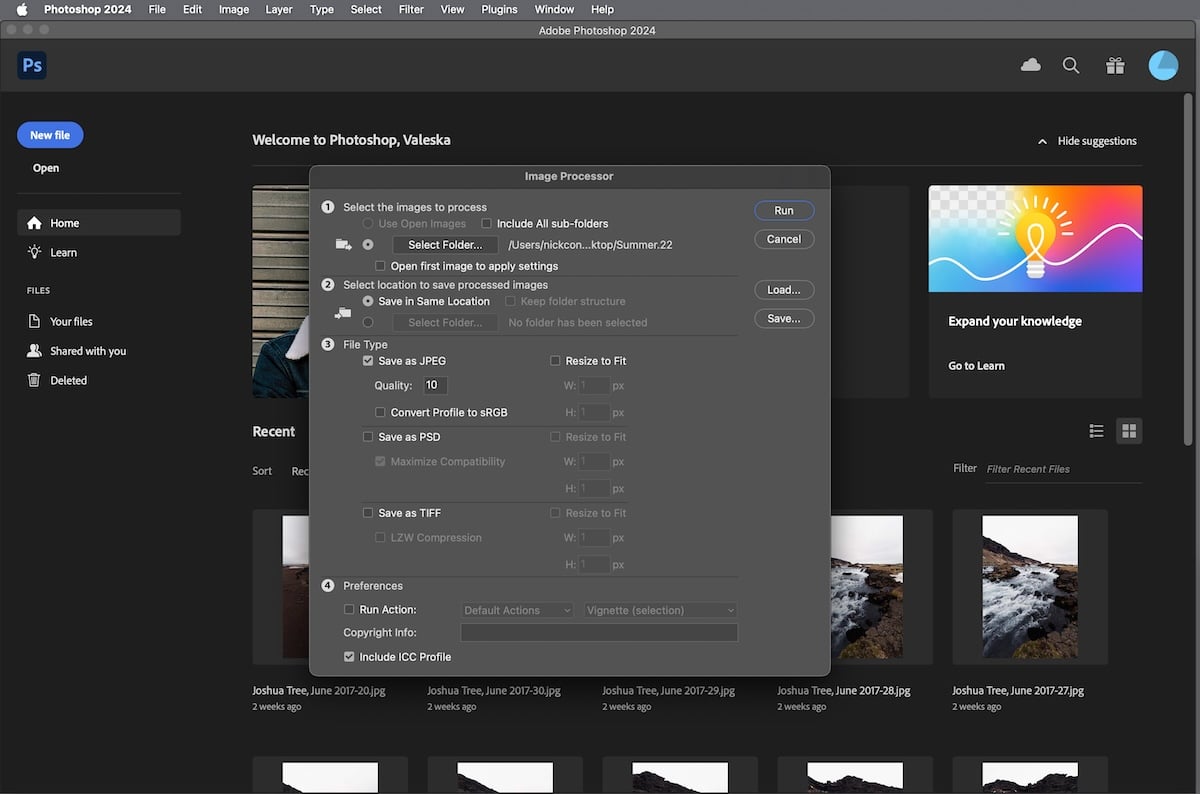
Upon opening the Image Processor, you will see a clear step-by-step process Photoshop outline. Let’s look at each of these sections in more detail.
Step 1 – Selecting Images
Photoshop lets you select from Use Open Images or Select Folder. The first option will use all the images in Photoshop, while the second option takes you to a normal file browsing interface.
To batch resize images in Photoshop, you will need to find the folder we have prepared using the Select Folder option. You can tick Include All sub-folders if you have an expansive folder structure.
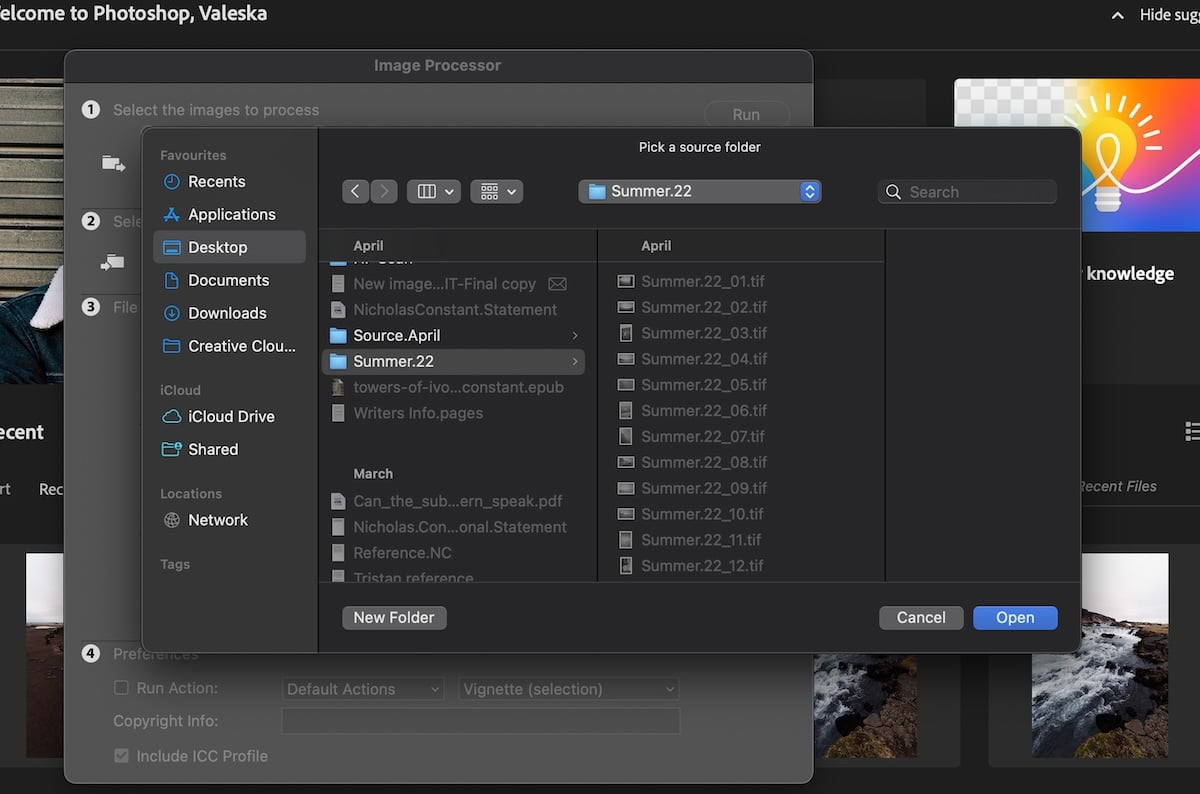
Searching for the prepared folder
Step 2 – Select Export Location
Now, you will select where your new images will end up. You can choose to save them in the same location or choose a custom location.
If you select Save in Same Location, Adobe will create a new folder for your new resized images inside your initial location. Select Folder will take you to a file browsing window where you can choose the exact location on your computer.

Use this section to select your desired output destination
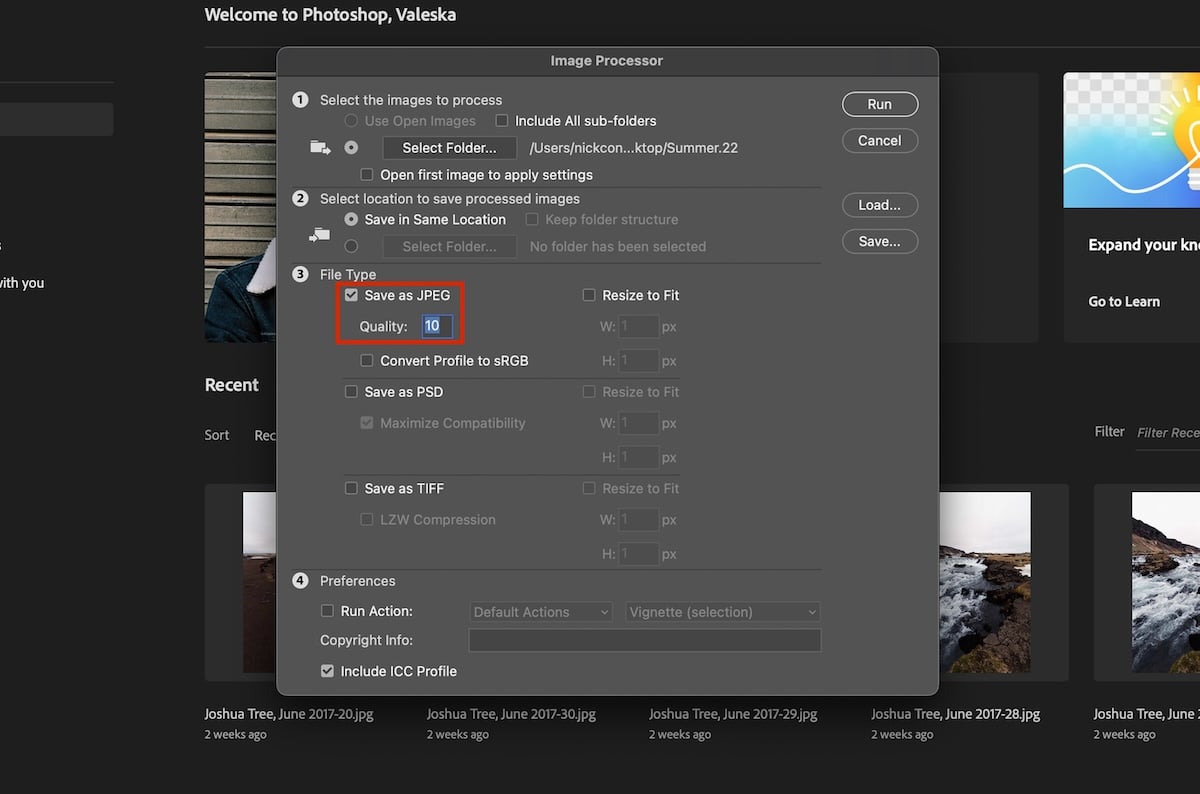
Step 3 – File Type
Editing the File Type is the most important section of this process. The first choice you will make is between your desired output file type. To resize images that have already been edited, you should choose JPEG.
The JPEG option gives you two different methods to resize your images. The first method, Quality, is rough and inaccurate. It allows you to put in a number between 1 and 10 to resize your image. This can be helpful if you quickly resize images without a select size in mind.
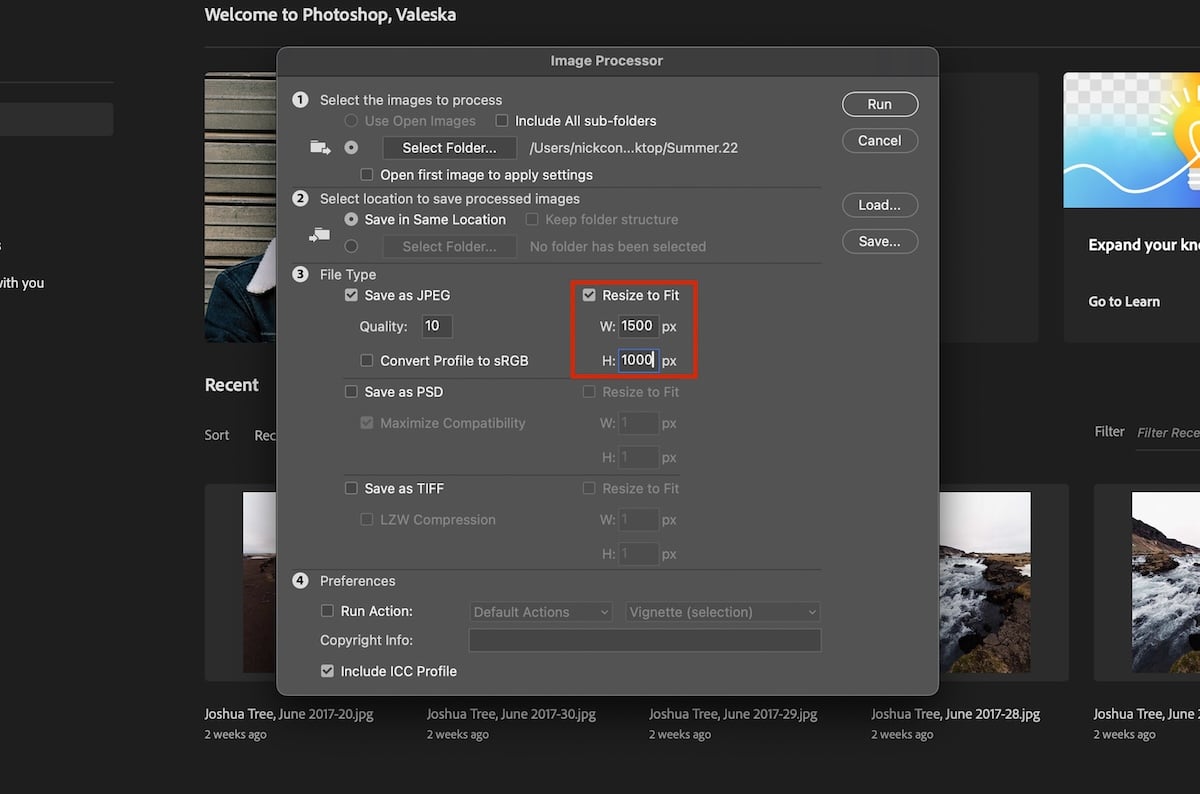
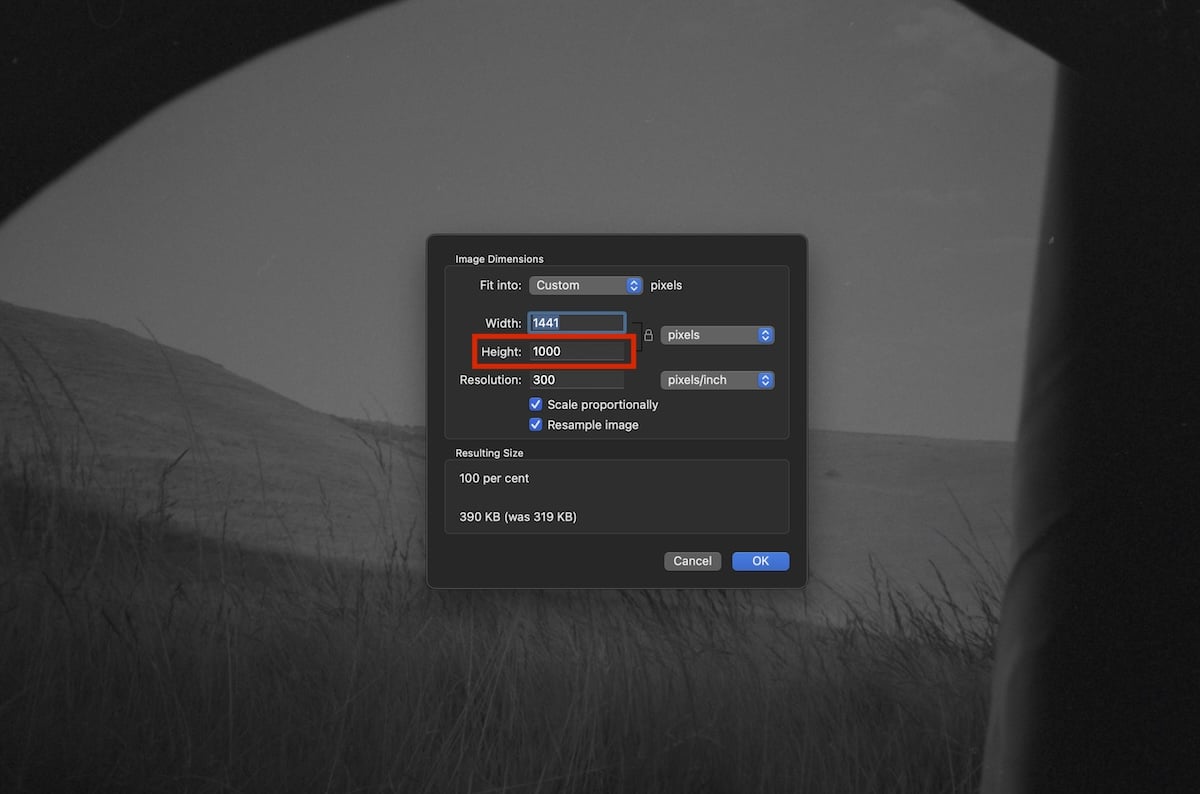
If you click Resize to Fit, you will have the option to resize your images in detail. Here, you will enter the width and height dimensions in pixels. The Image Processor will export your image as the smallest number from either the Width or Height.
The export process will not skew your image, so do not worry about having the two dimensions match up perfectly.
The Image Processor also allows you to export your images as PSD or TIFF files.
Step 4 – Preferences
Adobe Photoshop also allows you to perform a selection of adjustments to your images during this process. These adjustments include adding a Vignette or a Wood Frame.
This can be useful for decoration, but we should avoid it for resizing an image. For instance, if you add a Wood Frame, the image will export as the size you set, but the frame will add extra pixels.

A selection of the extra features you can apply to your images
Step 4 – Run Image Processor
When you have set all your parameters, click Run in the top right of the Image Processor window. You will now see each image open and close individually.
Afterward you can find your images in the export location you have selected.
The results will appear in a new folder
Conclusion: Batch Resize Images in Photoshop
Batch resize images in Photoshop is one of the fastest ways to resize a wide selection of images on your computer. It is a super simple process that only takes a few steps. Once you have done the process, it will get much faster the next time you do it.


