ExpertPhotography
  • Articles
  • My Learning
  • Store
  • About
  • Contact
  • Photo Quiz
ExpertPhotography

Learn Photography
  • Quick Capture Cheat Sheets
  • Photography for Beginners
  • Intuitive Composition
  • Show more...
  • Effortless Editing With Lightroom
  • Epic Landscape Editing
  • The Preset Collection
  • Show more...
  • The Magical Photography Spellbook
  • Dreamy Childhood Portraits
  • The Creative Photography Cookbook
  • Show more...
  • Simply Stunning Landscapes
  • Infinite Exposures
  • Milky Way Mastery
  • Show more...
  • Products In Focus
  • Fairytale Portraits
  • Organic Marketing for Photographers
  • Show more...
Need Help?
Contact UsCookie PolicyPrivacy PolicyTerms of Use
Connect

ExpertPhotography is part of several affiliate sales networks. This means we may receive a commission if you purchase something by clicking on one of our links.

ExpertPhotography is a participant in the Amazon Services LLC Associates Program, an affiliate advertising program designed to provide a means for sites to earn advertising fees by advertising and linking to amazon.com.

As an Amazon Associate, I earn from qualifying purchases.

Expert Photography © 2011-2024. All Rights Reserved.

Privacy Policy Terms of Use

Photoshop Processing

How to Blur a Face in Photoshop

Szilard Kovacs
by Szilard Kovacs
Last updated: 21/10/2024-3 min read
ExpertPhotography is supported by readers. Product links on ExpertPhotography are referral links. If you use one of these and buy something, we make a little money. Need more info? See how it all works here.

In this article, you’ll learn how to Blur a Face in Photoshop. This skill is essential for protecting privacy or creating artistic effects. We’ll guide you through a step-by-step process, from selection to the final merge. Mastering this technique will enhance your Photoshop abilities.

Step 1. Select the Face to be Blurred

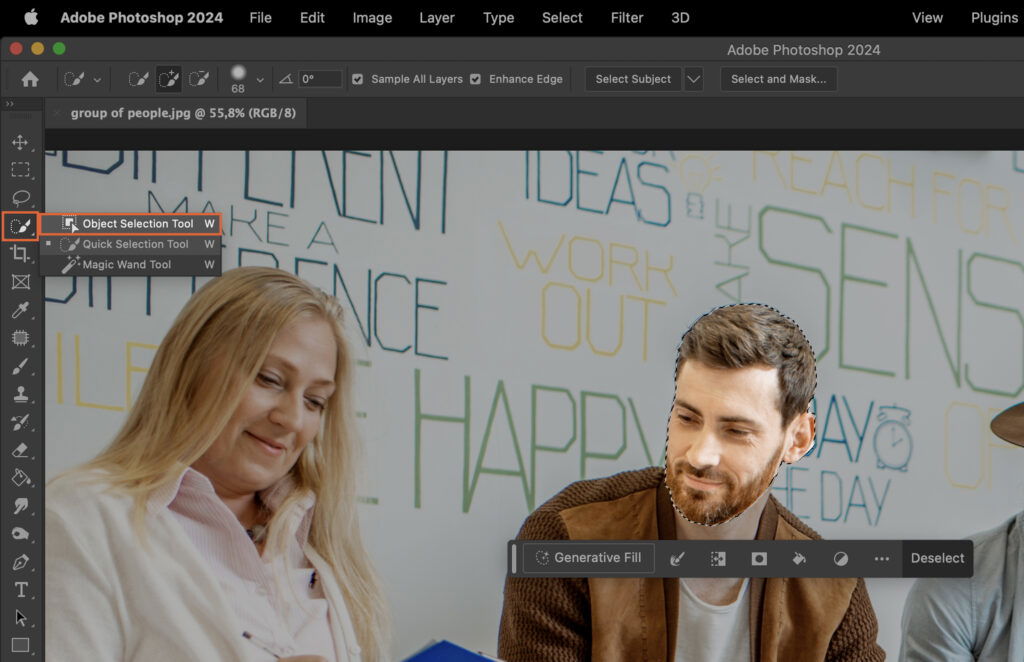
First things first, we need to identify the face we want to blur. We can do this using two handy tools in Photoshop: the Lasso Tool and the Quick Selection Tool.

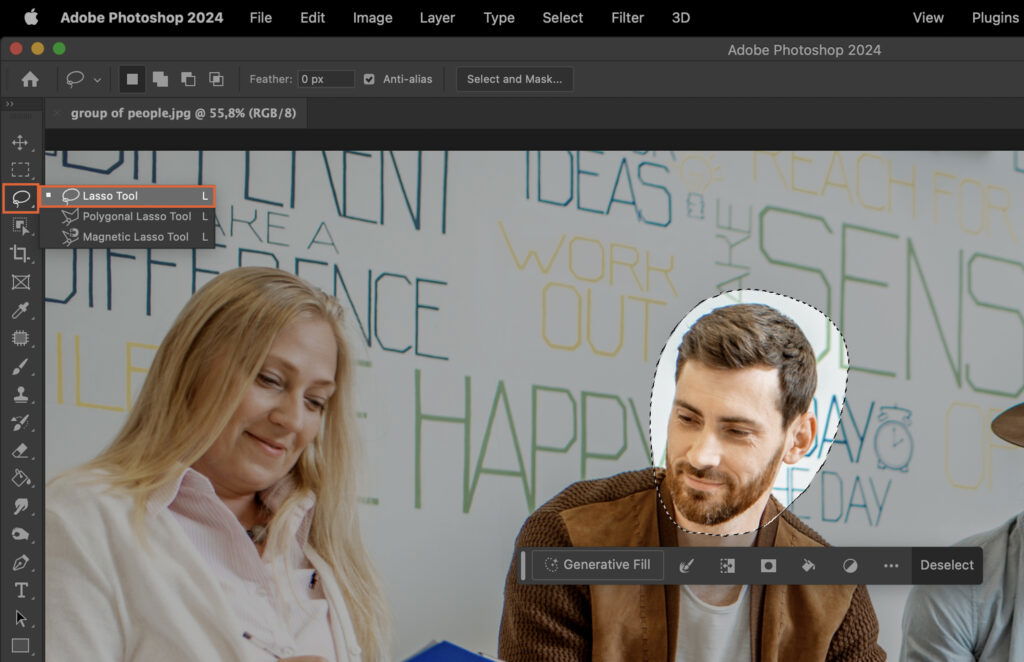
Step 1.1 Using the Lasso Tool

The Lasso Tool lets you draw a selection around the face. Simply click and drag around the area you want to blur. Make sure you’re as precise as possible to prevent blurring unwanted areas.

Adobe Photoshop interface, showcasing the use of a layering effect to combine two photos in one frame, with one man and woman interacting with each other.

Step 1.2 Using the Quick Selection Tool

The Quick Selection Tool is a more automatic option. Click on the tool, then click and drag over the face. Photoshop will auto-select the face for you. Adjust the size of the tool for better accuracy.

Adobe Photoshop software interface, with various tools and panels visible.

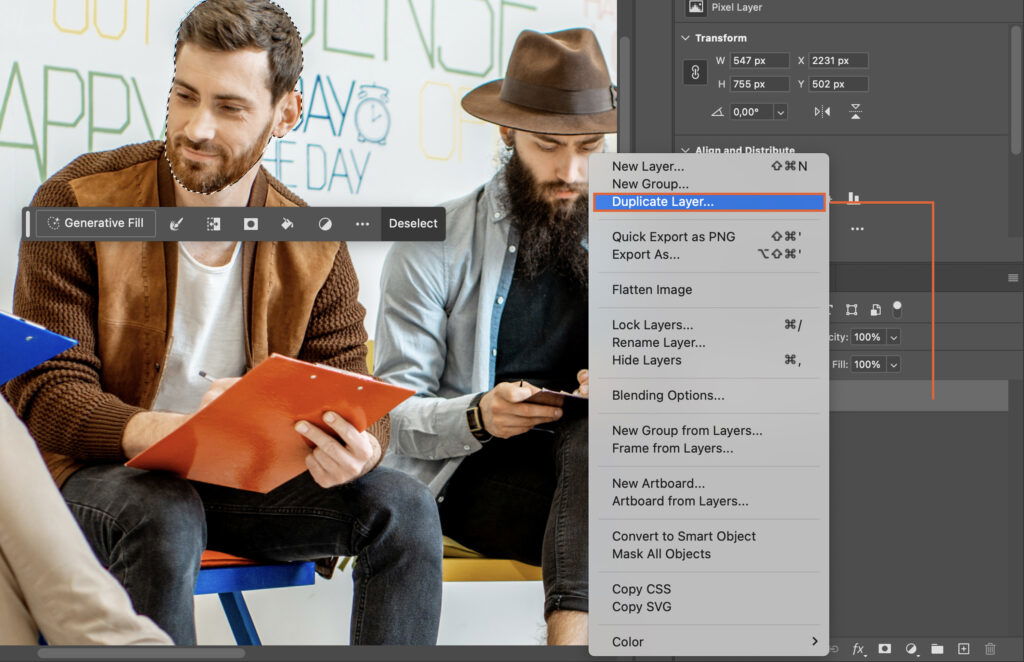
Step 2. Create a Duplicate Layer

After selecting the face, create a duplicate layer. This ensures you have a backup of the original image. Go to the Layers panel, right-click on the existing layer, and select ‘Duplicate Layer’.

A photo editing software with a finished image displayed, showing two men sitting in front of each other.

Step 3. Apply the Blur Effect

Next, apply the blur effect to the duplicate layer. You have three options: Gaussian Blur, Motion Blur, and Lens Blur.

An image editing software with various tools and settings displayed, showcasing the use of AI technology for photo editing.

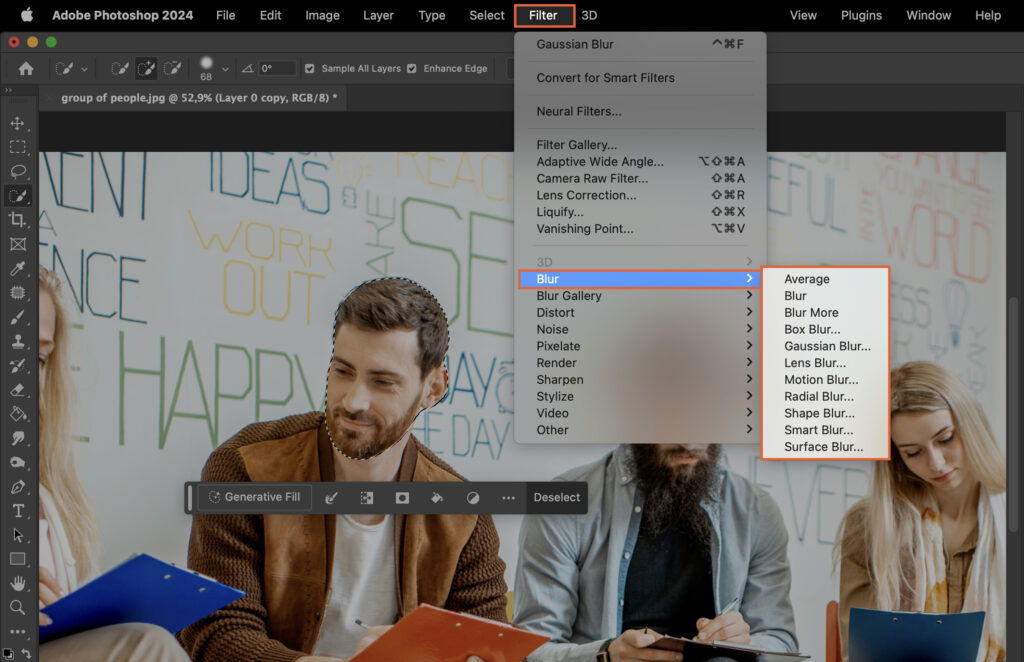
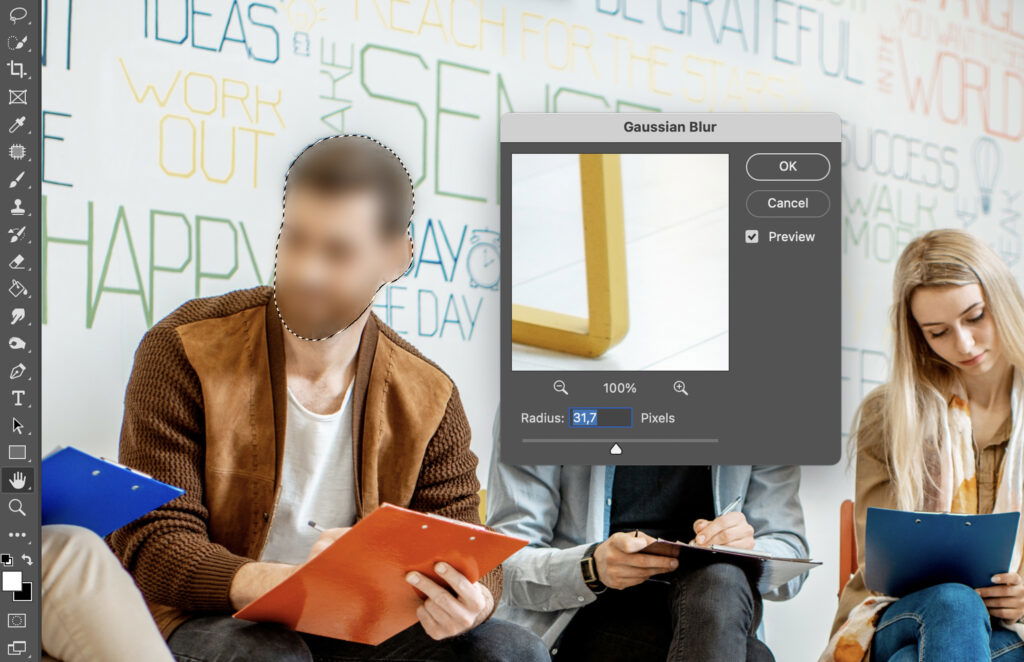
Step 3.1 Using the Gaussian Blur

Gaussian Blur is a versatile choice that adds a general blur. Go to the ‘Filter’ tab, choose ‘Blur’, then ‘Gaussian Blur’. Adjust the radius to control the blur level.

Adobe Photoshop interface open, displaying a photo of three people sitting together in a modern indoor setting.

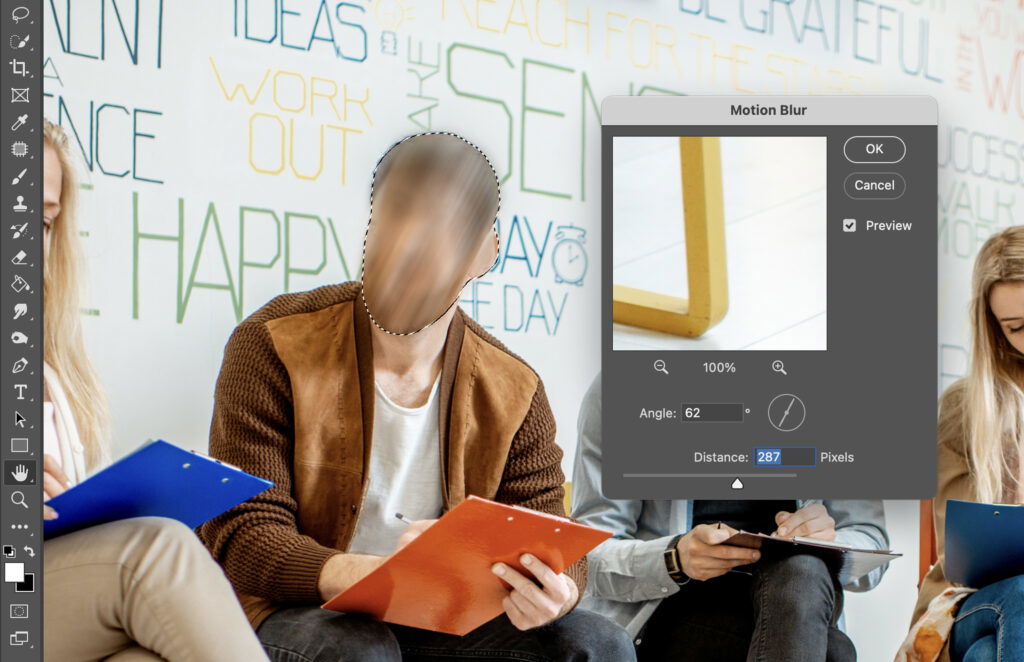
Step 3.2 Using the Motion Blur

Motion Blur gives the effect of movement. Follow the same steps as above, but select ‘Motion Blur’. Adjust the angle and distance to control the blur direction and strength.

A collage of people working, with a focus on an individuals computer screen displaying image editing software.

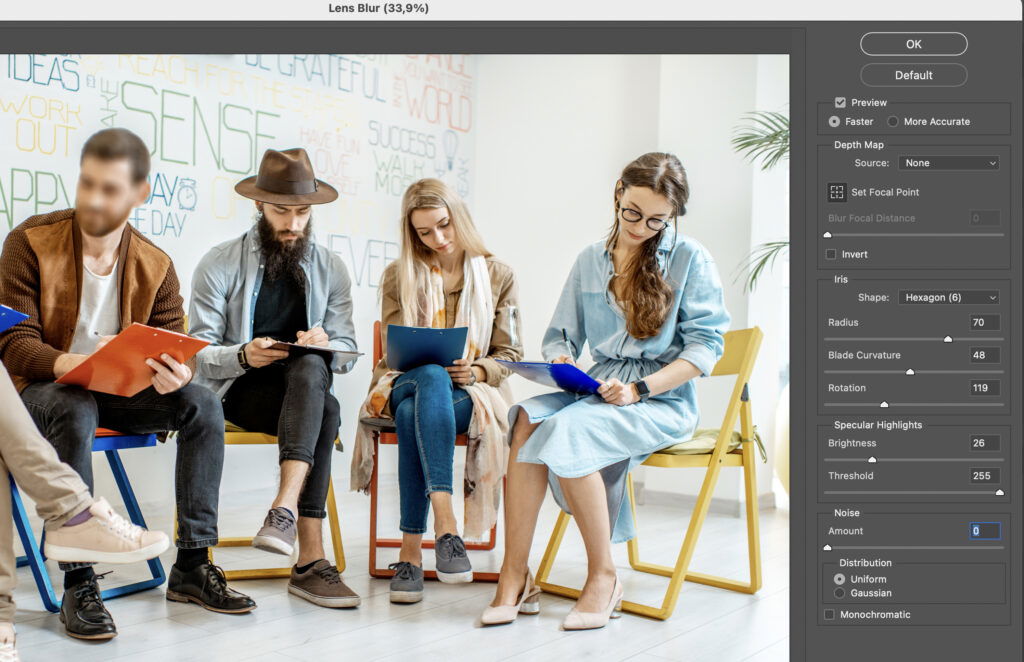
Step 3.3 Using the Lens Blur

Lens Blur creates a depth-of-field effect. Again, follow the same steps, but select ‘Lens Blur’. Adjust the radius and shape to control the blur.

A group of people sitting around chairs and tables while one person is reading something on a tablet.

Step 4. Modify the Blur Level

If the blur is too strong or weak, modify it. Go back to the blur settings and adjust the radius (Gaussian and Lens Blur) or distance (Motion Blur).
Sidebar-ad_QCC_related-product
Sidebar-ad_QCC_free-sample_
Sidebar-ad_QCC_free-download_2-posters

Popular Content

Fujifilm X-T200 Review (Should You Buy This Camera in 2024?)

Read Article