ExpertPhotography
  • Articles
  • My Learning
  • Store
  • About
  • Contact
  • Photo Quiz
ExpertPhotography

Learn Photography
  • Quick Capture Cheat Sheets
  • Photography for Beginners
  • Intuitive Composition
  • Show more...
  • Effortless Editing With Lightroom
  • Epic Landscape Editing
  • The Preset Collection
  • Show more...
  • The Magical Photography Spellbook
  • Dreamy Childhood Portraits
  • The Creative Photography Cookbook
  • Show more...
  • Simply Stunning Landscapes
  • Infinite Exposures
  • Milky Way Mastery
  • Show more...
  • Products In Focus
  • Fairytale Portraits
  • Organic Marketing for Photographers
  • Show more...
Need Help?
Contact UsCookie PolicyPrivacy PolicyTerms of Use
Connect

ExpertPhotography is part of several affiliate sales networks. This means we may receive a commission if you purchase something by clicking on one of our links.

ExpertPhotography is a participant in the Amazon Services LLC Associates Program, an affiliate advertising program designed to provide a means for sites to earn advertising fees by advertising and linking to amazon.com.

As an Amazon Associate, I earn from qualifying purchases.

Expert Photography © 2011-2024. All Rights Reserved.

Privacy Policy Terms of Use

Photoshop Processing

How to Brighten an Image in Photoshop

Szilard Kovacs
by Szilard Kovacs
Last updated: 21/10/2024-6 min read
ExpertPhotography is supported by readers. Product links on ExpertPhotography are referral links. If you use one of these and buy something, we make a little money. Need more info? See how it all works here.

Learning how to brighten an image in Photoshop can drastically enhance your photo editing skills. This article provides a detailed guide to image brightening, offering tools and techniques that can transform dull pictures into vibrant works of art.

Step 1. Access the Image Adjustment Tools

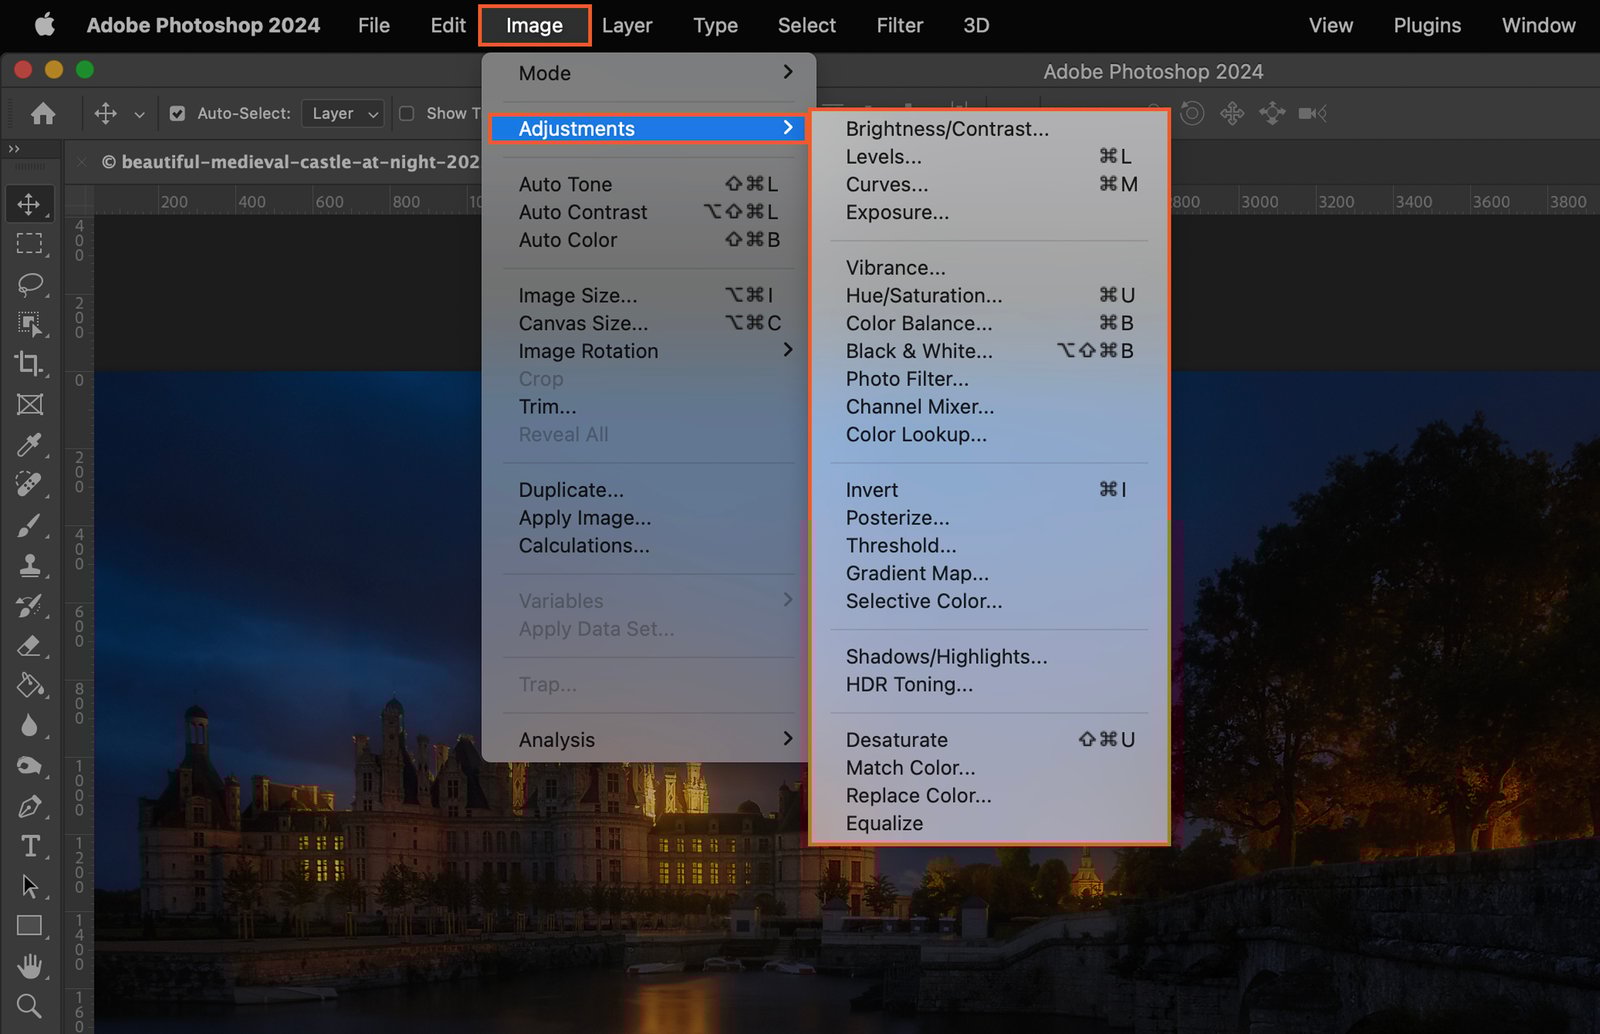
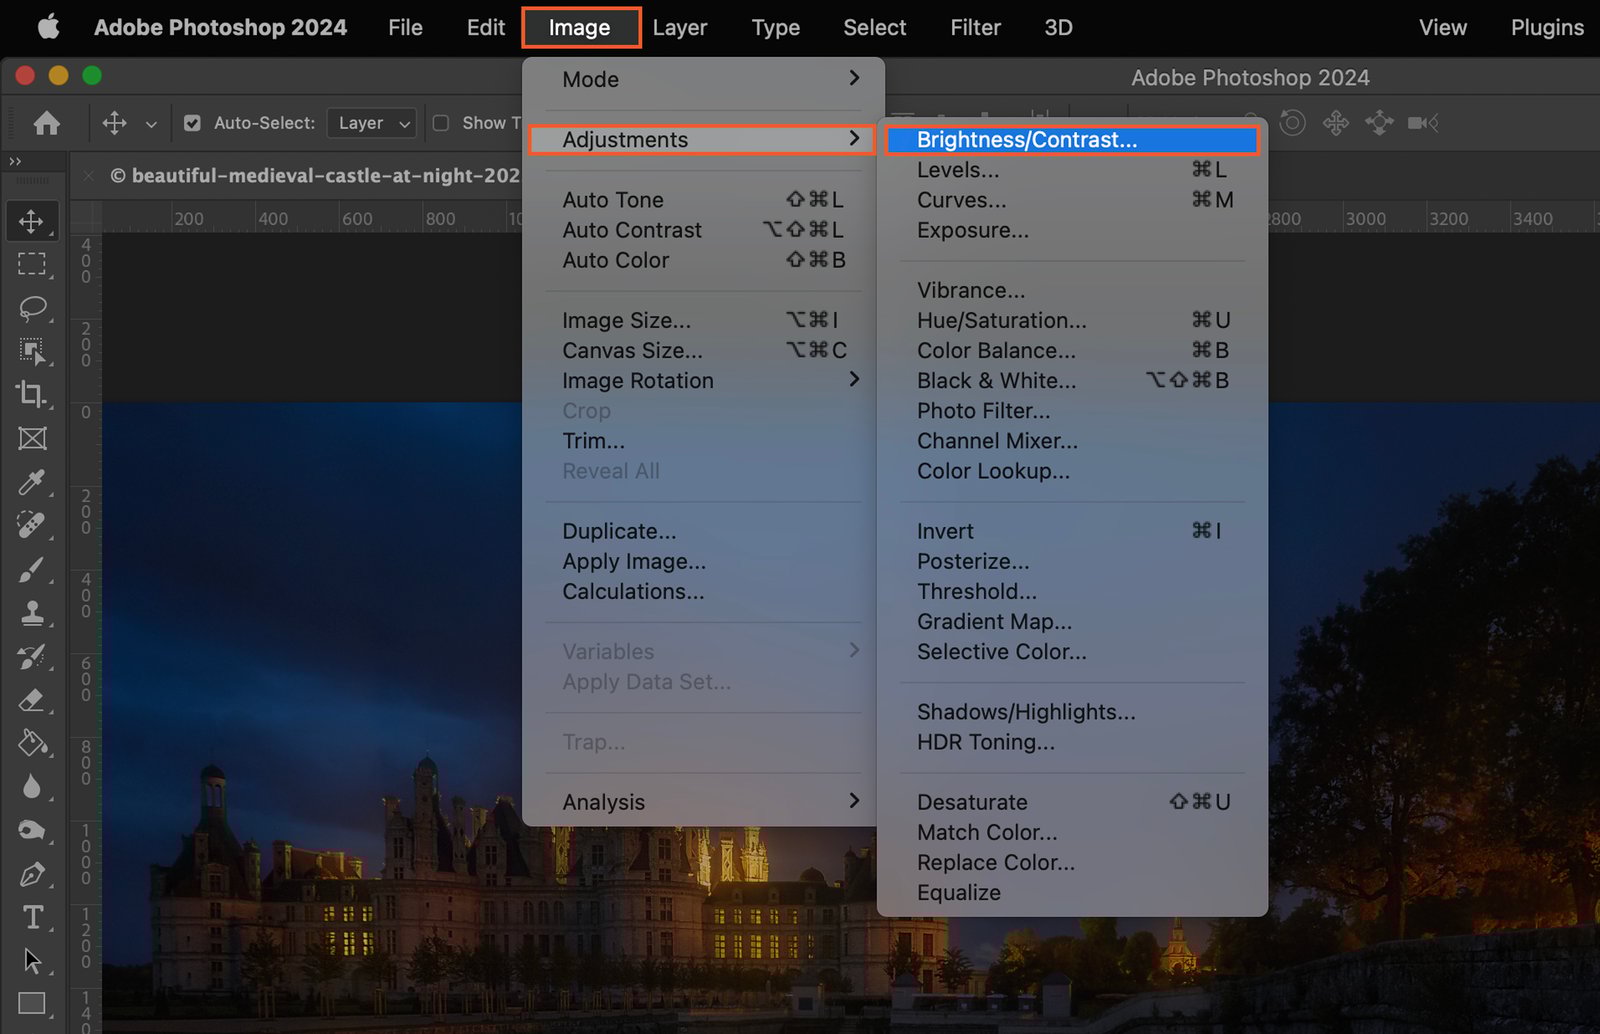
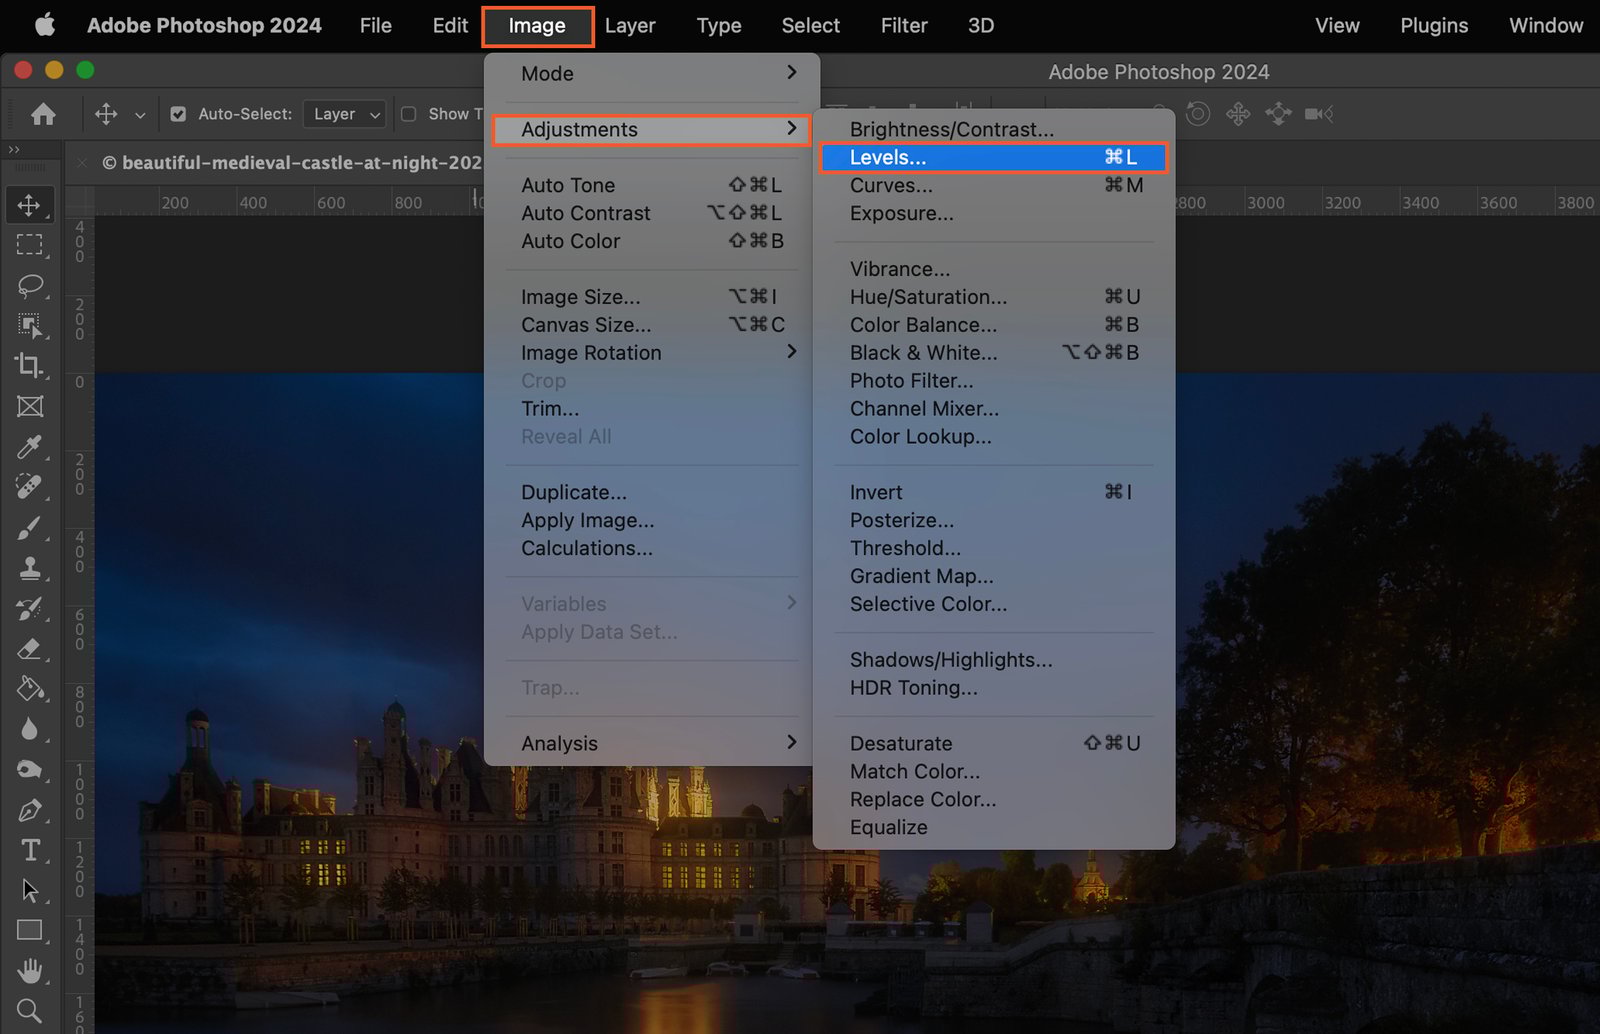
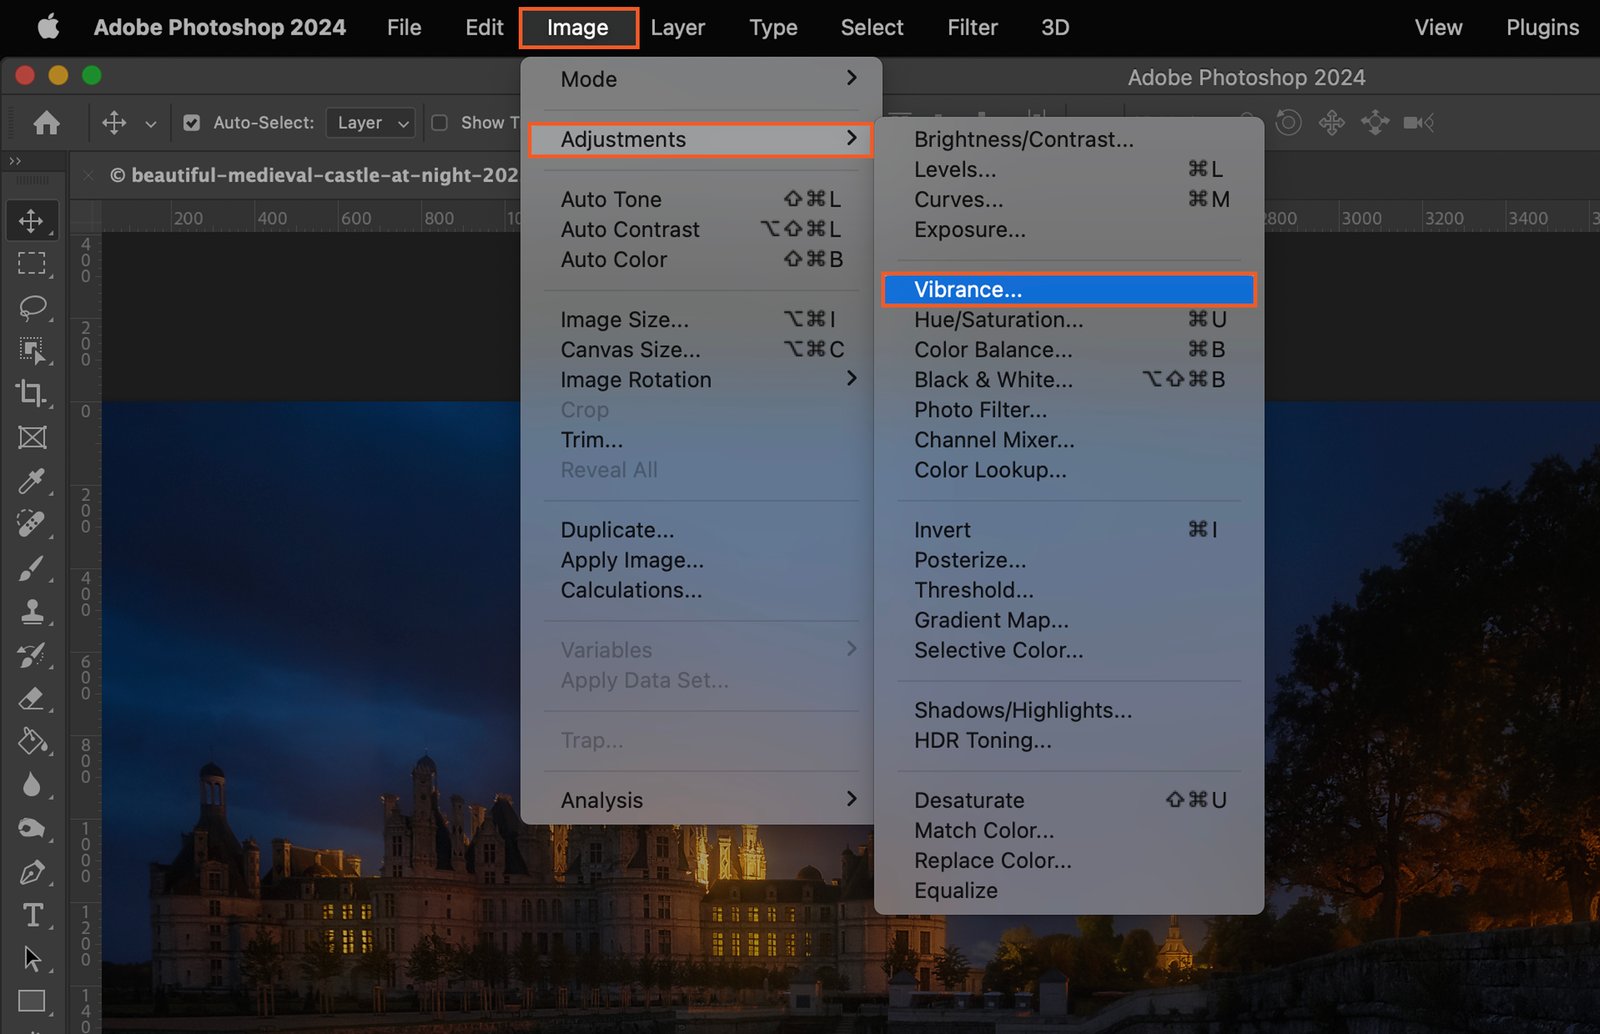
Start by opening your image in Photoshop. Go to the menu bar at the top and click on “Image”. In the dropdown menu, select “Adjustments”. This will reveal a host of tools for altering your image.

Adobe Photoshop program with the user interface partially obscured, showcasing a cityscape image with overlay text and various controls and panels.

Step 2. Use Brightness/Contrast Adjustment

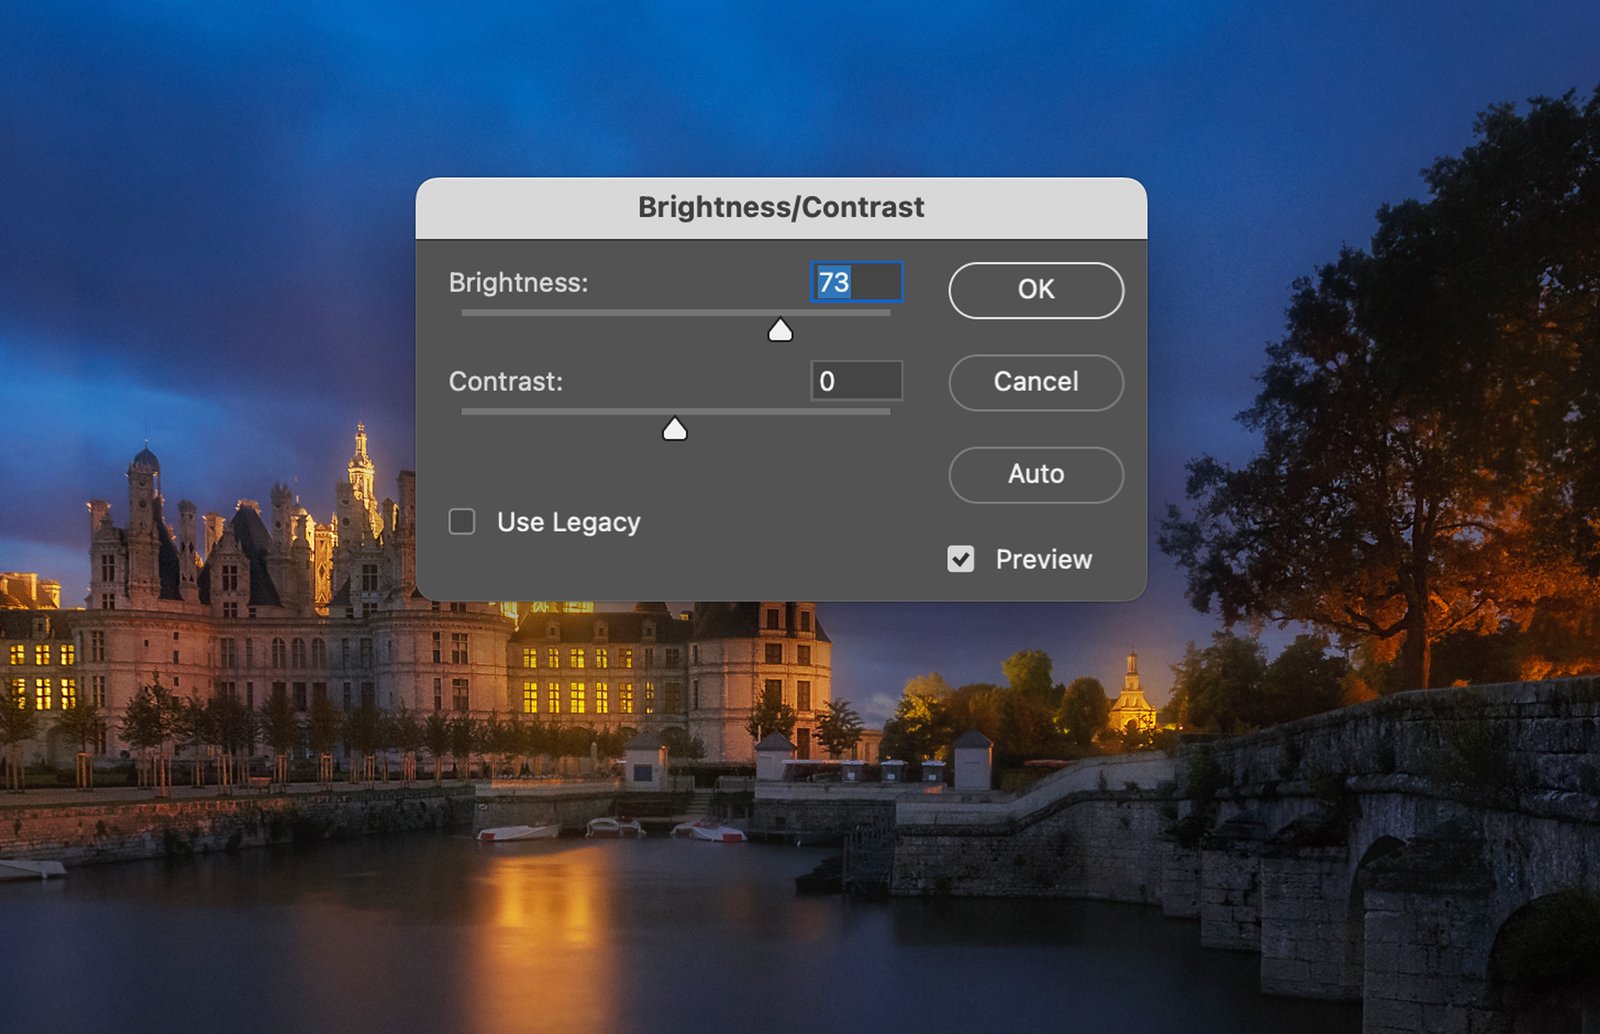
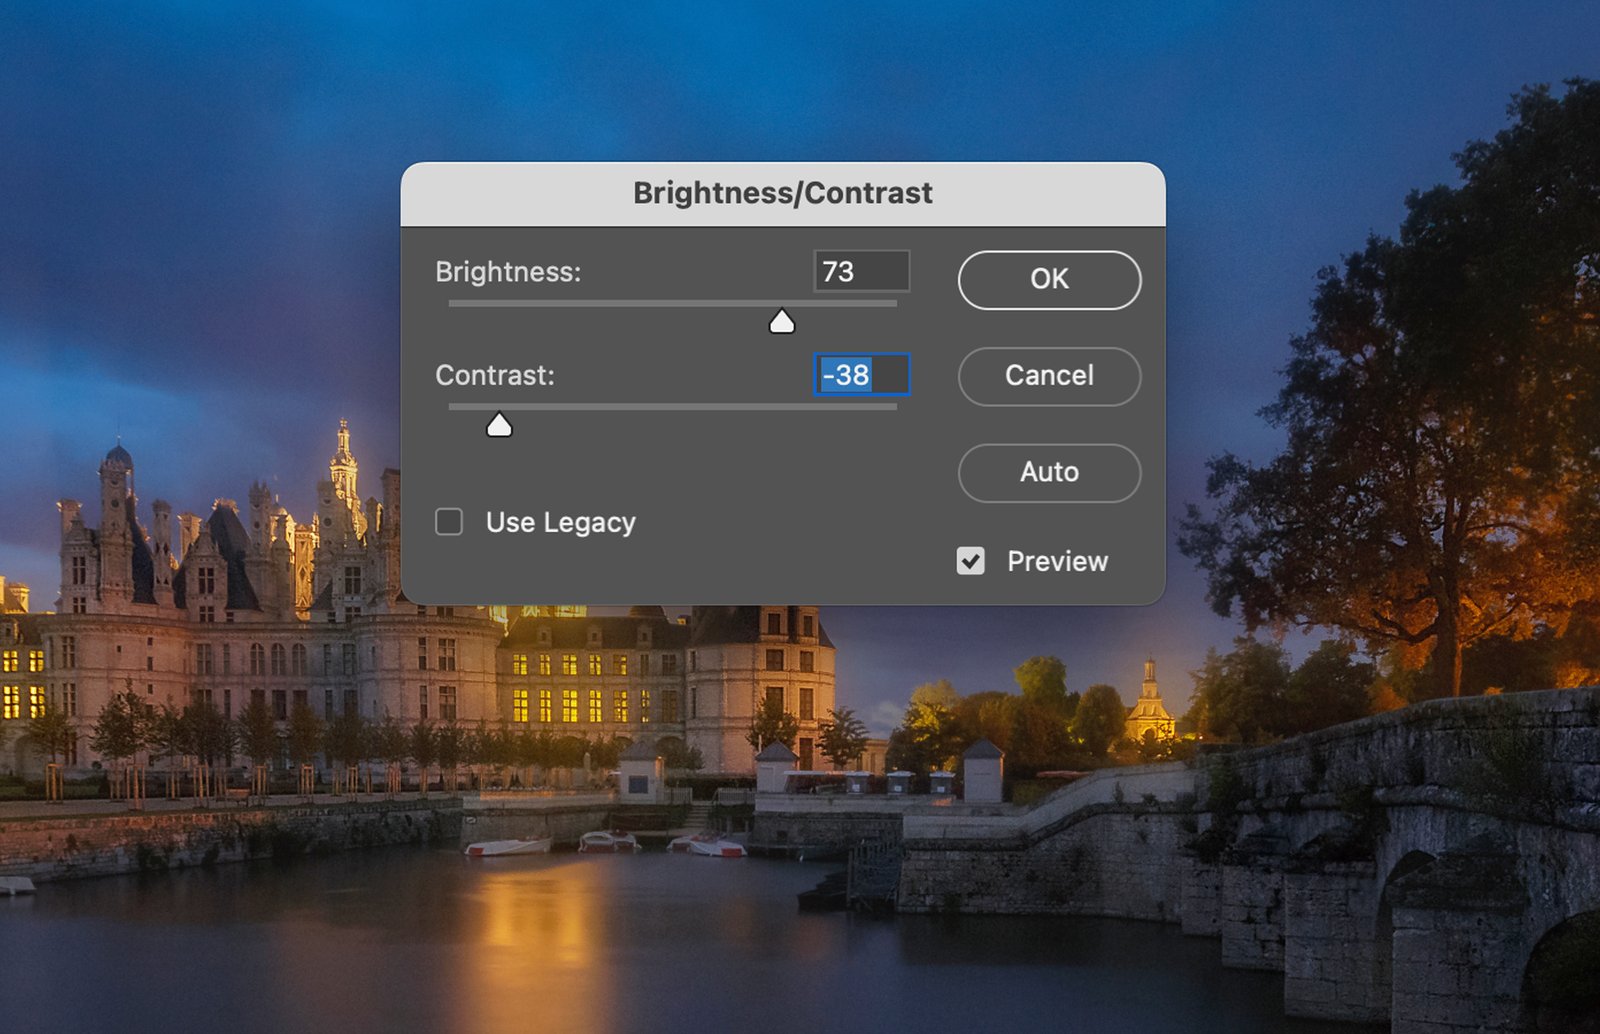
In the “Adjustments” menu, select “Brightness/Contrast”. This tool allows you to control the overall lightness or darkness and the range of tones in your photo.

Adobe Photoshop program, with a photo file selected in the Explorer window and properties displayed on the right side.

Step 2.1. Adjusting Brightness

Slide the “Brightness” control to the right to lighten the image and to the left to darken it. Be cautious not to overdo it as it may result in loss of detail.

An altered photo where the brightness has been increased significantly using Photoshop.

Step 2.2. Adjusting Contrast

The “Contrast” slider will increase or decrease the difference between dark and light areas. Slide to the right to enhance contrast and to the left to reduce it.

A dialog box open, displaying contrast adjustment options for a photo.

Step 3. Apply Levels Adjustment

Navigate back to the “Adjustments” menu and select “Levels”. This tool allows you to control the intensity levels of shadows, midtones, and highlights.

A Photoshop window open, displaying a watermark panel where a user is customizing the appearance of the watermark.

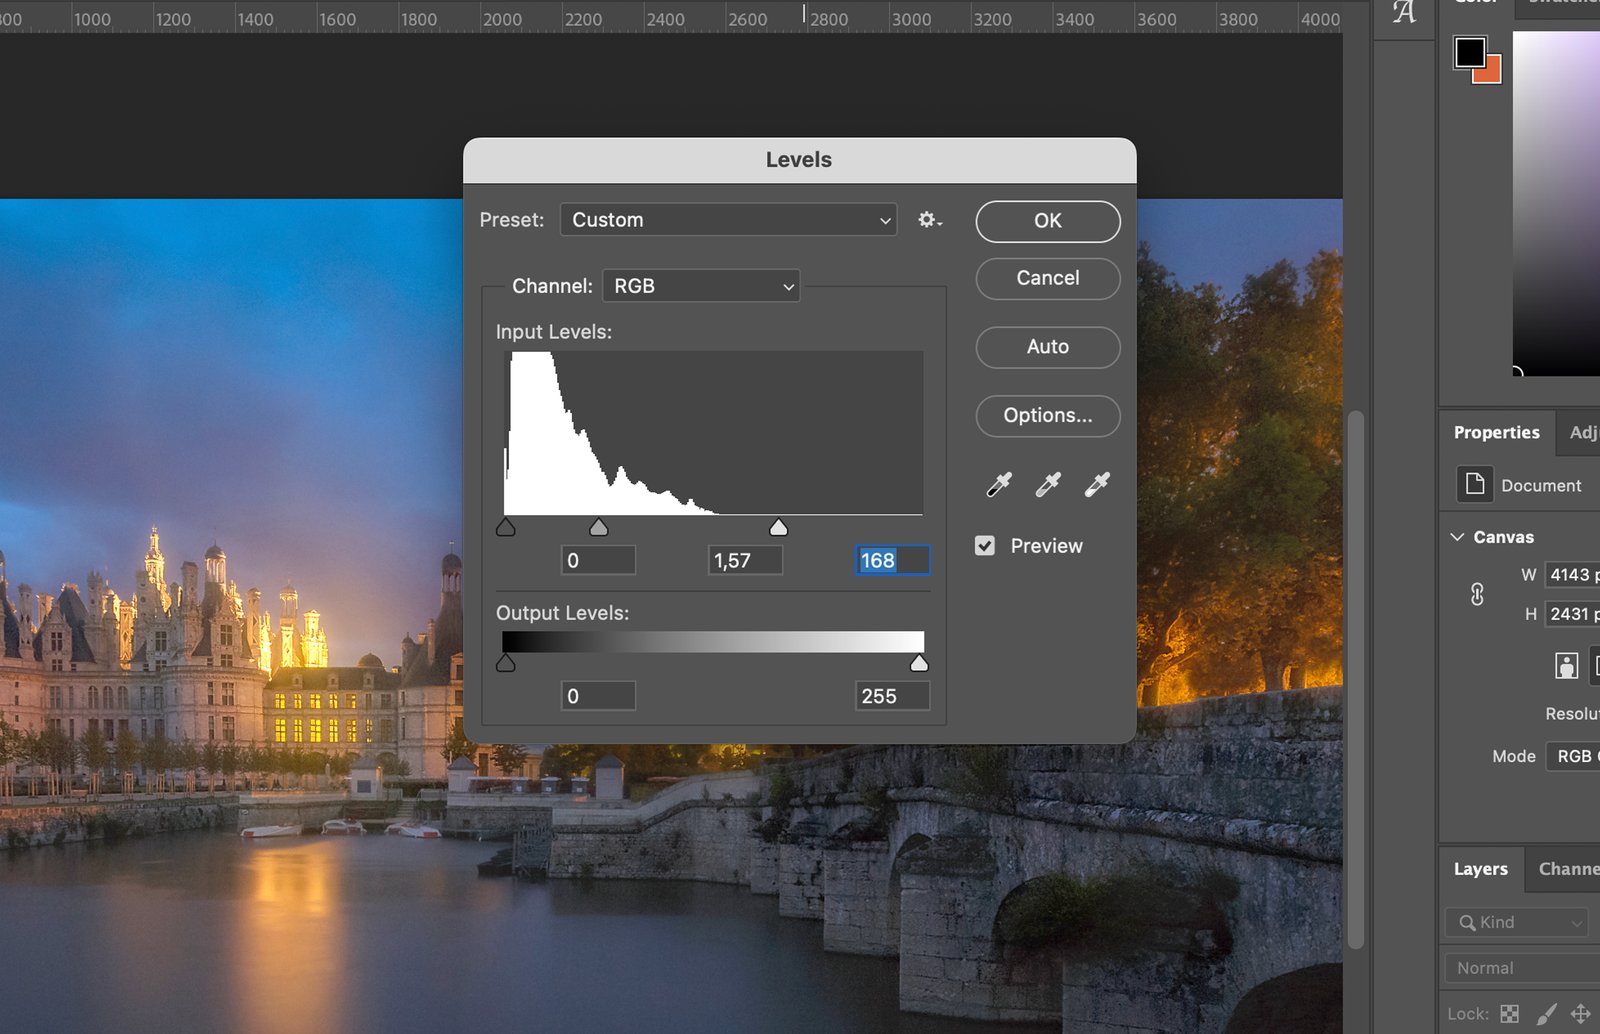
Step 3.1. Adjusting Input Levels

Input levels have three sliders: black, grey, and white. Adjusting these will alter the contrast of your image. Move the black slider to the right to darken shadows, and the white slider to the left to brighten highlights.

A editing software, where an image of a beautiful cityscape is displayed, and the user interface includes various tools for editing and adjusting the image.

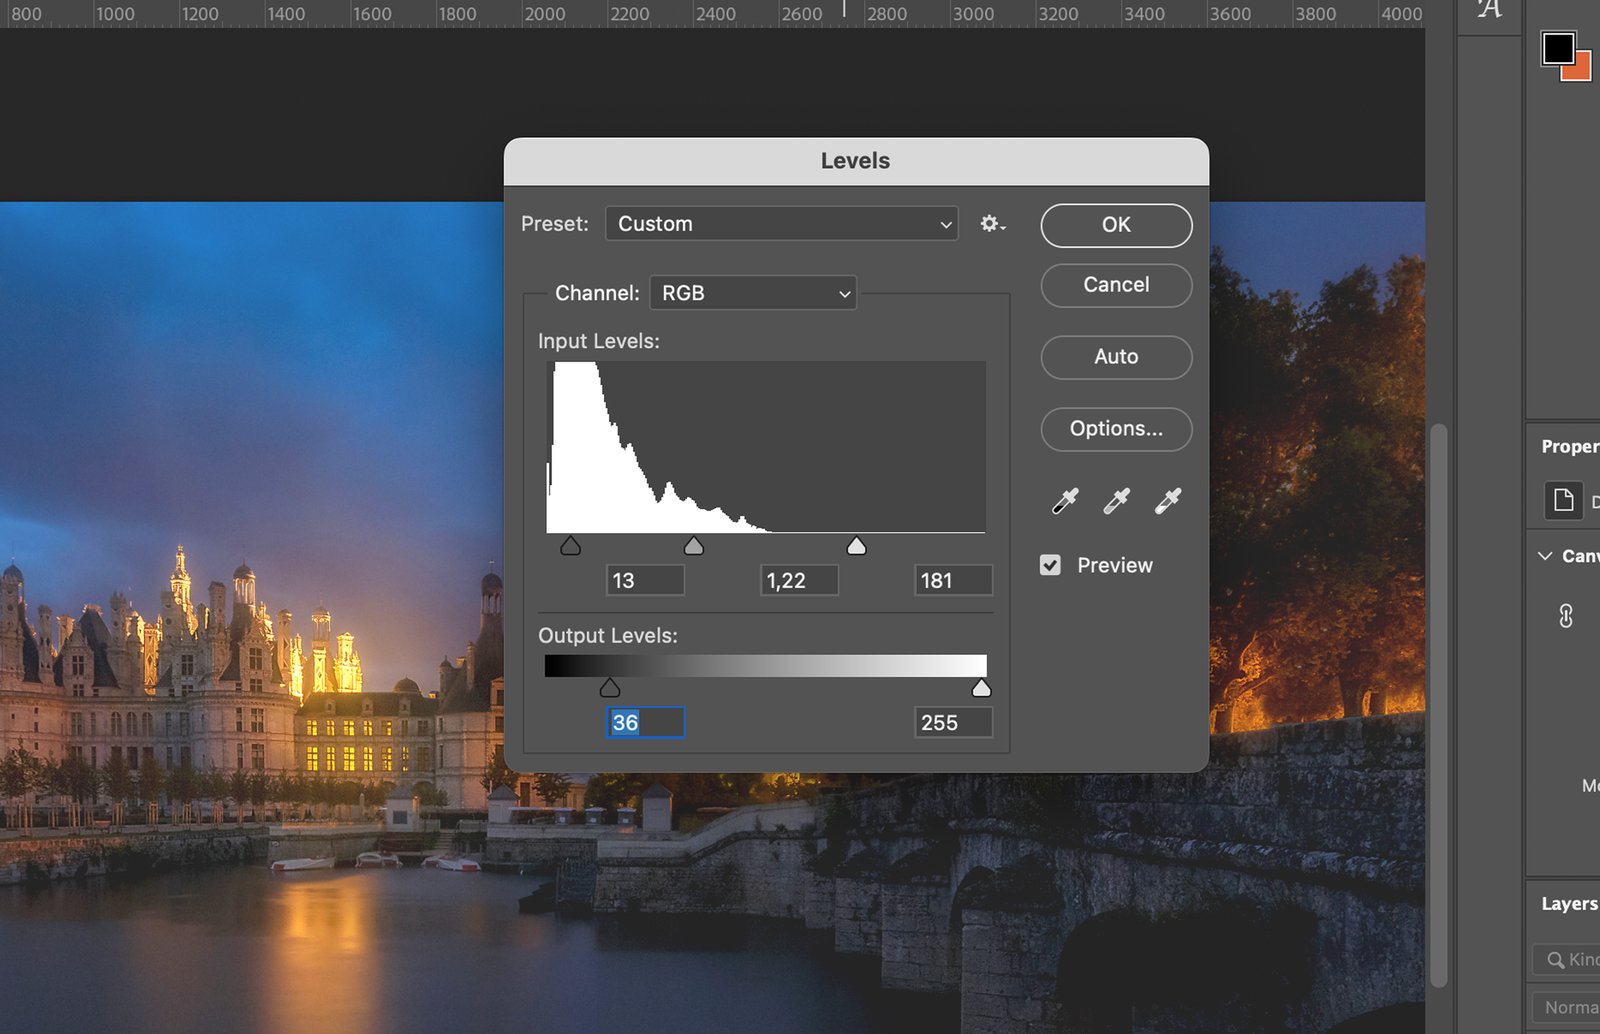
Step 3.2. Adjusting Output Levels

Output levels control the brightness and darkness of the image. Adjusting them can help you achieve a balanced brightness.

An image editing software with various tools and settings visible.

Step 4. Use Curves Adjustment

Back in the “Adjustments” menu, select “Curves”. This tool allows you to modify the image’s tonal range with more precision.]A photo editing software, displaying a collection of photographs in the lower left panel.

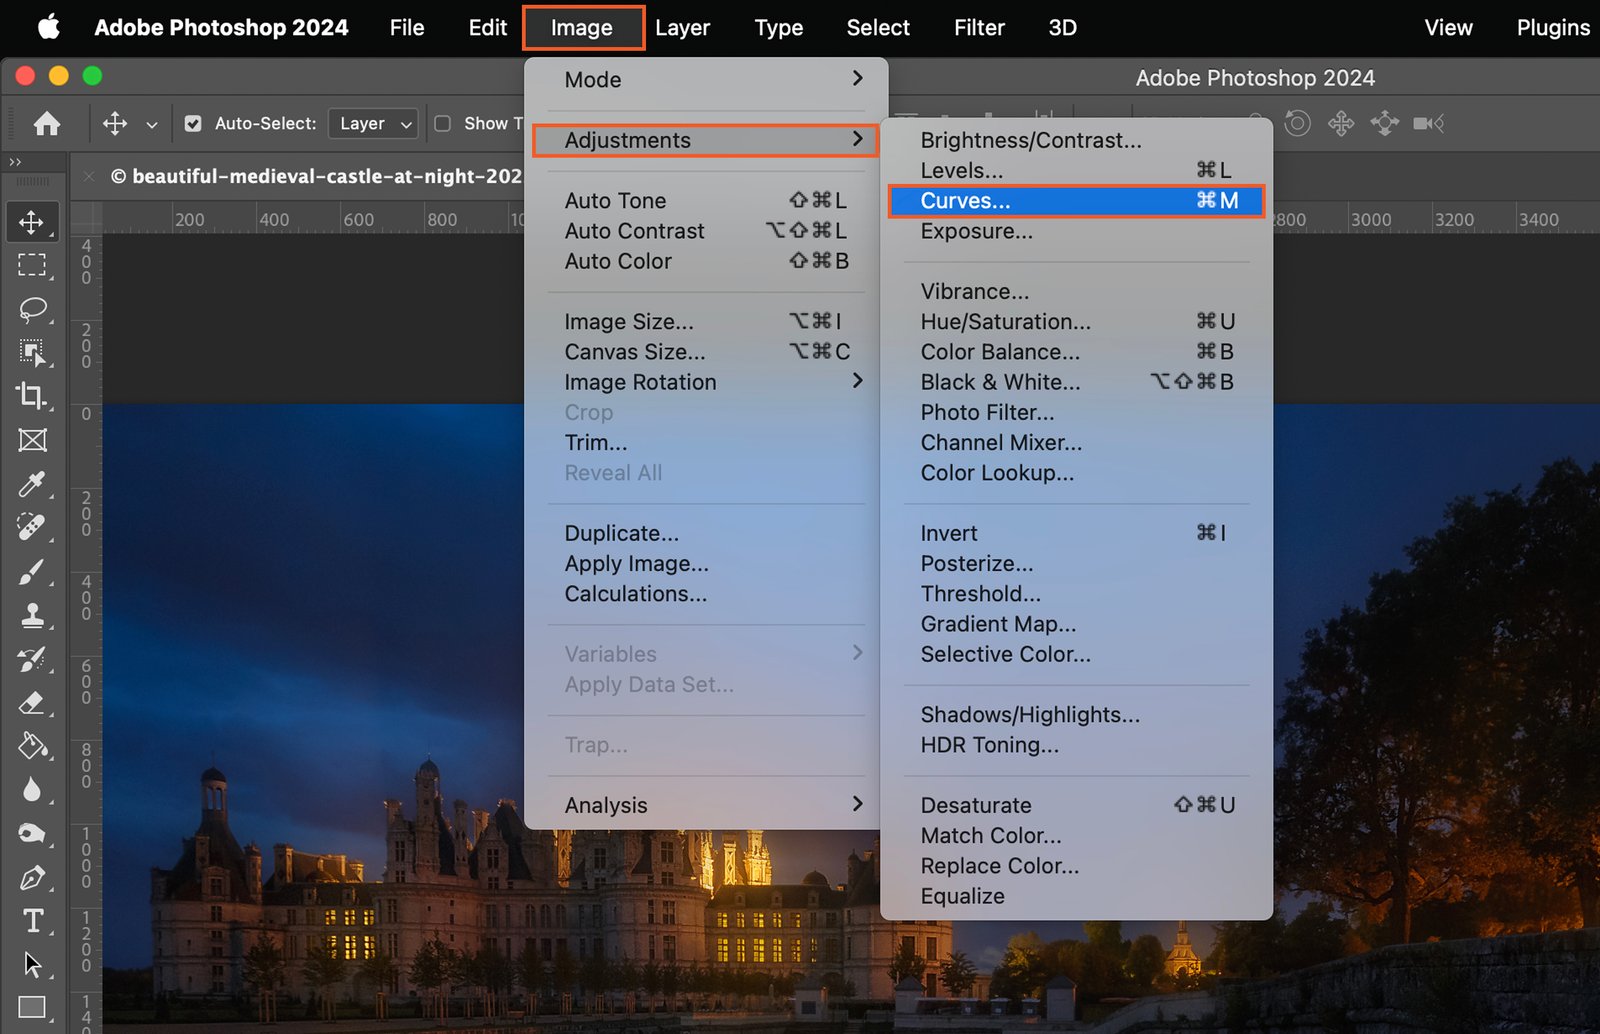
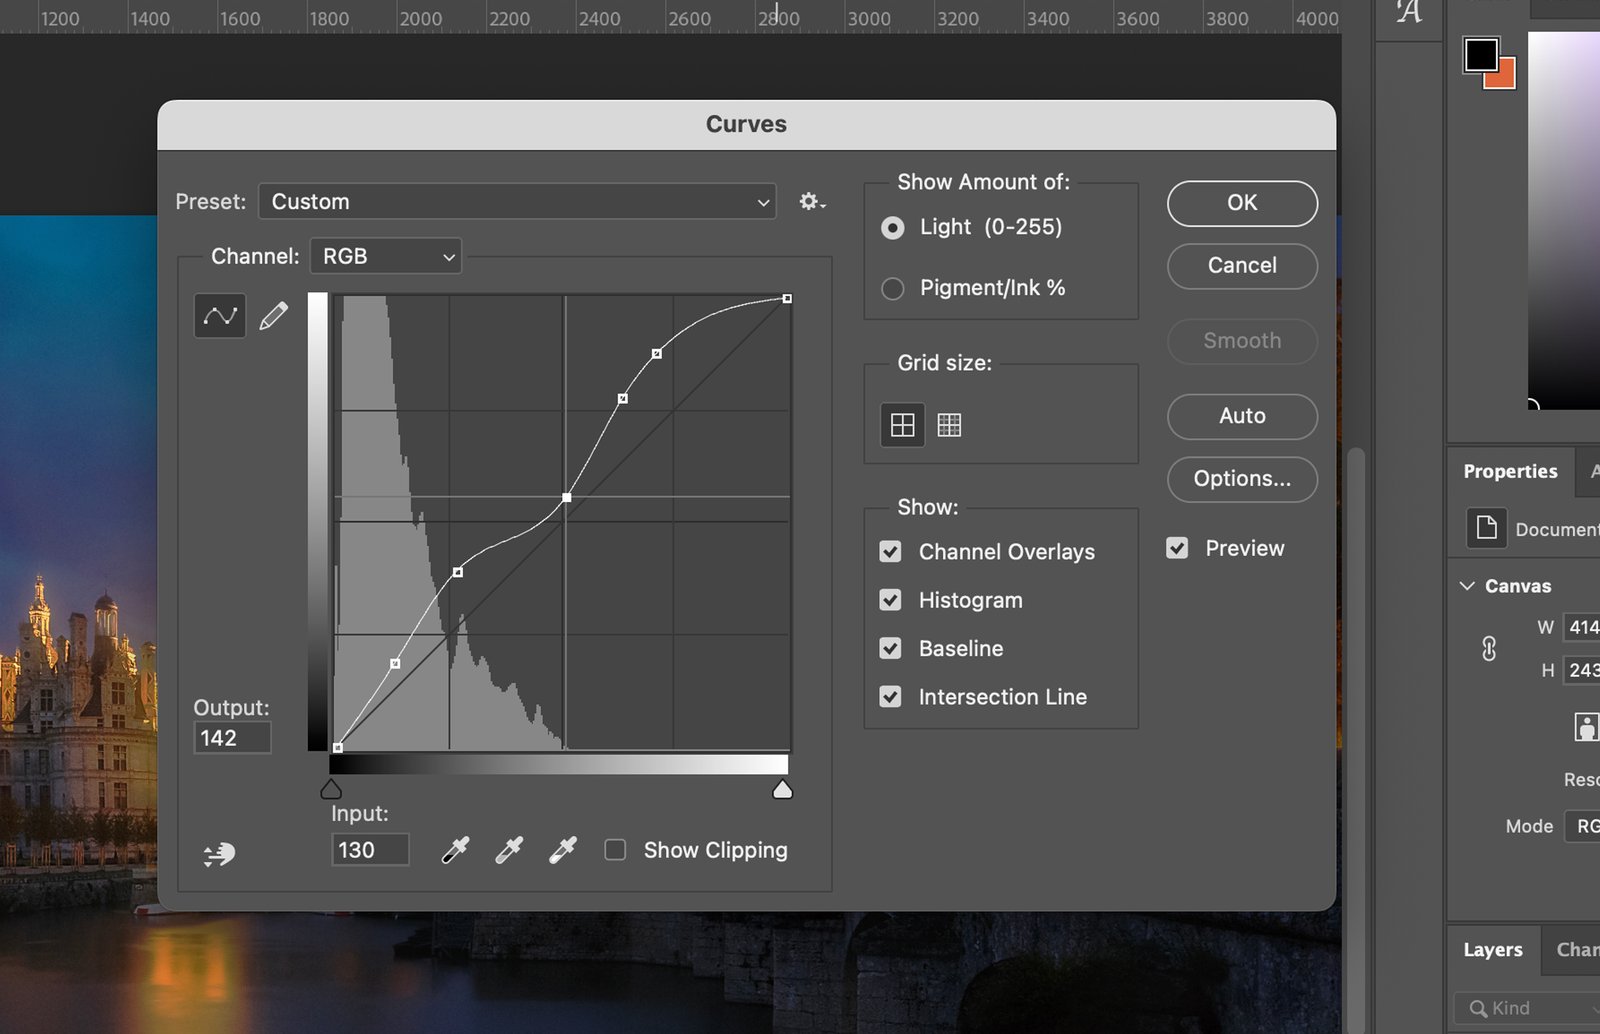
Step 4.1. Creating an S Curve

An “S” curve brightens the highlights and darkens the shadows, increasing contrast. Click in the middle of the line and drag upwards to brighten, and click again lower down and drag downwards to darken.

A photo editing software interface with an image of the Eiffel Tower open.

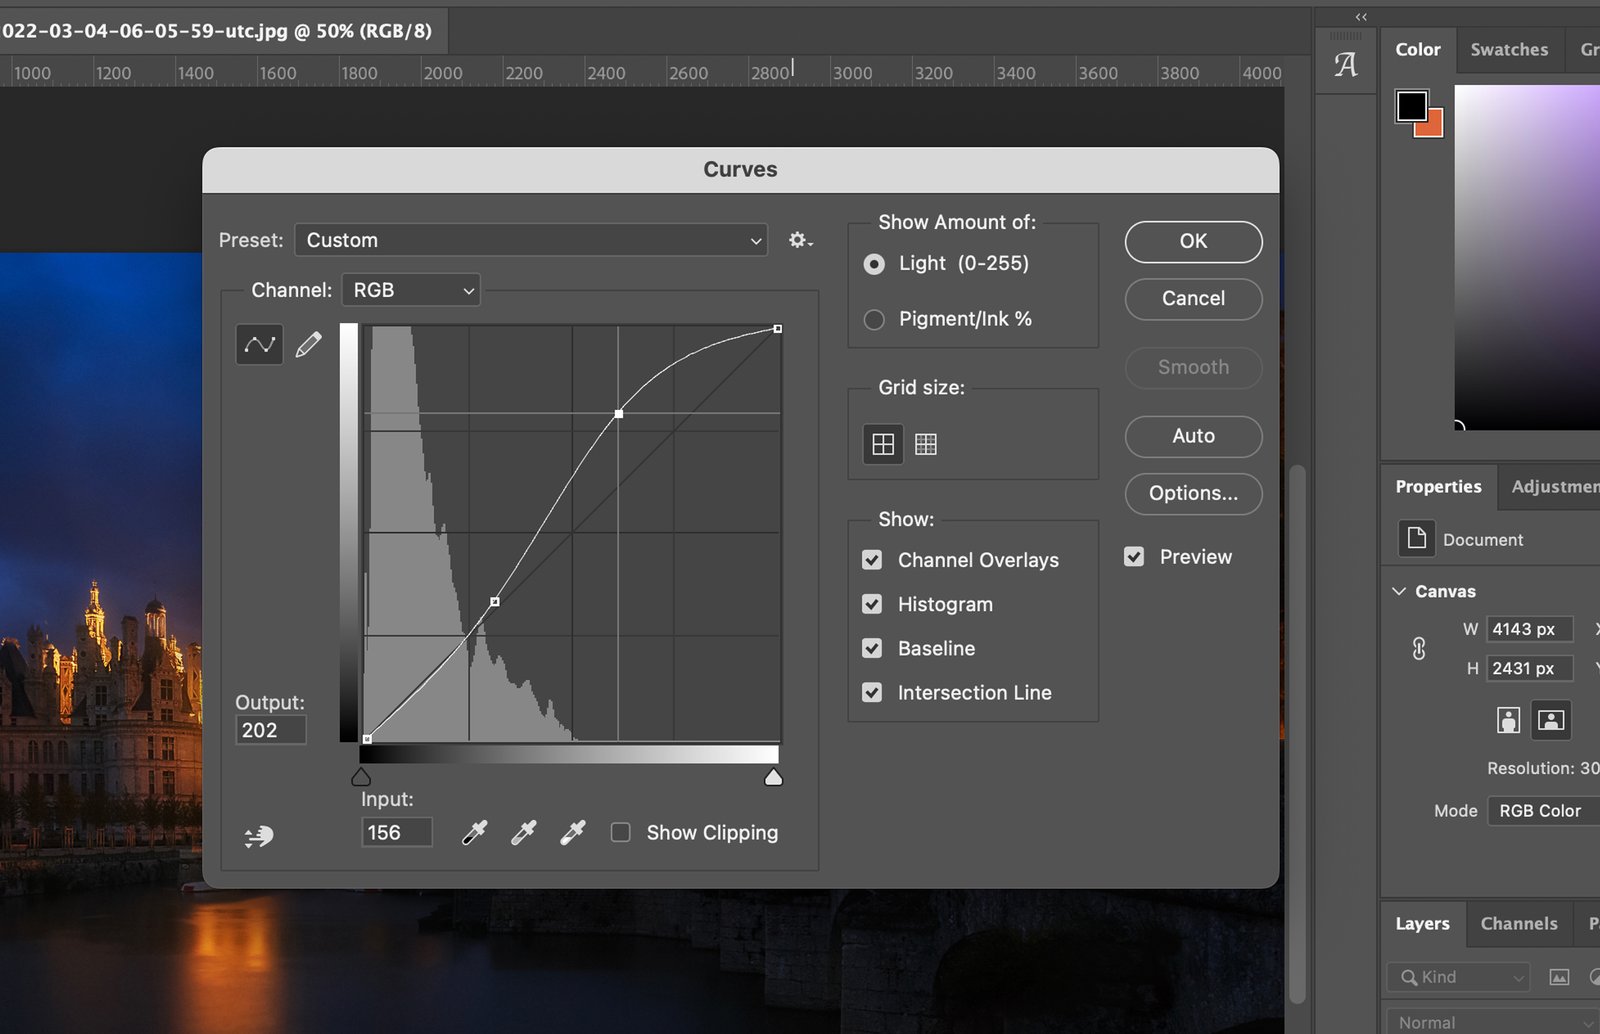
Step 4.2. Adjusting Points on the Curve

You can add more points to the curve and adjust them to fine-tune the brightness and contrast.

A software interface with various editing options and sliders, indicating that the user is likely working on graphic design or photo manipulation.

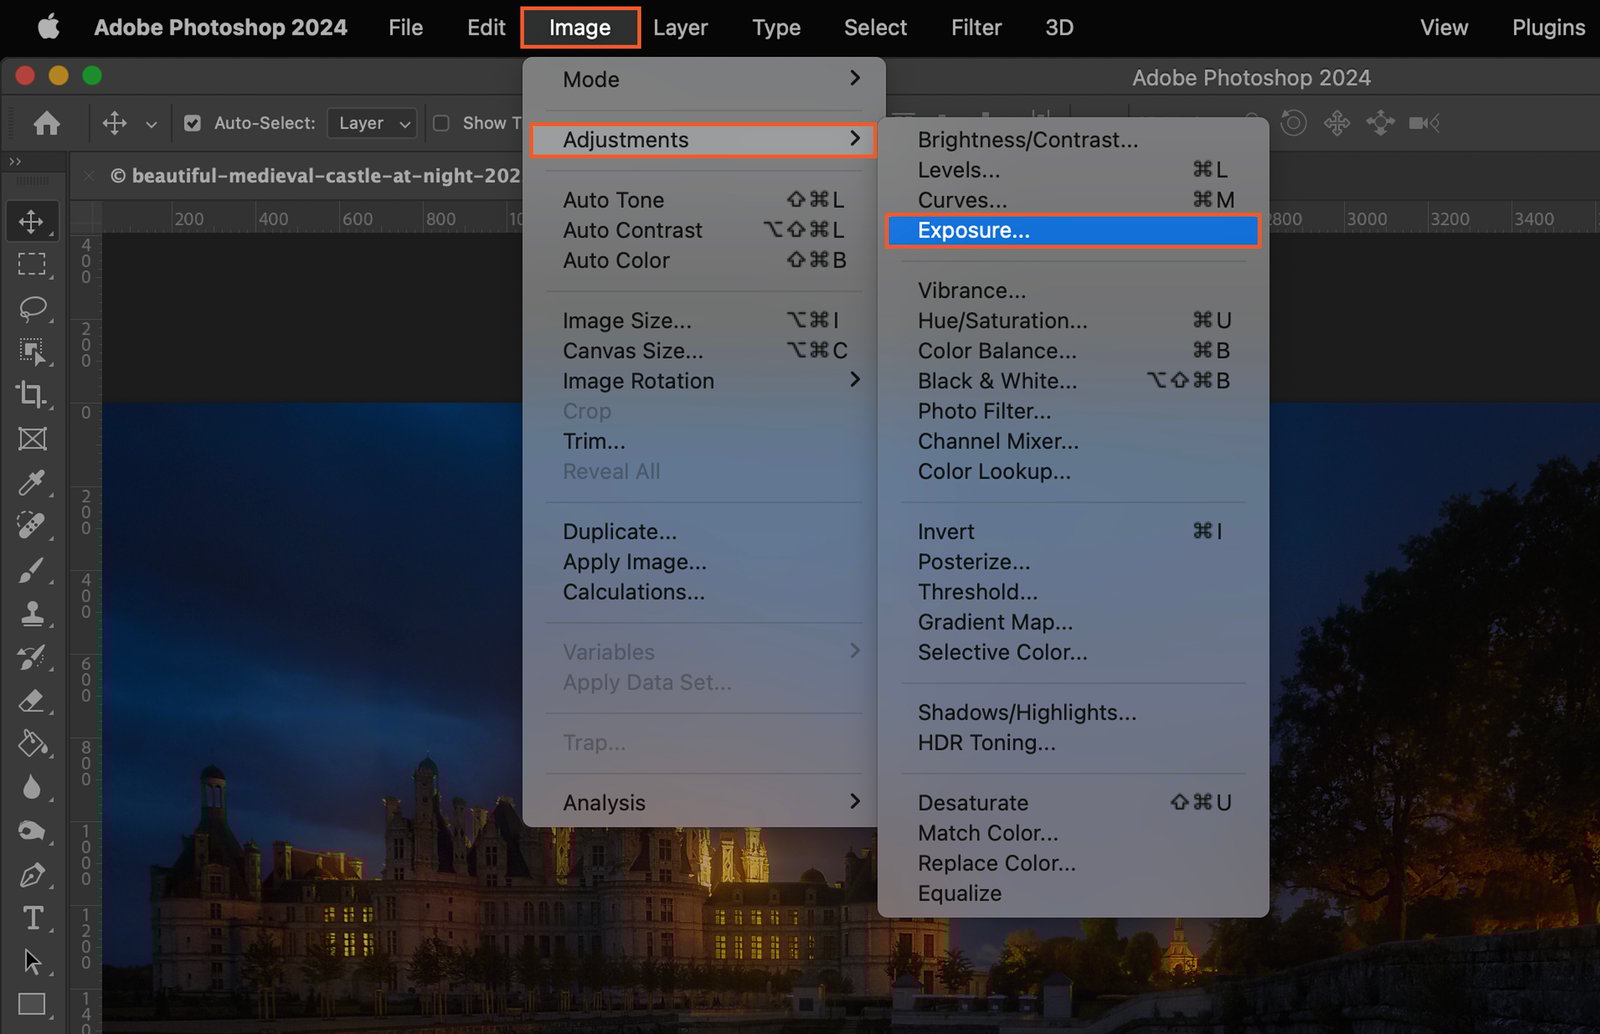
Step 5. Apply Exposure Adjustment

In the “Adjustments” menu, select “Exposure”. This tool alters the image’s overall exposure.

A digital photo album with a user interface.

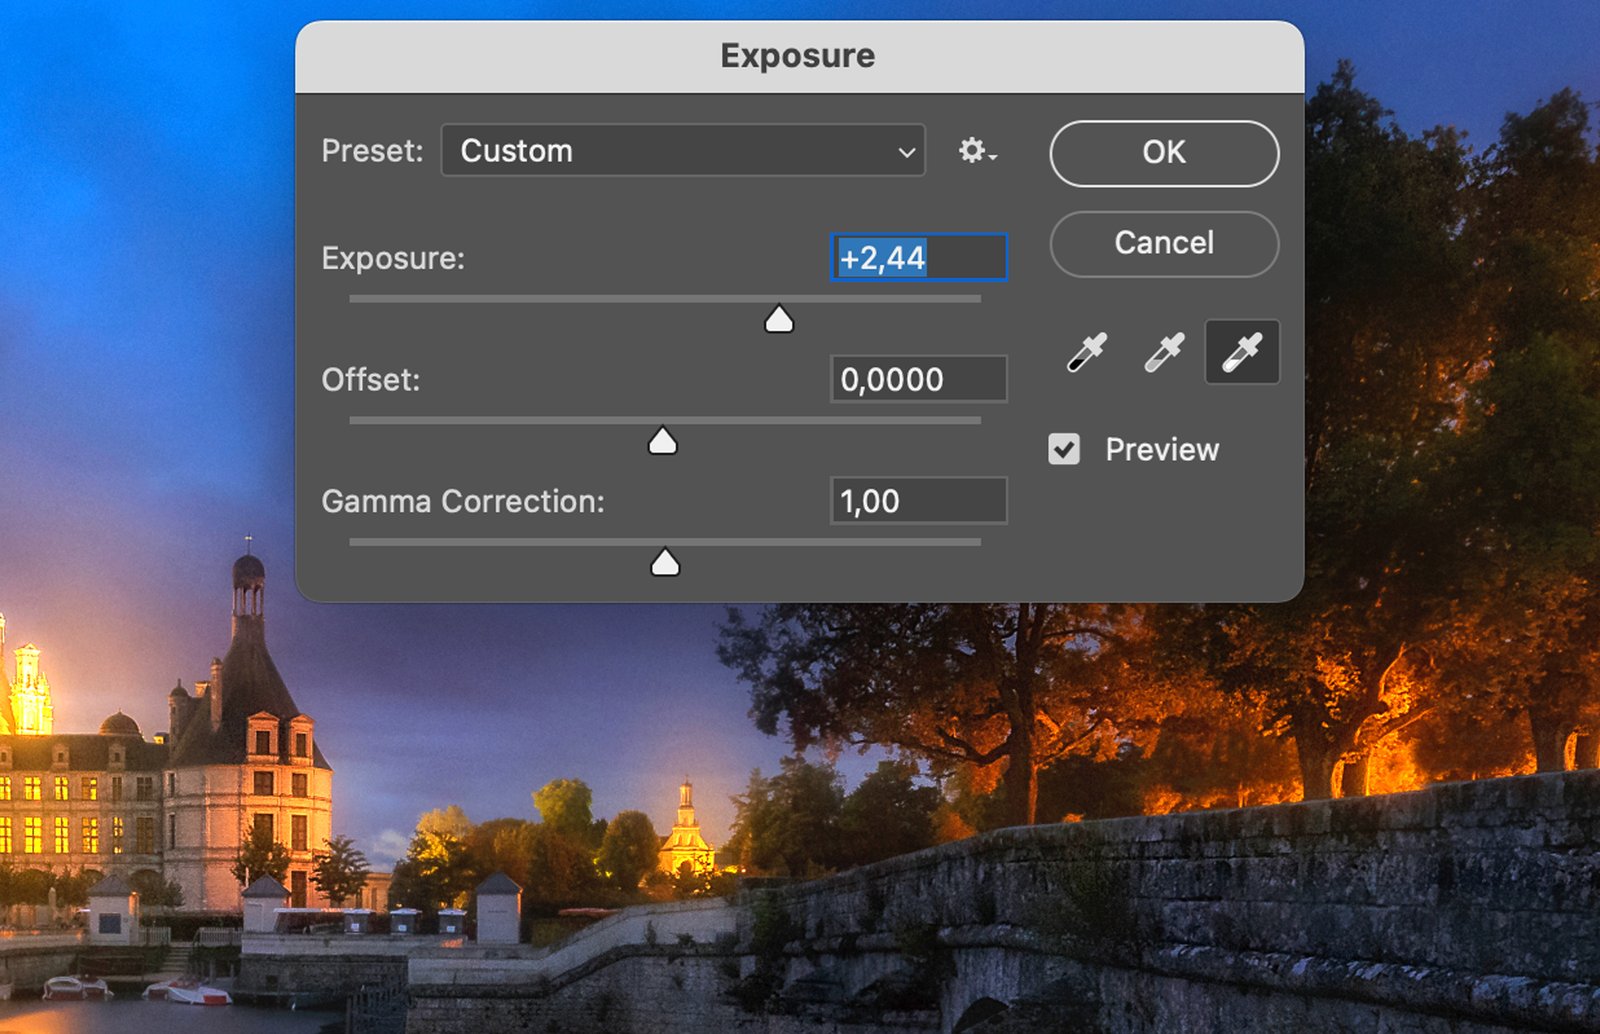
Step 5.1. Adjusting Exposure

The “Exposure” slider controls the overall lightness or darkness. Adjust until you achieve the desired brightness.

A graphic design program, where a user is adjusting the exposure settings on an image of a city at night.

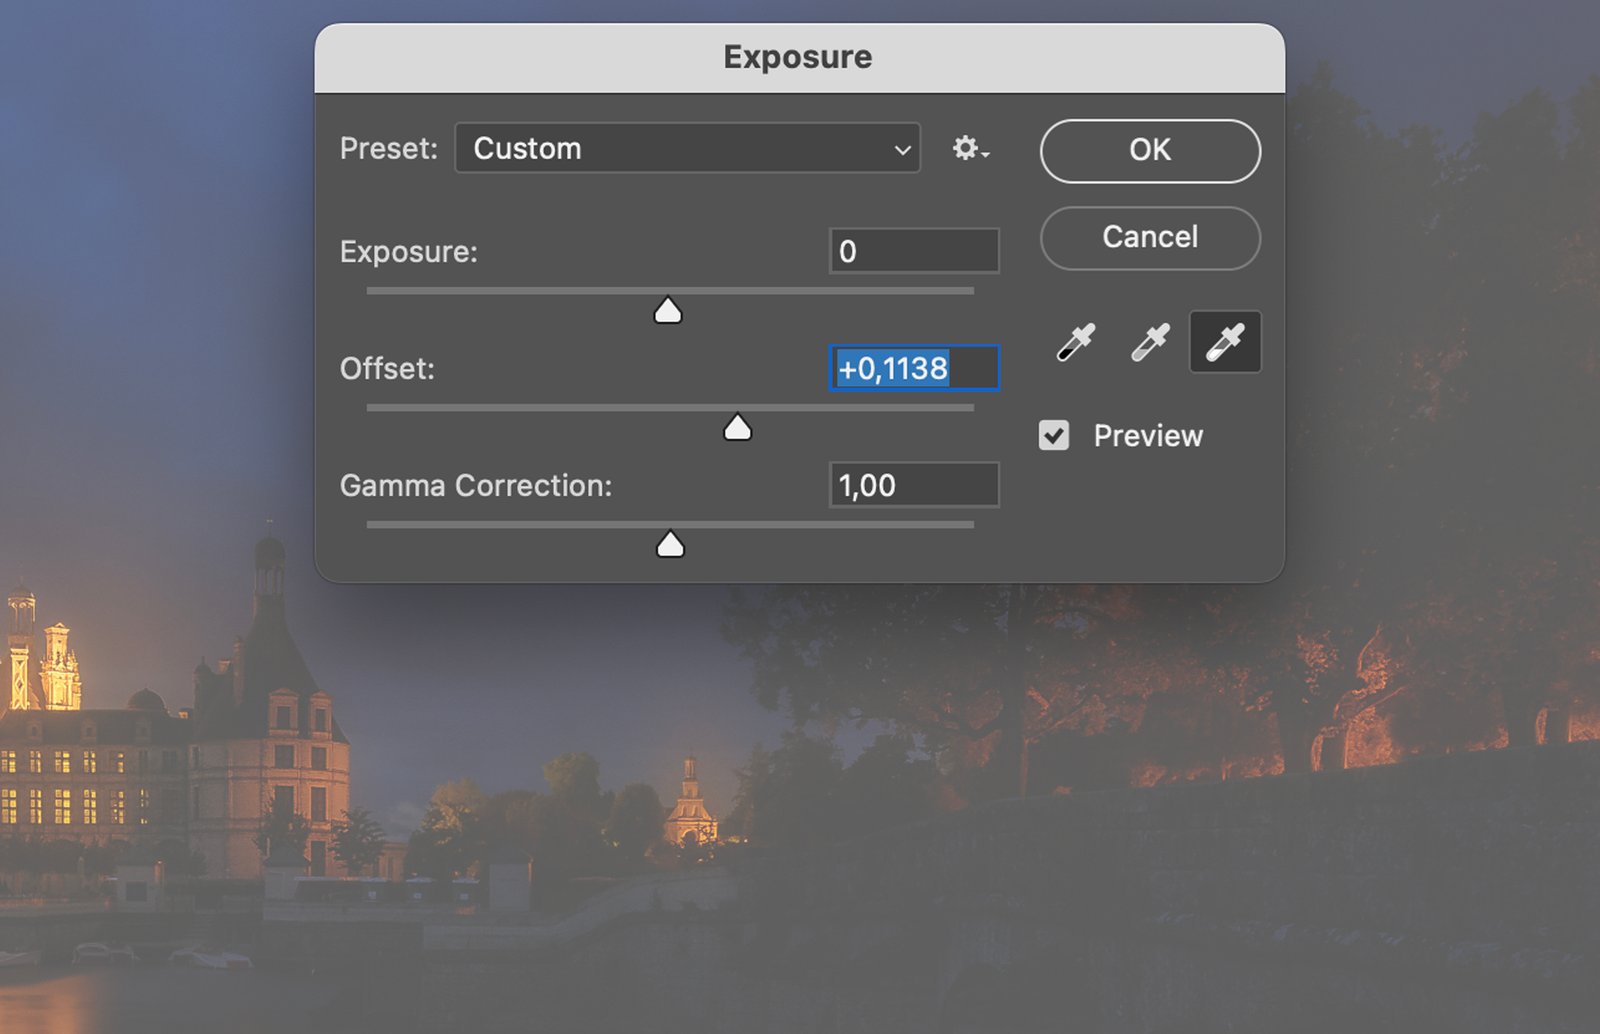
Step 5.2. Adjusting Offset

The “Offset” slider adjusts the midtones. A slight adjustment can help balance the image.

The exposure settings in the editing software Lightroom, with a beige and blue cityscape as the background.

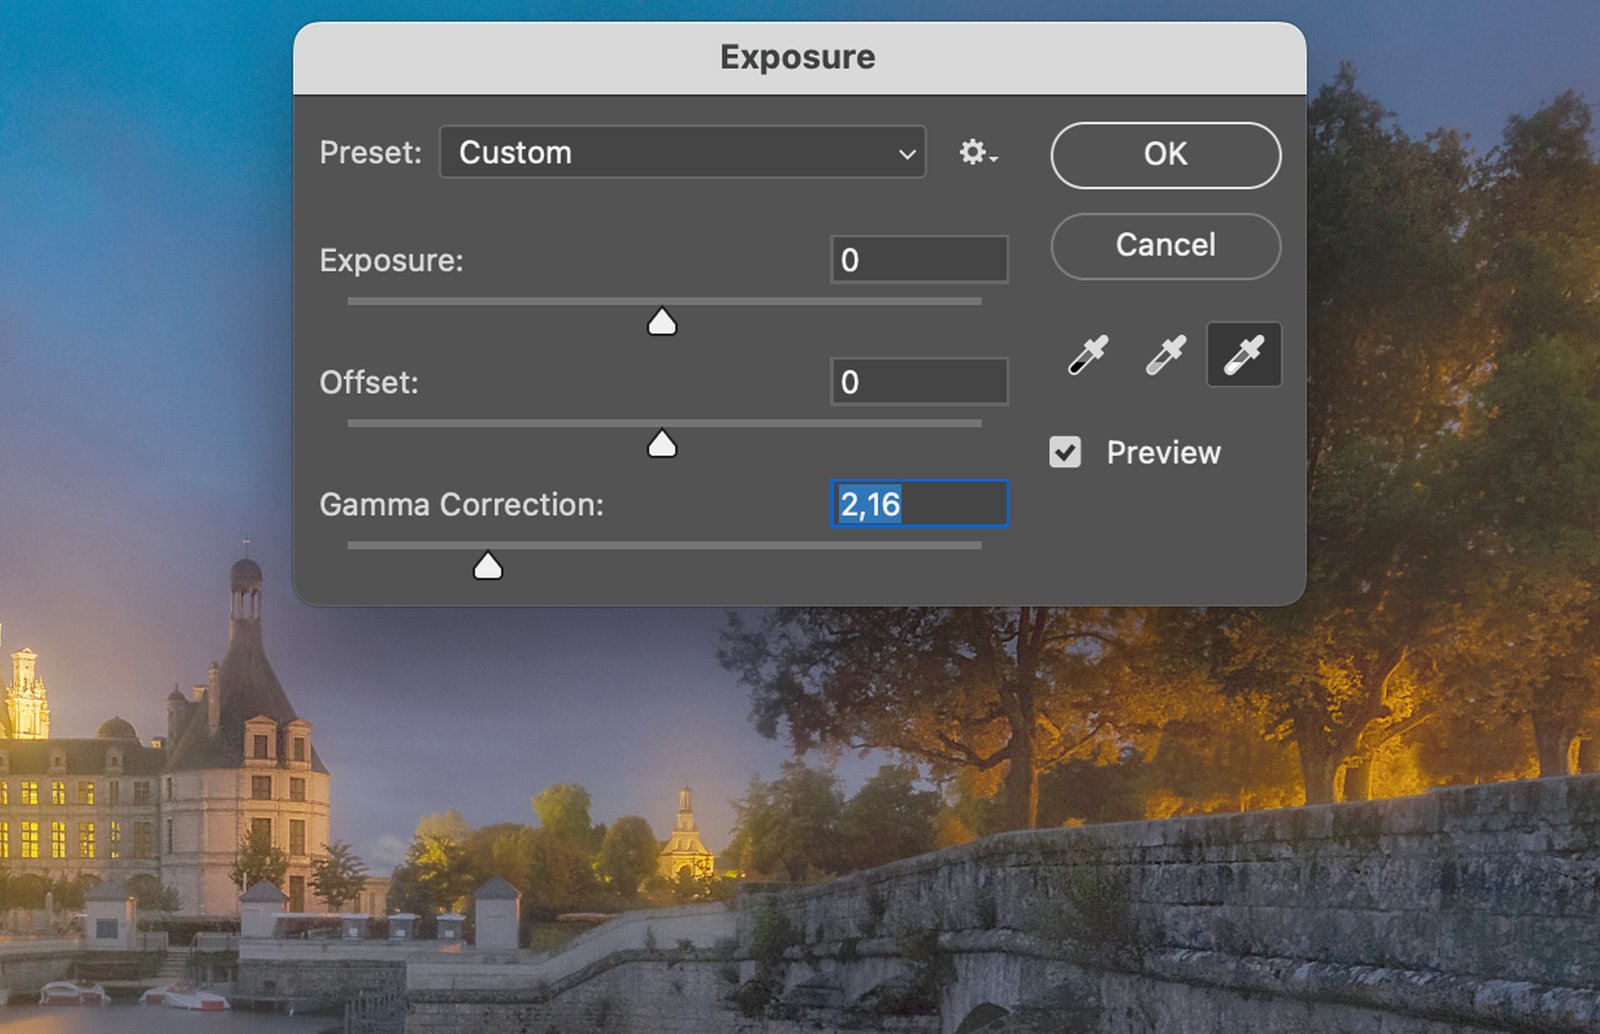
Step 5.3. Adjusting Gamma Correction

The “Gamma” slider controls the image’s contrast. Adjusting it can brighten or darken your image.

The Exposure tool in Adobe Photoshop, showing its settings being adjusted for a nighttime photo.

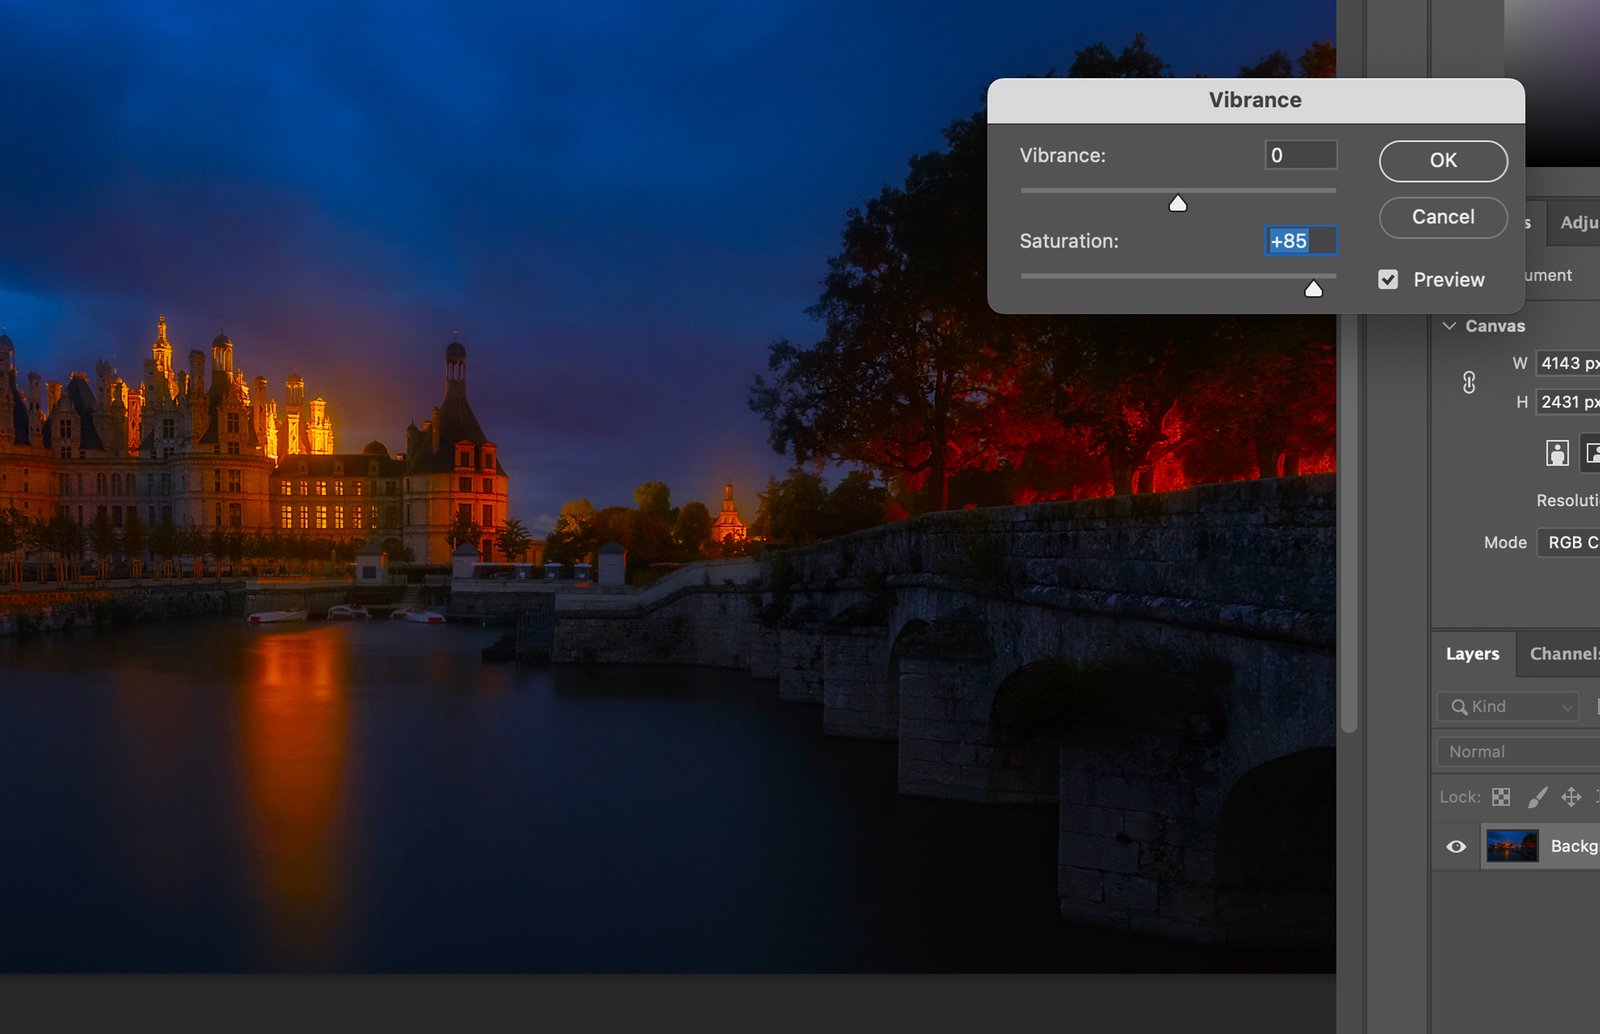
Step 6. Use Vibrance/Saturation Adjustment

In the “Adjustments” menu, select “Vibrance”. This tool adjusts the intensity of colors.

An image editing program, showcasing the use of various tools and settings for adjusting brightness, contrast, and other properties of an image.

Step 6.1. Adjusting Vibrance

The “Vibrance” slider enhances less saturated colors without overdoing already well-saturated areas.

A photo editing software program, where the user is adjusting the vibrance of a nighttime cityscape photograph.

Step 6.2. Adjusting Saturation

The “Saturation” slider increases or decreases the intensity of all colors in your image.

A computer program, showcasing a digital artwork with a focus on the vibrancy settings, specifically a saturation slider labeled Saturation.

Step 7. Refine the Image with Dodge and Burn Tools

The Dodge and Burn tools, found in the toolbar, lighten (Dodge) or darken (Burn) specific areas of your image.

A photo editing software, where a royal palace is being edited with various tools in the upper right corner.

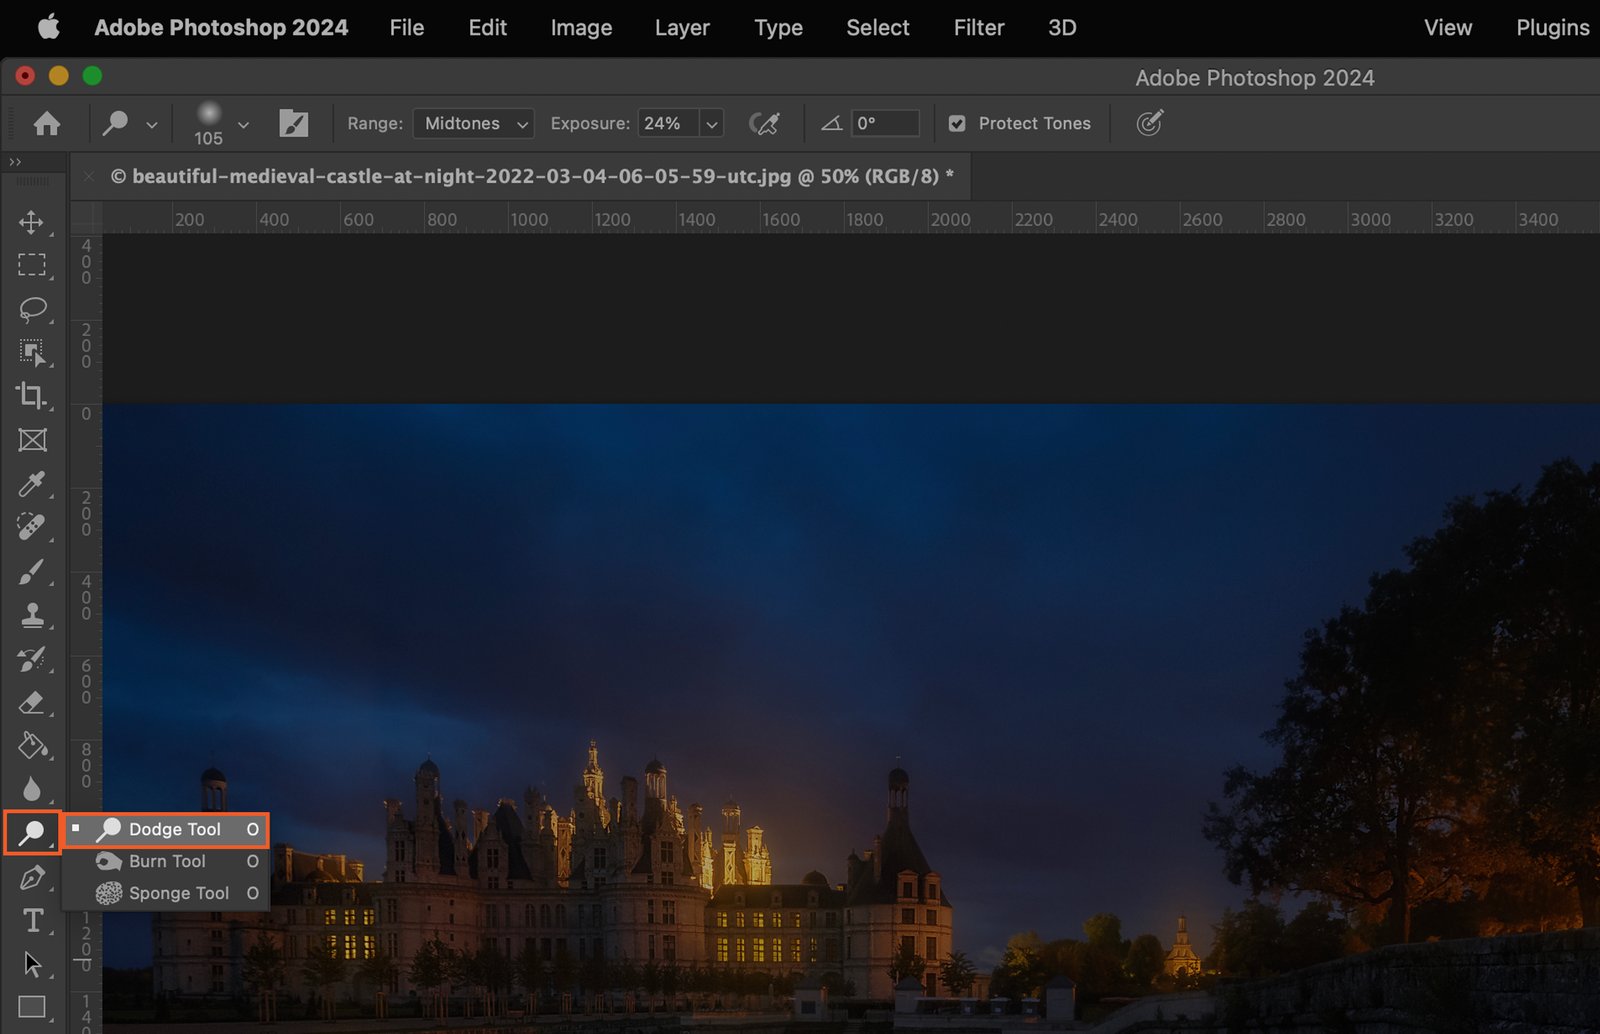
Step 7.1. Using the Dodge Tool

Select the Dodge tool and brush over areas you wish to brighten. Adjust the tool’s size, hardness, and exposure for better control.

A grand palace at night, with the moon and stars in the sky.

Step 7.2. Using the Burn Tool

Select the Burn tool and brush over areas you wish to darken. Like the Dodge tool, you can adjust the size, hardness, and exposure.

A dark sky over a castle, with the city lights glowing in the background.

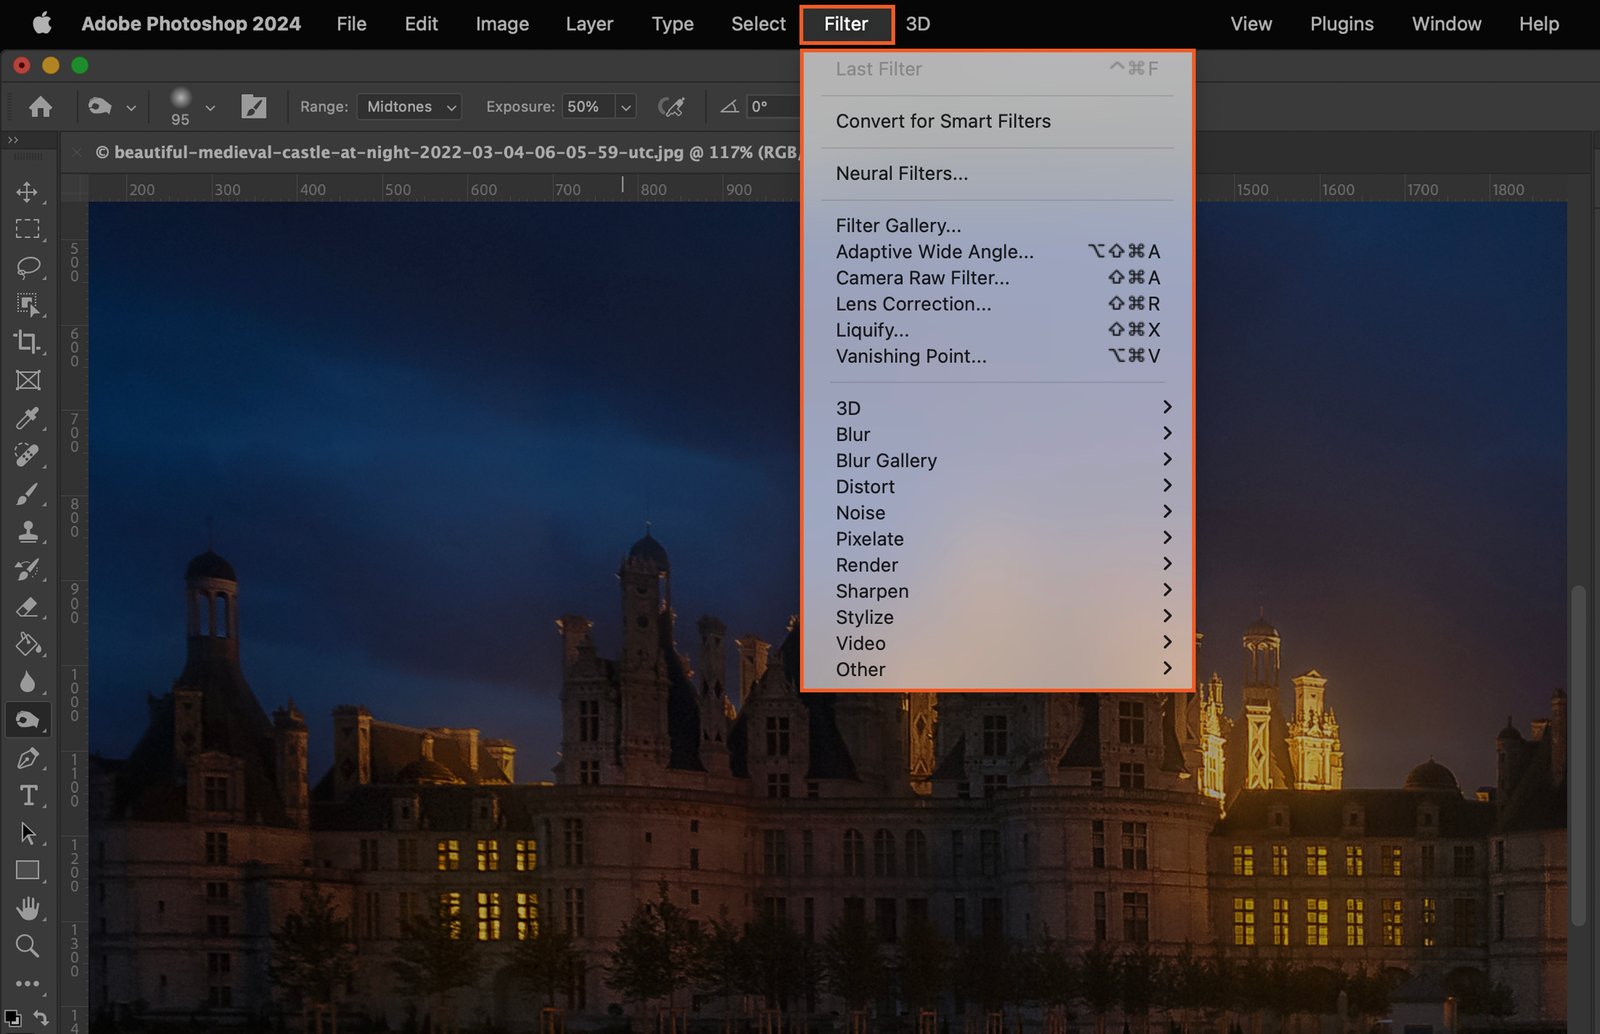
Step 8. Apply Filters for Additional Brightness

Photoshop’s “Filter” menu offers additional options for brightening your image. Explore options like “Sharpen”, “Blur”, and “Render” to further enhance your image.

The Photoshop interface with a photograph of a city skyline and various editing panels open.

Sidebar-ad_QCC_related-product
Sidebar-ad_QCC_free-sample_
Sidebar-ad_QCC_free-download_2-posters

Popular Content

Fujifilm X-T200 Review (Should You Buy This Camera in 2024?)

Read Article