Learning to change the DPI in Photoshop can enhance your image quality remarkably. This article provides a simple step-by-step guide to help you navigate this process with ease, improving your editing skills and overall digital design experience.
Start by opening Adobe Photoshop. Click on the ‘File’ tab on the top left corner and select ‘Open’. Browse your files, locate the image you want to modify, and click ‘Open’.
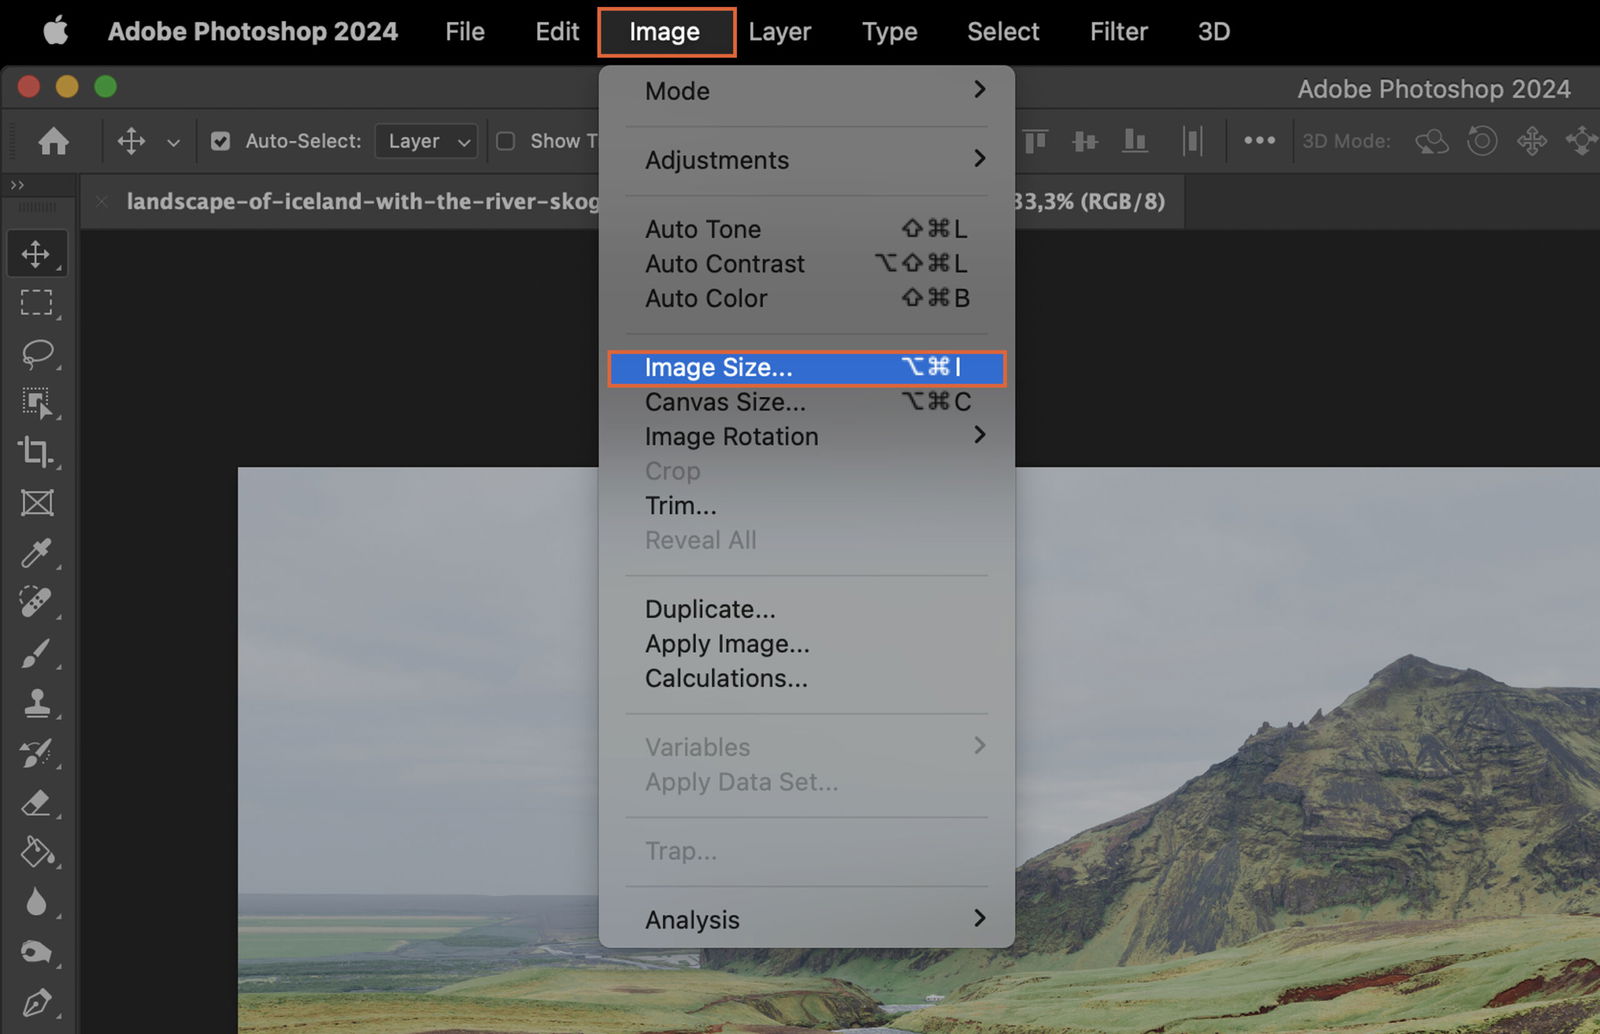
Once your image is open, look for the ‘Image’ tab in the menu bar at the top of your screen. Click on it to reveal a dropdown menu. In the dropdown menu, you will find an option labeled ‘Image Size’. Click on it to open a new dialog box with various image size settings.
In the ‘Image Size’ dialog box, look for the ‘Resolution’ field. This is where you can adjust the DPI (dots per inch) of your image. Click on the box next to ‘Resolution’ to make any changes.
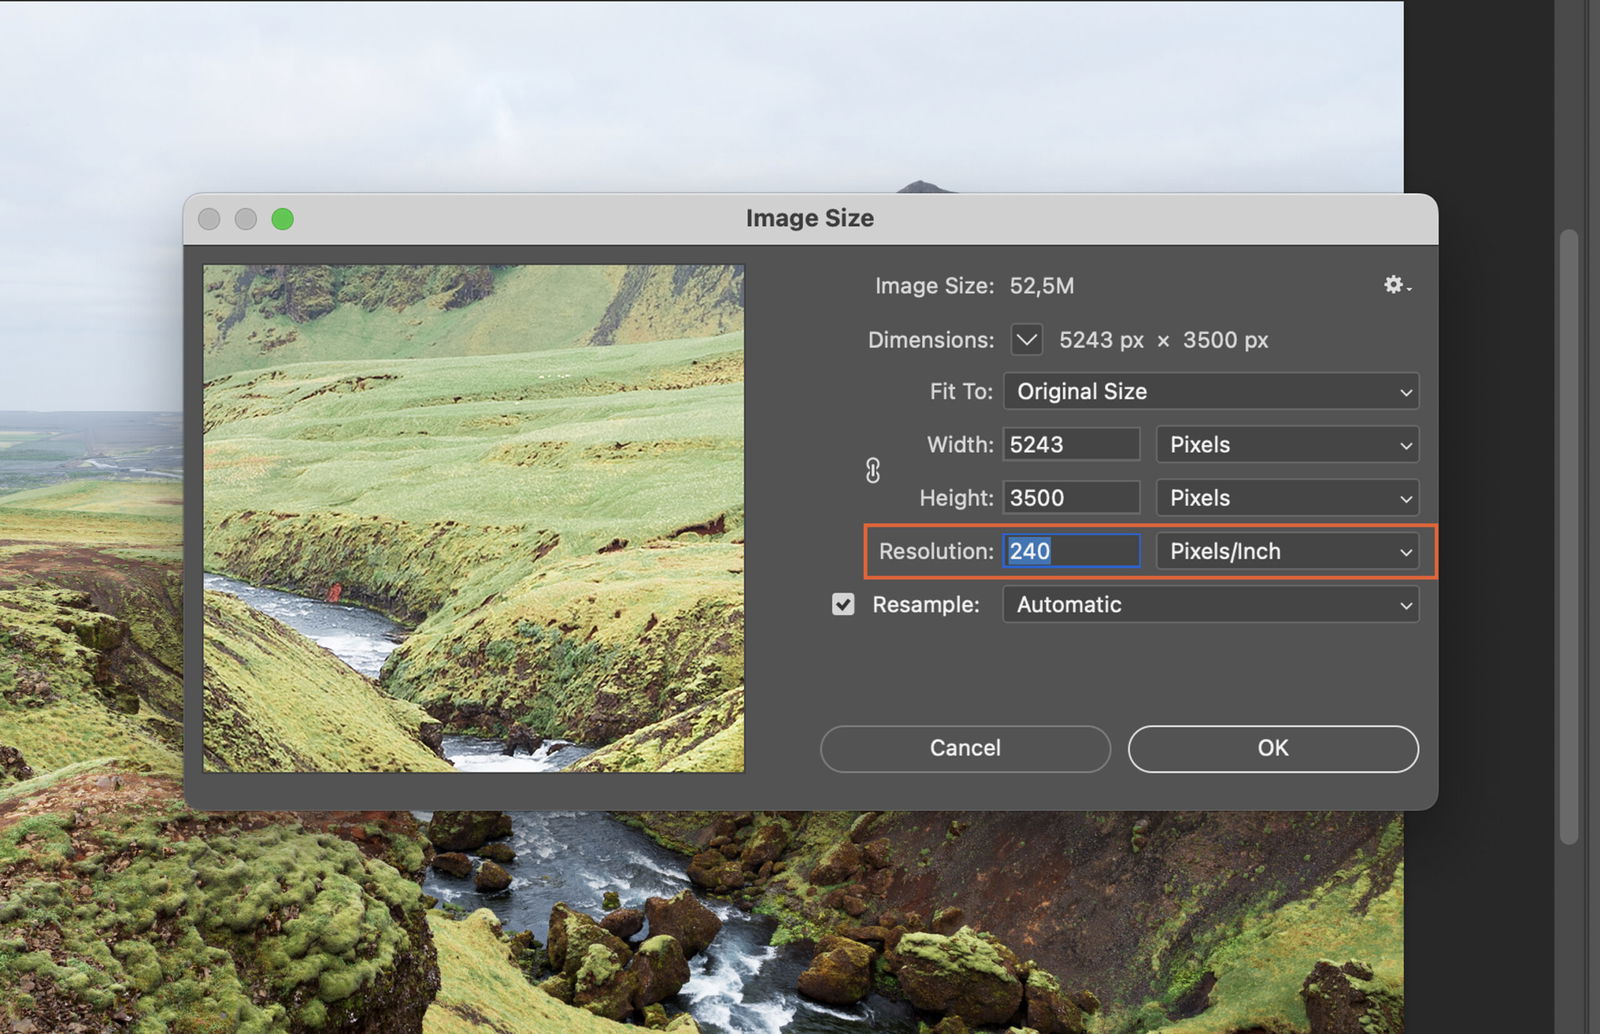
To input a specific DPI, simply type the desired number into the ‘Resolution’ box.
If you prefer, you can use the up and down arrows next to the box to increase or decrease the DPI value.
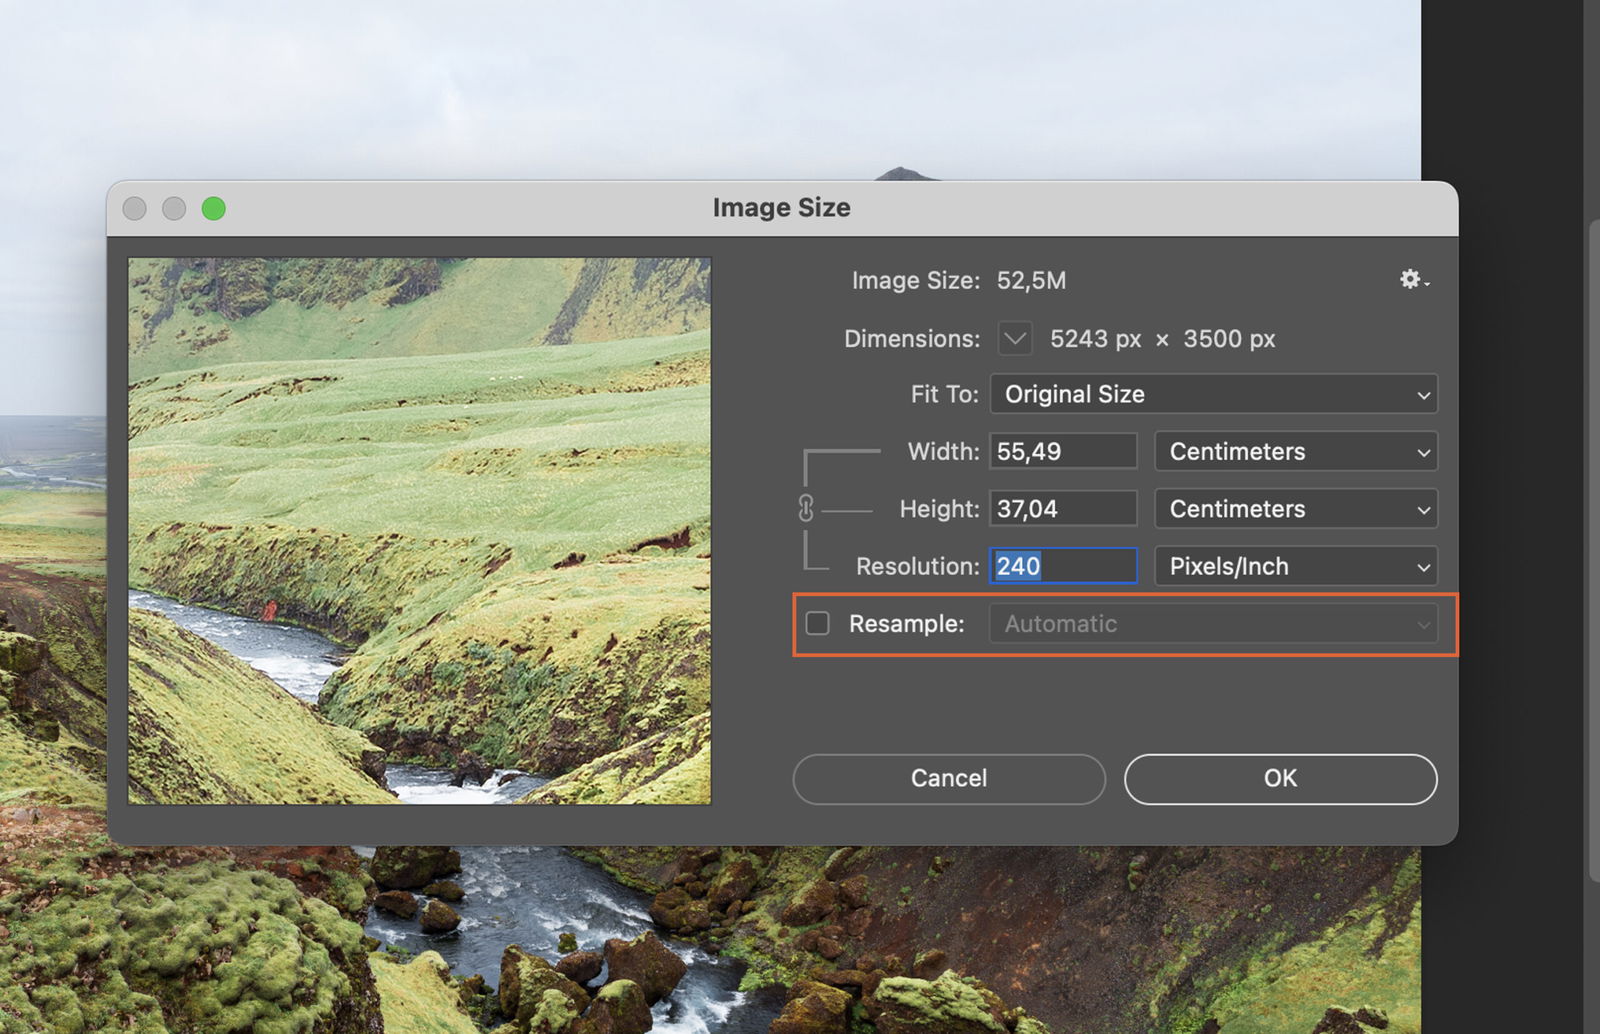
Check the ‘Resample’ checkbox below the ‘Resolution’ field. If it’s checked, uncheck it. This ensures the image’s dimensions remain constant while changing the DPI.
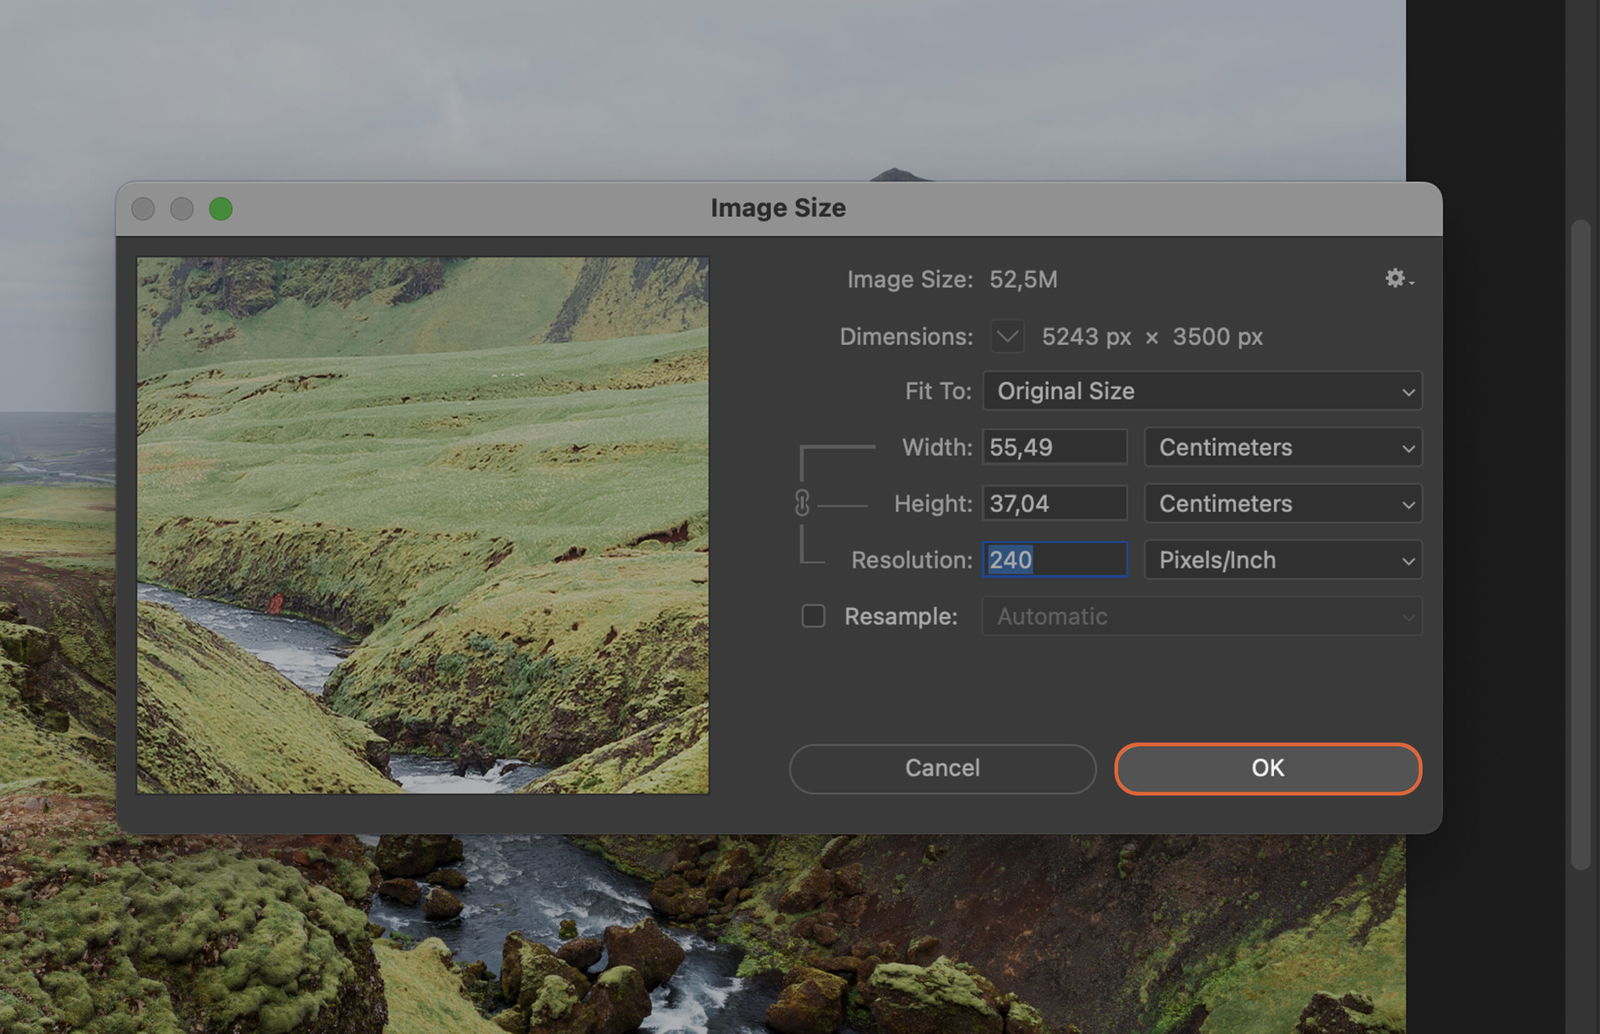
Once you’re happy with the new DPI, click the ‘OK’ button at the bottom of the dialog box to apply your changes.
Finally, save your image to preserve the new DPI. Click ‘File’ > ‘Save As’, choose your desired location, and click ‘Save’. Your image now has a new DPI.


