ExpertPhotography
  • Articles
  • My Learning
  • Store
  • About
  • Contact
  • Photo Quiz
ExpertPhotography

Learn Photography
  • Quick Capture Cheat Sheets
  • Photography for Beginners
  • Intuitive Composition
  • Show more...
  • Effortless Editing With Lightroom
  • Epic Landscape Editing
  • The Preset Collection
  • Show more...
  • The Magical Photography Spellbook
  • Dreamy Childhood Portraits
  • The Creative Photography Cookbook
  • Show more...
  • Simply Stunning Landscapes
  • Infinite Exposures
  • Milky Way Mastery
  • Show more...
  • Products In Focus
  • Fairytale Portraits
  • Organic Marketing for Photographers
  • Show more...
Need Help?
Contact UsCookie PolicyPrivacy PolicyTerms of Use
Connect

ExpertPhotography is part of several affiliate sales networks. This means we may receive a commission if you purchase something by clicking on one of our links.

ExpertPhotography is a participant in the Amazon Services LLC Associates Program, an affiliate advertising program designed to provide a means for sites to earn advertising fees by advertising and linking to amazon.com.

As an Amazon Associate, I earn from qualifying purchases.

Expert Photography © 2011-2024. All Rights Reserved.

Privacy Policy Terms of Use

News and Interviews

How to Change the Perspective of an Image in Photoshop

Szilard Kovacs
by Szilard Kovacs
Last updated: 21/10/2024-2 min read
ExpertPhotography is supported by readers. Product links on ExpertPhotography are referral links. If you use one of these and buy something, we make a little money. Need more info? See how it all works here.

Changing the perspective of an image in Photoshop can reframe a scene, giving it a fresh, new look. This article provides a step-by-step guide to mastering this useful skill, enabling you to create unique, captivating visuals.

Step 1. Select the Perspective Tool in Photoshop

To begin, locate the Perspective Tool in Photoshop’s toolbar. You’ll find it nested under the Edit menu, listed as “Transform”, then select “Perspective”.

A user interface with various options and settings.

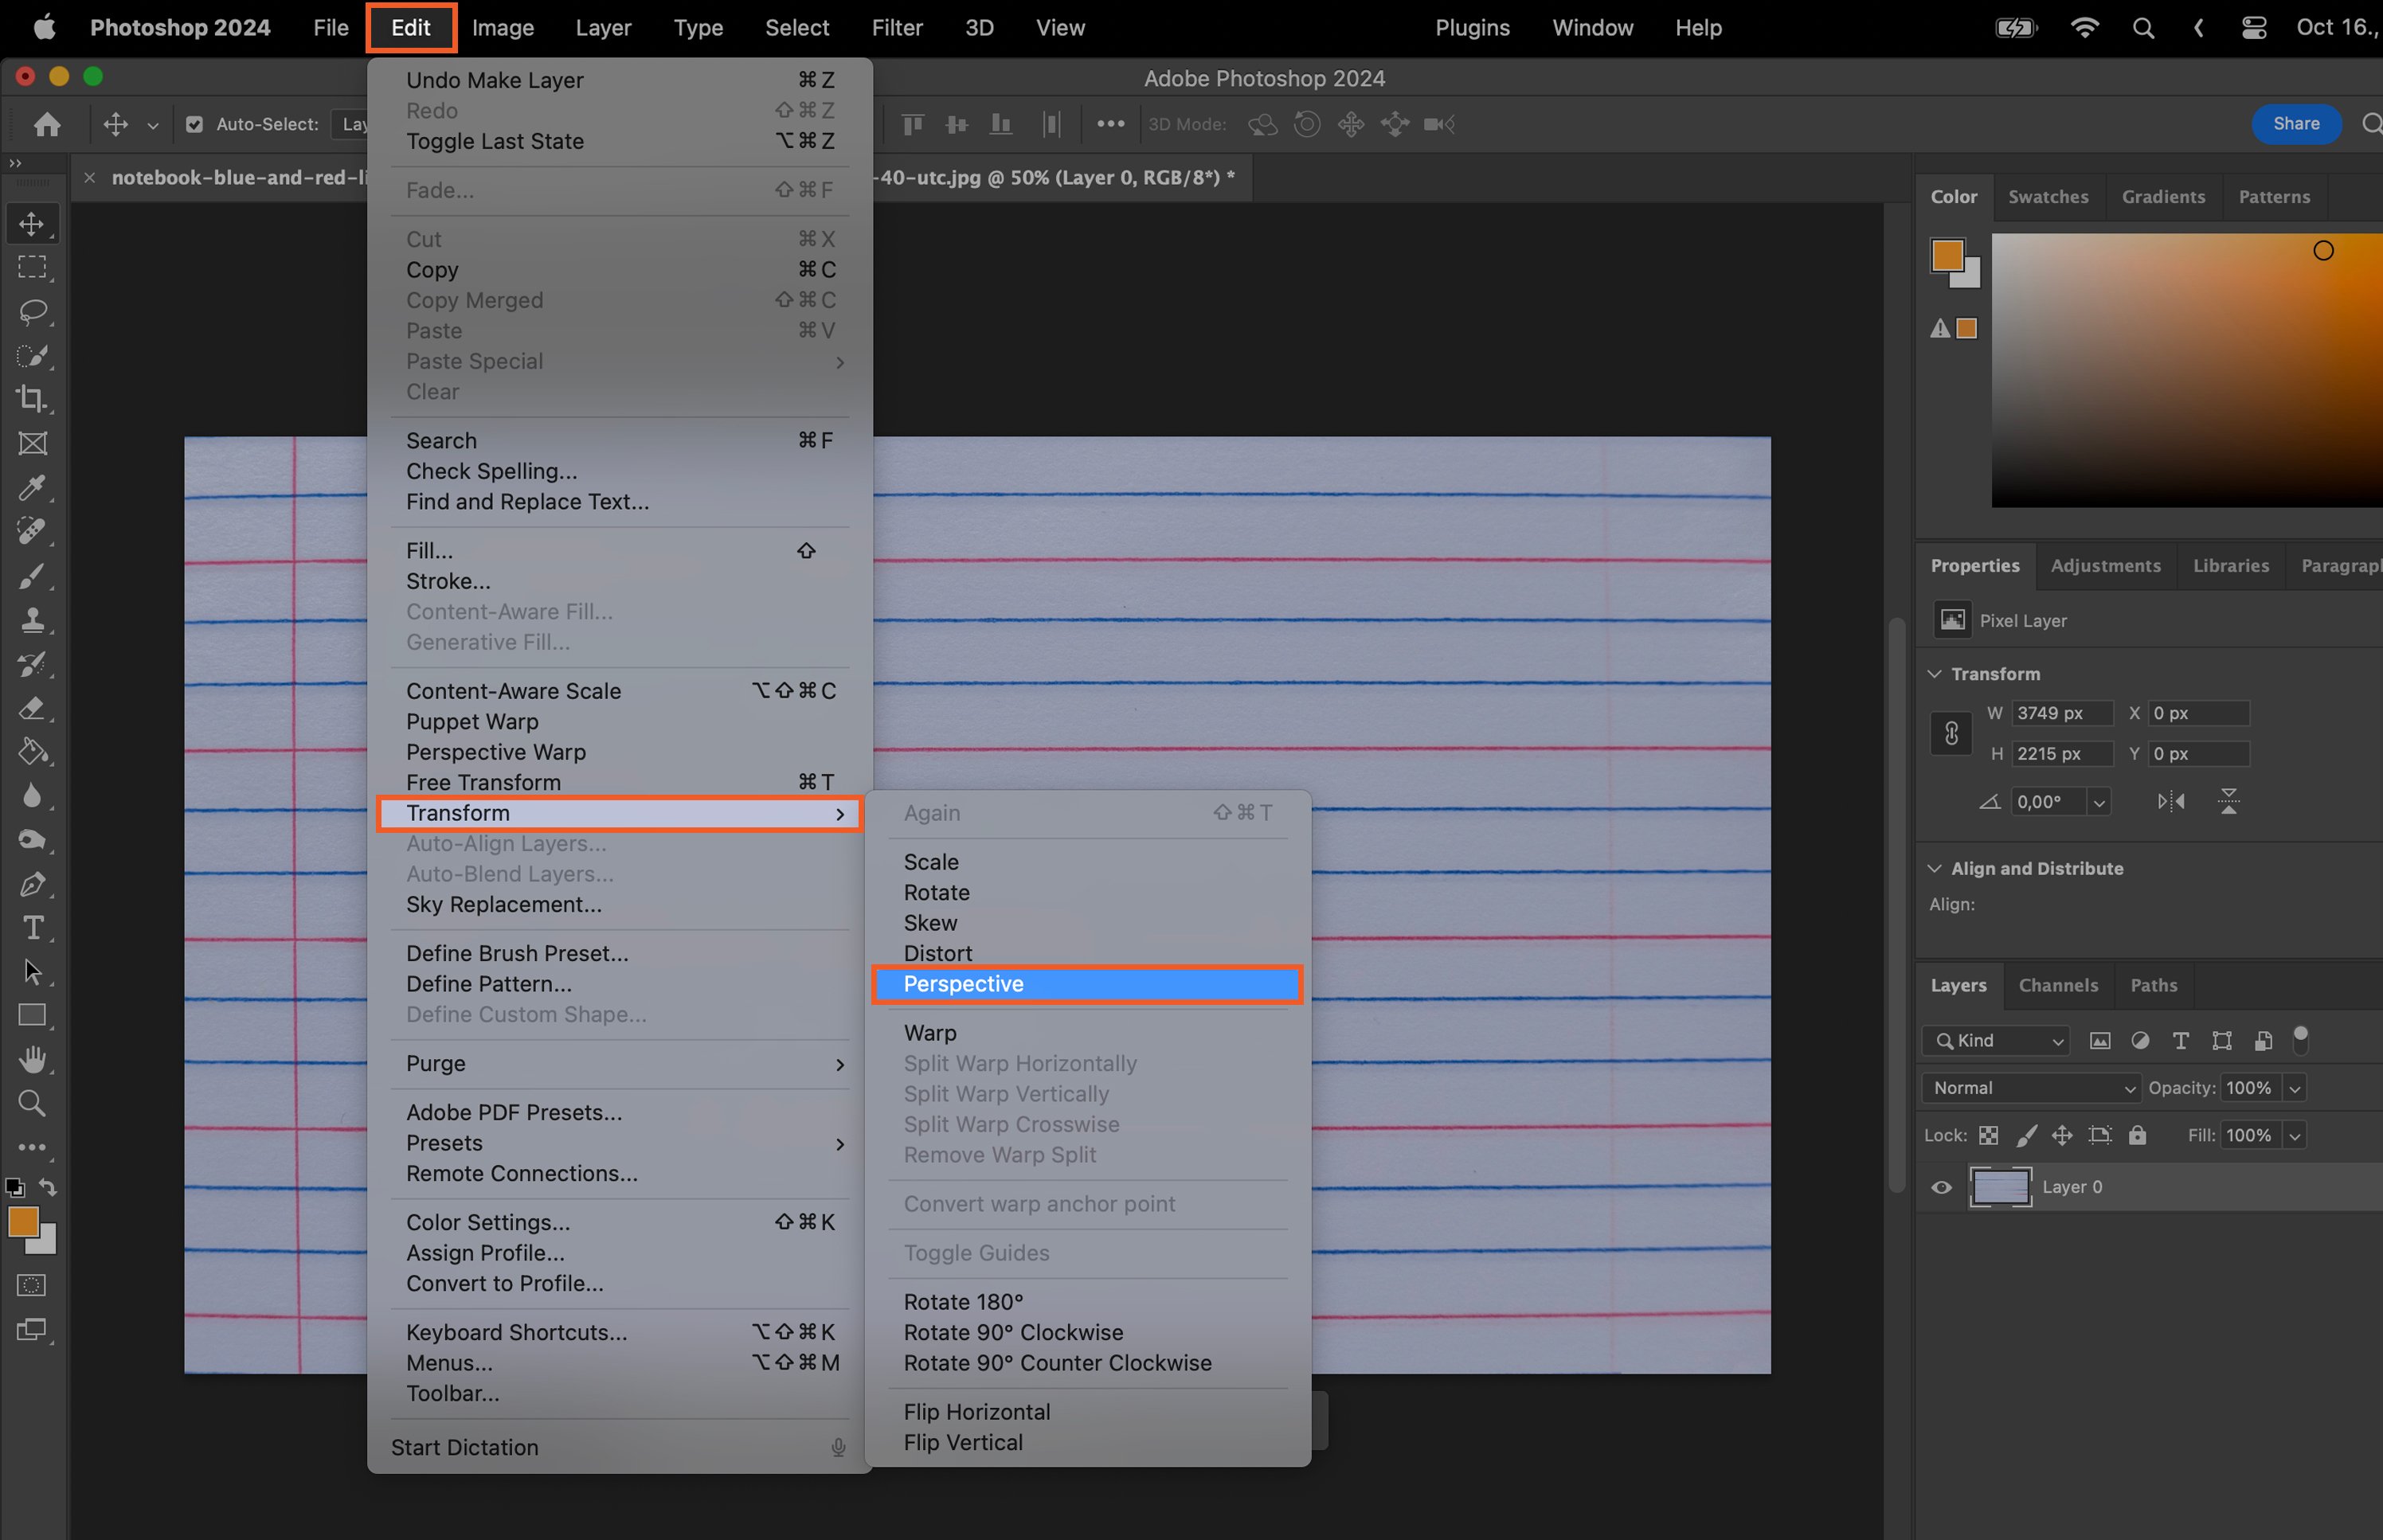
Step 2. Understand the Basics of the Perspective Tool

The Perspective Tool allows you to alter the viewpoint of an image. It works by stretching or squishing the sides of the image to mimic a change in perspective.

Step 3. Apply the Perspective Tool to the Selected Image

With your area selected, return to the Edit menu, choose “Transform”, then click “Perspective”.

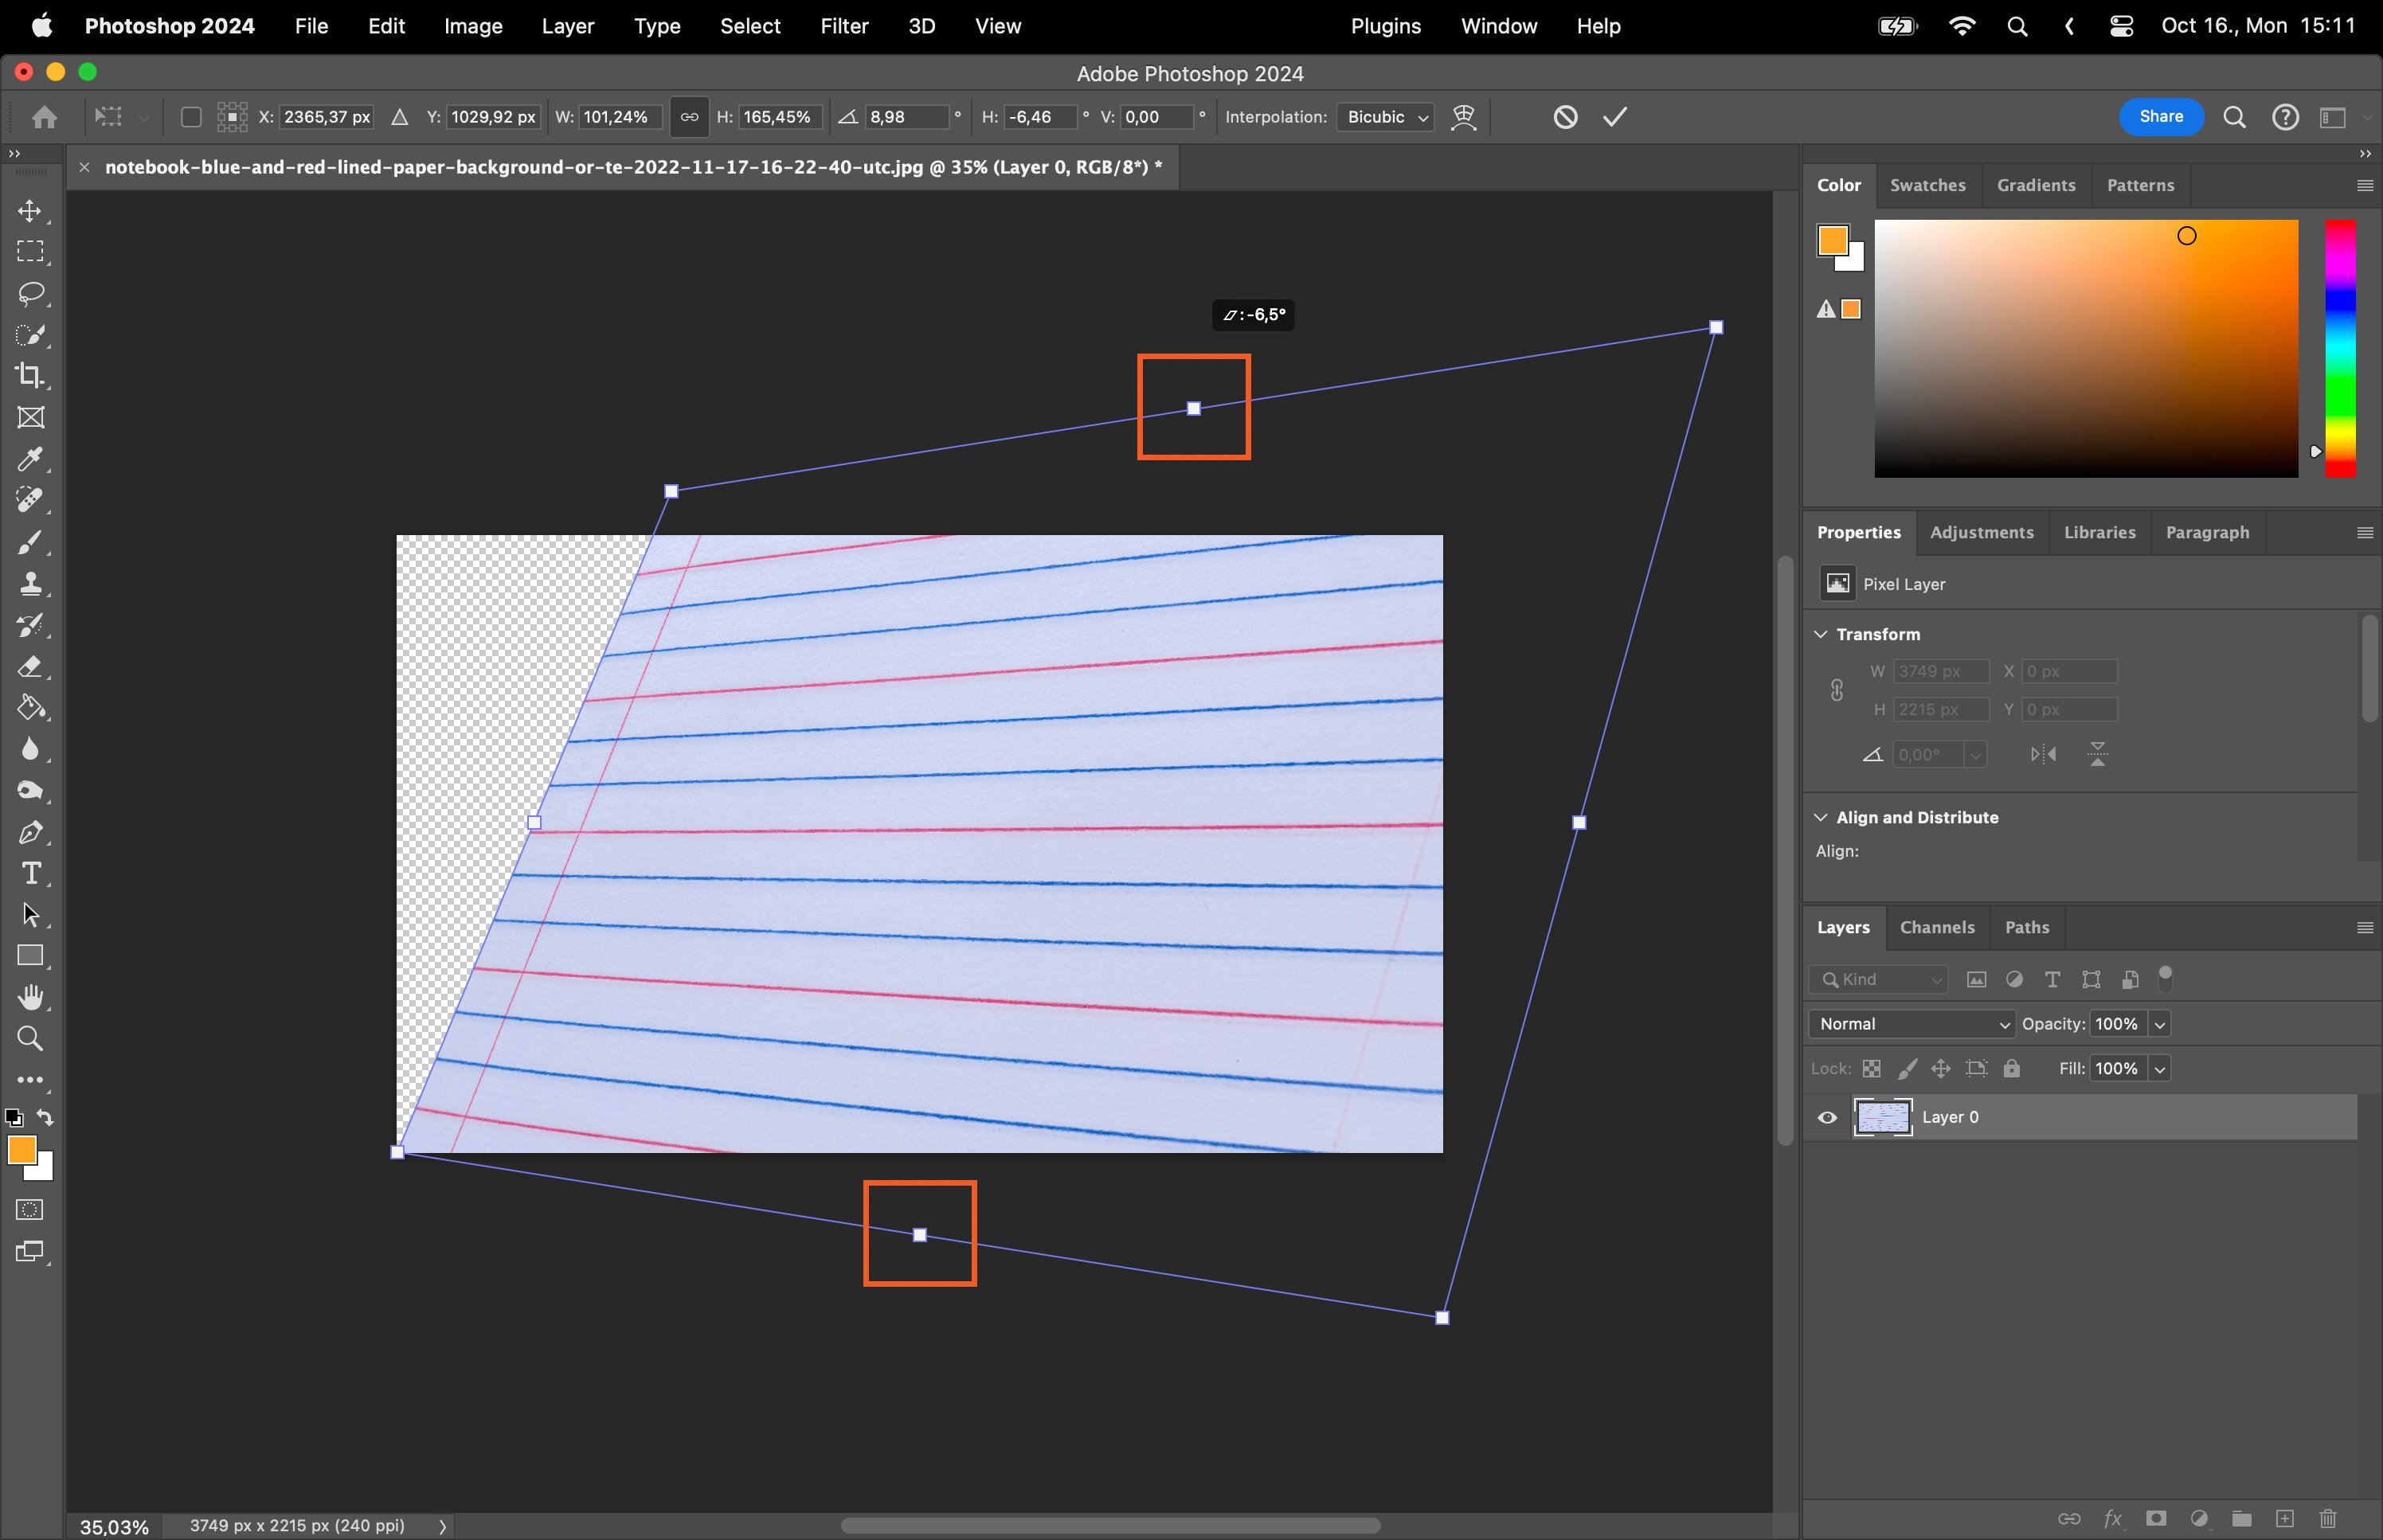
Step 3.1. Drag the Image Corners

To change the perspective, click and drag the corner handles of the bounding box around your selection.

Adobe Photoshop software, where a user is working on creating a new design or document.

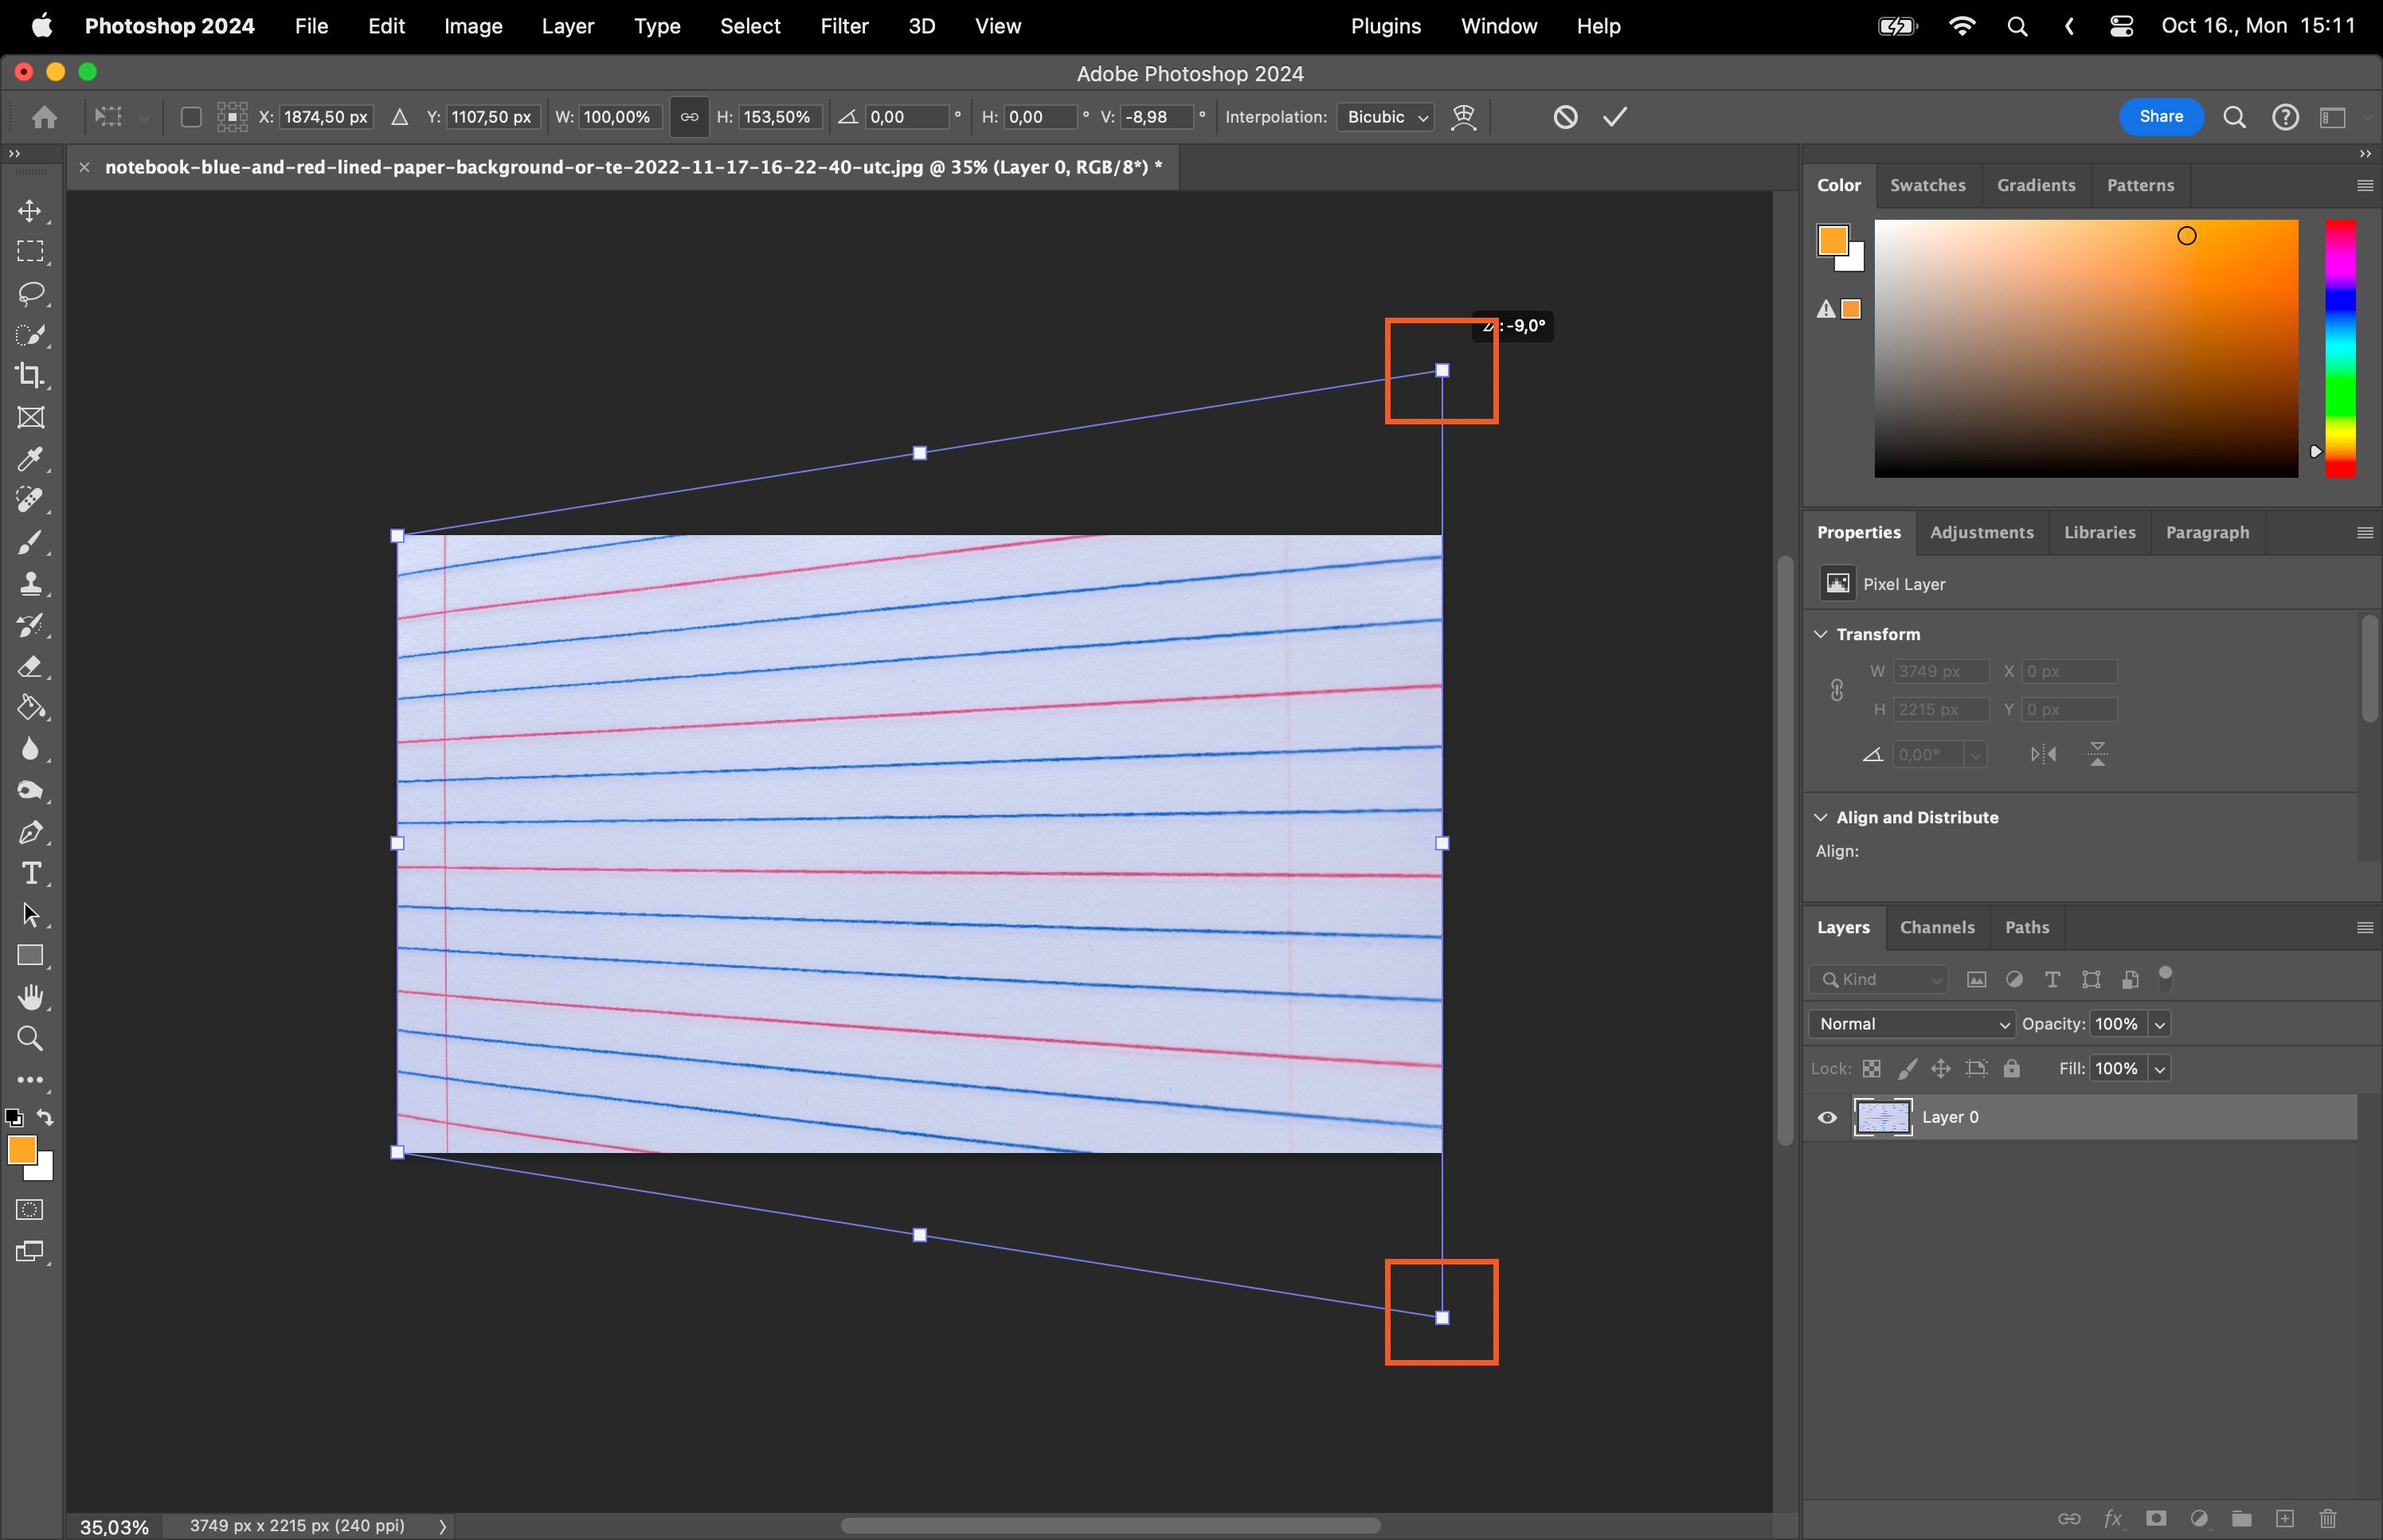
Step 3.2. Adjust the Horizontal and Vertical Perspective

Manipulate the horizontal or vertical perspective by dragging the side or top handles respectively.

A digital graphic design software, with a design that has various layers and adjustments visible in the software interface.

Step 4. Fine-tune the Perspective Change

Refine your changes by using the Move Tool to shift the selection, or the Free Transform Tool to resize or rotate it.

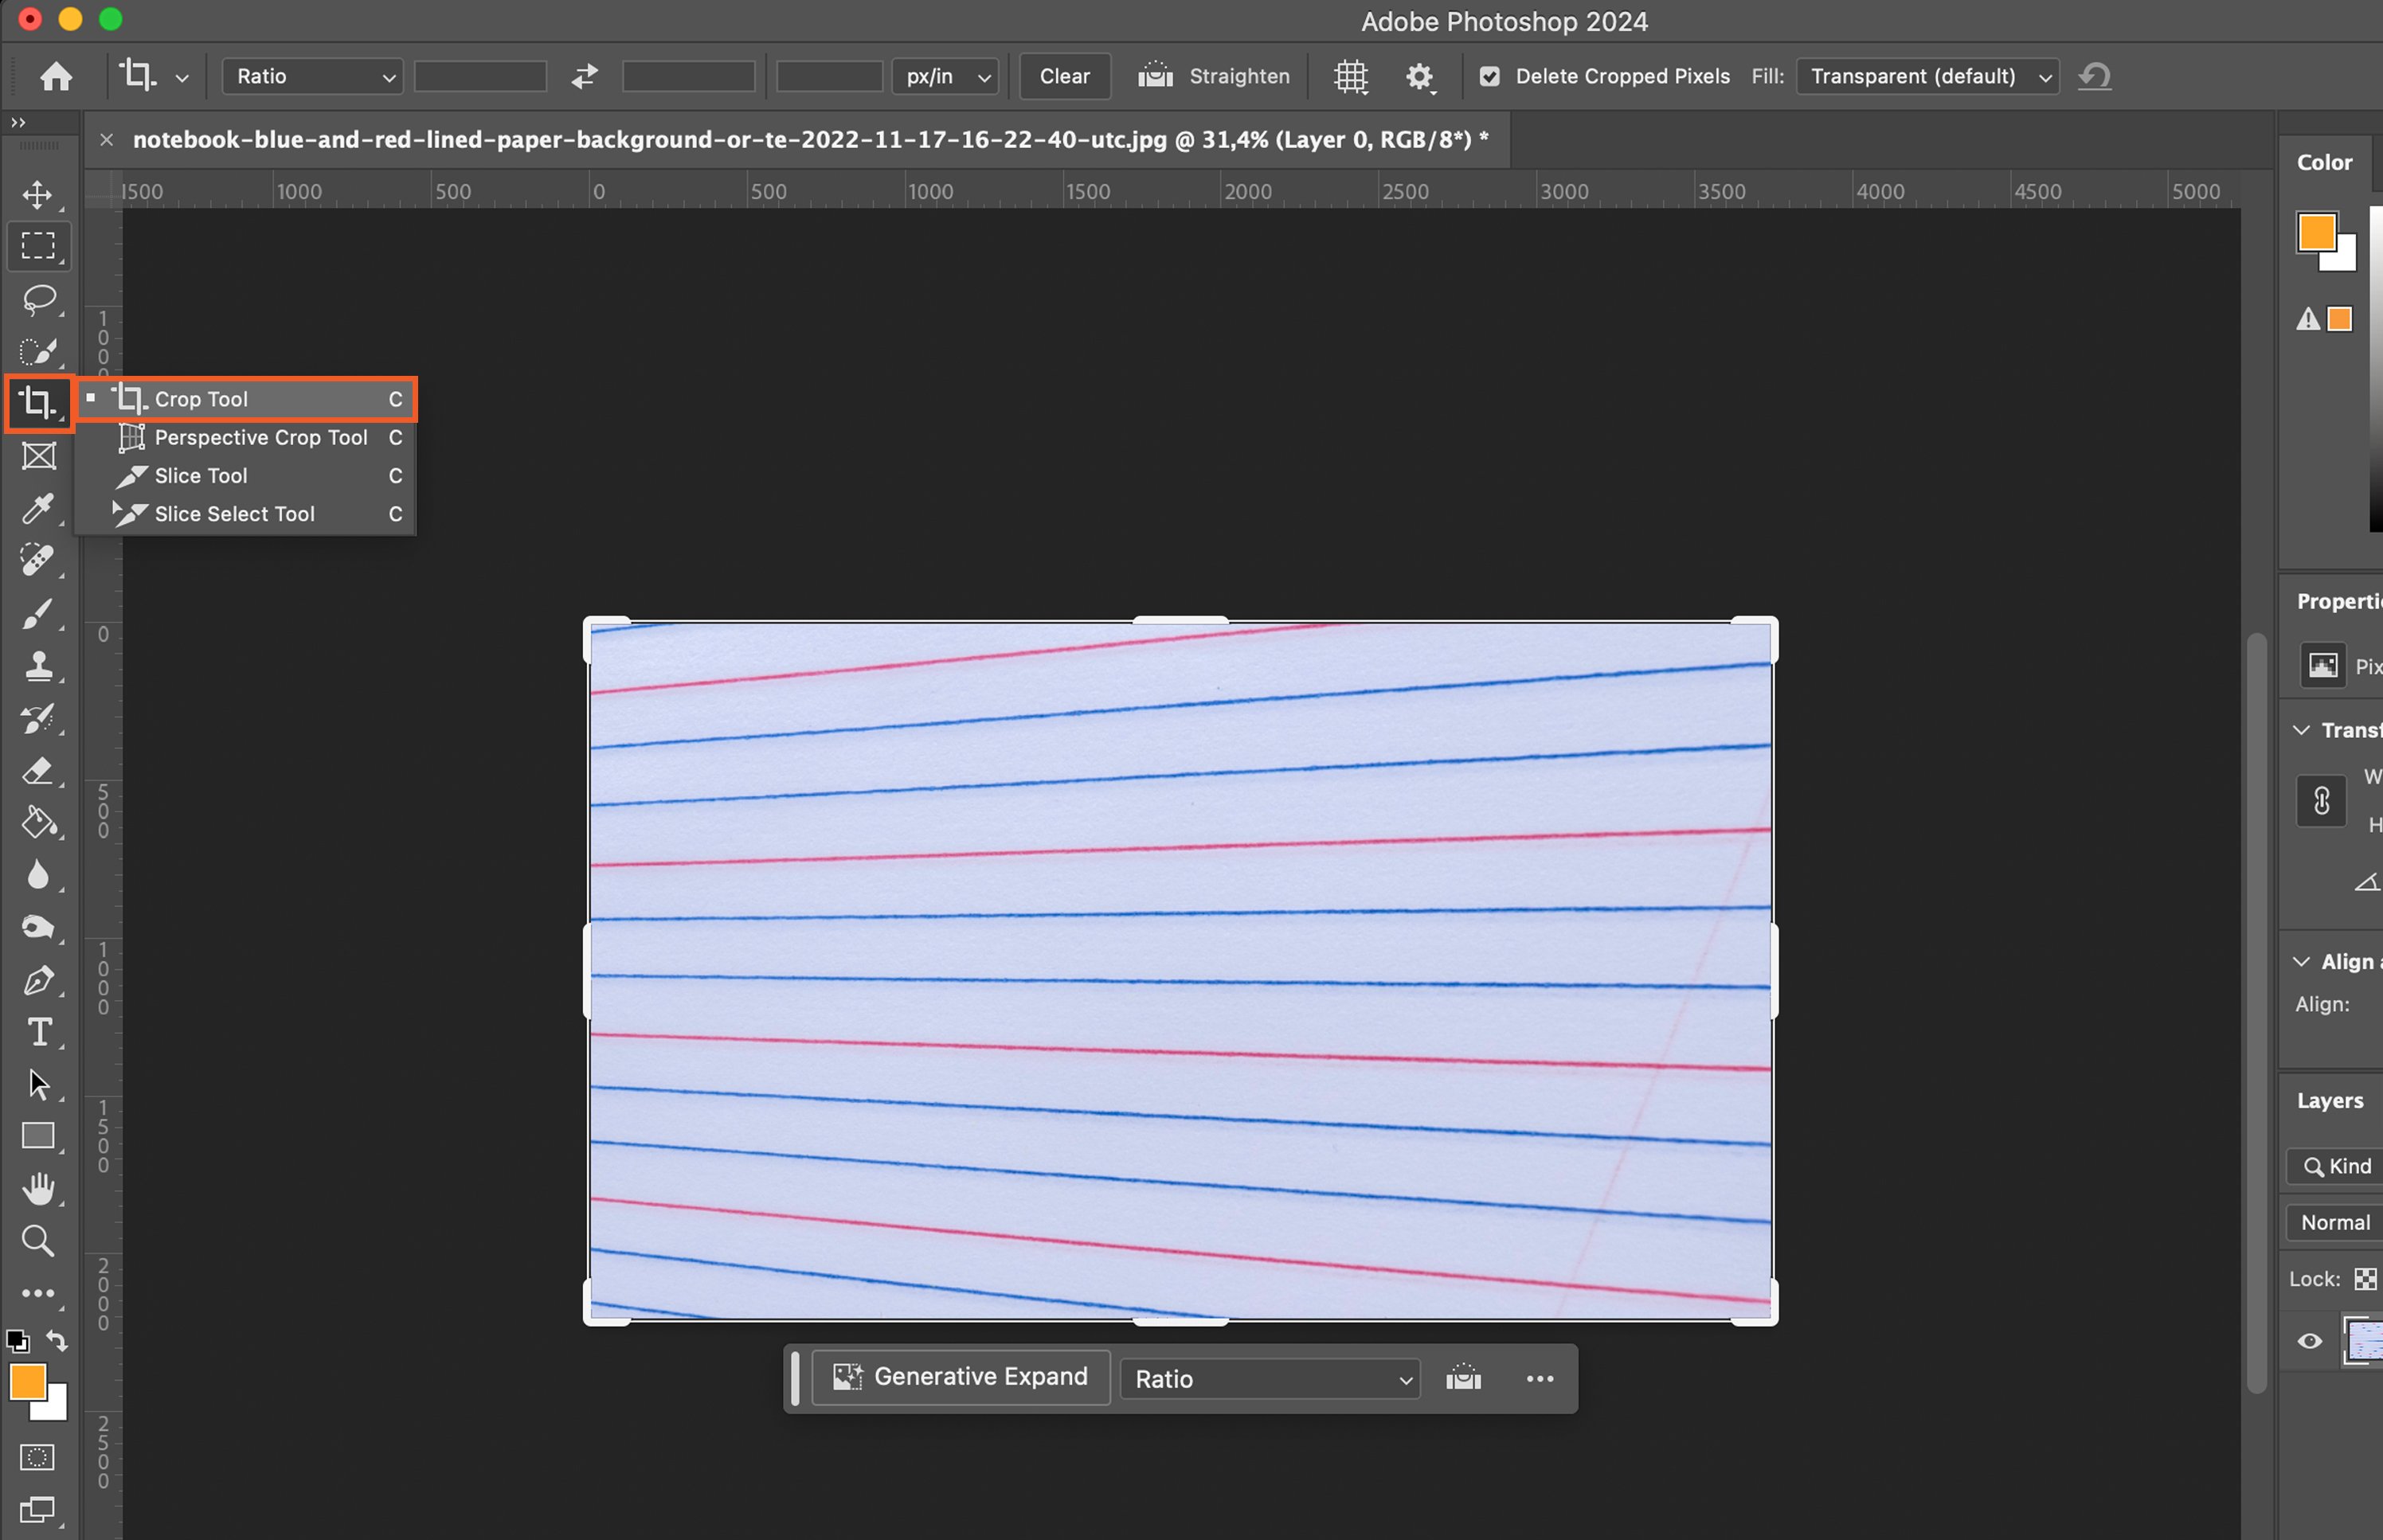
Step 5. Use the Crop Tool to Remove Excess Areas

After altering the perspective, you may have some excess areas. Use the Crop Tool to trim these away.

Adobe Photoshop interface displayed on a computer screen with image editing tools visible.

Step 6. Save the Altered Image

Once satisfied with the results, save your image. Go to File > Save As, choose your desired format and location.

Step 7. Compare the Original and Altered Images

Review your work by comparing the original and edited images. This helps in evaluating the effectiveness of the perspective change.

Step 8. Practice to Perfect the Skill

Mastering perspective changes in Photoshop requires practice. Experiment with different images and tools to get a better handle on the process.

Sidebar-ad_QCC_related-product
Sidebar-ad_QCC_free-sample_
Sidebar-ad_QCC_free-download_2-posters

Popular Content

Fujifilm X-T200 Review (Should You Buy This Camera in 2024?)

Read Article