Understanding how to convert an image to CMYK in Photoshop is an essential skill for digital artists and photographers. This process ensures color accuracy for print purposes, enhancing the final product’s quality. This article provides step-by-step instructions to accomplish this task efficiently.
Start by launching Photoshop and open the image you wish to convert to CMYK. Locate the ‘Image’ menu at the top of the interface; it’s typically found between ‘Layer’ and ‘Layer’.
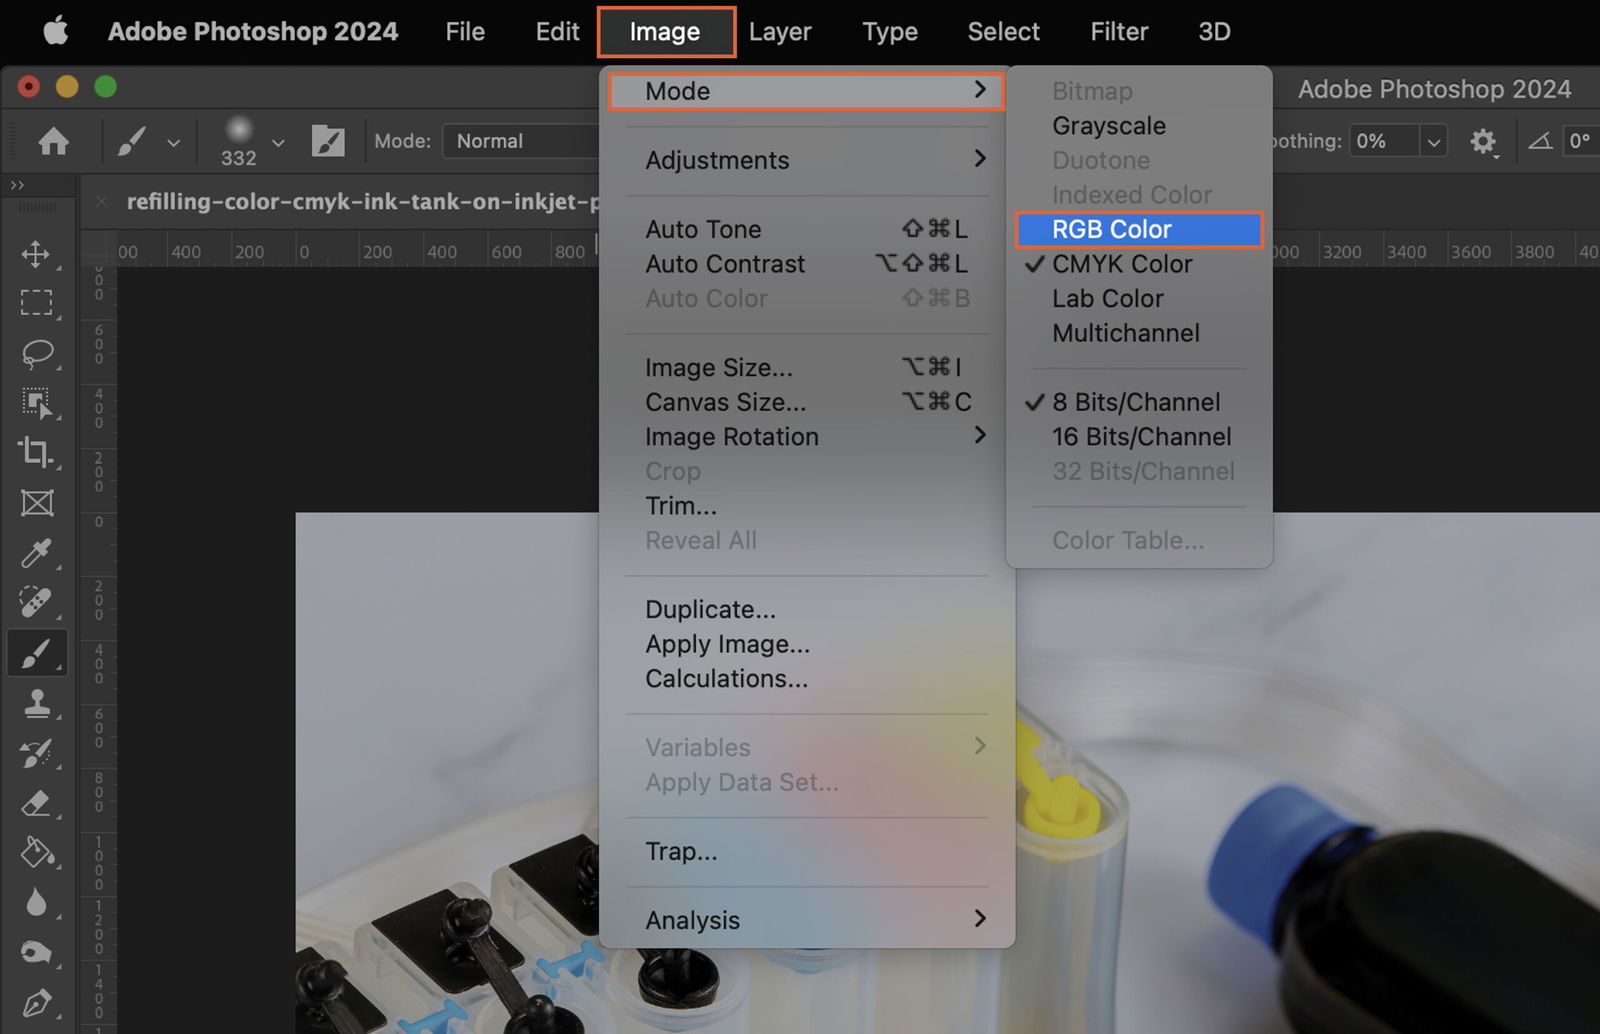
Click on the ‘Image’ menu to access a dropdown list. From this list, select ‘Mode’. This will open another dropdown menu.
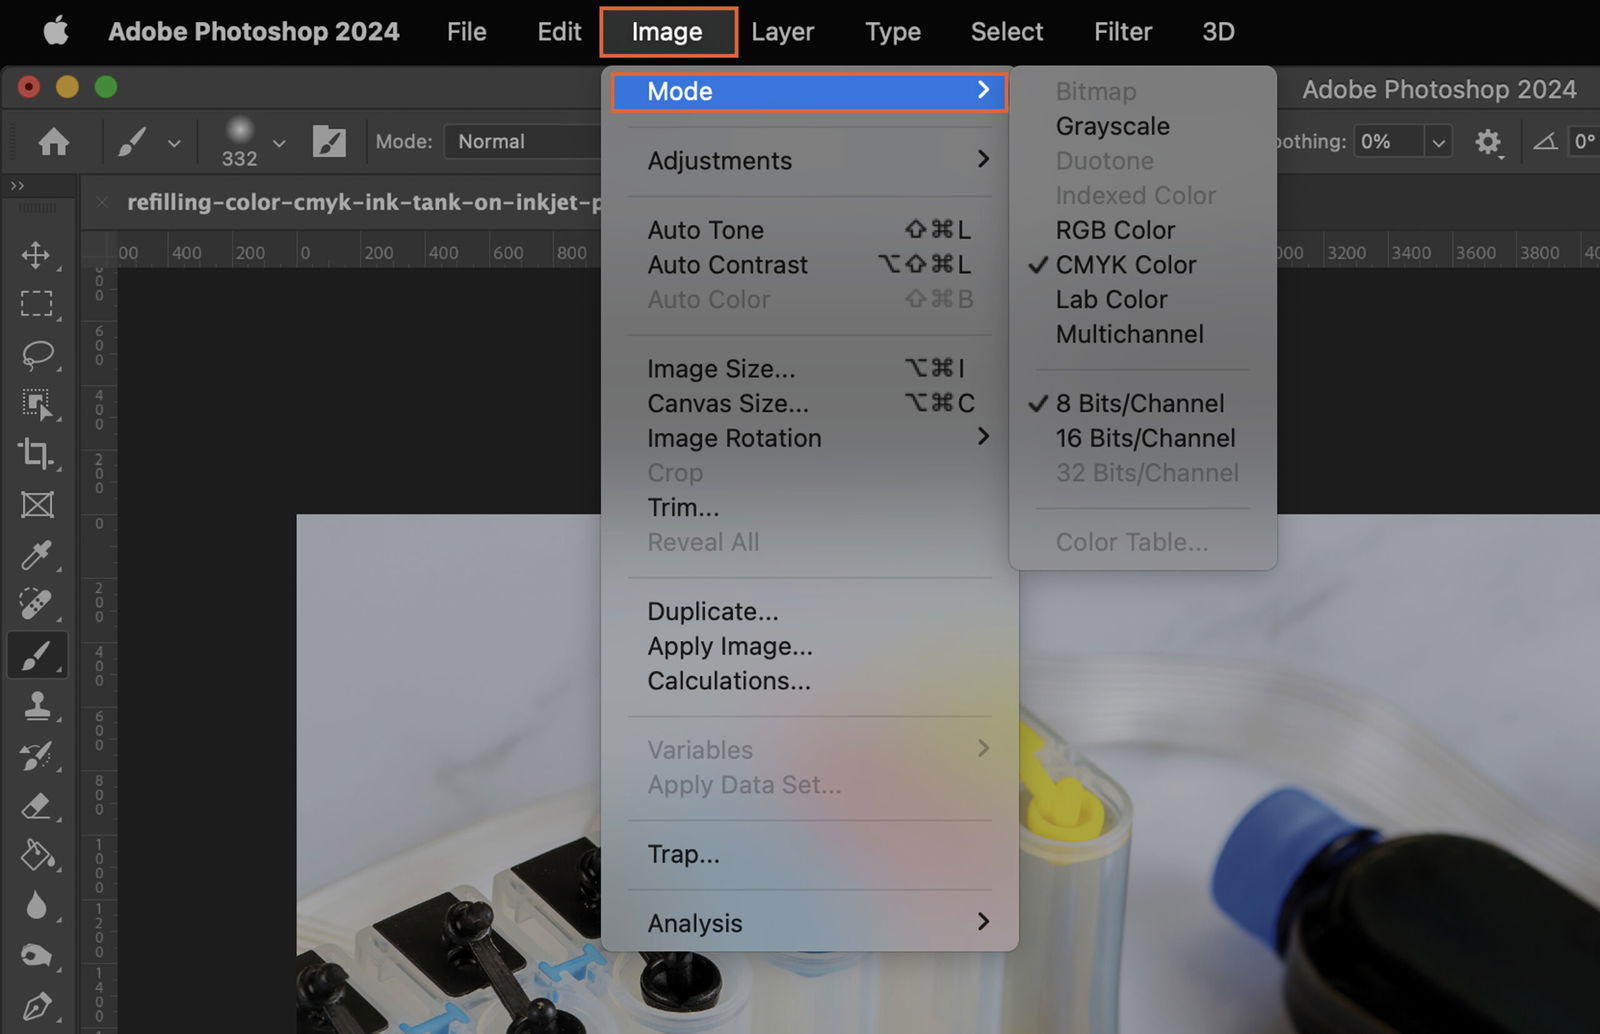
From the ‘Mode’ dropdown menu, click on ‘CMYK Color’. This action initiates the process of converting your image from its current color mode to CMYK.
A dialogue box may appear to confirm the color mode change. If it does, click ‘OK’. If it doesn’t, proceed to the next step.

This step involves fine-tuning the CMYK color profile. It’s an optional step but can improve the final image quality.
Find the ‘Edit’ menu at the top of the interface, typically located between ‘File’ and ‘Image’, and click on it. From the ‘Edit’ dropdown menu, select ‘Color Settings’. This will open a new dialogue box.

In the ‘Color Settings’ dialogue box, locate the ‘CMYK’ section. Click on the dropdown menu and choose the CMYK profile that suits your needs. Click ‘OK’ to save your settings.

Now, inspect your image to ensure the color conversion is satisfactory. If needed, make any adjustments using Photoshop’s editing tools.
Finally, save your image by clicking ‘File’, then ‘Save As’. In the ‘Save As’ dialogue box, select the format you wish to save the file in. Ensure ‘Embed Color Profile’ is checked to retain the CMYK color mode. Click ‘Save’ to complete the process.


