When you need to convert RGB to CMYK in Photoshop for print projects, knowing the right steps can make your work more efficient. This article will guide you through the process, ensuring your colors remain vibrant and true to your original design.
Step 1. Open the Image in Adobe Photoshop
Start Adobe Photoshop and open the image you want to convert. You can do this by clicking on ‘File’ in the menu bar, then ‘Open’, and selecting the image from your files.
Step 2. Check the Current Color Mode
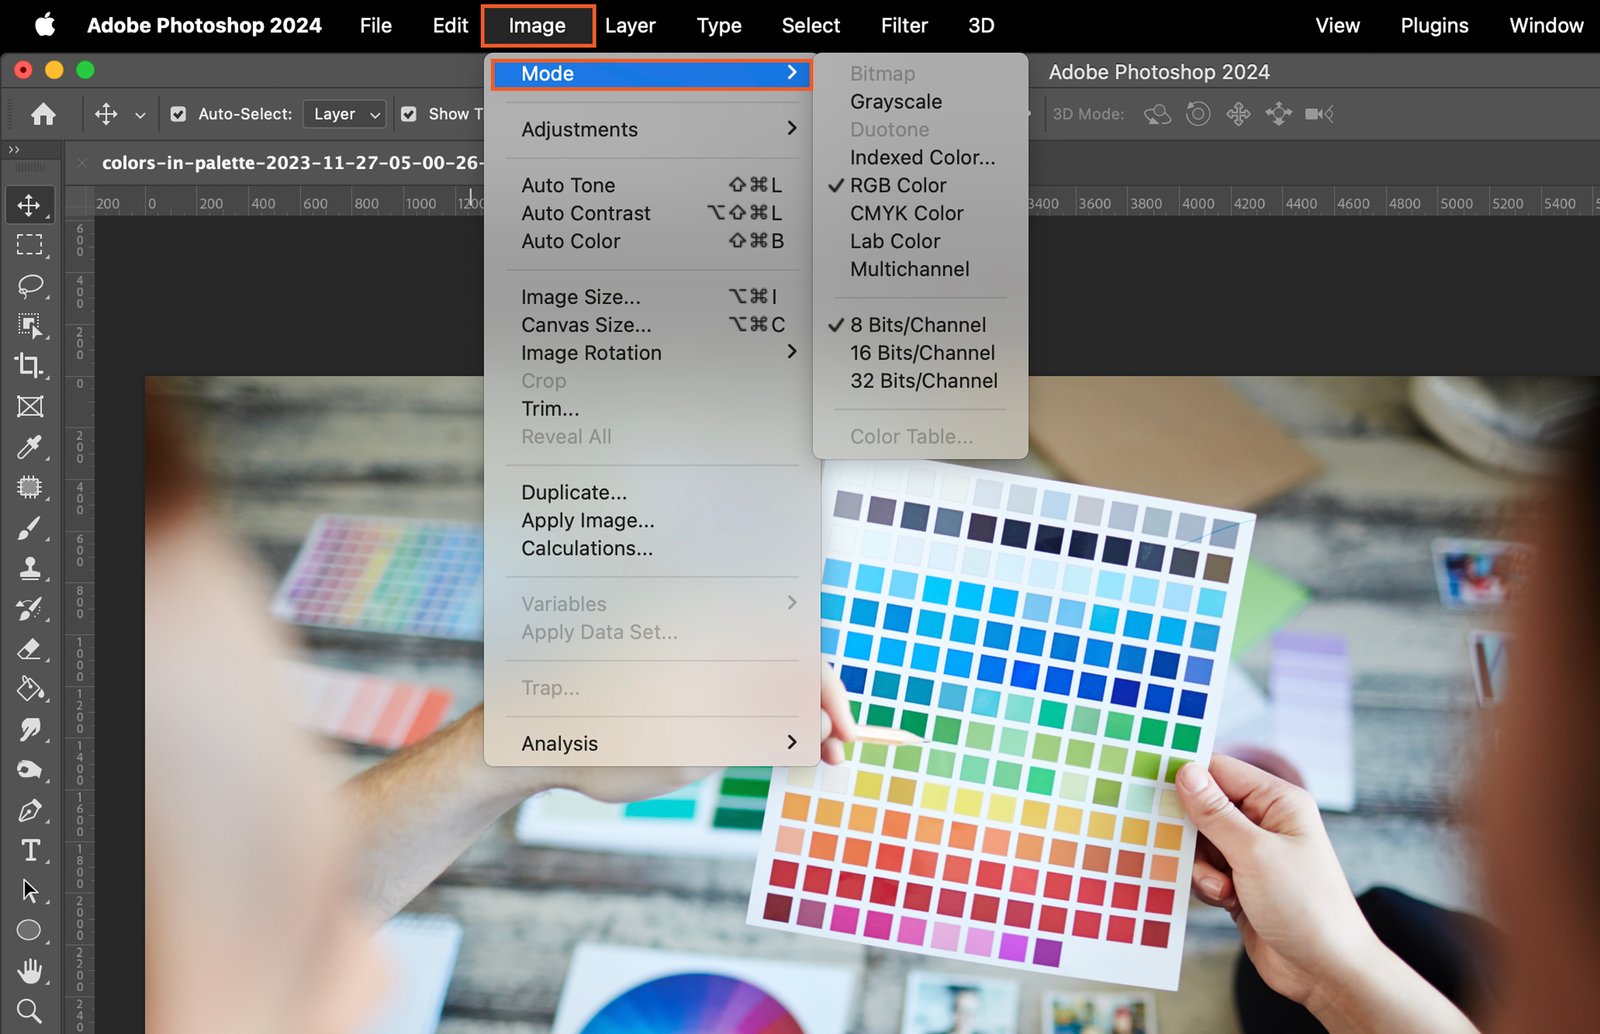
Before converting the image, verify its current color mode. Navigate to ‘Image’ in the menu bar, then ‘Mode’. The current mode will be ticked.
Step 3. Convert the Image Color Mode to CMYK
To change the color mode, there are two ways: using the menu bar or a keyboard shortcut.
Step 3.1 Using the Menu Bar
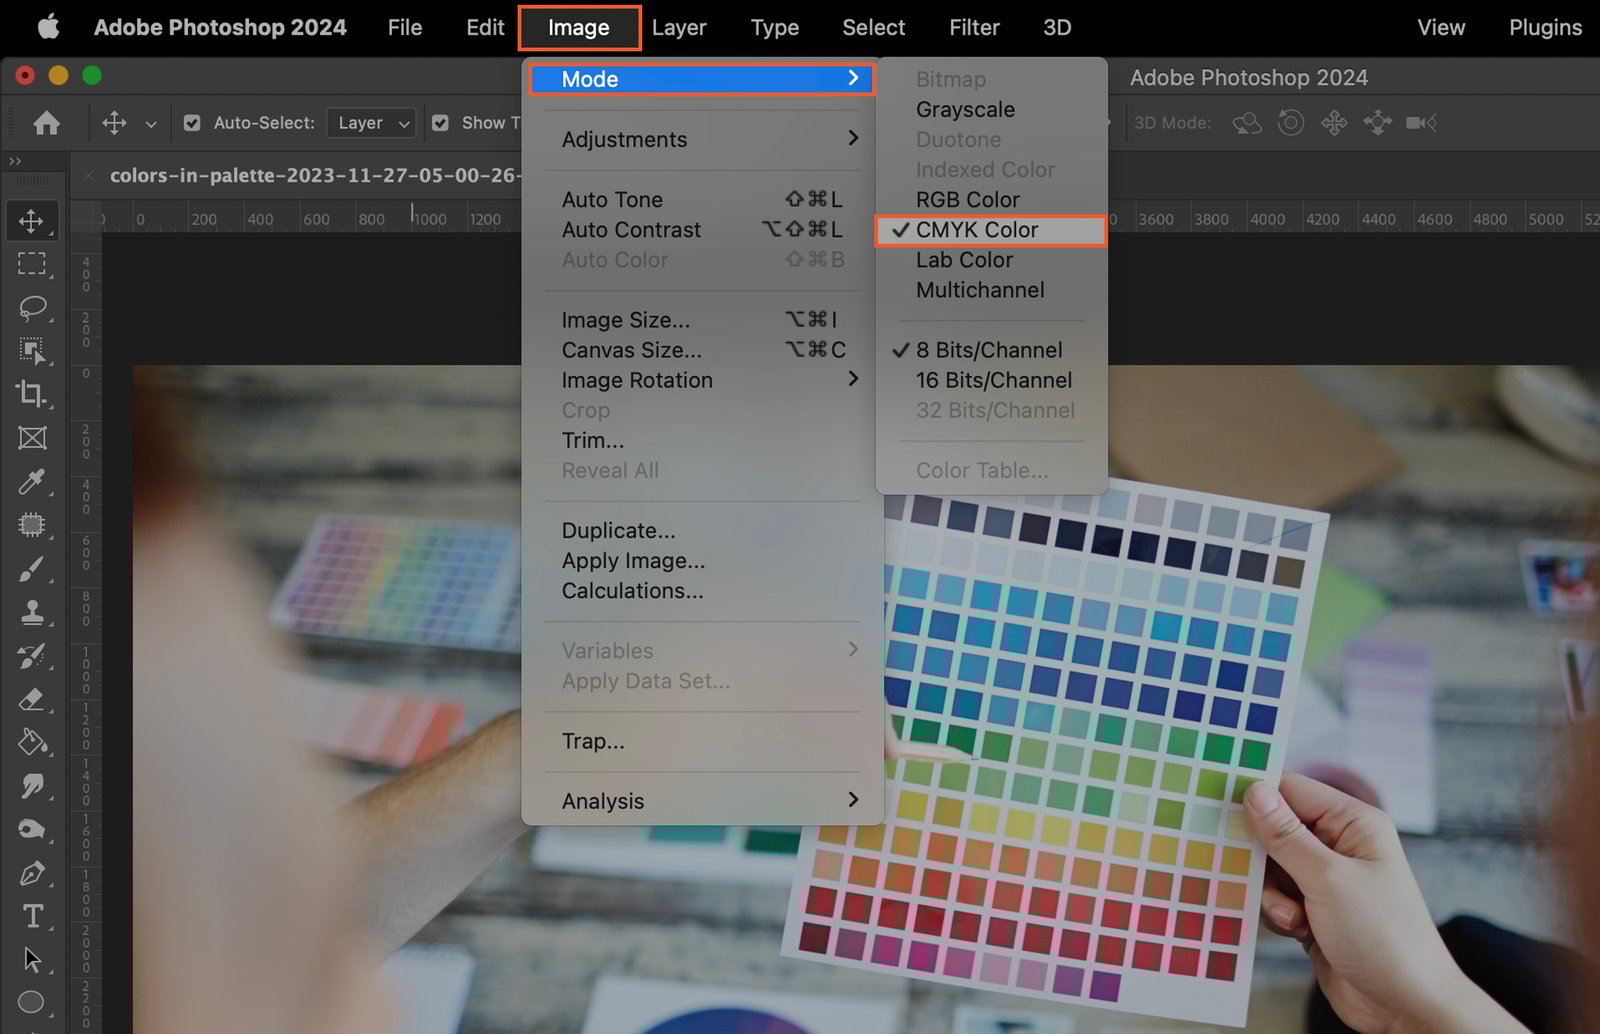
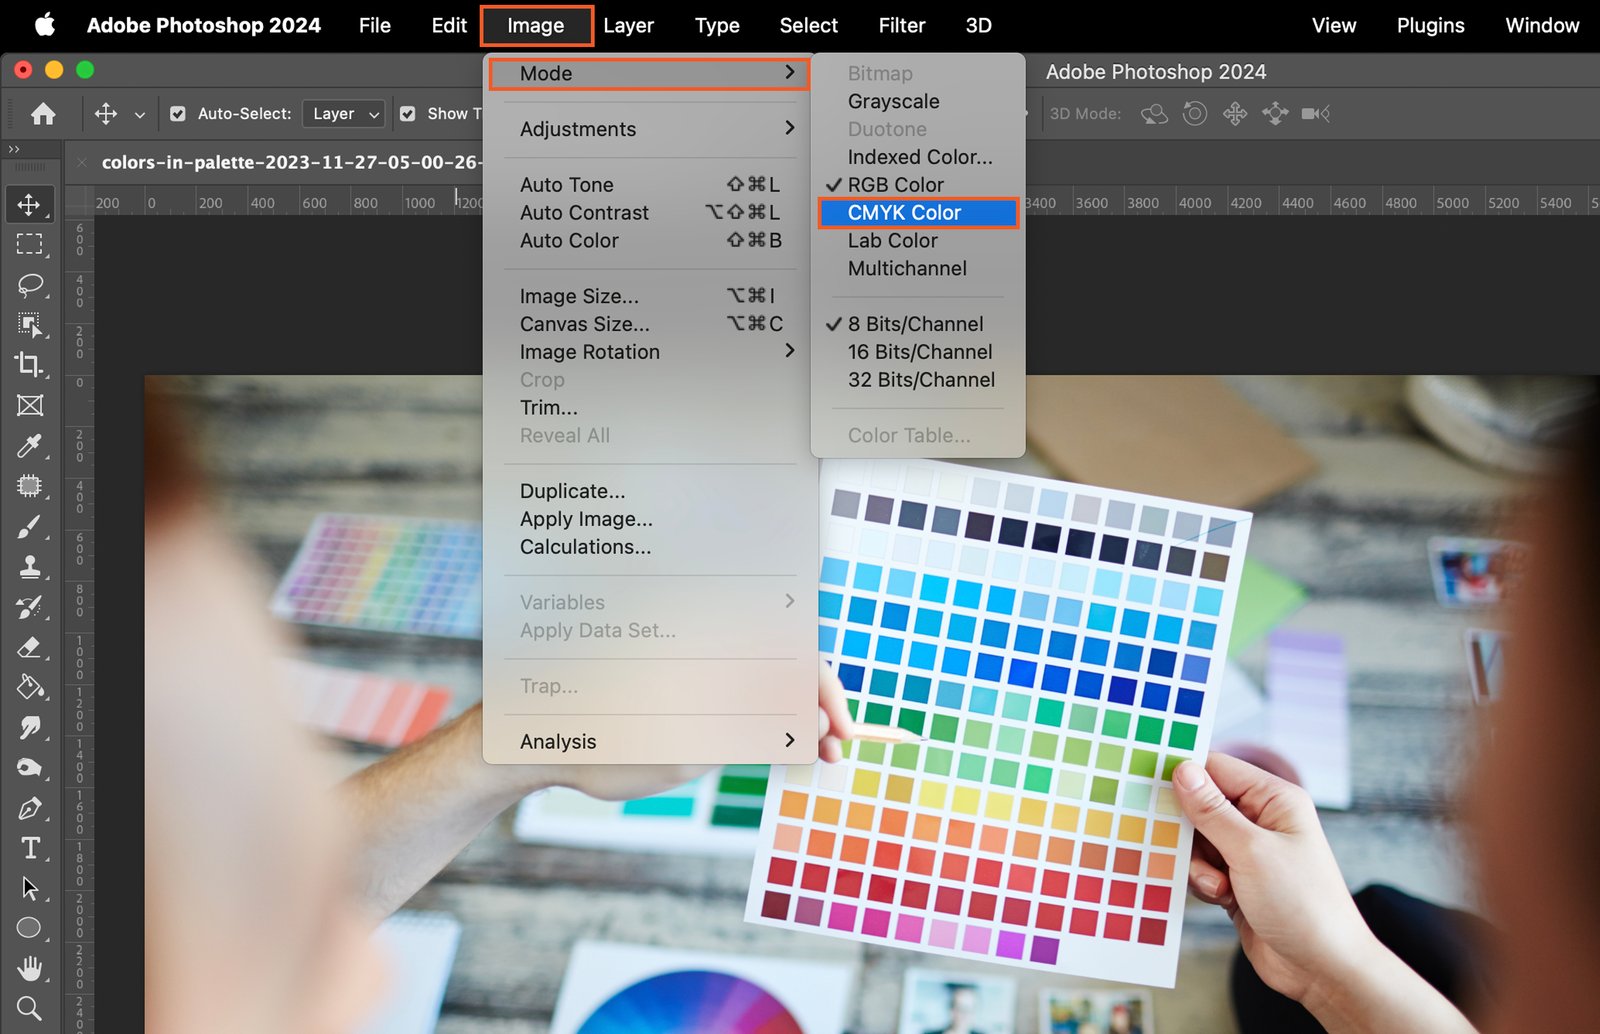
In the ‘Image’ menu, select ‘Mode’ then ‘CMYK Color’. This changes the color mode to CMYK.
Step 3.2 Using the Keyboard Shortcut
If you prefer a quicker way, use the keyboard shortcut. Press ‘Ctrl+Y’ on Windows or ‘Command+Y’ on Mac.
Step 4. Make Adjustments if Needed
After converting to CMYK, you might need to adjust the image’s color balance or brightness and contrast.
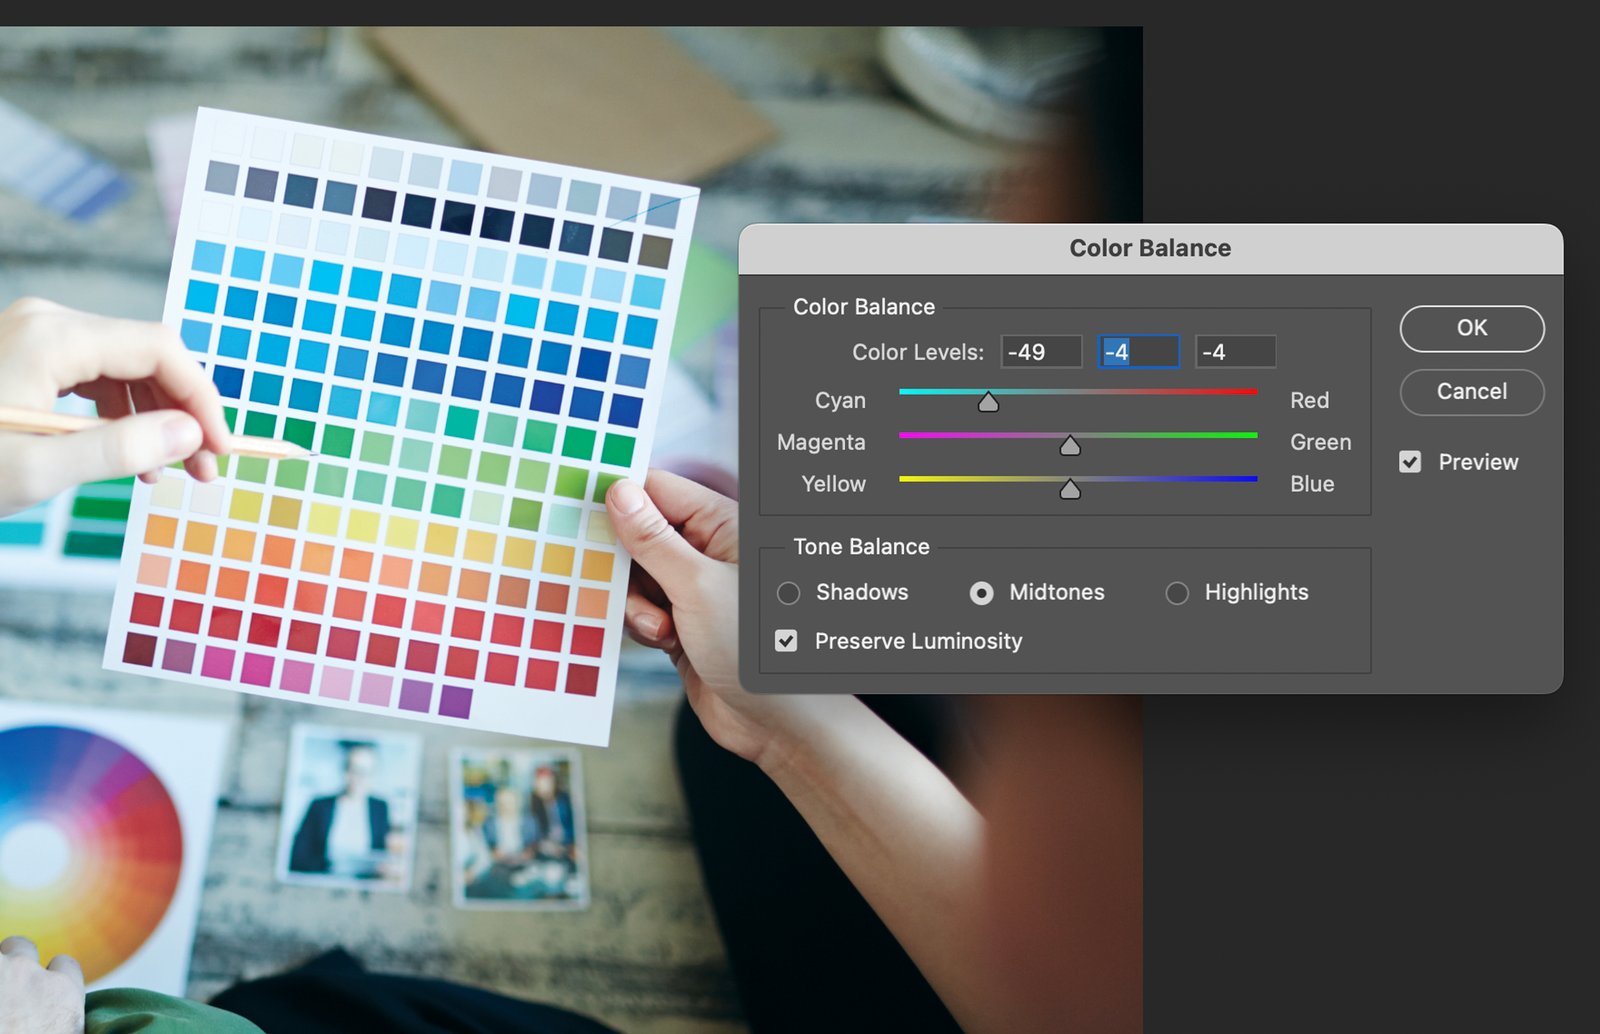
Step 4.1 Adjusting the Color Balance
To adjust color balance, go to ‘Image’, ‘Adjustments’, then ‘Color Balance’. Use the sliders to adjust the color levels.
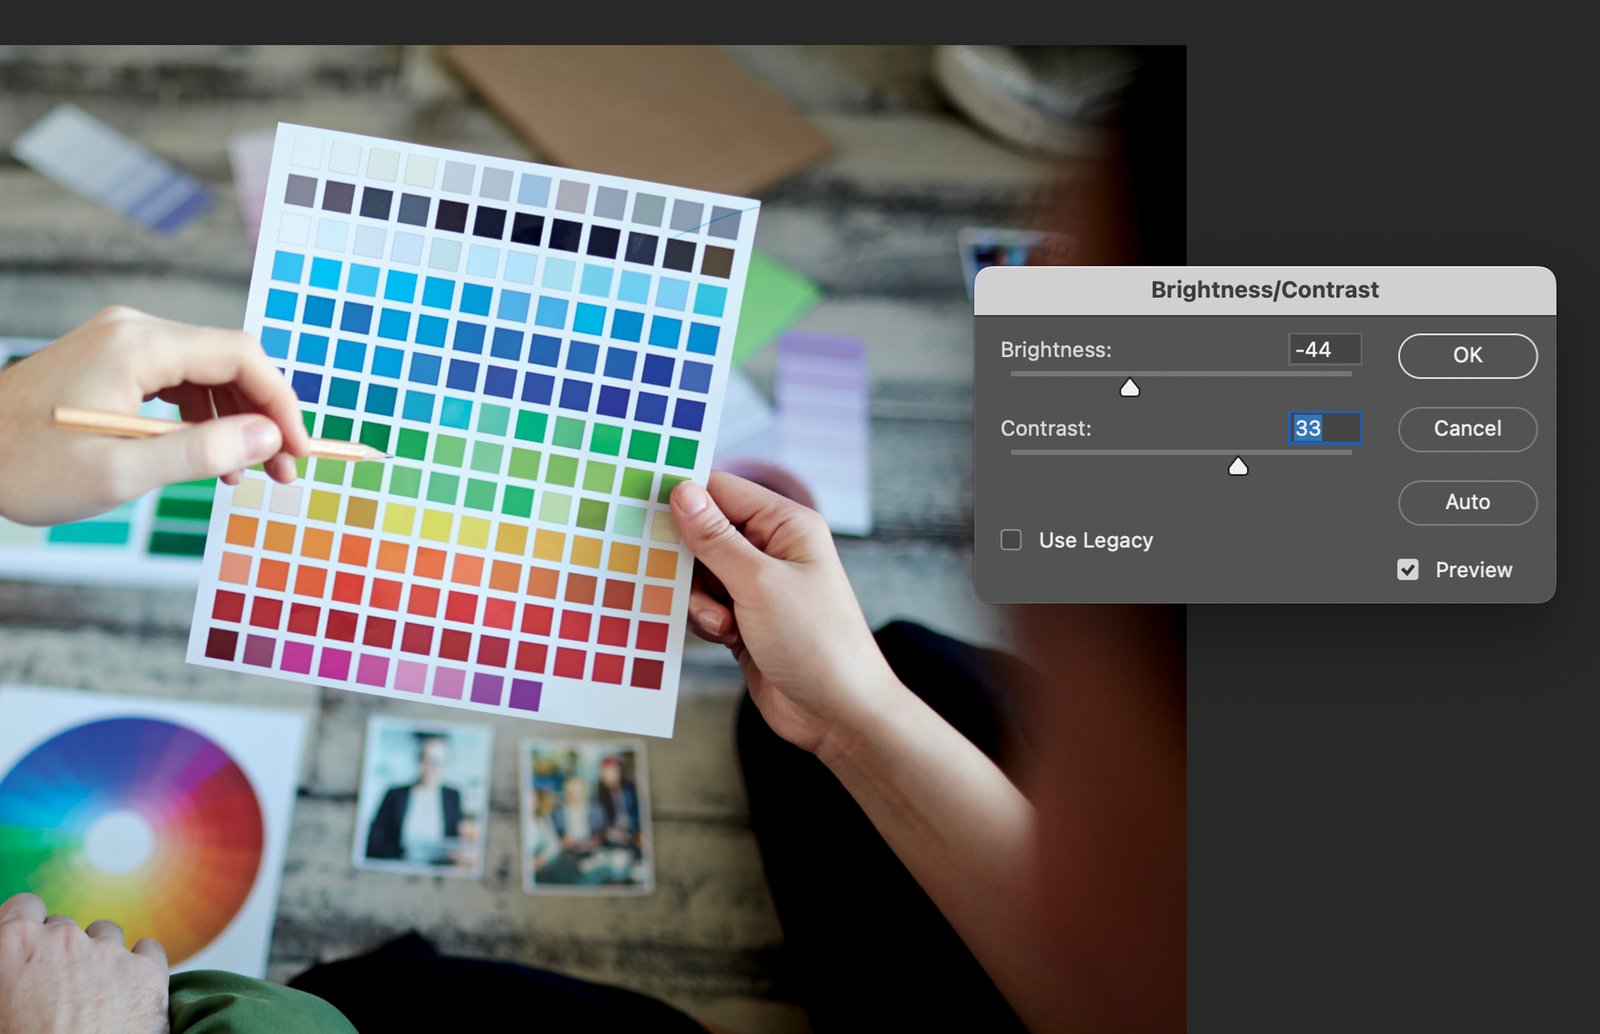
Step 4.2 Adjusting the Brightness and Contrast
Also in ‘Image’ and ‘Adjustments’, you’ll find ‘Brightness/Contrast’. Adjust these settings to your liking.
Step 5. Save the Image in CMYK Format
After making necessary adjustments, save the image. You can either save as a new file or overwrite the existing one.
Step 5.1 Saving as a New File
To save as a new file, click ‘File’, then ‘Save As’. Choose a name and location for your new image.
Step 5.2 Overwriting the Existing File
To overwrite the existing file, simply click ‘File’, then ‘Save’.
Step 6. Confirm the Color Mode Change
Finally, confirm your image is now in CMYK mode. Go to ‘Image’, ‘Mode’, and ensure ‘CMYK Color’ is ticked. Your image is now ready in its new color mode.