Learning to convert to RGB in Photoshop can significantly enhance image quality and flexibility. This article provides a simple, step-by-step guide to help you master this valuable skill.
Step 1. Open the Image in Photoshop
Start by launching Adobe Photoshop on your device. Open your desired image by clicking on the “File” option in the upper left corner. Select “Open” and browse to your image’s location. Double-click the image file to open it.
Step 2. Select the Mode Option
Under the “Image” menu, you’ll find the “Mode” option. This option allows you to choose the color mode of your image.
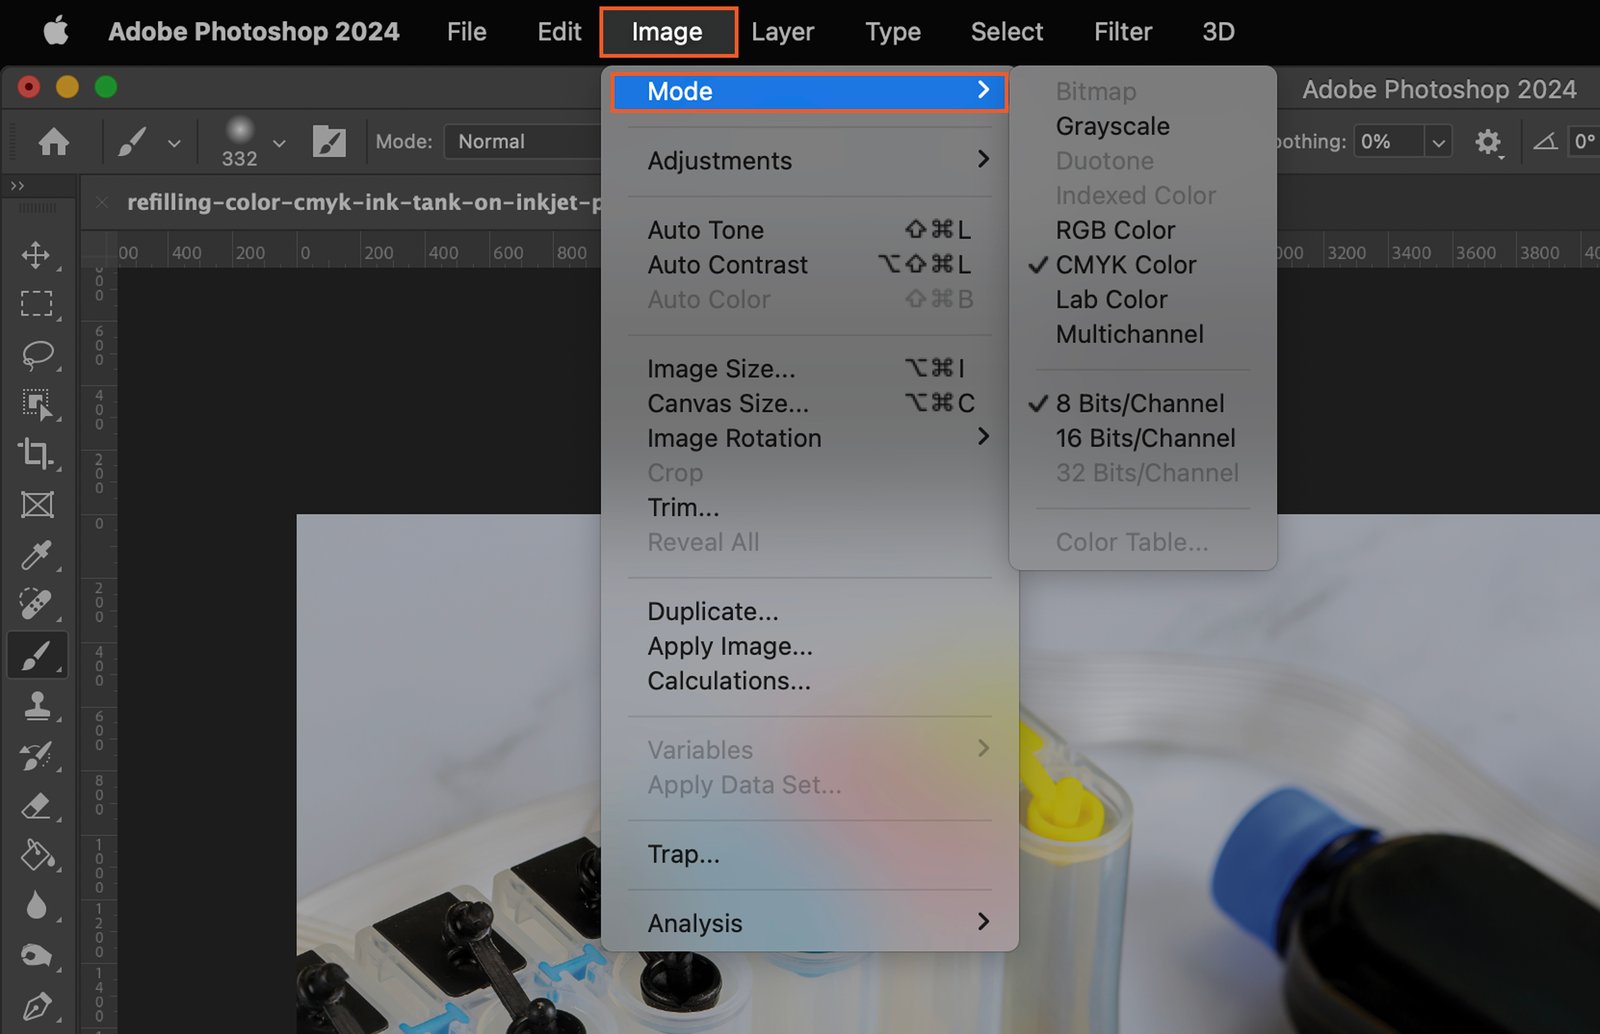
Step 2.1 Use the Menu Bar
Using the menu bar, click on “Image” and then “Mode”. This will open a list of color modes.
Step 2.2 Use the Shortcut Key
Alternatively, you can use the shortcut key “Alt + Shift + Ctrl + K”. This will also bring up the “Mode” options.
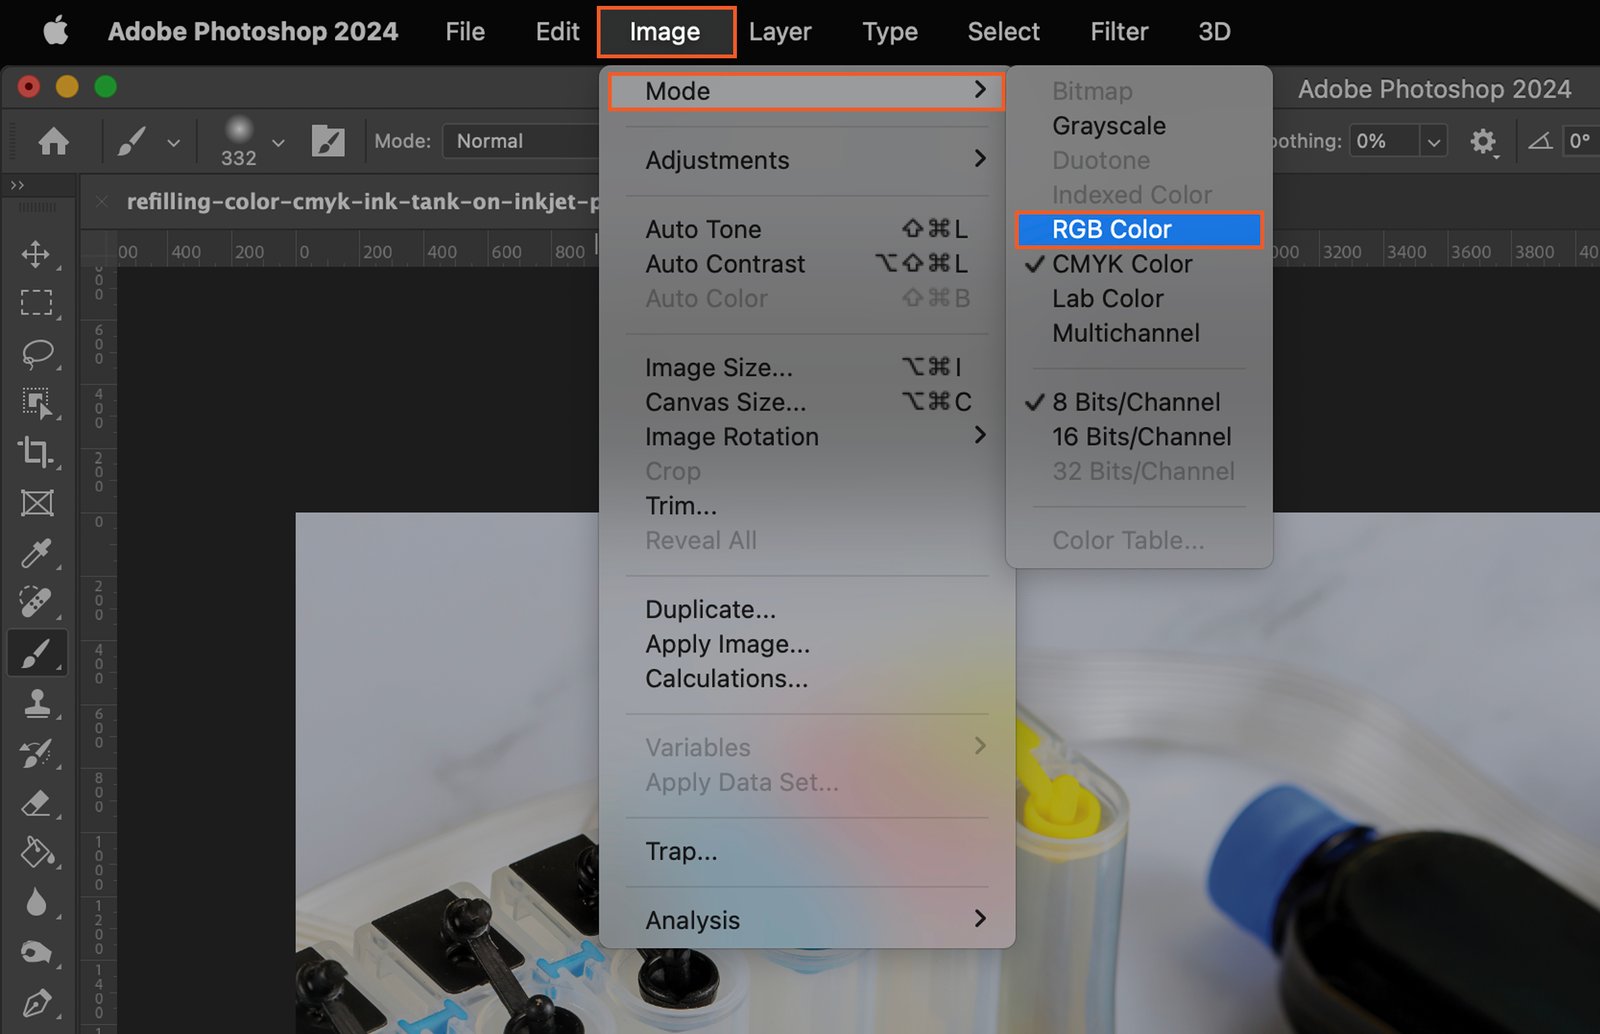
Step 3. Choose RGB Color
From the list of color modes, select “RGB Color”. This stands for Red Green Blue, the primary colors in the color spectrum.
Step 4. Confirm the Change
After selecting “RGB Color”, a dialog box may appear asking you to confirm the change. Click “OK” to proceed.
Step 5. Save the Converted Image
Finally, save your image to keep the changes. Go to “File”, then “Save As”. Choose a location, name your file, and click “Save”. Your image is now in RGB mode.


