Creating an animated GIF can seem challenging, but with the right knowledge, it’s quite manageable. This article will guide you through the process in Photoshop, ensuring you can craft your own engaging animations. Knowing this process not only boosts your digital skills but also offers a fun and creative way to communicate visually.
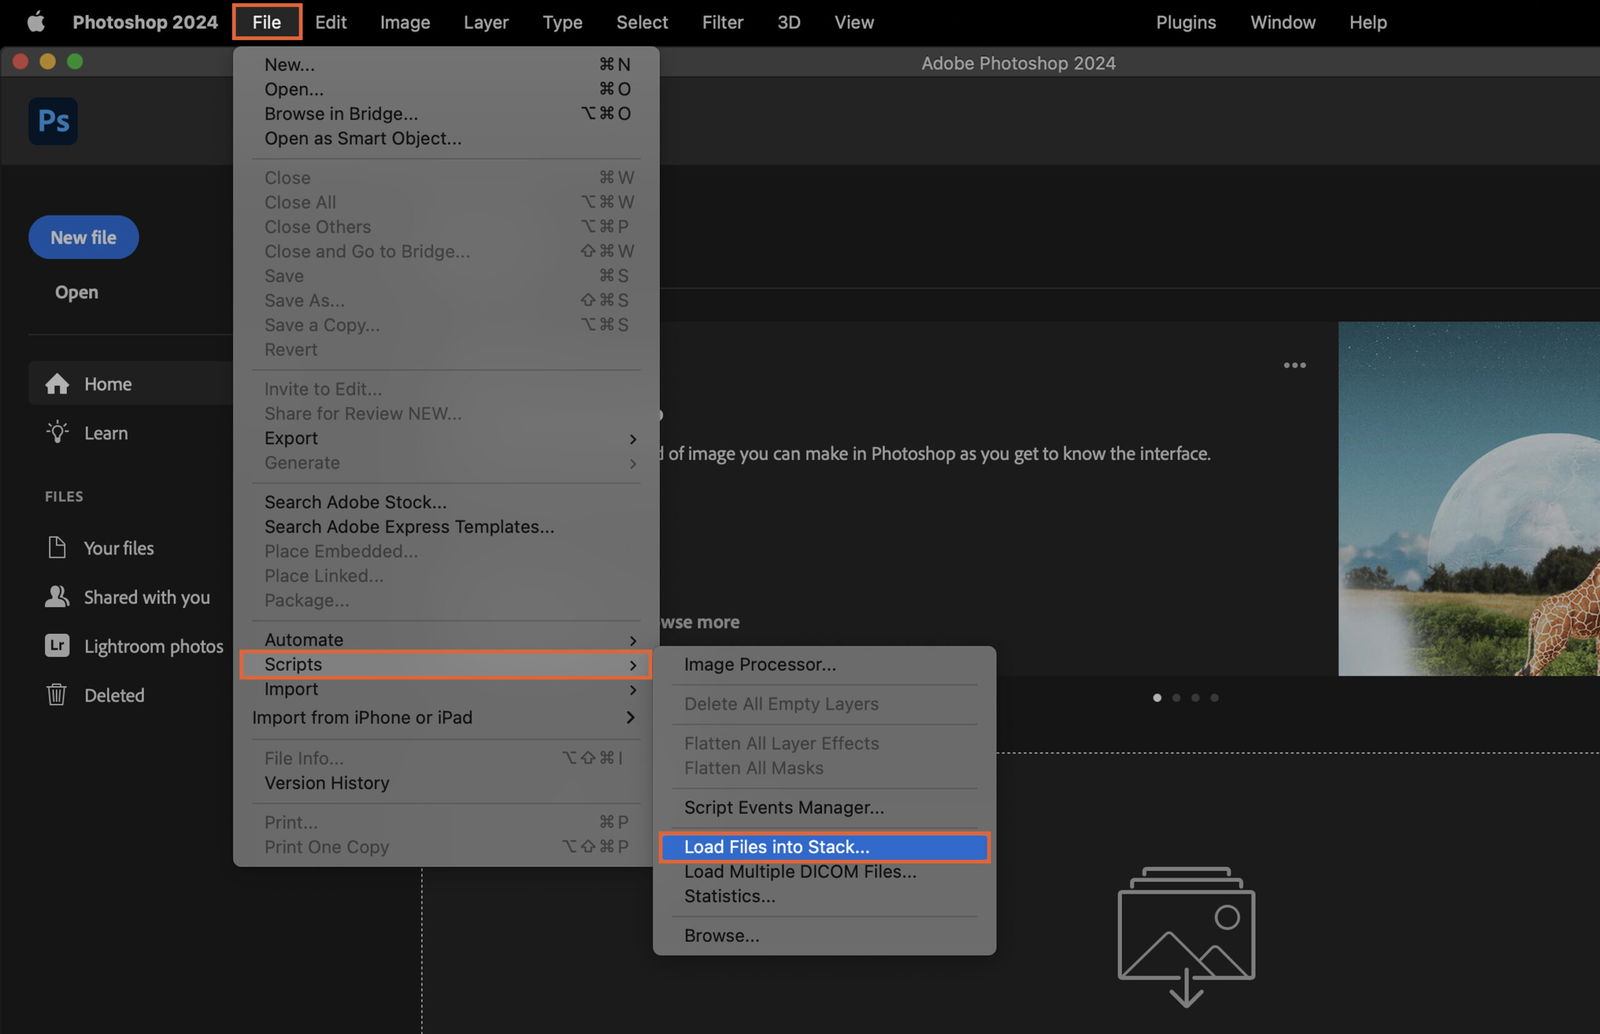
Start your project by importing all the images or frames you plan to use in your GIF. You can do this by navigating to File > Scripts > Load Files into Stack. From there, select the files you want to include in your animation.
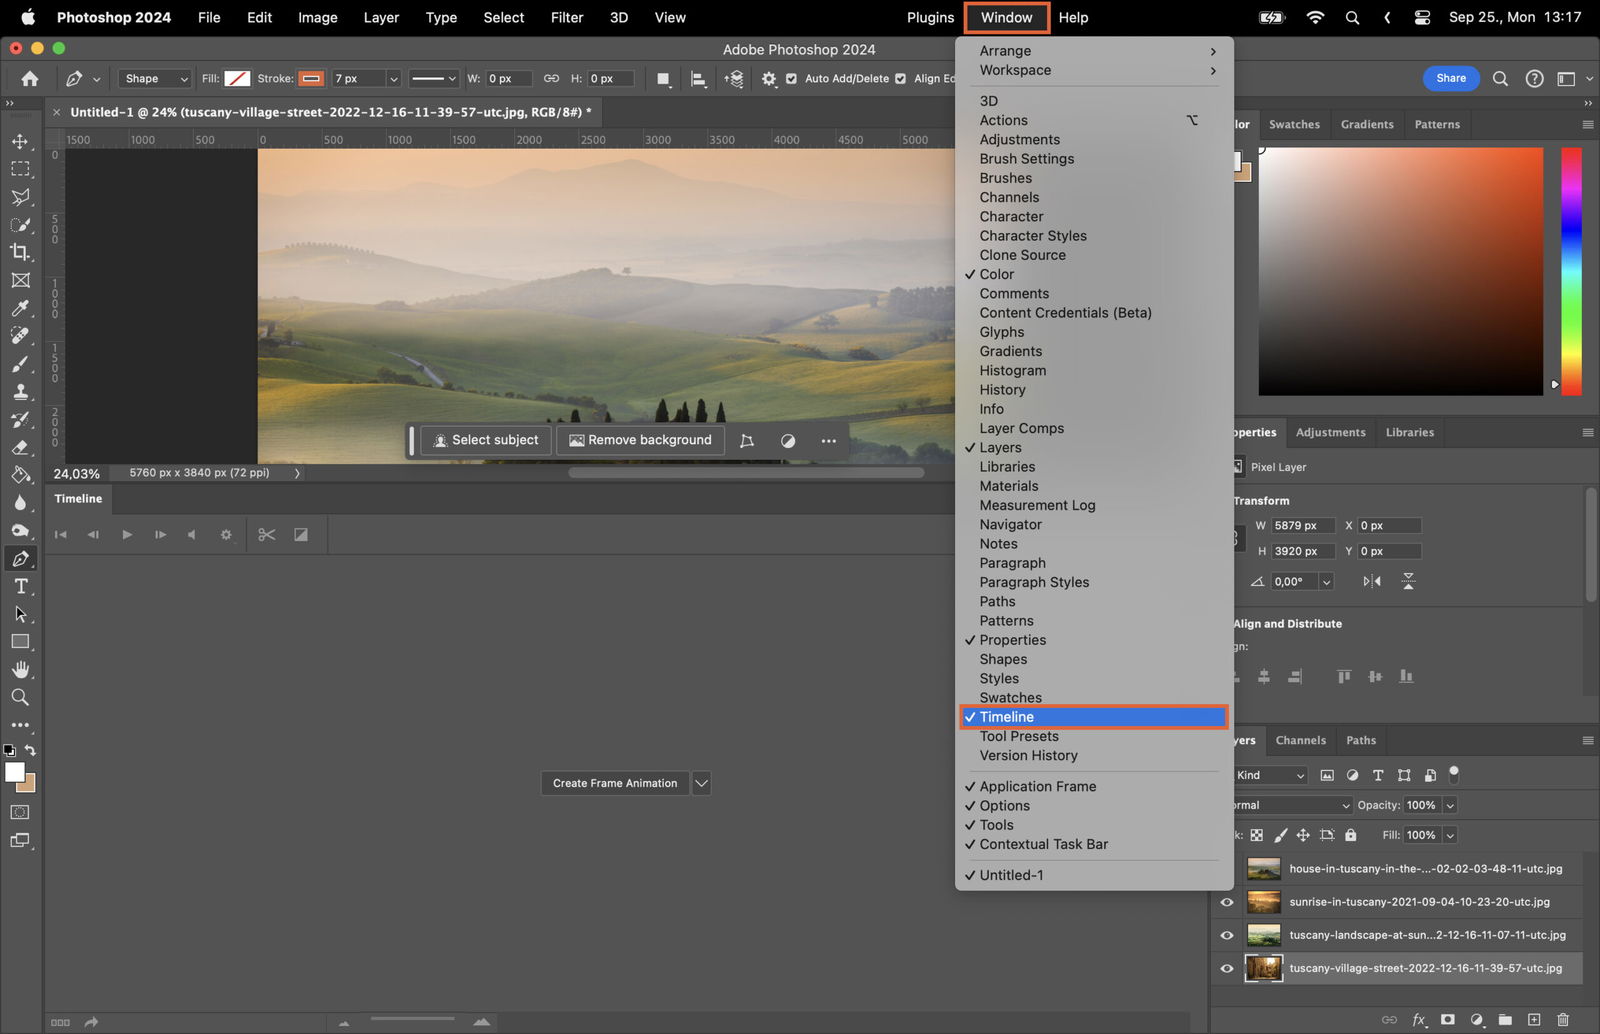
Once your images are loaded, you’ll need to open the Timeline window to create your animation. You can find this by going to Window > Timeline. This will open a new panel at the bottom of your workspace.
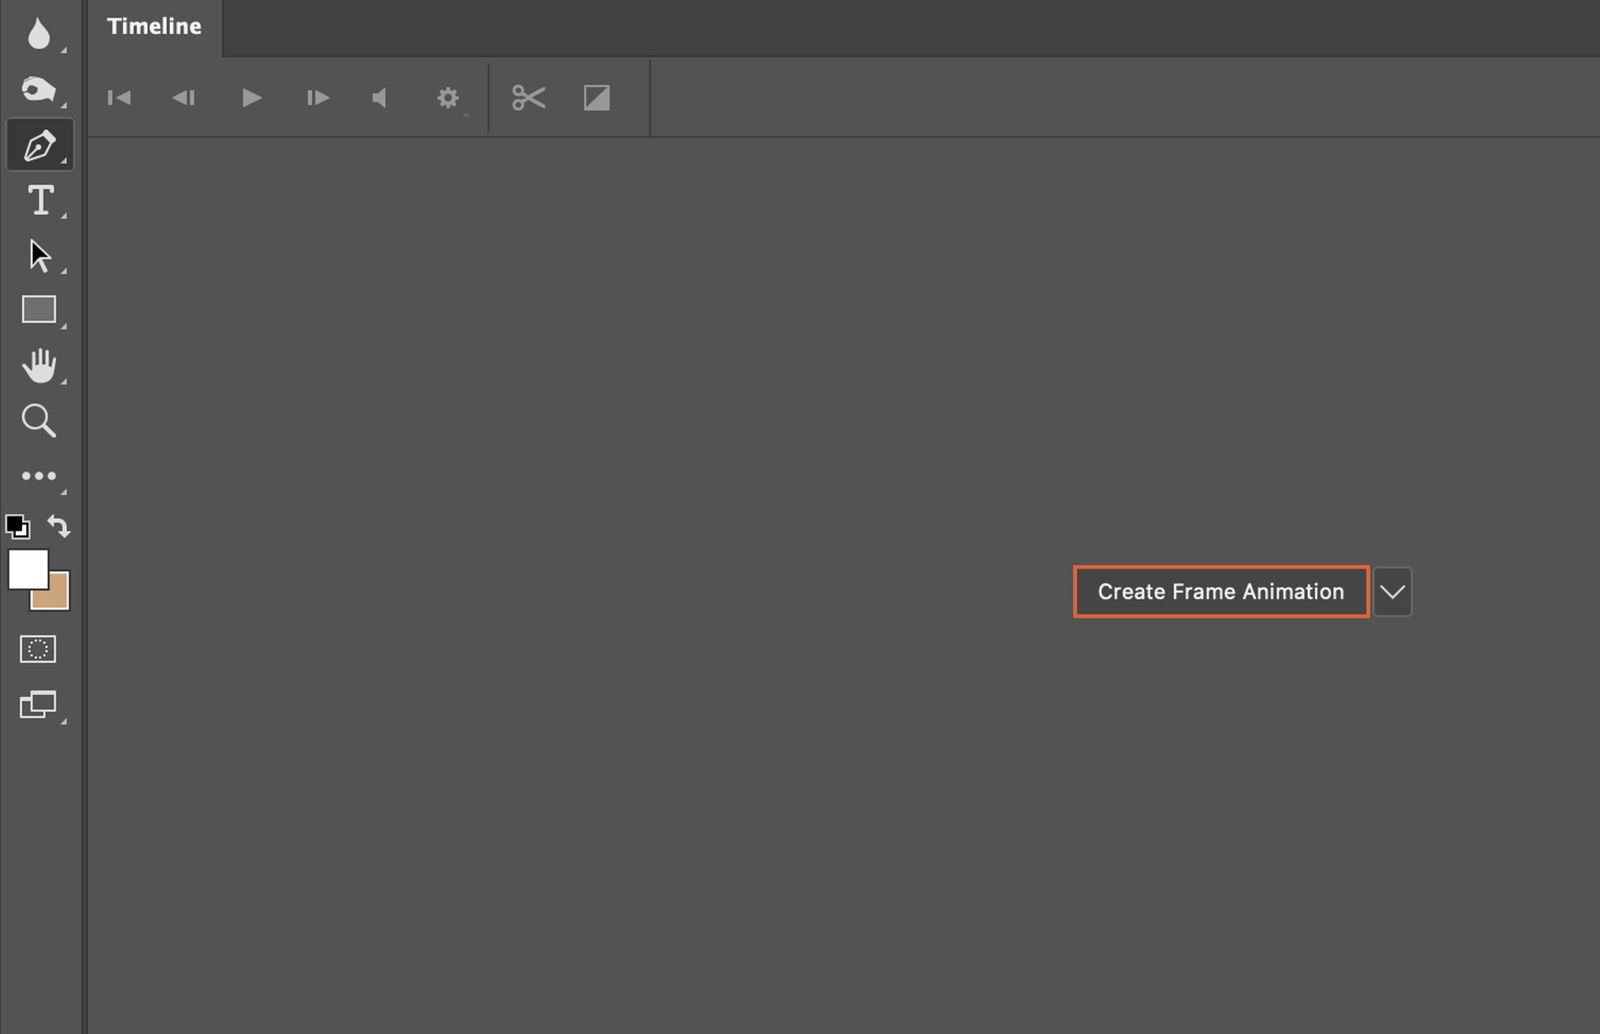
In the Timeline window, you’ll see a drop-down menu. Click on it and select “Create Frame Animation.”
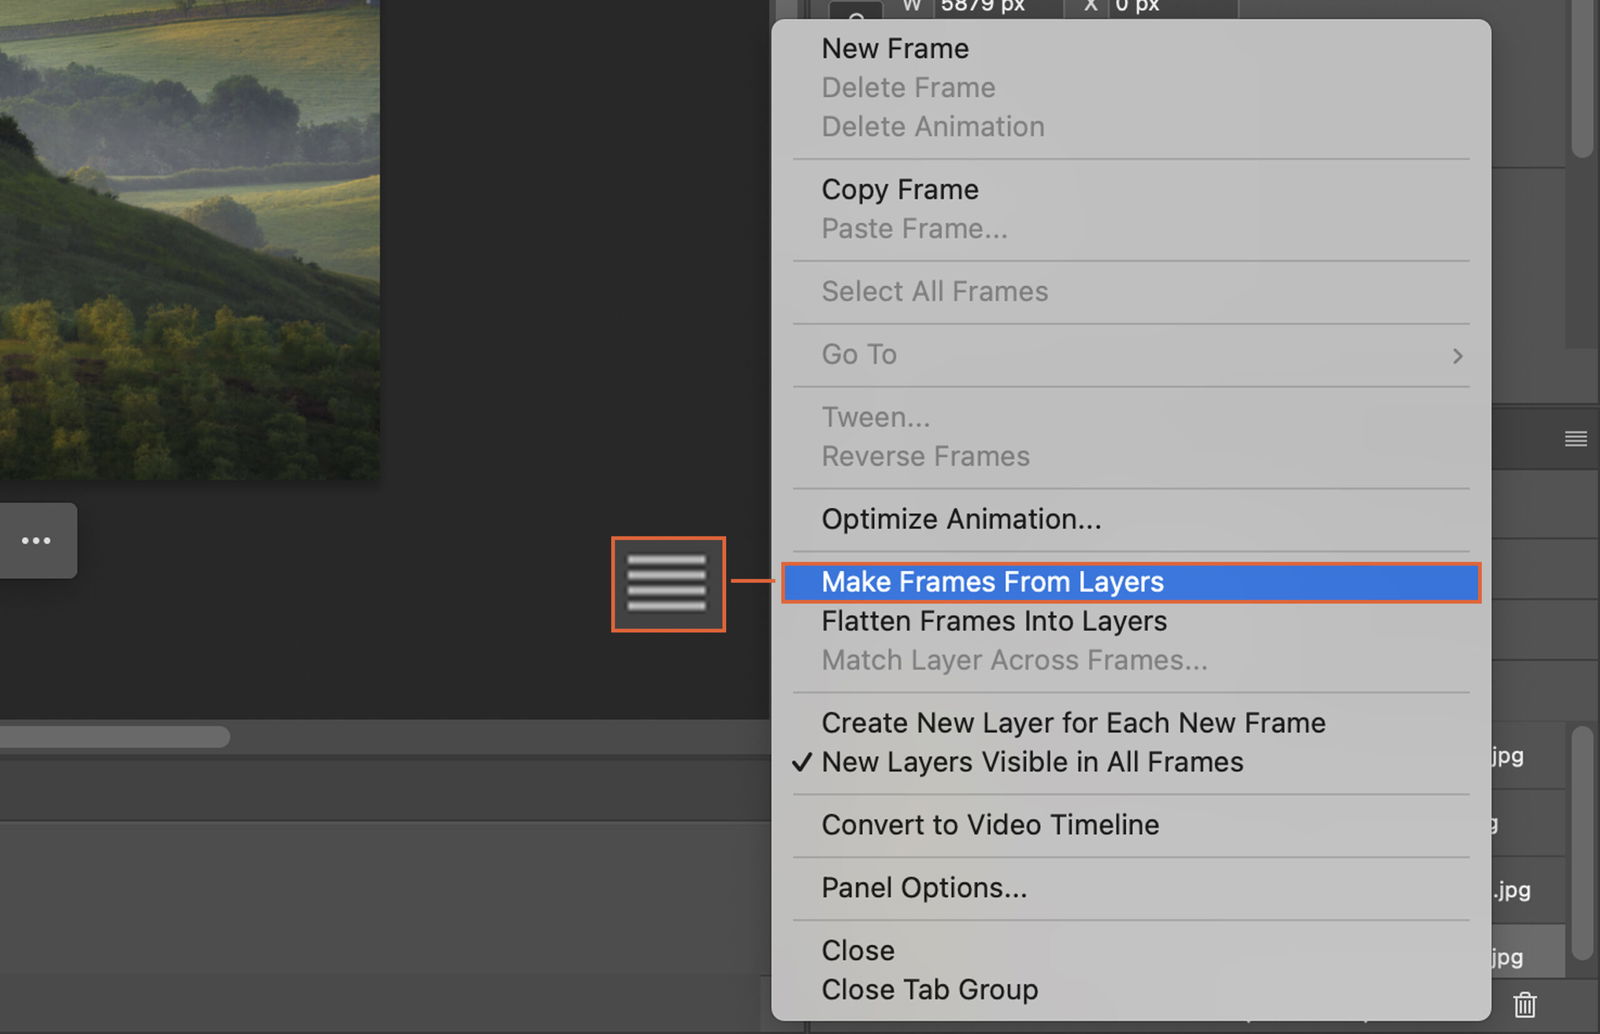
To convert your layers into separate frames, click on the menu icon on the right side of the Timeline panel. Then select “Make Frames From Layers.”
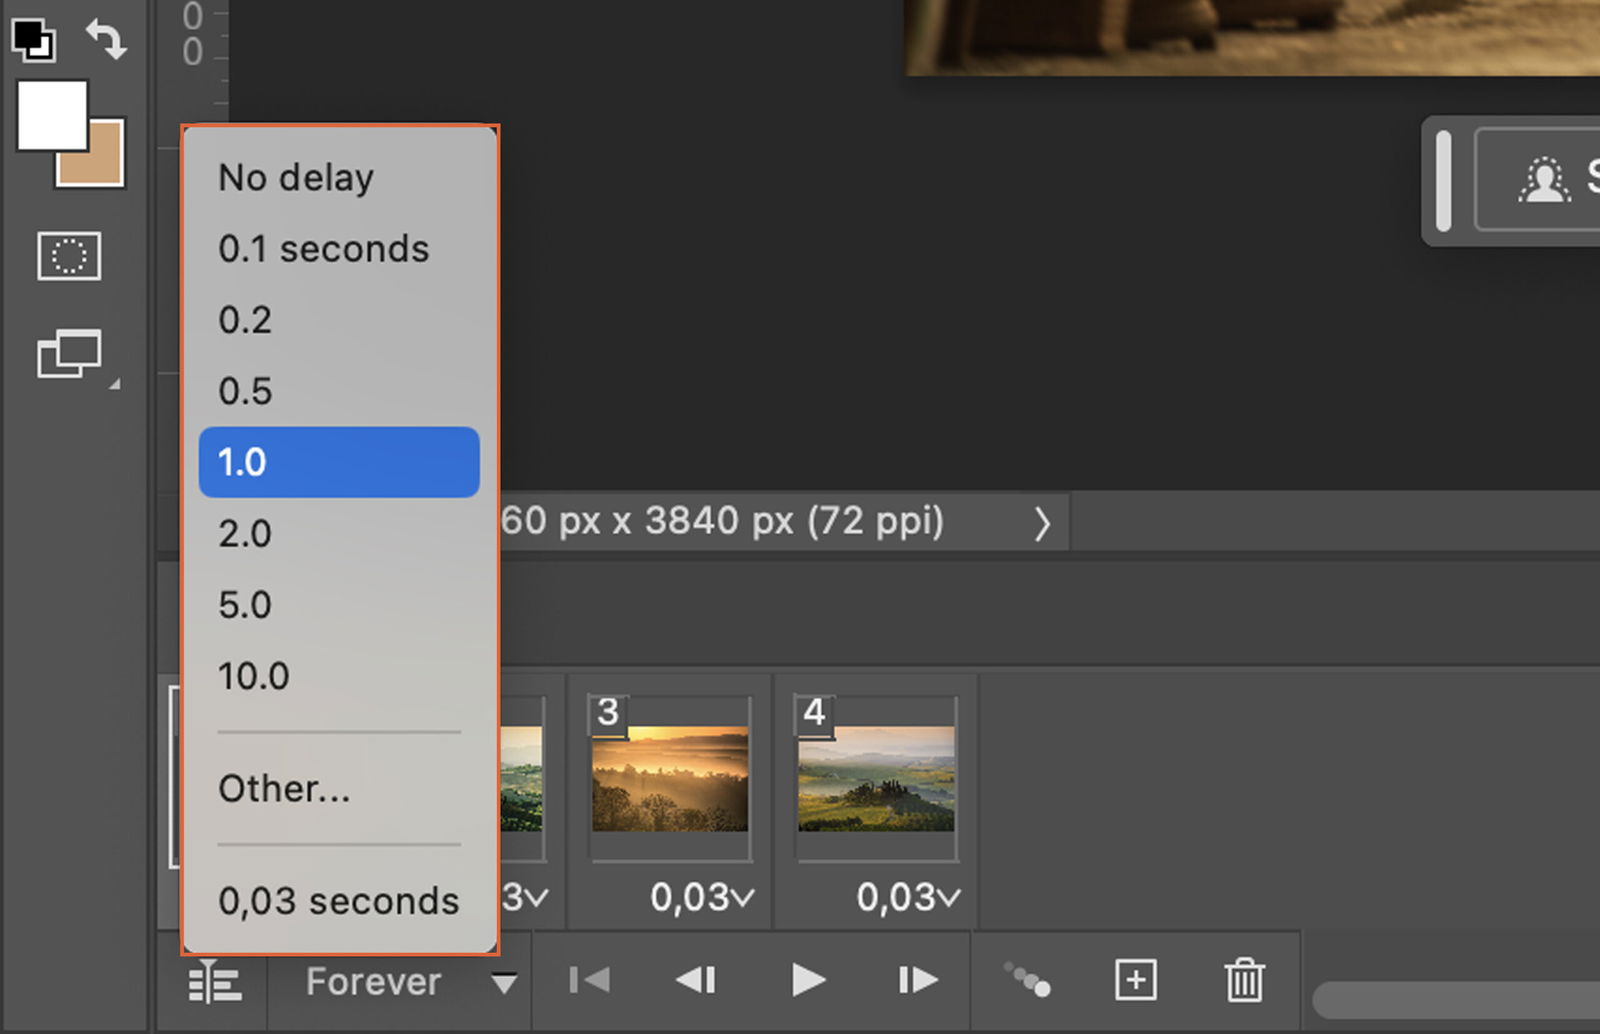
You can set how long each frame will display by selecting the time delay at the bottom of each frame. You can choose a preset time or input a custom duration.
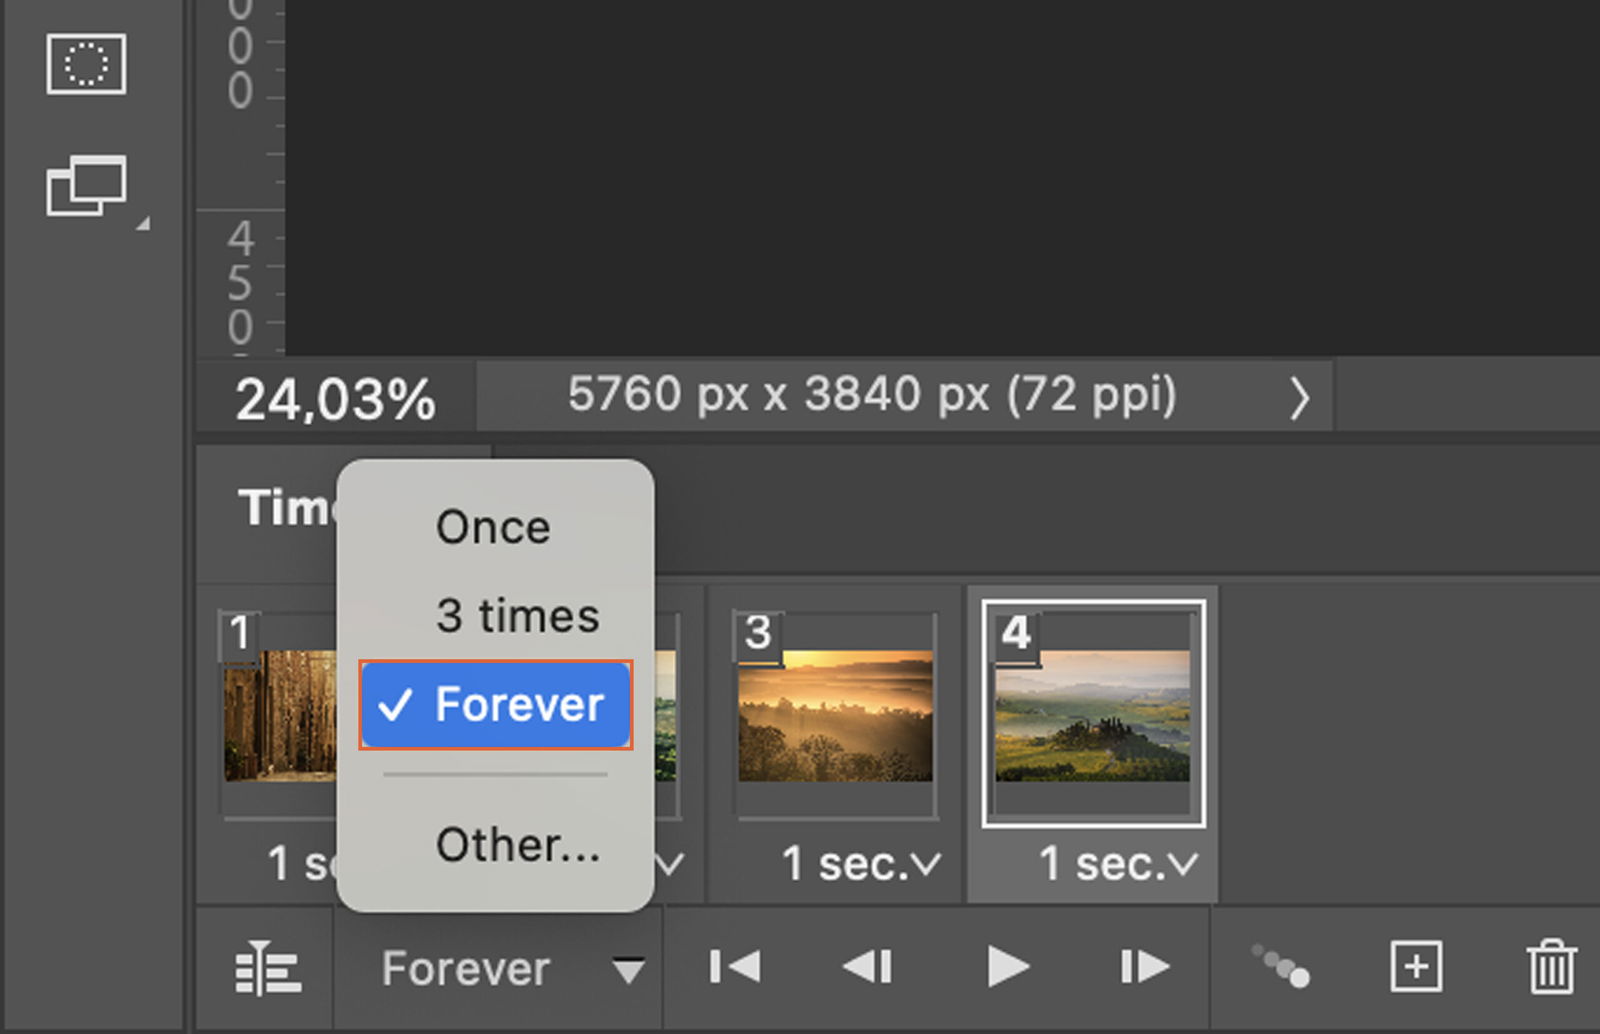
Decide how many times you want your GIF to loop. At the bottom of the Timeline panel, you’ll see an option titled “Once.” Click on this to choose how many times your GIF will loop.
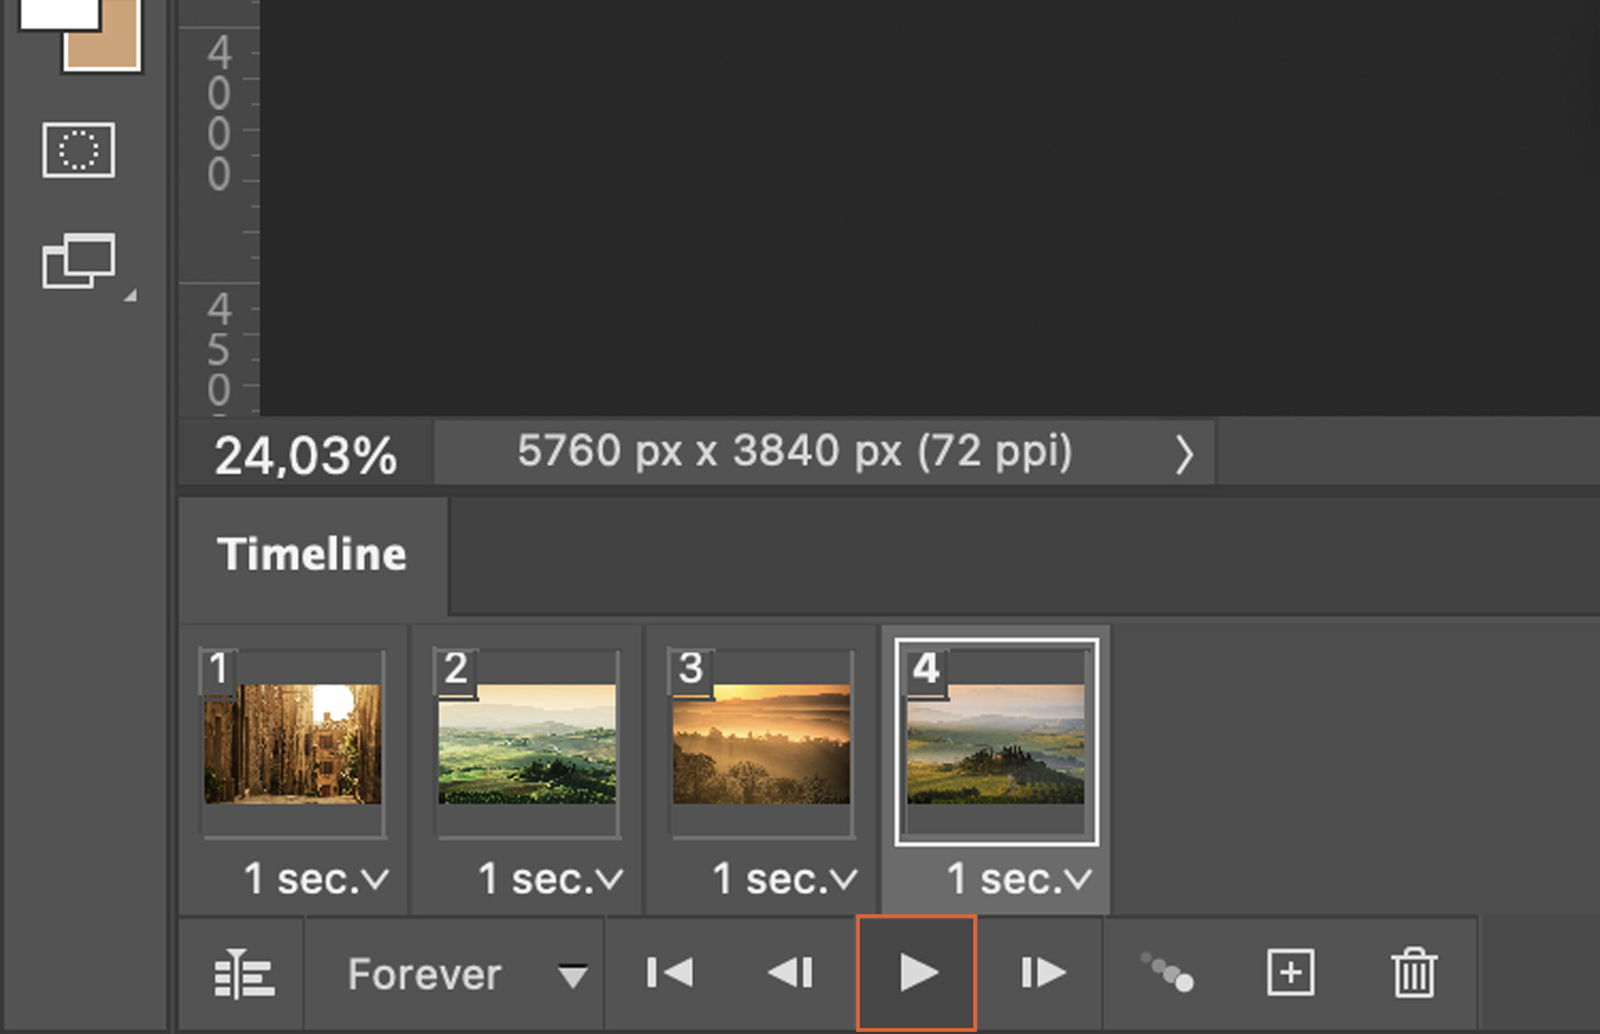
Before saving your GIF, preview it to ensure it appears as you want. Click the play button in the Timeline panel to start the preview.
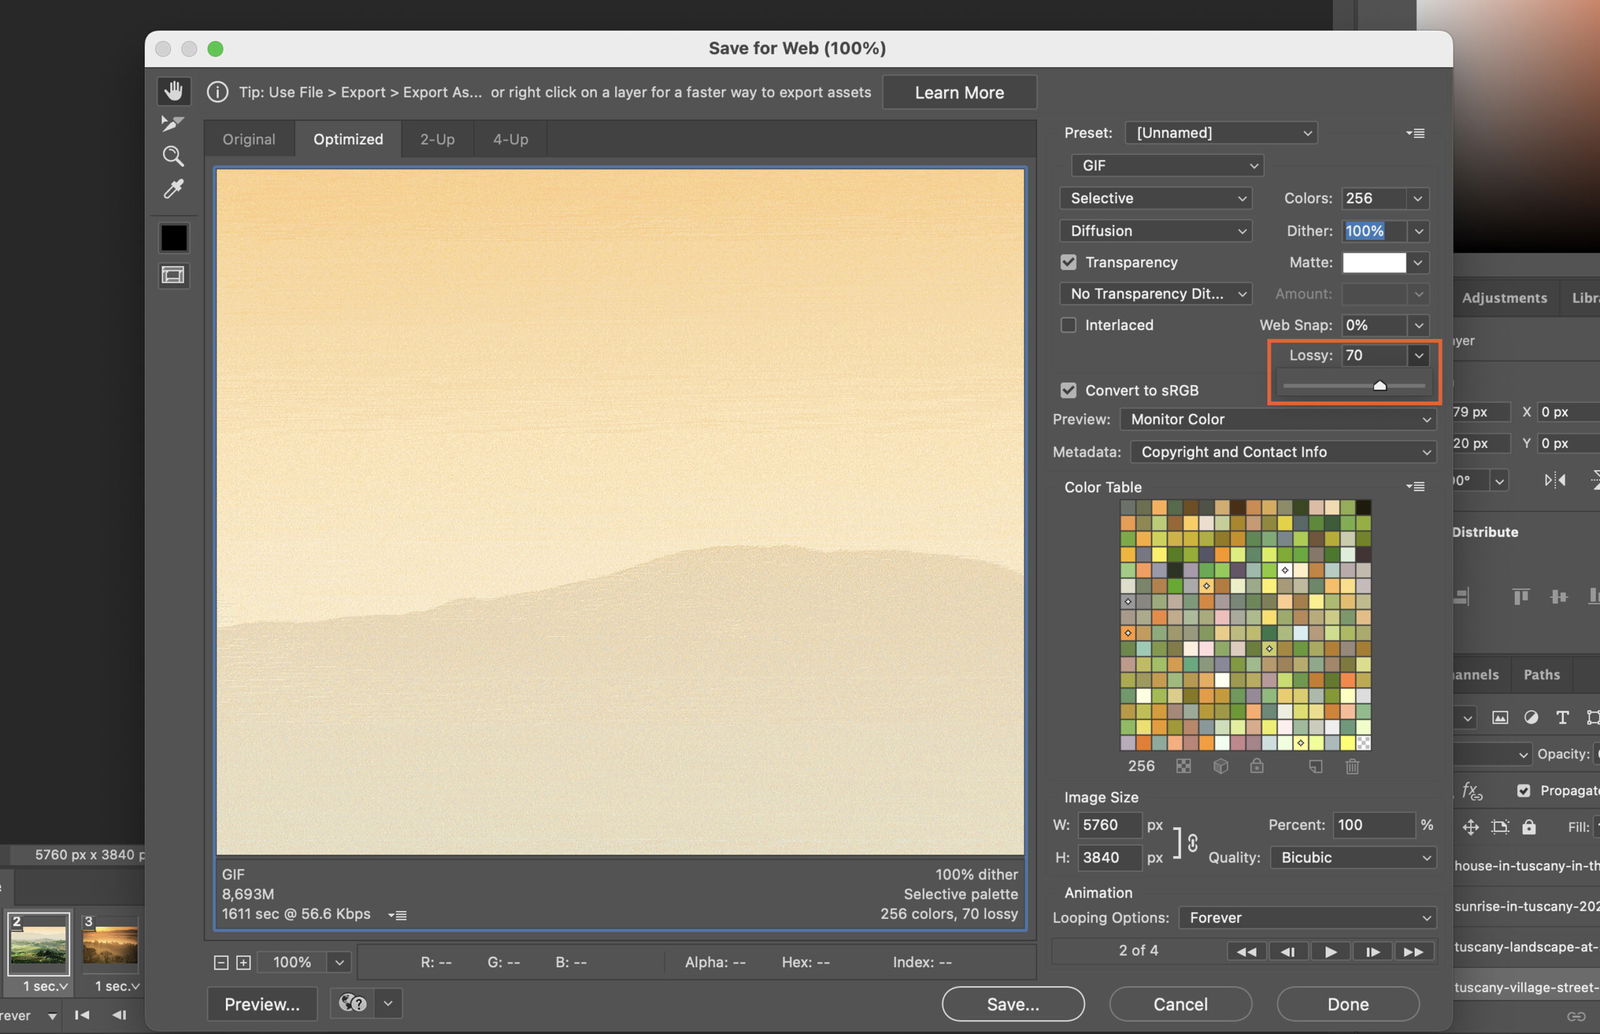
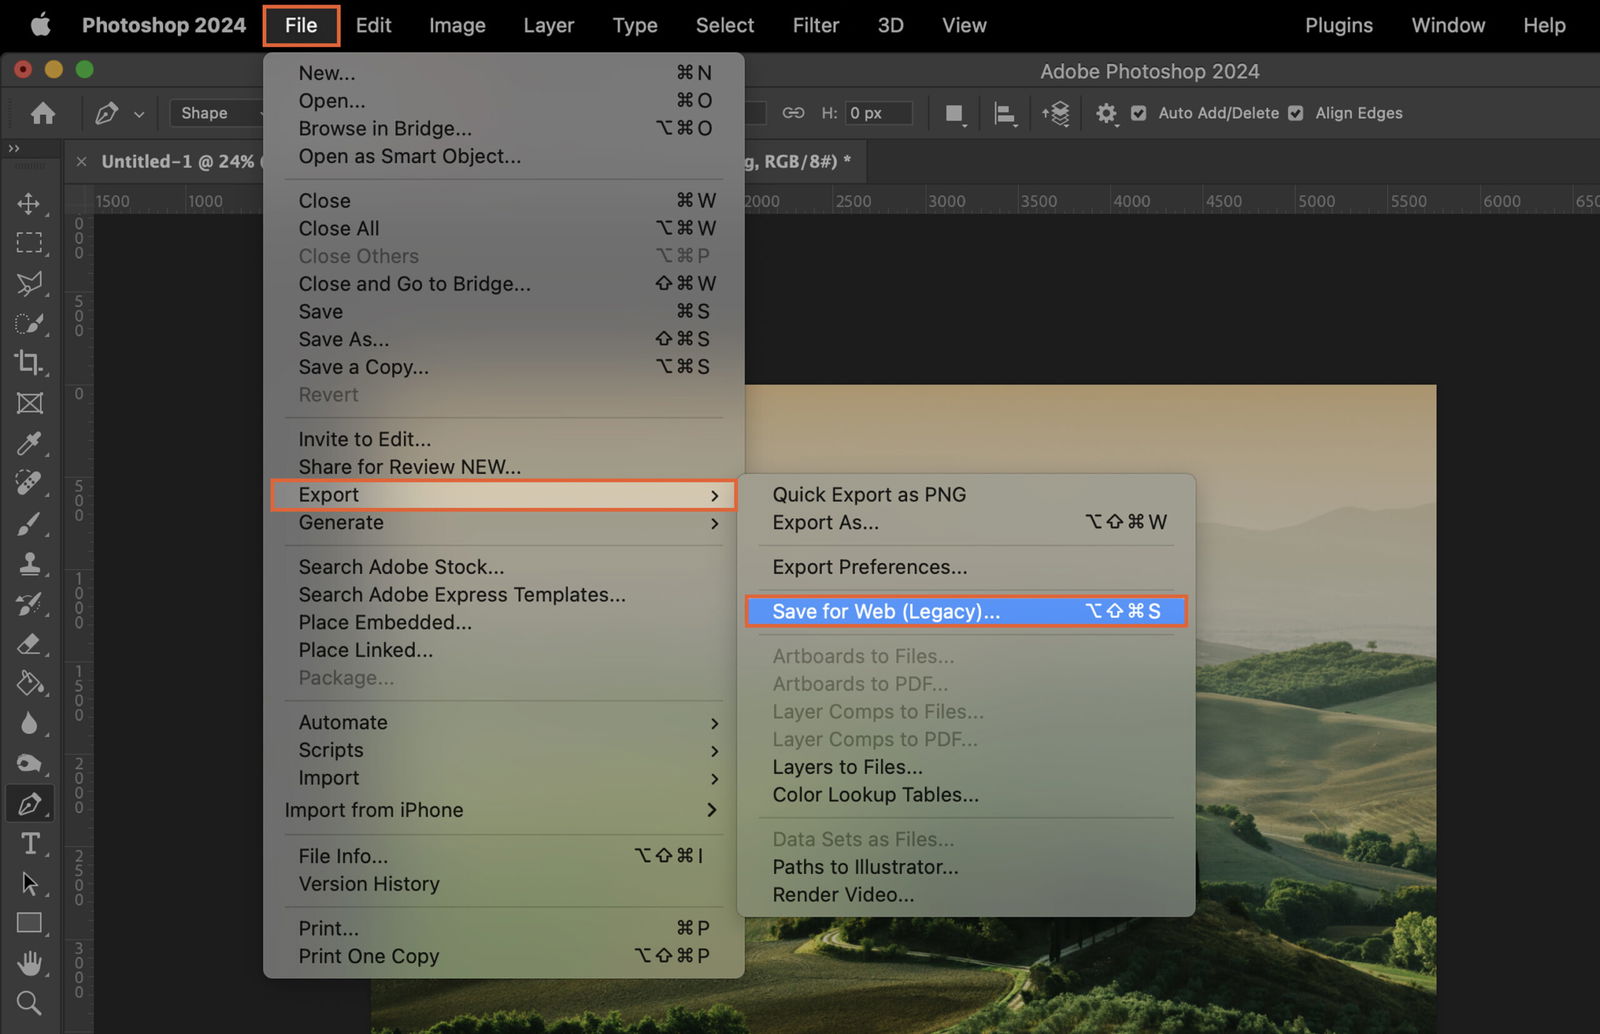
To save your animation as a GIF, go to File > Export > Save for Web (Legacy). In the dialog box that pops up, select GIF as the file type.
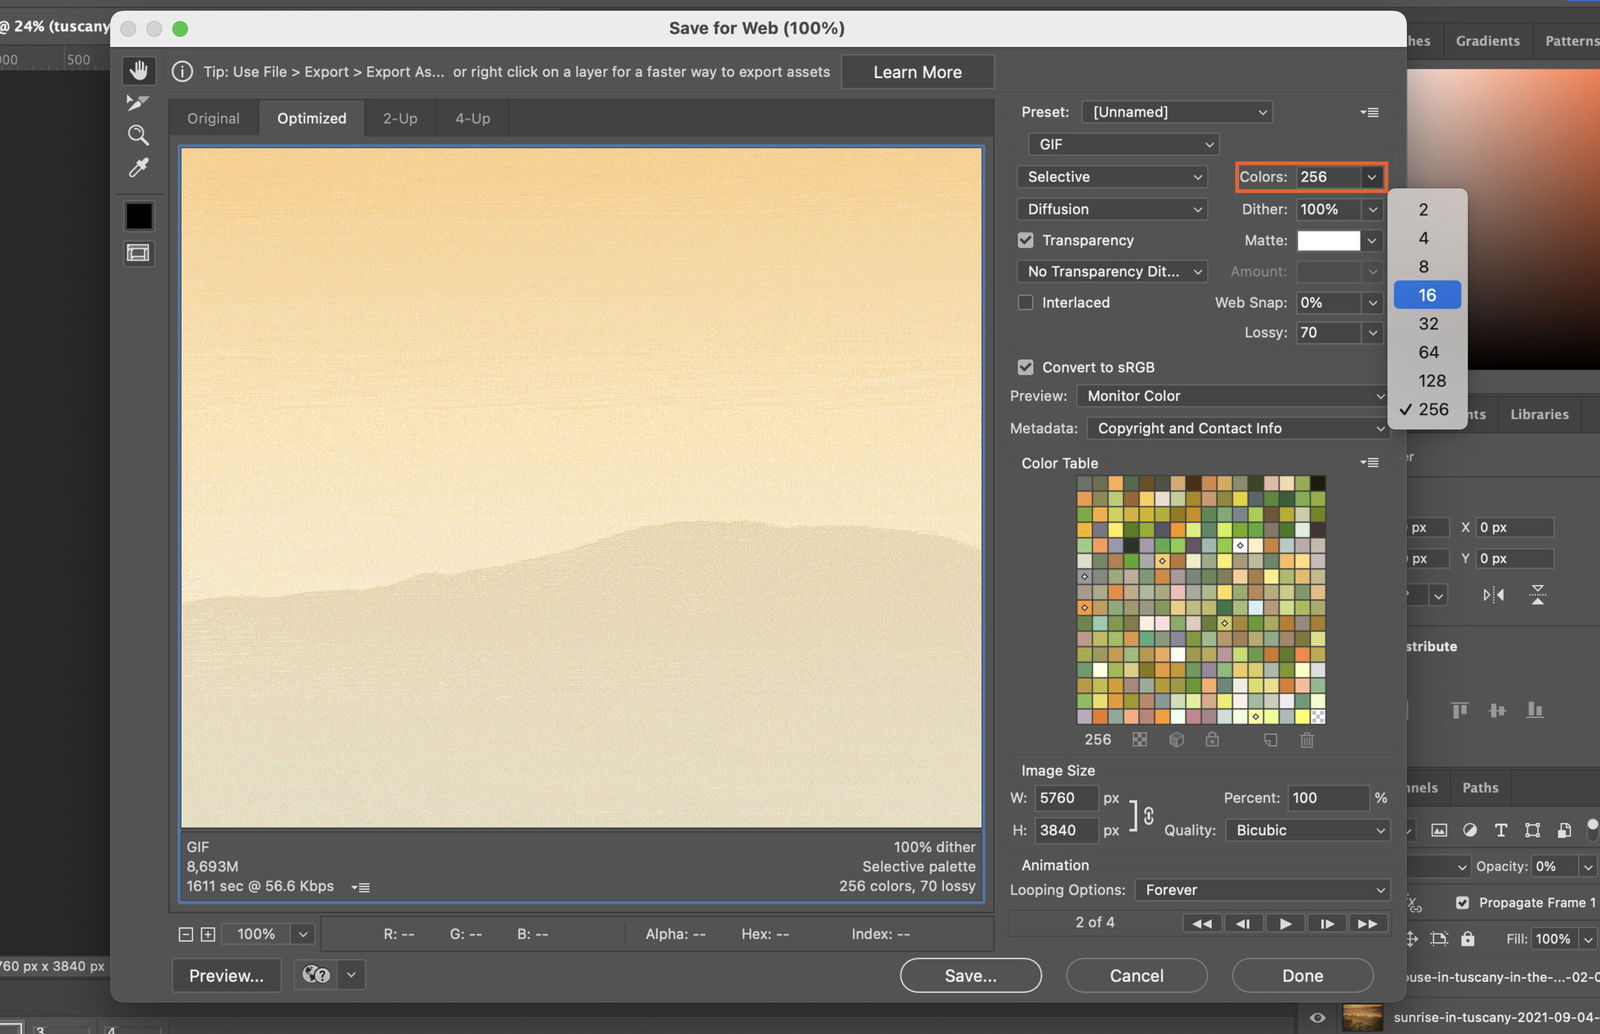
In the same dialog box, adjust the settings as needed. You can change the colors, dithering, and transparency settings to your liking.
Reduce the file size of your GIF by decreasing the number of colors used. In the Save for Web dialog box, lower the “Colors” value in the GIF settings.
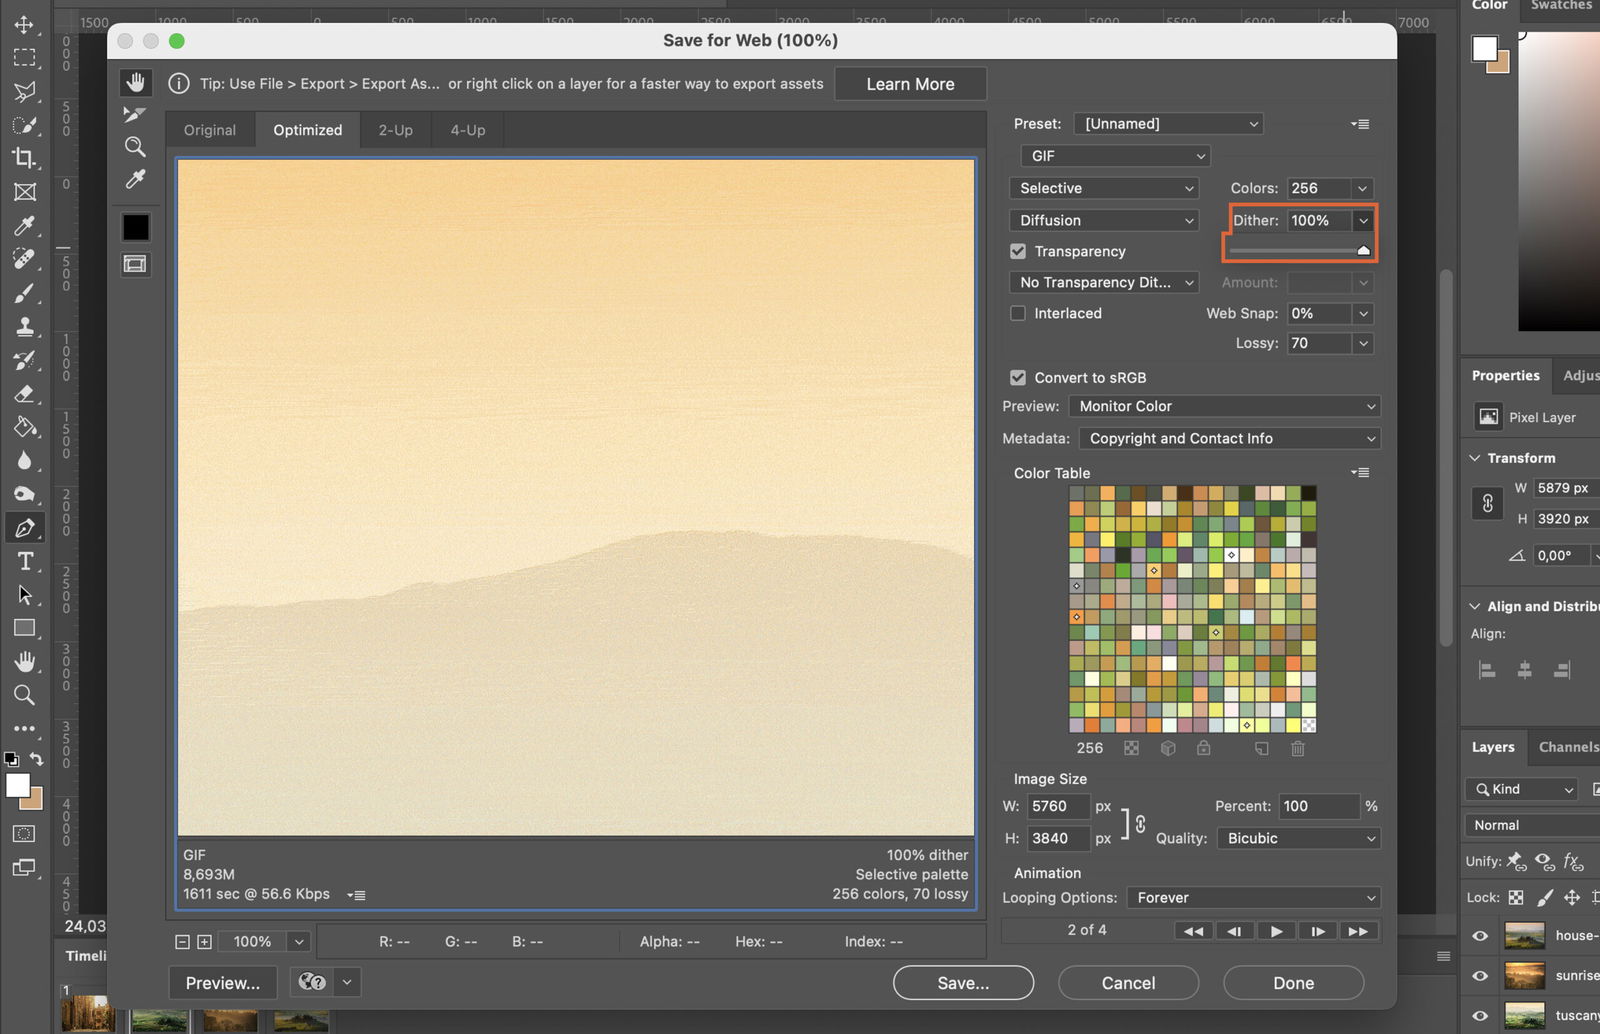
You can also adjust the dithering settings to optimize your GIF. Higher dithering values can result in smoother transitions between colors but may increase file size.
Finally, you can choose to apply lossy compression to your GIF. This will reduce the file size further, but may impact image quality. Adjust the “Lossy” value in the GIF settings to apply this compression.