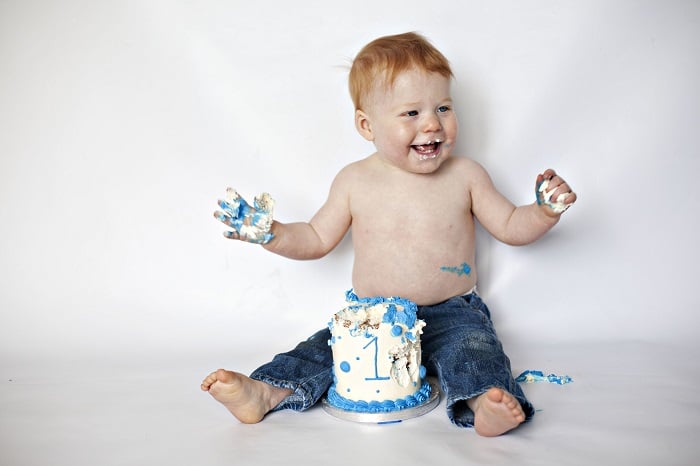
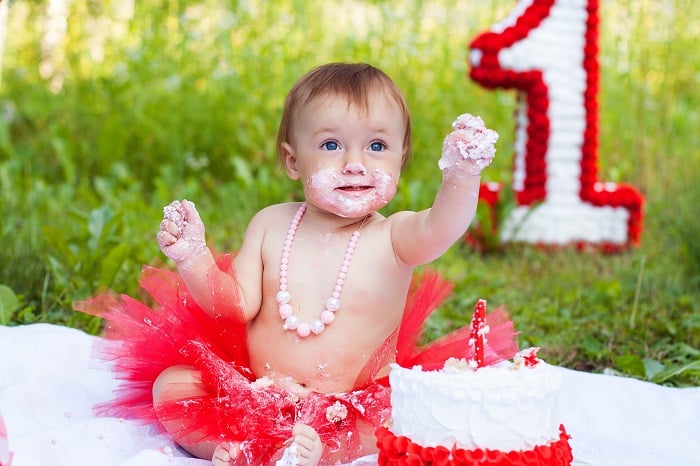
Nothing quite says beautiful mess like first birthday cake smash photography. But when you decide to go the DIY route, the results tend to be less beautiful and more mess.
From shooting my firstborn’s cake smash to his little sister’s, I’ve discovered a few tricks to getting colorful, messy first birthday photos with DIY cake smash photography.
From keeping it simple to plan the cleanup, here are 11 tips to make those cake smash photos memorable.

1. DIY Cake Smash: Ditch the Plastic High Chair
High chairs are designed to let babies feed themselves with minimal mess. But the mess is what makes great cake smash photos!
Ditch the high chair, and you’ll be able to photograph the cake in their toes (trust me, they’ll have cake in their toes).
Putting the baby and the cake on a flat surface gives them free reign to make a mess—and isn’t that what cake smash photos are all about?
There is one exception. I’ve seen some great cake smash sessions done with a painted wooden high chair.
While even a wooden high chair keeps them from getting cake in their toes, painted wooden high chairs are sweet but simple props and offer a different style of cake smash images.
2. DIY Cake Smash Photography — Do It Yourself (But With Help)
The biggest issue I face when photographing my own kids compared to working with a client is getting them to smile when they can’t see me because of the big camera in front of my face.
I’ve discovered that I get much better grins when I have some help—usually dad, grandma or grandpa, or someone else they love, doing something silly.
My favorite picture of my son is from when he was giggling at his grandma with a huge dimpled smile that lit up his entire face.
For a cake smash, the extra help goes even further. For my daughter’s first birthday, her papa helped make sure that the frosting mess stayed on the backdrop and not all over my living room.
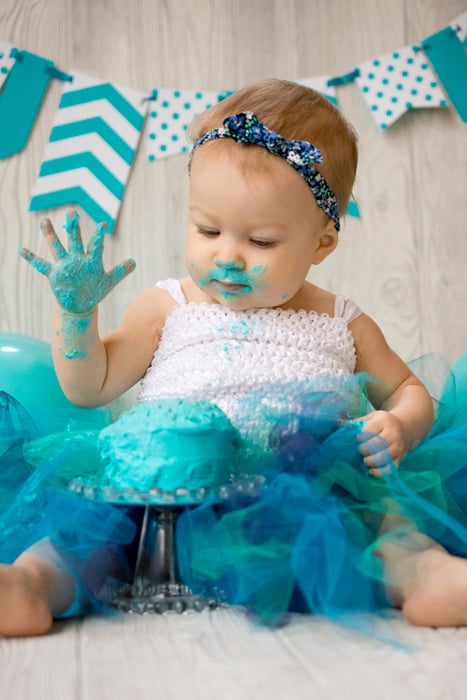
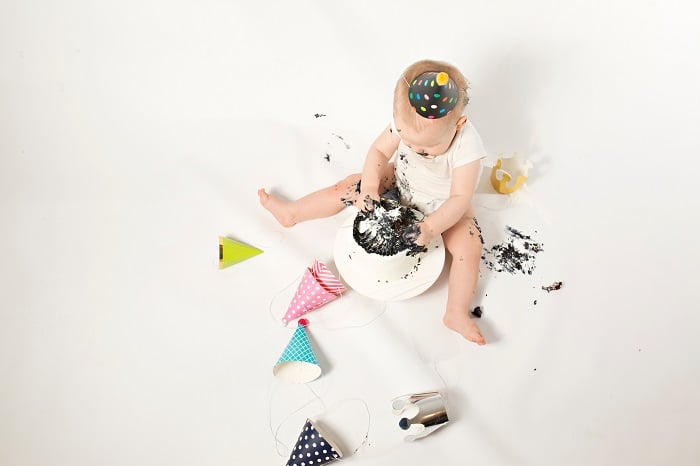
3. Keep Props Simple for DIY Cake Smash Photos
I’m not sure who was more excited for her cake smash photography session, my daughter, or me. That excitement makes it pretty easy to go overboard with props, but I knew if I didn’t keep it simple, I’d end up with photos that were too busy once the cake was smashed everywhere.
Choose a simple background with only one or two props besides the cake. (It’s also perfectly fine to do just a background and cake.) Keep in mind you’ll want to shoot several angles, so you may want to arrange your props to have some close-ups that crop some of the items out.
Besides being simple, the props I used were pretty inexpensive. The background is actually a piece of wall panelling I picked up at a hardware store for about $25 and cut into two pieces.
The cake stand is an $8 candle holder, similar to this one, which was perfect for an over-sized cupcake.
I then just added a pre-made banner and a bag of balloons I picked up at a dollar store.
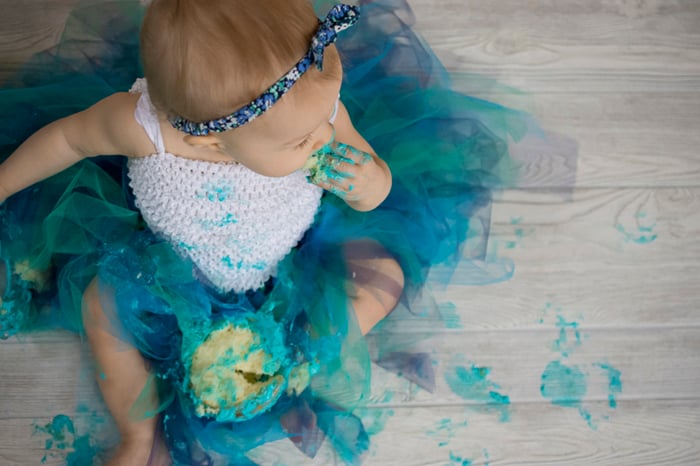
4. Color Coordinate
Going into my daughter’s DIY cake smash photography session, I knew I wanted a low key background with pops of color. Start with one item that you would like to coordinate in the session—for me, that was the headband she’d worn for all of her monthly photo sessions throughout the first year. Then, add in colors that coordinate or compliment that item.
Pay close attention to the color of the cake frosting too. White frosting may look good, but it is also the hardest to photograph, since white objects are more prone to becoming overexposed highlights. I used blue icing, and while the photos turned out good, blue does tend to stain more than other colors.
5. Schedule the Session for the Least Fuss
The timing of the cake smash photoshoot matters more than you’d think. For my son’s first birthday, I did his cake smash at his birthday party—besides making the session more stressful, it made my son a bit more nervous with so many people around. Because I was also playing hostess, I rushed through the photos.
So for my daughter’s cake smash, I planned the session during the day, well before her nap time, and when I would have the best light coming in through the windows. (And yes, it’s perfectly fine if the cake smash photos aren’t done on their actual birthday.)
6. Look for Light
For the fun, playful look that comes with cake smash photos, look for a soft light that’s easy to work with.
I set up in my living room during the day, where I had light coming in from the front and left sides from several different windows. That left me with plenty of light to shoot without a flash, but soft enough to not leave any weird shadows.
Look for a spot in your home that has great window light—avoid the harsher light by using a large north or south facing window. If you’re stuck with a window that has the sun streaming in, use a sheer white curtain—this will act as a cloud to soften the sunlight a bit.
Of course, if the weather cooperates, you can also set up outside in the shade.
7. Perfect Your Exposure Before the Cake Comes In
Once the cake comes in, you’ll need to take photos quickly, so make sure your settings are good ahead of time. I took a photo of just the cake and background by itself, then put the cake away and took a few pictures of just my daughter.
Besides adding to the variety of the session with a few mess-free images, I was able to make sure that my exposure was accurate and my shutter speed was fast enough to keep her from blurring.
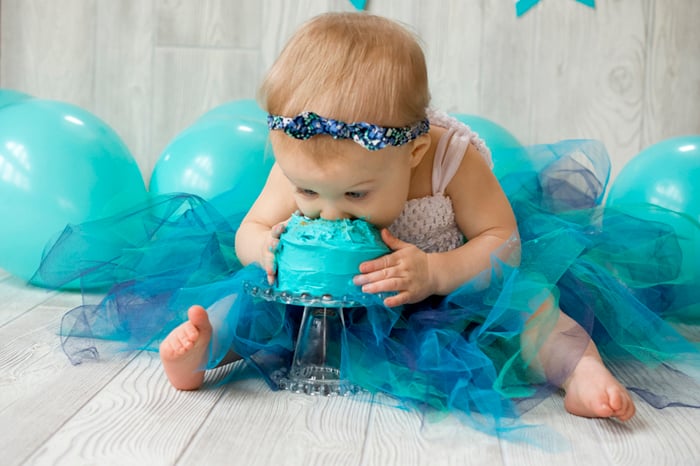
8. Encourage Shy Babies
Someone just set a giant cake in front of you—you’re going to dig in, right? I would too, but babies aren’t always the same way. If the birthday baby doesn’t seem interested after the first few minutes, try putting your finger in some frosting and giving them a taste.
Once they realize what’s in front of them, most babies will happily dig in themselves.
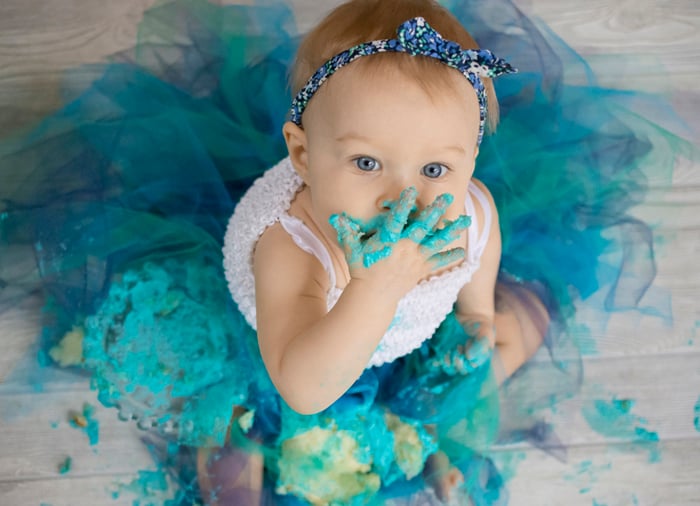
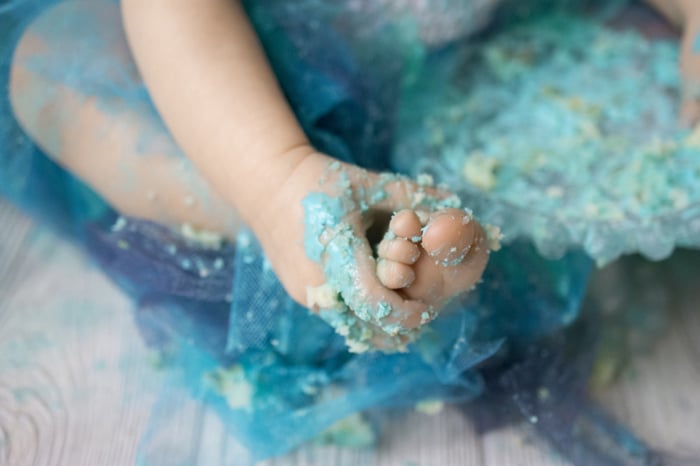
9. Adjust Your Composition
A typical cake smash will only take a few minutes of actual cake smashing, so shoot fast but be prepared to adjust your angle to get a variety of shots. I started at my daughter’s eye level because I like the intimate feeling of photographing kids from their perspective.
But, I also took a few shots toward the end standing up so that I could see the tiny frosting handprints.
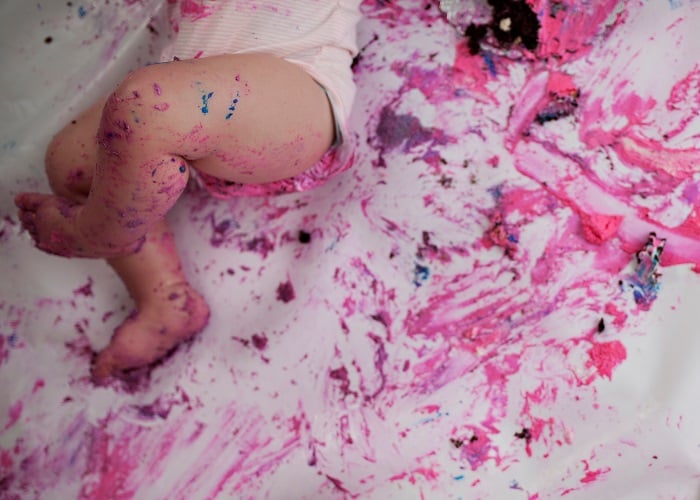
Don’t be afraid to get in close too—some of my favourite shots are just toes covered in cake.
10. Keep Clean Up in Mind
As you plan a DIY cake smash session, it’s important to consider the clean up too. Keep paper towels handy. Plan on going straight from the cake smashing to the bathtub and tossing any clothing straight into the wash to avoid staining.
If you were able to recruit help, take a few shots of the background after the birthday boy or girl is on the way to the bathtub (and you can take photos of the clean up too).
11. Keep Edits to a Minimum
One more perk to shooting with the intention of getting messy? Editing is simpler as well. The mess is part of the memories, so don’t try to "fix" any frosting splotches. I shot in RAW, then adjusted for better brightness and contrast but otherwise kept the edits to a minimum.
That first birthday cake is a big milestone; taking a few cell phone photos of the birthday baby in a plastic highchair just doesn’t do it justice. Planning a DIY cake smash photography session allows you to capture more colorful, messy photos of that momentous first birthday.
Conclusion
Not only does a cake smash session make perfect first birthday photos but is also sure to be one of those cherished memories that will last forever!
With just a little time and creativity, anyone can take amazing DIY cake smash photos too.