ExpertPhotography
  • Articles
  • My Learning
  • Store
  • About
  • Contact
  • Photo Quiz
ExpertPhotography

Learn Photography
  • Quick Capture Cheat Sheets
  • Photography for Beginners
  • Intuitive Composition
  • Show more...
  • Effortless Editing With Lightroom
  • Epic Landscape Editing
  • The Preset Collection
  • Show more...
  • The Magical Photography Spellbook
  • Dreamy Childhood Portraits
  • The Creative Photography Cookbook
  • Show more...
  • Simply Stunning Landscapes
  • Infinite Exposures
  • Milky Way Mastery
  • Show more...
  • Products In Focus
  • Fairytale Portraits
  • Organic Marketing for Photographers
  • Show more...
Need Help?
Contact UsCookie PolicyPrivacy PolicyTerms of Use
Connect

ExpertPhotography is part of several affiliate sales networks. This means we may receive a commission if you purchase something by clicking on one of our links.

ExpertPhotography is a participant in the Amazon Services LLC Associates Program, an affiliate advertising program designed to provide a means for sites to earn advertising fees by advertising and linking to amazon.com.

As an Amazon Associate, I earn from qualifying purchases.

Expert Photography © 2011-2024. All Rights Reserved.

Privacy Policy Terms of Use

Photoshop Processing

How to Edit a Video in Photoshop

Szilard Kovacs
by Szilard Kovacs
Last updated: 21/10/2024-4 min read
ExpertPhotography is supported by readers. Product links on ExpertPhotography are referral links. If you use one of these and buy something, we make a little money. Need more info? See how it all works here.

Editing a video in Photoshop can seem daunting. This article simplifies the process, offering a step-by-step guide that can enhance your video editing skills. Mastering this process can open up new creative possibilities and add a professional touch to your projects.

Step 1. Importing a Video File into Photoshop

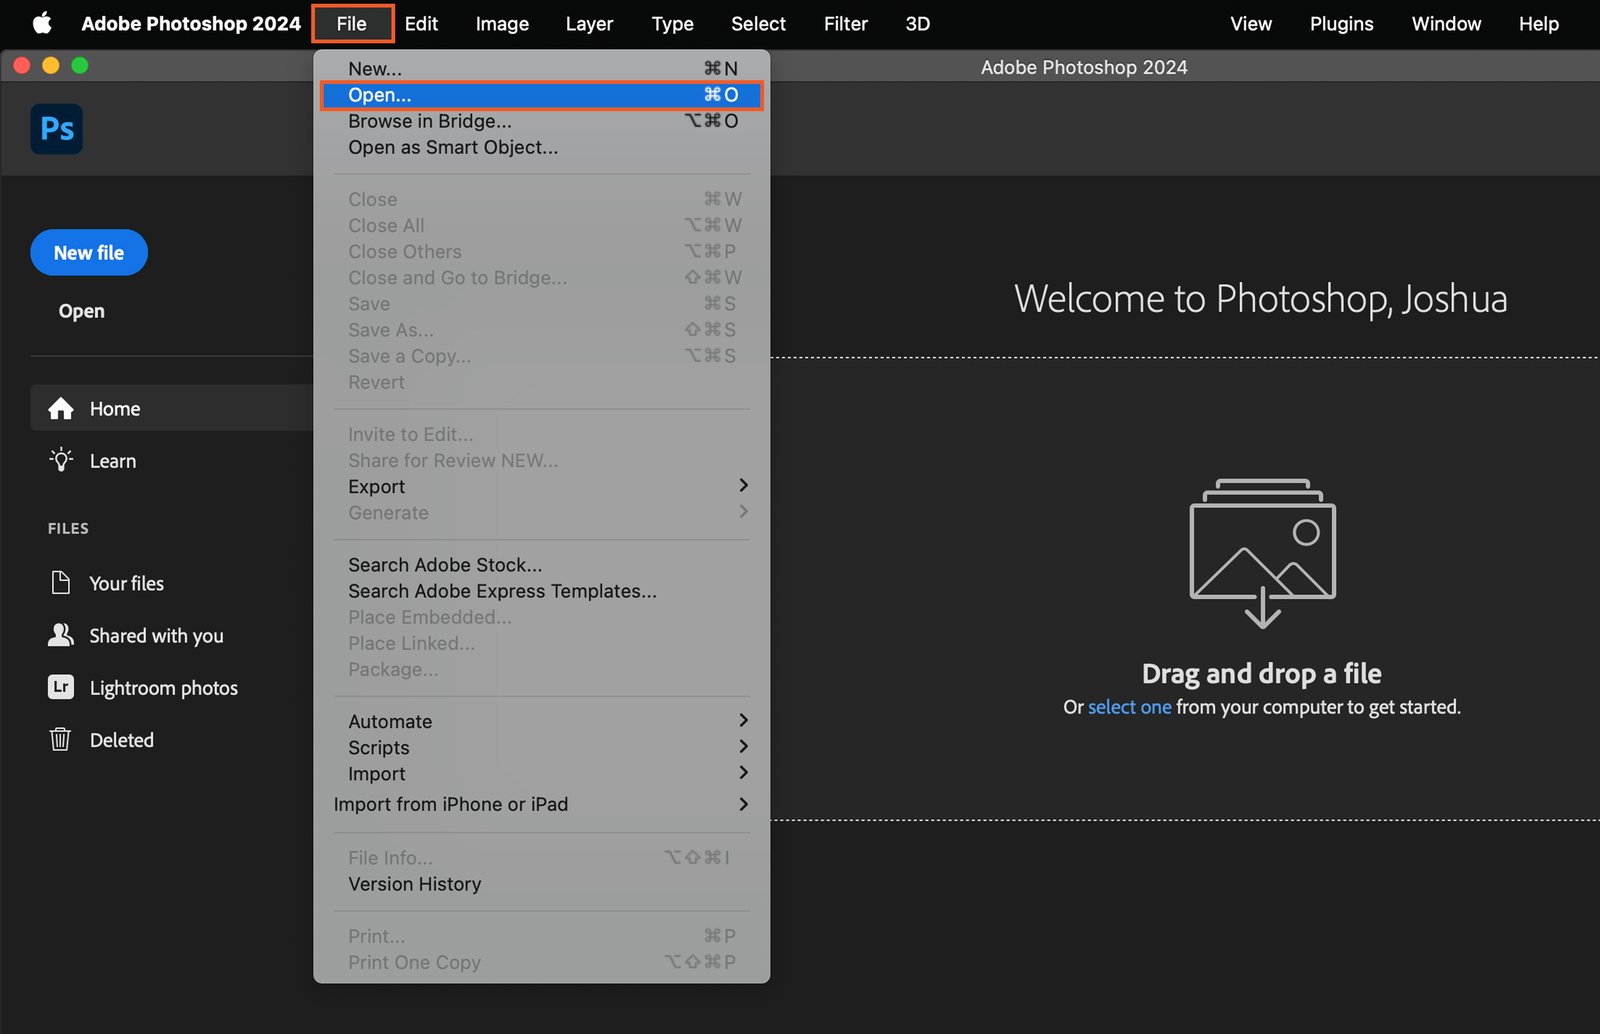
To start editing a video in Photoshop, you first need to import your video file. Go to “File” > “Open” from the main menu, browse to your video file, select it, and click “Open”. Photoshop will load it as a layer in a new document.

An Adobe Photoshop window with the interface in German, showing a file with a variety of layers and settings.

Step 2. Converting Video Layer into a Smart Object

Converting your video layer into a Smart Object allows you to apply non-destructive edits. Right-click on the video layer in the Layers panel and select “Convert to Smart Object”.

Convert to smart object option in Photoshop.

Step 3. Using Timeline Panel

The Timeline panel is where you’ll do most of your editing. If it’s not visible, go to “Window” > “Timeline” to open it. The timeline shows your video’s frames and allows you to control playback.

Step 4. Editing Video on Timeline

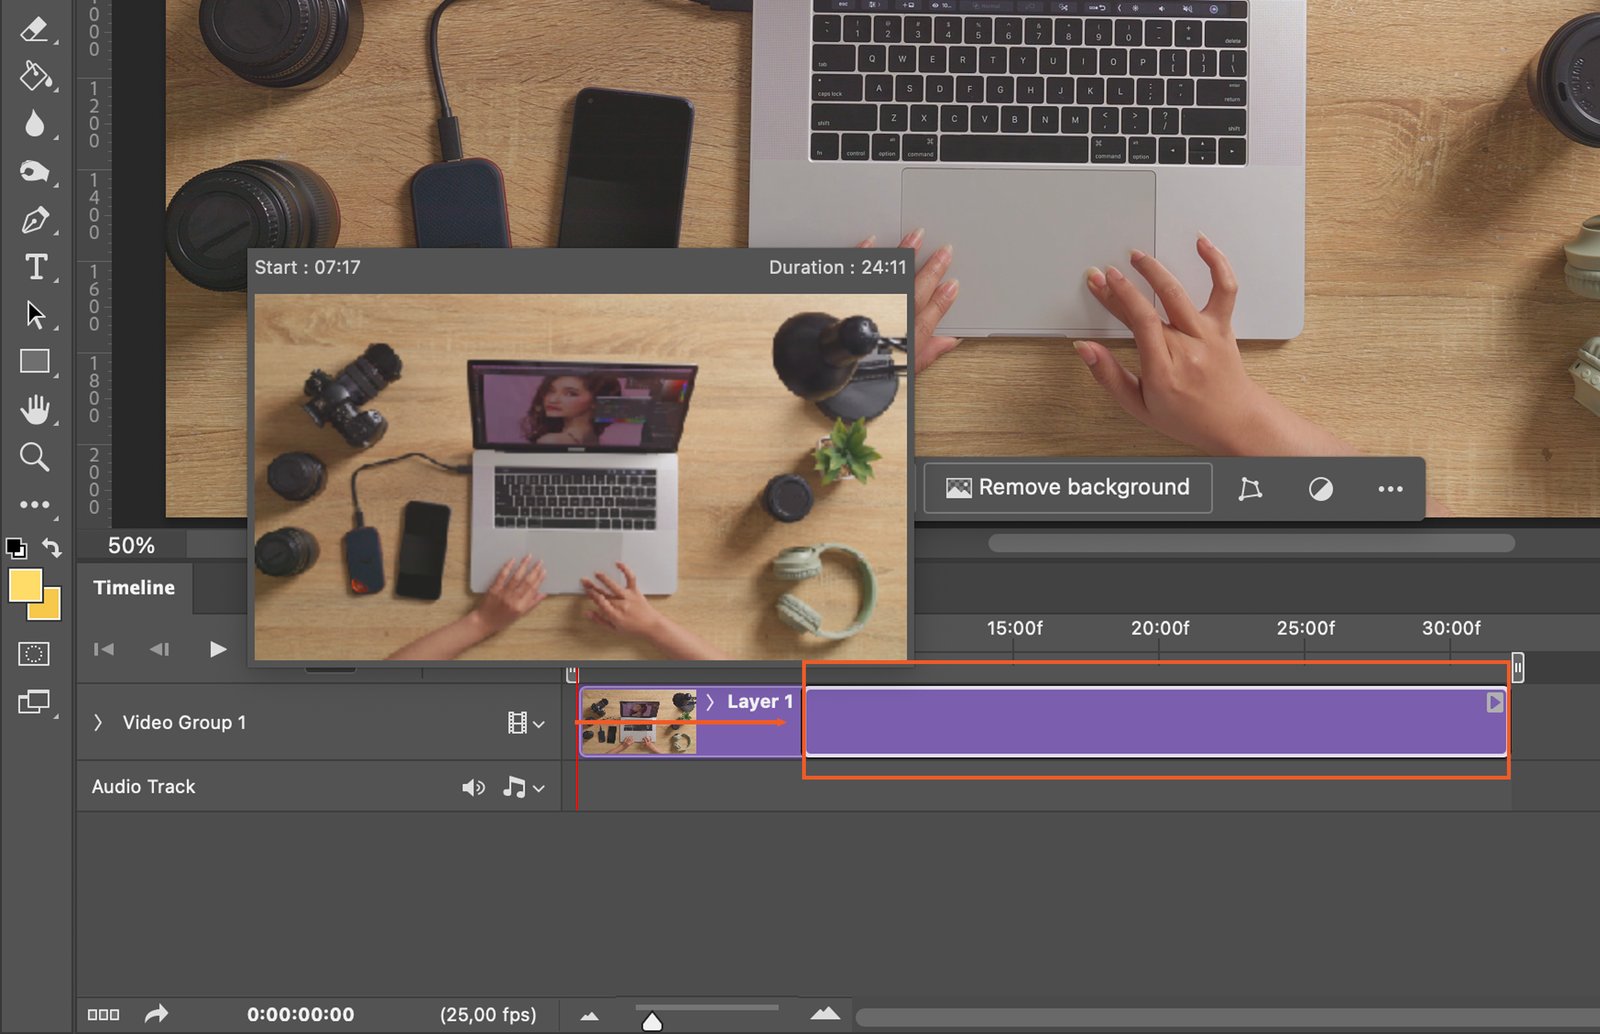
Step 4.1. Trimming the Video

To trim your video, move the playhead to your desired start or end point, then drag the end of the clip towards the playhead.

The timeline panel in Photoshop.

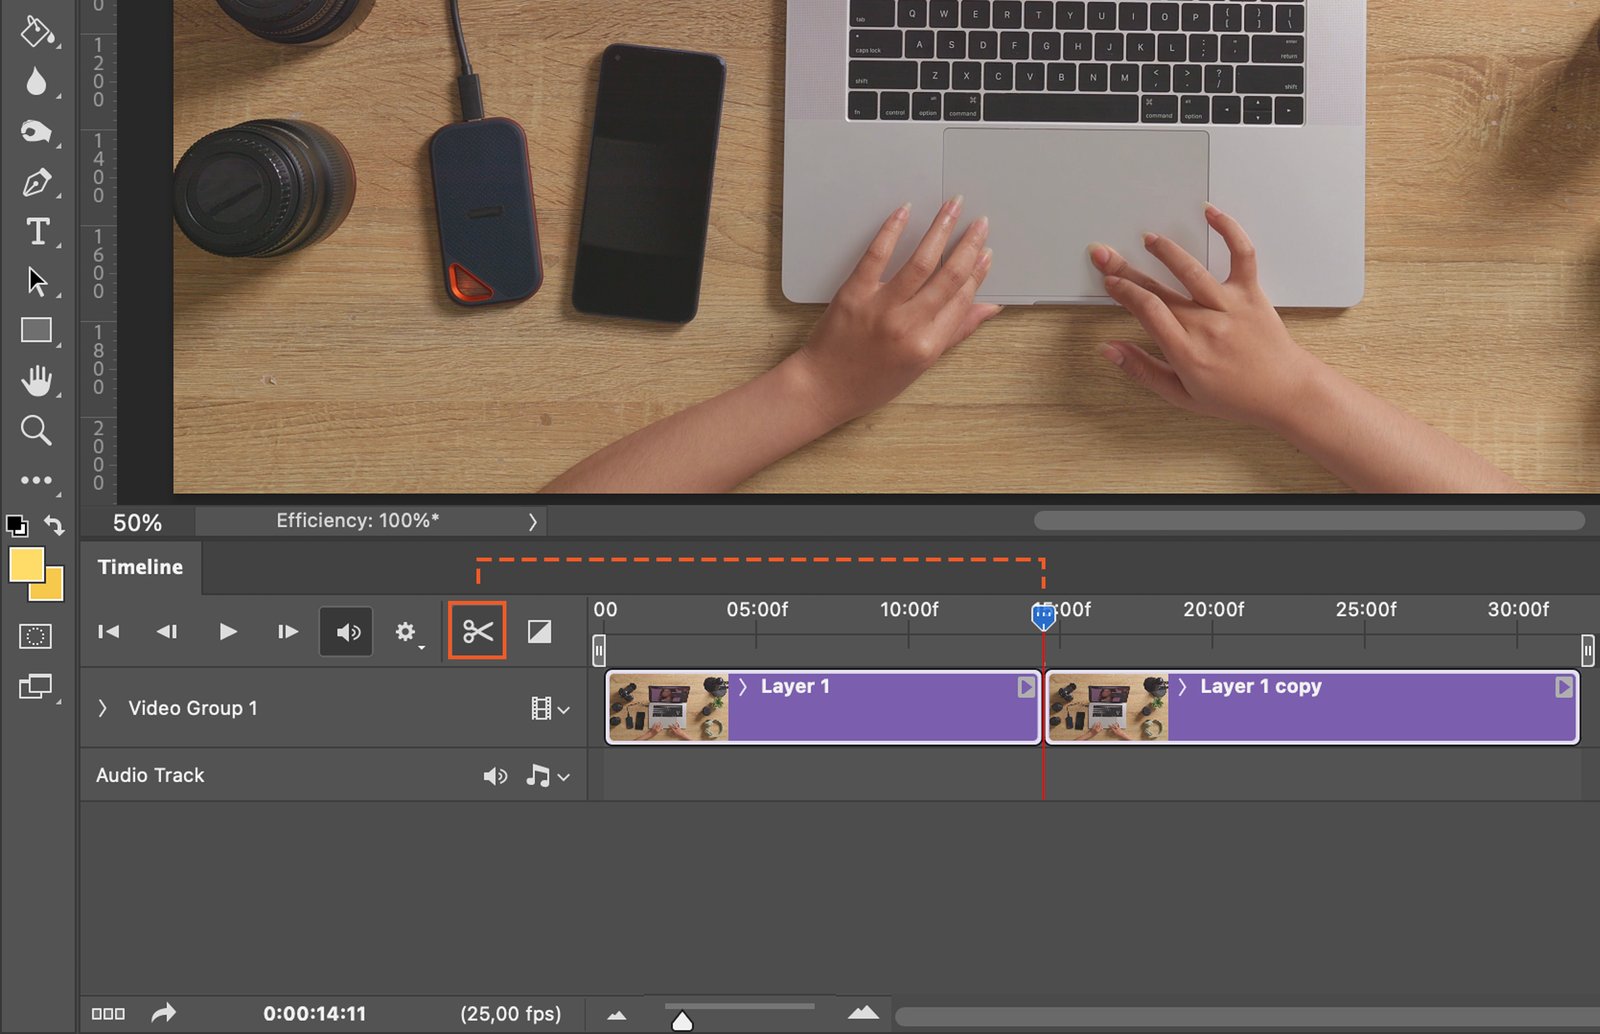
Step 4.2. Splitting the Video Clip

To split a clip, position the playhead where you want to split, then click on the scissors icon in the Timeline panel.

A video editing software interface with clips playing in the preview window.

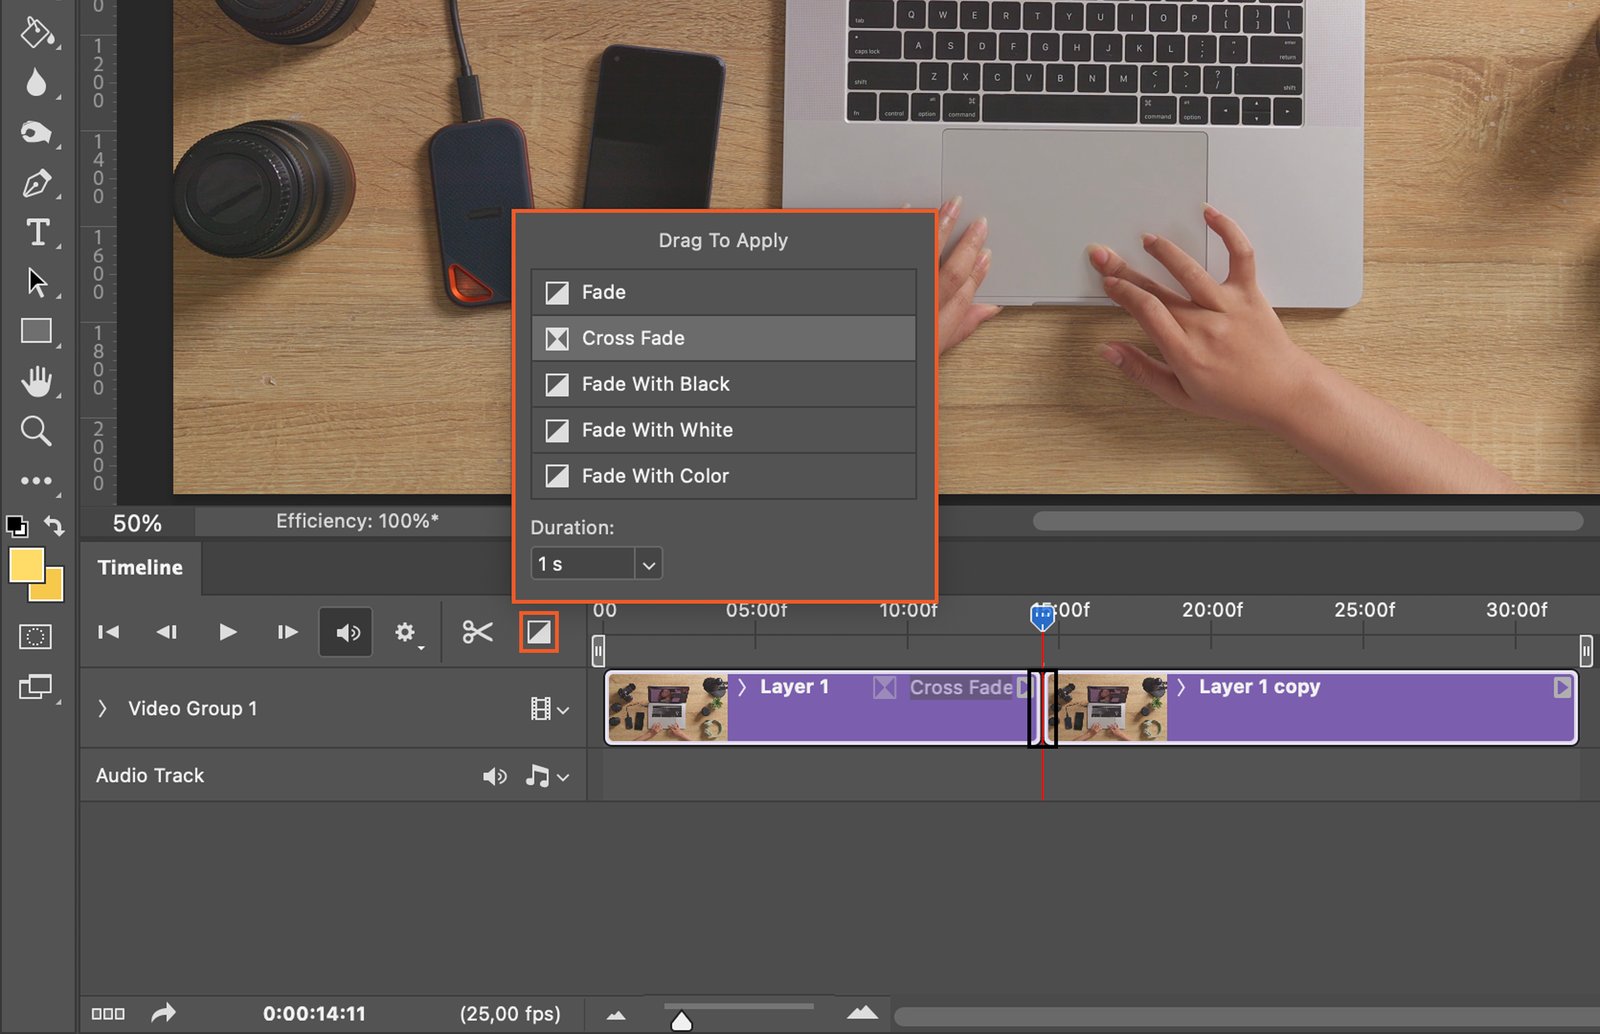
Step 5. Adding Transitions

Transitions can be added between clips. Click on the square icon between clips in the Timeline panel, then choose your desired transition from the menu. Drag and drop the effect between the two clips

A video editing program, and the mouse pointer is on a pop-up window to select different functions.

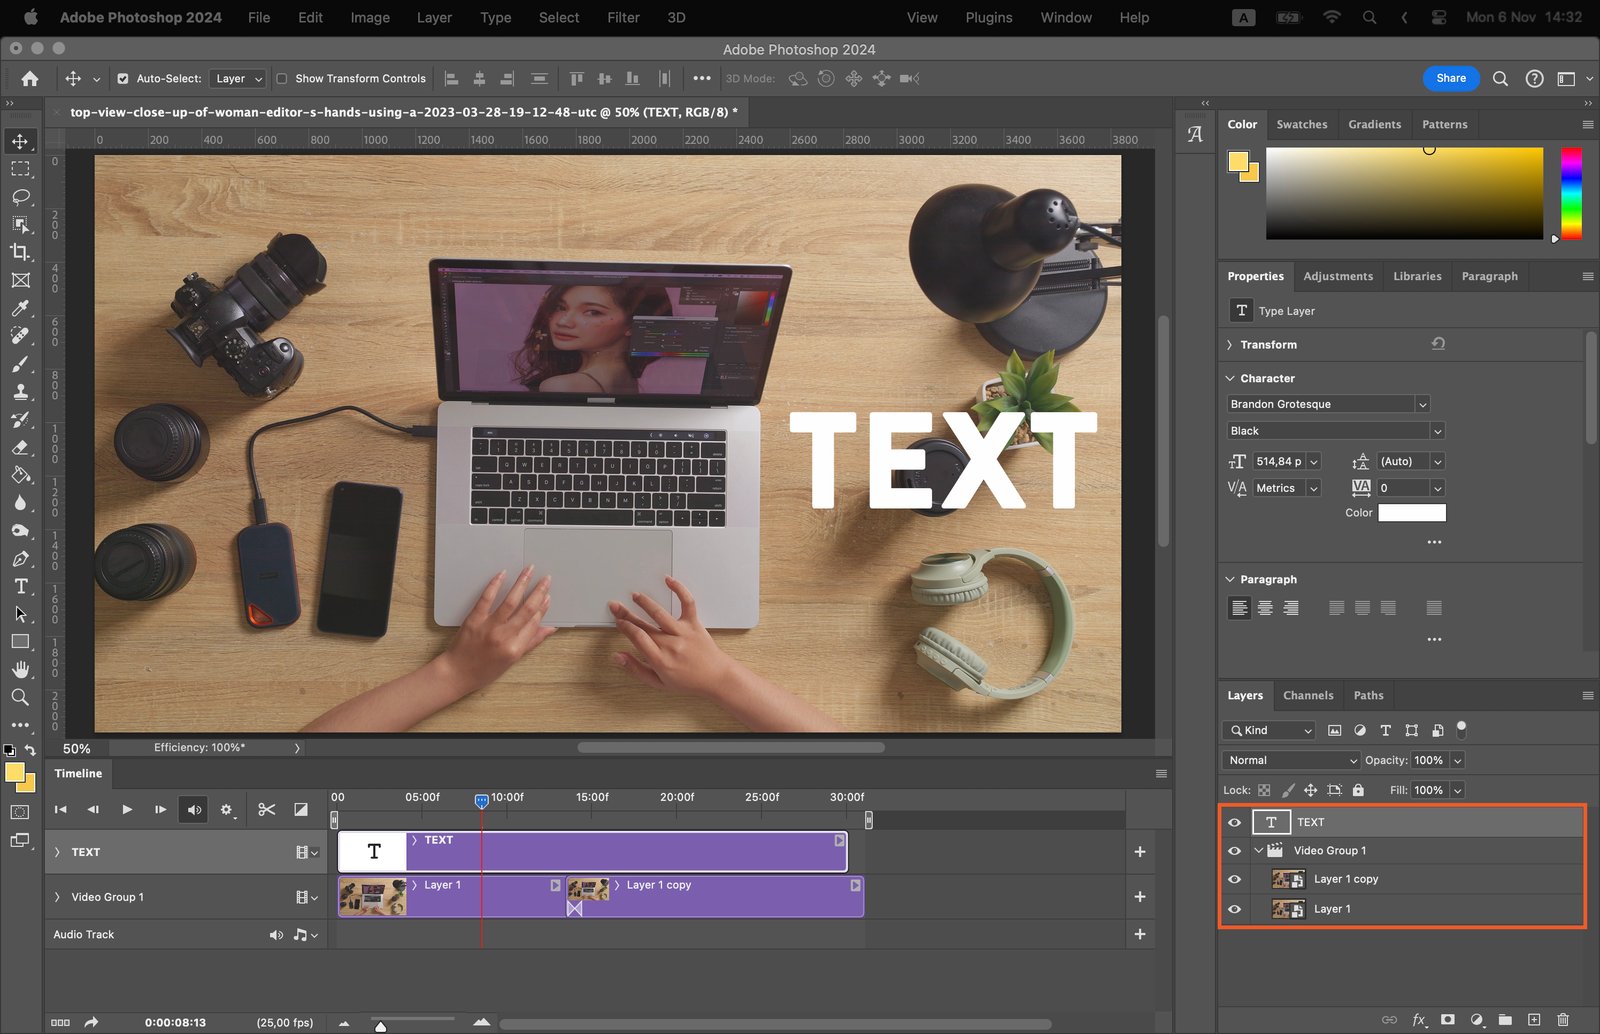
Step 6. Adding Text and Graphics to Video

To add text, select the Text tool from the Tools panel, click where you want to add text on the video, and start typing. Move the text layer above the Video Group. you can make it longer or shorter by clicking and holding either side of the layer and stretch it.

A man working on a laptop with text that says text and graphic elements, all shown on the monitor.

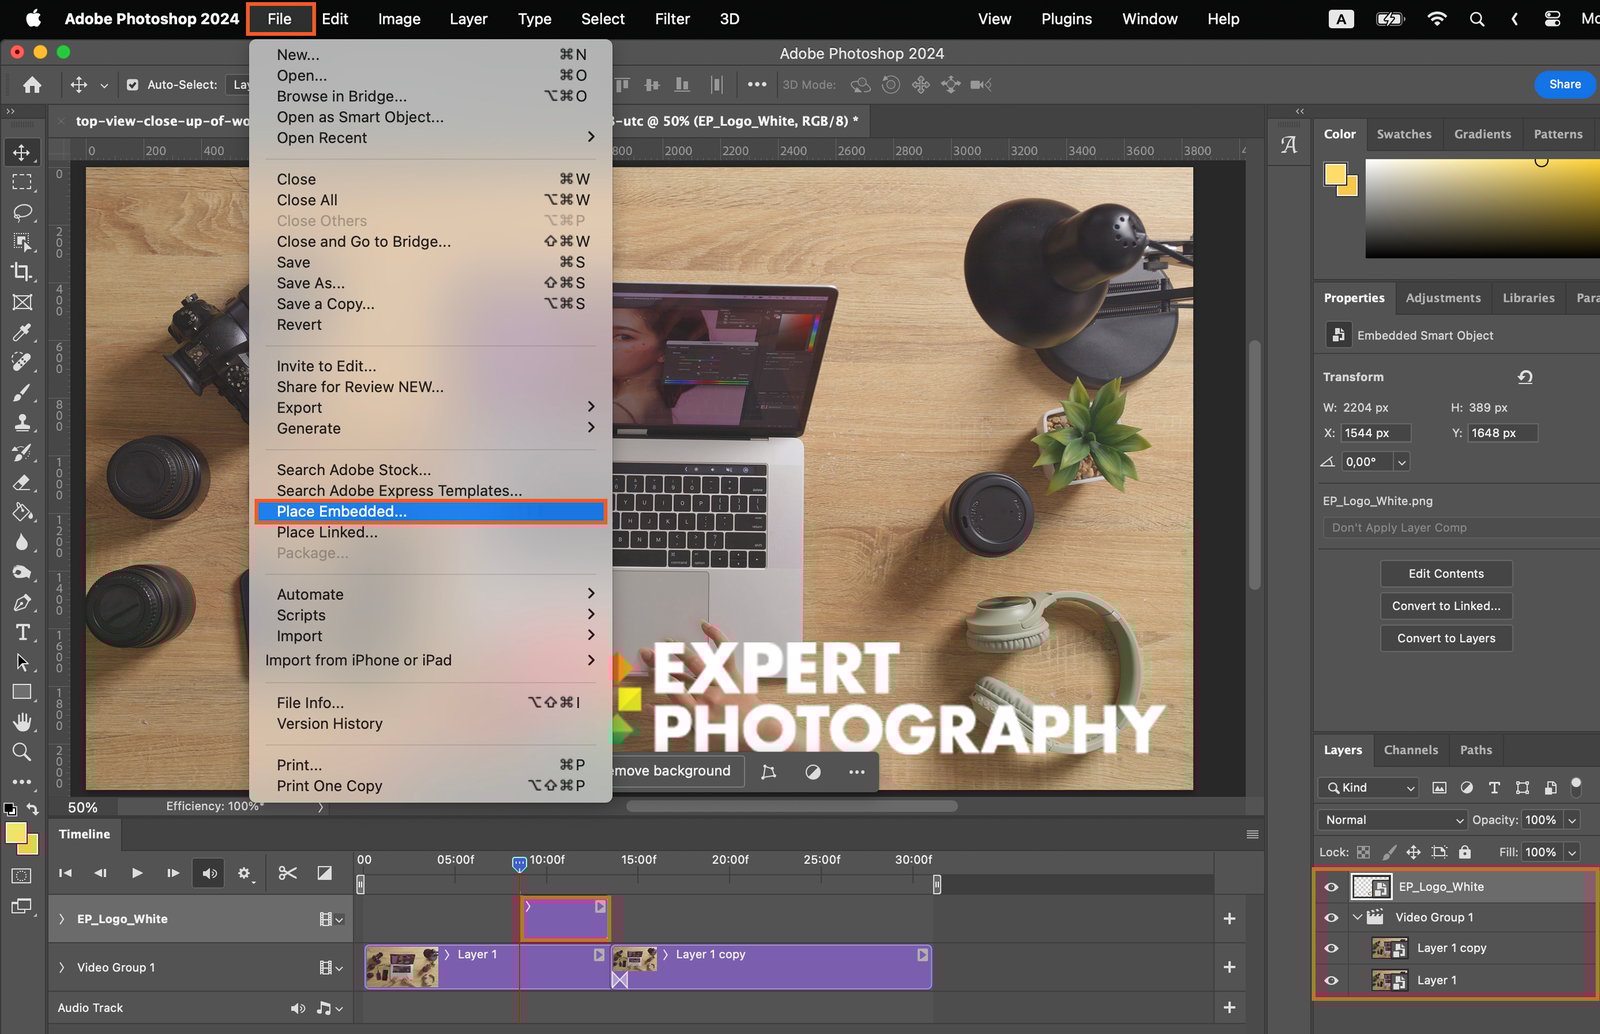
For graphics, go to “File” > “Place Embedded”, select your image file, and click “Place”.

Adobe Photoshop software, highlighting its user interface and functionality with the help of text labels pointing out various tools and settings.

Step 7. Applying Filters and Adjustments to Video

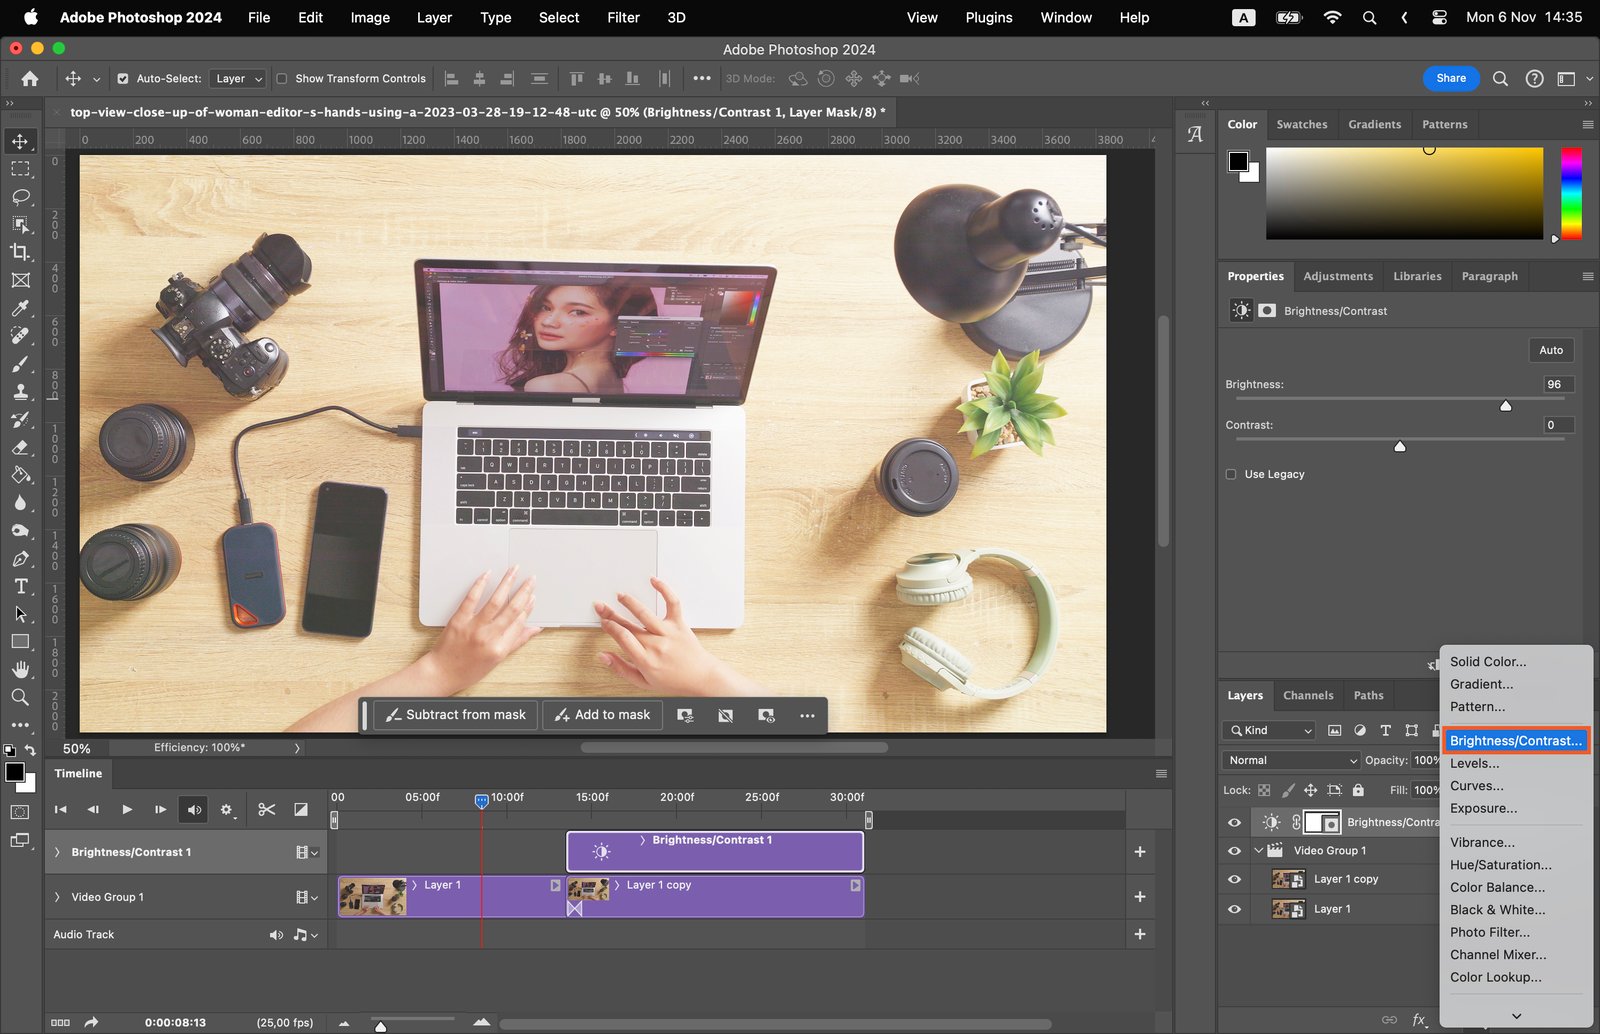
Filters and adjustments can be applied via Adjustment layers. Remember, these will affect the entire video if applied directly to the video layer.

Adobe Photoshop application, showing an open project with a mock-up of a workspace scene on the canvas.

Step 8. Adding Audio to Video

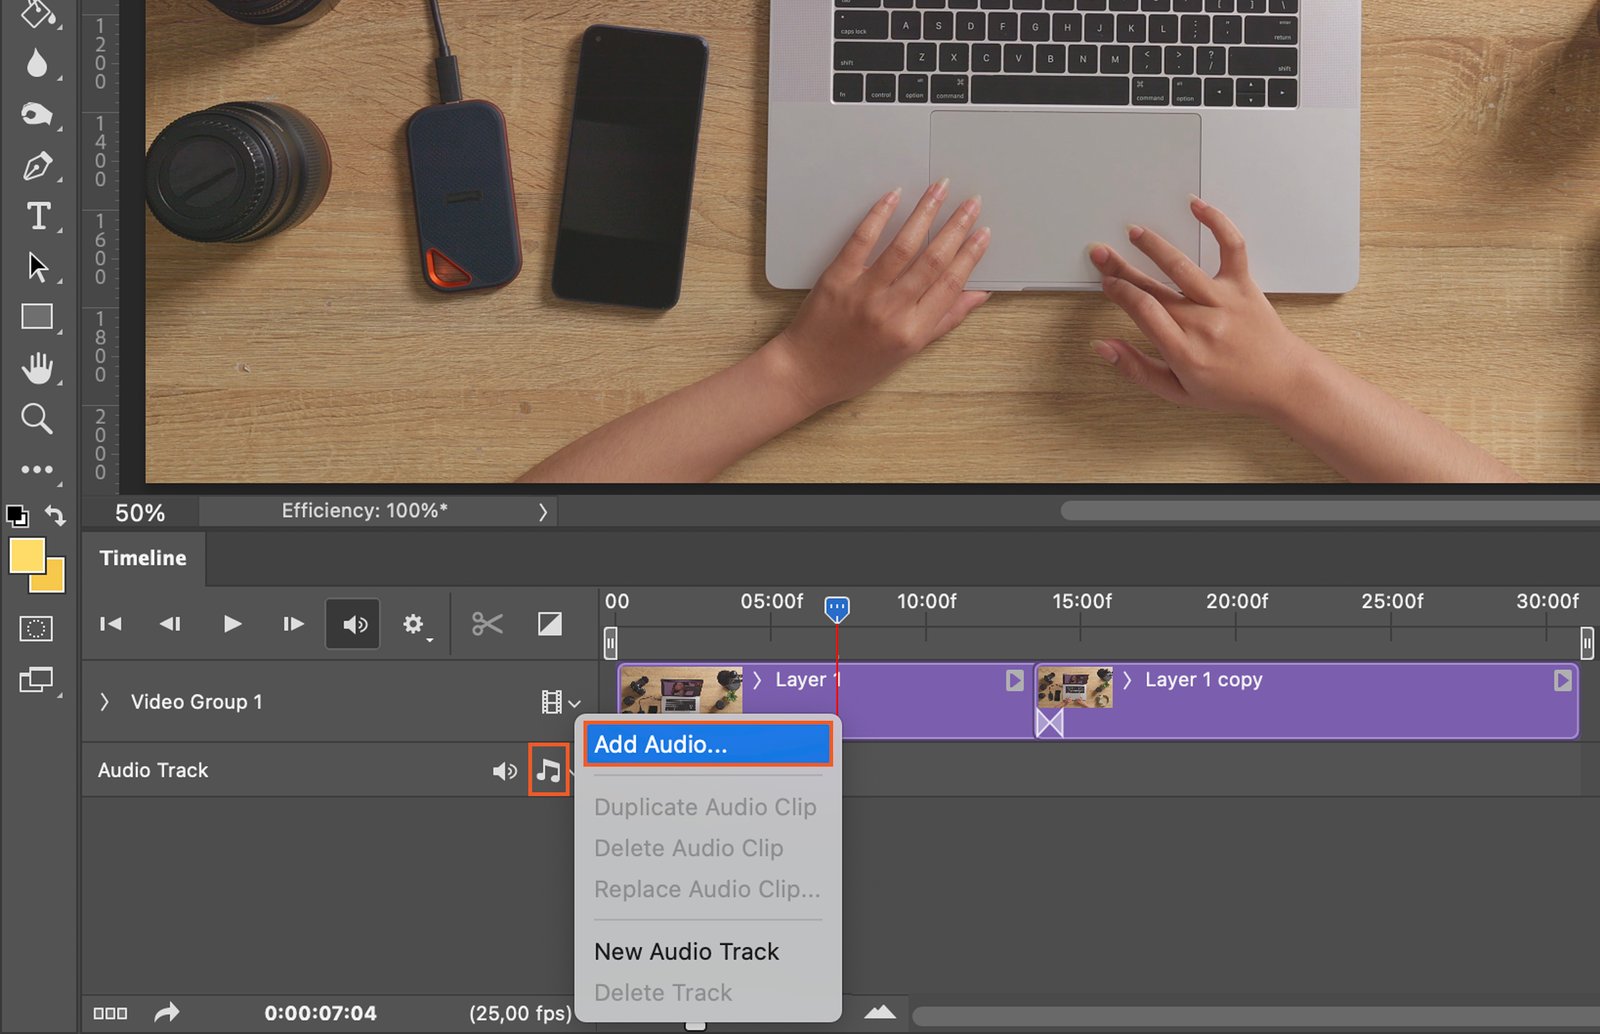
To add audio, go to the Timeline panel’s menu, select “Add Audio”, and choose your audio file. The audio will appear as a separate track in the timeline.

A video editing software, specifically showing an audio clip being edited on a timeline.

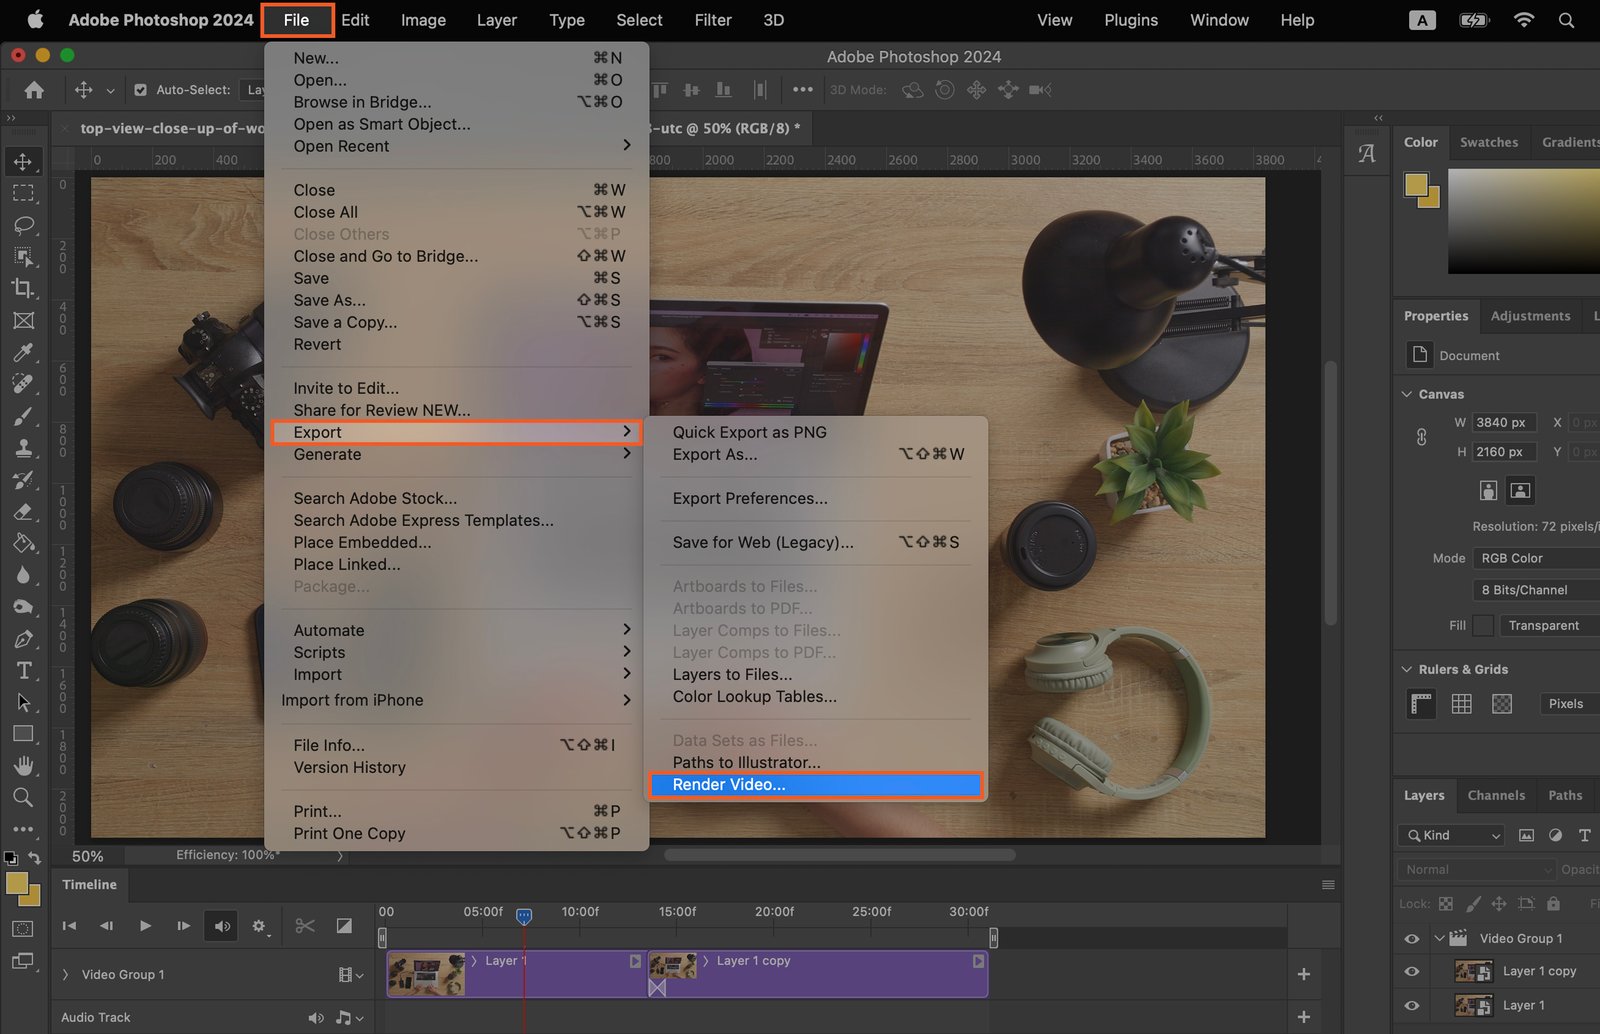
Step 9. Rendering and Exporting the Edited Video

Once you’re happy with your edits, go to “File” > “Export” > “Render Video”. Choose your desired settings, then click “Render” to create your final video.

Adobe Photoshop software, with various panels open and active.

Sidebar-ad_QCC_related-product
Sidebar-ad_QCC_free-sample_
Sidebar-ad_QCC_free-download_2-posters

Popular Content

Fujifilm X-T200 Review (Should You Buy This Camera in 2024?)

Read Article