ExpertPhotography
  • Articles
  • My Learning
  • Store
  • About
  • Contact
  • Photo Quiz
ExpertPhotography

Learn Photography
  • Quick Capture Cheat Sheets
  • Photography for Beginners
  • Intuitive Composition
  • Show more...
  • Effortless Editing With Lightroom
  • Epic Landscape Editing
  • The Preset Collection
  • Show more...
  • The Magical Photography Spellbook
  • Dreamy Childhood Portraits
  • The Creative Photography Cookbook
  • Show more...
  • Simply Stunning Landscapes
  • Infinite Exposures
  • Milky Way Mastery
  • Show more...
  • Products In Focus
  • Fairytale Portraits
  • Organic Marketing for Photographers
  • Show more...
Need Help?
Contact UsCookie PolicyPrivacy PolicyTerms of Use
Connect

ExpertPhotography is part of several affiliate sales networks. This means we may receive a commission if you purchase something by clicking on one of our links.

ExpertPhotography is a participant in the Amazon Services LLC Associates Program, an affiliate advertising program designed to provide a means for sites to earn advertising fees by advertising and linking to amazon.com.

As an Amazon Associate, I earn from qualifying purchases.

Expert Photography © 2011-2024. All Rights Reserved.

Privacy Policy Terms of Use

News and Interviews

How to Group Objects in Photoshop

Szilard Kovacs
by Szilard Kovacs
Last updated: 21/10/2024-4 min read
ExpertPhotography is supported by readers. Product links on ExpertPhotography are referral links. If you use one of these and buy something, we make a little money. Need more info? See how it all works here.

Managing multiple layers in Photoshop can become confusing. This article shows how to Group Objects to streamline your workflow, enhance organization, and simplify transformations. Mastering this technique can lead to a more efficient and productive design process.

Step 1. Open the Layers Panel

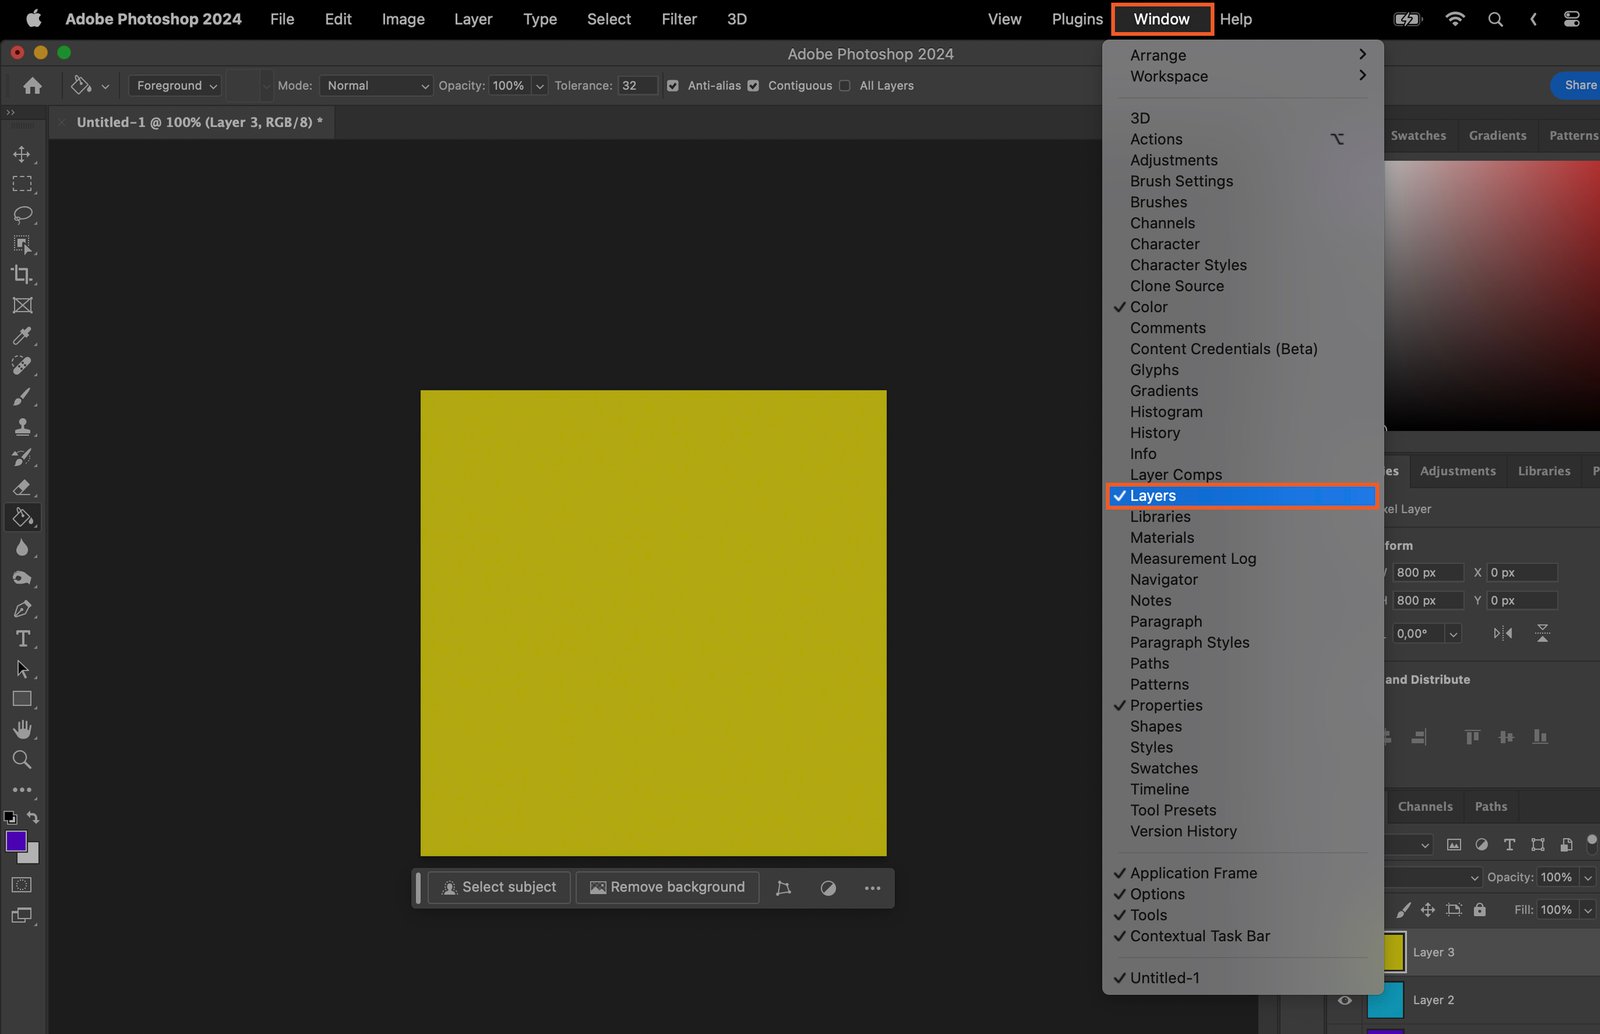
In Photoshop, to view your layers, navigate to the “Window” menu at the top of the screen. From the dropdown menu, select “Layers”. This will open the Layers panel on the right side of your workspace.

A graphic design software interface with a yellow square and an orange rectangular shape selected, onscreen tools and menus are displayed, indicating the softwares functions.

Step 2. Select the Layers You Want to Group

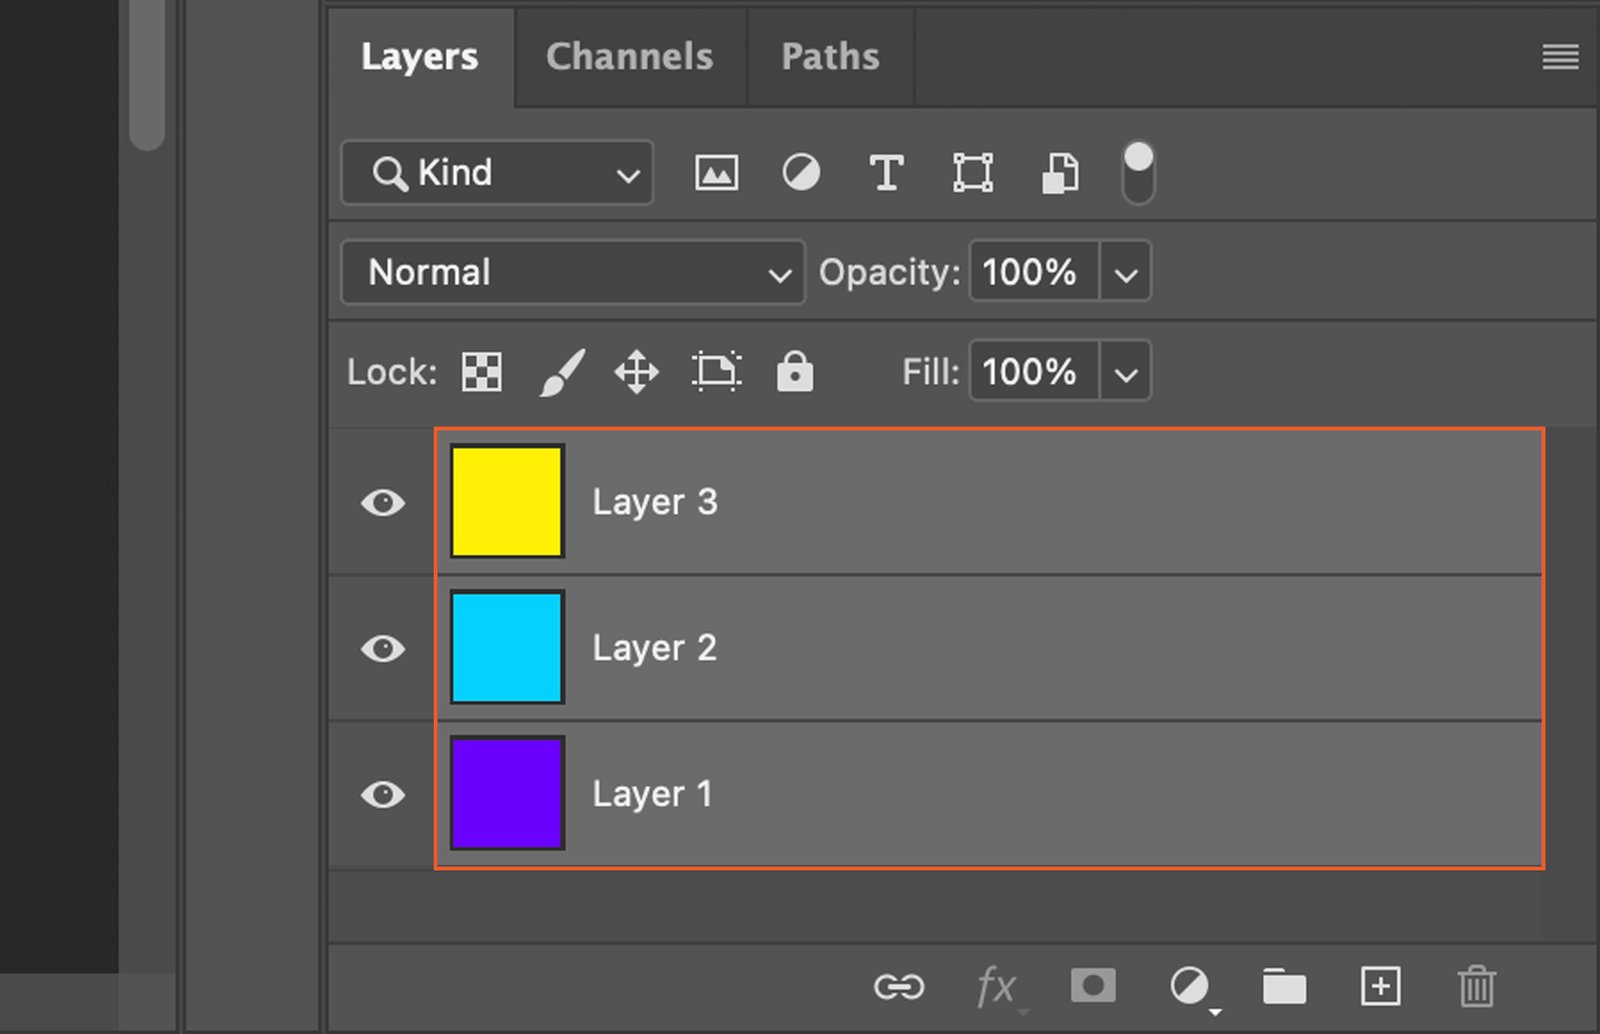
In the Layers panel, click on the layers you want to group.

Step 2.1 Using the Control Key

Hold down the Control (Ctrl) key and left-click each layer you wish to group. This allows you to select multiple layers individually.

A software interface with a dropdown menu, a canvas area for selecting layers and channels, and an icon indicating that this is a 100% Adobe Creative Cloud application.

Step 2.2 Using the Shift Key

If the layers you want to group are consecutive, click the first layer, hold down the Shift key, and then click the last layer. This will select all layers in between.

Adobe Photoshop interface, featuring the Layers panel with three layers in color: red, blue, and yellow.

Step 3. Create a New Group

With your layers selected, click on the folder icon at the bottom of the Layers panel to create a new group.

Adobe Photoshop interface with multiple color layers, each labeled differently.

Step 4. Move the Selected Layers into the New Group

Simply drag the selected layers into the new group. They should now be nested under the group in the Layers panel.

A computer program, specifically a digital audio workstation interface.

Step 5. Name Your Group

Double-click on the new group’s name to rename it. This helps keep your work organized, especially in complex projects.

Adobe Photoshop open, displaying the Layers panel, showing multiple layers and a color picker panel, which appears to be for selecting a color or style.

Step 6. Reordering and Nesting Layer Groups

You can reorder groups by clicking and dragging them up or down in the Layers panel. 

Adobe Photoshop open, showing a blank document and toolbars.

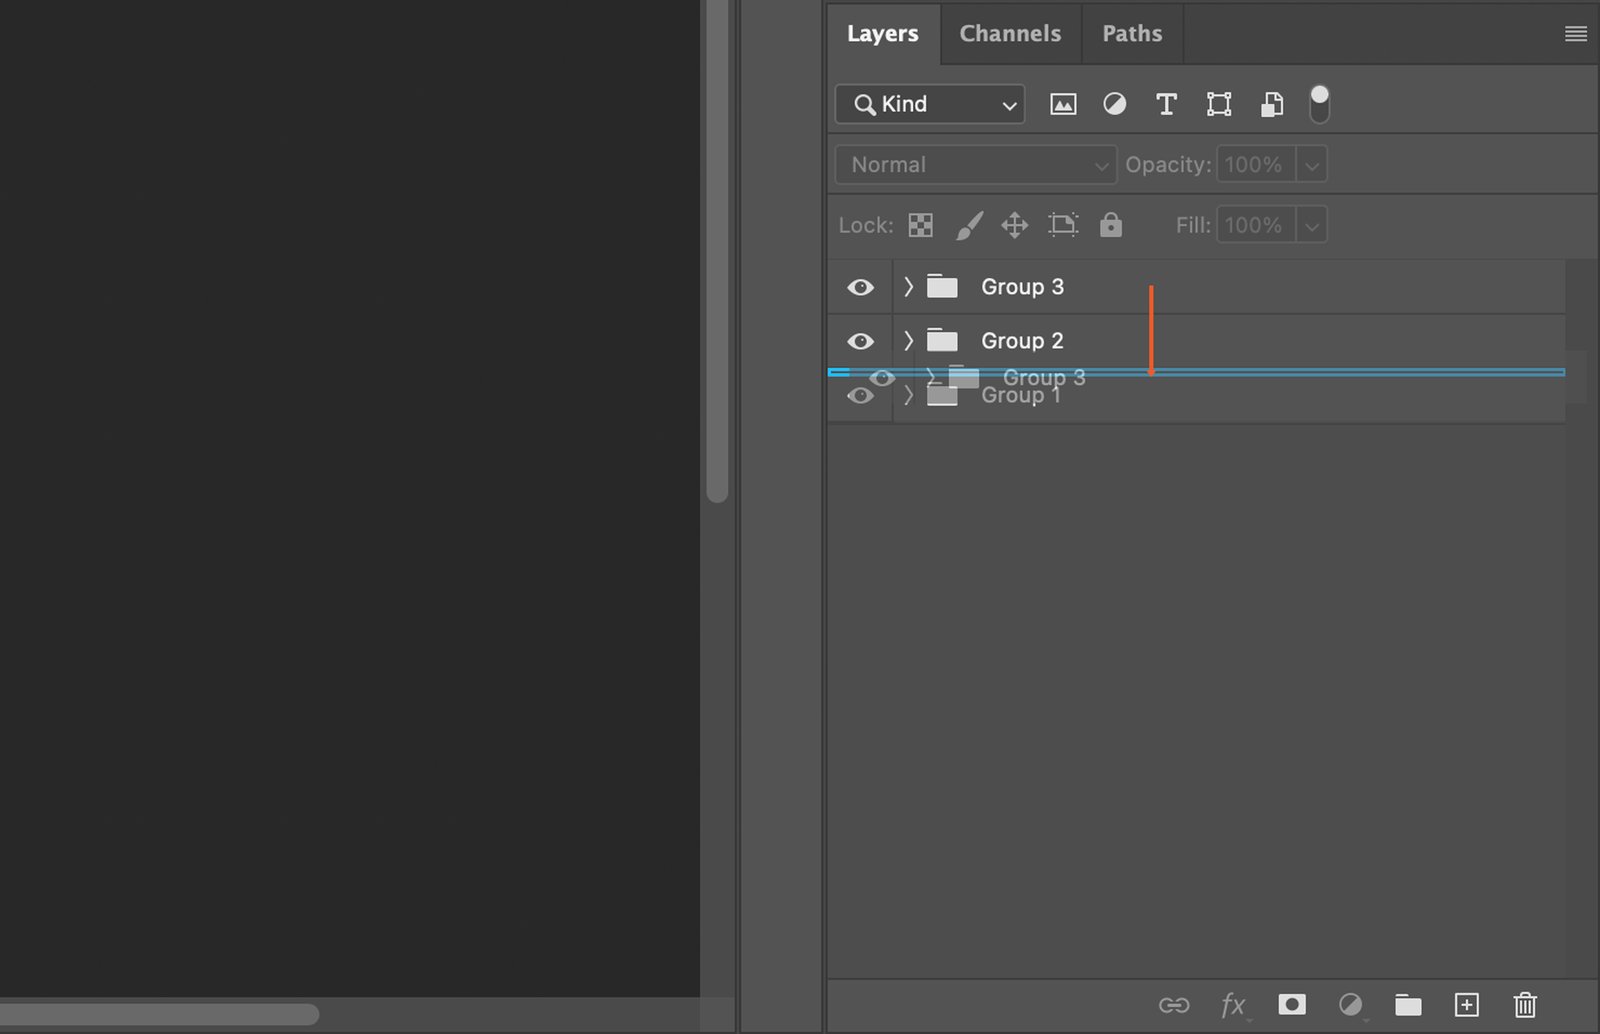
To nest groups, drag a group onto another group.

Adobe Photoshop program on a computer screen, with the interface visible and the workspace highlighted by a bounding box.

Step 7. Working with Grouped Layers

Grouped layers can be manipulated as a single unit.

Step 7.1 Transforming Grouped Layers

To transform a group of layers, select the group and use the Transform tool (Ctrl + T) as you would with a single layer.

Adobe Photoshop screenshot with a yellow box selected, showing color properties on the right and tools panel at bottom.

Step 7.2 Applying Layer Styles to Grouped Layers

You can apply layer styles to a whole group at once. Right-click on the group and select “Blending Options” to access Layer Styles.

An interface from graphic design software, where the user has selected Blend Options and is shown several layers with their corresponding color options.

Step 8. Ungrouping Layers

To ungroup layers, right-click on the group and select ‘Ungroup Layers’

A graphic design software, displaying options for layer manipulation and text editing.

Step 9. Deleting Layer Groups

To delete a layer group, select it and click on the trash bin icon at the bottom of the Layers panel. You can choose to delete the Group and Contents or the Group Only.

The process of creating an advertisement in Adobe Photoshop, with focus on a group creation error message.

Sidebar-ad_QCC_related-product
Sidebar-ad_QCC_free-sample_
Sidebar-ad_QCC_free-download_2-posters

Popular Content

Fujifilm X-T200 Review (Should You Buy This Camera in 2024?)

Read Article