Mastering the ability to make an image transparent in Photoshop can unlock a new level of creativity in your graphic design work. This article provides a step-by-step guide to help you solve this challenge, enhancing your skills and the quality of your projects.
Photoshop offers a variety of tools for image selection. Depending on the image complexity and the level of precision you need, choose from the Quick Selection Tool, the Lasso Tool, or the Magic Wand Tool.
The Quick Selection Tool is ideal for complex images with many different elements. It allows you to drag your cursor over the part of the image you want to select, making it a good choice for detailed work.

The Lasso Tool lets you draw freeform selections around the part of the image you want to make transparent. This tool is best for simple images or when precision isn’t crucial.

The Magic Wand Tool is useful for selecting areas of similar color. Click on the part of the image you want to select, and the tool will automatically select all adjacent areas of the same color.

After choosing your tool, make a selection on the image. Remember, the area you select is the part you want to make transparent.

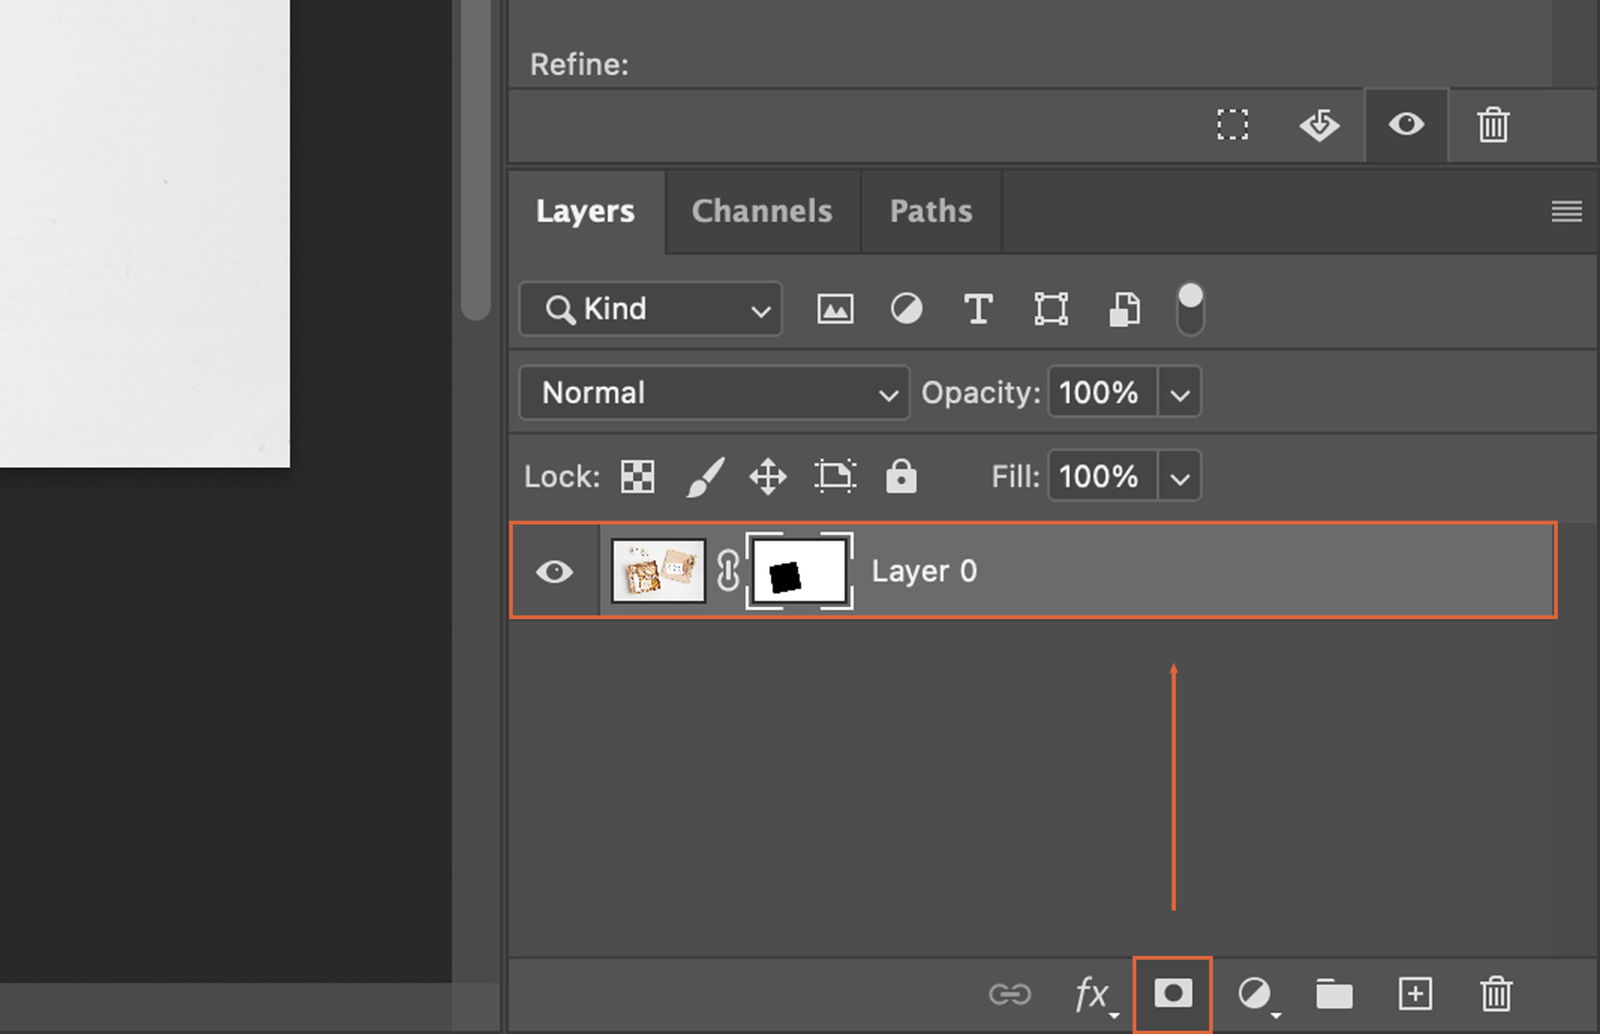
Once you’ve made your selection, create a layer mask. This can be done by clicking on the “Layer Mask” icon at the bottom of the layers panel.

With the layer mask selected, apply transparency. Choose the paint bucket tool, set your foreground color to black, and click on your image. The selected area will become transparent.
To ensure a clean, professional look, refine the edges of your selection. Use the “Refine Edge” tool in the options bar to smooth, feather, or shift the edge of your selection.
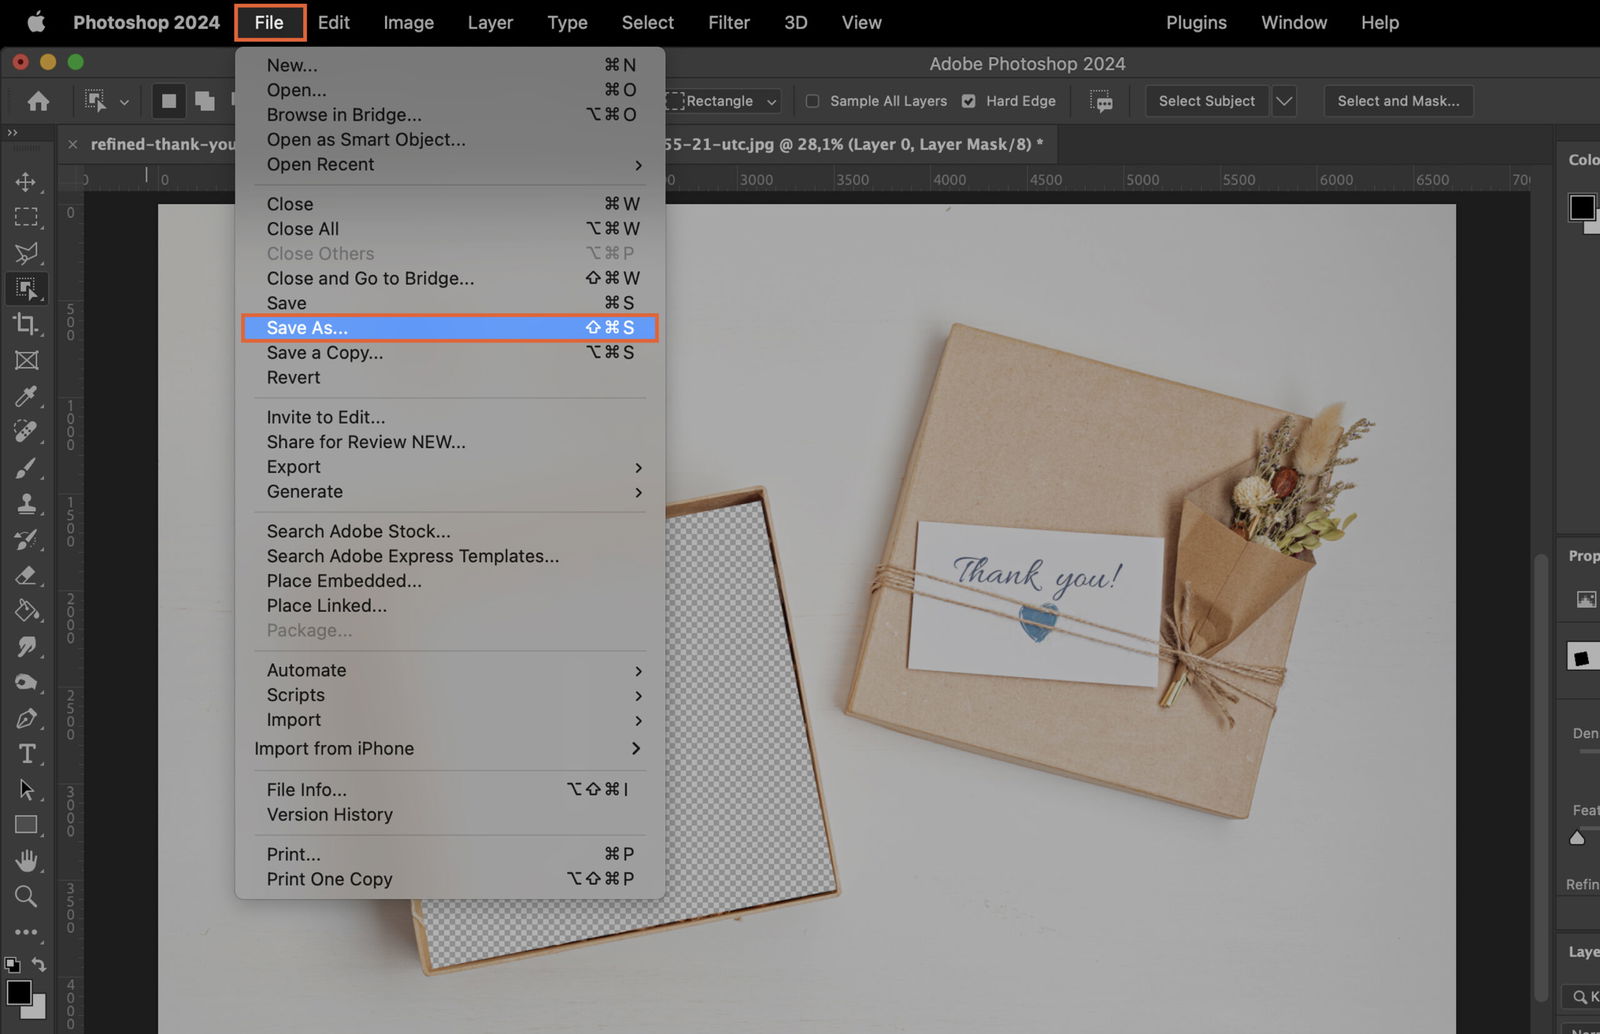
Finally, save your image in a format that supports transparency. Both PNG and GIF formats support this feature.
PNG is a good choice for saving images with transparency. It supports a full range of color and maintains high quality.
GIF is another option for saving images with transparency. However, it only supports a limited color palette, making it less ideal for complex images.


