Struggling with blurry or dull images? This guide will show you how to improve image quality using Photoshop. Mastering these steps can enhance your photos, making them more visually appealing and professional. Let’s dive into the process.
Step 1. Evaluate the Image
Begin by analyzing the quality of your image. Look for areas that need improvement such as resolution, exposure, contrast, color, sharpness, noise, and imperfections. This initial assessment will guide you through the subsequent steps.
Step 2. Adjust Image Resolution
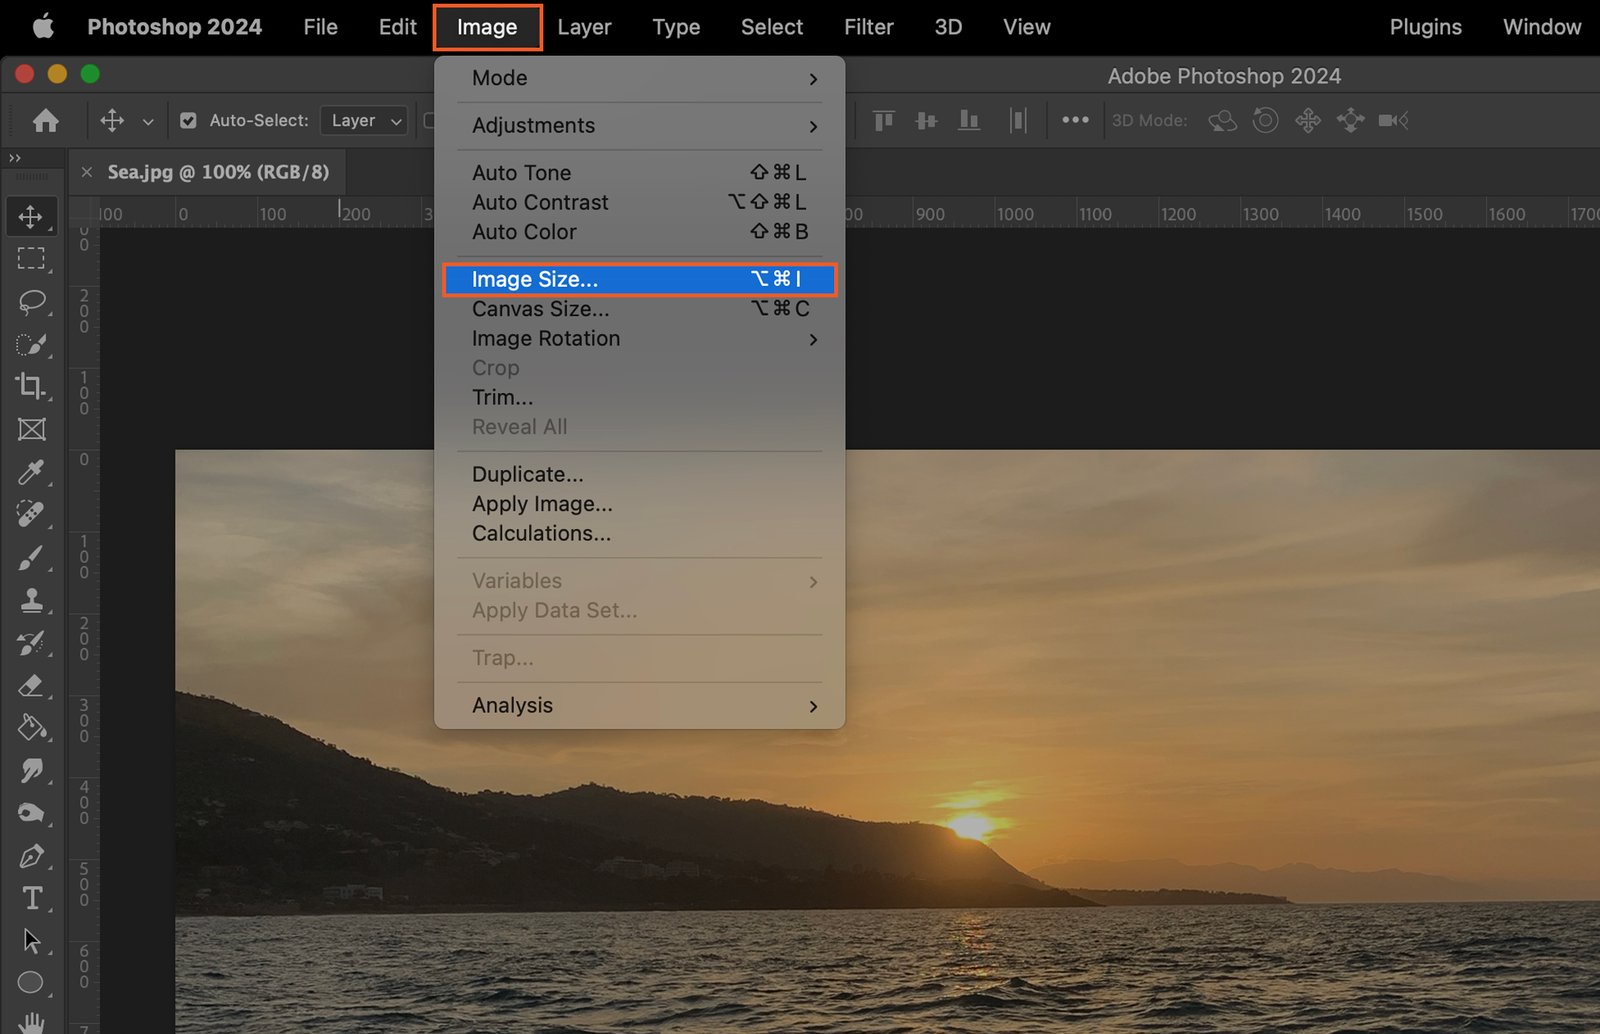
High resolution is key for a clear image. Go to ‘Image’ > ‘Image Size’ to adjust the resolution.
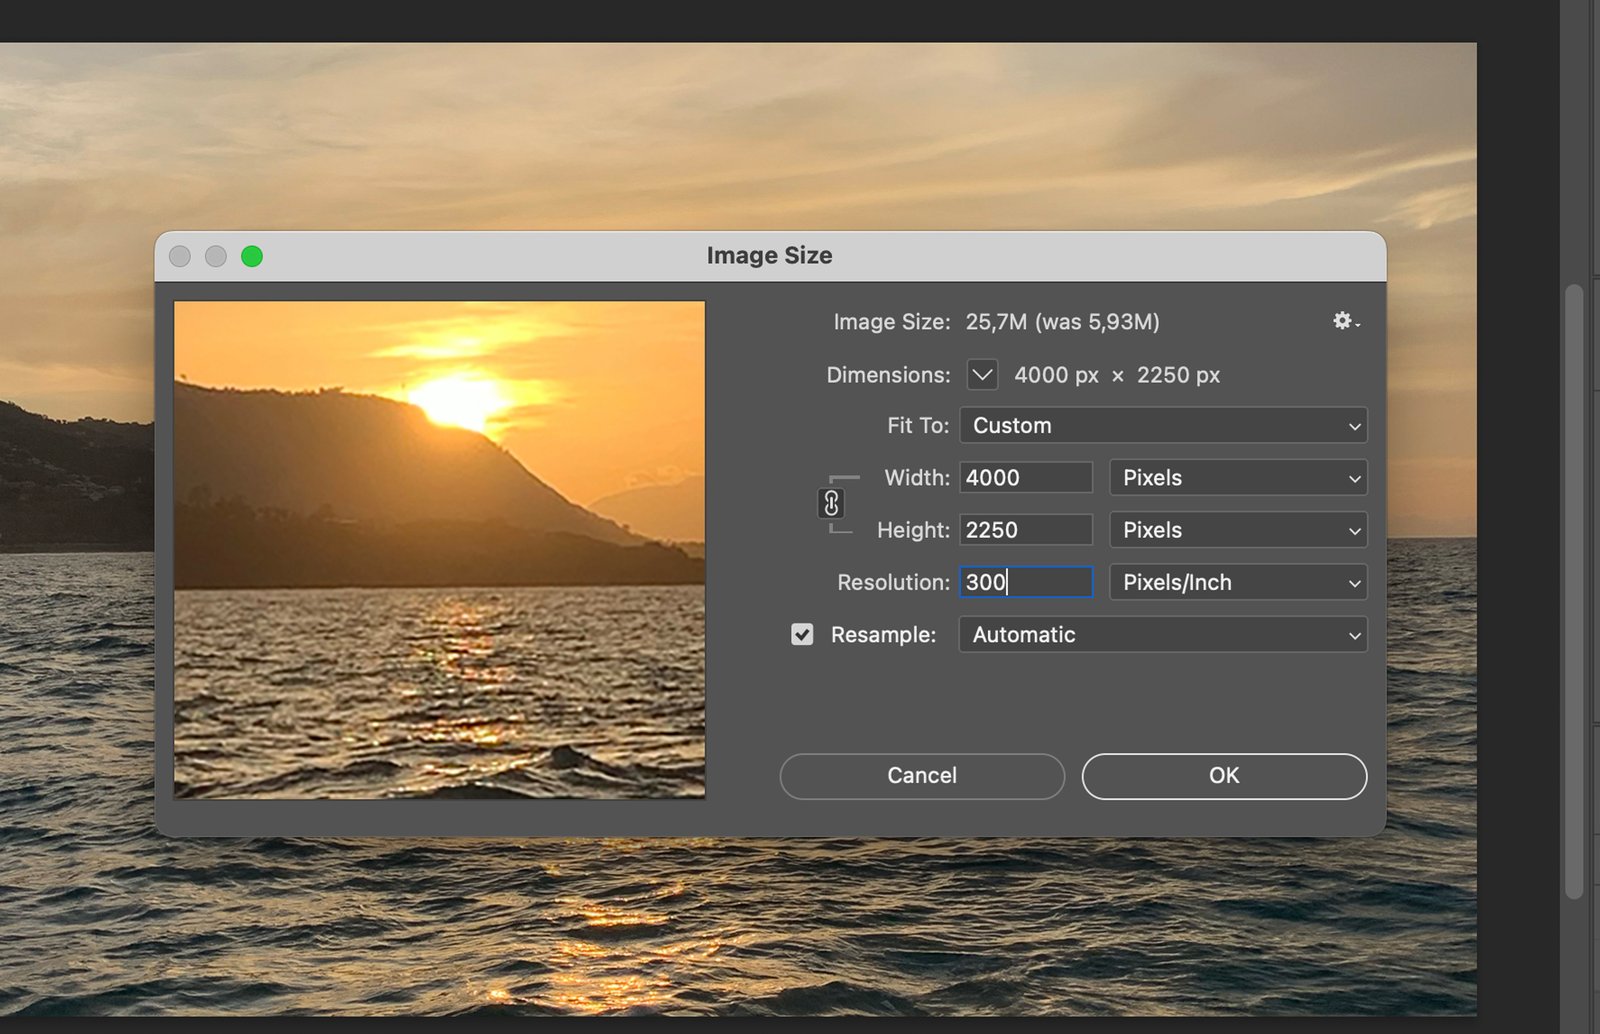
For print, aim for a resolution of 300 pixels/inch; for web, 72 pixels/inch is sufficient.
Step 3. Correct Image Exposure
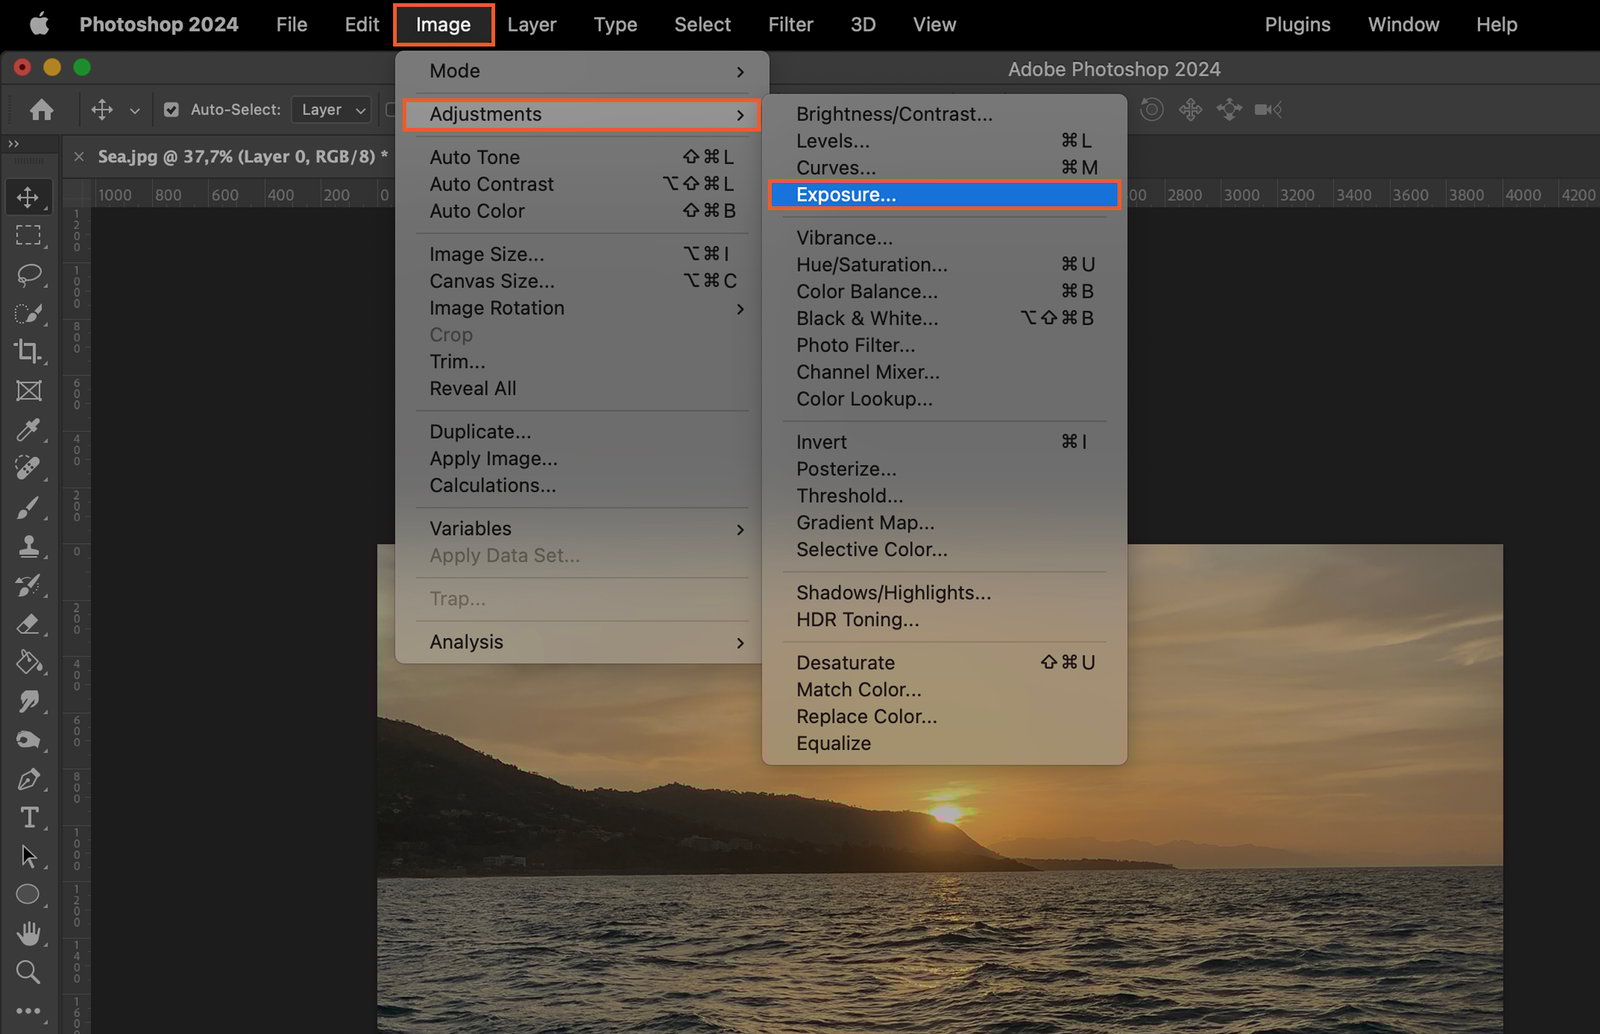
Exposure affects how light or dark your image is. To adjust, go to ‘Image’ > ‘Adjustments’ > ‘Exposure’.
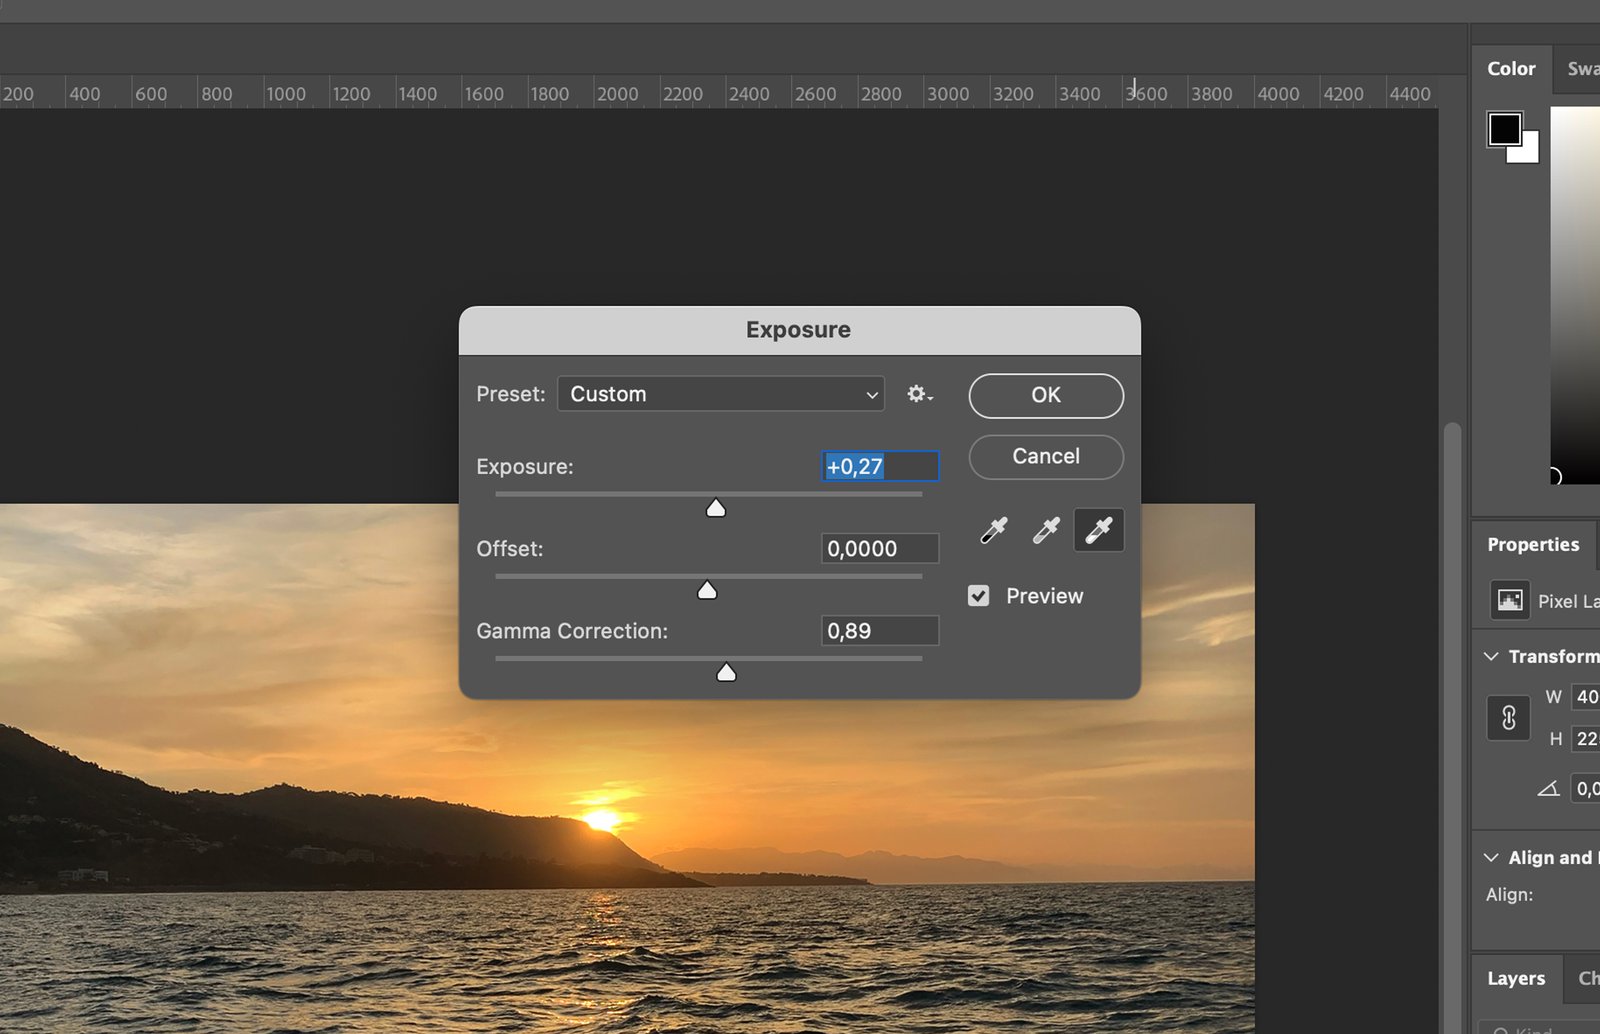
Slide the exposure level until your image appears well-lit without being washed out.
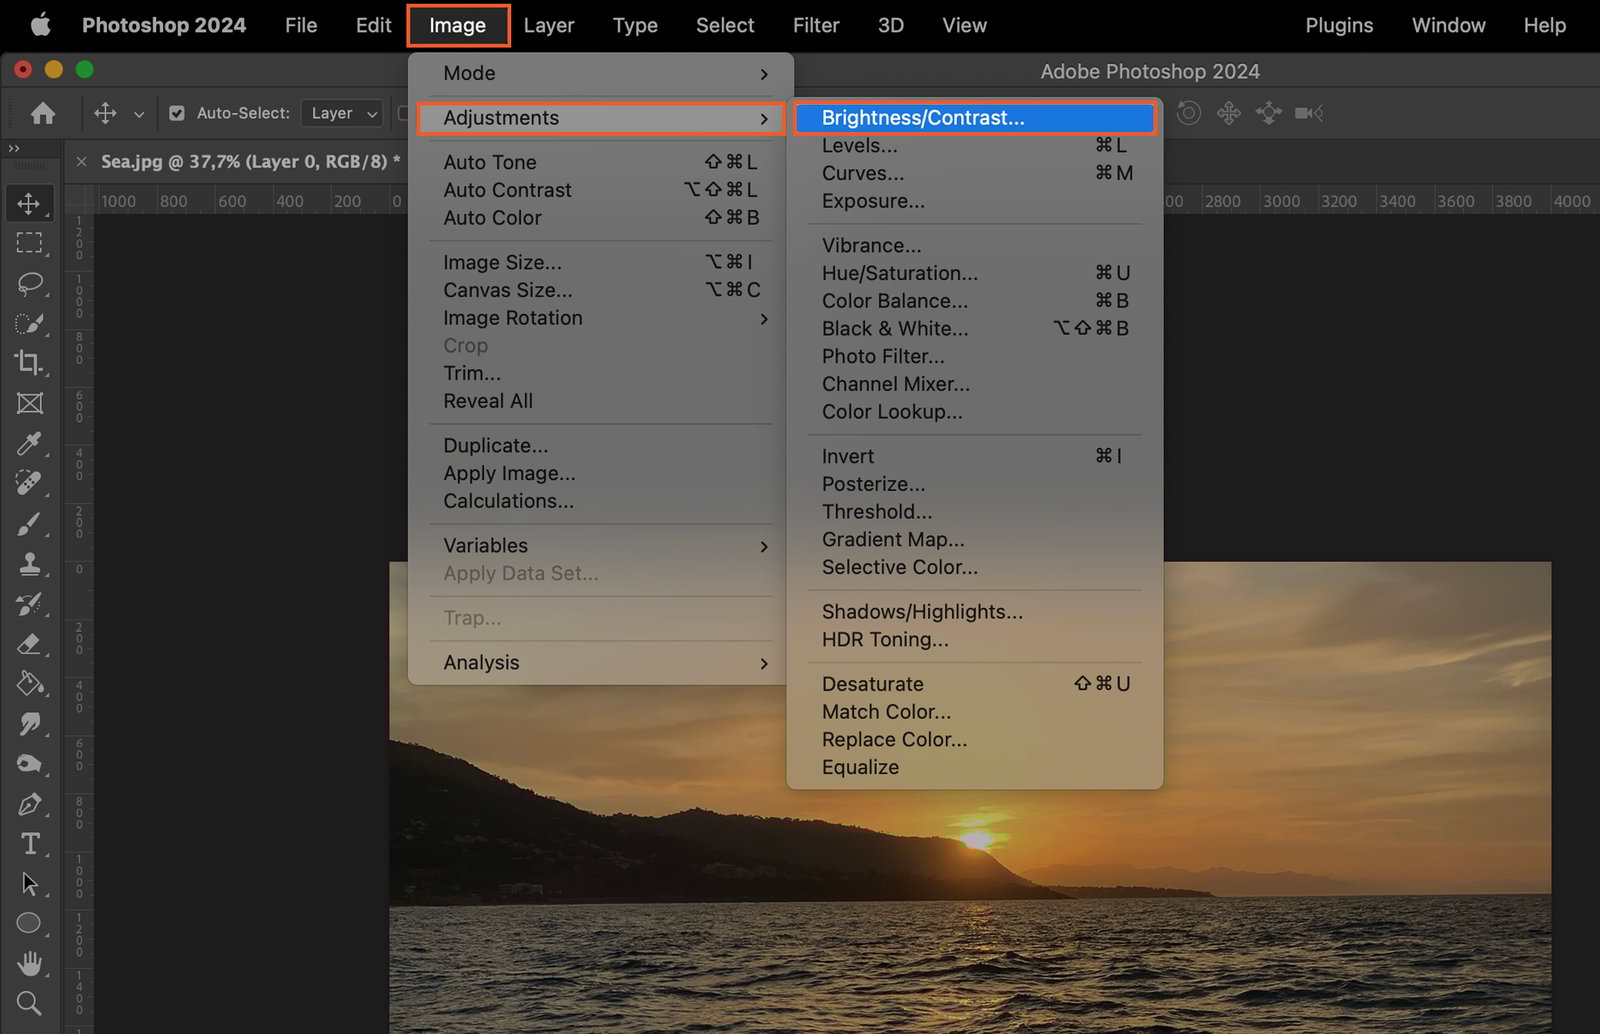
Step 4. Improve Image Contrast
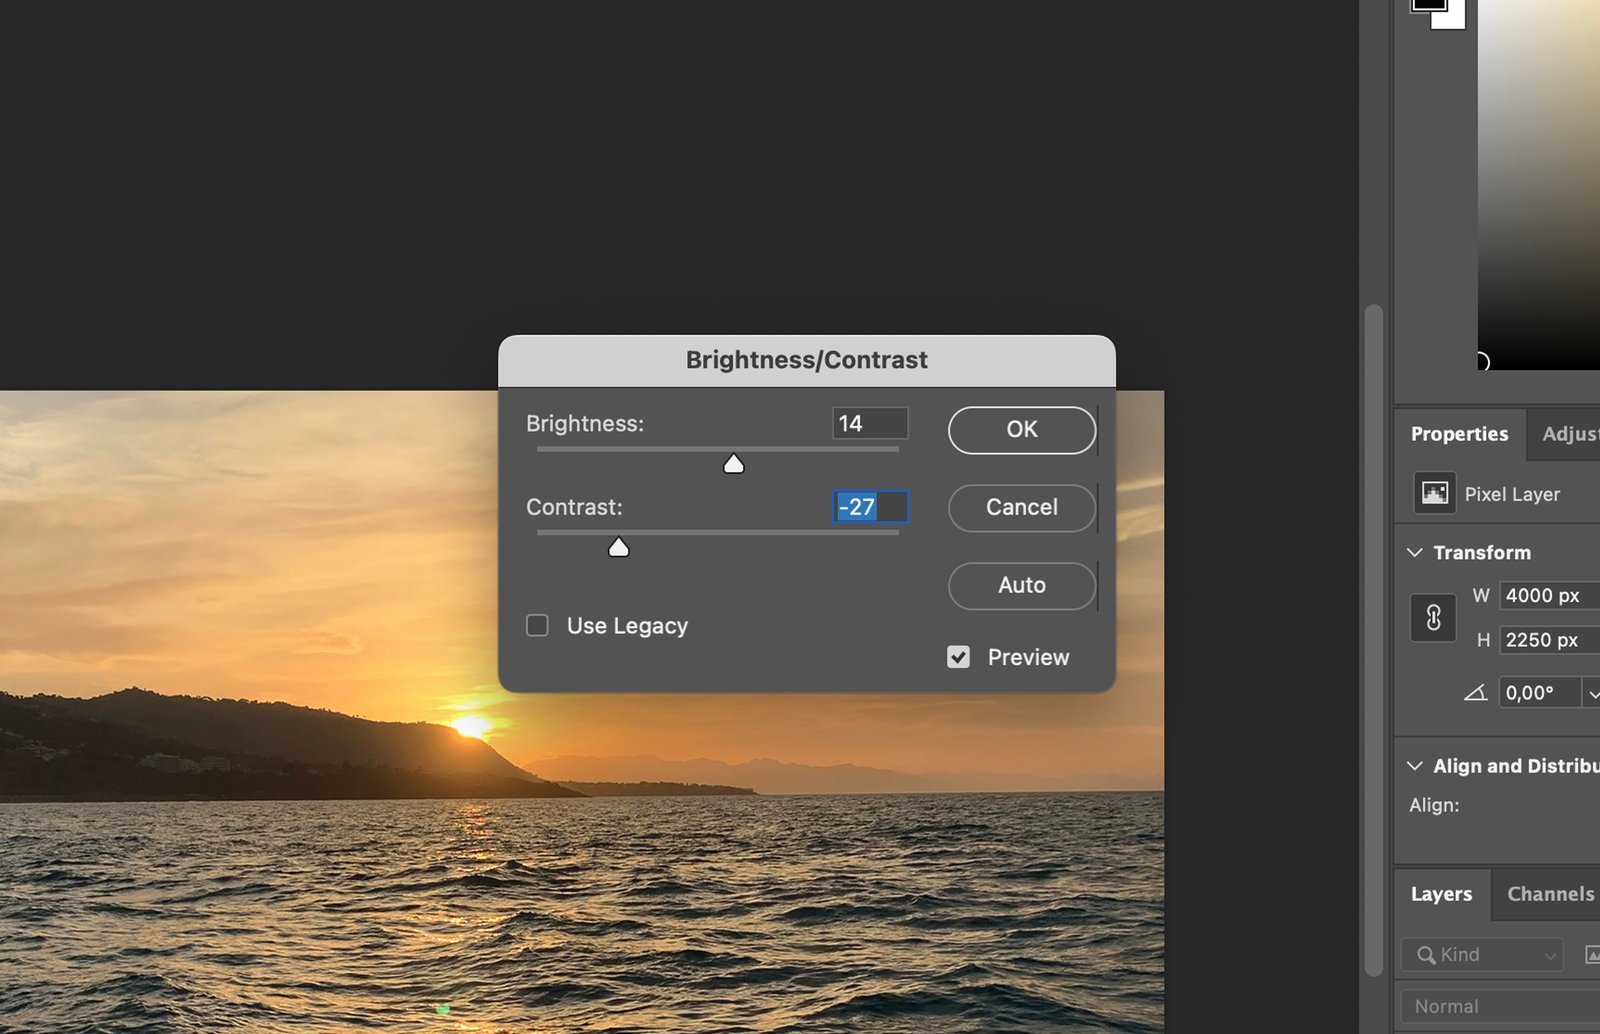
Contrast adds depth, making colors and shapes pop. Adjust contrast via ‘Image’ > ‘Adjustments’ > ‘Brightness/Contrast’.
Play with the sliders until satisfied with the depth of your image.
Step 5. Enhance Image Colors
A well-colored image is vibrant and inviting. Photoshop provides several tools to adjust color.
Step 5.1. Adjust Saturation
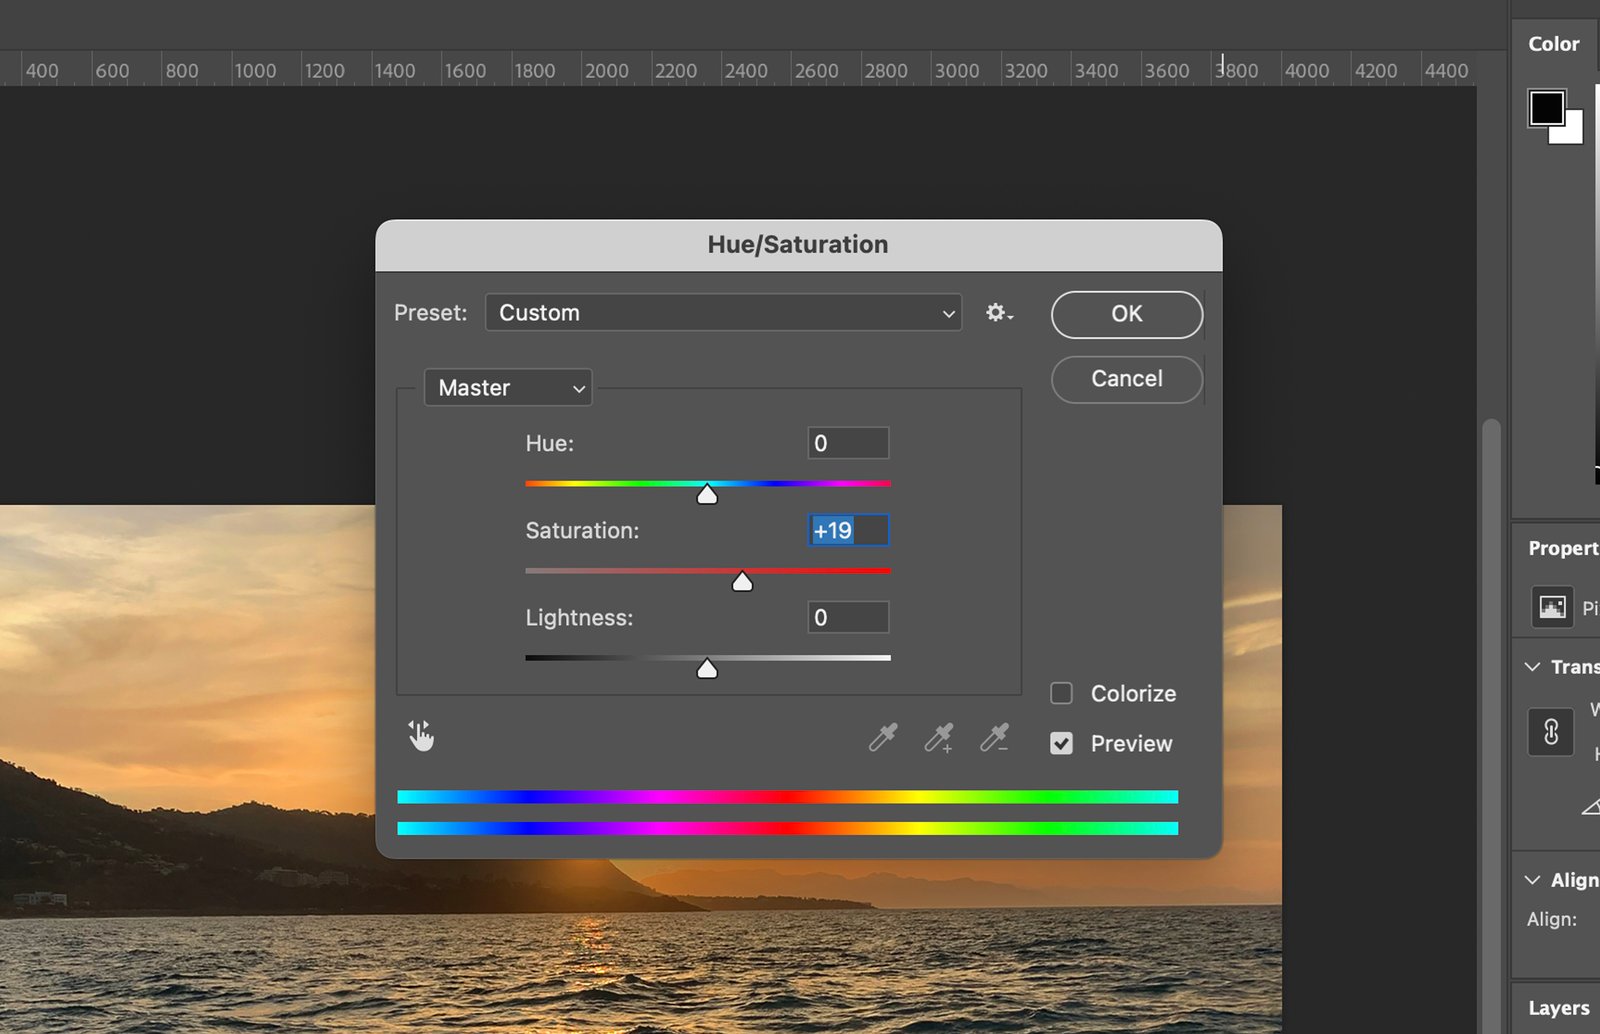
Saturation controls color intensity. To adjust, go to ‘Image’ > ‘Adjustments’ > ‘Hue/Saturation’. 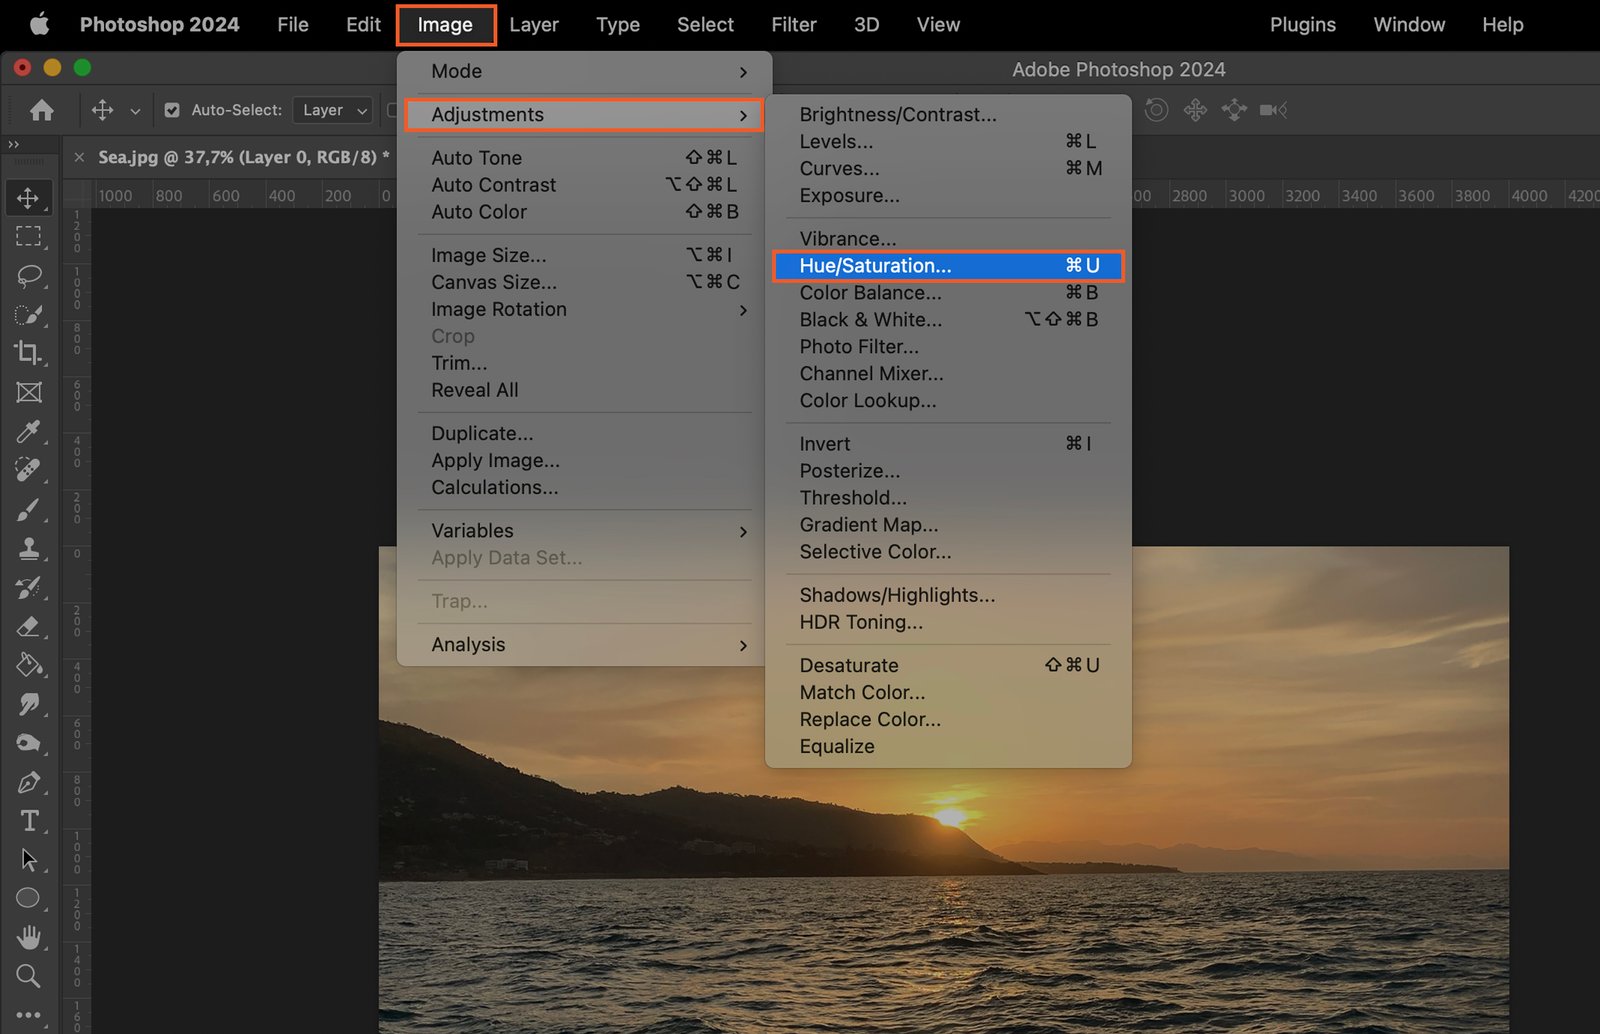
Slide the saturation bar until colors are vivid yet realistic.
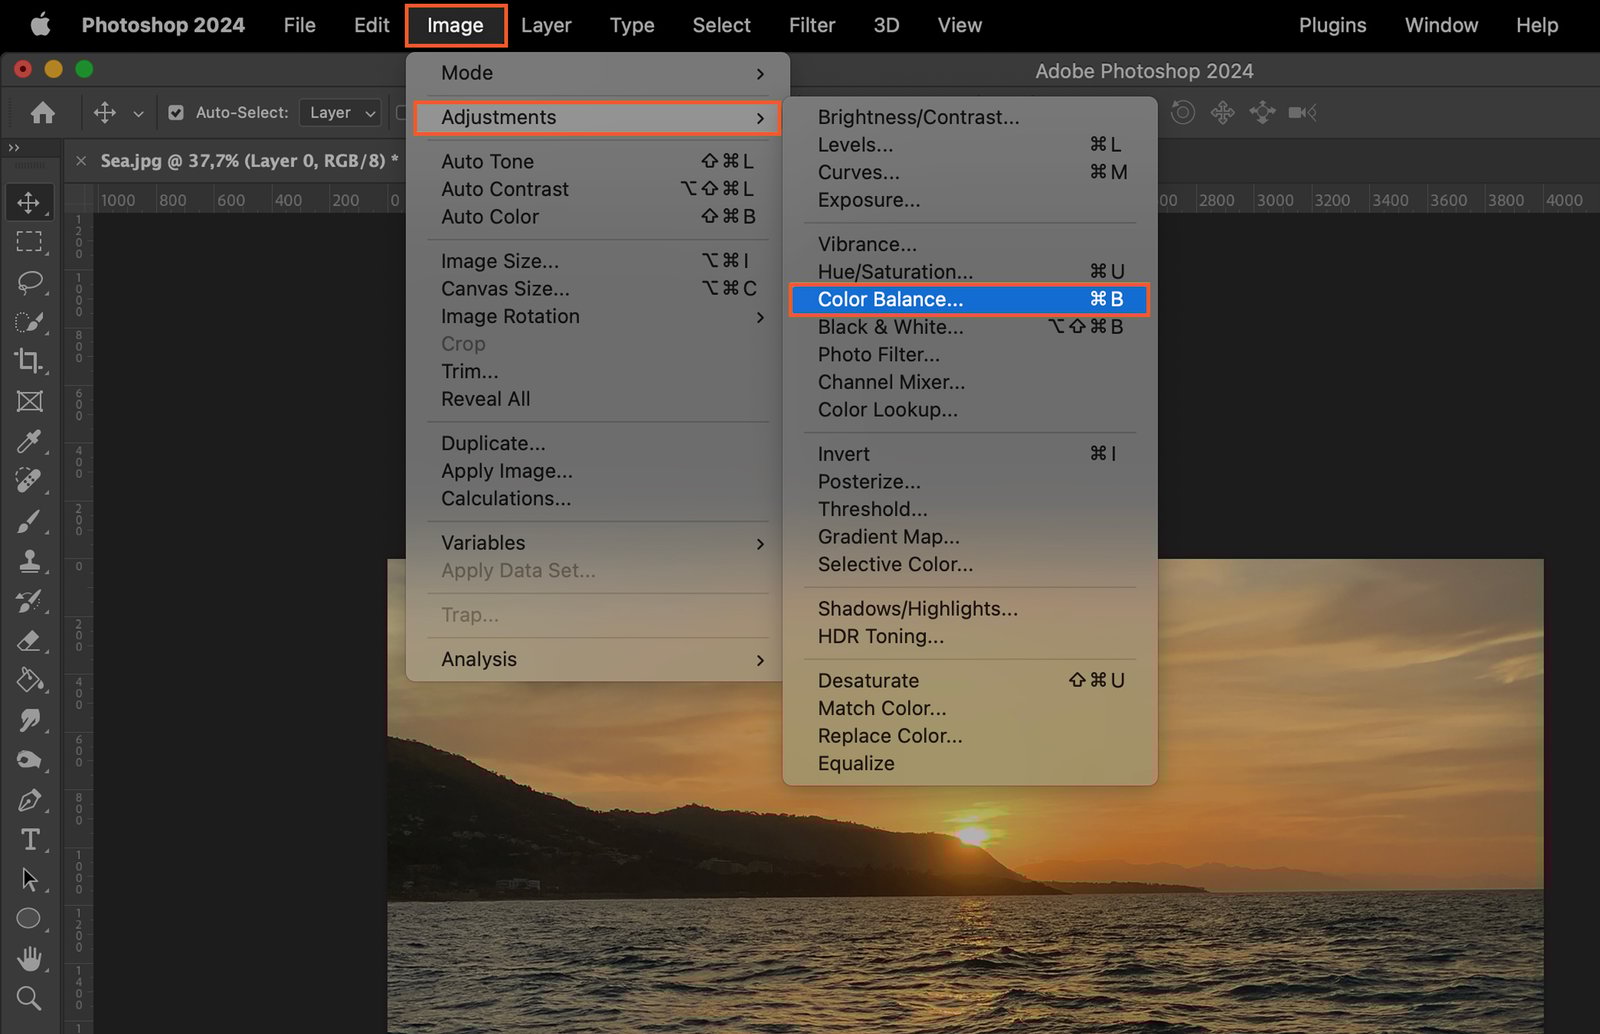
Step 5.2. Modify Color Balance
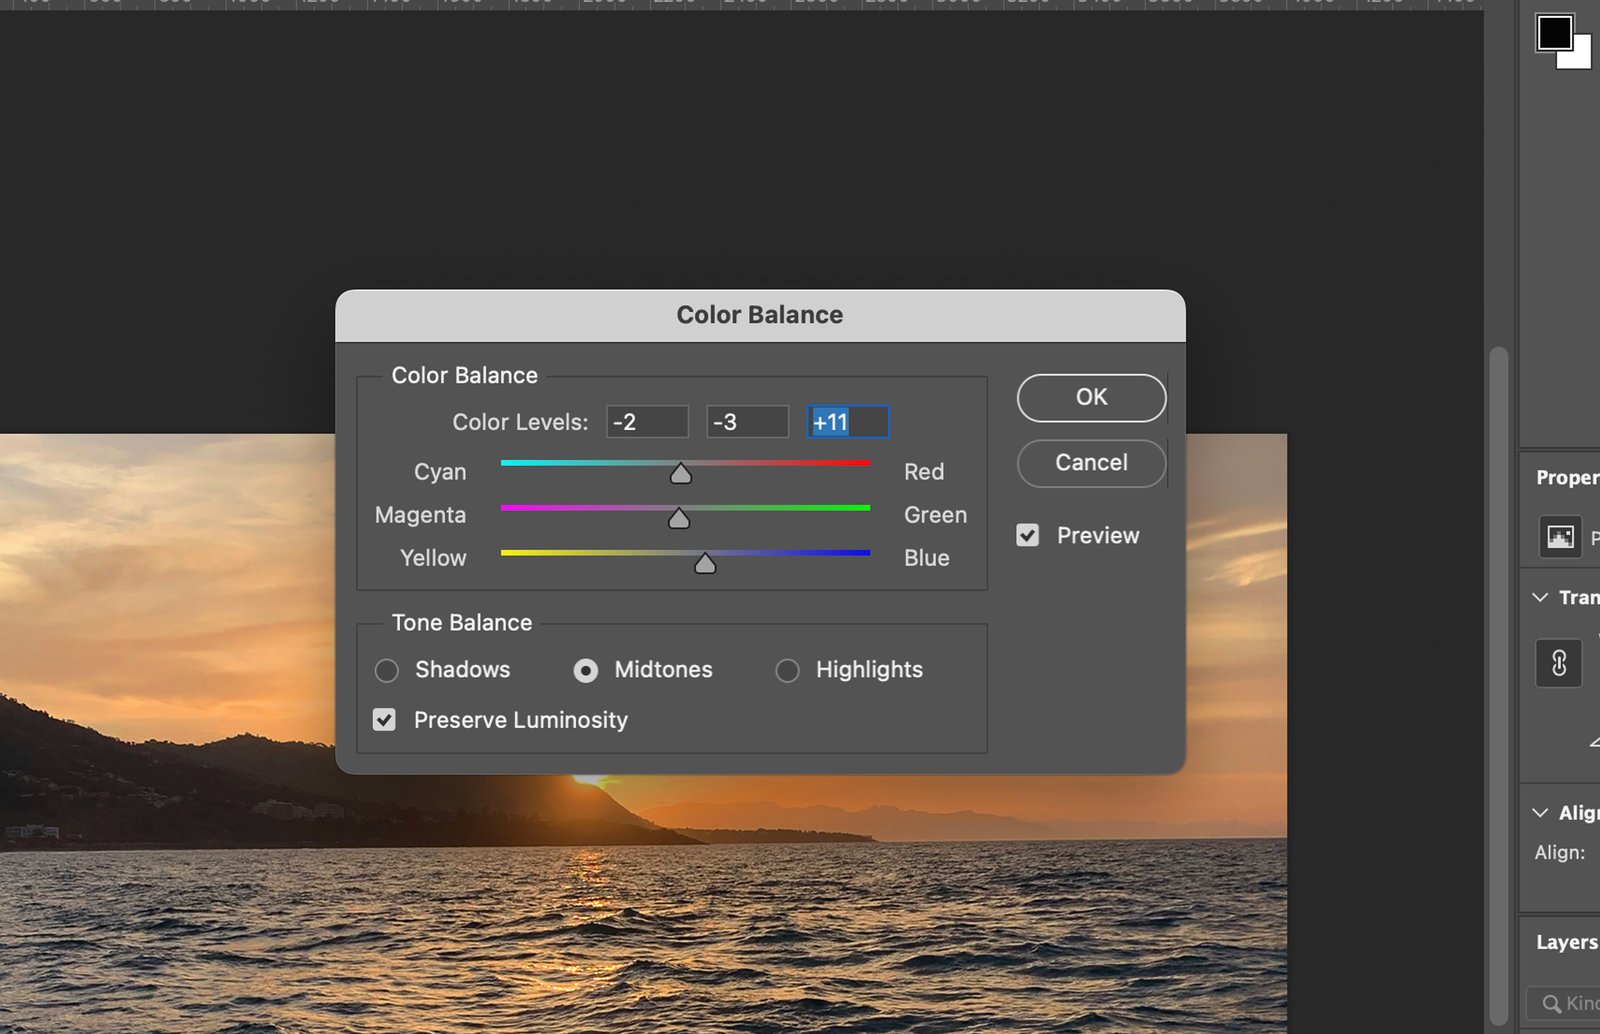
Color balance affects the mix of colors in your image. Adjust by going to ‘Image’ > ‘Adjustments’ > ‘Color Balance’.
Tweak the sliders until the colors are in harmony.
Step 5.3. Use Selective Color
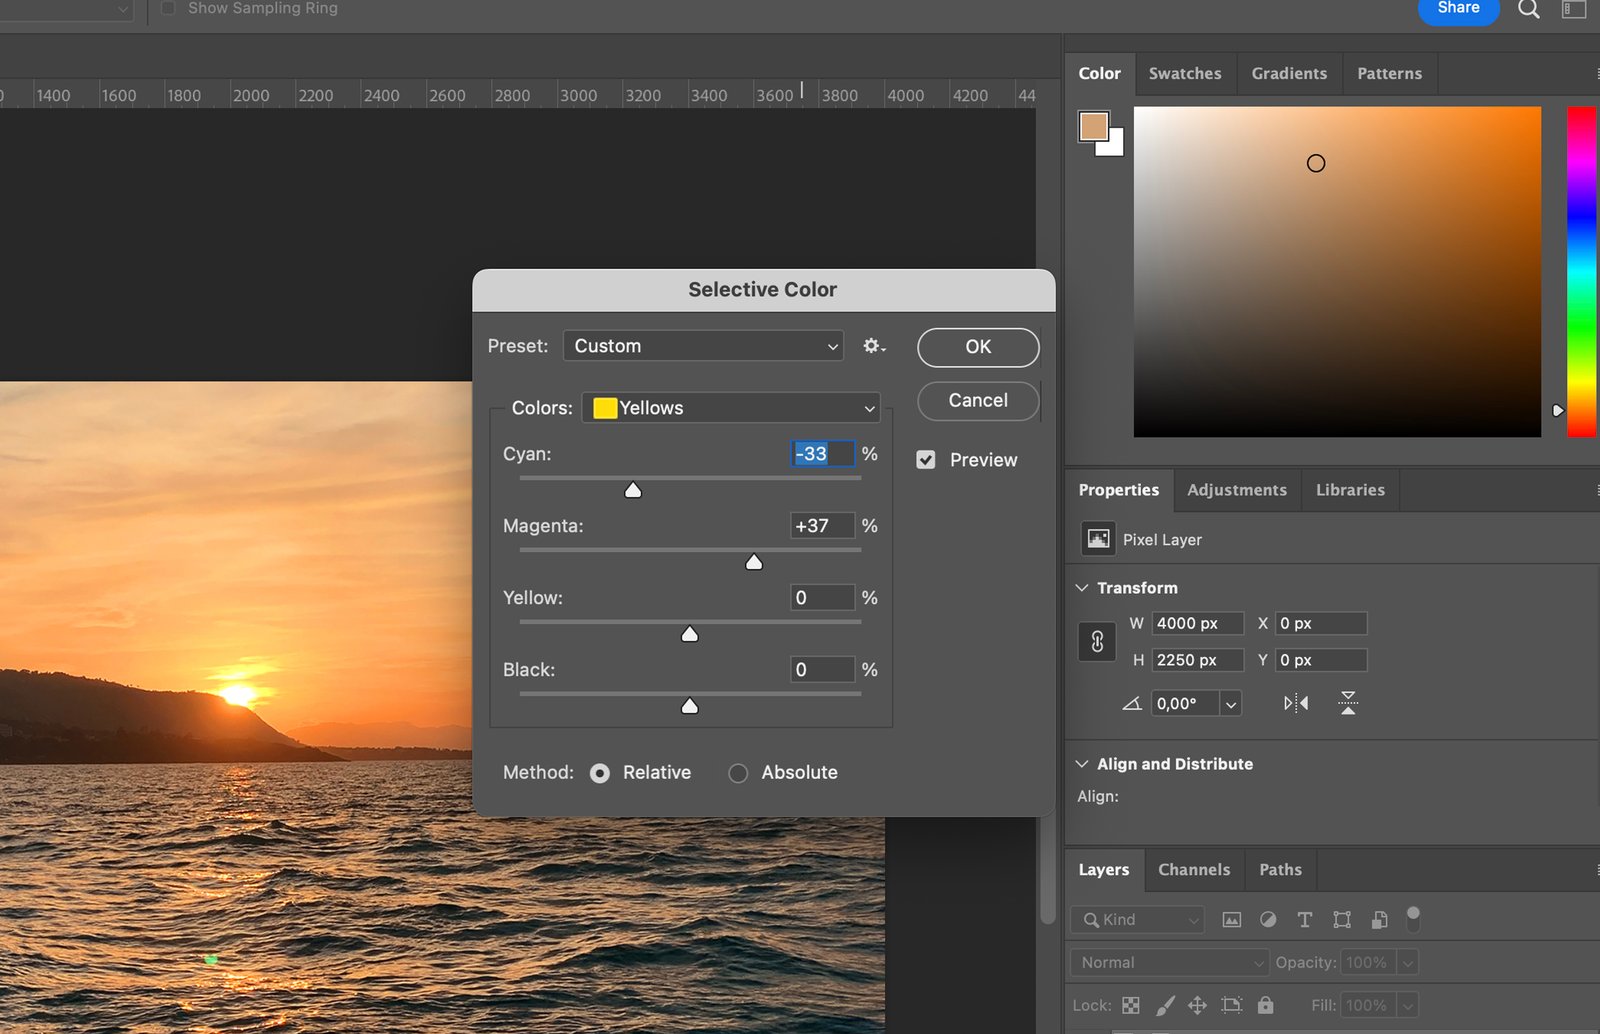
Selective color allows you to adjust individual colors. Find this at ‘Image’ > ‘Adjustments’ > ‘Selective Color’.
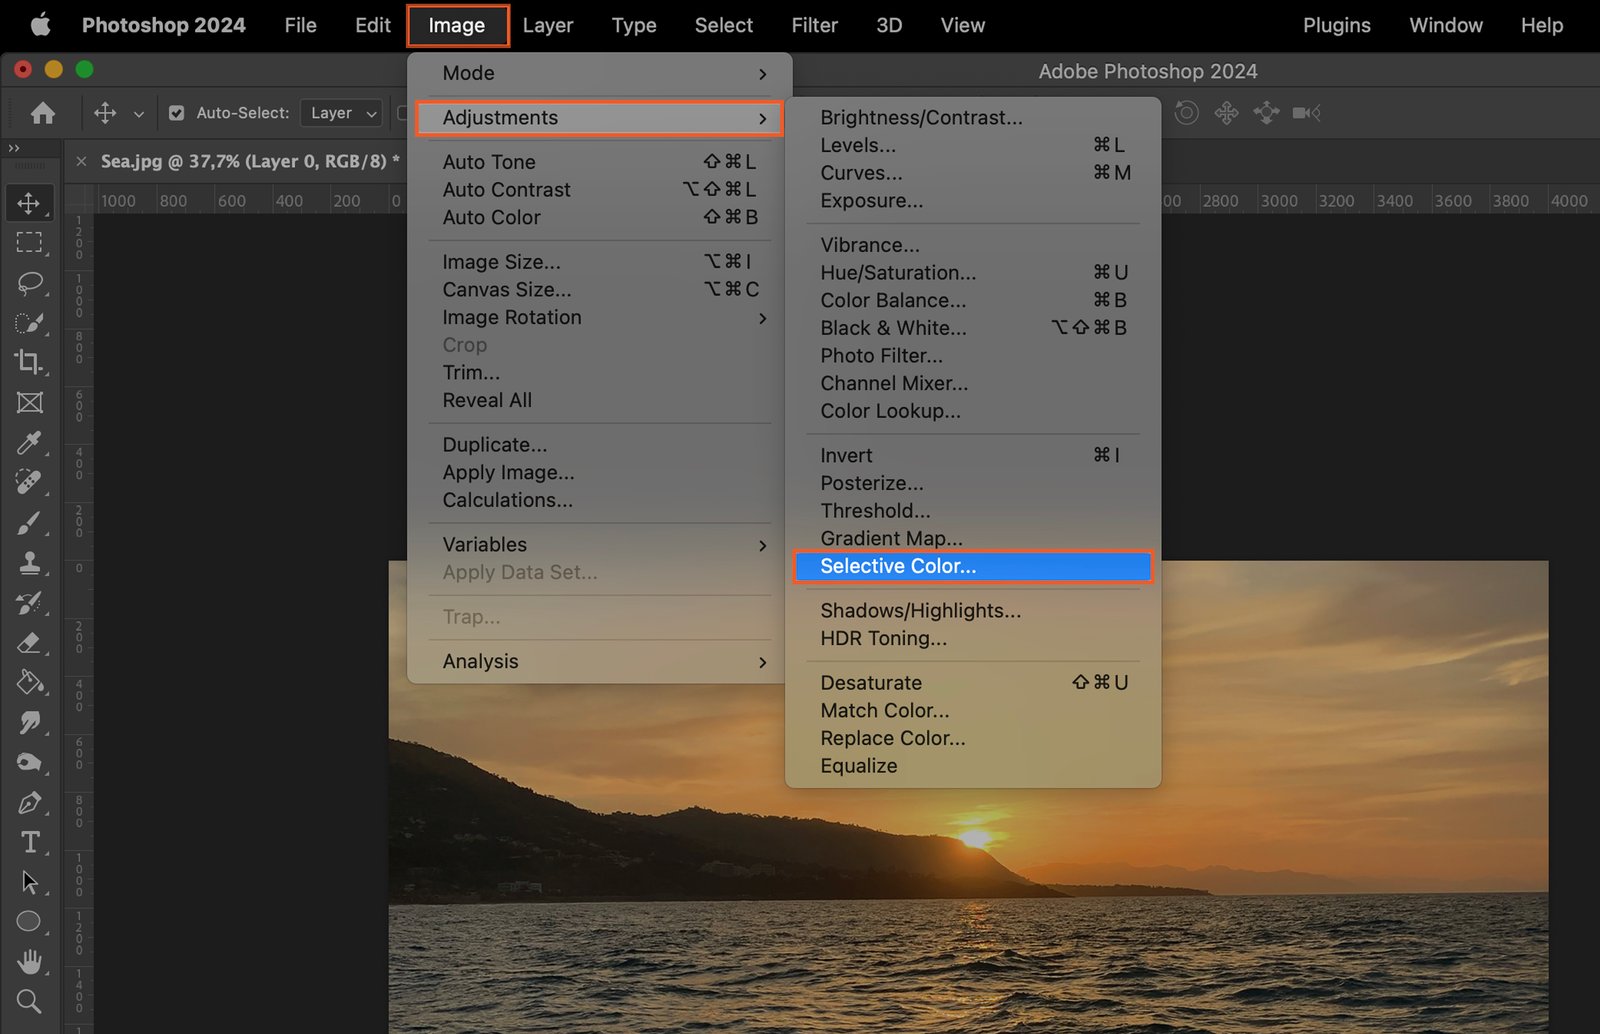
Use this tool to make specific colors stand out.
Step 6. Sharpen Image Details
Sharpness brings clarity to your image. There are several ways to sharpen in Photoshop.
Step 6.1. Apply Unsharp Mask
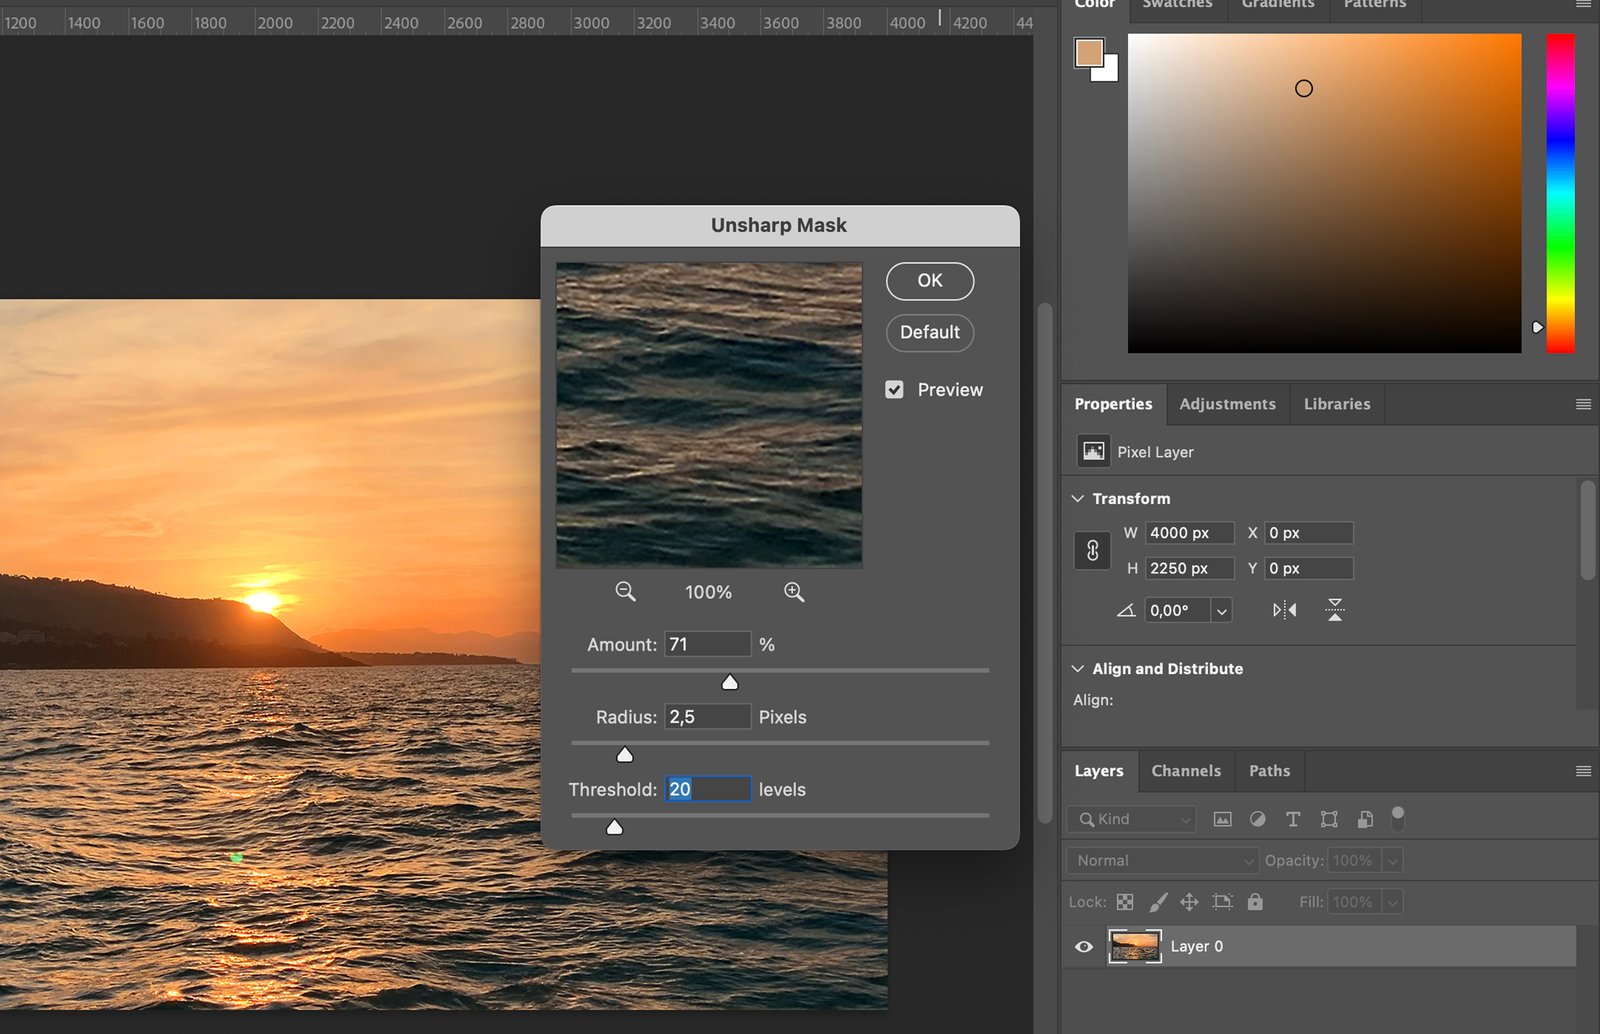
The Unsharp Mask sharpens the overall image. Go to ‘Filter’ > ‘Sharpen’ > ‘Unsharp Mask’.
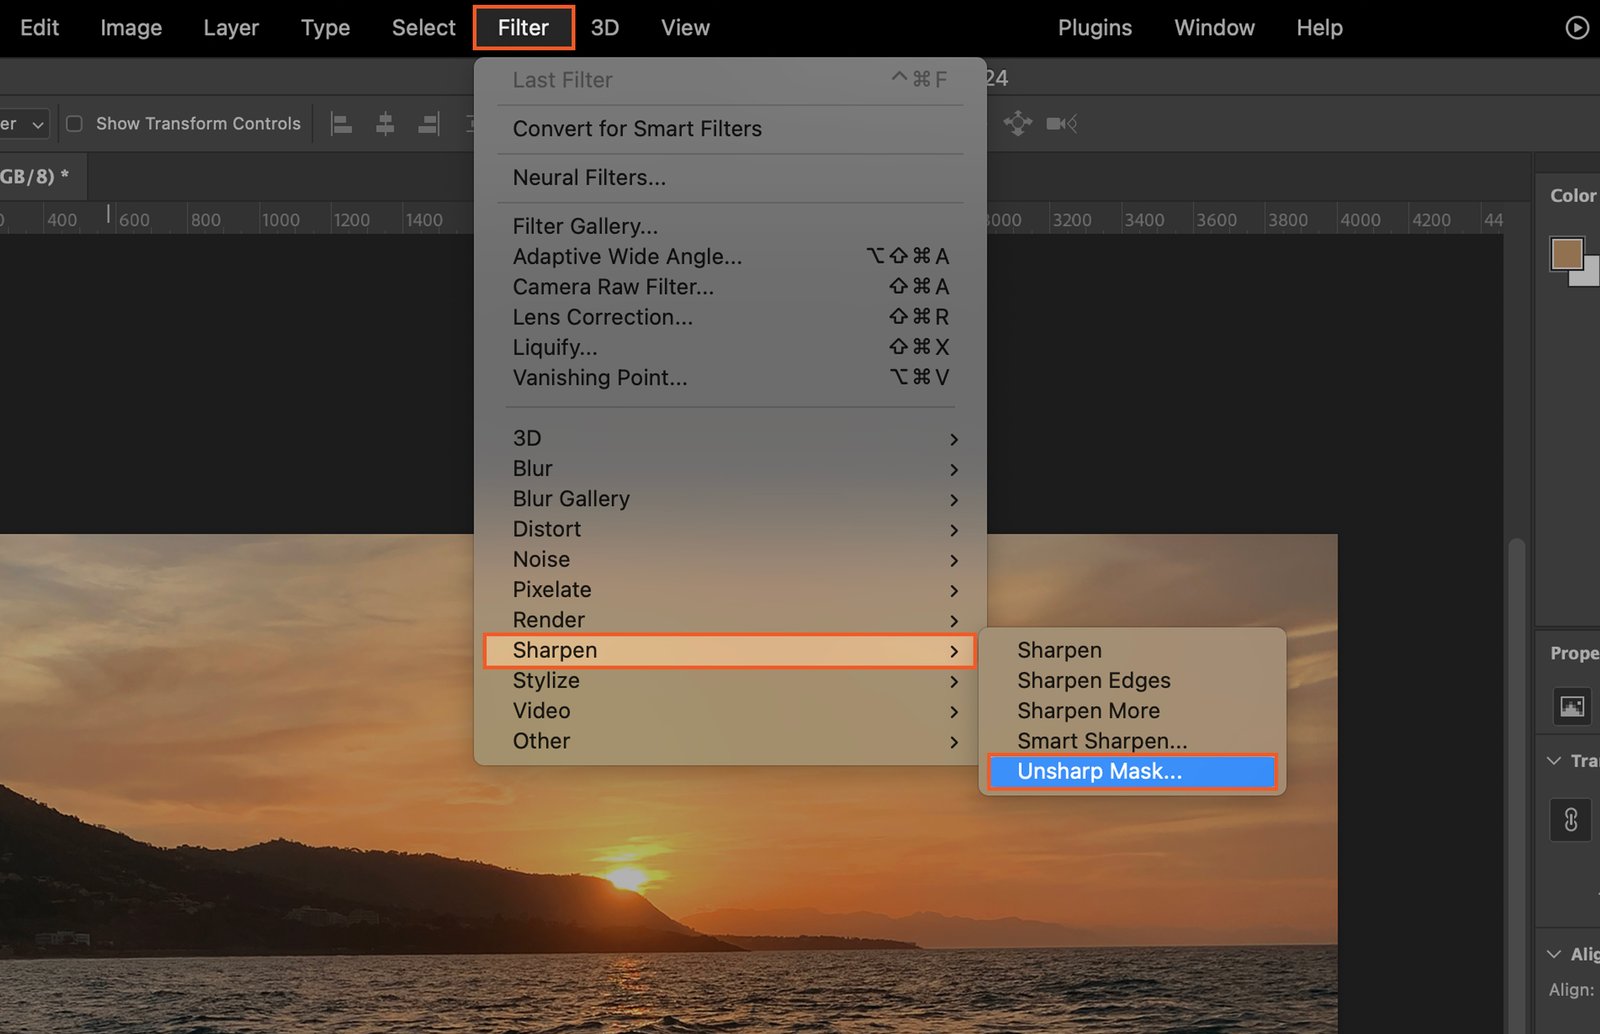
Adjust the sliders for desired sharpness.
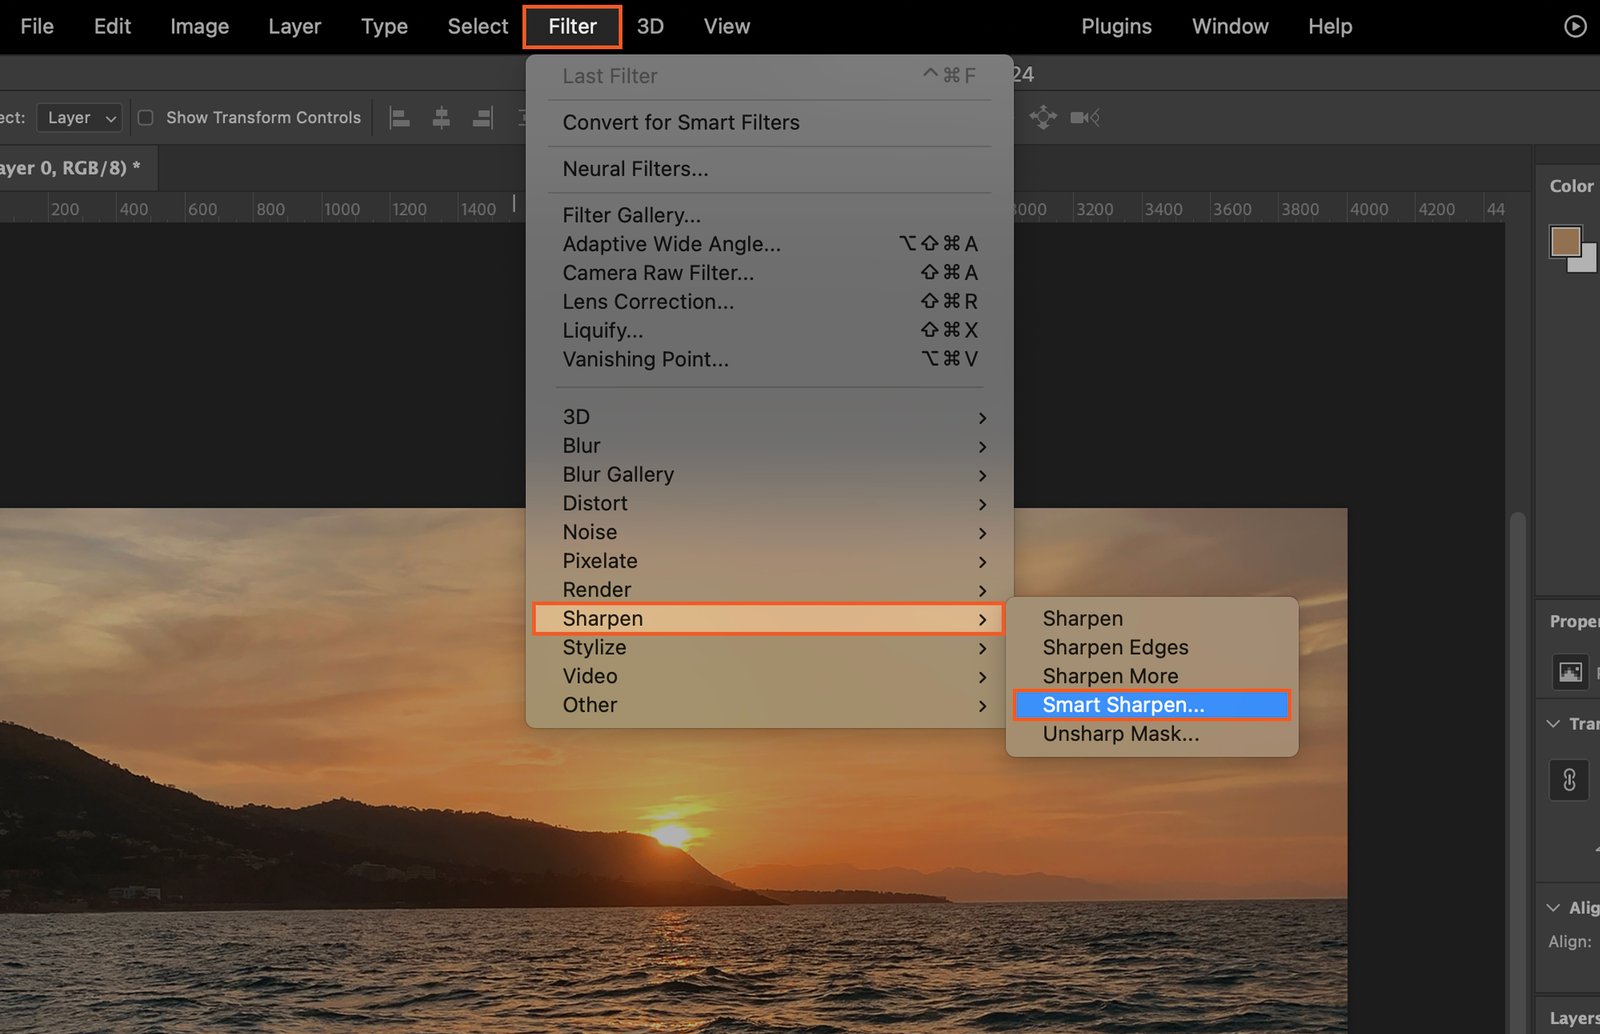
Step 6.2. Utilize Smart Sharpen
Smart Sharpen allows more control over where the image is sharpened. Find it at ‘Filter’ > ‘Sharpen’ > ‘Smart Sharpen’. Use this for specific areas of your image.
Step 7. Reduce Image Noise
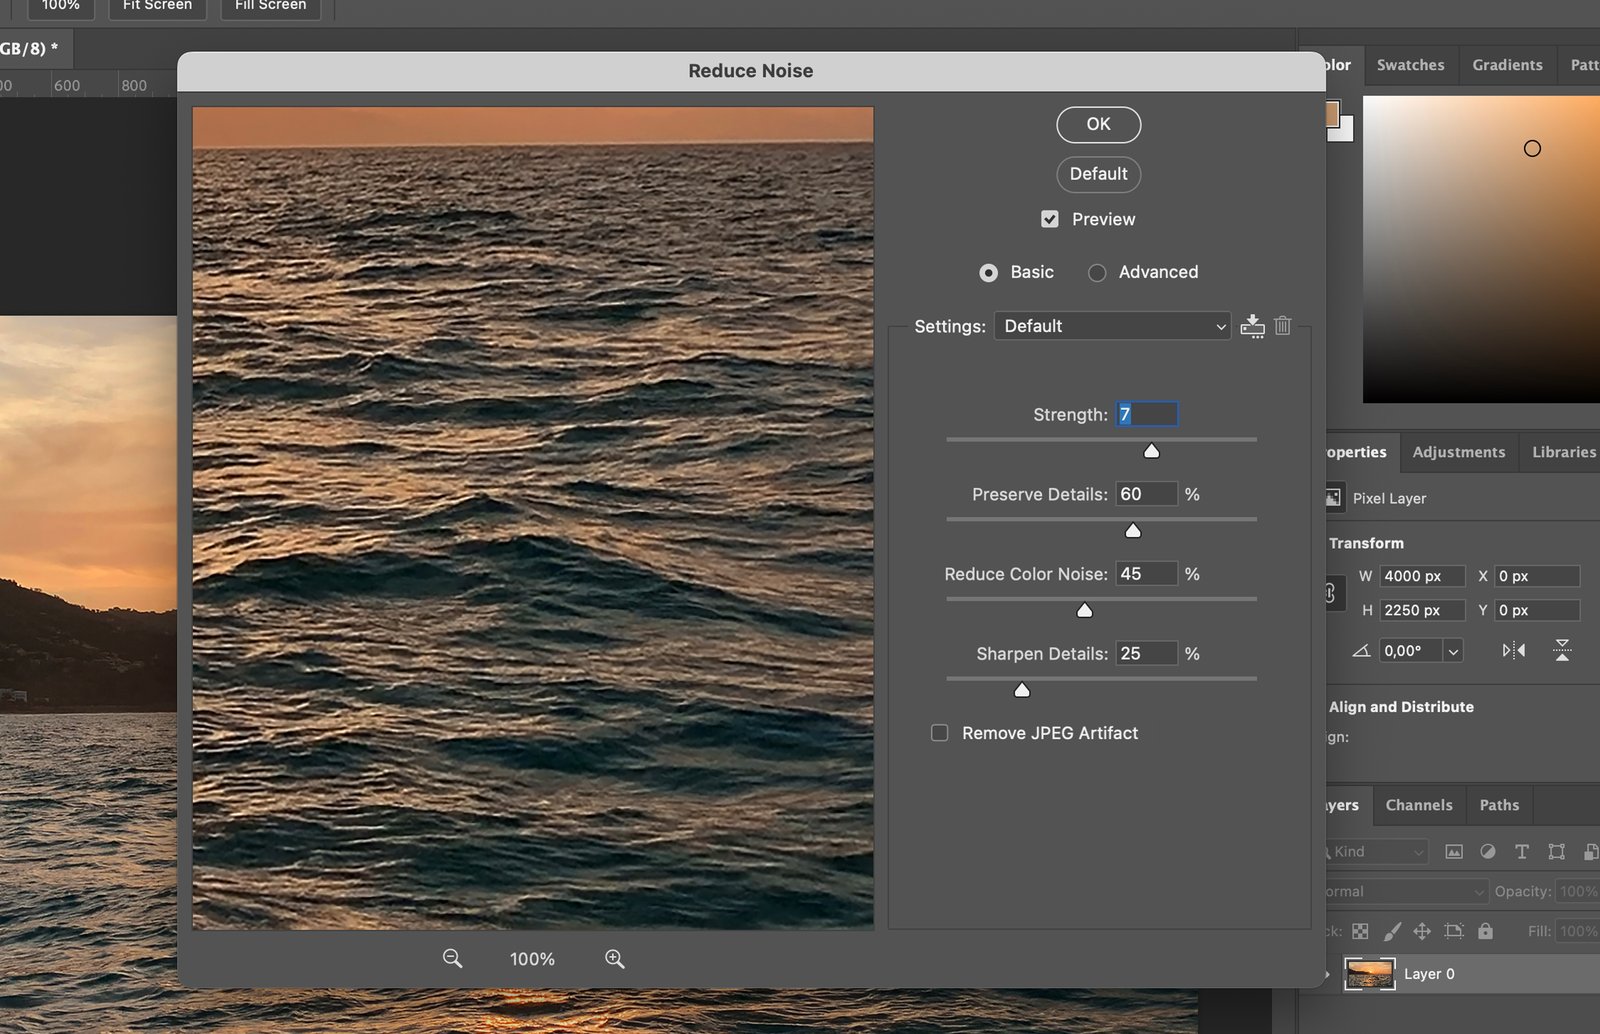
Noise appears as grain or speckles. To reduce, go to ‘Filter’ > ‘Noise’ > ‘Reduce Noise’.
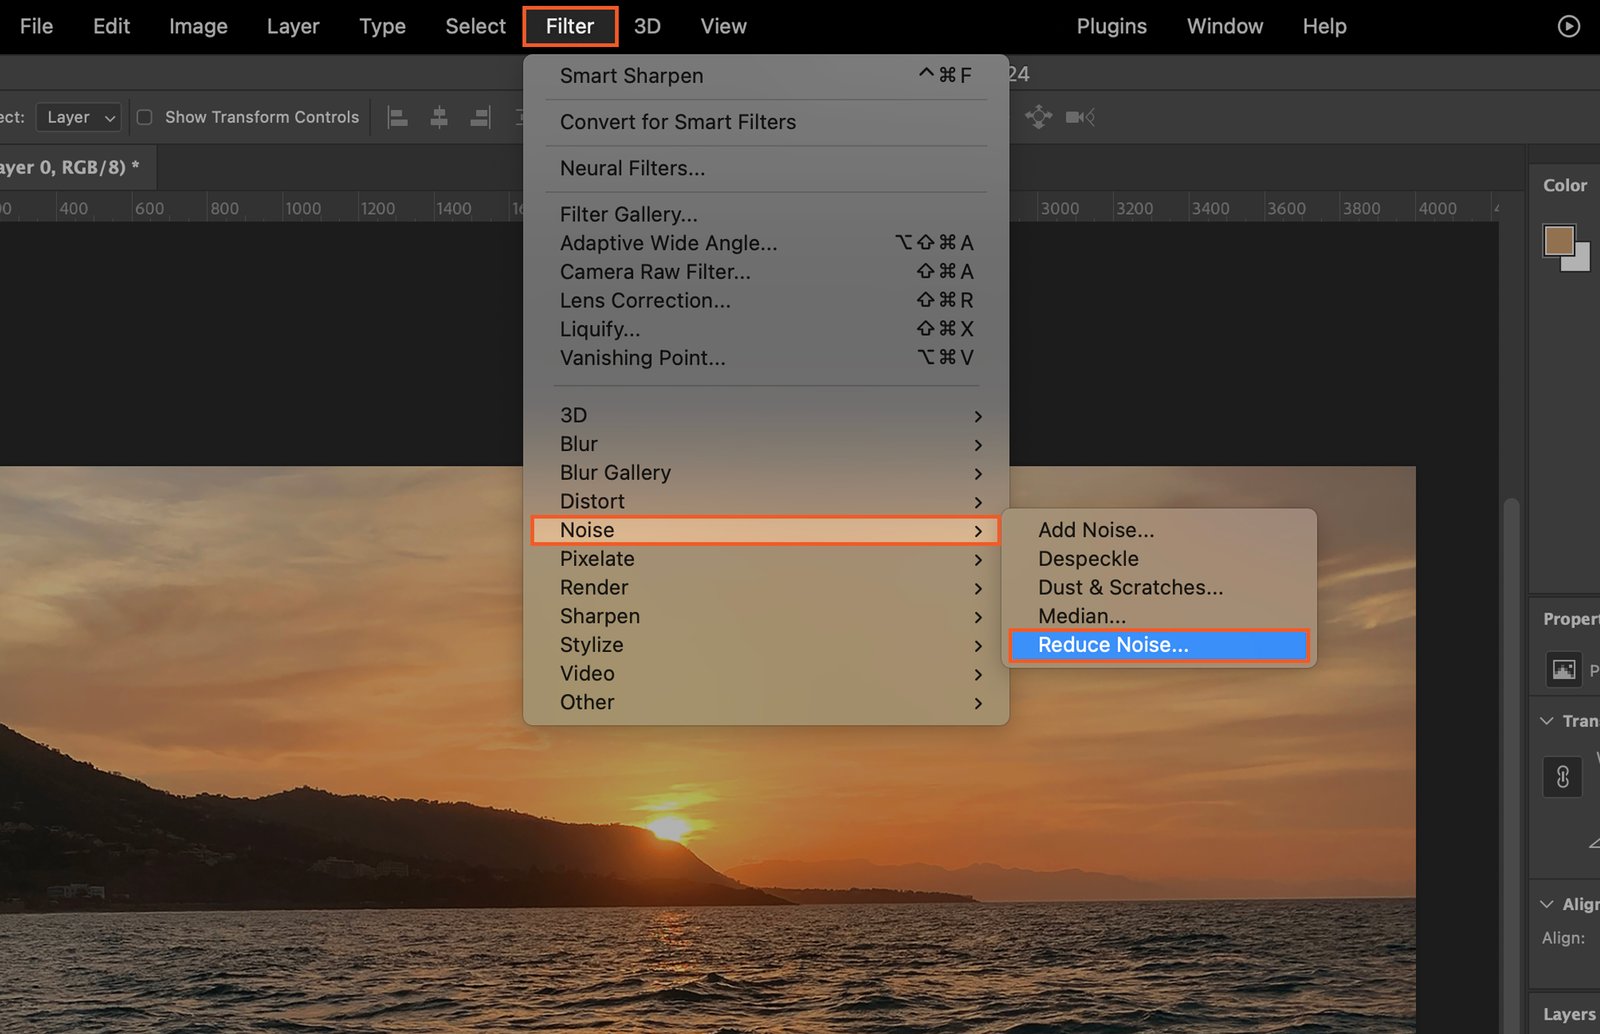
Adjust the strength and preserve details sliders to reduce noise while maintaining image quality.
Step 8. Retouch Imperfections
Imperfections can be distracting. Photoshop has several tools for retouching.
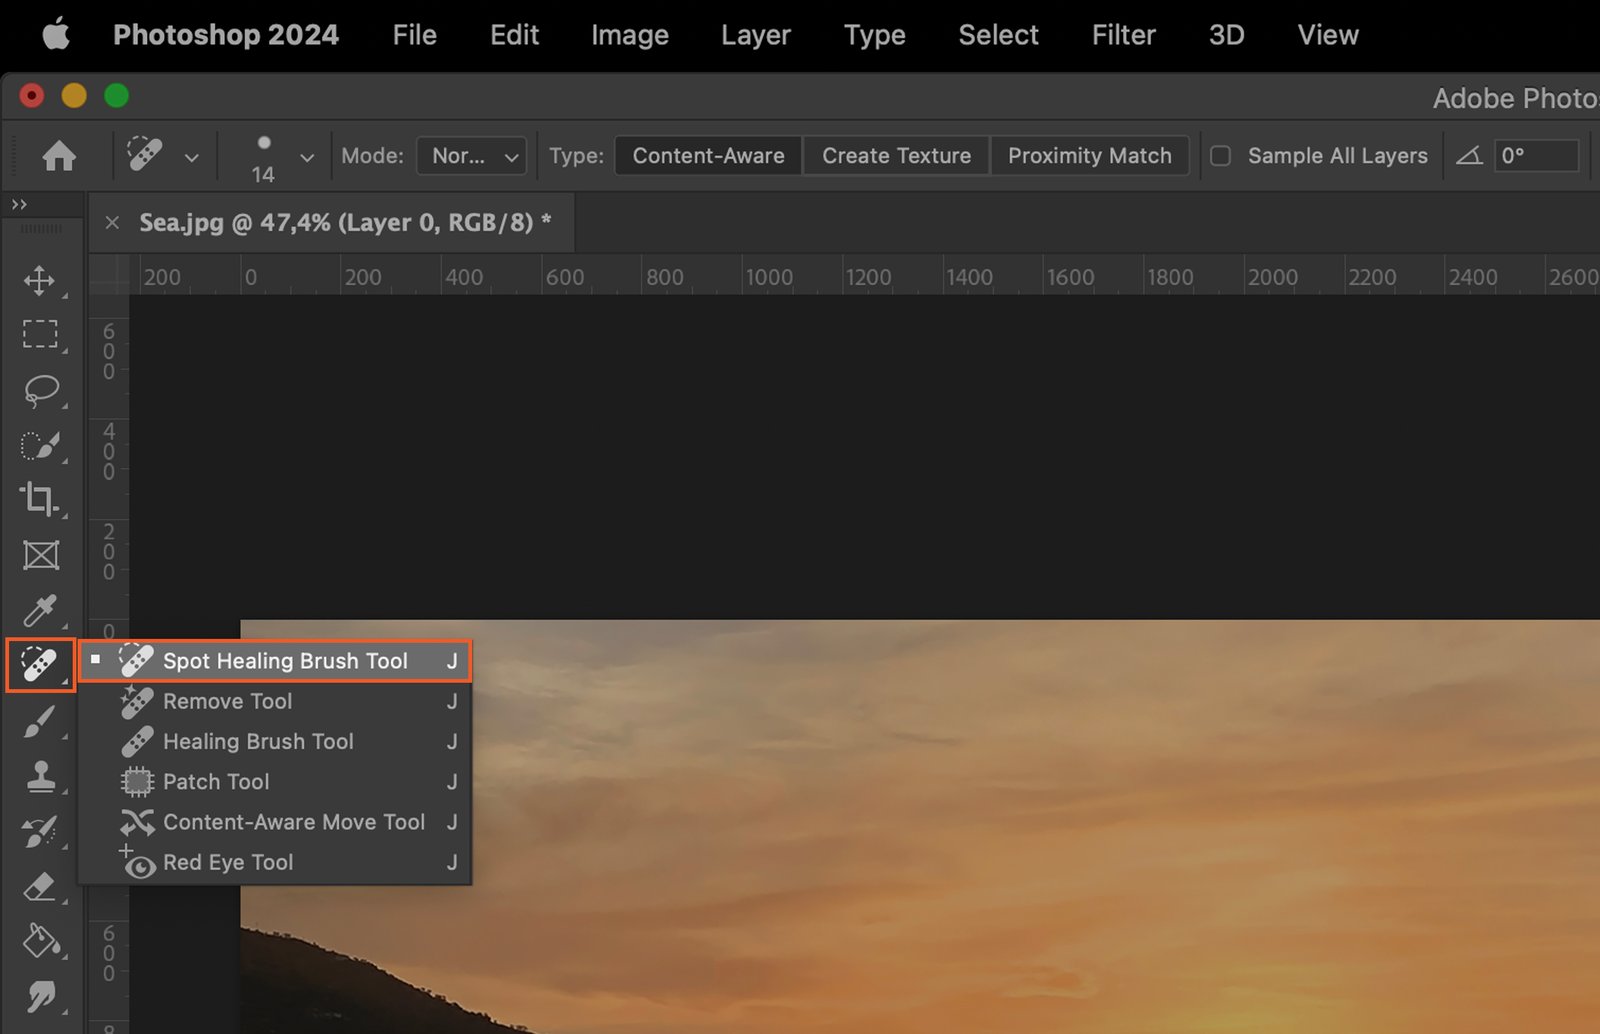
Step 8.1. Apply Spot Healing Brush
The Spot Healing Brush automatically samples pixels around the spot. This is ideal for small imperfections like dust or scratches.
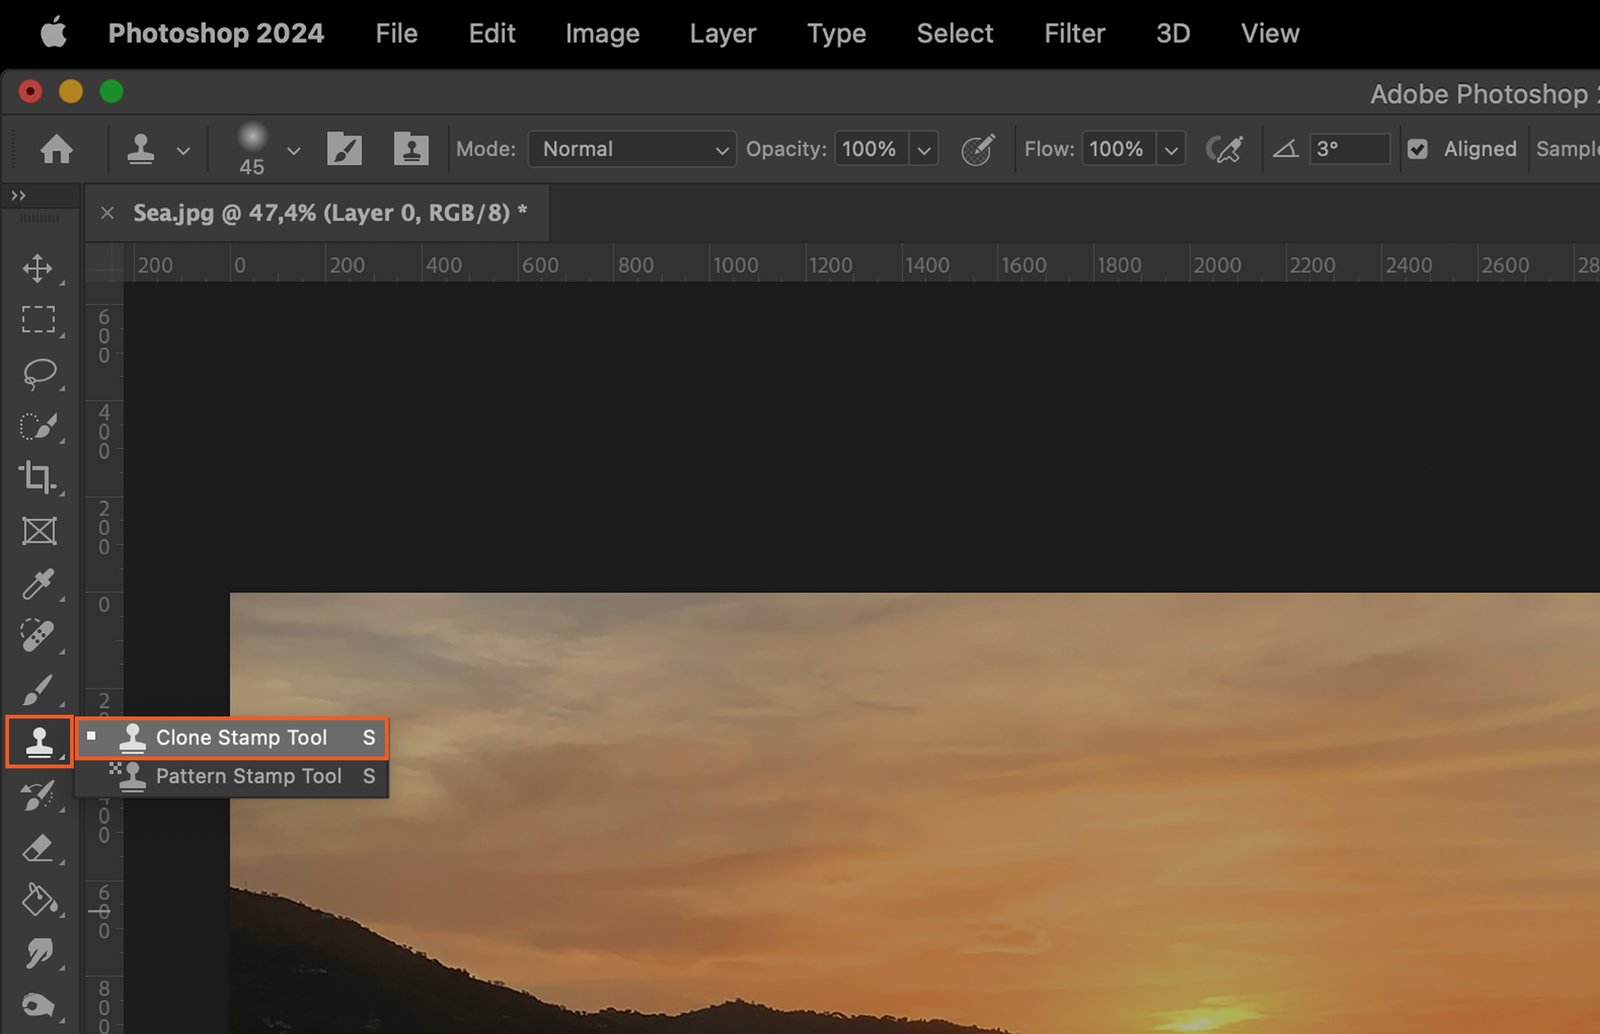
Step 8.2. Utilize Clone Stamp
The Clone Stamp duplicates one area of an image to another. This is useful for larger imperfections or repeating patterns.
Step 9. Apply Filters for Enhanced Effects
Filters can add unique effects to your image. Go to ‘Filter’ and explore the options. Each filter has customizable options for a tailored effect.
Step 10. Final Image Review and Adjustments
After all edits, review your image. Check for areas that may need further adjustments. Remember to save your work often and create a backup of the original image. Now, you’re ready to present your enhanced image.


