If you’re struggling to install Photoshop Brushes, this guide is for you. Understanding this process can unlock a world of creativity in your digital art projects, providing you with a wider range of tools to express your artistic vision.
Step 1. Downloading the Desired Photoshop Brushes
Begin by choosing the Photoshop brushes you want to add to your toolkit. Many websites offer free or paid brushes. Once you’ve selected, click on the ‘download’ button. Ensure the downloaded file is in .abr format as this is the standard Photoshop brush format.
Step 2. Extracting the Downloaded File
Some brush files may come in a zipped or compressed format. Use software like WinRAR or 7-zip to extract the files. Right-click the downloaded file and select ‘Extract Here’ or ‘Extract to [filename]’.
Step 3. Launching Adobe Photoshop
Open Adobe Photoshop on your computer. If you haven’t installed it yet, download it from Adobe’s official website, install and then launch it.
Step 4. Accessing the Brush Tool
Step 4.1 Using the Toolbar
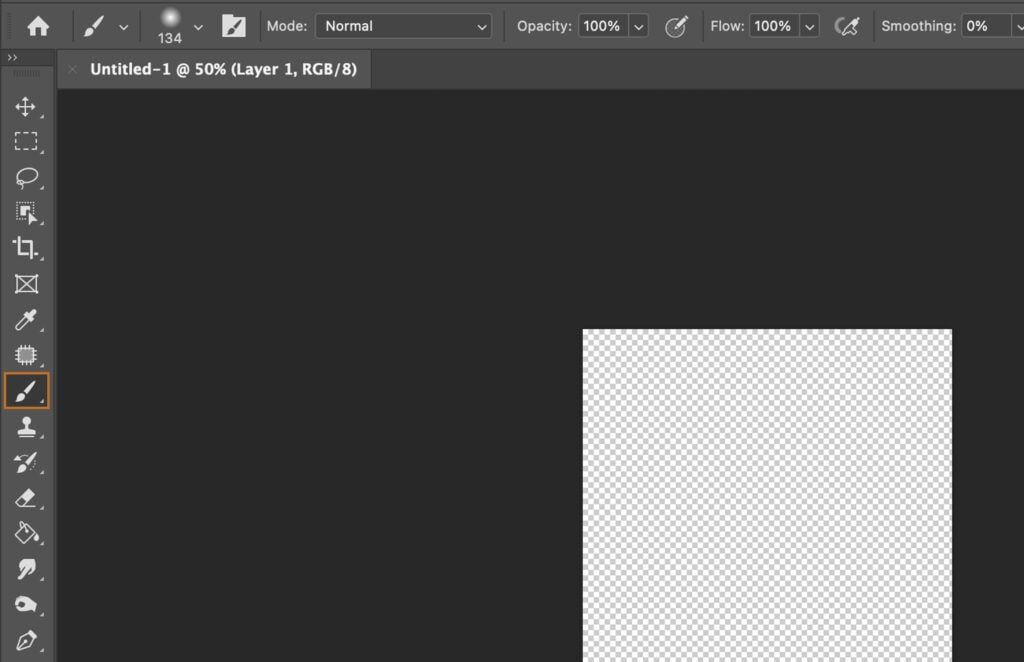
On the left-hand side of your Photoshop interface, find and click on the brush icon to select the Brush Tool.
Step 4.2 Using the Shortcut Key
Alternatively, press the ‘B’ key on your keyboard for a quick shortcut to the Brush Tool.
Step 5. Opening the Brush Presets
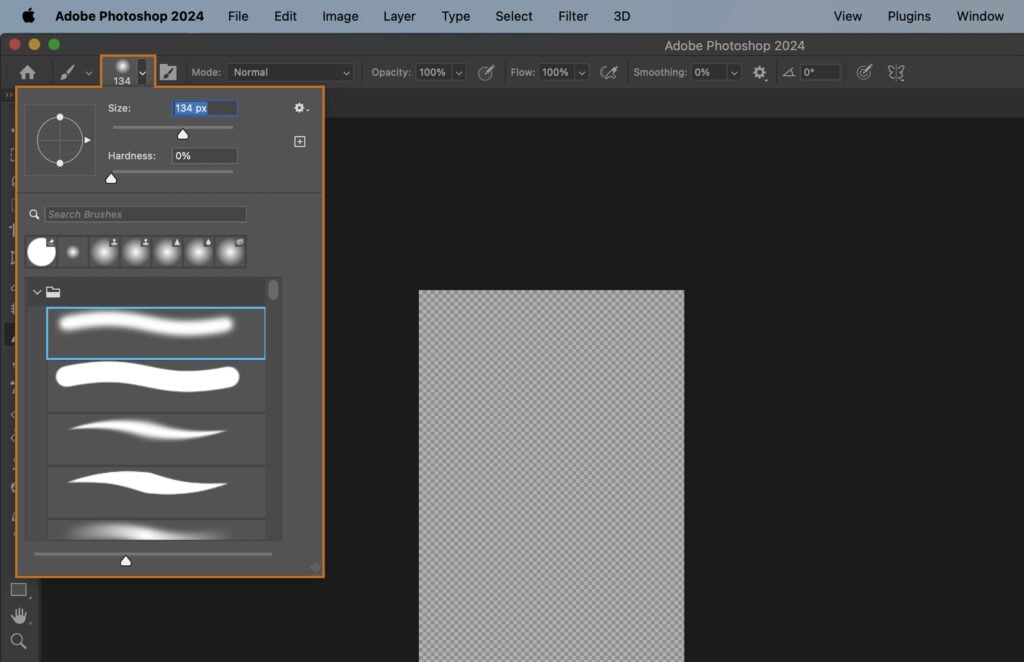
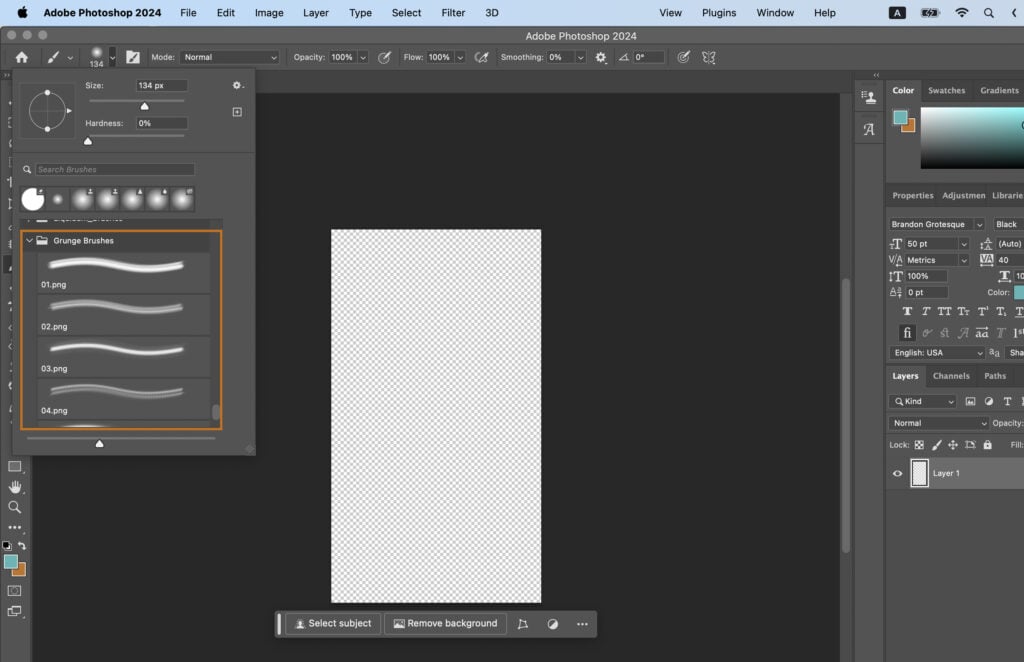
Go to the option bar at the top of the screen, click on the downward arrow next to the brush sample. This will open the Brush Presets dropdown menu.
Step 6. Loading the New Brushes
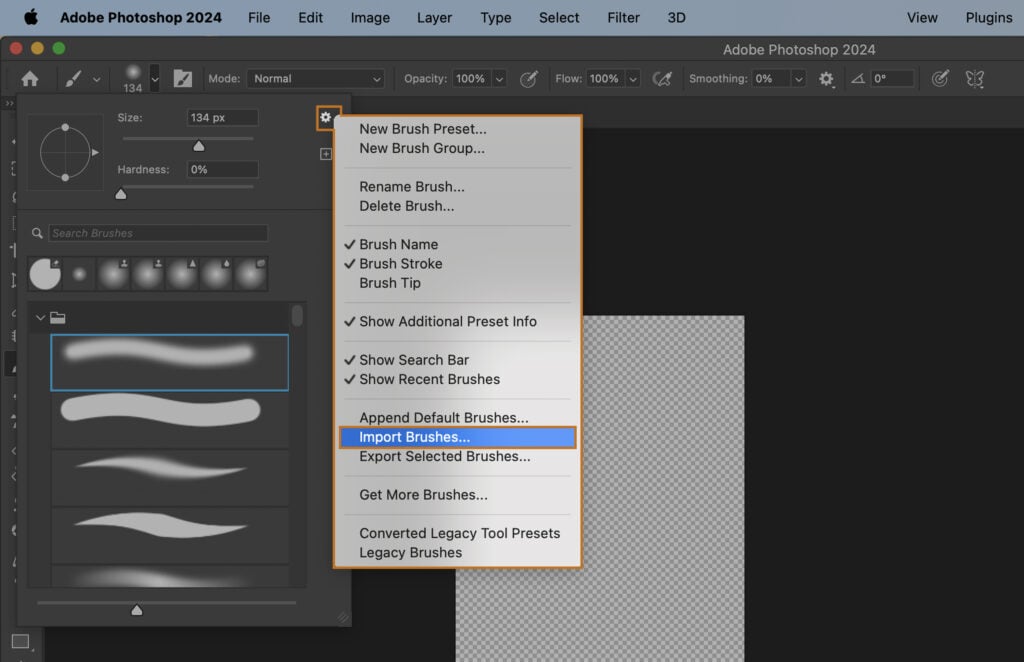
In the Brush Presets dropdown, click on the gear icon on the top right corner, then select 'Import Brushes'. Navigate to the location of your .abr file, select it, and click ‘Load’.
Step 7. Selecting and Using the Newly Installed Brushes
Step 7.1 Using the Brush Presets Panel
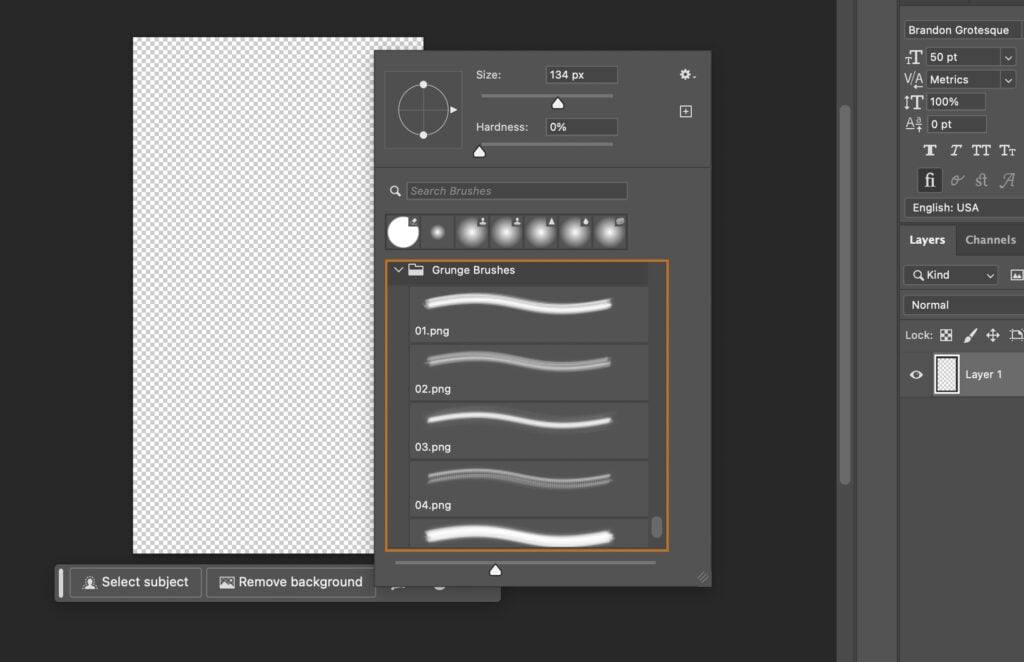
Your new brushes should now be available at the bottom of your Brush Presets. Click on any brush to select and use it.
Step 7.2 Using the Options Bar
You can also select the new brush directly from the Options Bar. Click on the downward arrow next to the brush sample and scroll down to your new brushes.
Step 8. Saving Your Work
After using your new brushes, remember to save your work. Go to ‘File’ > ‘Save’ or use the shortcut ‘Ctrl+S’ on Windows or ‘Command+S’ on Mac. Choose your desired location and file format, then click ‘Save’.
