Isolating colors in Photoshop can be a challenge for many users. This article simplifies the process, guiding you through the steps to achieve stunning, color-focused images. Mastering this technique can significantly enhance your digital artistry.
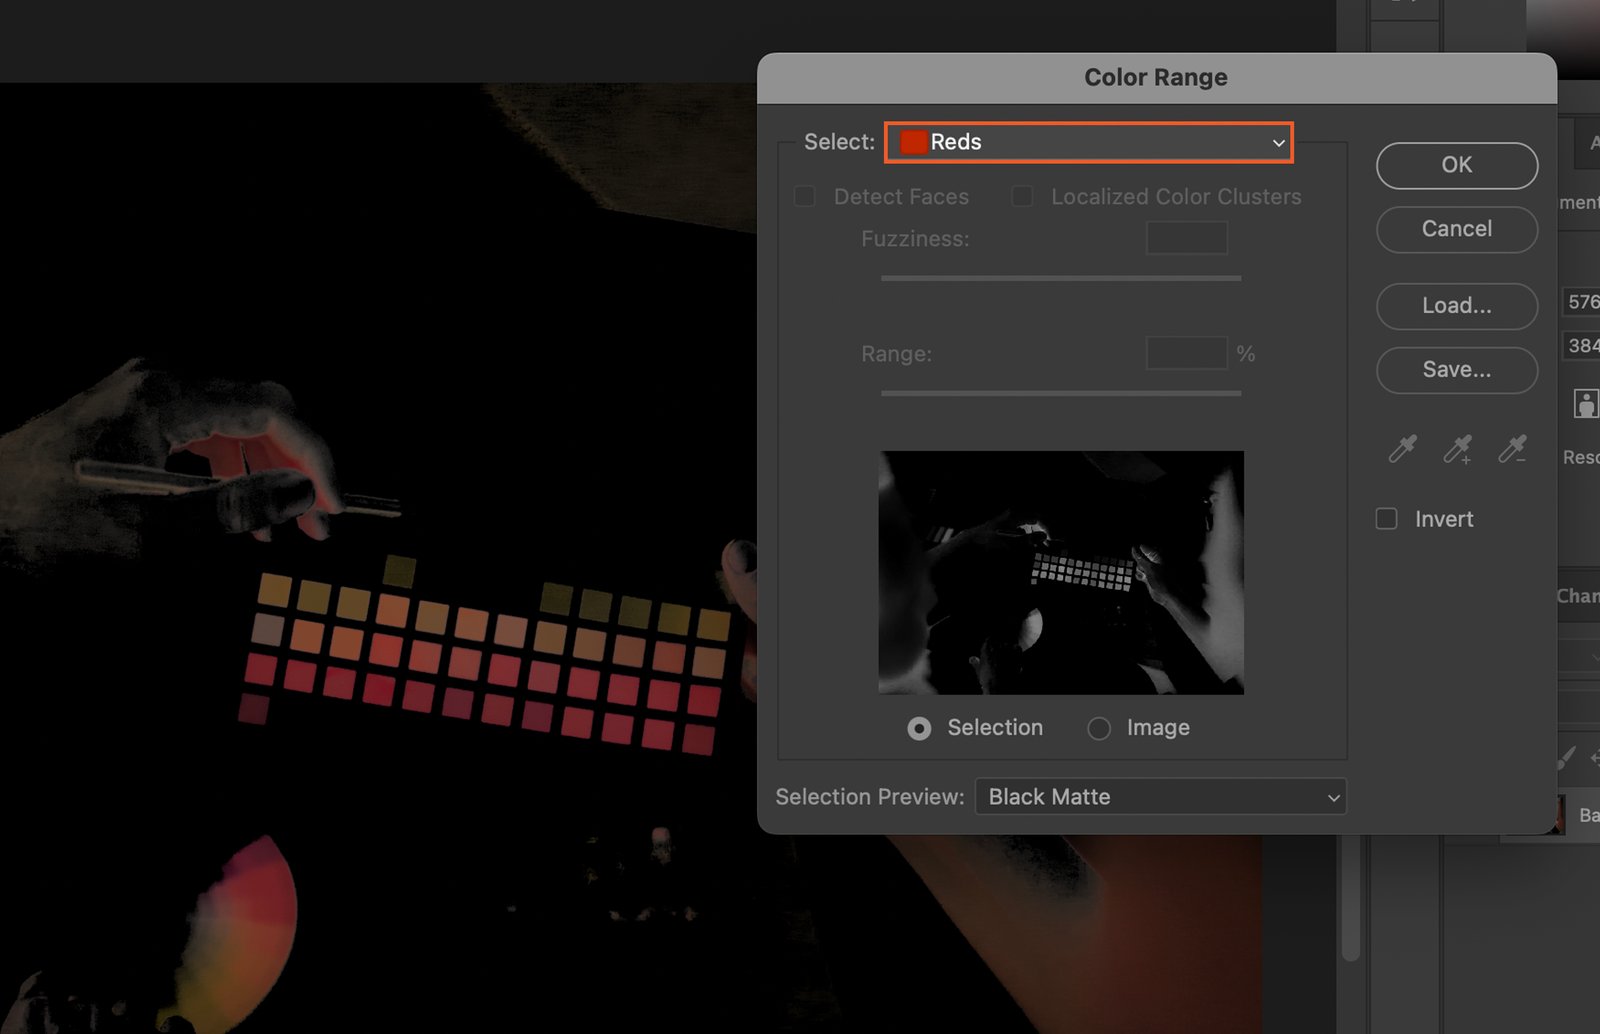
Step 1. Choose the Color Range Function
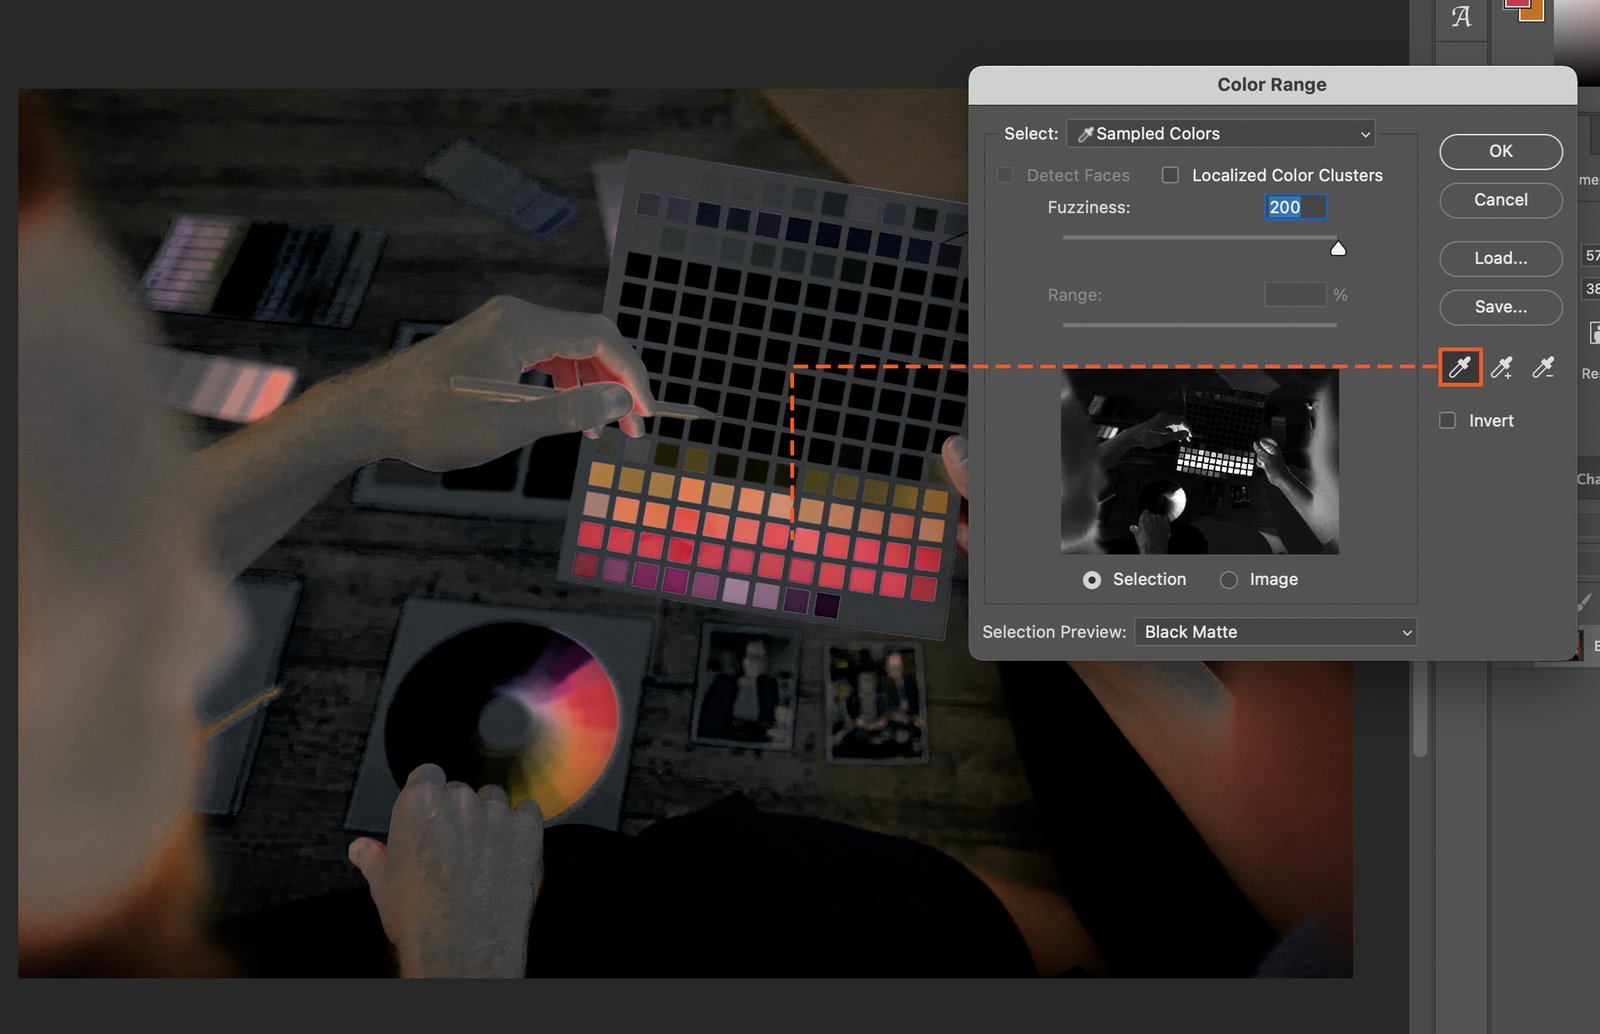
Start by opening the image in Photoshop. Navigate to the “Select” menu at the top of the screen and click on “Color Range”. This function allows you to target a specific color within your image.

Step 2. Select the Desired Color
Now, it’s time to choose the color you want to isolate.
Step 2.1 Using the Eyedropper Tool
In the Color Range window, click on the Eyedropper tool. Then click on the area of the image that has the color you want to isolate. This will select all pixels of this color in the image.
Step 2.2 Using the Color Picker
Alternatively, you can use the Color Picker for more precise selection. Click on the Color Picker button in the Color Range window, then select your desired color from the color spectrum that appears.
Step 3. Adjust the Fuzziness Slider
The Fuzziness slider determines the range of colors selected. A lower value selects colors very close to your chosen color, while a higher value selects a broader range of similar colors. Adjust this according to your needs.