Creating a transparent background in Photoshop can enhance your image’s versatility for various design projects. This article provides a step-by-step guide to help you achieve this, making your images adaptable and improving their overall appearance.
Step 1. Choose the Right Selection Tool
The selection tool you choose depends on the complexity of your image. Photoshop provides a variety of tools to cater to different situations.
Step 1.1 Use the Remove background feature
Click the “Remove background” button at the bottom of the image, this will automatically remove the background and creates a layer mask.
You can use the automatically created Layer Mask to refine the mask.
Step 1.2 Use the Select subject button
Click the Select Subject button and Photoshop will automatically select your subject with just one click.
Step 1.3 Use the Quick Selection Tool
For more complex images, the Quick Selection Tool is a better choice. It allows you to make selections by simply painting over the area you want to select.
Step 2. Make the Selection
After choosing the right tool, click and drag over the area you want to select. The selected area will be surrounded by a moving dashed line, often called “marching ants.”
Step 3. Refine the Edges of the Selection
Once you’ve made your selection, you might find some rough edges. Click on ‘Select and Mask’ in the options bar to fine-tune your selection.
Step 4. Delete the Background
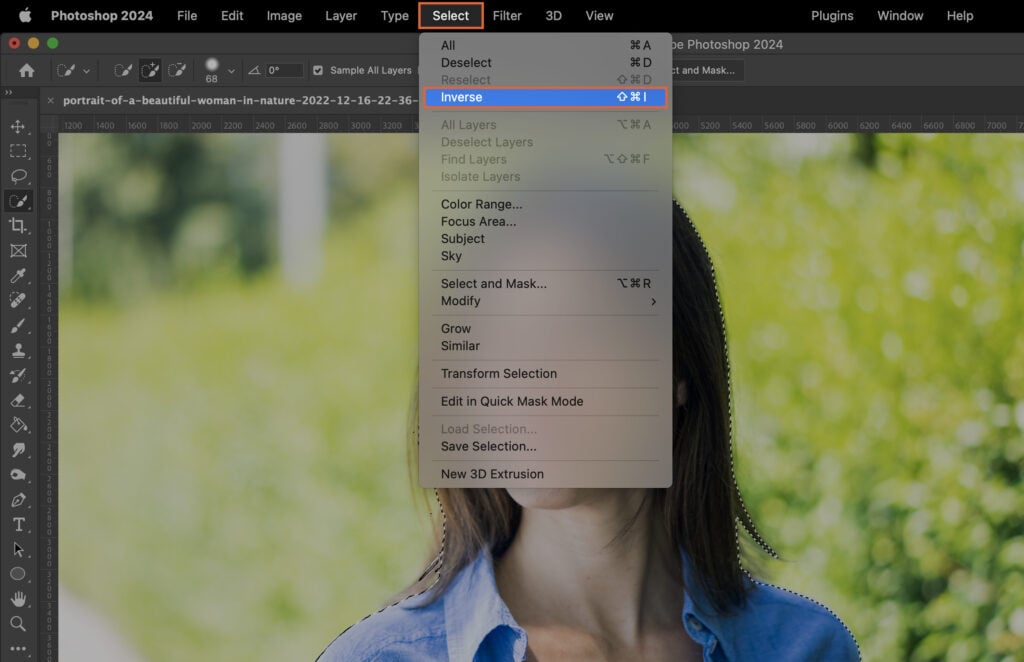
Invert the selection by going to Select > Inverse. Unlock your layer by clicking on the little lock icon.
With the selection still active, hit the ‘Delete’ key. The selected background will be removed, leaving a checkerboard pattern that represents transparency.
Step 5. Deselect the Image
To deselect the image, go to ‘Select’ in the menu bar and click on ‘Deselect’. Alternatively, you can press ‘Ctrl+D’ on your keyboard.
Step 9. Save the Image as a PNG
To save your image with a transparent background, go to ‘File’ > ‘Save As’, choose PNG from the format list, and click ‘Save’.
Step 10. Check the Transparency of the Background
Finally, open your saved image to check the transparency of the background. If done correctly, it should appear as a checkerboard pattern in Photoshop.


