Struggling to remove color in Photoshop? This article guides you through a step-by-step process using the Hue & Saturation adjustment layer, helping you achieve professional results and enhance your digital creations.
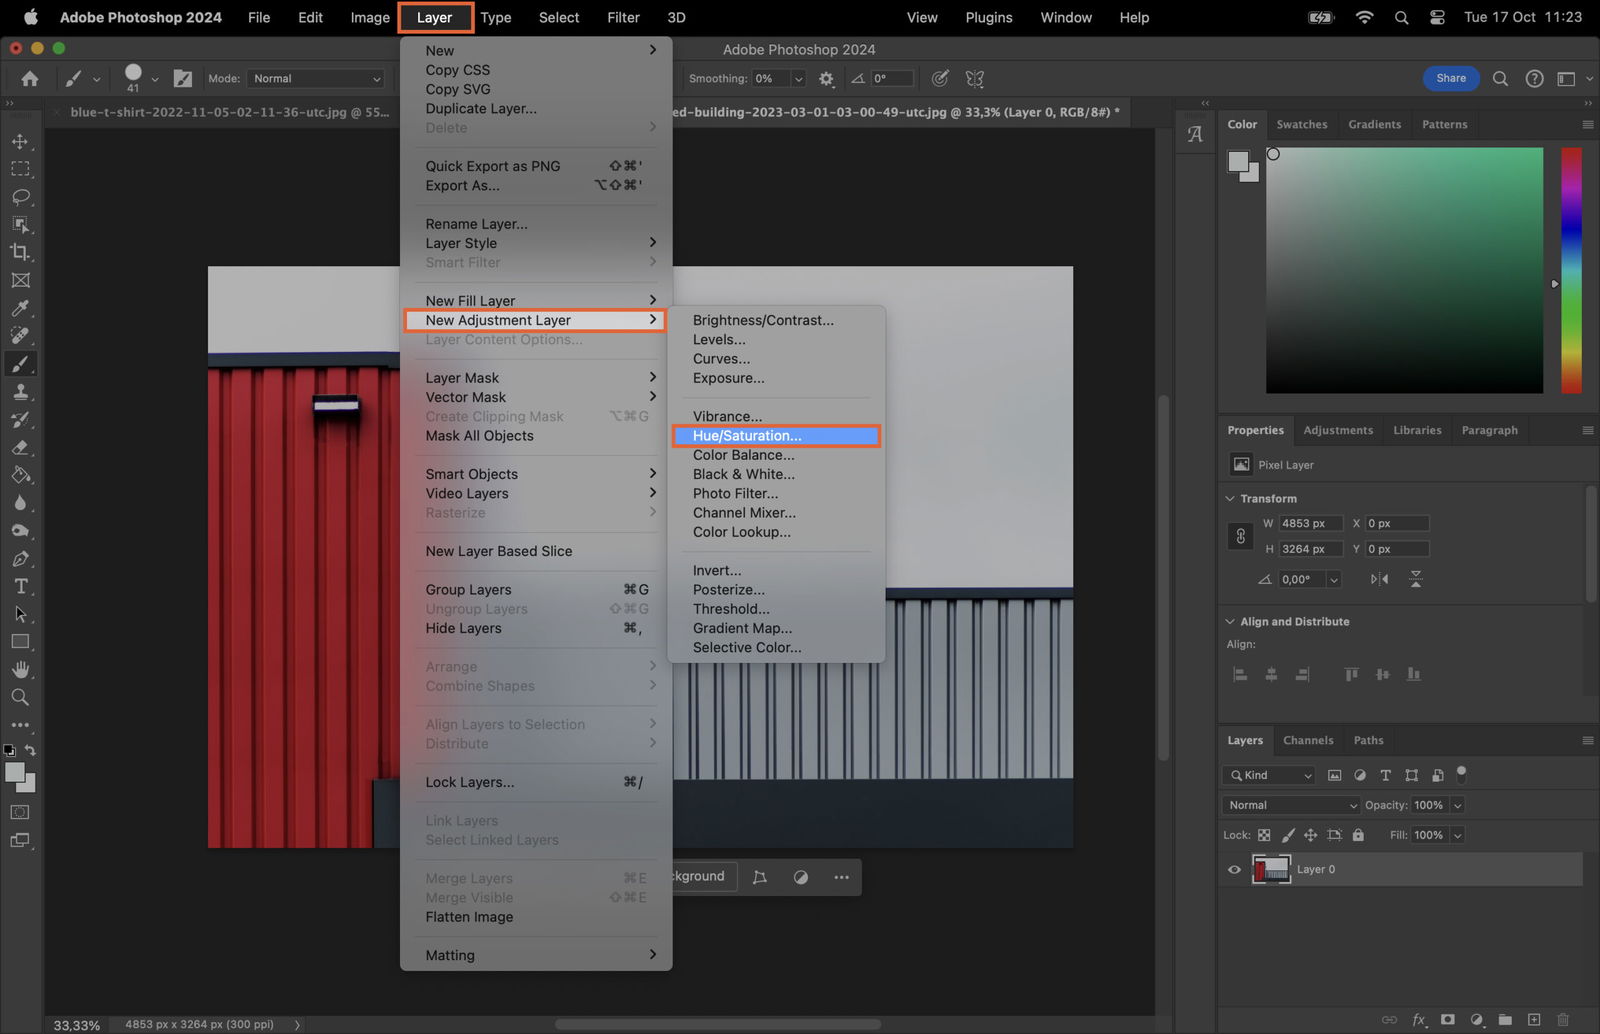
Launch Photoshop and open the image you wish to edit. Navigate to the “Layer” menu. Select “New Adjustment Layer” and then choose “Hue/Saturation”.
In the Hue/Saturation dialog that appears, click on the hand icon. Use the hand tool to click on the specific color in your image that you want to remove.
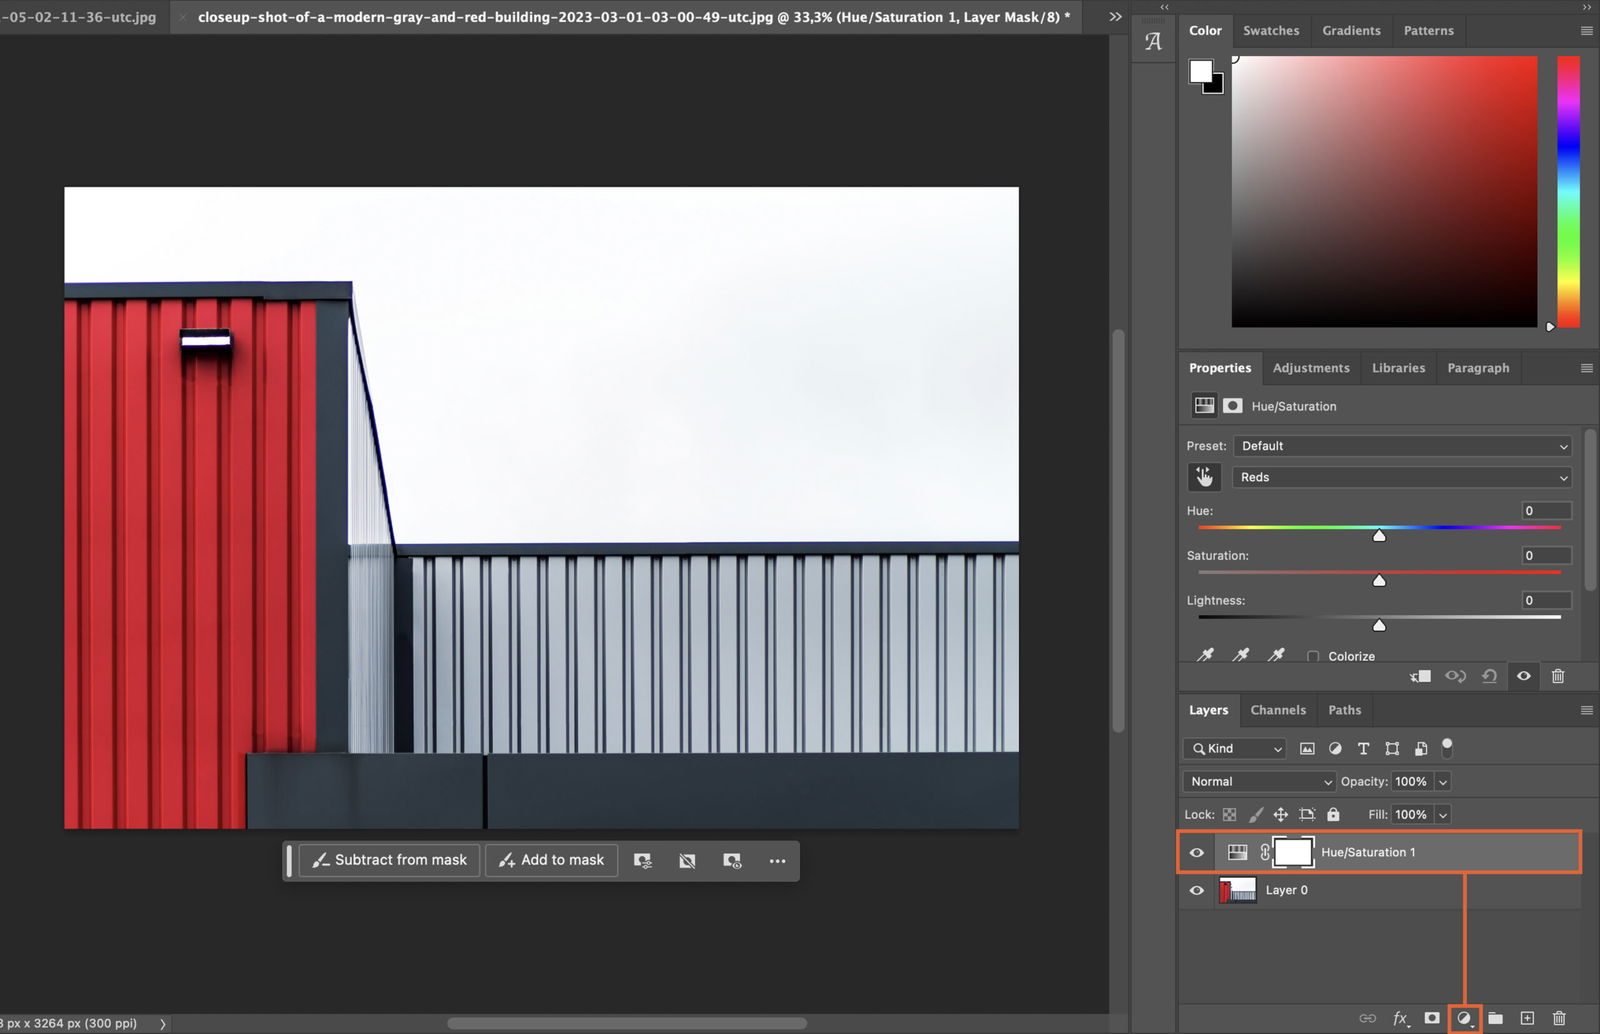
After selecting the color, adjust the “Saturation” slider to the left to lower its intensity. Continue lowering the saturation until the color is effectively removed from your image.


