Struggling to remove hair in Photoshop? This article guides you through a simple step-by-step process, enabling you to achieve professional results. Mastering this technique will elevate your photo-editing skills and enhance your digital creations.
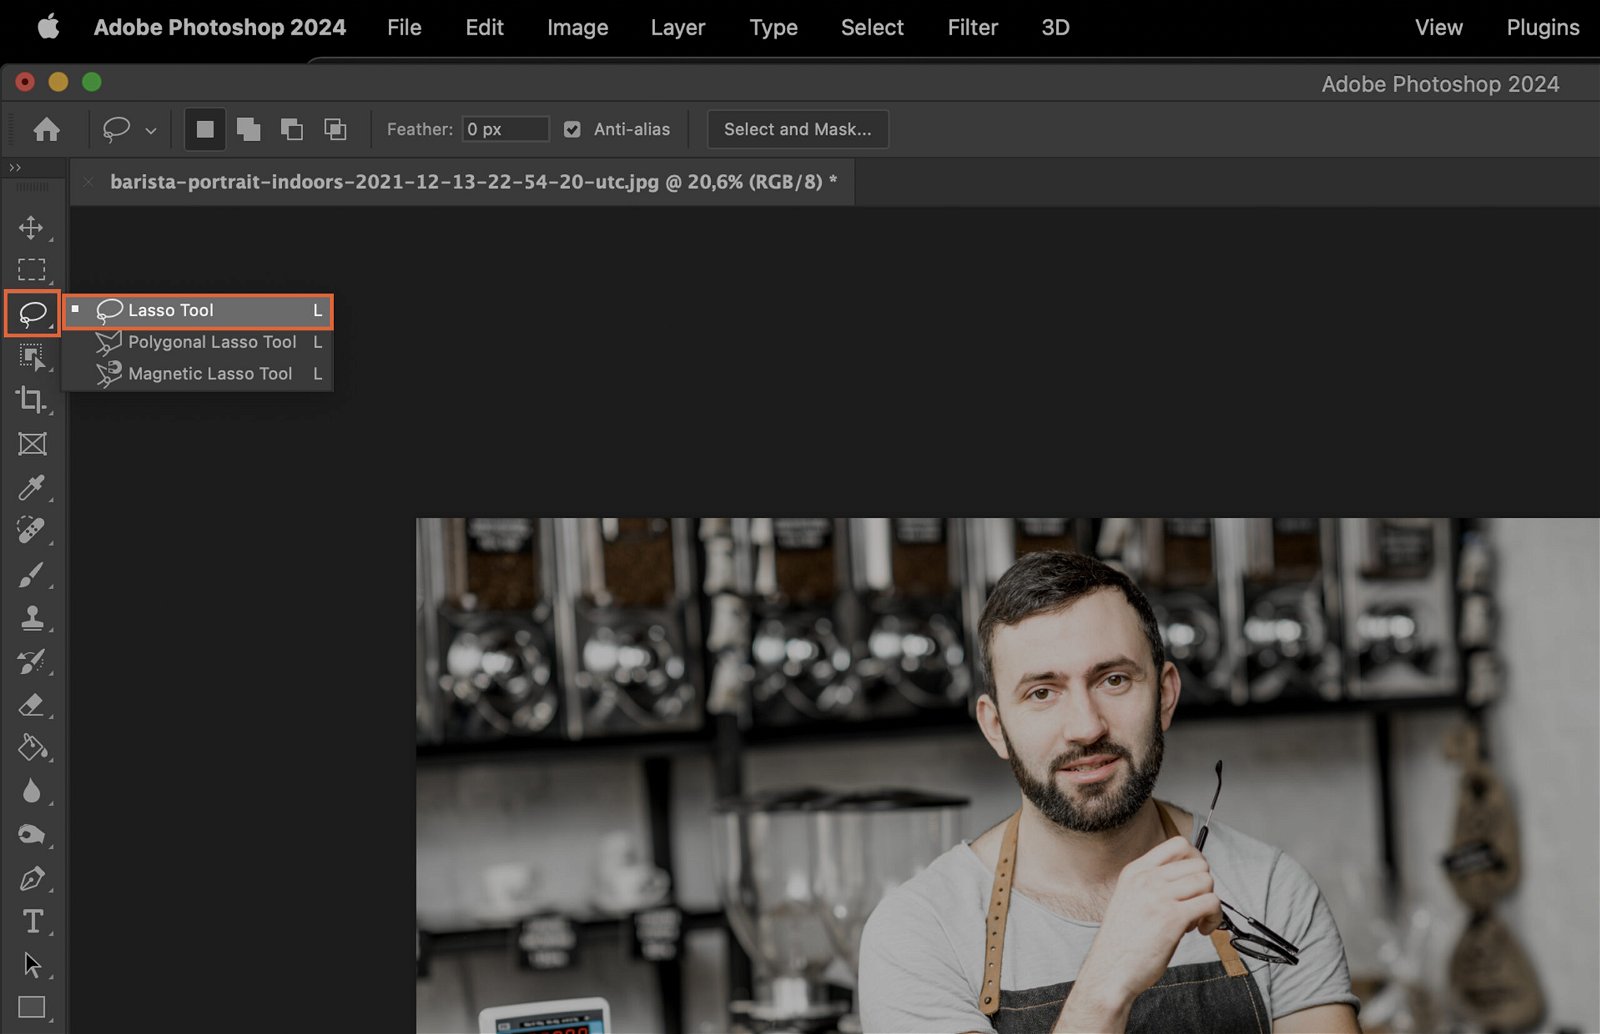
Step 1. Choose the Right Tool
Photoshop provides various tools for different tasks. When removing hair using Generative Fill, we’ll start by selecting the hair with the Lasso Tool.
Step 2. Select the Hair Area
Now, with the Lasso Tool selected, outline the hair area you want to remove. Don’t worry about precision at this stage; a rough outline will suffice.
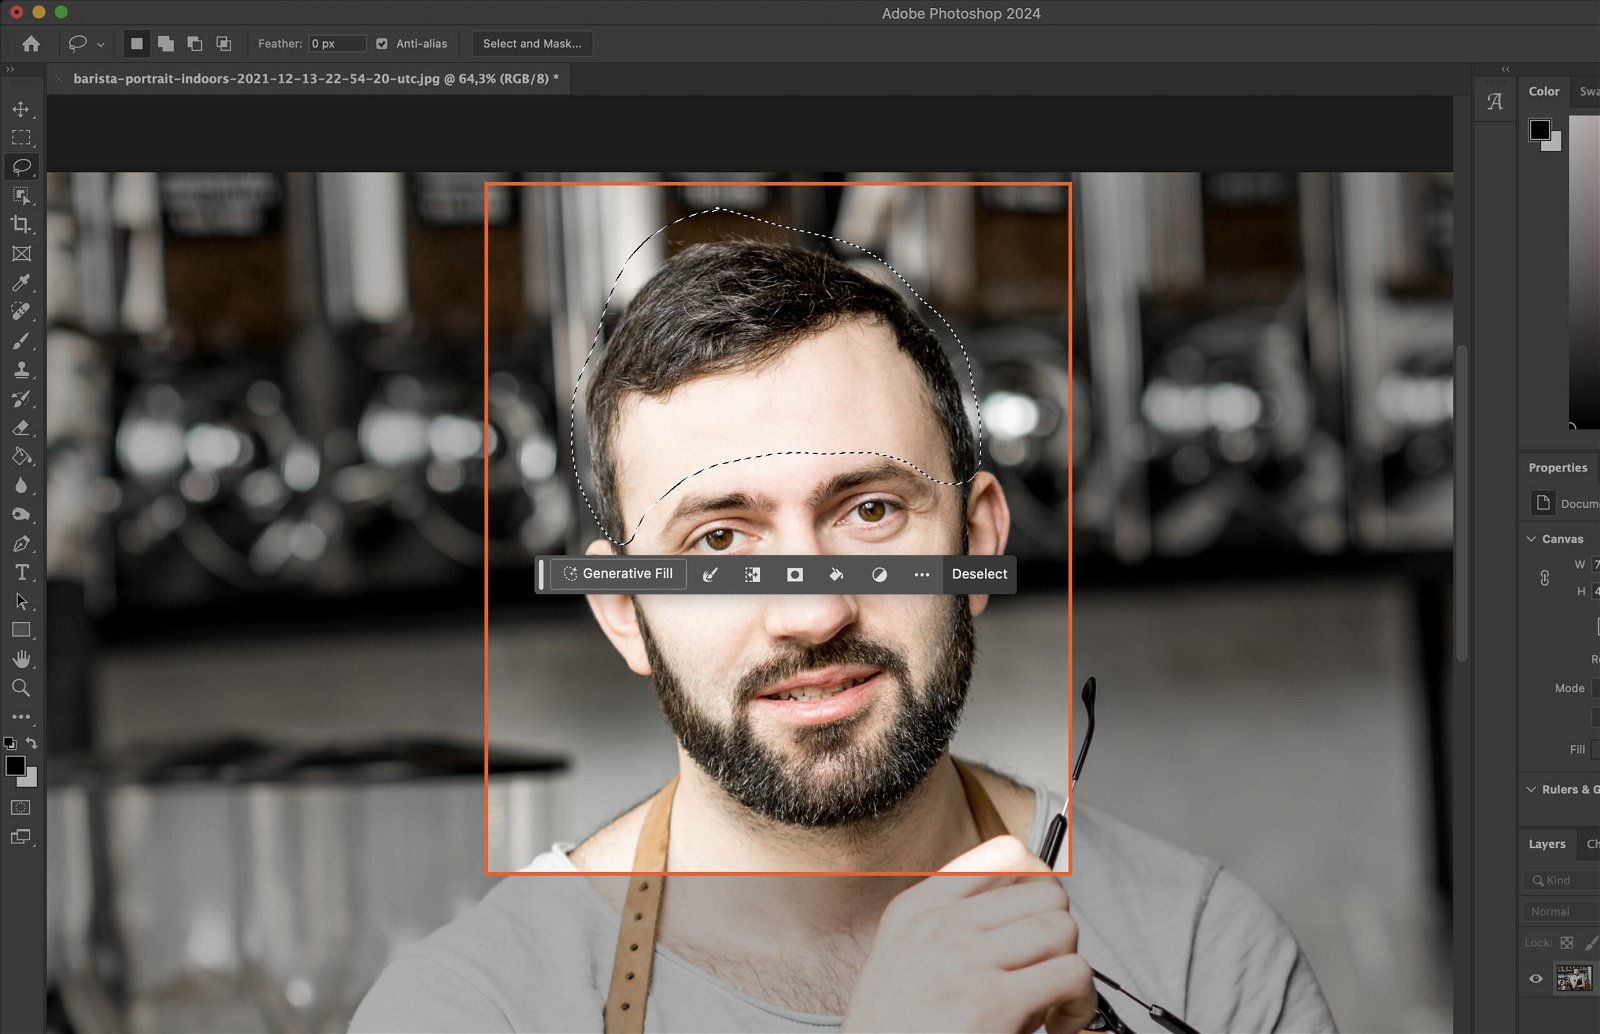
Step 3. Applying Generative Fill
Here’s where Generative Fill comes into play:
With the hair area selected, click on “Generative Fill.”

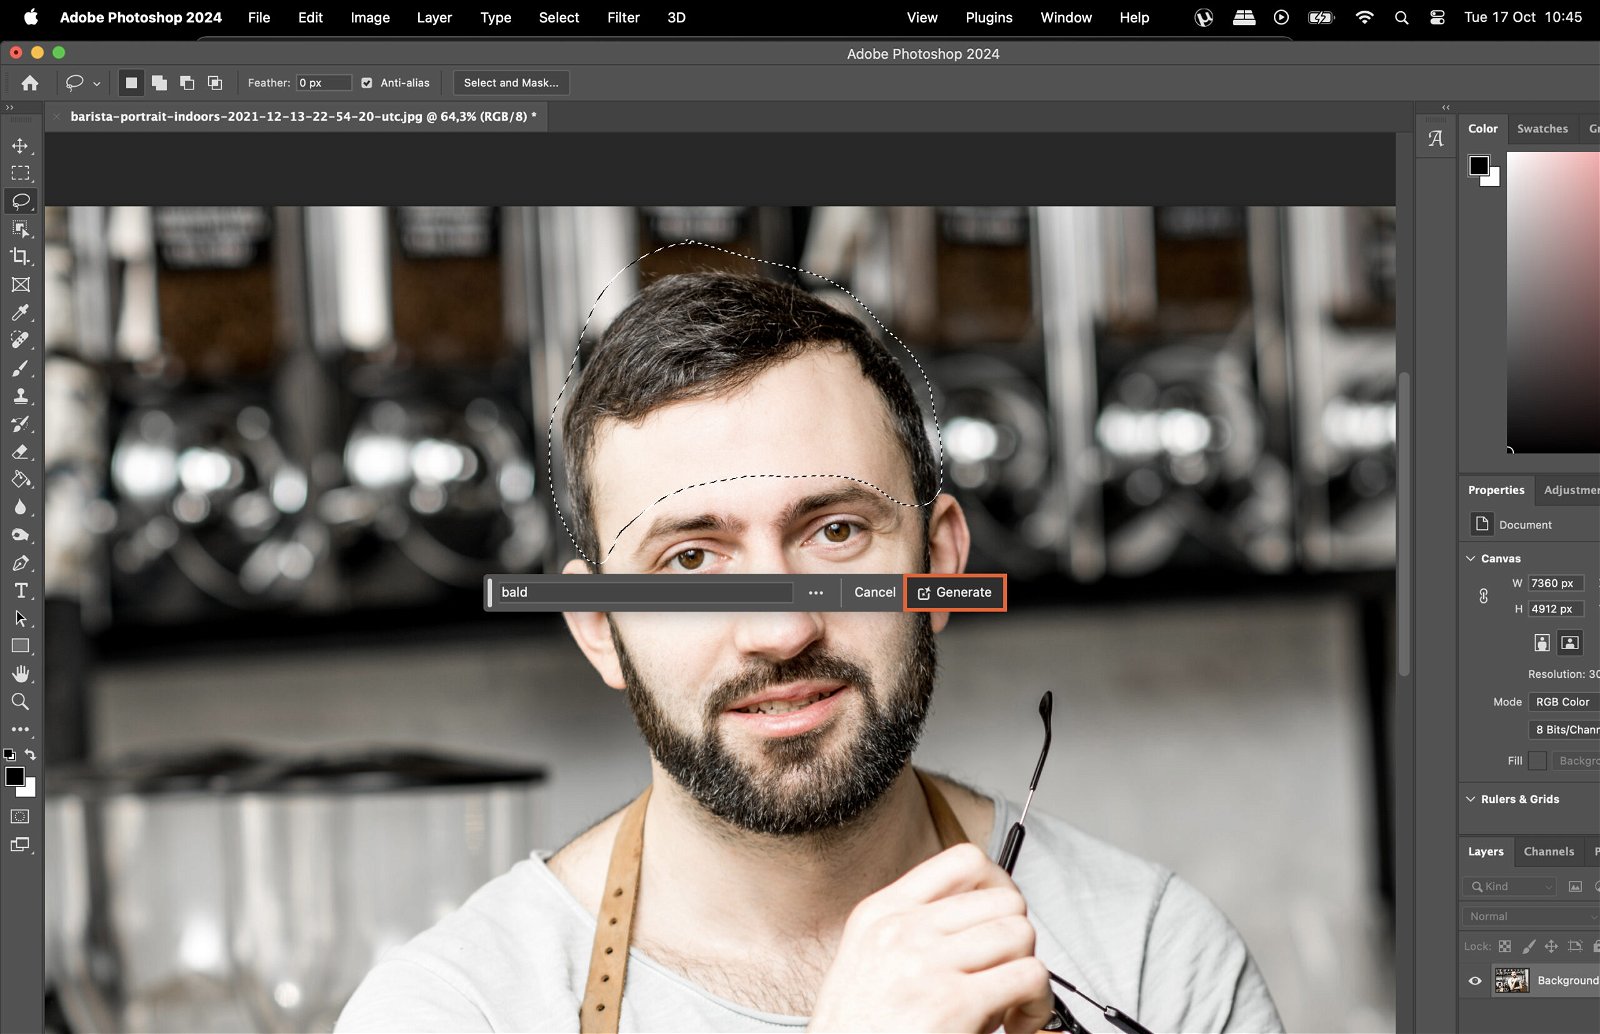
In the field labeled “What would you like to Generate? (Optional),” type “bald.”

Initiate the Generative Fill process.
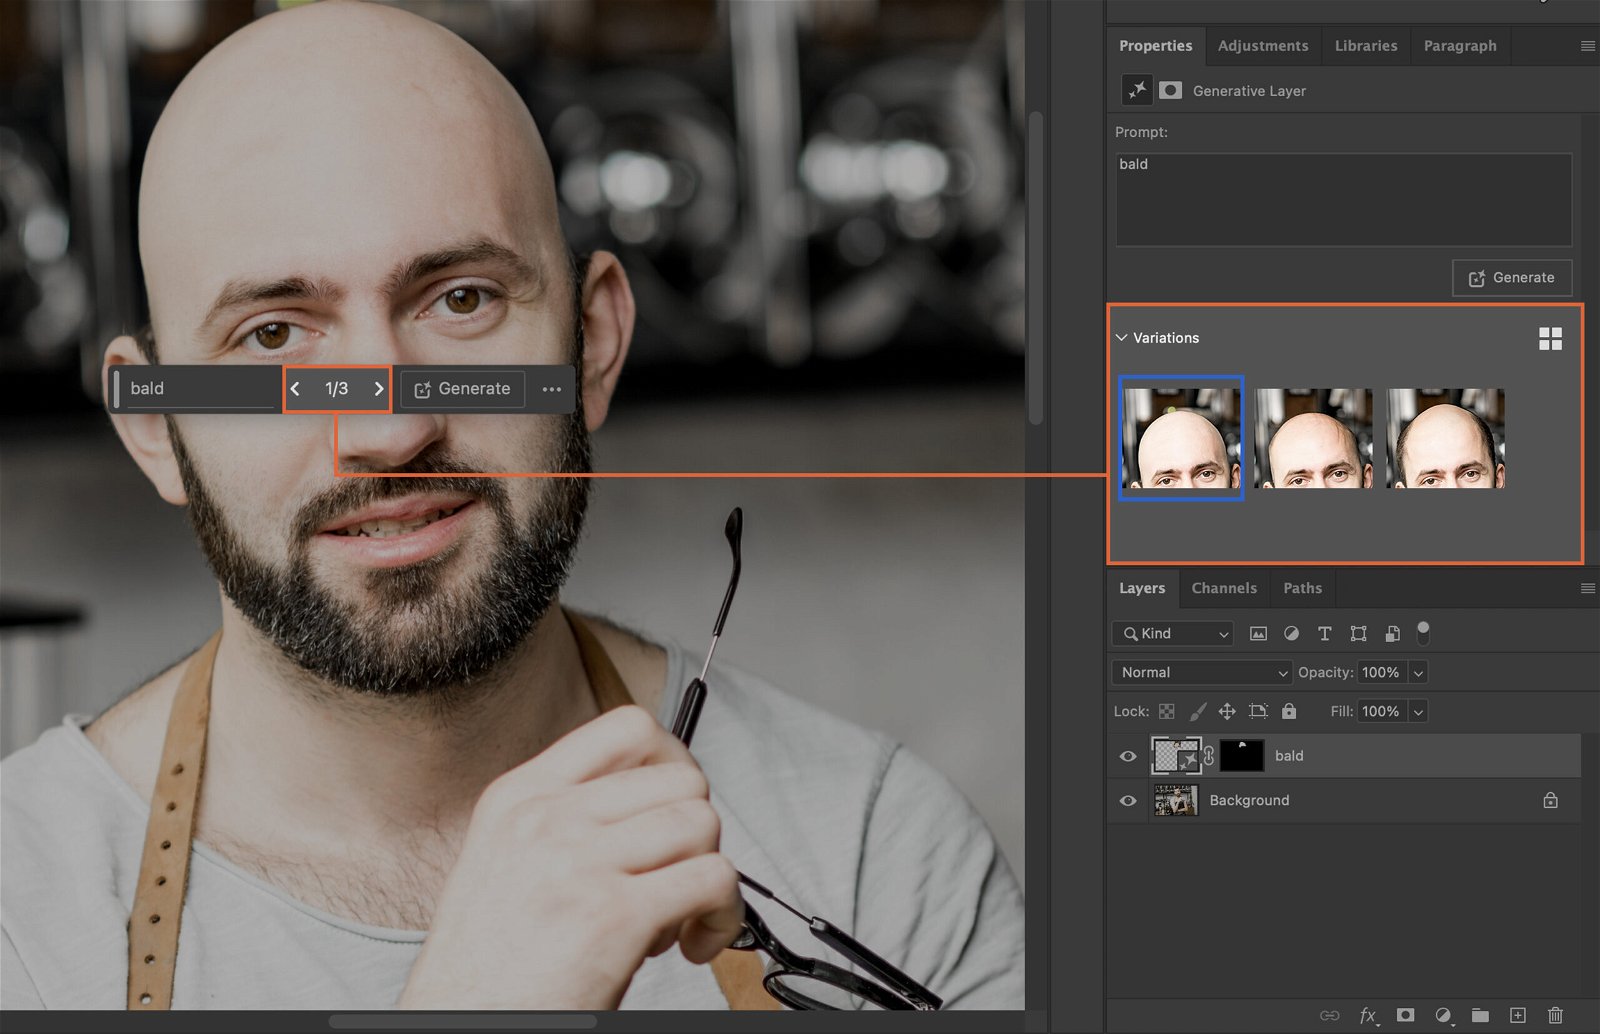
Step 4. Choose the Best Result
After the Generative Fill has done its magic, you’ll typically be presented with multiple variations. Your final step is to select the most suitable result from these variations, ensuring a seamless hair removal in your image.