Struggling with color replacement in your digital images? This article guides you through the process of how to replace color in Photoshop, enabling you to breathe new life into your images and achieve the aesthetic you desire.
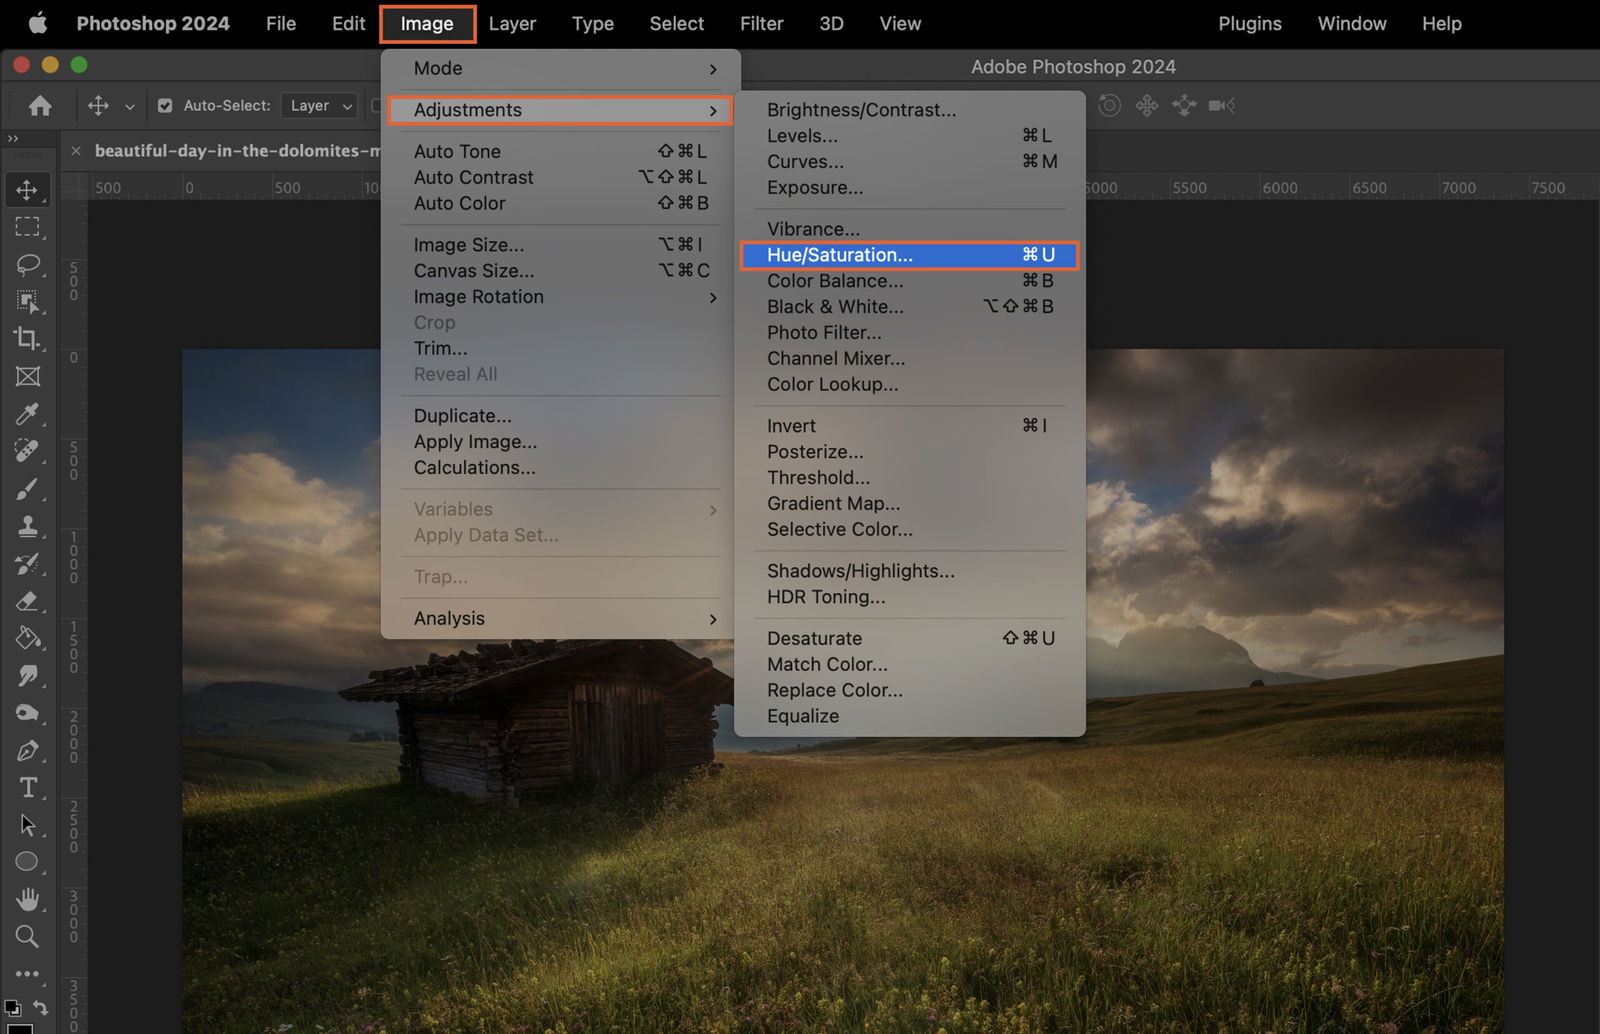
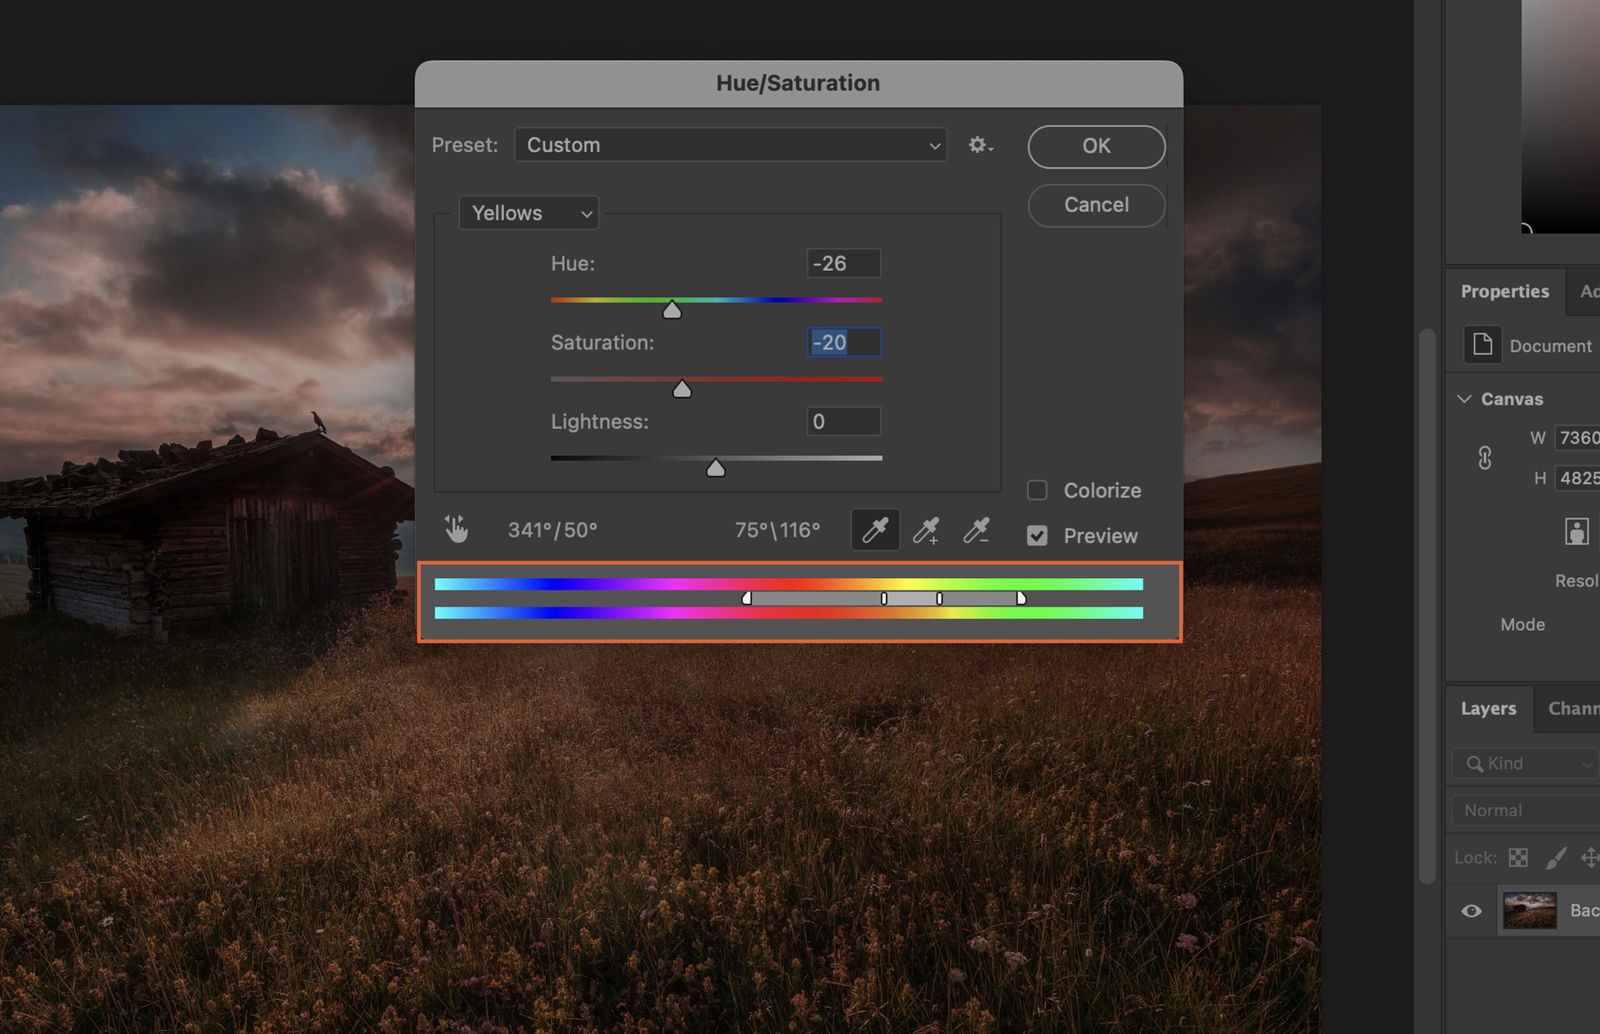
To begin, open the image you want to edit in Photoshop. Go to the menu bar at the top of the screen, click on ‘Image’, then ‘Adjustments’, and finally ‘Hue/Saturation’. This will bring up the ‘Hue/Saturation’ adjustment panel.
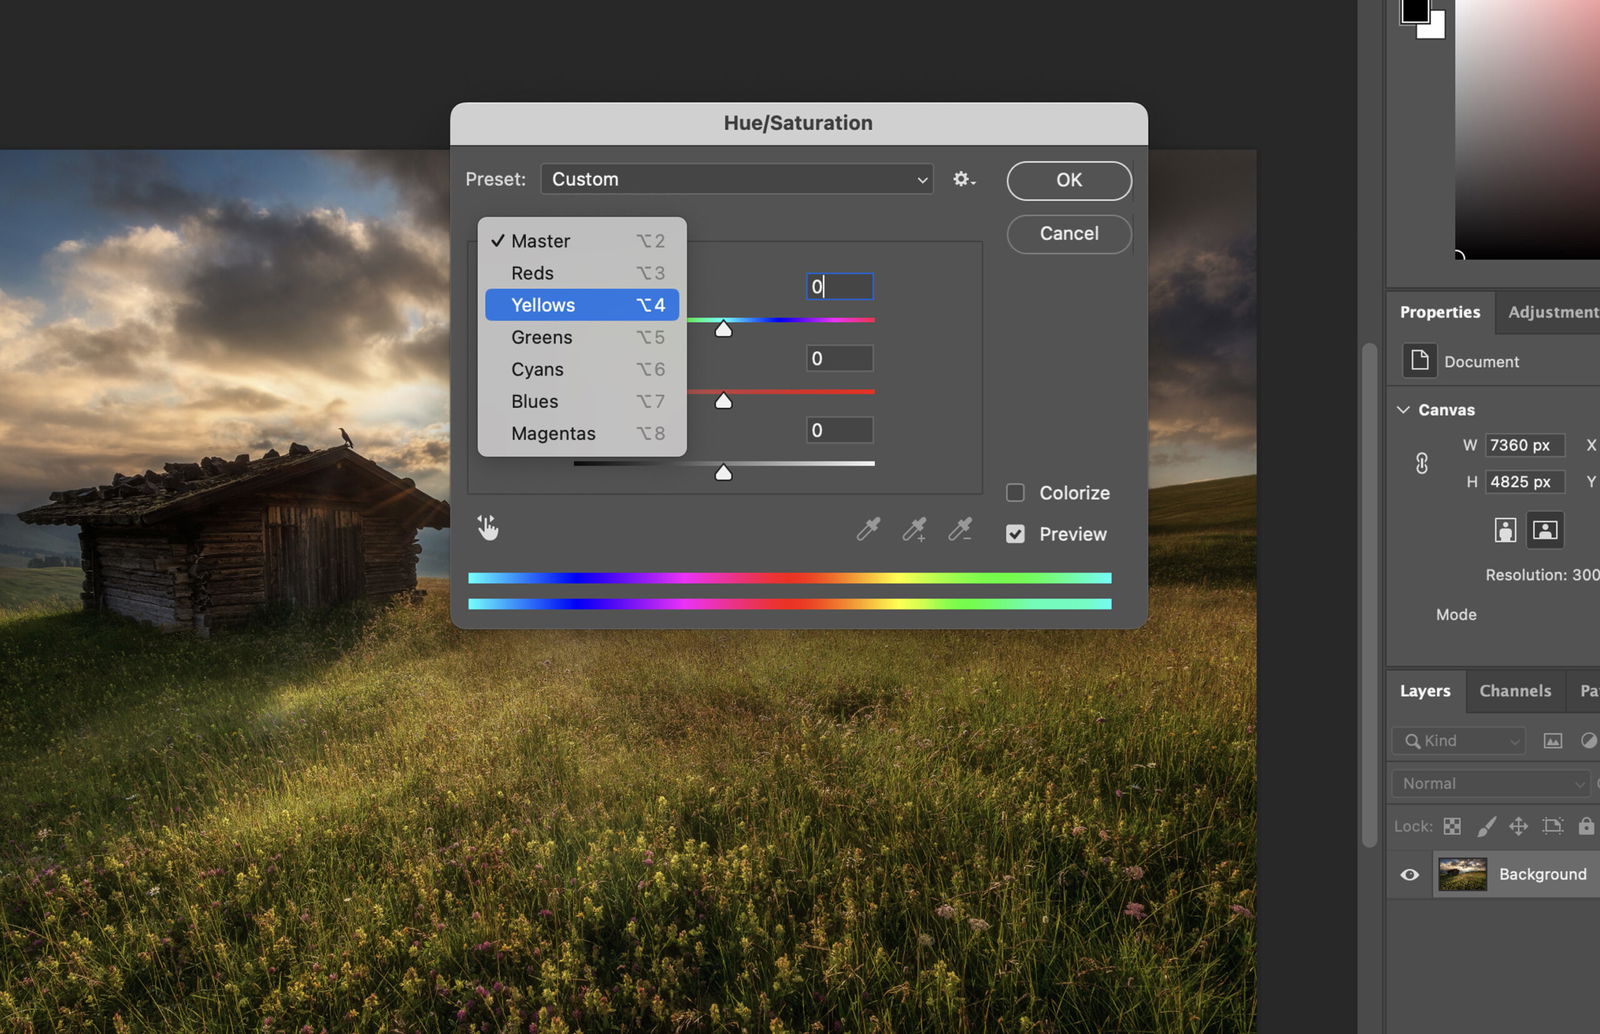
Next, you’ll need to specify the color range to replace. In the ‘Hue/Saturation’ adjustment panel, click on the dropdown menu labeled ‘Master’. This will give you a list of color ranges to choose from. Select the color range that best matches the color you wish to replace.
Now, it’s time to select the new color. To do this, move the ‘Hue’ slider left or right until you find a color that you like.
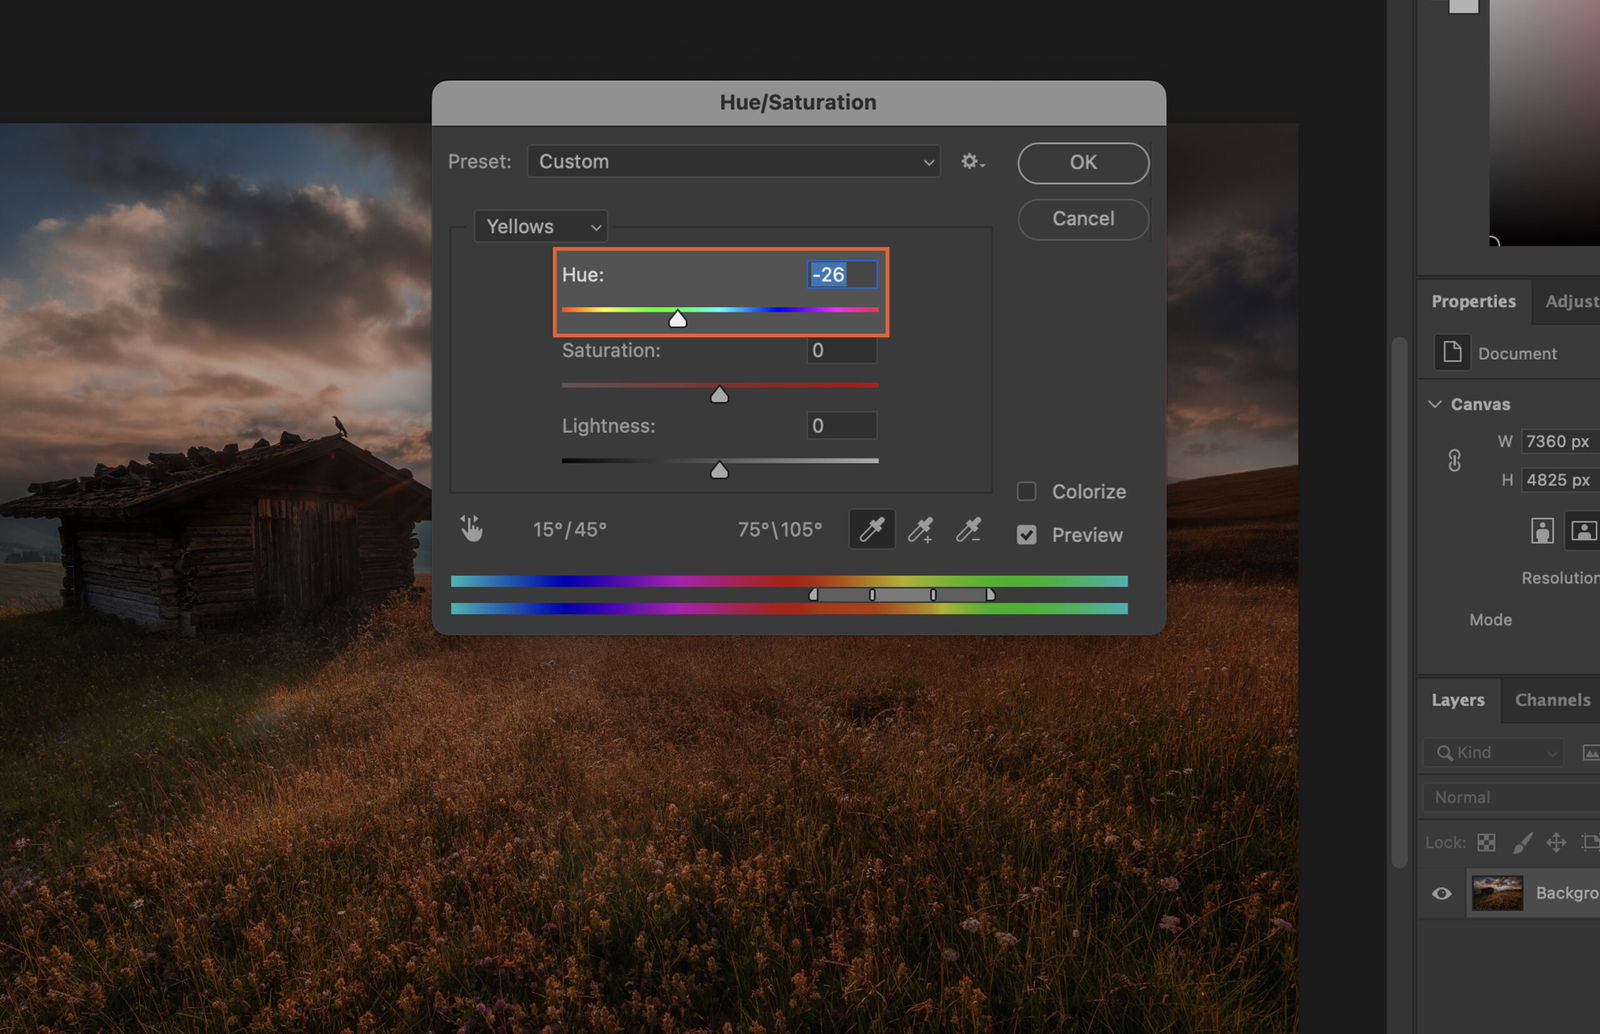
To modify the intensity of the new color, adjust the ‘Saturation’ slider. Move it to the right to intensify the color, or to the left to make it more muted.

To refine the color replacement, adjust the ‘Fuzziness’ slider. This will control the range of colors that will be replaced. A lower value will target a narrow range of similar colors, while a higher value will target a broader range.
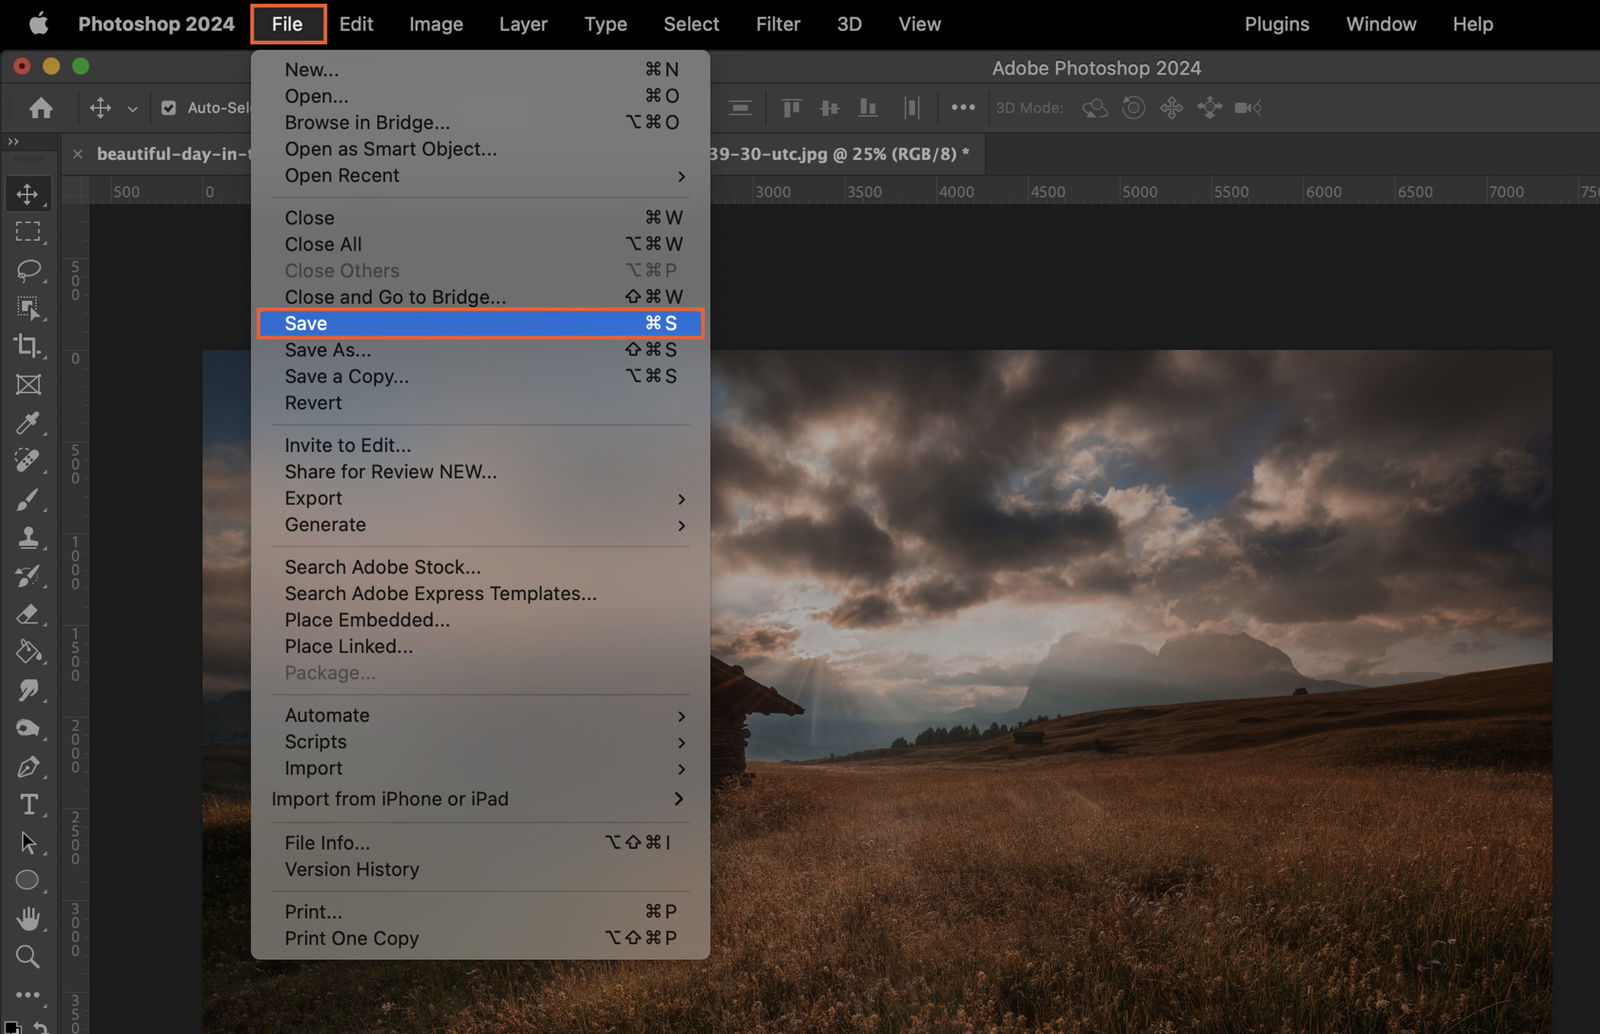
Once you’re satisfied with the color replacement, save your changes. Go to ‘File’ in the menu bar, then click ‘Save’. Your image is now updated with the new color.