Learning how to Slice an Image in Photoshop can greatly simplify your web design and development process. This article guides you through the steps, helping you save time, enhance your workflow, and ultimately create more engaging web content.
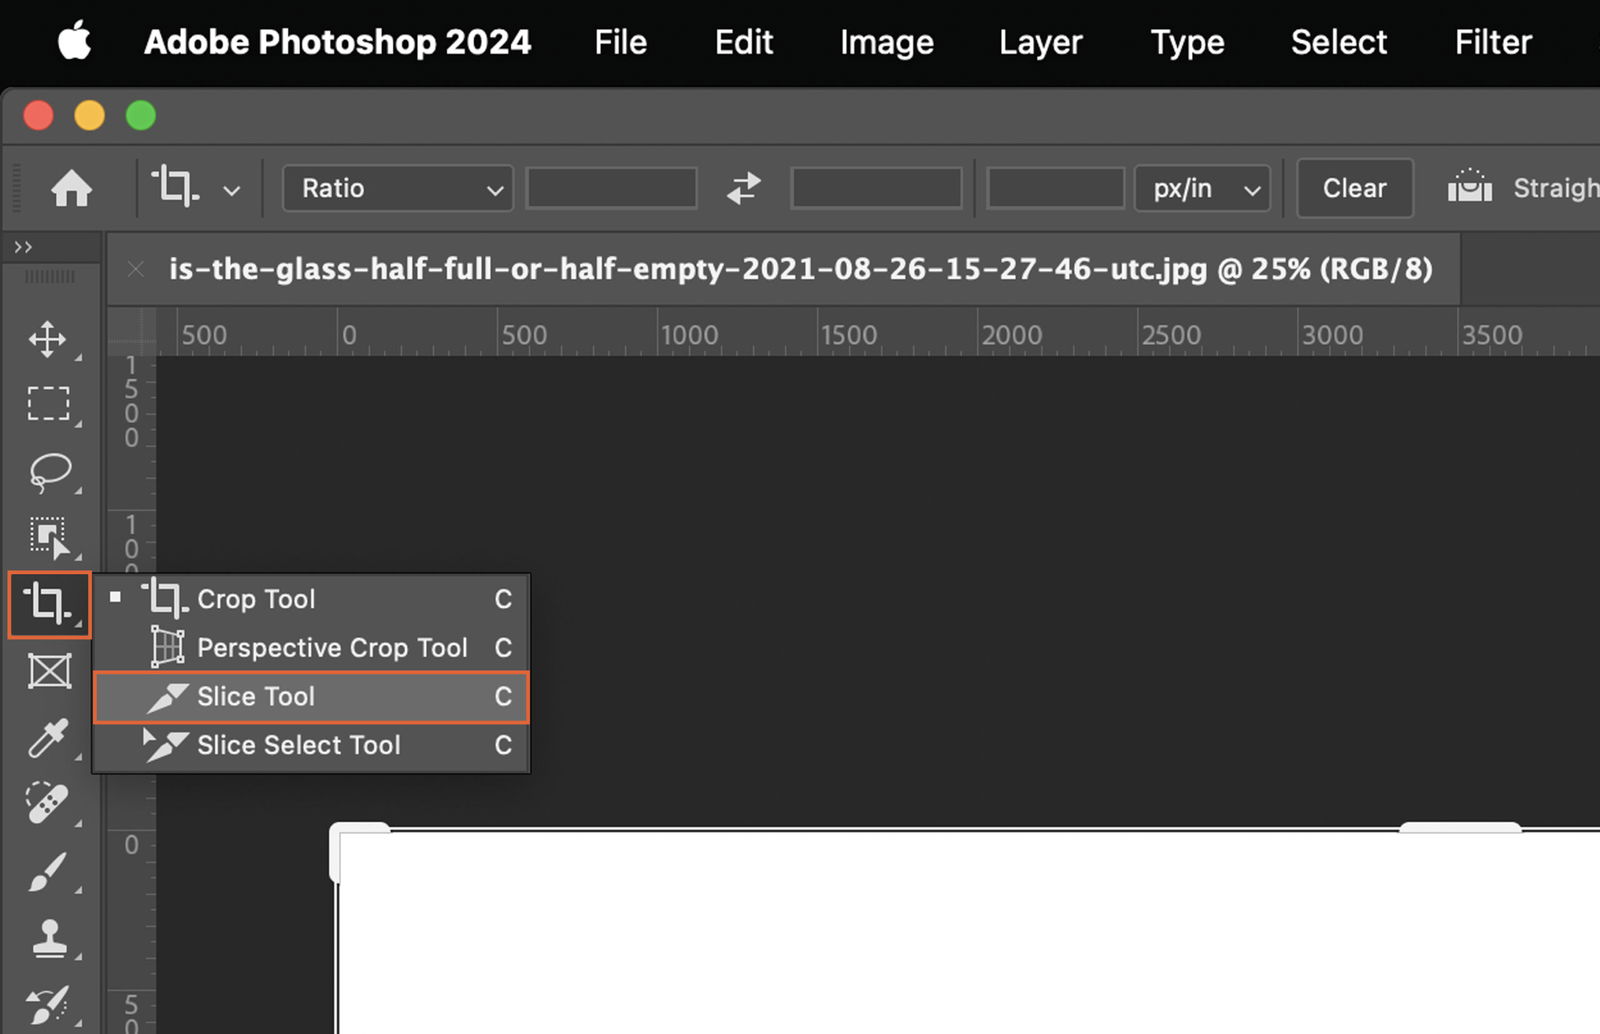
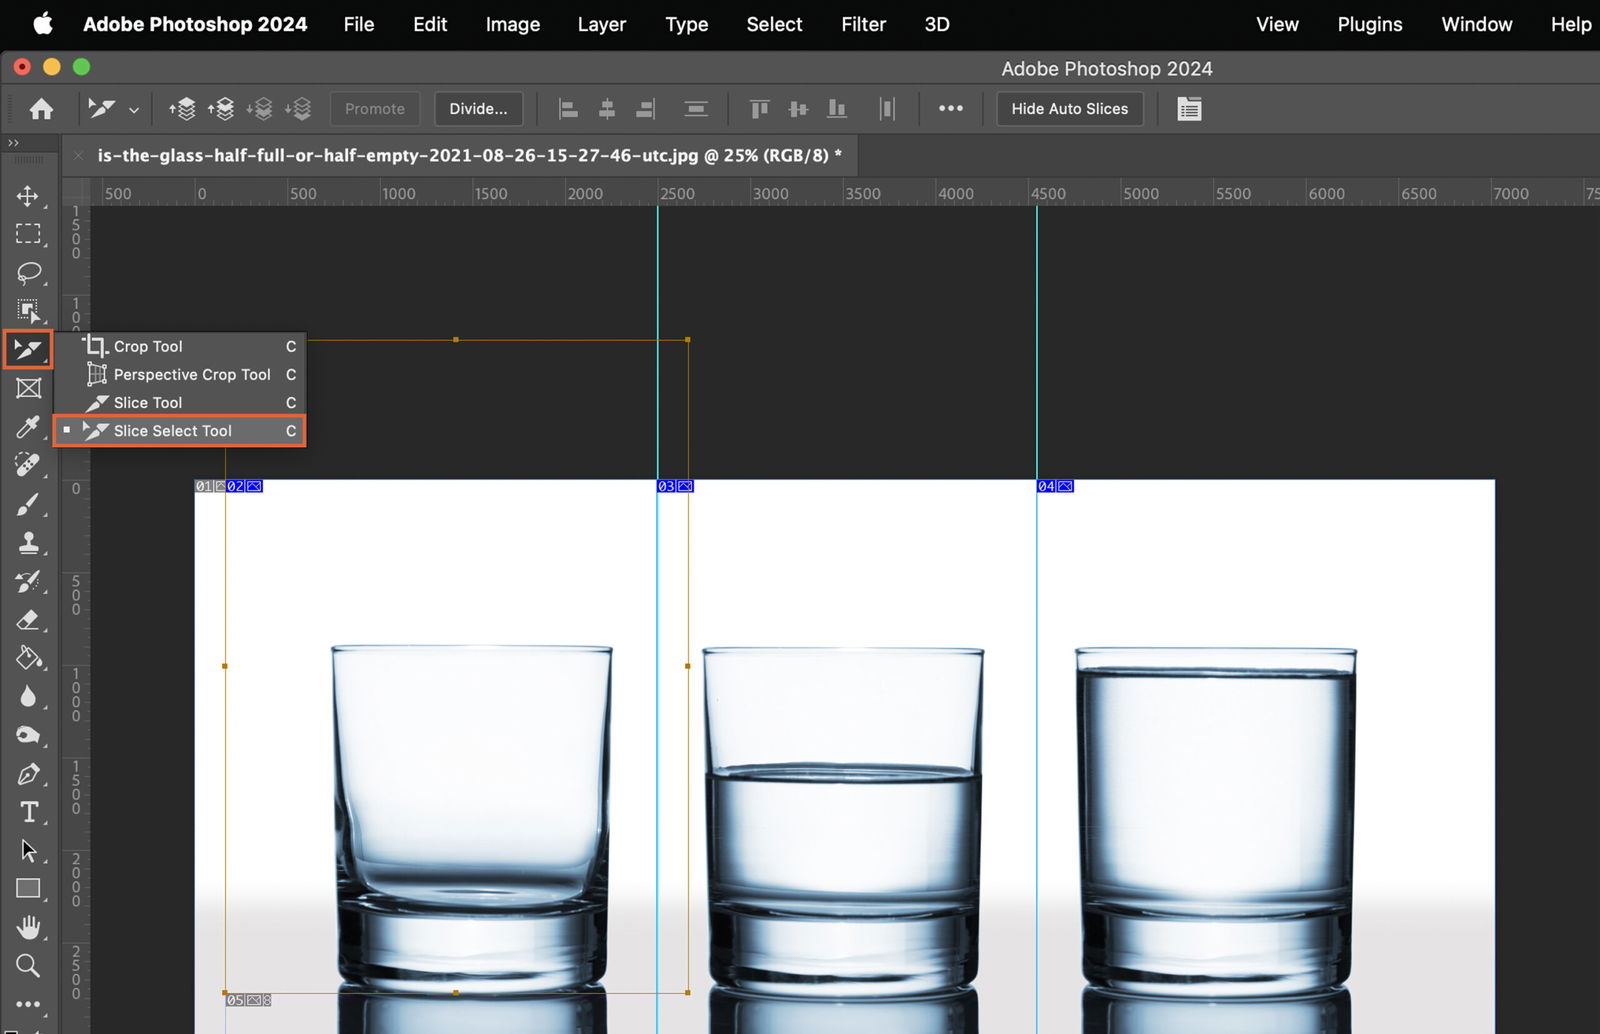
Begin by launching Adobe Photoshop. In the left-hand toolbar, locate and select the Slice Tool. It’s icon resembles a small kitchen knife. If you can’t find it, right-click on the Crop Tool and select Slice Tool from the dropdown menu.
To slice the image, you need to define the area you want to slice. There are two ways to do this.
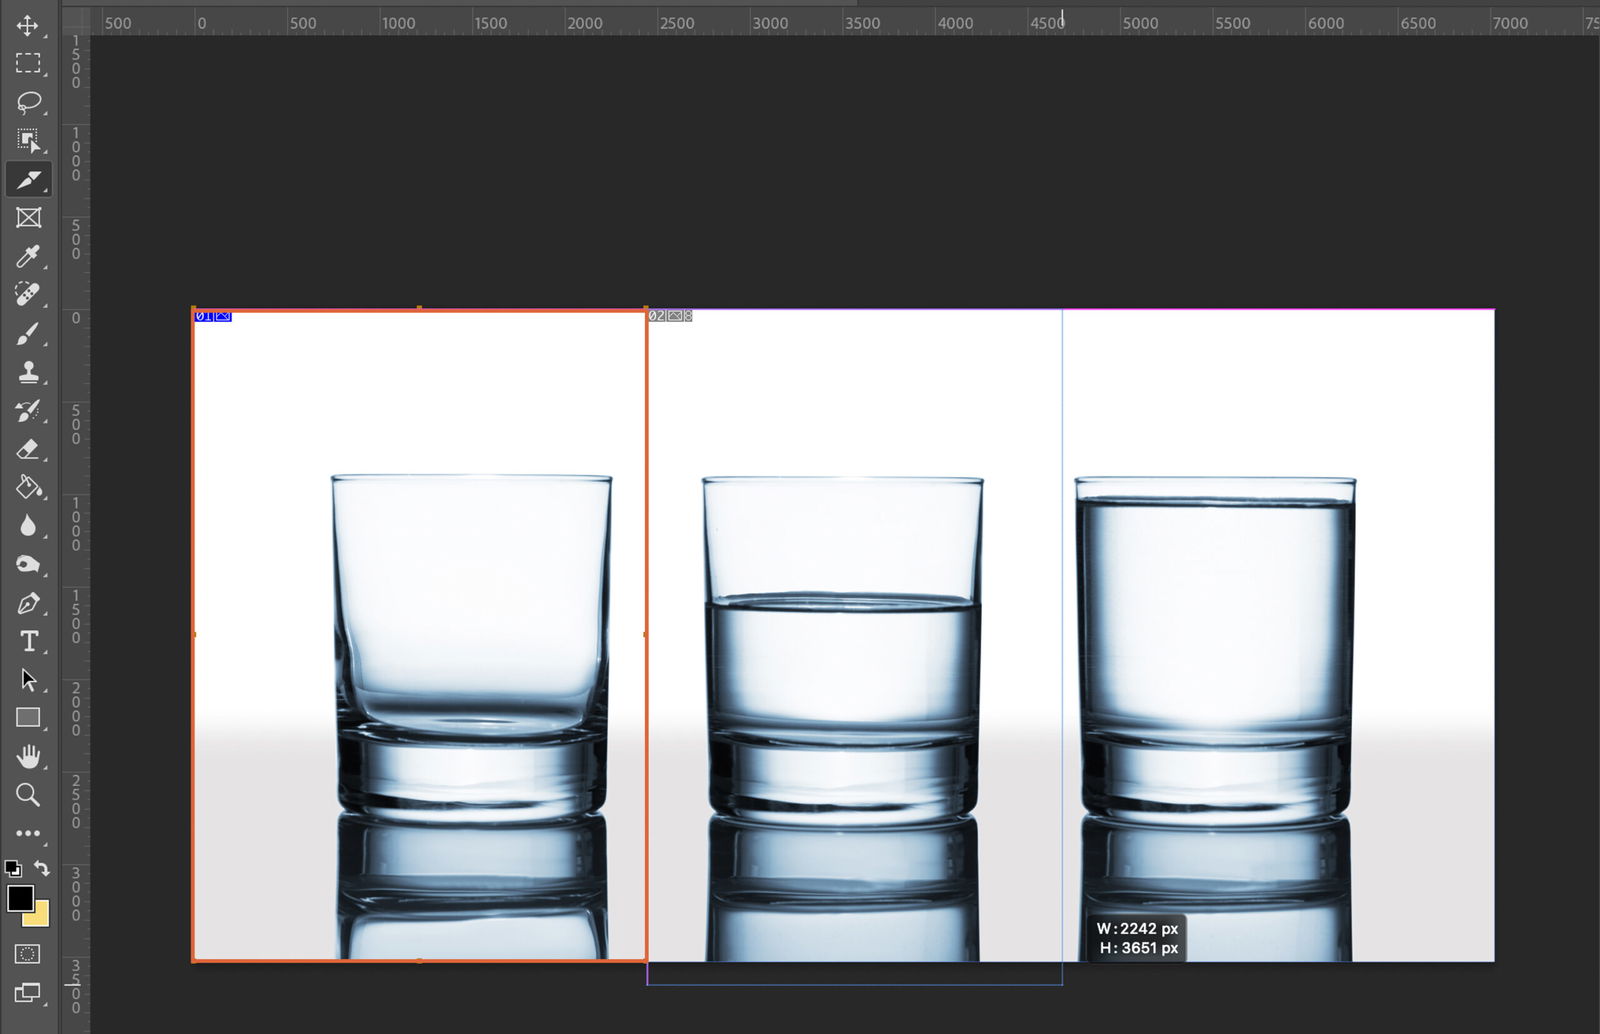
Click and drag the Slice Tool over the area you want to slice. Release the mouse button to create the slice. Adjust the size and shape by dragging the handles on the corners and sides of the slice.
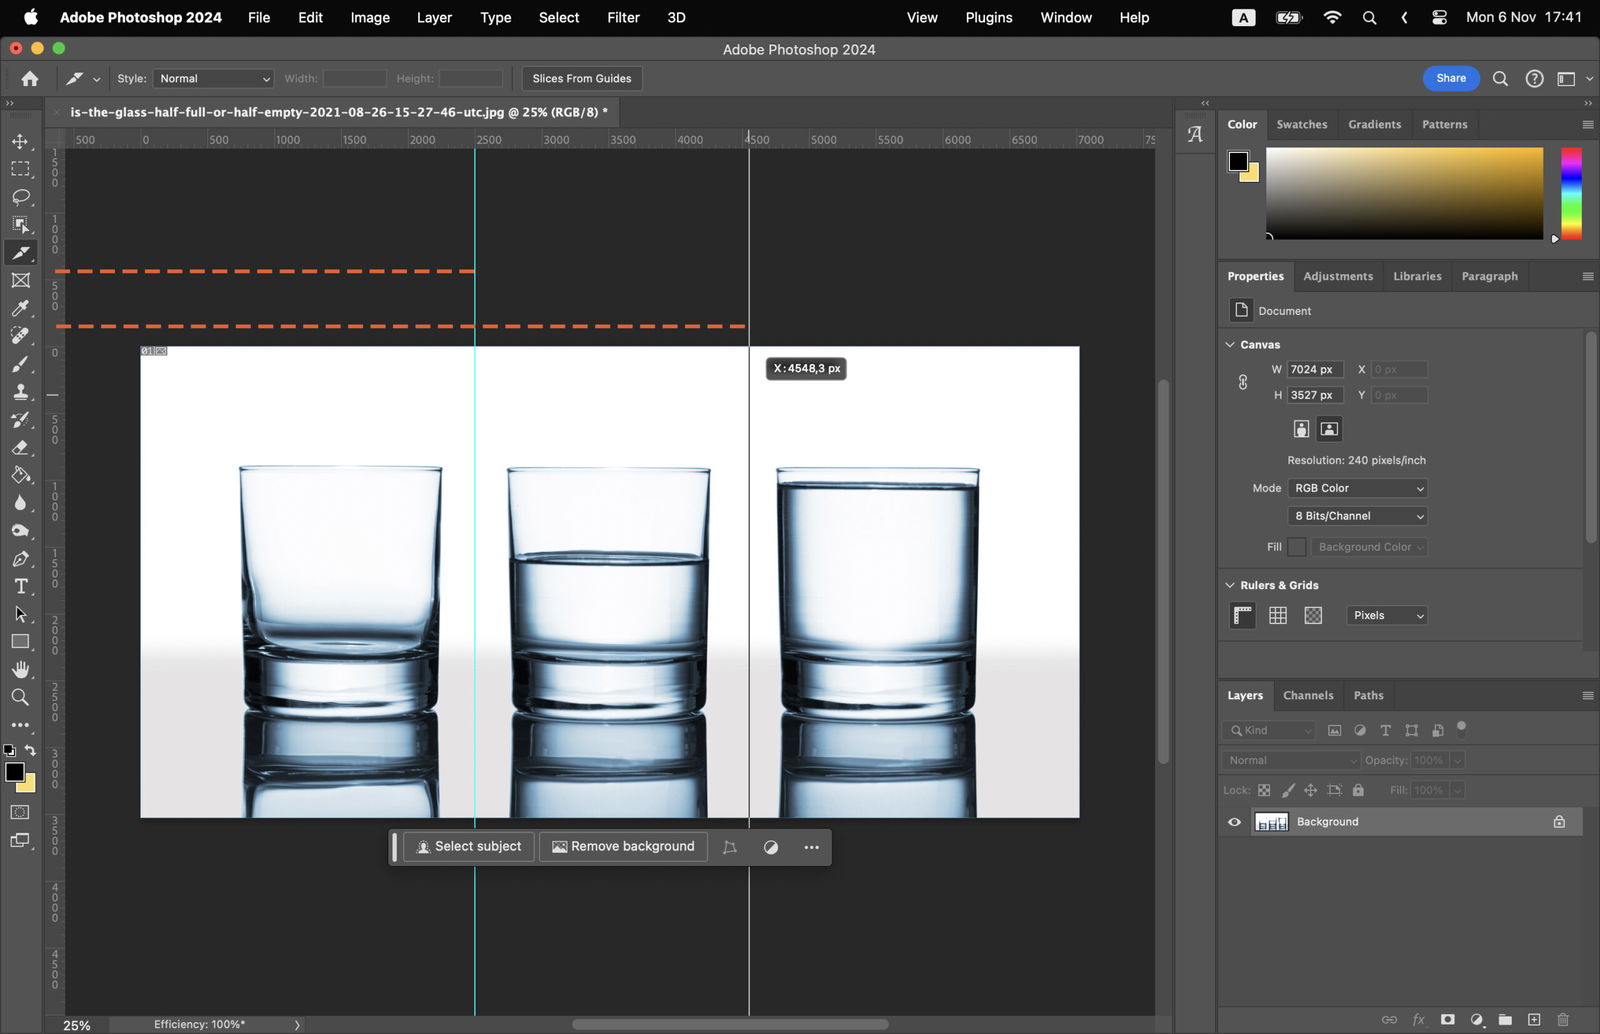
You can also use Photoshop’s guides to define your slices. First, create guides by clicking on the ruler and dragging to your desired location.
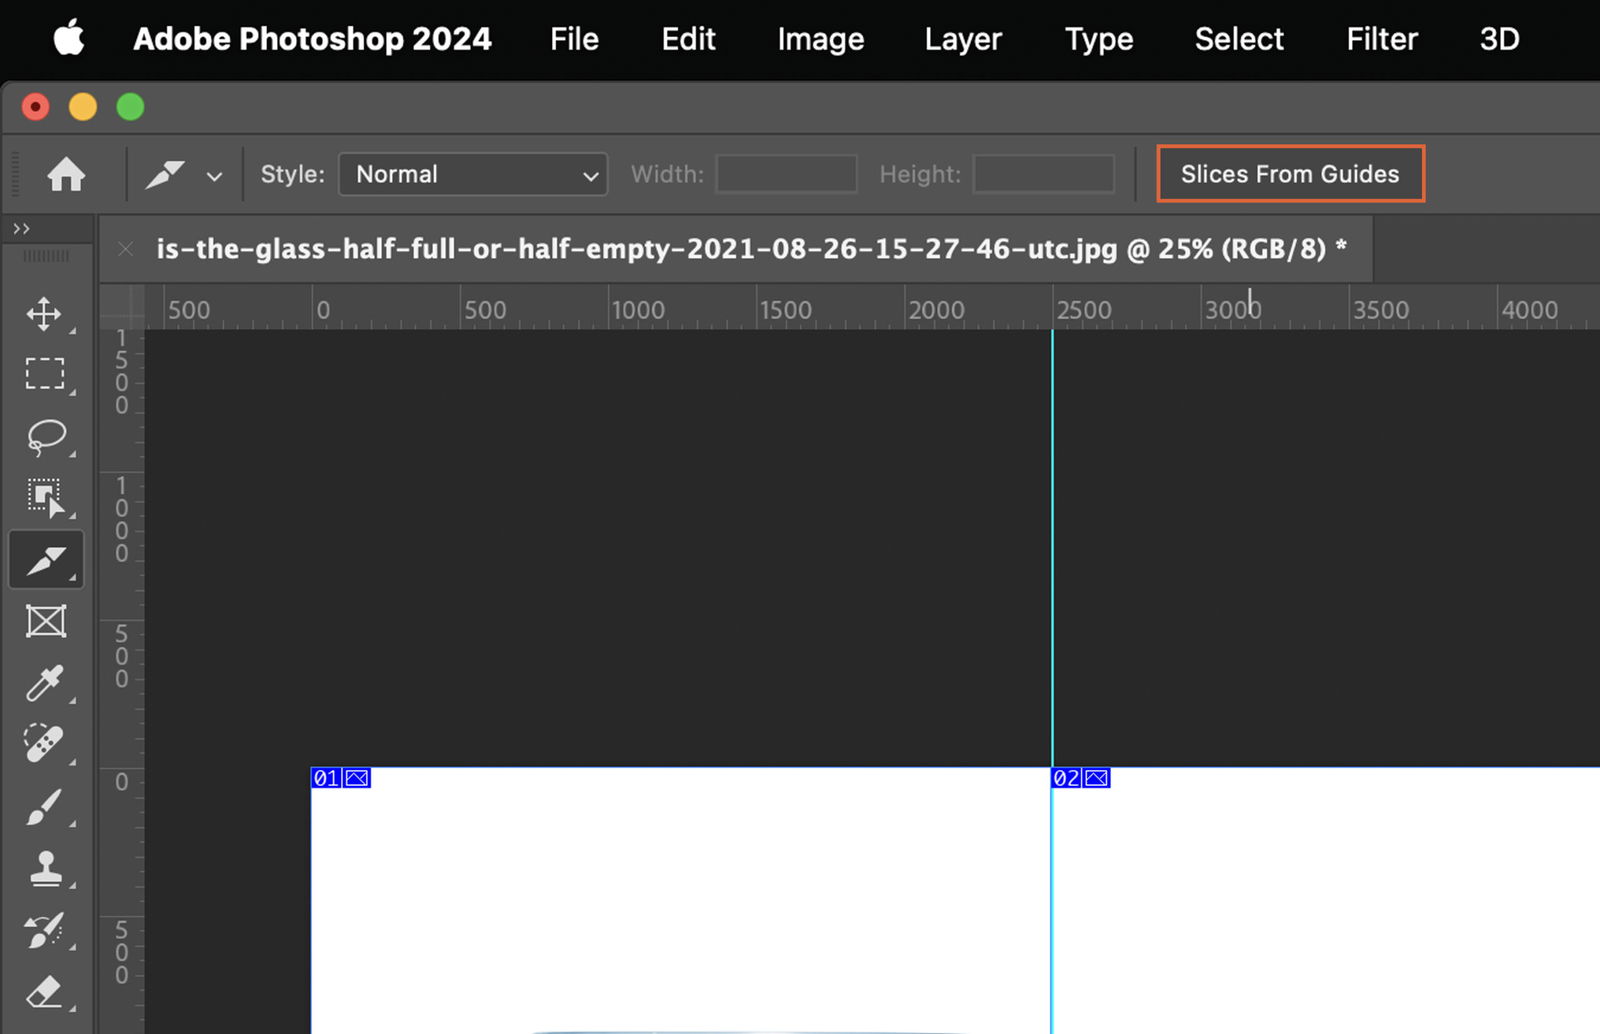
Next, go to the Slices menu, select “Slices from Guides”. Photoshop will automatically create slices based on your guides.
If you need to modify your slices, select the Slice Select Tool in the toolbar (it’s located under the Slice Tool). Use this to move or resize your slices.
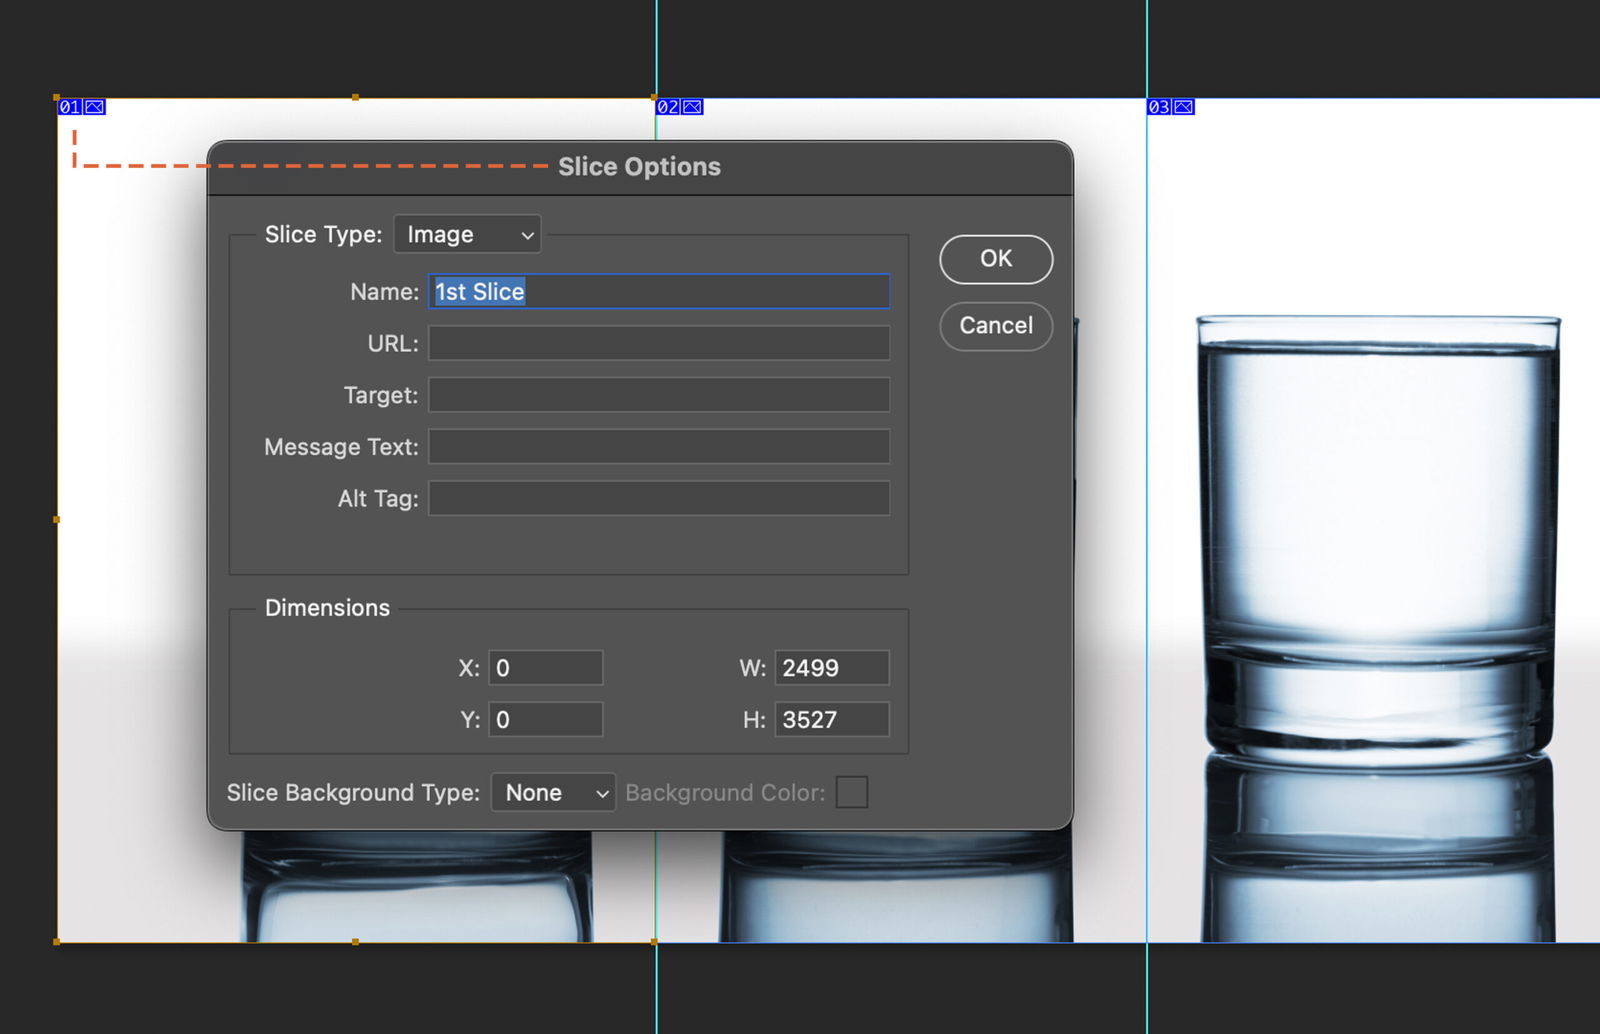
Double-click on a slice to open the Slice Options dialog box. Here, you can name your slice and set optimization settings. Naming your slices helps keep your files organized, especially when working with multiple slices. You can also add URL links to each slices.
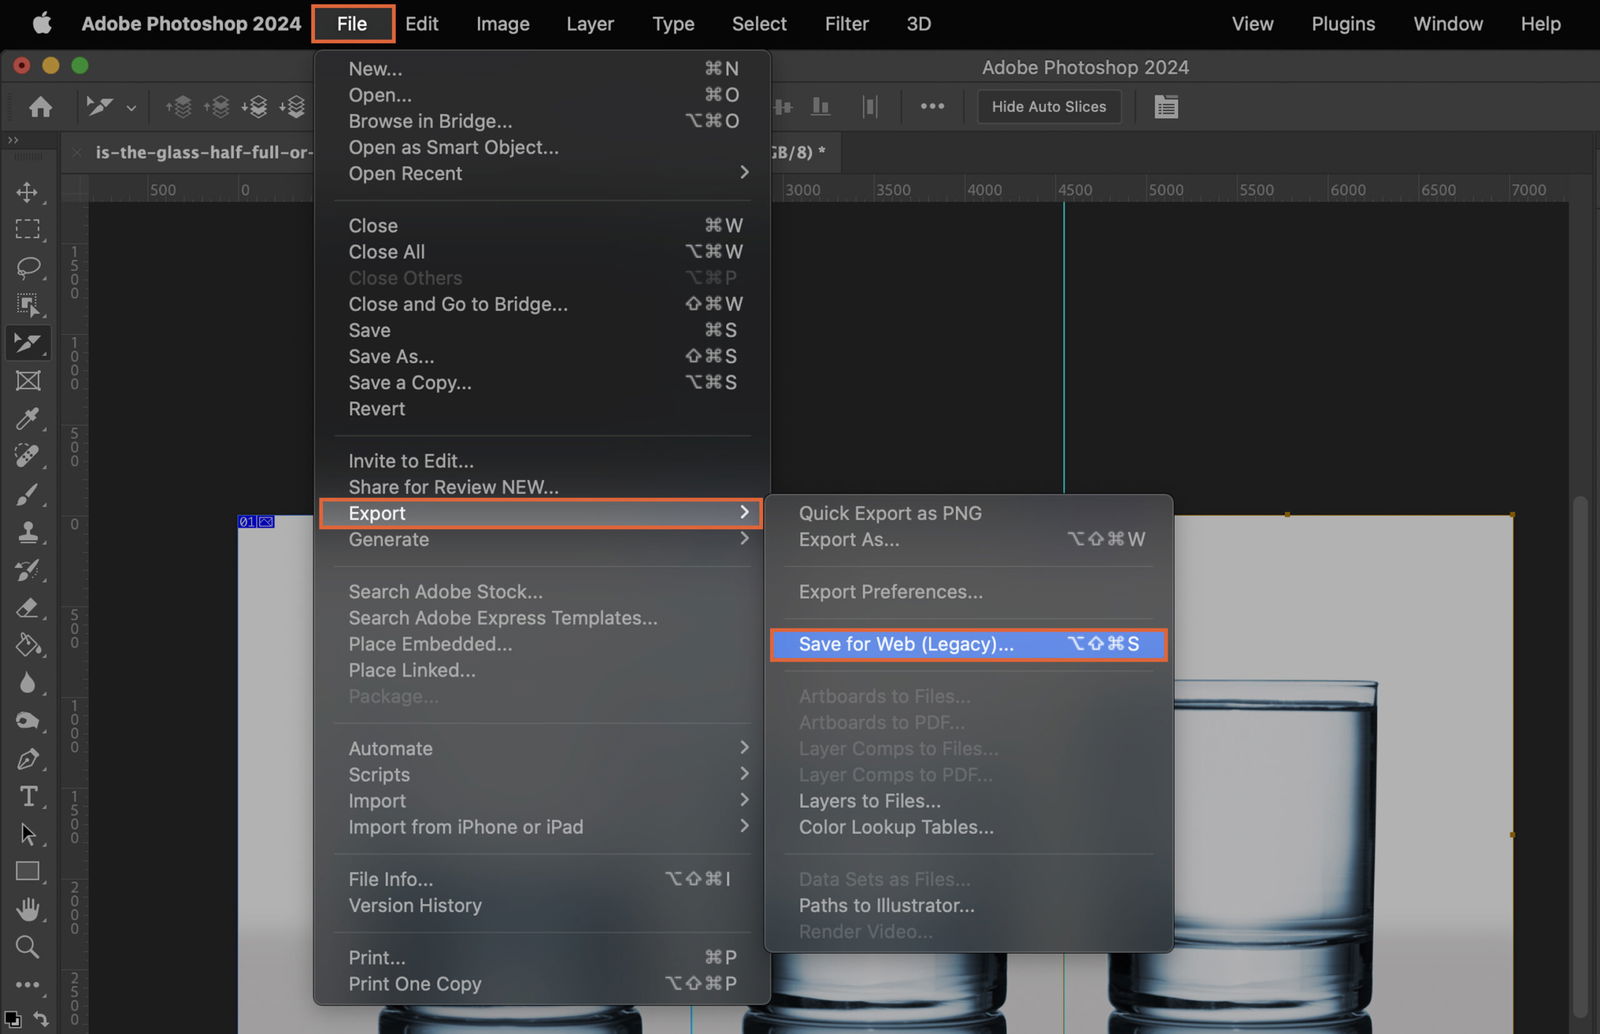
Go to File > Save for Web. In the dialog box, set your desired file format and quality settings. Ensure “Slices” is set to “All User Slices”, then click Save.
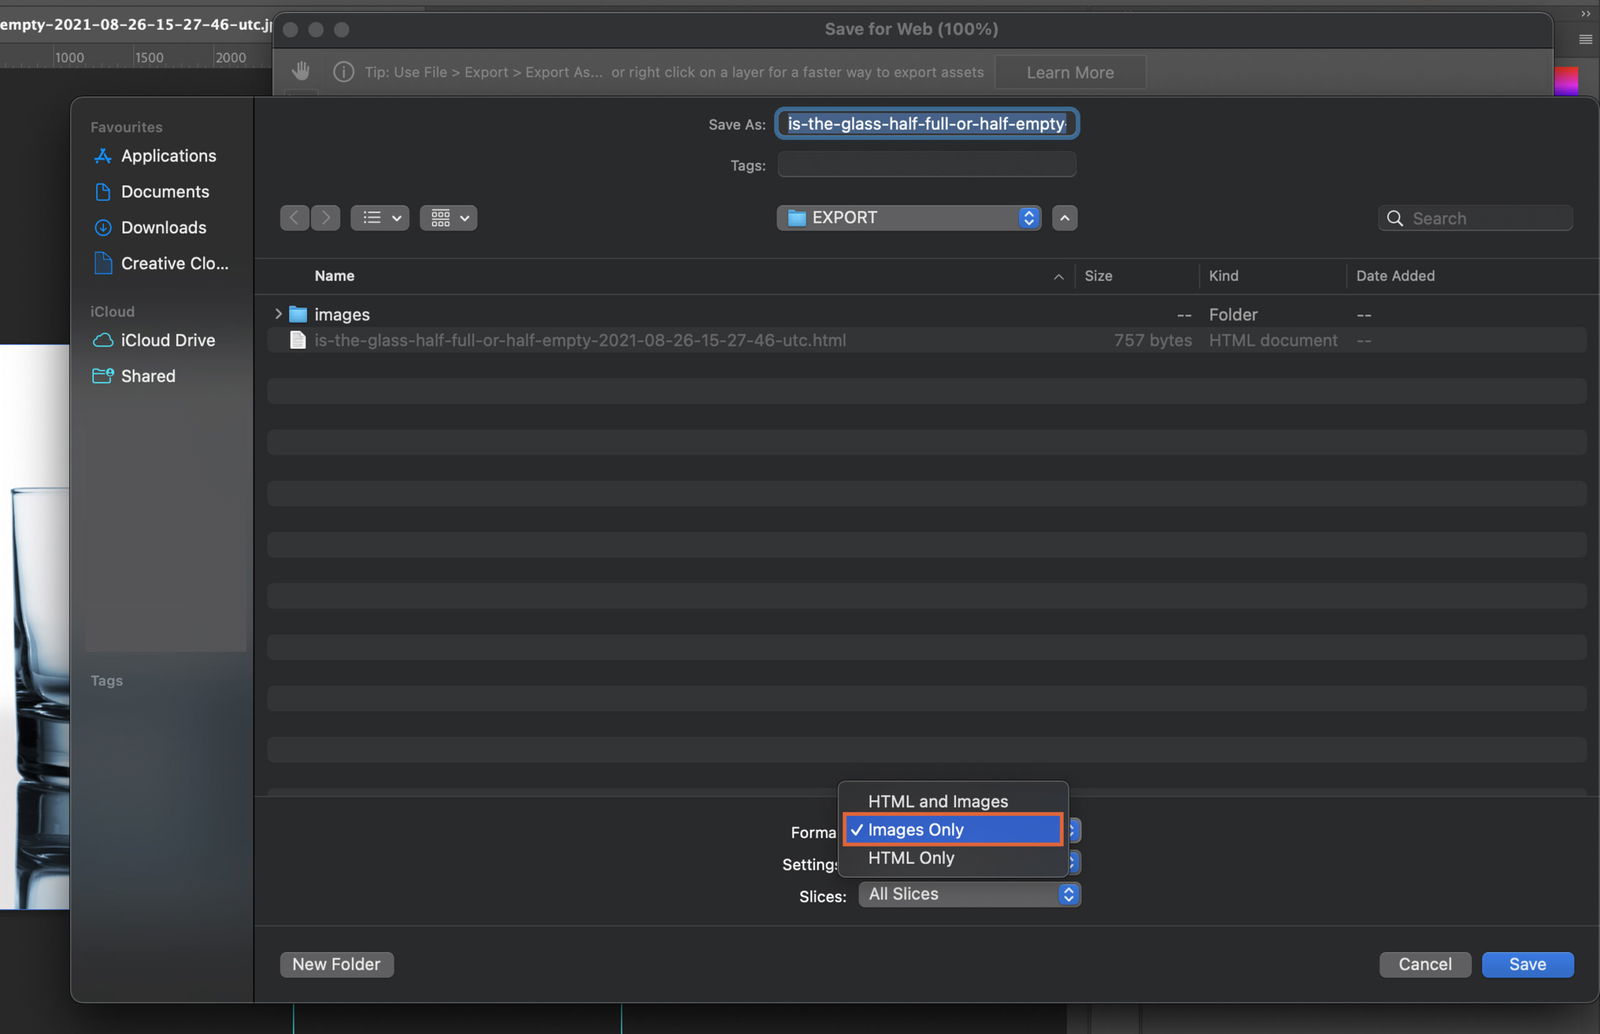
There are two ways to export your slices: as HTML and images, or as images only.
In the Save for Web dialog box, select HTML and Images in the Format dropdown. This will save your slices along with an HTML file that displays them.
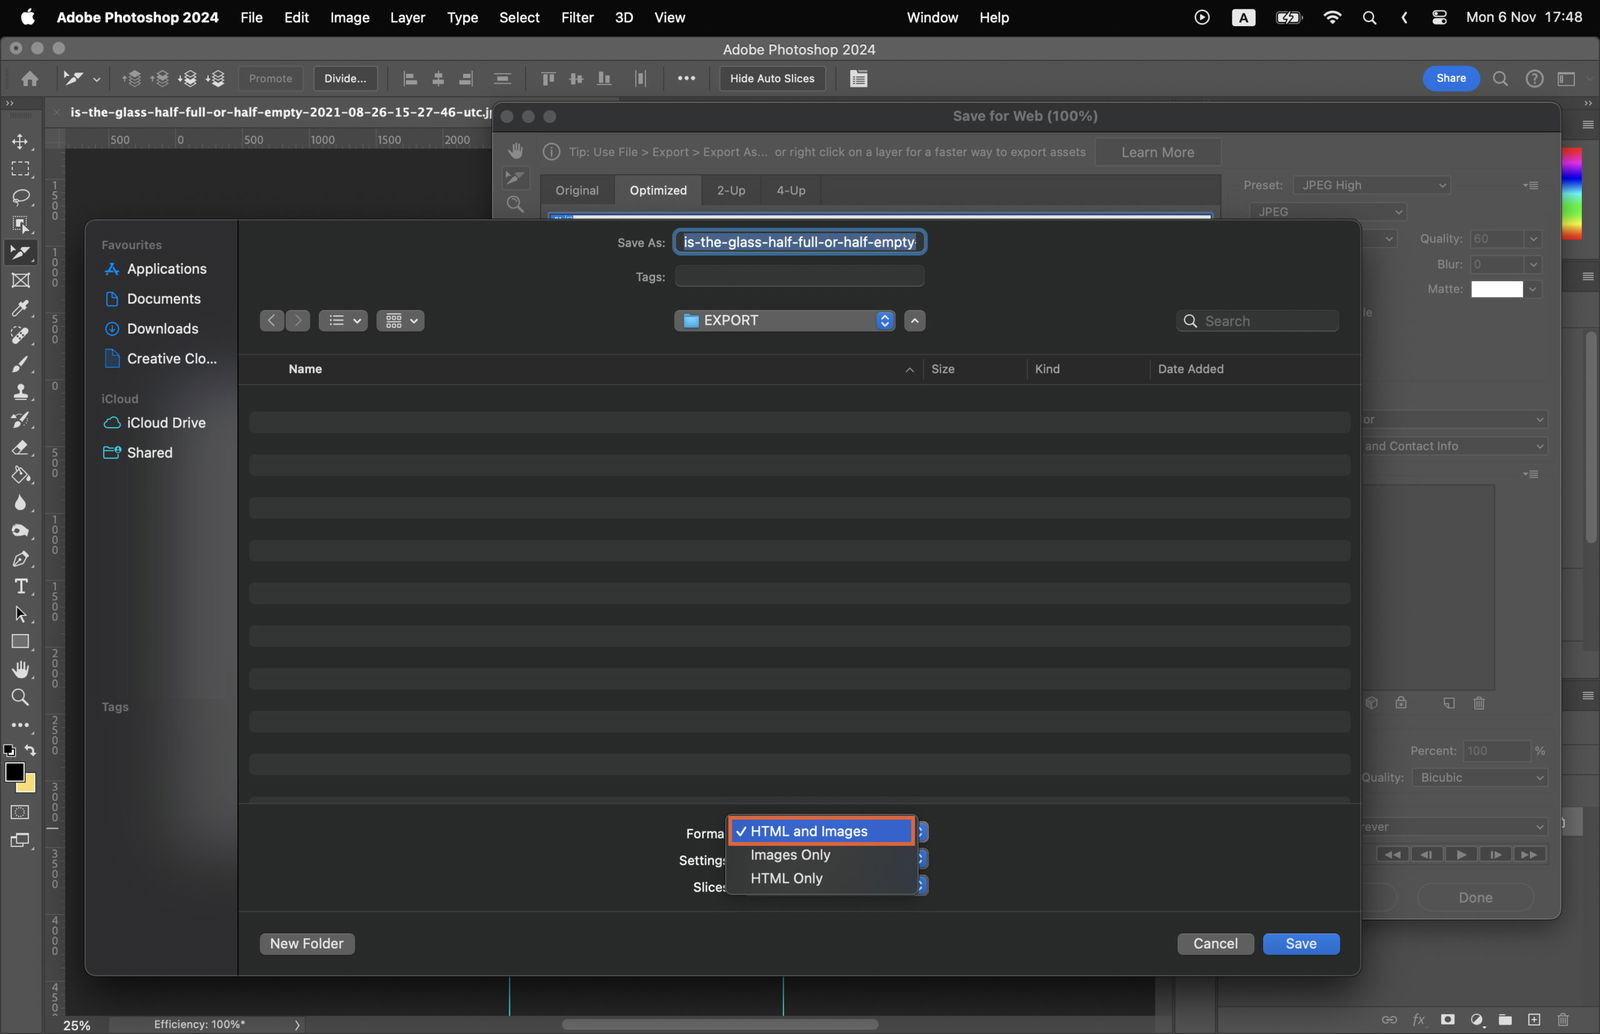
If you only want to export the images, select Images Only in the Format dropdown. Your slices will be saved as separate image files.
To preview your slices, open the HTML file that was saved in your chosen directory. The file will open in your default web browser, displaying your slices as they appear on a web page.
If you need to make changes to your slices, simply return to Photoshop, make your adjustments, and save again. Your exported files will be updated with the changes.


