ExpertPhotography
  • Articles
  • My Learning
  • Store
  • About
  • Contact
  • Photo Quiz
ExpertPhotography

Learn Photography
  • Quick Capture Cheat Sheets
  • Photography for Beginners
  • Intuitive Composition
  • Show more...
  • Effortless Editing With Lightroom
  • Epic Landscape Editing
  • The Preset Collection
  • Show more...
  • The Magical Photography Spellbook
  • Dreamy Childhood Portraits
  • The Creative Photography Cookbook
  • Show more...
  • Simply Stunning Landscapes
  • Infinite Exposures
  • Milky Way Mastery
  • Show more...
  • Products In Focus
  • Fairytale Portraits
  • Organic Marketing for Photographers
  • Show more...
Need Help?
Contact UsCookie PolicyPrivacy PolicyTerms of Use
Connect

ExpertPhotography is part of several affiliate sales networks. This means we may receive a commission if you purchase something by clicking on one of our links.

ExpertPhotography is a participant in the Amazon Services LLC Associates Program, an affiliate advertising program designed to provide a means for sites to earn advertising fees by advertising and linking to amazon.com.

As an Amazon Associate, I earn from qualifying purchases.

Expert Photography © 2011-2024. All Rights Reserved.

Privacy Policy Terms of Use

Photoshop Processing

How to Use the Eraser Tool in Photoshop

Szilard Kovacs
by Szilard Kovacs
Last updated: 21/10/2024-3 min read
ExpertPhotography is supported by readers. Product links on ExpertPhotography are referral links. If you use one of these and buy something, we make a little money. Need more info? See how it all works here.

Struggling to Use the Eraser Tool in Photoshop? This guide will simplify the process, teaching you how to locate, understand, and apply this crucial tool. Mastering this skill can enhance your editing precision and efficiency, transforming your Photoshop experience.

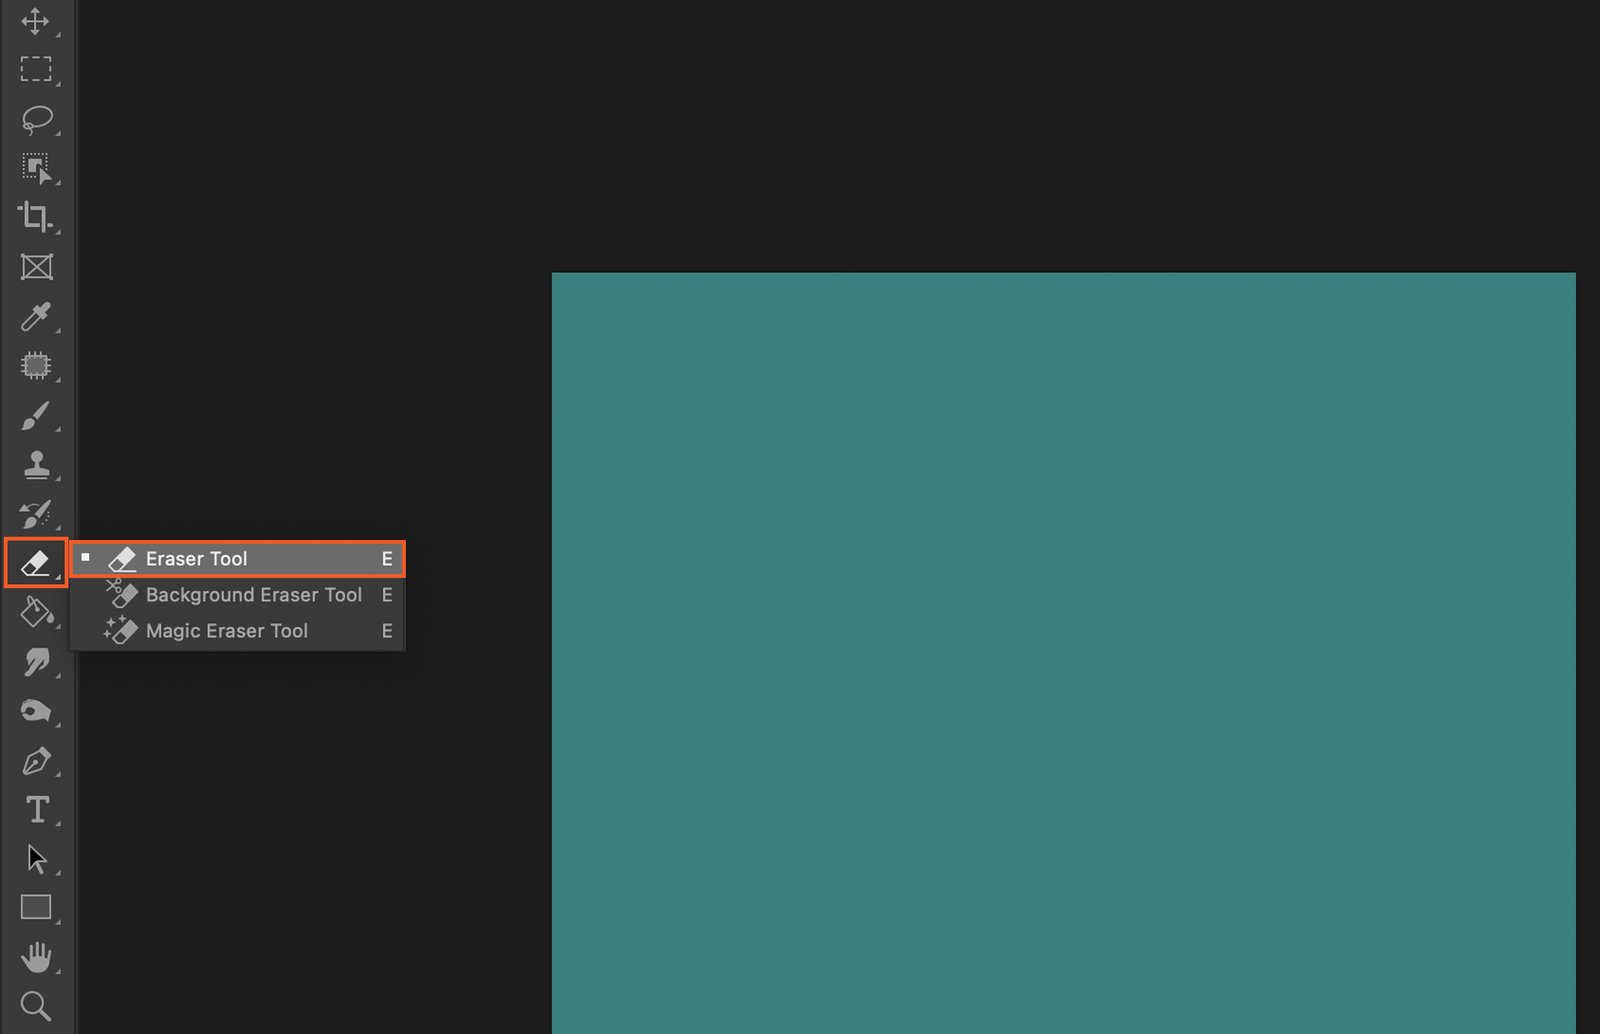
Step 1. Locate and Select the Eraser Tool

Firstly, open your Photoshop workspace. The Eraser Tool is located on the toolbar, represented by an icon resembling an eraser. Click on it to select.

A photo editing interface with various elements such as brushes, adjustment layers, and a drop shadow effect applied to the photo.

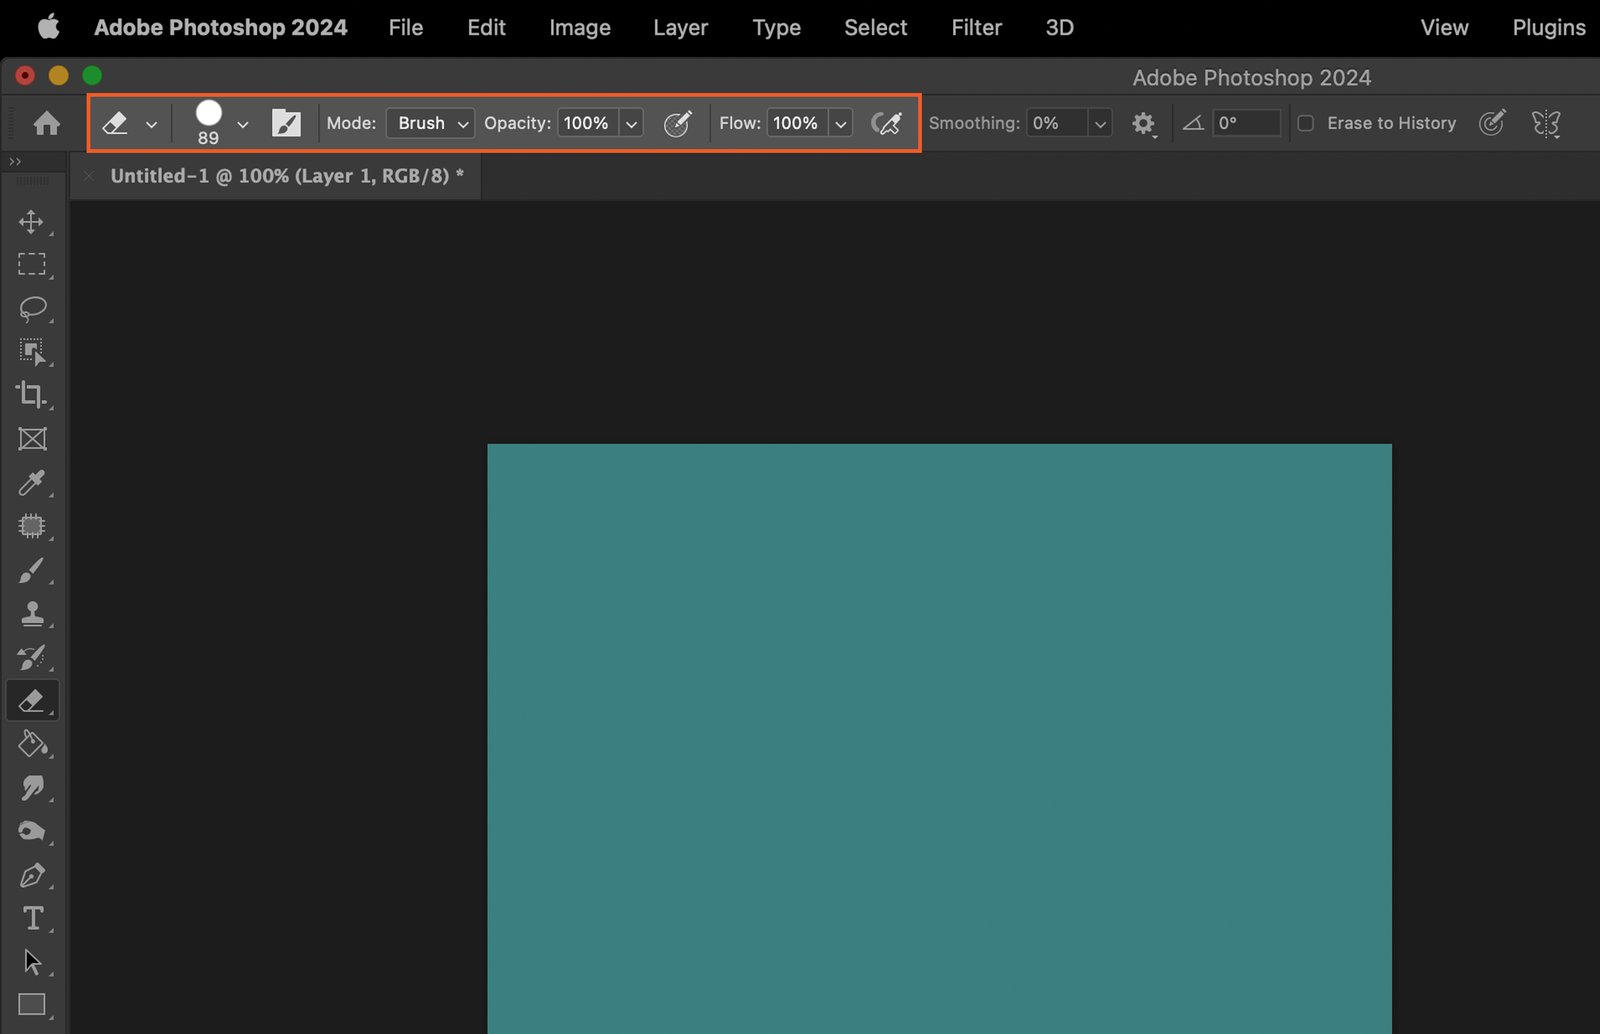
Step 2. Understand the Eraser Tool Options Bar

Once the Eraser Tool is selected, an options bar appears at the top of your workspace. This bar allows you to modify the eraser’s behavior.
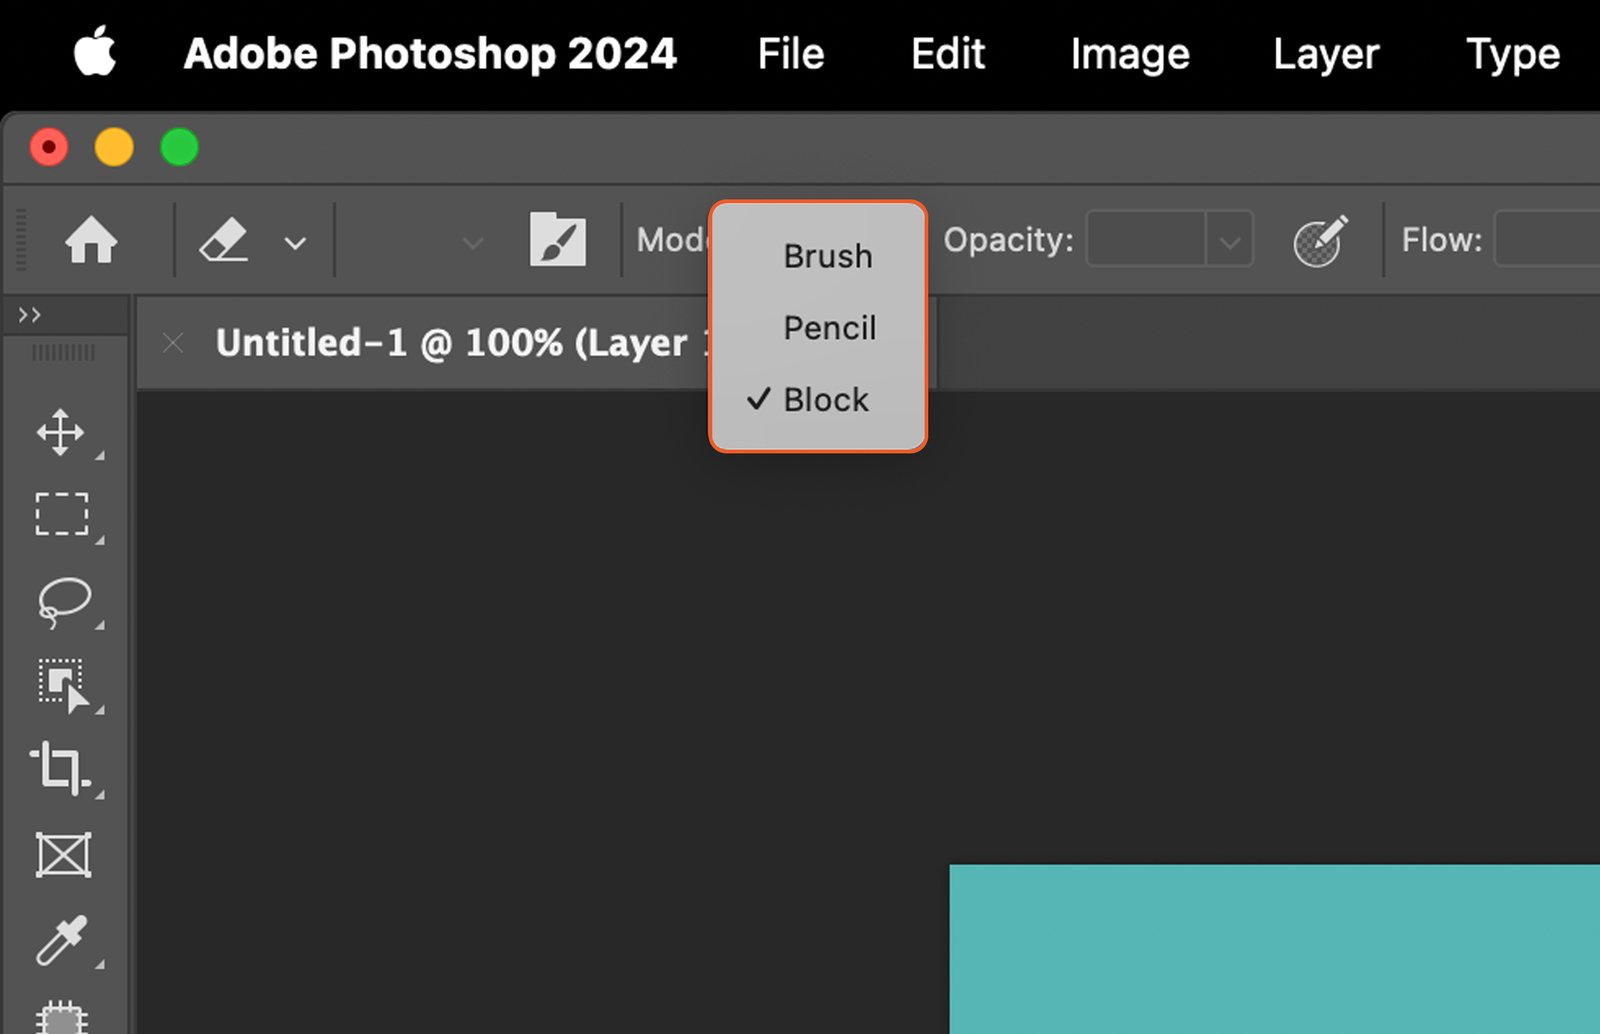
Adobe Photoshop application displaying a mostly blank canvas, a tools palette, and some panels of options on the left side.

Step 2.1. Mode

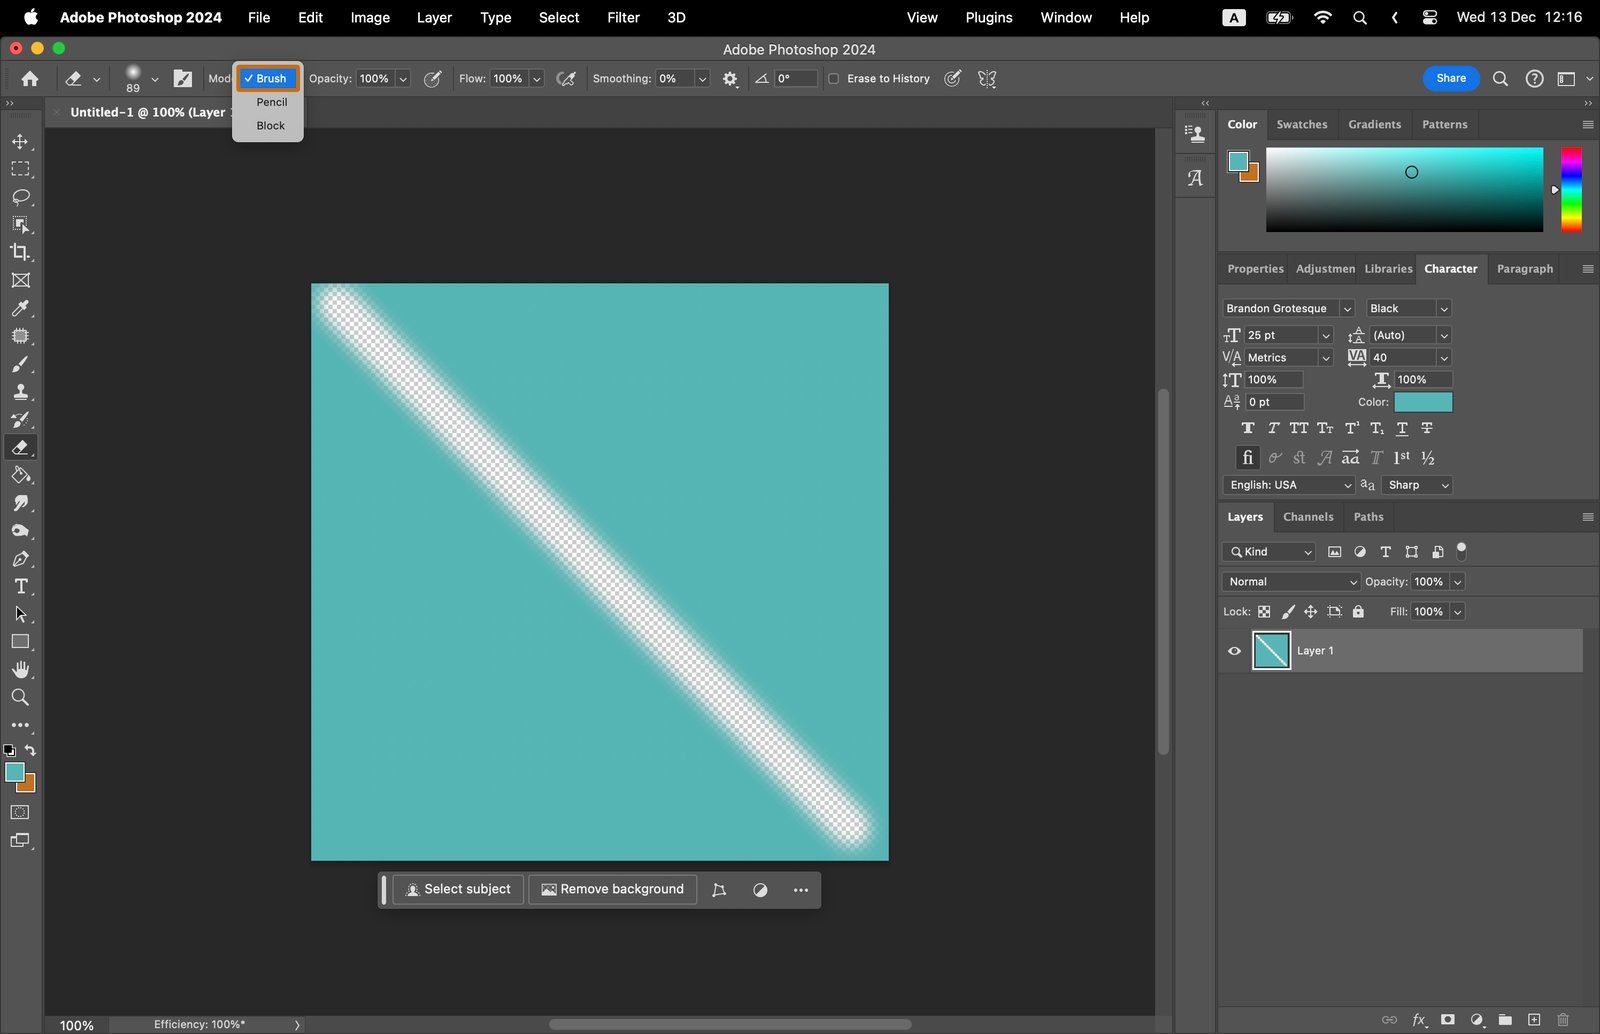
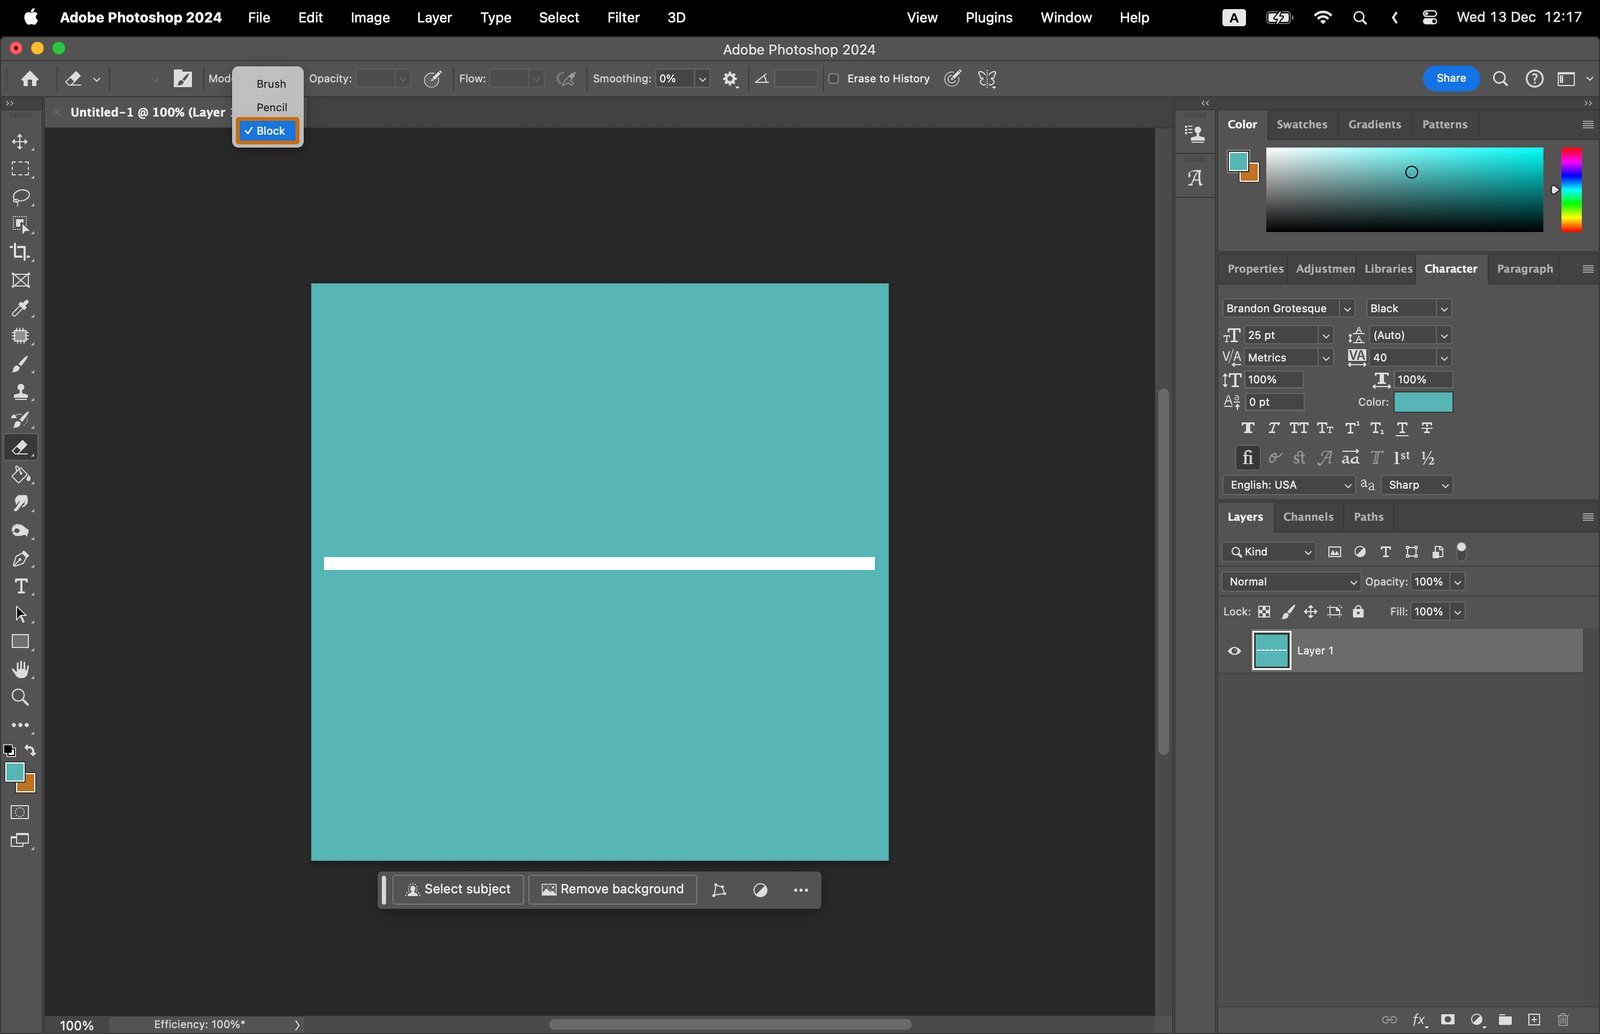
The ‘Mode’ dropdown menu lets you select the blending mode of the eraser. You can choose from various options like Brush, Pencil, and Block.
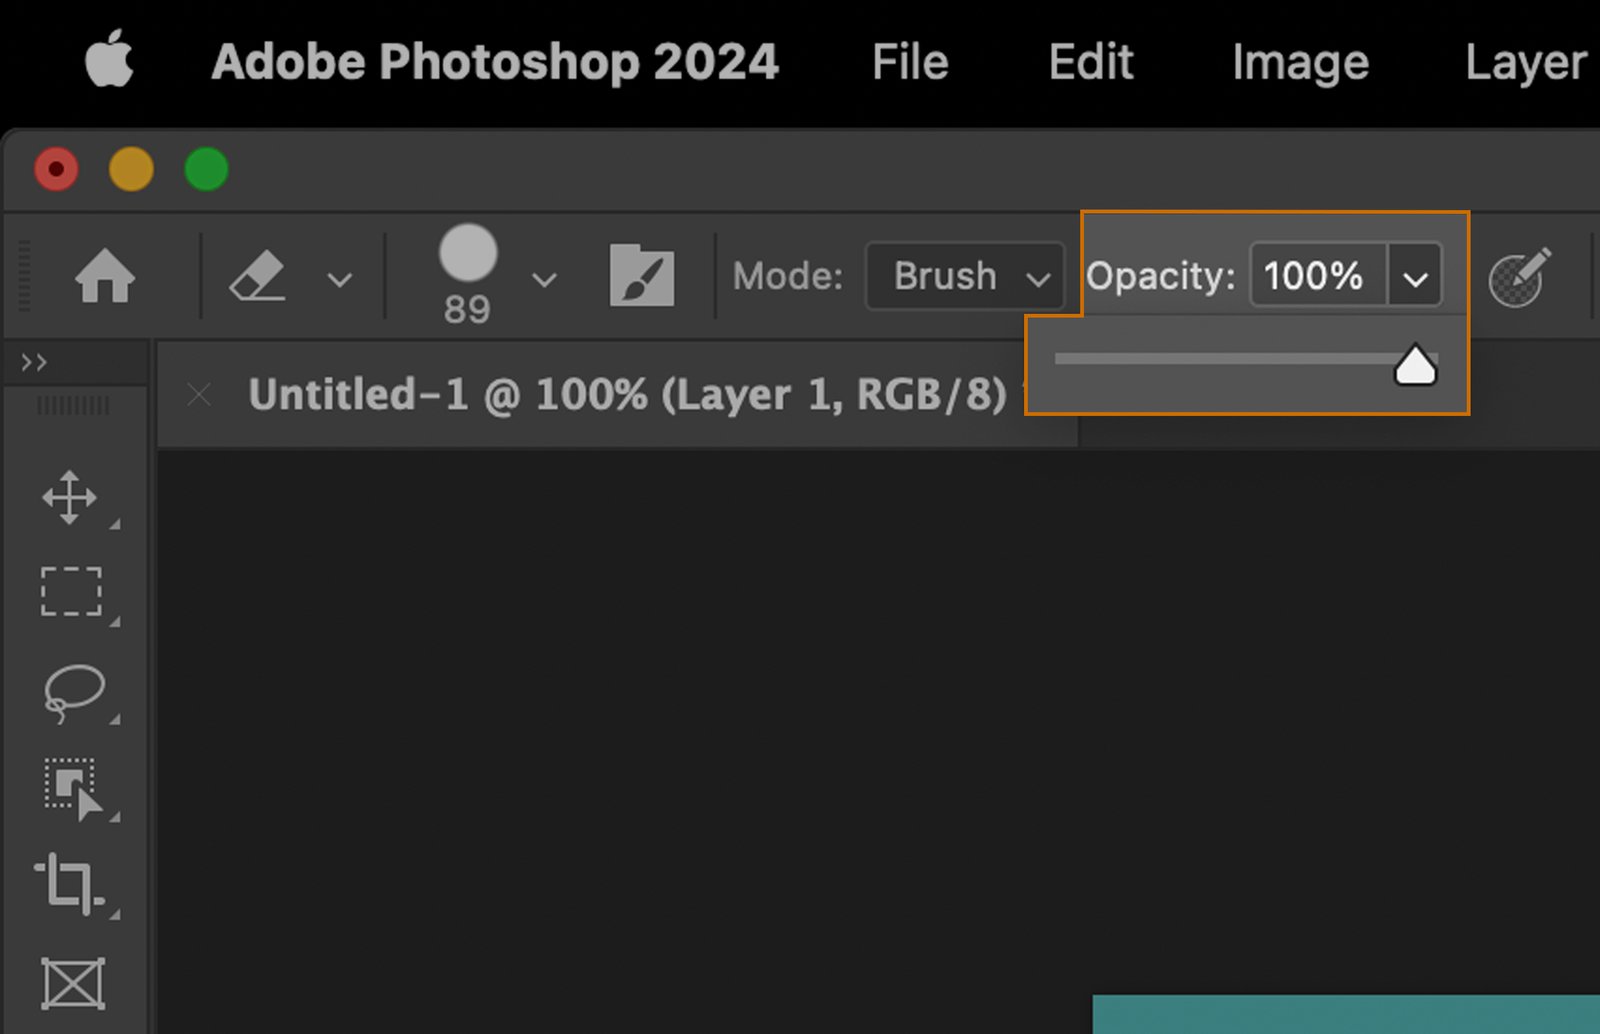
Adobe Photoshop showcasing a customizable brush effect with a selected panel for adjusting properties.

Step 2.2. Opacity

‘Opacity’ controls the transparency of the eraser. A lower value results in a more transparent erasure, while a higher value makes the erasure more opaque.
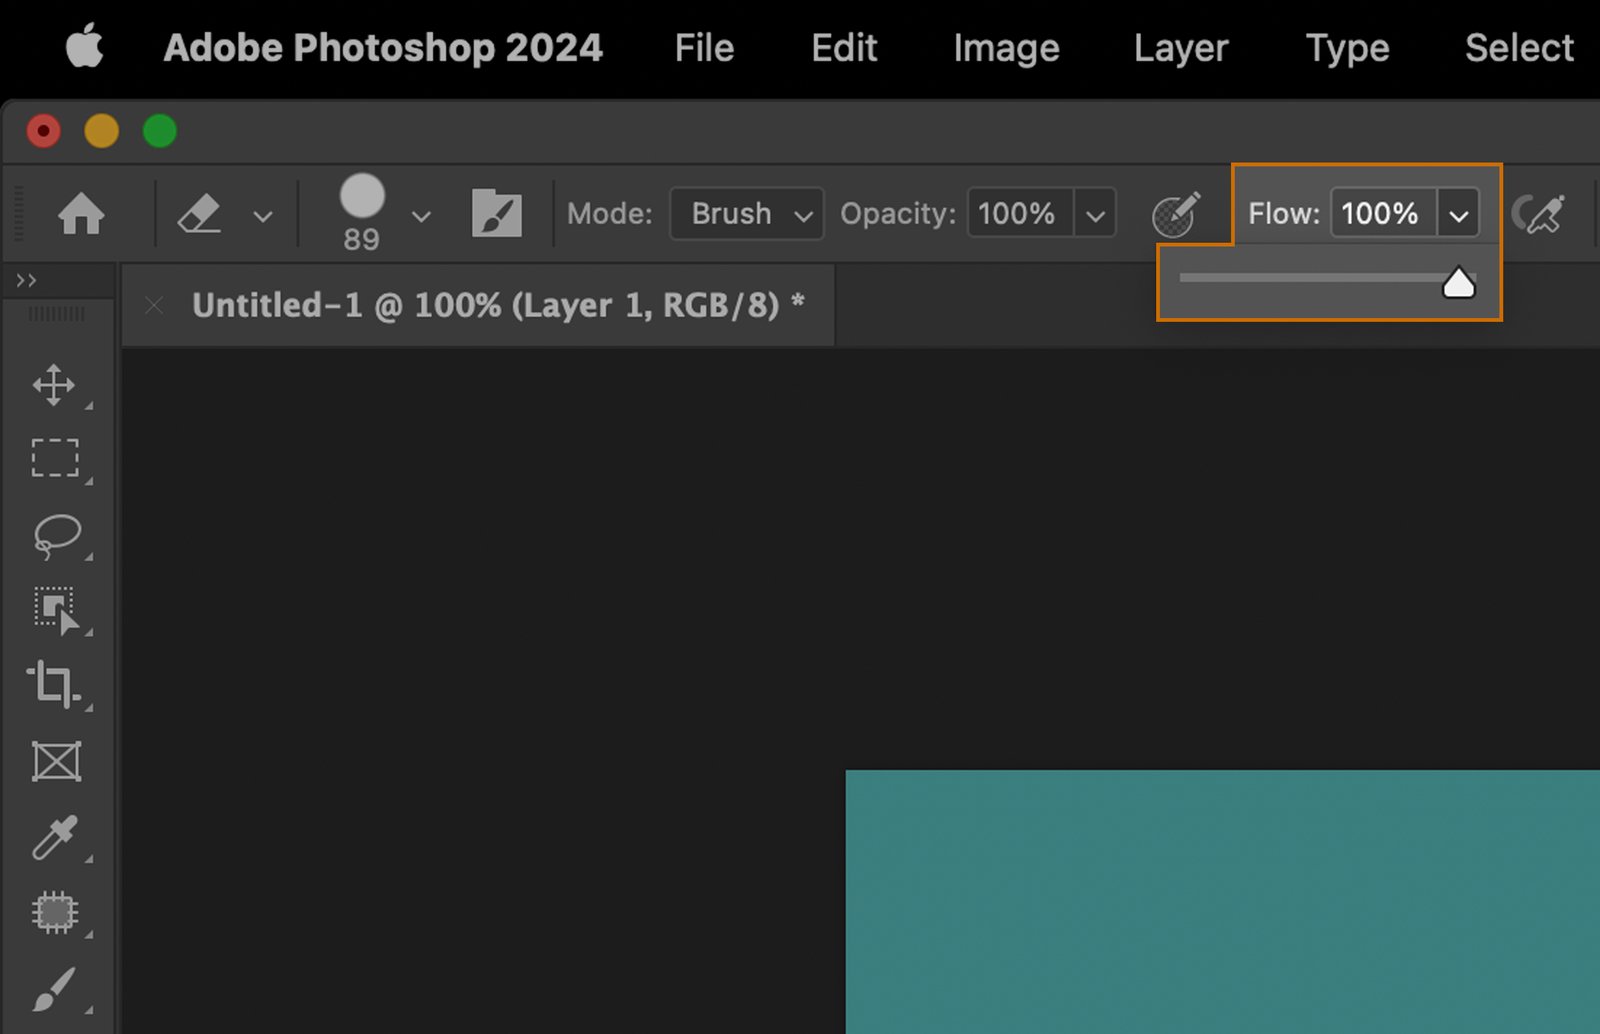
The Adobe Photoshop interface with several tools and panels visible, showcasing its features.

Step 2.3. Flow

The ‘Flow’ slider adjusts the speed at which color is applied as you move the eraser. Lower values mean slower color application.

Adobe Photoshop application, showing the workspace and displaying a dialog box with 100% zoom level.

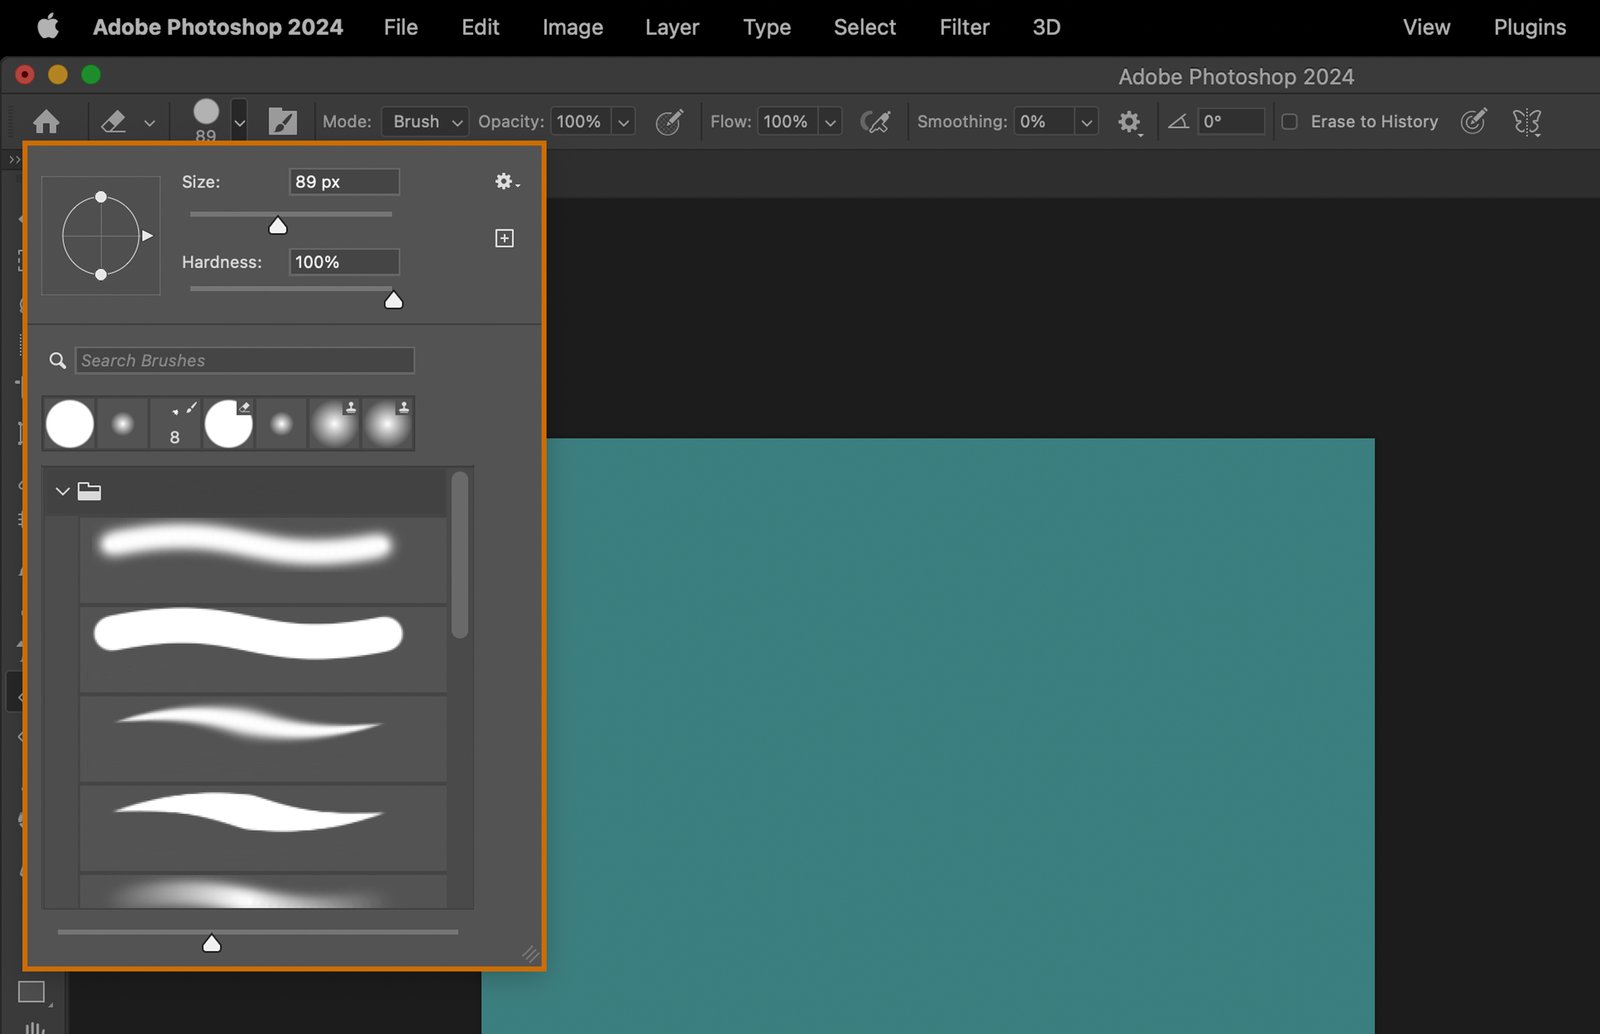
Step 2.4. Eraser Brush and Size

Here, you can select the brush type and adjust its size. Different brushes create different erasure effects.

An Adobe Photoshop window, showcasing various tools and properties.

Step 3. Choose the Eraser Type

Step 3.1. Brush Eraser

The Brush Eraser mimics a paintbrush and is useful for soft, blended edges.

A digital workspace with an illustration, a design program open on a computer screen, and a creative setup including various tools for graphic design.

Step 3.2. Pencil Eraser

The Pencil Eraser is similar to a pencil, creating hard-edged lines. It’s great for precise erasing.

A digital design software with a blue square in the center, displaying a simple black and white vector illustration.

Step 3.3. Block Eraser

The Block Eraser erases in a hard-edged square shape. It’s excellent for erasing large, straight areas.

A software interface used for designing and editing images, showing the process of creating an advertisement with a blue background.

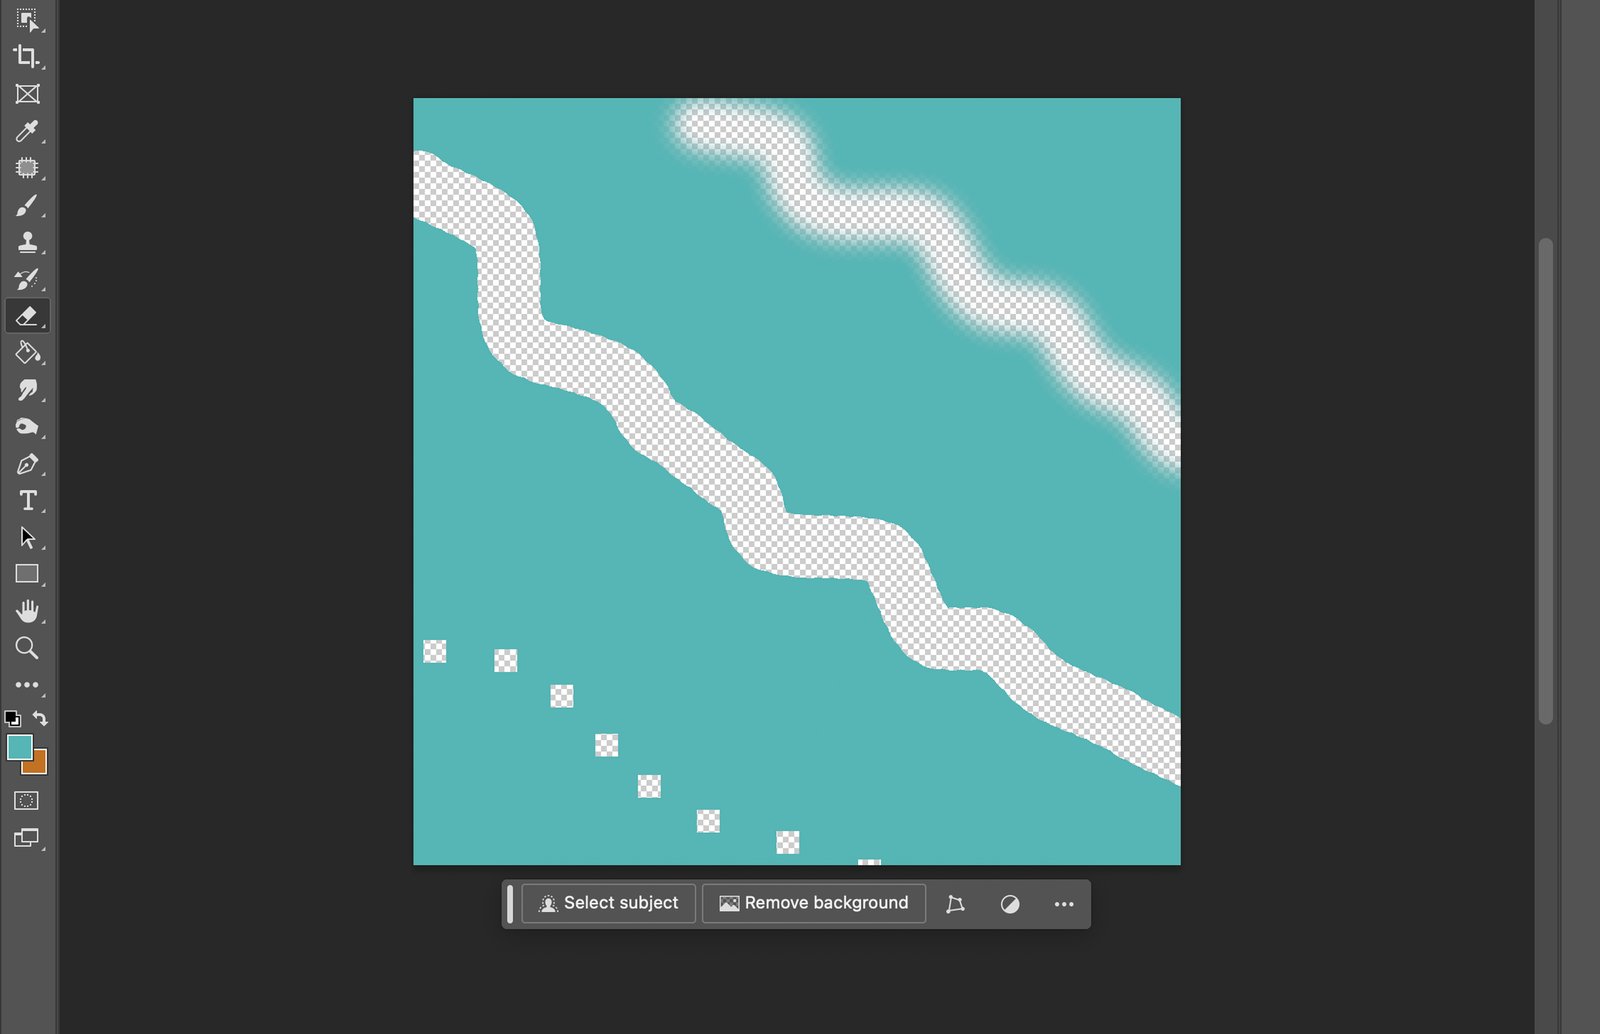
Step 4. Apply the Eraser Tool to Your Image

To erase, simply click on the area you want to erase and drag your mouse. The area under the eraser will be removed.

A graphic with a simple, stylized design featuring a blue background and abstract white shapes that create a wavy pattern.

Step 5. Understand the Eraser Tool Limits and Workarounds

Remember, the Eraser Tool permanently removes pixels. It’s recommended to duplicate layers before erasing.

Step 6. Practice Using the Eraser Tool

Like any tool, mastering the Eraser Tool requires practice. Explore its features and experiment with different settings to get a feel for what it can do.

Sidebar-ad_QCC_related-product
Sidebar-ad_QCC_free-sample_
Sidebar-ad_QCC_free-download_2-posters

Popular Content

Fujifilm X-T200 Review (Should You Buy This Camera in 2024?)

Read Article