Mastering how to use the Eyedropper Tool in Photoshop can simplify your editing process. This guide aims to solve the complexities of this tool, enhancing your color matching skills, and ultimately, the quality of your work.
Step 1. Locate the Eyedropper Tool in Photoshop
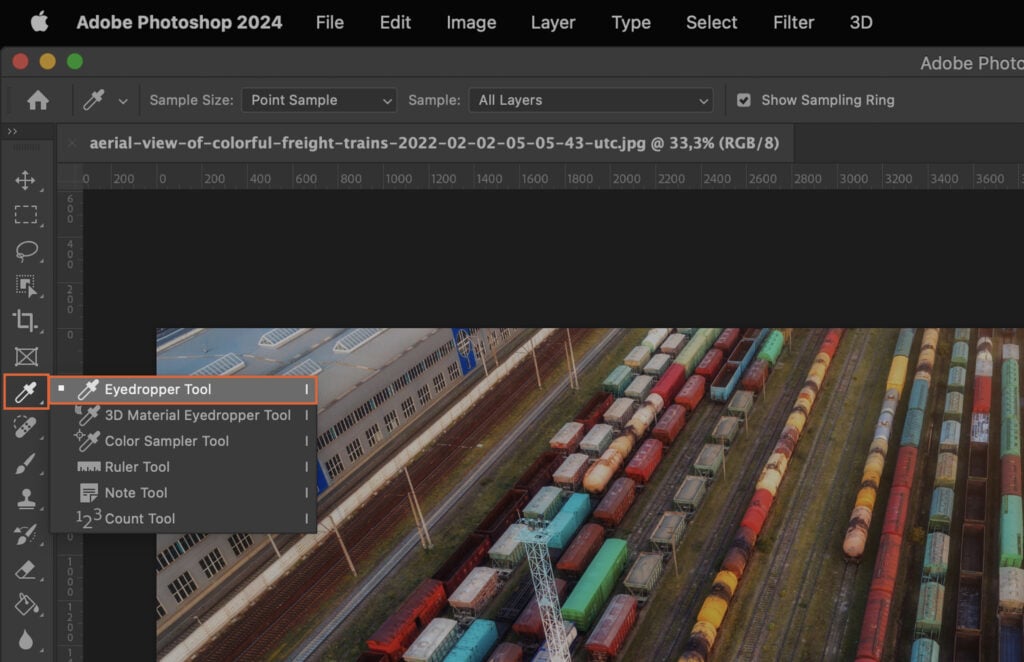
The Eyedropper Tool is found in the toolbar on the left side of the Photoshop interface. It’s represented by an icon that looks like a traditional eyedropper.
Step 2. Understand the Options Bar for the Eyedropper Tool
Once you select the Eyedropper Tool, the options bar at the top of the screen will change to reflect its unique settings.
Step 2.1. Sample Size
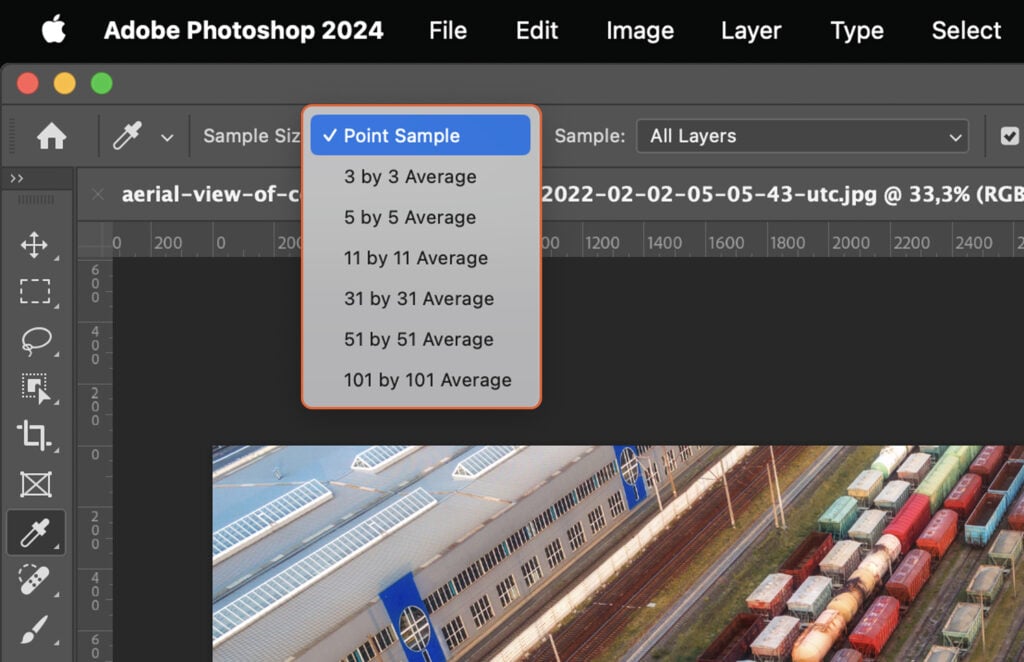
Sample size determines the number of pixels the Eyedropper Tool samples when you click. The larger the sample size, the more pixels it averages, which can be useful for noisy or grainy images.
Step 2.2. Sample Ring
The Sample Ring shows a preview of the color you’re about to sample (outer ring) and the currently selected color (inner ring).
Step 3. Using the Eyedropper Tool
The primary function of the Eyedropper Tool is to select colors from your image.
Step 3.1. Sampling a Single Color
To sample a single color, simply click on the desired area of your image.
Step 3.2. Sampling an Average Color
To sample an average color, change the Sample Size to a larger value, then click on the desired area. Photoshop will average the colors of the selected pixels.
Step 4. Changing the Sample Source
You can change the sample source from the options bar, allowing you to sample colors from different layers or even different documents.
Step 5. Using the Eyedropper with Other Tools
The Eyedropper Tool can be used in conjunction with other tools to create a more efficient workflow.
Step 5.1. Eyedropper with Brush Tool
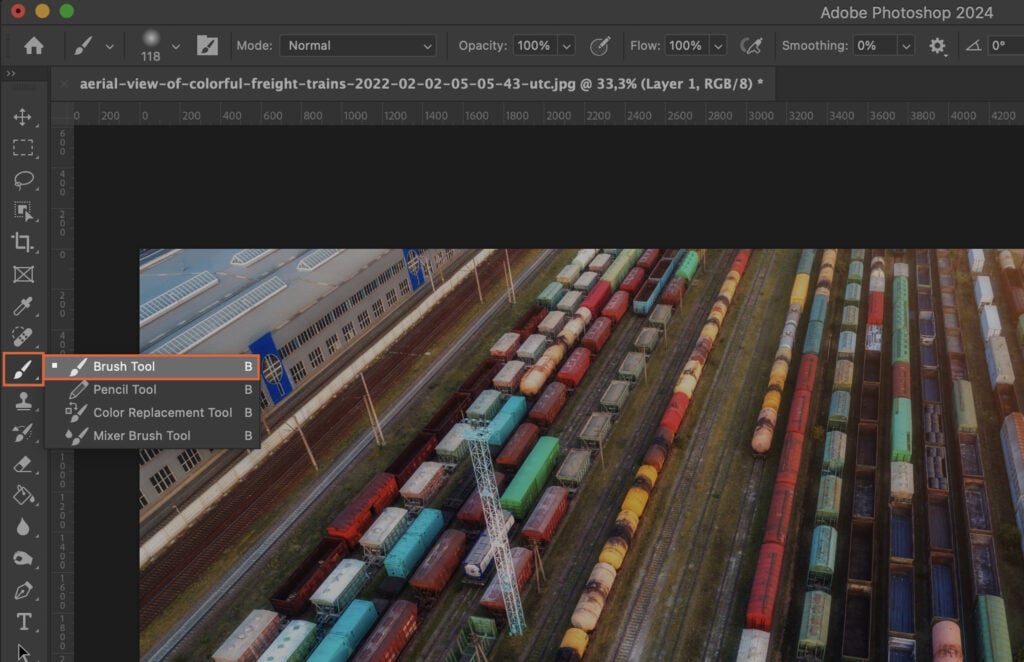
While using the Brush Tool, hold down the Alt key (Option key on Mac) to temporarily switch to the Eyedropper Tool and sample a color.
Step 5.2. Eyedropper with Gradient Tool
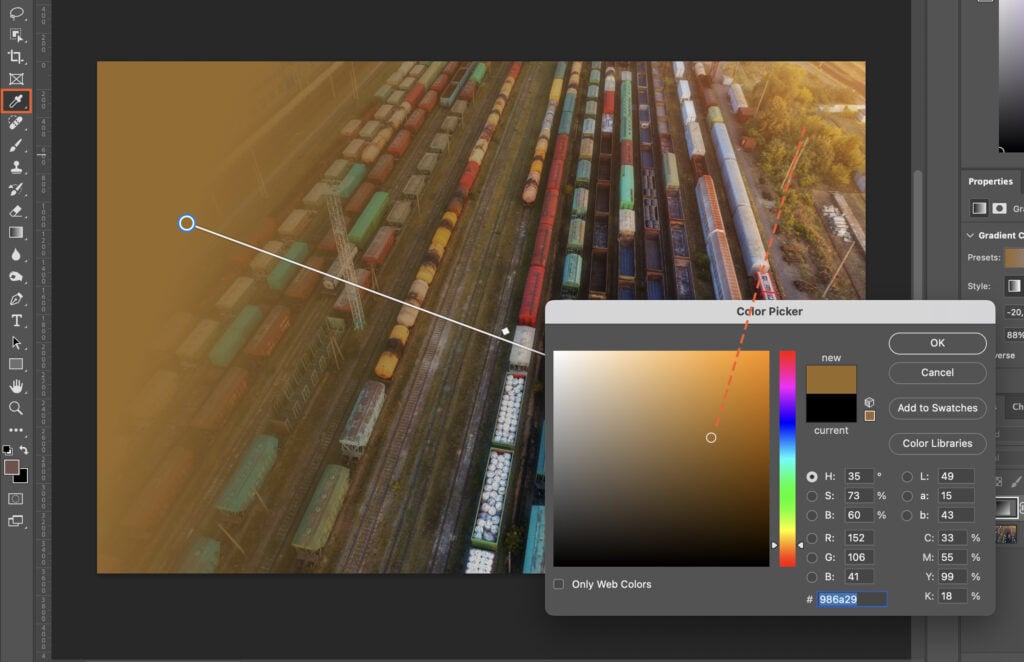
In the Gradient Editor, you can use the Eyedropper Tool to select colors directly from your image to use in your gradient.
Step 6. Understanding the Color Picker
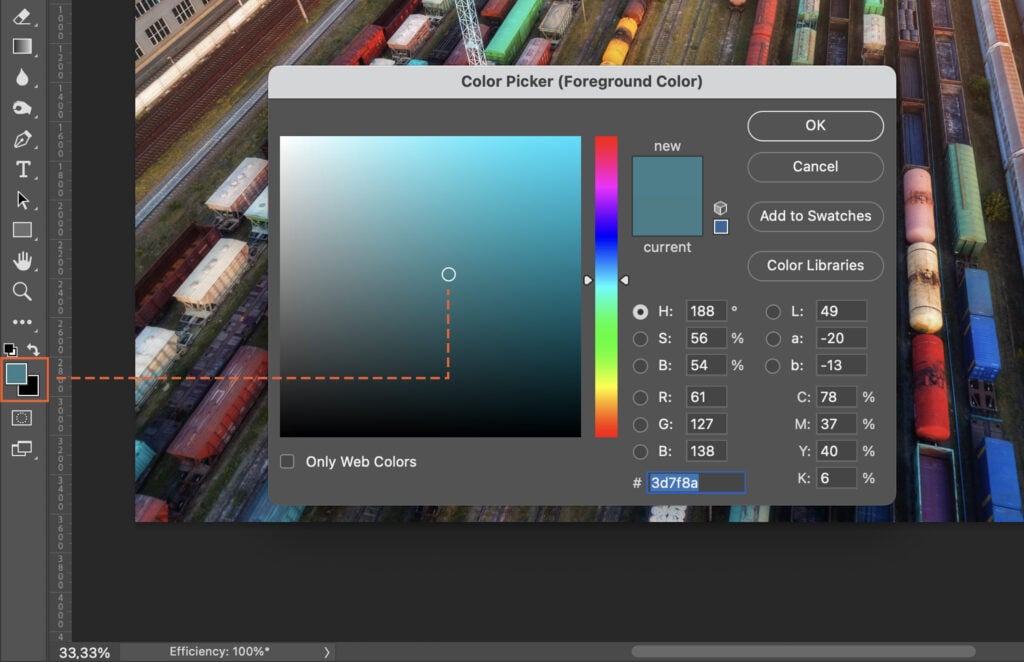
The Color Picker window is where you can fine-tune the color you’ve selected, adjust hue, saturation, and brightness, or input specific color values.
Step 7. Setting the Foreground and Background Colors
The colors you select with the Eyedropper Tool become your new foreground color. To set the background color, hold down the Alt key (Option key on Mac) while clicking.
Step 8. Saving the Selected Color
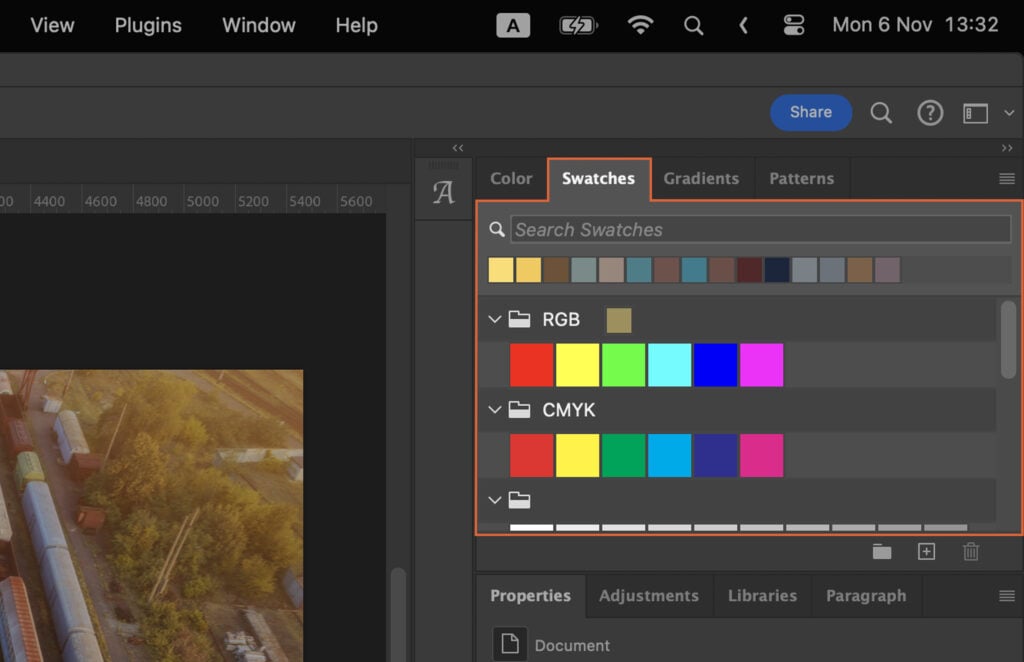
To save a selected color for future use, click on the color swatch in the Color Picker window and add it to your Swatches panel.
Step 9. Using the Eyedropper Tool for Precise Color Matching
The Eyedropper Tool is essential for precise color matching, especially when editing images or creating complex designs. Simply sample the color you want to match and apply it where needed.
