ACDSee Photo Studio for Mac 10 is a RAW processing and editing software exclusive for Macs. The software provides us with a space to store, sort, and adjust our digital photos. Photo Studio for Mac 10 prioritizes accessibility, letting us get to and perform sorting and editing actions in a simple way. And its biggest highlight is its price!
ACDSee has been in the digital imaging business for a long time. Its first iteration was released in 1994, and the software was even used for large-scale image management in the movie Titanic!
This tells us that ACDSee has grown as a digital photography software. It meets the needs of modern photographers. It also tells us that the program can store and efficiently sort through big catalogs, a welcome feature for any photographer.
Our ACDSee Photo Studio review will go into further detail. We will look at all the features it offers, from basic to advanced. By the end of this article, you’ll understand if it’s the right program for you.
I have used Adobe Lightroom since its first iteration and have experience with various editing software. I have tested the top options available on the market. This testing has included everything from high-end software to entry-level programs.
You can check out all our other Lightroom alternative software reviews to find the one that suits you best!


ACDSee Photo Studio for Mac 10 is a non-destructive RAW processing and editing software. It can edit our RAW photo files without touching the original file. So, you can make as many adjustments and manipulations as you like without ruining your image.
One of the key features that ACDSee Photo Studio 10 sells itself on is that it is a “total package” for photographers. They say you don’t need additional programs or plugins after purchasing it.
In my experience, this isn’t the case. If you want to perform advanced manipulations, you still need Photoshop.
With this software, you still find various editing adjustments and organizing functions. These are more than enough to control a wide batch of photographs in your preferred working style. It features good search functions and the whole range of rating systems we find with other software.
The most appealing attribute of ACDSee Photo Studio for Mac 10 is its price. It is available as a one-time purchase for a great price. This makes it ideal software for photographers who want a cheap option without sacrificing too much in terms of features and quality.
Photo Studio for Mac 10 now includes facial recognition. This helps speed up several sorting processes. You can now find and sort through images with people. This could be extremely helpful for portrait photographers. It also lets you attach a name to or batch delete a wide range of images.
You will notice that Photo Studio 10 doesn’t skip out on many basic features. It even pushes some functions into more advanced modes of editing. This is particularly evident in color editing.
You will find a Color Wheel and Tone Wheels that greatly aid in fine-tuning the color of your photograph. Features like this are helpful for many photography genres, from taking fashion photos to landscapes.


| Minimum Computer Requirements |
Minimum Computer Requirements
4 GB RAM (8 GB RAM recommended)
|
| Minimum Software Requirements |
Minimum Software Requirements
macOS 12 (Monterey)
|
| Tethered Shooting |
Tethered Shooting
No
|
| Mobile / Tablet Option |
Mobile / Tablet Option
Yes
|
| Keyword Tagging |
Keyword Tagging
Yes
|
| Camera and Lens Corrections |
Camera and Lens Corrections
Yes
|
| Brush Tools |
Brush Tools
Clone, Heal
|
| Layered Editing |
Layered Editing
Yes (uses its own approach)
|
| AI Editing |
AI Editing
No
|
| Noise Reduction |
Noise Reduction
Yes
|
| Export Options |
Export Options
JPEG, TIFF, PNG, PDF, HEIC
|
| Best For |
Best For
Photographers who prioritize file management and will make minimal tonal or advanced adjustments to their images
|
As mentioned, ACDSee Photo Studio for Mac 10 sees itself as a “total package.” While that may be true, it doesn’t directly compete with other Lightroom alternatives. This is because it doesn’t have the advanced AI features that are being incorporated into many applications.
What is strange is that ACDSee Photo Studio Ultimate 2024 (for PCs) does have these features. So, ACDSee hasn’t transferred these features to their Mac software yet, which is odd.
Regardless, Photo Studio 10 does include enough features that it doesn’t feel lacking. Instead, there is a wide range of actions managed in a convenient way. This is true across the entire program, from the organization to editing and even through the importing and exporting process.
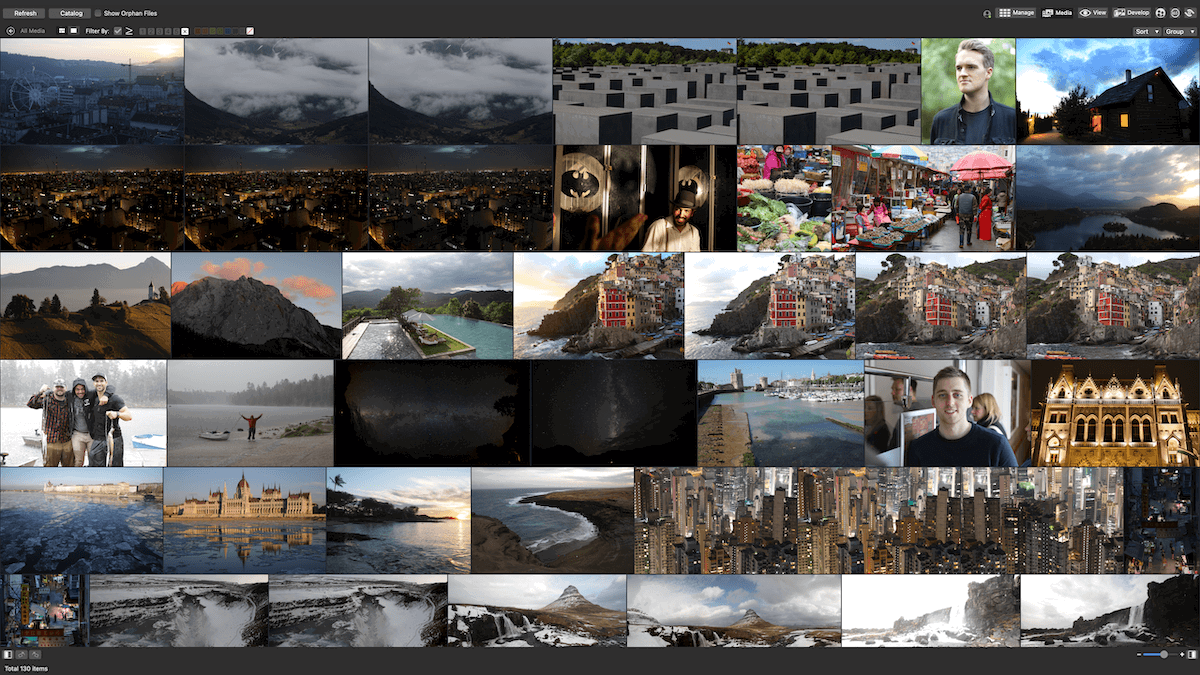
The new Media Mode makes the photo management and pre-editing process much simpler. ACDSee rightly identified that images got lost in the display because Manage Mode shows a wide range of great information.
Now, Media Mode puts the images front and center without distractions. But it still lets you sort by the same range of filters.
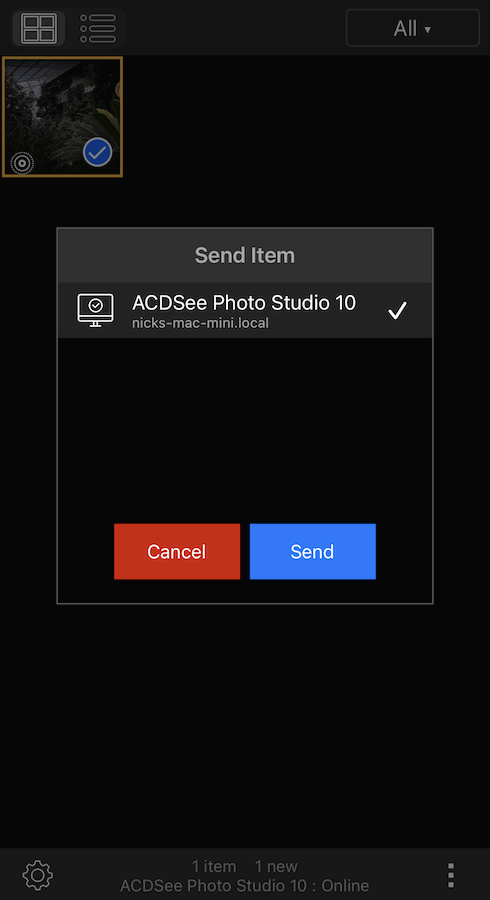
ACDSee Photo Studio 10 supports a wide range of RAW formats. It even supports HEIC files used in most iPhones. On top of this, ACDSee provides an application that lets you send images directly from your phone to the app.
Photo Studio 10‘s main strength is its price. Finding another software that performs as many key features as ACDSee for the same price at the same standard is hard.
This is a welcome price point. We are used to paying high prices for good quality products in any facet of photography. With ACDSee, you can achieve great edits with excellent control for a fantastic price.
Another key strength is its basic editing adjustments. This is particularly true in regards to its color editing.
It may provide less control than Lightroom or Capture One. But it lets you fine-tune the color process. This is particularly helpful for those working with sequences who want to color-grade their entire work.
I am also a big fan of the interface. ACDSee Photo Studio for Mac 10 balances information and simplicity well. The application is much easier to navigate than some others. It’s good for those unfamiliar with editing software or easily overwhelmed with information.


ACDSee Photo Studio for Mac 10 doesn’t have an import process. Instead, it uses a file browsing process and creates new files when you edit. This means you don’t have to wait to import a big collection of photographs.
Instead, you may have to wait longer when you finish your edit and want to save the current process. This is a trade-off that makes sense, as you will not edit every single photo.
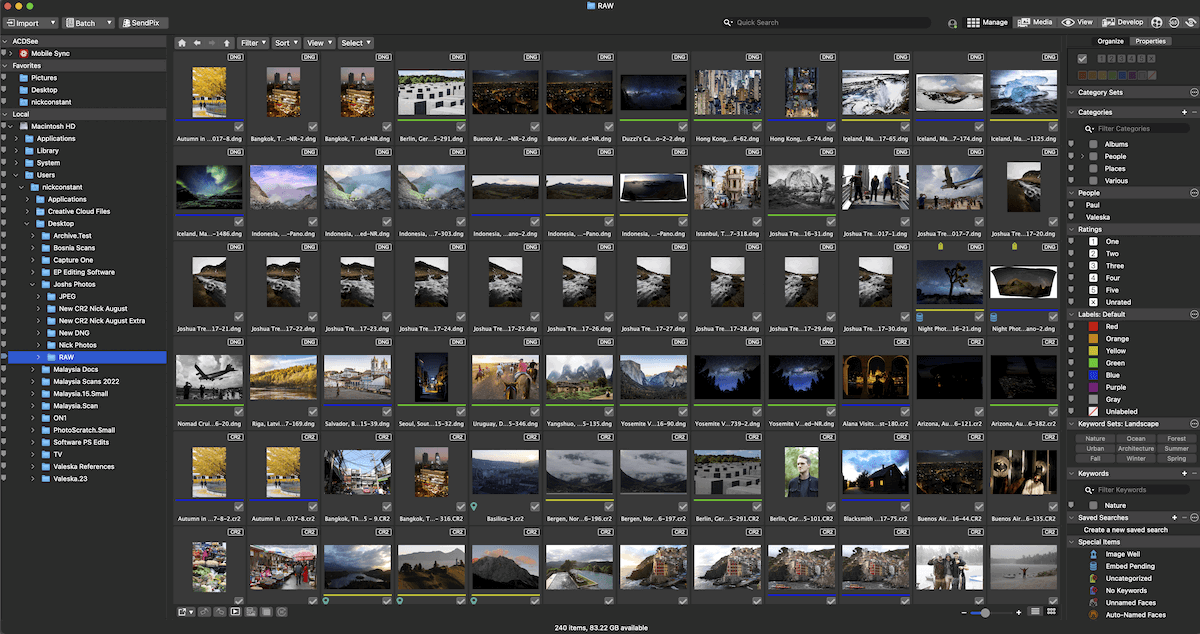
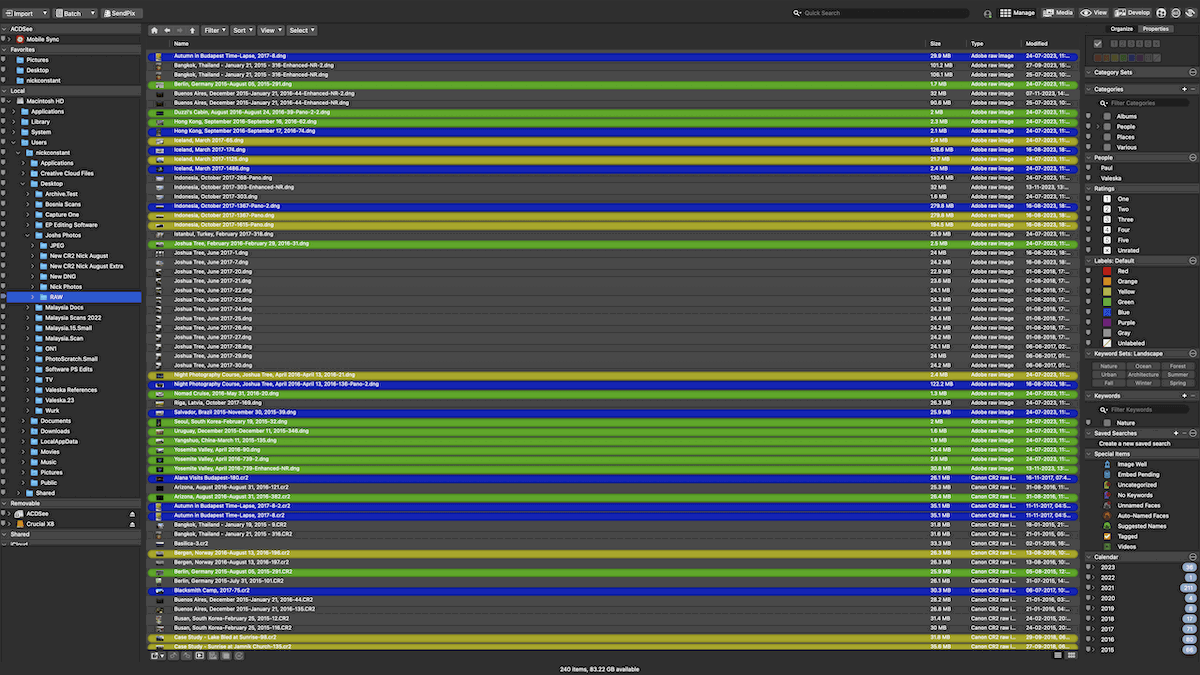
The Manage Mode has a comprehensive list of ways to organize your current folder in its right-hand panel.
Any photographer who has worked with an extensive photo catalog will appreciate the clarity and variety of options. You can sort by people, ratings, labels, keywords, special items, and dates.
There is a lack of smart features like smart organization. But this is not surprising with the lack of AI across Photo Studio for Mac 10. These features are found in the PC versions of ACDSee Photo Studio 2024, along with smart keywords.
There are a few different viewing modes in ACDSee Photo Studio 10. The new Media Mode takes center stage in this version. It fills the gap with a viewing mode that places the photos front and center. Once you learn your way around this space, it becomes the ideal culling area.
The Manage Mode can get confusing with the color labels and ratings. Media Mode hides these but keeps the information, meaning you can still sort by these groups. In Media Mode, the portrait images appear much smaller, so it’s worth increasing the thumbnail size along the bottom.
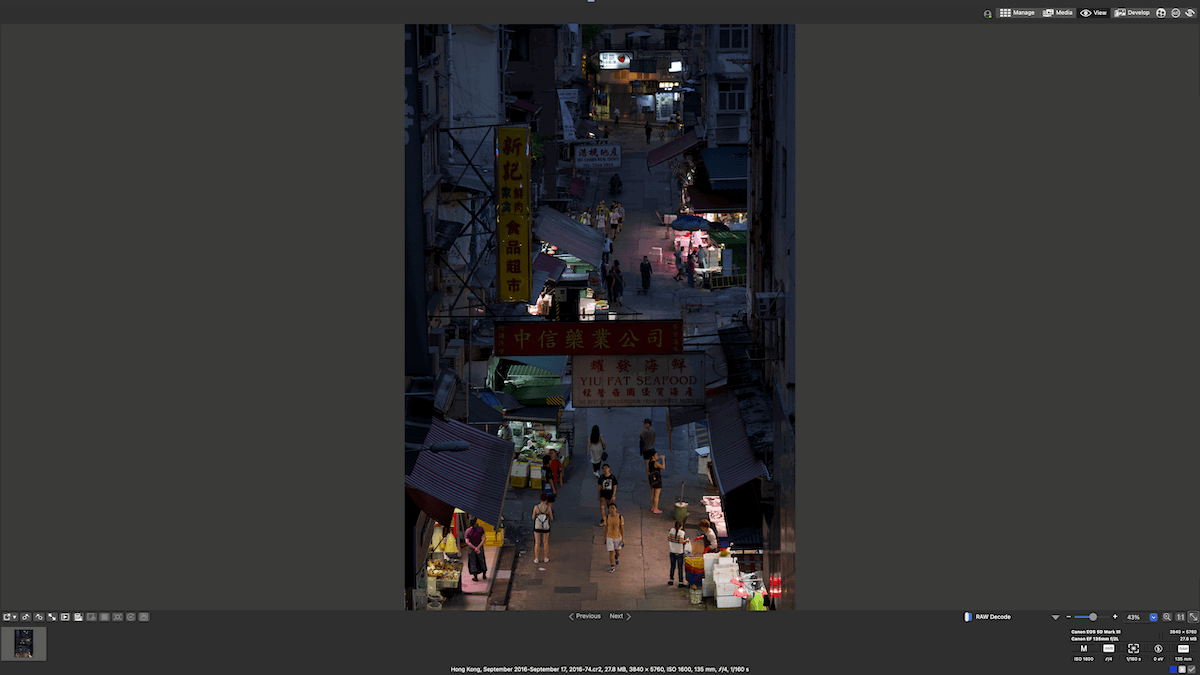
There is also a View Mode, the full-screen view in Photo Studio 10. This filmstrip-style window lets you focus on a single image. The best feature on this page is that it easily shows you your camera settings at the bottom right of the window.
A unique feature you won’t find in many other programs is the List View in Manage Mode. This reduces the image to small thumbnails, and the text information is the most prominent feature.
A feature like this is extremely helpful for teams working with large quantities of photographs. If the images are well documented through their title, you can easily find batches and organize them.
ACDSee Photo Studio 10 has a simple search bar that lets you search by the title or keywords you have attached to your images. It isn’t the most advanced search bar, as you can’t search by camera or lens type. But it provides some parameters you can set and saves recent and favorite search terms.
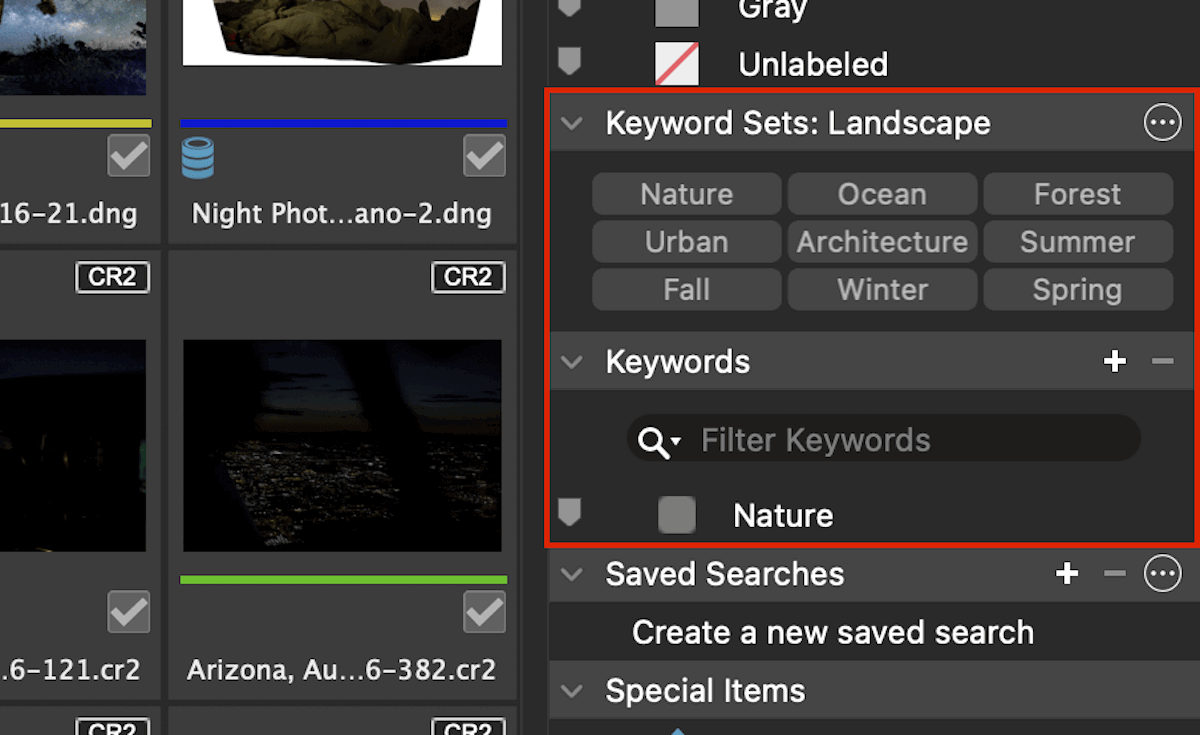
Adding keywords to specific images is incredibly easy. There is a Keyword Sets section in the right-hand panel of Manage Mode. This can be changed between various photographic styles, like Landscape and Portrait. Inside these sets are keywords you can click and automatically set to your image.
Photo Studio 10 provides a wide range of filters, ratings, and labels you can attach to images to help your sorting habits. A wide range of sorting options are also available for viewing your images in Manage Mode. Thanks to facial recognition, you can even sort the images by portraits.
ACDSee Photo Studio 10 possesses excellent RAW processing capabilities. The image quality is on par with top-of-the-range software, so you don’t sacrifice clarity or sharpness. When comparing the results to Lightroom, you will notice that the results have less contrast. You will also notice the colors are less vibrant.
Those last two points aren’t much of an issue. Some professionals prefer working with flatter images. As you can see in the highlights or shadows, we can see more information in the ACDSee results.


Let’s now look into the performance of Photo Studio 10‘s basic editing tools. The Develop Mode features an easy, straightforward window that makes it easy to focus on the actions you want to perform.
These adjustments are ordered in a convenient way that mimics a good workflow. You can follow down the list and adjust the sliders that are relevant to you.
I am a big fan of the Light EQ tool they have. In the Advanced Mode, you can get a great deal of control over your image. They also include an information box that helps display washed-out or blacked-out tones and colors.
The Exposure Compensation tool lets you adjust for 4 stops of light in either direction. This tool adjusts very well. It’s not too harsh or subtle. From our comparison, we can see that the ACDSee results are much darker.
This could be because ACDSee only goes up to -4, whereas Lightroom can reach -5 stops. Either way, the ACDSee Exposure tool is much more subtle than it seems. And it acts similarly to what I would expect from a camera.


We can put the basic editing tools under further testing by looking at how each program adjusts shadows. Photo Studio for Mac uses the Light EQ to adjust the shadows, midtones, and highlights.
The Light EQ is split into three sections. No single tool functions the same as other programs, but we will look at its Shadow Tool for comparison to Lightroom.
These results show that ACDSee is very subtle with its edit. With the Light EQ, you can perform harsher edits in the Standard and Advanced modes. To get an accurate comparison, we must set the Lightroom slider to -50. Regardless, let’s see how they compare.


The most notable difference? It seems ACDSee has a more profound effect on the colors than just the tones. Reducing the shadows adds more saturation to the image. Lightroom does a better job at this adjustment, especially as we are just comparing each program’s simplest slider.
ACDSee Photo Studio for Mac includes a range of other basic edits. A standout feature for me is its large Tone Curve. This is an adjustment I consider to be crucial as it helps you understand images and histograms better. It also lets you adjust in different channels, perfect for more advanced levels of control.
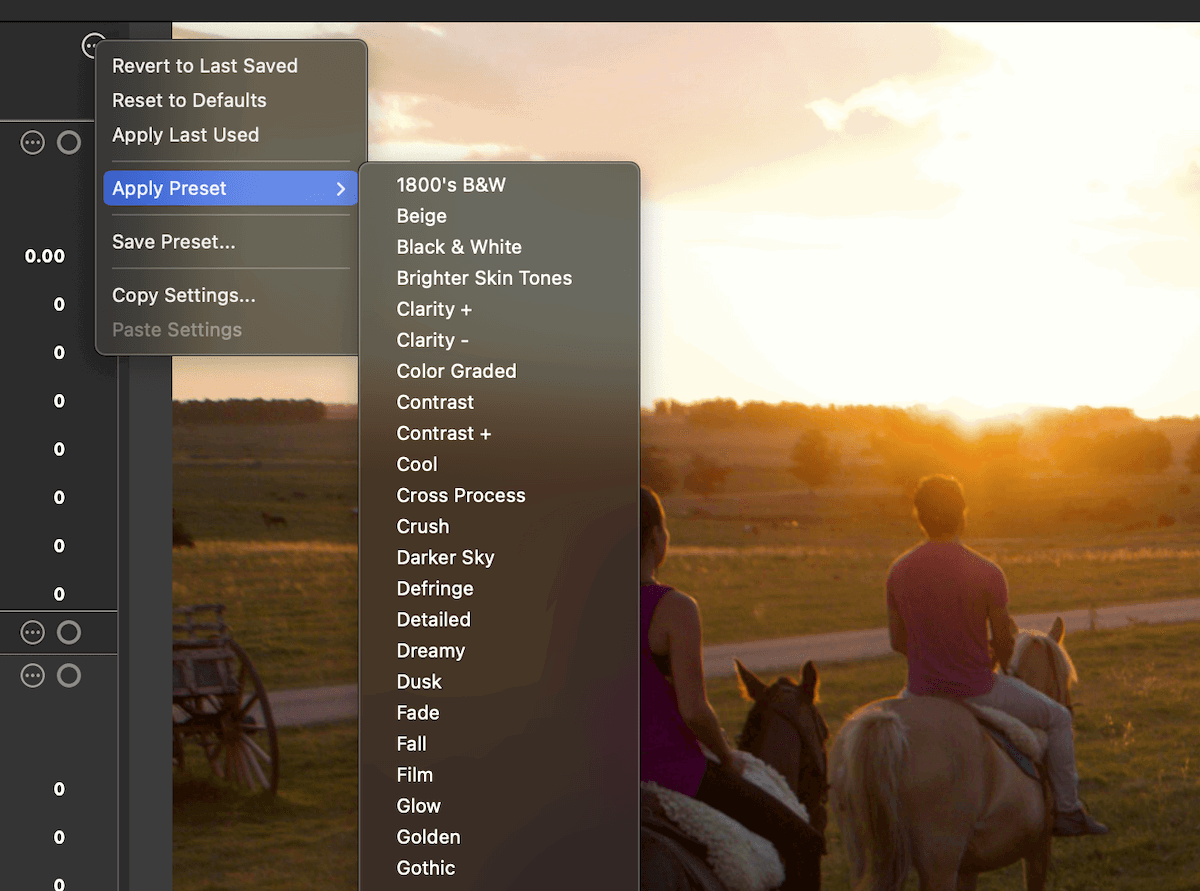
Photo Studio 10 features a range of simple presets you can apply to your photographs. It is not a comprehensive list, and ACDSee does not provide a preview before you set a preset. This means the process of finding your ideal option can be quite laborious.
Photo Studio 10 does let you create your own preset. After clicking Save Preset, you can name and set which adjustments you want to be copied over. This is helpful if you plan on batch-editing images in a similar style. This can benefit many photographic genres, like event and wedding photography.
ACDSee Photo Studio for Mac 10 has a Repair section. This lets you use a Heal and a Clone Brush. The Heal tool doesn’t perform to a good standard, but the Clone tool works well.
The Heal Tool requires you to set a point of reference. We are used to seeing this feature specifically on a Clone tool. I’m unsure why we need it to produce a more accurate healing than a content-aware approach.
Even when setting the reference point, the Heal Tool doesn’t do a great job on larger items. It even kept some of the objects that I fully brushed over. So, this tool doesn’t perform the way it should.
On the other hand, the Clone Tool works great. It is smooth, and you can be as accurate as you like. It is not up to par with Photoshop, but it lets you make the necessary adjustments.
Photo Studio for Mac also comes with a Red Eye Correction. This isn’t needed much with modern cameras, but it could help those going through their old digital archives.


Photo Studio 10 provides a few different ways to view the image you are editing. The most important is the compare button named Show Original. This does what it says. It shows the original image when clicked. This is helpful to see how much you have pushed the edits in your image.
ACDSee has also put a view that shows the clipped points in your image. This highlights your washed-out highlights and blacked-out shadows. This is helpful to ensure your image has the most information possible.
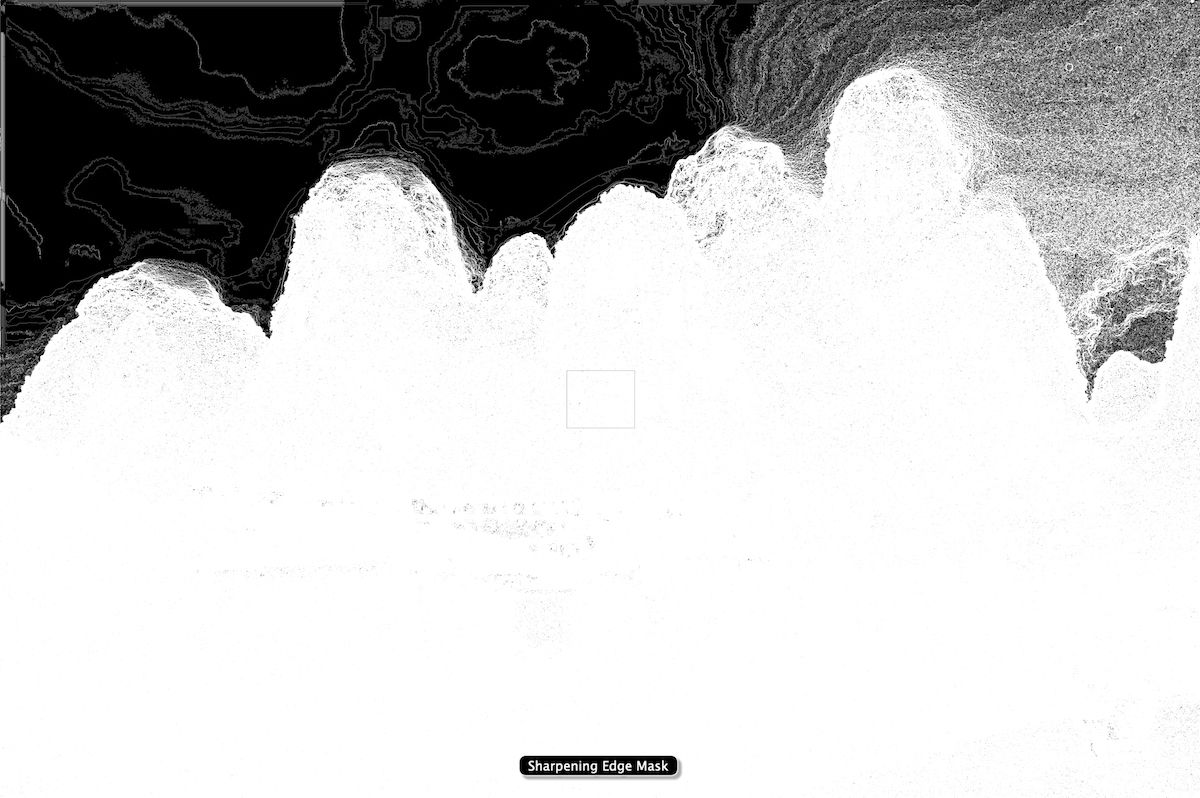
If you move over to the Detail panel, you will find a Sharpening Edge Mask view. This can help you identify the accentuated edges when refining the sharpening in your image. This can be helpful but is most likely something you won’t use daily.
You might also find the Grid Overlay useful for composition. You can find this in the Geometry panel.


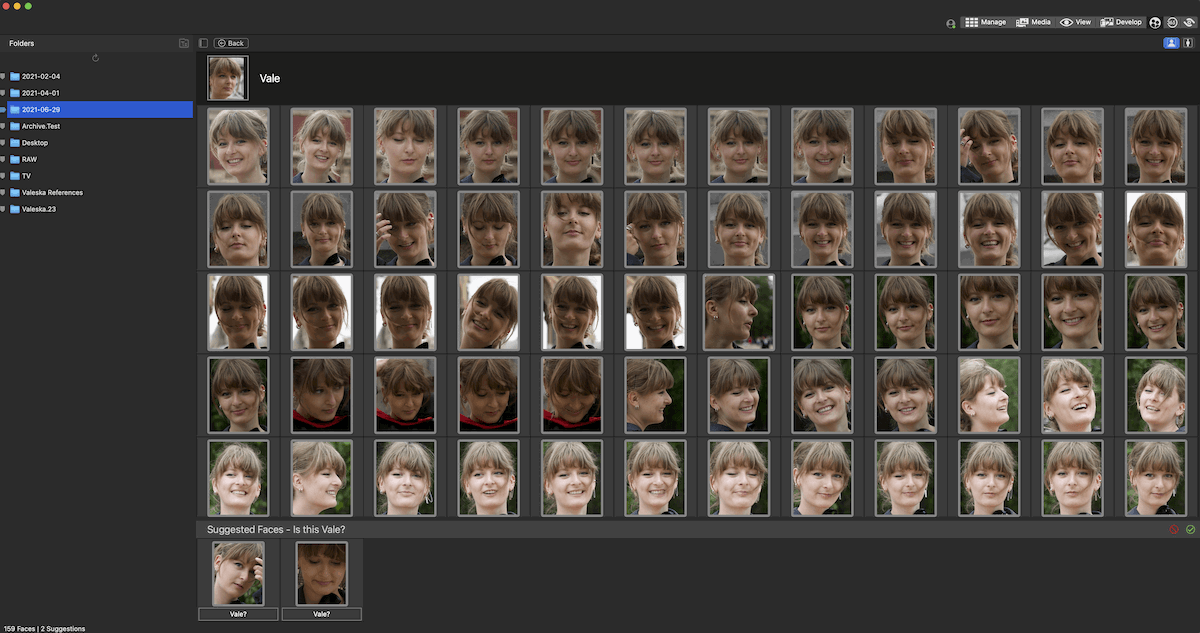
People Mode is one of the key features of ACDSee Photo Studio for Mac 10. We are familiar with facial recognition from several photo editing applications. We even find it on our smartphones.
As we are familiar with the shortcomings of facial recognition, when a program makes a big deal about this feature, we expect big things. In reality, ACDSee’s facial recognition functions similarly to any other technology that uses it.
People Mode has its own workspace in ACDSee Photo Studio for Mac 10. You can sort through the detected faces and attach names.
I decided to test these features on a shoot containing 190 street portraits of the same person. At the start, it showed me only two faces, and it couldn’t recognize it was the same person. As I clicked through some of the images, it picked up more.
After I named the model, it only produced 15 other matches out of 190 photos. Photo Studio 10 also gave me five suggested faces of possible matches.
After accepting all these matches, I was left with 21 images of the same model. After cycling through each image (which was annoying and long to perform), the program grouped 55 out of the 190 portraits. After revisiting the same page a few times, the number eventually reached 161.
Overall, this technology works okay when grouping portraits. But, it is not a game changer in facial technology. So, if this is an important reason for you in software, consider other options. The best available facial recognition software comes from Adobe Lightroom.
The Smart Brush is an excellent tool that helps you mask or alter certain aspects of your photograph. The Develop Brush in Photo Studio for Mac lets you use up to eight brush adjustments on each image.
This is a nice, simple way to introduce a beginner to layer editing without the standard layer approach. In this program, you simply choose a new brush at the bottom, which you can tick on and off.
You can turn on the Smart Brush inside the Develop Brush panel. The Smart Brush can be used in three modes (Brightness, Color, and Magic). The Smart Brush identifies different areas. Thus, it gives you a more accurate brush without making it smaller.
The Magic Smart Brush works the best. It helps identify the subject or area you want to cover and produces an accurate mask. Its strongest feature is that it doesn’t apply a full coverage of the space, leaving certain bits out of selection. This makes subtle adjustments much more believable.
The Brightness Smart Brush works great as well. This is best if you want to mask an area with a high contrast between the sky and the background. You still have to follow the shape of your subject, but it is a great way to make good masks quickly.


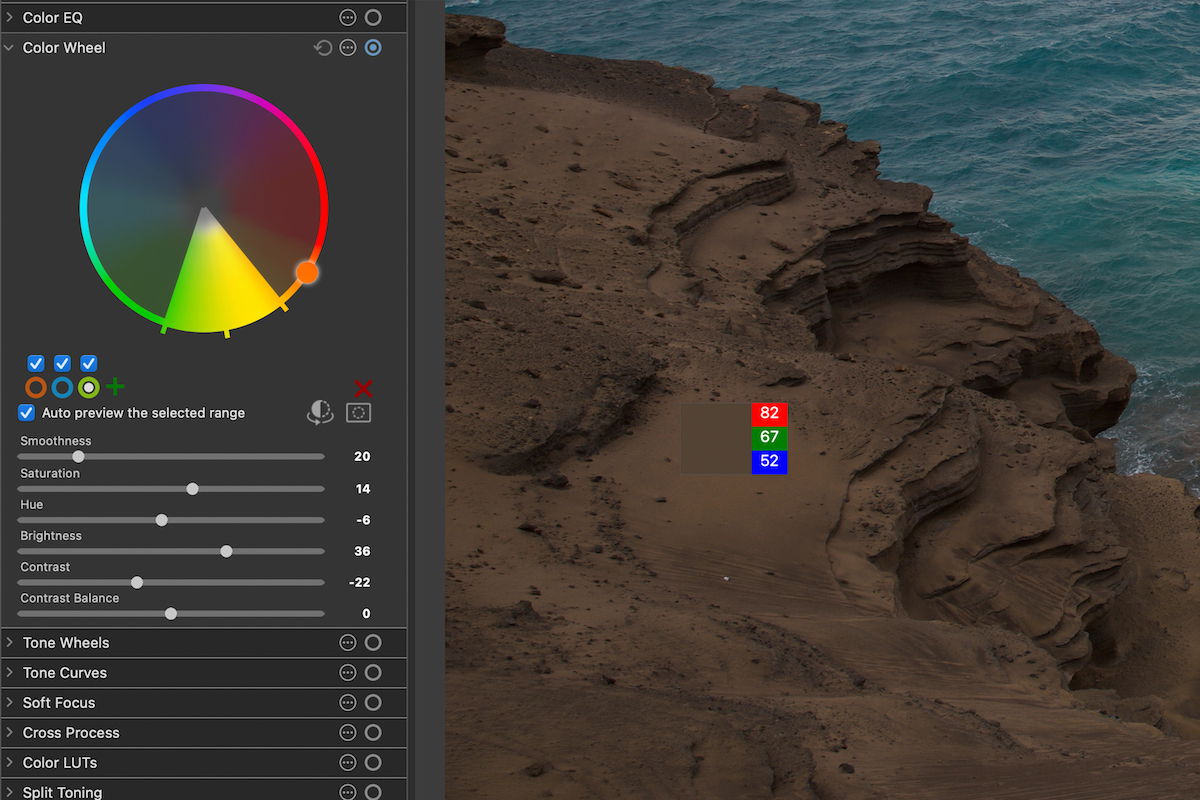
The Color Wheel is one of the best tools in ACDSee Photo Studio 10. It brings us specific levels of color control in an incredibly easy and approachable manner. The tool also lets you perform numerous color changes on a single photo. Again, this is a great introduction to layered editing for beginners.
Select the Color Wheel box under the Tune panel to use this tool. You can select a color range from the wheel or click directly on the color you want to adjust on your image.
From there, you can adjust the range of the spectrum you want to edit by moving your “pizza slice” selection. When adjusting this range, a unique view appears over your image. This highlights what color will fall into your mask.
After you select your color range, you can make several adjustments using the slider. These can be subtle or completely change your selected section’s color.
The more dramatic adjustments will suffer from noticeable edges between the color you want to edit and the rest. This is most noticeable in images with a deep depth of field.
The Color Wheel tool is fantastic. I recommend it to photographers who like to get creative with their work. It can be useful for product photography, where colors must be as accurate and desirable as possible. You could also edit the background of your product shots easily!
I made an edit using only the Color Wheel to show you can bring the best out of each color. This edit is straight from the RAW file and has no basic adjustments attached.


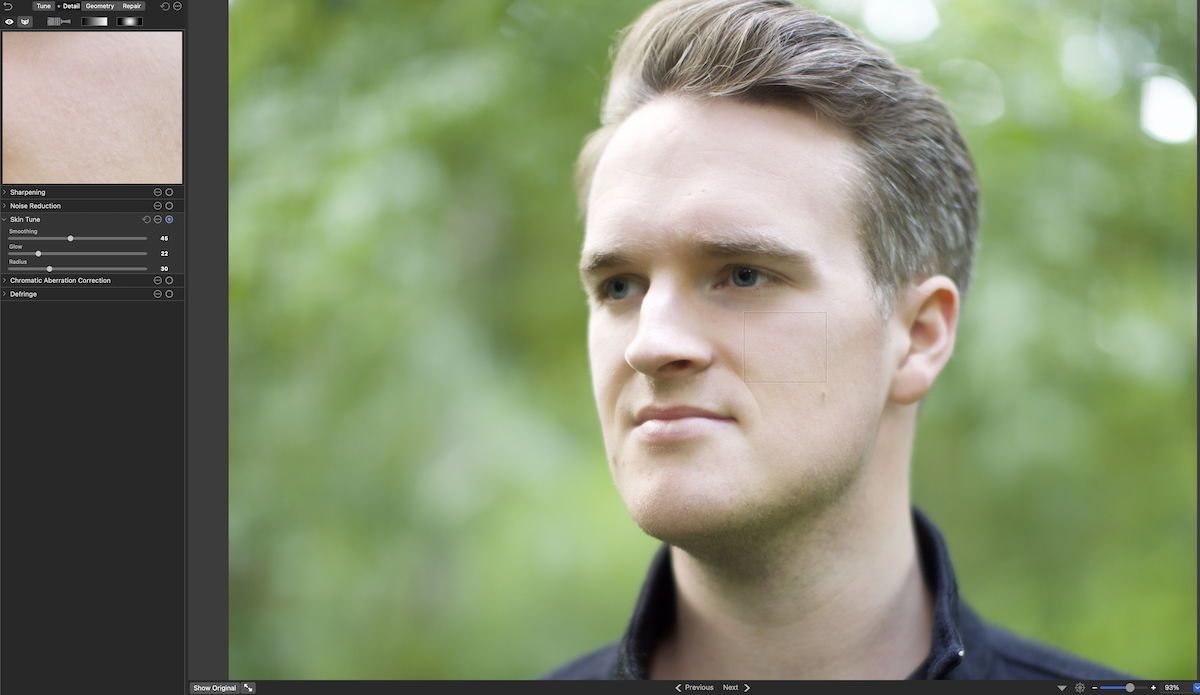
ACDSee Photo Studio for Mac 10 includes a dedicated Skin Tune section. This helps smooth over your portraits. You can find the Skin Tool inside the Detail panel. You get three sliders that can greatly impact your model’s skin.
The Skin Tune tools are a great way to subtly improve your model’s skin without extensive photoshopping. The tool doesn’t eliminate blemishes. Rather, it adjusts the smoothness and tones of the face to make the skin more appealing.
I have found that the tool can adjust other tones around the image, not just on the skin. This is slightly annoying as the tool should only act on the skin. It is not too much of an issue, though. It is only evident when pushing the Glow slider.

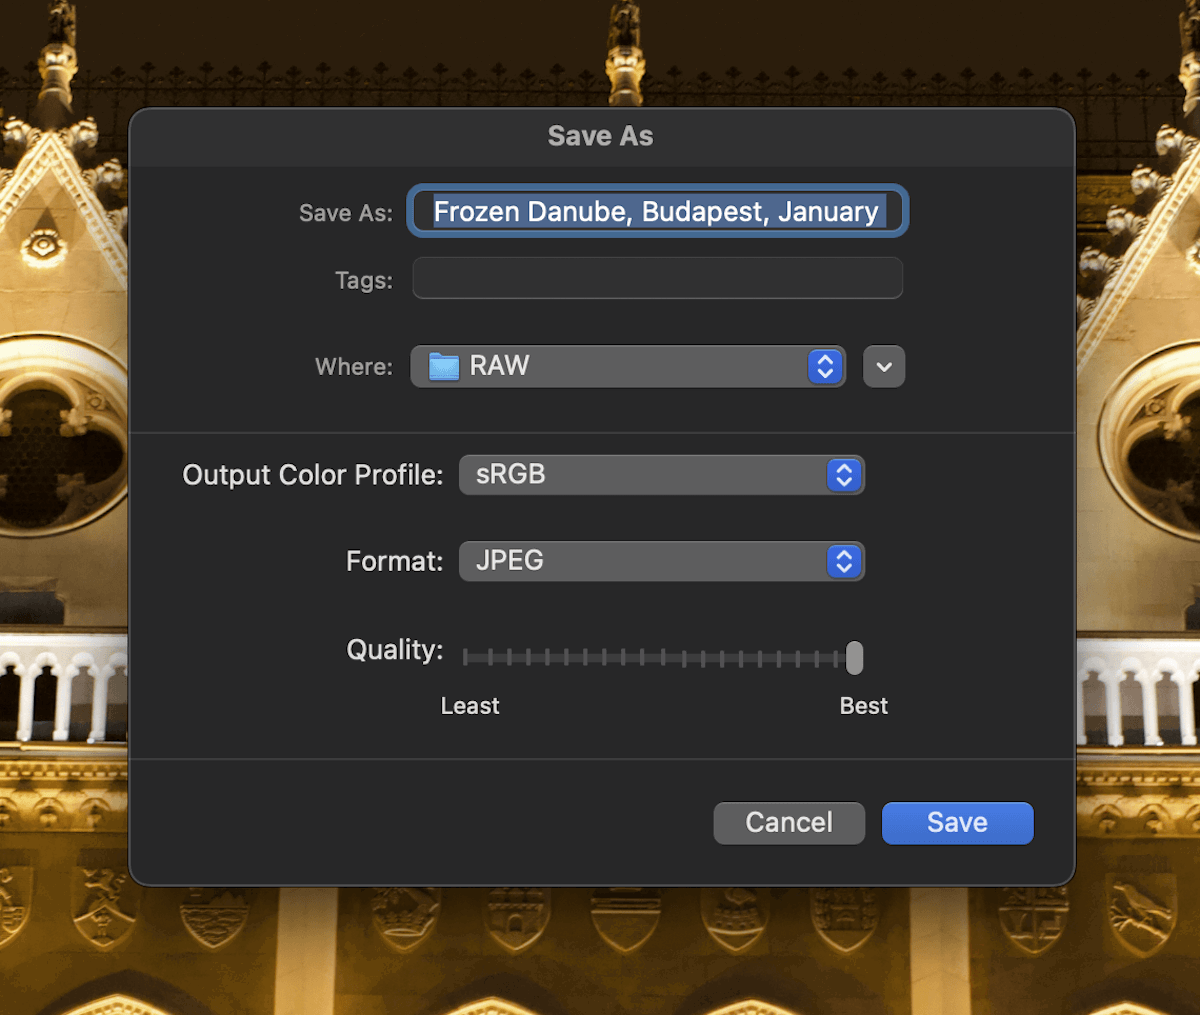
ACDSee Photo Studio 10 does not offer many options for exporting your photographs. The program’s exporting process is simple. Instead of an export button, you go to the Save As… button in the File drop-down.
ACDSee only offers five export formats and doesn’t let you export in the original file or DNG format. This is a huge oversight. It prevents you from transferring the most information you can to advanced programs like Adobe Photoshop.
There are also no advanced controls for exporting. There is no way to add a watermark at this point, no way to add additional metadata, and no way to dictate the image size. There is a selection of color profiles and a Quality slider.
So ACDSee presents us with the bare minimum, and honestly, it’s fine. The photographer using this software will likely want a quick and simple export. This process works well for beginners or those who value simplicity.
I have found that ACDSee only exports images in 72 dpi. This is evident with every file type. And I could not find a solution. This is a big oversight, as this resolution is insufficient for high-quality images.
One aspect that could work better is how you must save your edit before returning to the Manage or Media Mode. This tends to make your file-keeping confusing and messy if you quickly try to look to the next photo.
Some photographers may find it useful as you can easily create many different edits of the same image. But most other software has a better approach to this.
ACDSee provides a dedicated application for smartphones and tablets. This app does not come with purchasing the desktop version, so you must pay extra. The application looks simple and easy to use, much like the desktop version.
The ACDSee app has a fully redesigned workspace for smartphone and tablet users. It features a wide range of basic slider-based adjustments and select advanced tools like color control and a range of brush tools.
The application also comes with features specifically for phones and tablets. This includes a collage maker and a built-in camera app for more accurate control over your camera.
ACDSee does provide a free Mobile Sync app. This lets you easily transfer images from your phone to your application over a local network. As ACDSee Photo Studio 10 is for Mac only, the application is a bit redundant as you can use AirDrop (if you own an iPhone).
One of the biggest advantages of ACDSee Photo Studio for Mac is its price. There are no multiple options to choose between subscription or perpetual license. Instead, you get a single offer, which tends to be on discount a lot, and is a fair price.
It isn’t the cheapest software we have reviewed, but it is the best option if you want budget software that performs to a high standard.
ACDSee lets you buy an extra license key for a discounted price along with the software. This could be helpful if you use different computers. They also offer a 32 GB flash drive, which can be sent to your address.
As our ACDSee Photo Studio review shows, the main difference between Photo Studio 10 and Adobe Lightroom is the level of control each offers. Lightroom doesn’t compromise on functions to cater to beginners.
It feels like Photo Studio 10 doesn’t go as in-depth to prioritize simplicity. So, it feels like a beginner’s version of Lightroom, which is actually ideal for those starting out in photography.
For basic adjustments, Lightroom does everything ACDSee does and more. It offers much more control, options, and processes to perform simple adjustments. You will also notice that Lightroom’s brush tool performance is much more advanced.
The one big advanced feature missing from ACDSee is AI capabilities, and Lightroom is filled with them. The only feature close to these in ACDSee is facial recognition, which doesn’t even work well.
ACDSee does have one feature better than Lightroom—its layered editing approach. You can’t really call it layered editing, as it doesn’t use the layered approach. Instead, you get a click-on click-off method that uses different channels.
This approach is a great way for beginners to get their heads around editing in different layers and channels. I even found it refreshing to perform edits using this method.
ACDSee falls short in many departments apart from a few tools and costs. I recommend buying Adobe Lightroom if you have the budget.
But maybe you want to save as much money as possible on photo editing software and don’t need to perform advanced edits. If so, ACDSee Photo Studio for Mac 10 could be for you.
You can read our full Adobe Lightroom software review to learn more about it.


| Measurement |
Measurement
Score
|
| Workspace |
Workspace
|
| File Management & Organization |
File Management & Organization
|
| RAW Processing |
RAW Processing
|
| Importing & Exporting |
Importing & Exporting
|
| Basic Editing Tools |
Basic Editing Tools
|
| Manipulation Tools |
Manipulation Tools
|
| Advanced Editing |
Advanced Editing
|
| One-Click Editing |
One-Click Editing
|
| Range of Tools |
Range of Tools
|
| Value for Money |
Value for Money
|
| Total Score |
Total Score
|
Our ACDSee Photo Studio review shows that this is simple and effective photo editing software. We expect bad performance from cheaper applications. This is not the case here.
Instead, Photo Studio 10 performs most actions to a high standard. It produces results similar to ones from the top applications.
Looking at the performance of basic features, we can see that Photo Studio 10 does a great job of producing believable edits. This is a crucial aspect of photo editing software, so I recommend using this application.
Another aspect ACDSee doesn’t compromise on is its excellent organizing features. This makes the program beneficial to photographers who value a tidy and organized workspace. They also simplify the organization process. Browsing doesn’t get too stressful when looking around the interface.
This software’s shortcomings stem from a lack of advanced or unique features. It would benefit from modern AI search functions as a recently released software. This is particularly a shame as ACDSee’s PC Photo Studio versions have plenty of them.
Despite this, ACDSee’s program is attractive to many photographers. Thanks to its excellent price and fine adjustments, it is ideal for those who like to perform minimal adjustments to their images. I suggest ACDSee Photo Studio for Mac 10 for product or event photographers who prioritize organization.