Capture One is a high-end RAW processing software. It prioritizes collaboration, tethered shooting, and color science. These qualities make it ideal for studio and editorial shoots. It’s good to be familiar with this software if you want to get into editorial photography. And it is especially beneficial if you’re starting as a photography assistant.
Capture One Pro was created as a RAW image converter for Phase One cameras back in 1994. Because it started as a high-end RAW processor, it had always required a high degree of technical expertise. But it has grown into household software for editing digital images. Now, it is Adobe’s top competitor and is industry-standard software.
The software earns this stellar reputation thanks to its high level of detail and control. It covers everything from a customizable workspace to extra features that cater to professional photographers.
In recent years, Capture One has become known as the go-to software if color correction is crucial in your photoshoot. Thanks to its unique controls, you can use multiple techniques to adjust colors to your desired output.
Let’s now see how Capture One performs when put under a microscope. We will look at how the software performs through a range of fields, finding out if it is the right software for you!
I have used Adobe Lightroom since its first iteration and have experience with various editing software. I have tested the top options available on the market. This testing has included everything from high-end software to entry-level programs.
Go through our Lightroom alternatives article to find the best editing software for you!

Capture One Review: Key Features and Benefits
Capture One Pro is a RAW processing program that performs non-destructive photo edits. The software operates in both “Sessions” and through a “Catalog.” Catalogs work the same as they do on Lightroom. Sessions let you follow a set path through your editing workflow for a singular shoot.
Sessions are brilliant as they keep your files well organized. When creating a Session, you create a place where the images are saved to your computer’s hard drive. It then stores all the original, edits, and even discarded images. This system makes it easy to transfer projects between computers and Catalogs.
These Sessions are particularly useful when using Capture One for tethered shooting, one of its key strengths. Tethered shooting requires software that can deal with high volumes of information quickly. It also needs features that complement overseeing quality control, which Capture One does well.
Pair this with Capture One Live, and you have a new approach to client-photographer relationships. We will look deeper into Capture One Live later.
Capture One understands that the image selection process can be laborious. The result is what turns out to be a simple, easy workspace. Their culling process gives you a great overview of your current images. And this makes it incredibly useful to highlight your favorite shots and clear out throwaways.
You will also notice you can work with layers in Capture One Pro. It is a great introduction to working with other editing software. They introduce it in an easy-to-grasp manner. And it also complements its comprehensive range of adjustments, another one of its strengths.
Another key feature is the customizable workspace. Most programs offer a certain degree of customizability, but Capture One has it to the fullest. You can alter the position of most elements in the workspace by holding down the Command or Alt button (macOS or Windows). And you can add or subtract certain elements by right-clicking each workspace.
Capture One has developed some AI features. For instance, it incorporates an AI tool that automatically zooms in on your subject’s face. But they do not use the technology to its full capabilities compared to other image software. We will touch on these features later on.
Overview of Specifications
| Minimum Computer Requirements |
Minimum Computer Requirements
8 GB RAM, 10 GB disk space
|
| Minimum Software Requirements |
Minimum Software Requirements
macOS 11.7 (Big Sur), Microsoft Windows 10 20H2
|
| Tethered Shooting |
Tethered Shooting
Yes
|
| Mobile / Tablet Option |
Mobile / Tablet Option
Yes
|
| Keyword Tagging |
Keyword Tagging
Yes
|
| Camera and Lens Corrections |
Camera and Lens Corrections
Yes
|
| Brush Tools |
Brush Tools
Masking, Healing Mask, Cloning Mask, Dust Remove, Spot Remove
|
| Layered Editing |
Layered Editing
Yes
|
| AI Editing |
AI Editing
Yes
|
| Noise Reduction |
Noise Reduction
Yes
|
| Export Options |
Export Options
JPEG, JPEG Quickproof, TIFF, DNG, PNG, PSD
|
| Best For |
Best For
Professionals who spend a lot of time fine-tuning color or photographers who work in a studio and deal with large teams
|
Capture One can handle the whole post-production process but cannot perform heavy manipulations. It has RAW processing abilities, great file management, a mix of simple and complex editing tools, and exports in multiple formats.
Combine these actions with a brilliant tethered shooting option, and you have an all-in-one software. It supports quick-fire, time-sensitive shoots and is a place to fine-tune single images.
Capture One’s complexity is in its attention to detail in the adjustments and actions you can perform. None of its options feel like an added extra or afterthought.
Instead, you find finely tuned processes, ranging from small, elaborate tasks to actions reduced to a simple slider. This includes everything from the culling process to adjusting the angle of photos.
The Capture One team continues to develop these processes, releasing updates every few months. Its current development trend follows similar photographic software. It includes automating lengthy processes and using AI to assist with its accuracy. For instance, one of their latest additions is Auto Dust Removal, which we will cover later.
To run the latest version of Capture One on your Mac, you must have macOS 11 as a minimum requirement. On top of this, you must have mid-OS updates, at least macOS 11.7, 12.6, and 13.5.
Capture One runs on Windows 10, but again, you must have the Windows 10 20H2 update. The software requires 8 GB of RAM and 10 GB of free space. You also need internet access to run Capture One Live.
Main Strengths
The main strengths of Capture One Pro lie in its color management and tethered shooting. These two features favor a wide range of photographic genres and are perfect for any editorial photography.
Also, Capture One continues to introduce features that assist editorial photoshoots. This revolves around how to best deal with batch photos for culling, comparing, and applying similar edits. An example is its Smart Adjustments, which we will cover later.
By placing importance on these features and actions, we can see that Capture One understands its market position. They intend to grow with editorial shoots in mind. It has cemented itself as an industry-standard software by excelling in this way and providing great RAW processing.
Workspace and File Management
Opening up Capture One for the first time can be overwhelming. Other software we reviewed has done a better job at making a simpler workspace. But I was surprised at how quickly I learned to work my way around the software. And I was shocked when I understood the full extent of customizability in the workspace.
This information-heavy workspace made sense when I kept in mind the environmental context the software is made for. You want each action to be a click or two away on a photo shoot. You do not want it hidden in a box or drop-down menu. It may take a few hours to get settled into Capture One, but this adjustment period quickly fades.
Importing and Organizing Photos
When importing, you get a popup window that has a simple walkthrough process. You upload your images into a specific catalog. And they remain in their imported group until you spread them across your collections or folders.
File browsing acts in a similar way to Lightroom. But the uploading process is more in-depth. Capture One prioritizes the culling process at this point.
The importing and culling process is brilliant. It’s more complex than Lightroom’s and much more in-depth. For starters, you can apply filters and ratings at this point. You can even add metadata to the picture and adjustments you may have set under “Styles.” On top of this, you have new features like Group Overview and Face Focus, which we will look at later.
Capture One lacks a smart organizational feature that automatically groups certain photos. This is almost achieved in the Group Overview feature but doesn’t extend to creating new groups or folders.
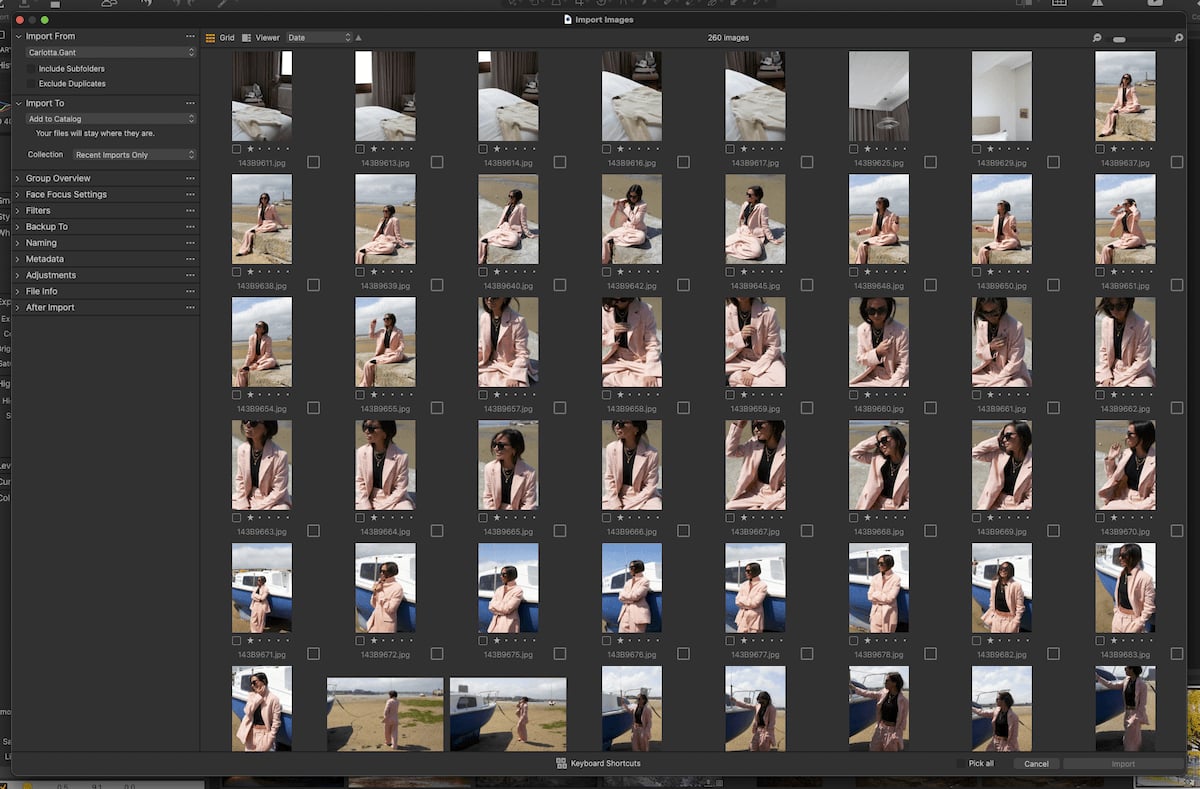
Import interface
Viewing Photos
After your images are imported, Capture One prioritizes a fullscreen view rather than a grid view of your selected photos. At any point, you can click the Culling icon at the top right to return to a grid view. You can also drag out the thumbnail panel if this is more convenient.
Capture One has done a great job of making the main image panel as flexible as possible. You can view one image or select a range of images in a grid view. This is helpful when editing a photo series, as you want them all to have the same intensity and color.
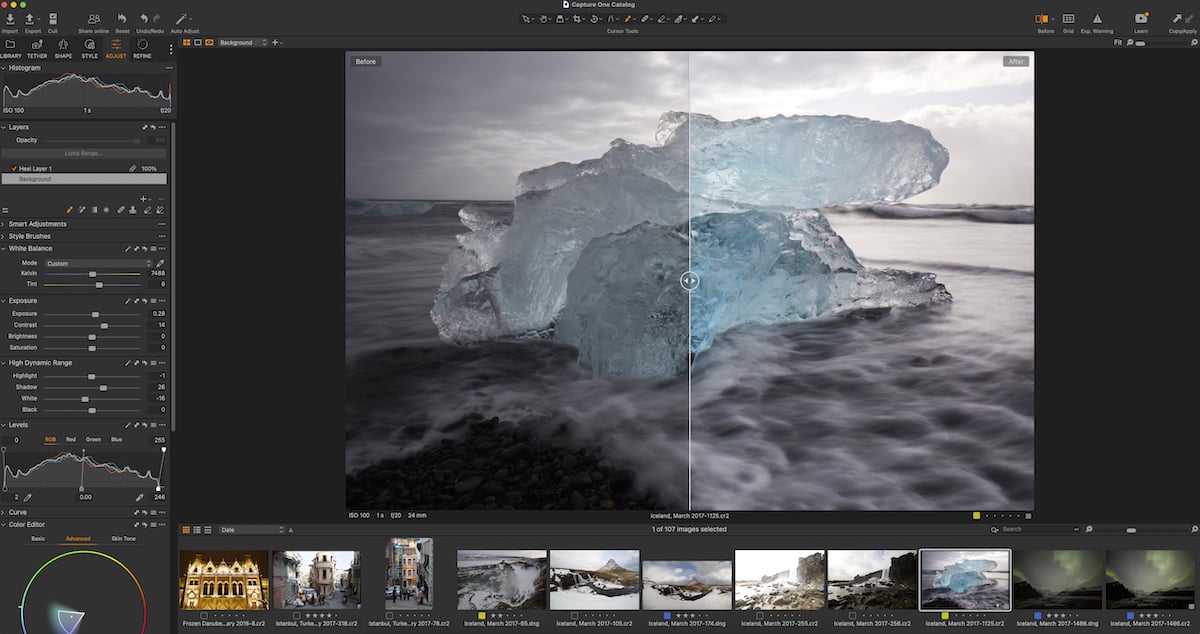
Toward the top right of the app, you see an option to have a “before view” of your images. You can select between a slider or full-screen option, two choices often found in editing software like this. On top of this, if you have a few images up in grid view, it will apply the Before/After view to them all!
It may seem like Capture One offers little for viewing options. But the flexibility it offers is unmatched in comparable software. It effectively utilizes the main photo panel, allowing multiple editing styles and approaches.
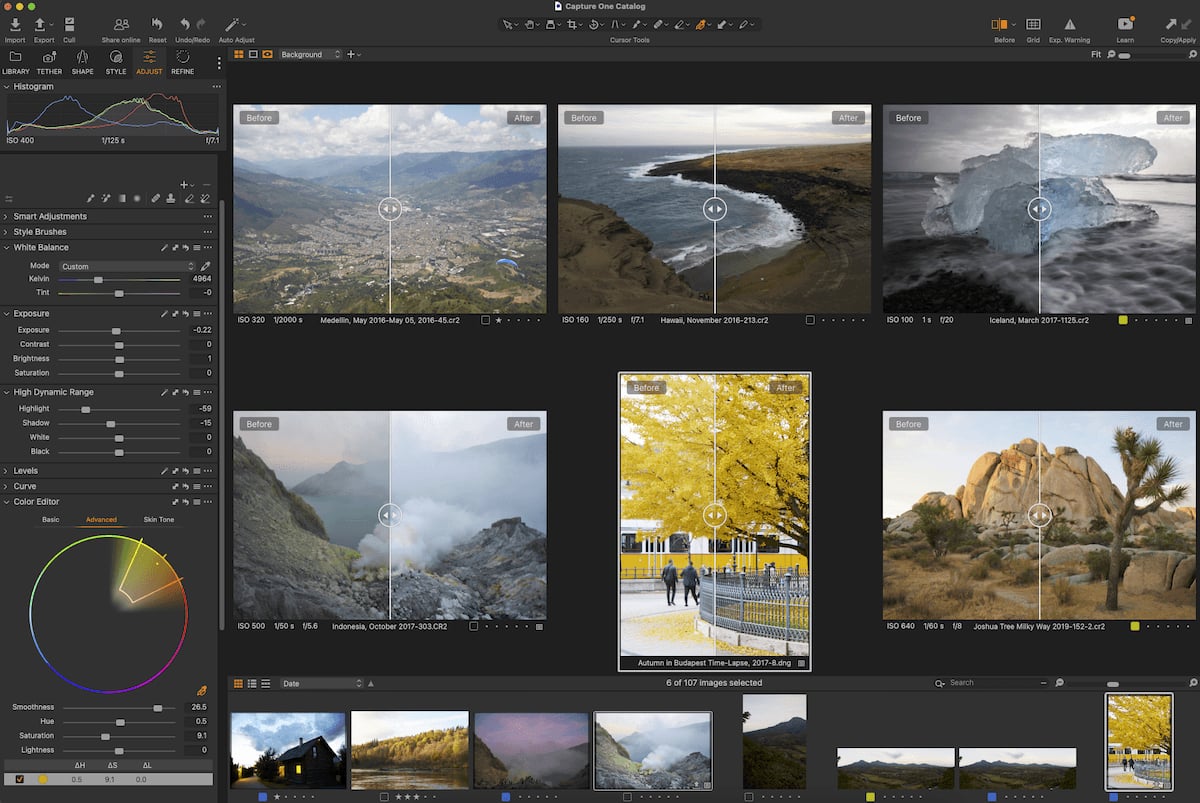
Example of the Before/After view on multiple images
Search and Sorting Tools
Due to Capture One‘s in-depth culling stage, there aren’t many special methods to search through vast quantities of photos. Instead, it executes the standard color and star rating system effectively. If you go through the detailed culling stage, you can sort through relevant filters, keywords, and metadata in the Library section.
You will also notice a search bar above the thumbnails. This advanced search feature lets you sort through a wide range of criteria. This is particularly useful if you have a big catalog that spans hundreds of shoots. You can also sort through filters and ratings.
Image Development
Here, we look at how to process and edit images with Capture One. We will compare some basic edits with Lightroom and explore more complex editing options.
RAW File Processing
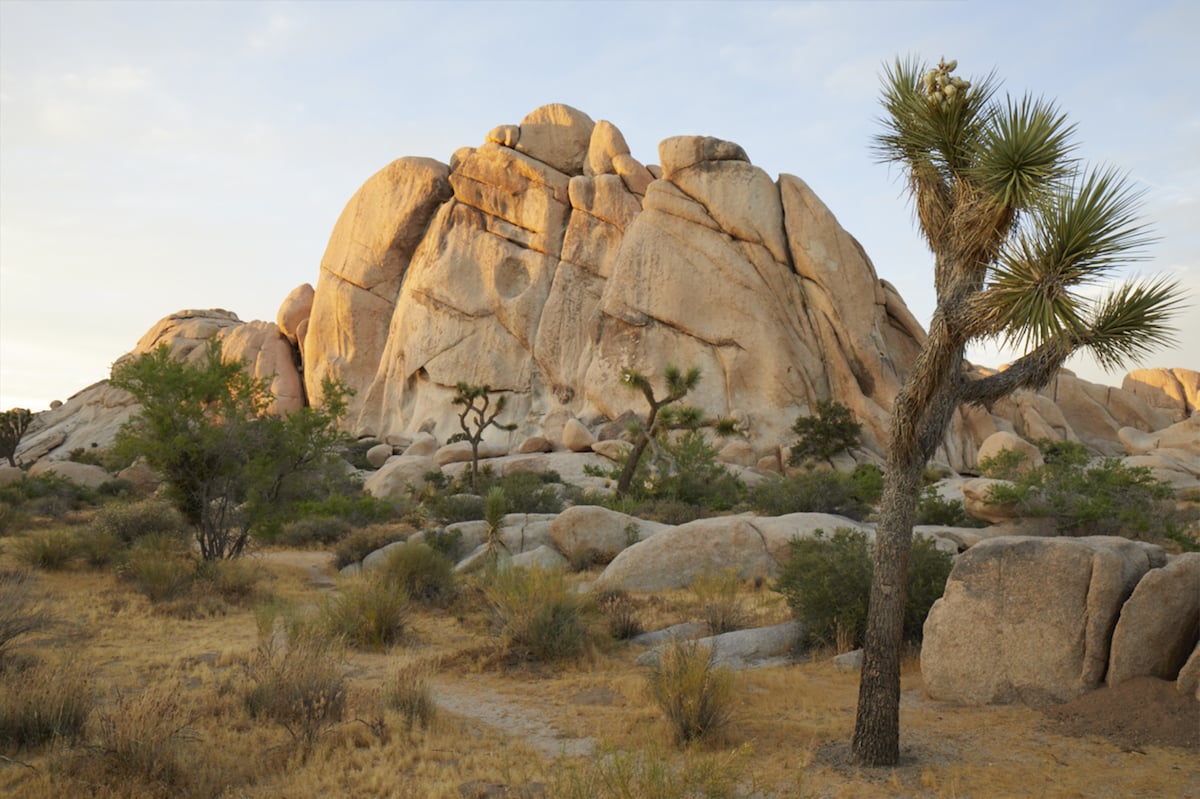
First, we’ll examine Capture One‘s primary feature, RAW processing. This is where software reads image data and translates it into a visual photo. Capture One has been processing RAW files since the digital photography boom. You would expect the results to be up to a high standard… and you’d be right.
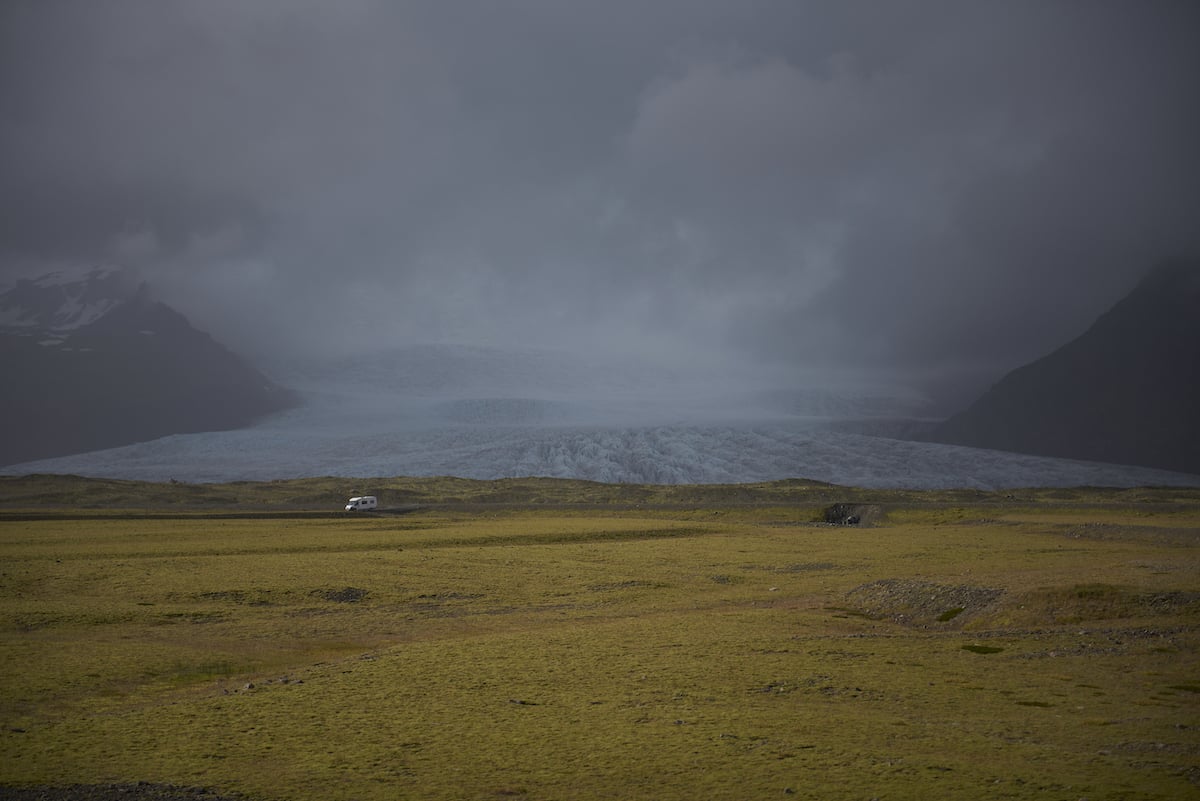
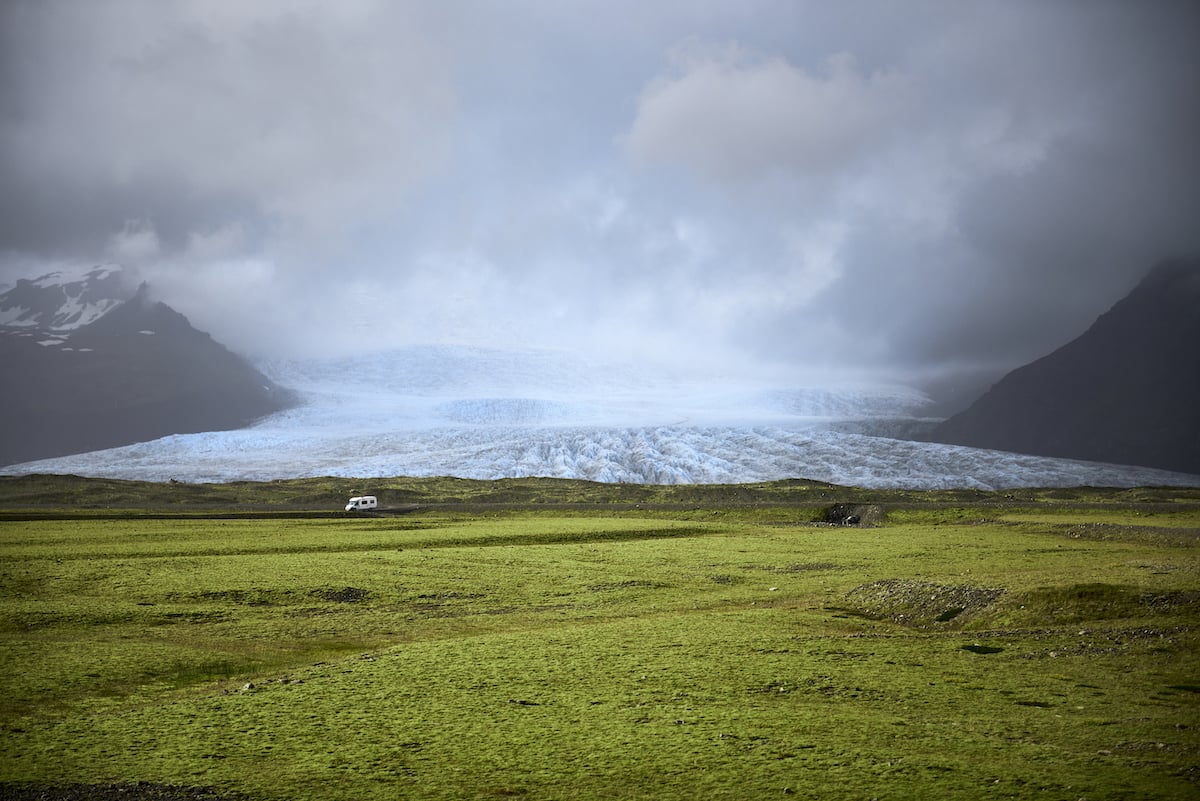
Capture One provides one of the best RAW processors on the market. The comparison between Capture One and Adobe Lightroom is slight. The first thing you may notice is how they deal with colors. Capture One’s color comes across as slightly more saturated.
Capture One also presents slightly more light in the shadows. You would think this translates to more detail, but Lightroom can actually draw more detail out of finer elements. You will find this not only in the shadows but across the whole image as well.
This may be due to Capture One providing a softer photo rendition. The pixels are still the same size, but in Lightroom, the pixels are more defined than in Capture One’s results.


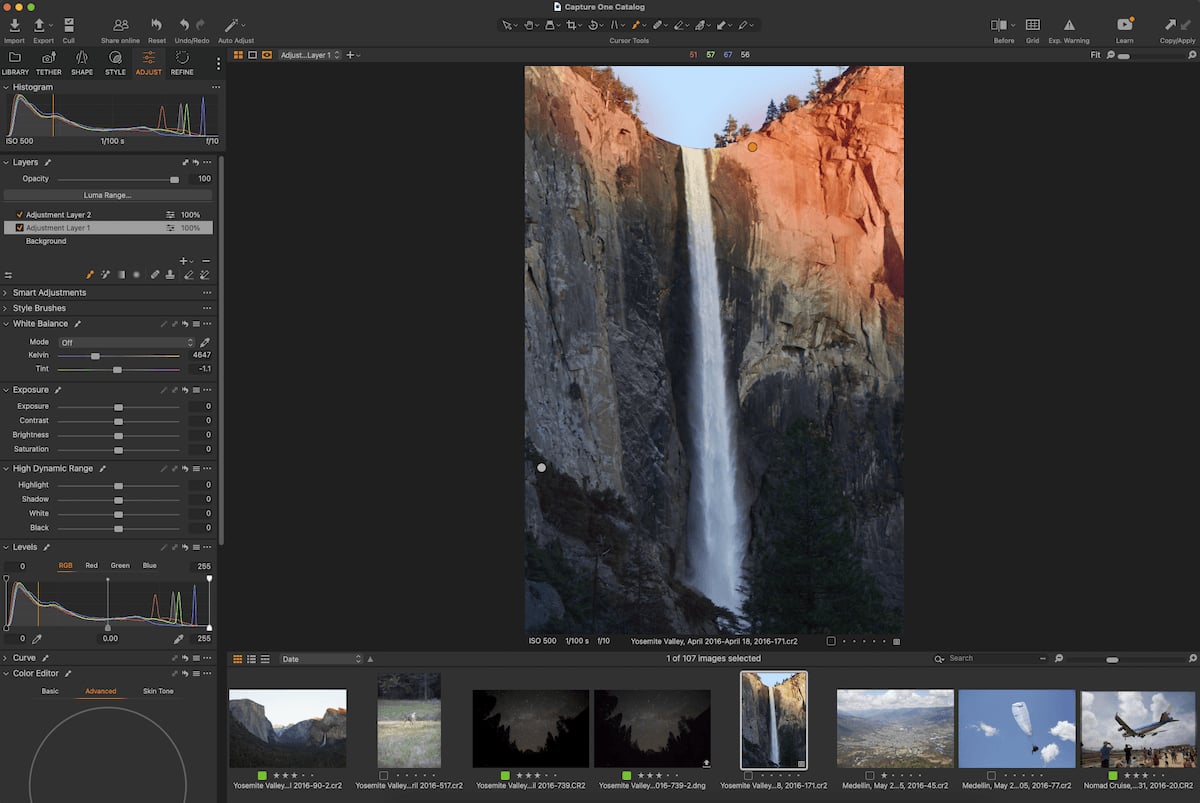
Basic Editing Tools
To get to Capture One‘s basic adjustments, you must find your way to the Adjust panel on the left-hand side. There, you will find collapsible sections to work through. Most of these adjustments feature a simple sliding method. Capture One provides a less comprehensive range of adjustments than Lightroom does. But it makes up for this in its specialties.
The Exposure tool lets you compensate for up to four stops of light in either direction. This tool works well. It reads the image and treats the highlights and shadows differently. It comes very close to producing a similar result to what a camera would capture if you add or subtract a couple of stops.
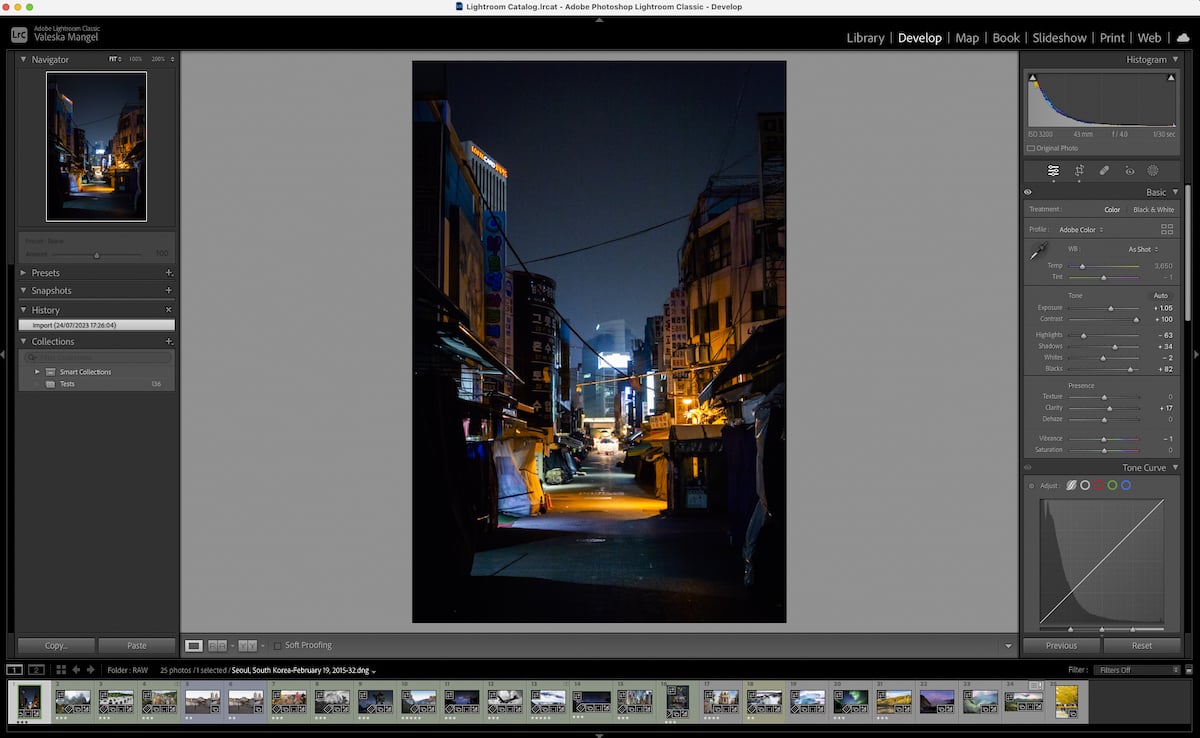
Let’s look at how this adjustment performs compared to Lightroom. Lightroom lets you push the exposure compensation to five stops in either direction. We can see a big difference in performance when looking at the same image with -4 exposure.
Lightroom tends to flatten detail much more than Capture One. But Capture One does produce more noise and pixelation in the same areas.
The noticeable difference between these two images is the superior color retention and dynamic range in the Capture One edit. Again, this edit would be closer to how a camera would capture the same image taken at four stops higher.
These differences are apparent in how each program deals with particular tonal adjustments. Let’s look deeper into each image, reducing the shadows to the lowest degree.


Capture One does a good job differentiating the tones and only adjusting the shadows. Whereas Lightroom slightly brings down the tone of the whole image as well. In this adjustment, Capture One produces a softer result than Lightroom.
My favorite feature in Capture One’s adjustment panel is the expert use of a histogram, particularly in the Levels and Curve drop-downs. Capture One presents the histogram with the RGB channels in a clear manner. In both Levels and Curves, you can adjust these channels separately for fine amounts of control.
Capture One Styles (Presets)
Capture One does not place as much importance on presets as other editing software. But it still provides a simple and convenient method to apply, edit, and create presets. Capture One refers to presets as “Styles.” In the Style section, you find the camera adjustments and the presets.
You find a very basic array of presets preinstalled in the program. The bulk of Capture One’s preset support comes from their online store. These presets are of a high standard, but you pay a premium price. Capture One does also support presets you buy off other websites.
A strong point of the Style section is that it clearly presents the active styles and presets at the top of the drop-down menu. An interesting feature is that if two of your presets clash, Capture One will tell you and put “(Overridden)” next to one of your presets.
At any point, you can go to the Adjust panel and fine-tune your select Styles. This goes a long way when you have a particular style you want to achieve. You can always save this new edit as a preset for future use.
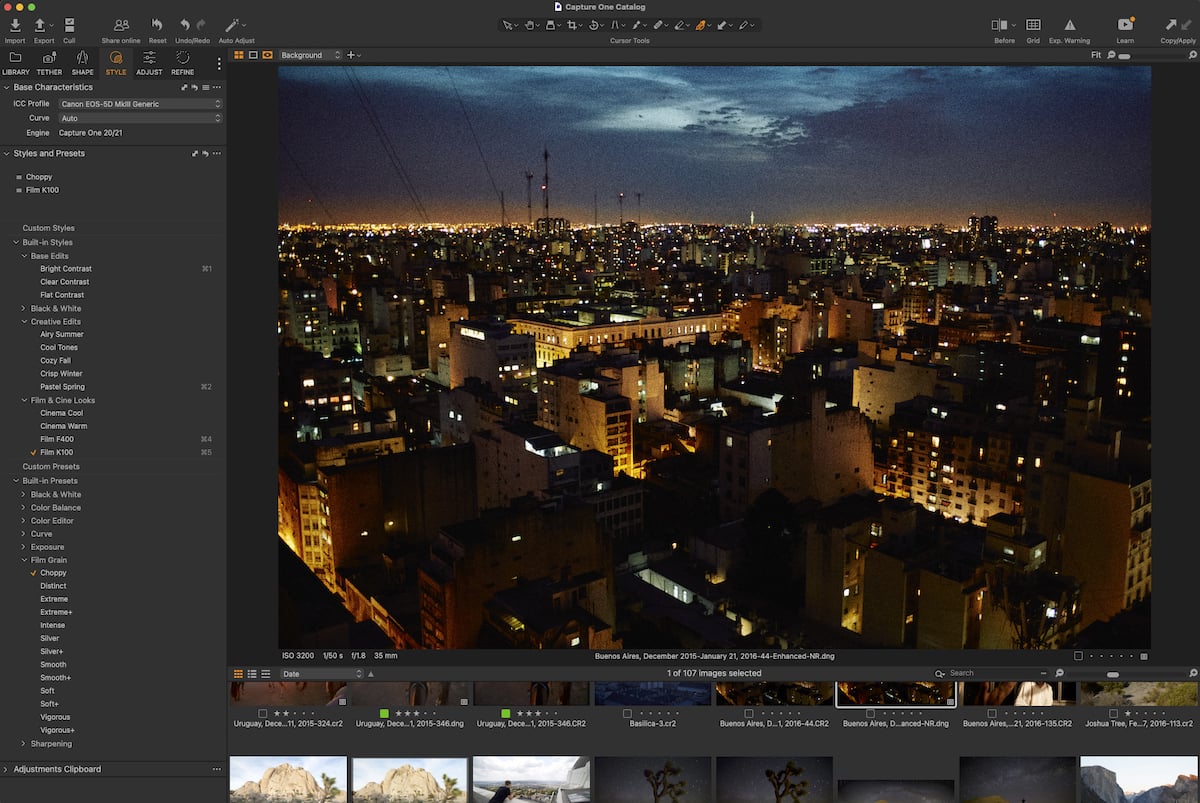
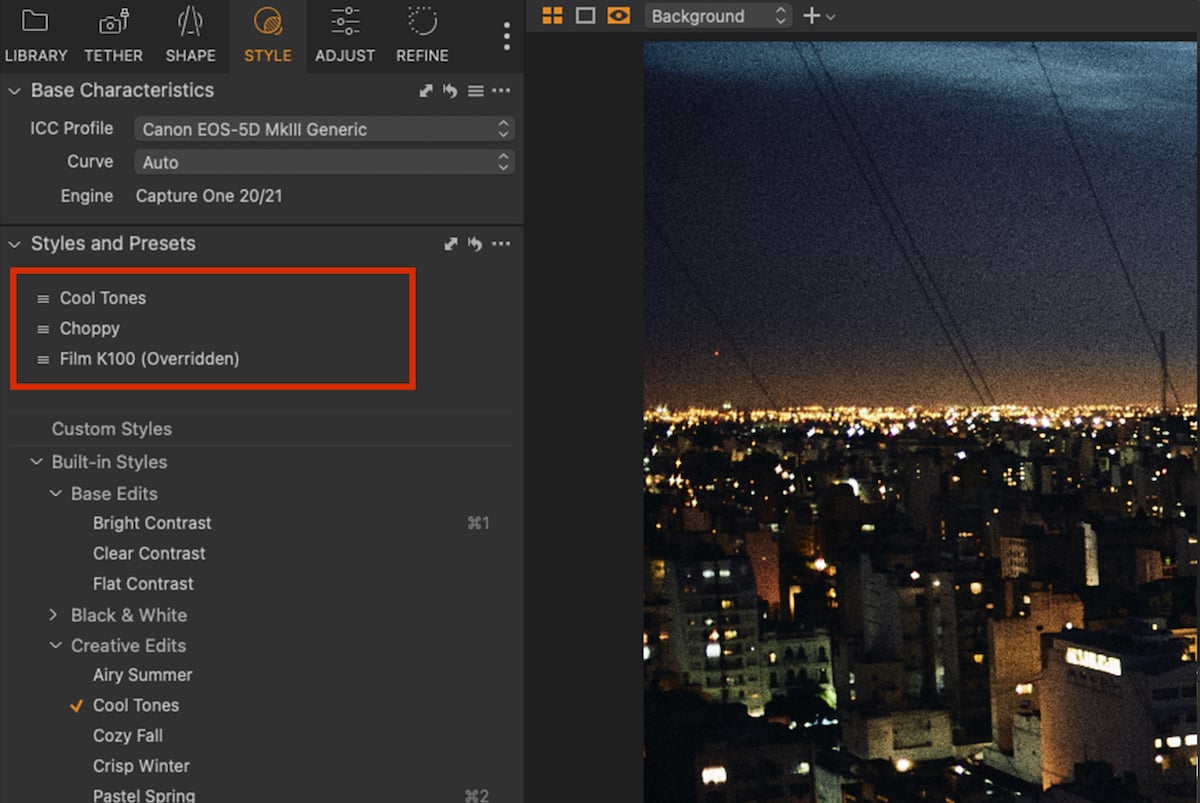
Photo Manipulation Tools
Capture One does not have any standout manipulation tools that will dramatically alter your image. You will find brush tools as well as healing and cloning masks. These helpful actions allow finer control over your edits.
The software also provides layered editing in a simple way. The Layers drop-down menu is found at the top of the Adjust panel. Once you make a brush stroke, add a gradient, or perform any other action, you automatically create a new layer.
Layered editing lets you keep certain edits separate. If you want to delete a specific edit, you do not have to restart the editing process all over again.
Capture One does have a Magic Brush that is used for selection. This brush is helpful, but it doesn’t have any special AI support to make it super accurate. Programs like ON1 Photo RAW do this well, but it isn’t a priority for Capture One.
Overall, these tools work great. It would be nice to see more advanced features that utilize the power of AI. But I assume Capture One is putting their time into developing other sections.
The selection of brushes may keep some photographers from needing more detailed software for their edits, like Photoshop. But if you plan to make big visual manipulations, you will not get it all done on Capture One.
Example of Brushes in use with Adjustment layers under the top-left histogram.
Variety of Image Editing Views
Capture One has a few ways to view your images to help with editing. Three icons above the right-hand side of your image help with this.
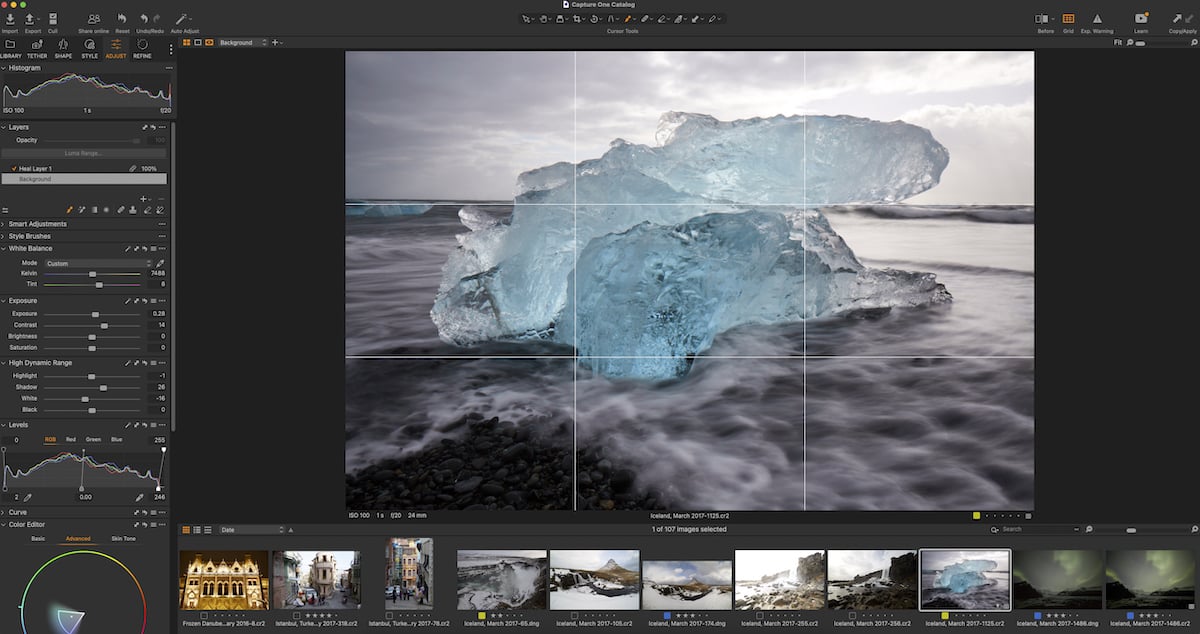
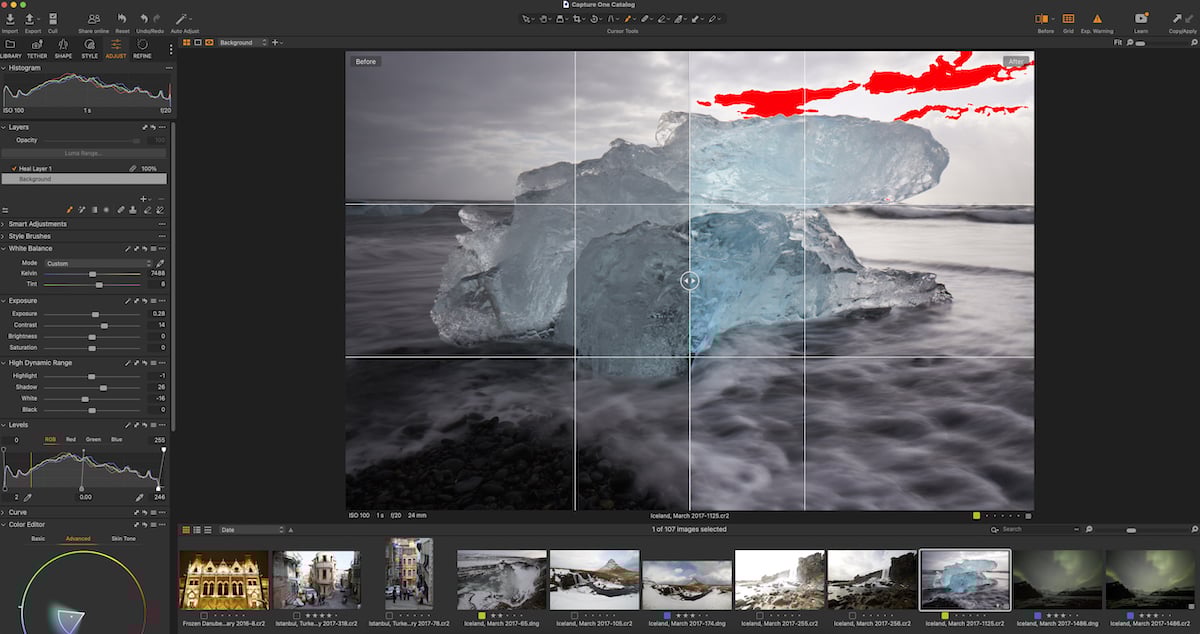
The Before/After view lets you see the original image in a single click. You can choose a slider over the image or a full-screen overlay to click on and off. Next to this, you have a grid overlay.
The last option is an exposure warning. This will highlight areas that are considered to be too dark or blown out. You can even put all three views on at the same time!
The best feature that Capture One has included is the ability to see multiple photos at once. At any point, you can Command- or Ctrl-click (macOS or Windows) another image to put it in the main photo panel. You can do this for as many images as you would like.
An action like this helps work with a photo series. It is also helpful if you want a continuous style over many photoshoots.
You can choose a reference image and try matching the tones and colors you like.
Advanced Editing Features
Now, we look at advanced and unique editing features compared to Lightroom and other editing software. These make Capture One software stand out from the rest.
Advanced Color Editing
Capture One’s main strength lies in its exceptional color handling. The Color Editor feature allows expert control over the colors in your photo. You may think this would involve a steep learning curve, but Capture One has made it easy to operate.
This ease doesn’t compromise accuracy. You still get all the color statistics you need for pinpoint precision! The Color Editor uses a simple click method where you select the dropper and then click on the color you want to adjust.
Capture One highlights the spectrum region your colors lie in. From here, you can adjust these colors’ smoothness, hue, saturation, and lightness. You can also expand and contract your selected region.
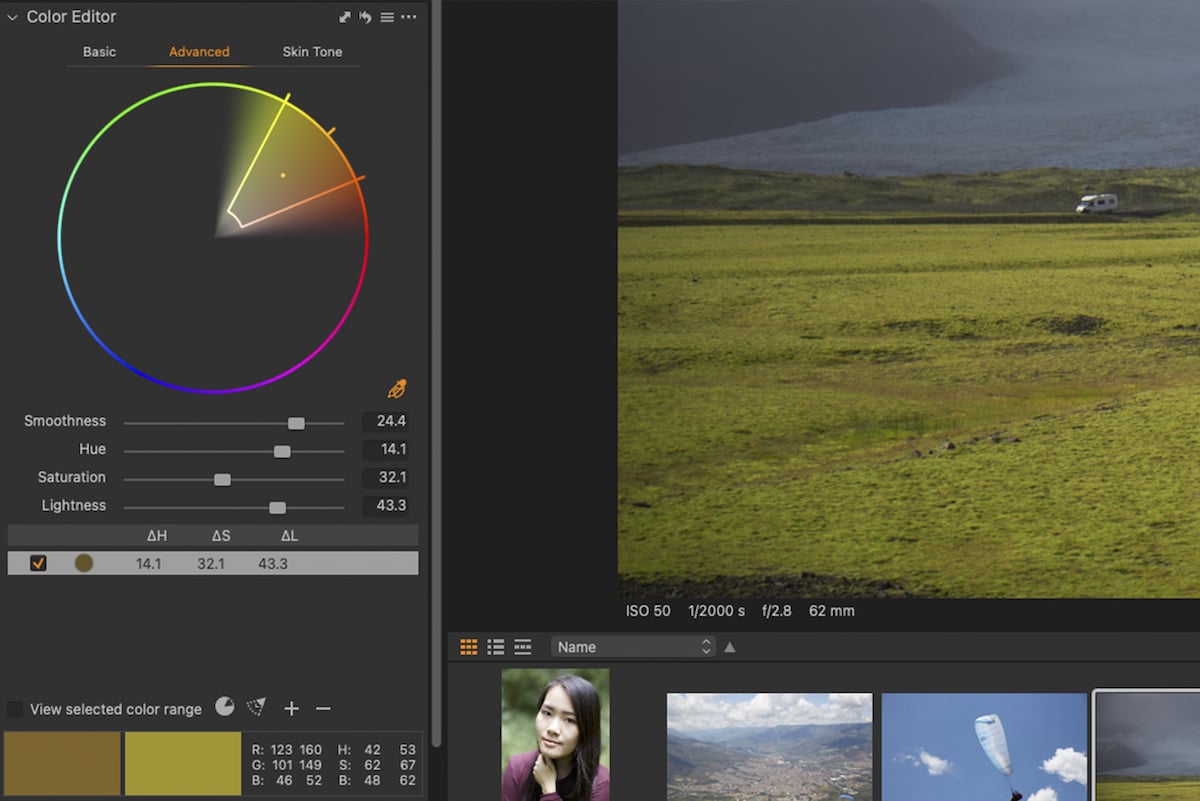
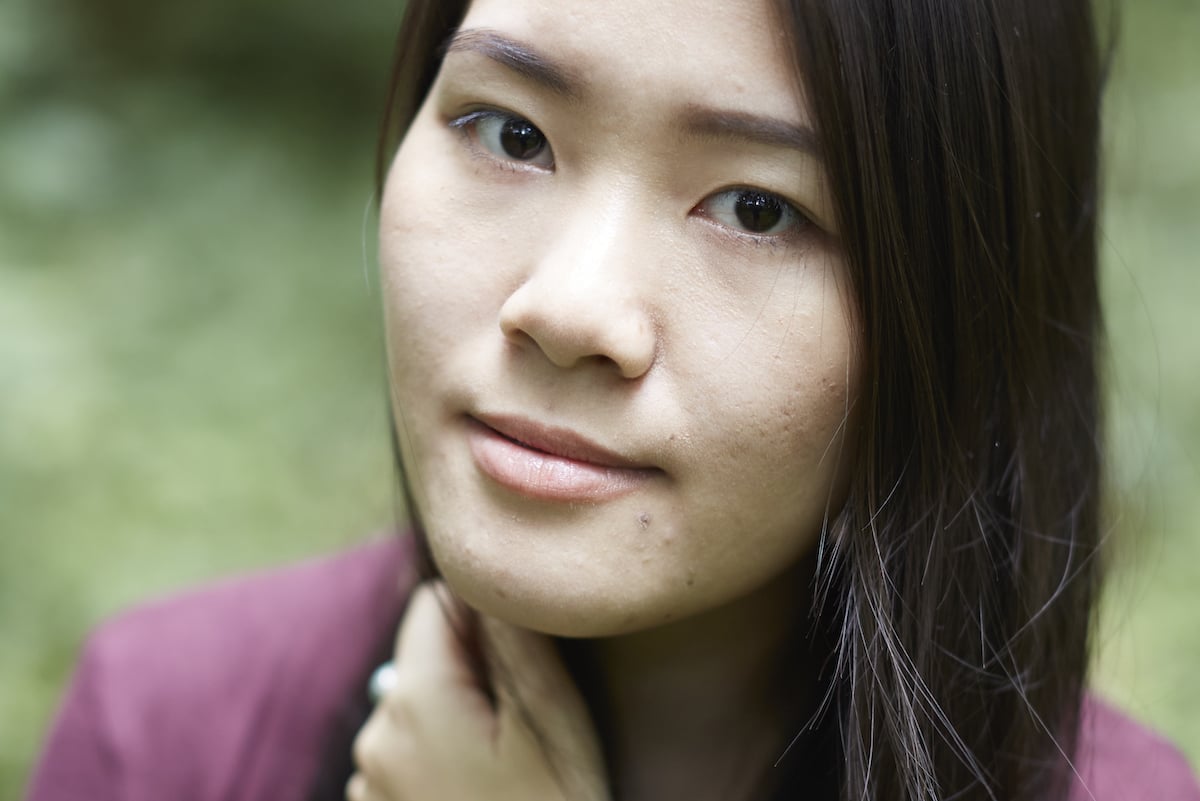
Capture One even includes a specific section to adjust skin tones. This is a great way to make subtle changes that don’t change your model’s complexion. You can change dull skin into a more vibrant and pleasing tone using the software’s six simple sliders.
Overall, this tool works brilliantly and may be the sole reason for purchasing Capture One. Color selection like this is extremely important for any photographic genre. But it is much more crucial for editorial or fashion photography. Separating the colors makes highlighting the product or subject you want to promote easier.
Cull View (Face Focus and Group Overview)
The culling stage in Capture One may be my favorite feature of the entire program. I was blown away by how you can reduce a huge photoshoot to your best photos. It may take time, but it is accurate and thorough. Capture One has employed a few new features to make this process faster and more in-depth.
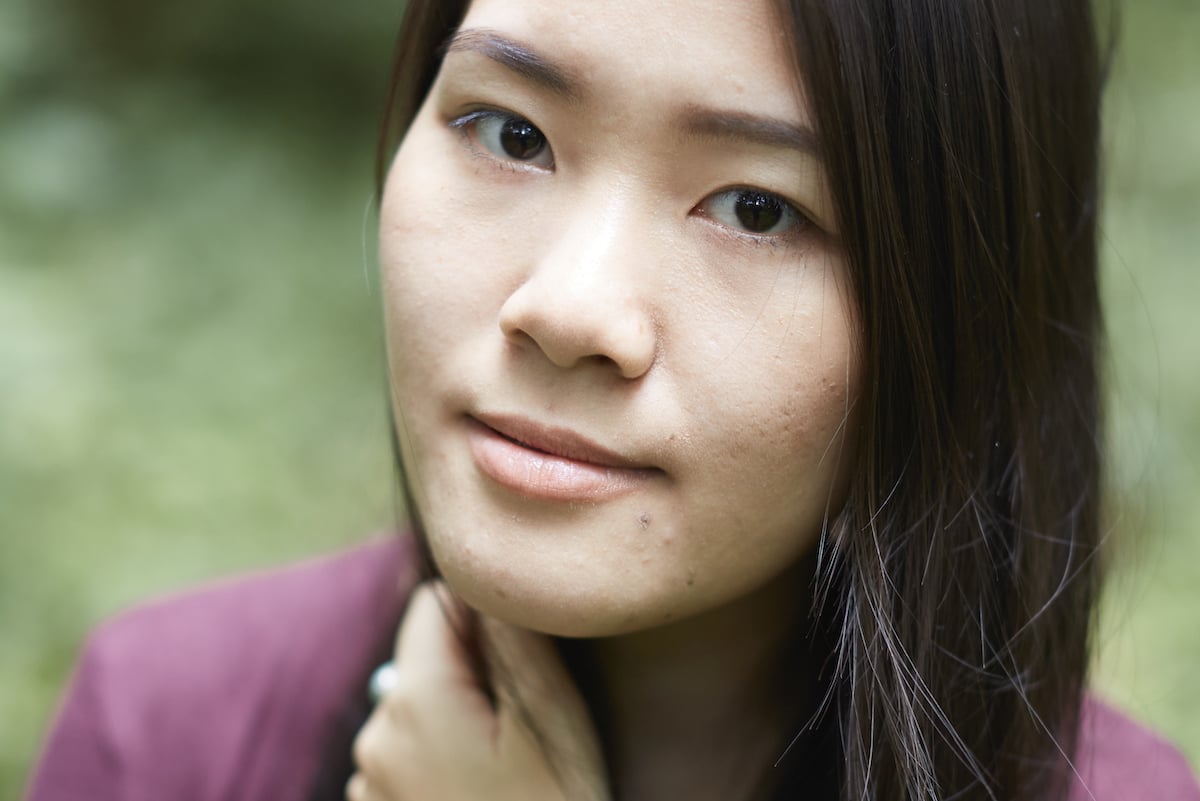
The first feature is Face Focus. The title is self-explanatory; it is a tool that lets you check the focus on the face of your models without zooming into the image. The AI reads your photo for a face and then provides you with a small thumbnail at the top of the culling page.
If your model’s face takes up a large portion of the photo, the thumbnail will target their eyes. This feature is important for photoshoots. The image is unusable if the focus is slightly off. I got great results from this tool and found it saves a lot of time in the culling process. I could easily see which shots were in focus and which were not.
I was also pleasantly surprised that the Face Focus tool still worked when my model wore glasses or sunglasses. It even worked well in low-light situations. Apparently, Capture One struggles to read the faces of older people. But this is something I have yet to personally experience.
Face Focus work area highlighted in the top-left corner of Cull view
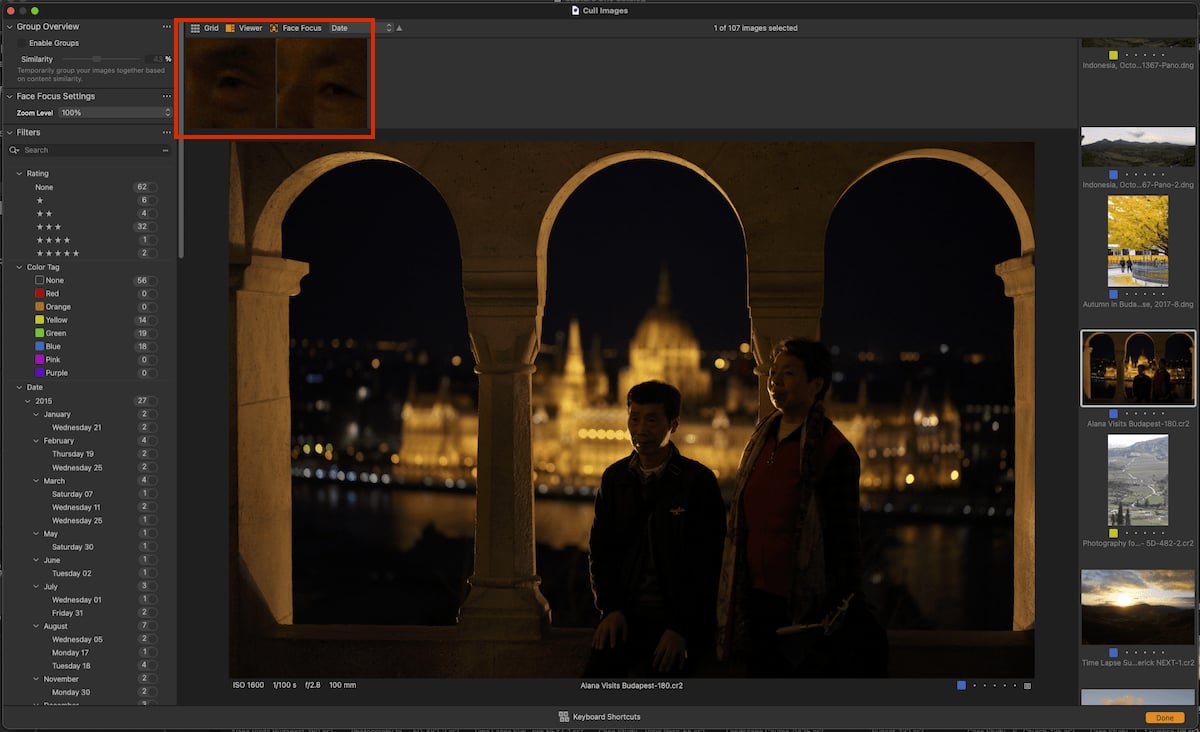
The second feature is Group Overview. This reads your photos and puts them into groups based on similarity. This is particularly helpful if you use different lenses, set elements, or clothes in a single photoshoot. With this tool, you can see all the images from a particular style and then choose your favorite few.
Capture One lets you change the similarity percentage between the photos you compare. So, if you have only slight changes throughout the shoot, you can increase the threshold. Whereas if the shoot is sporadic, you can decrease the similarity.
These new elements for the culling stage allow you to ensure that the best photos don’t slip through the cracks. They also do a great job clearing up your workspace so you are only focused on the best shots.
Group Overview selection highlighted at the bottom
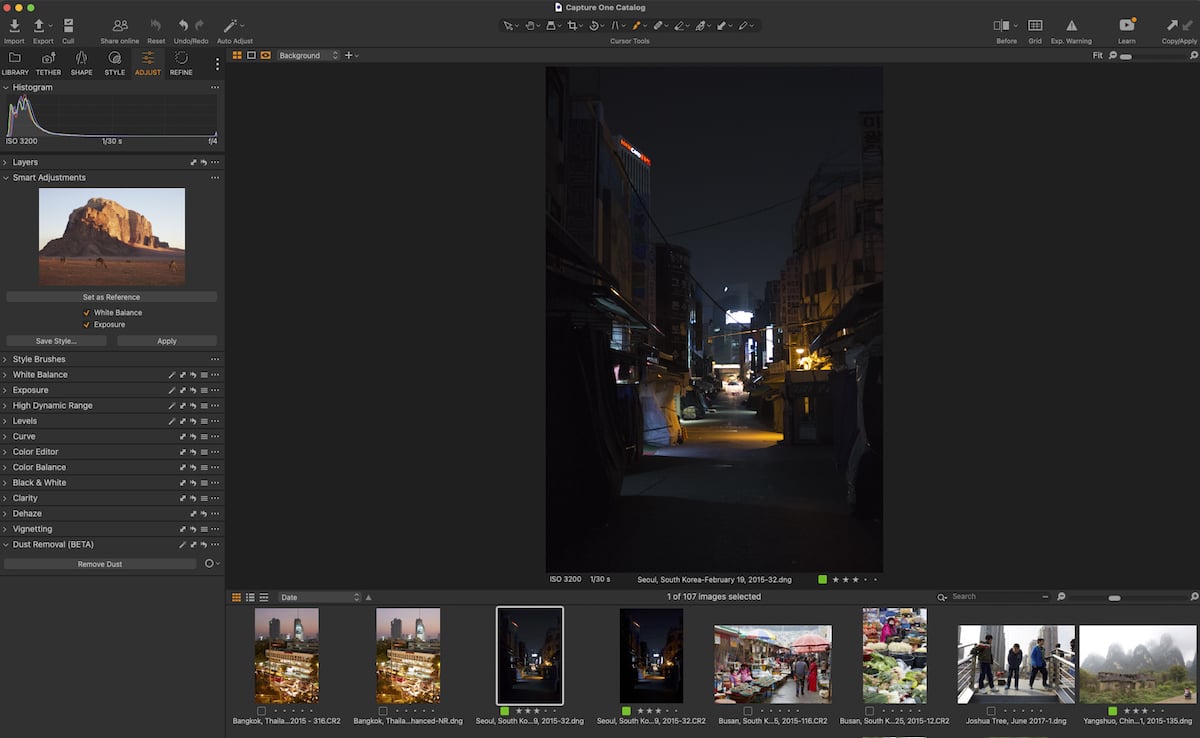
Smart Adjustments
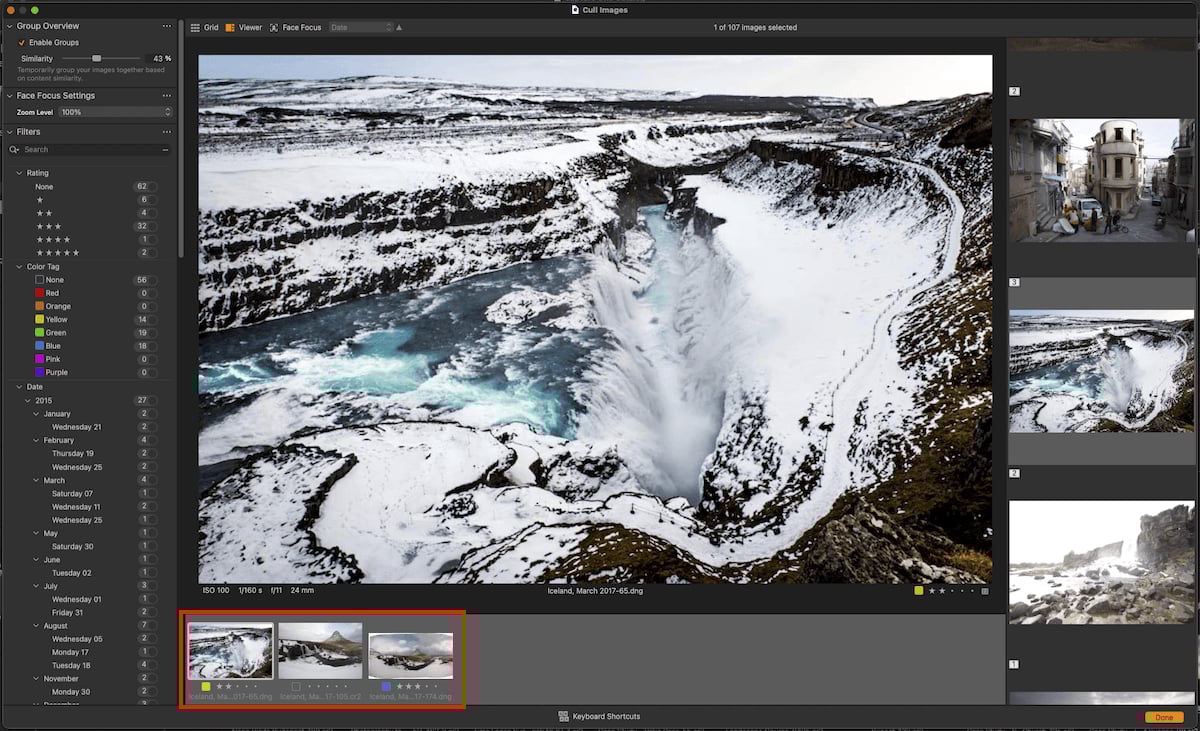
Smart Adjustments is where Capture One‘s AI development comes to light. This feature can quickly apply intelligent exposure and white-balance adjustments to hundreds of photos. It is a way to get multiple photos to match in a simple and effective way.
You start by selecting a reference photo. You then select a wide range of photos. And the software applies the same white balance and exposure to these images. This seems like a simple adjustment, but the effect you get is profound. Images of different subject matters and from different locations work much better as a series.
Sometimes, small changes in lighting when shooting out on location can cause the Auto White Balance (AWB) to make large adjustments. This is where Smart Adjustments shine. It ensures the whole photoshoot has similar aesthetic qualities.
On top of this adjustment, you can fine-tune your photo however you like. A great feature of Smart Adjustments is that it provides a quick way to save your edit as a Style. Doing this copies over all the relevant adjustments you have set, not just the exposure and white balance.
Smart Adjustments are most beneficial for editorial photographers. But this Capture One feature can benefit any photographer. Everyone from wedding photographers to amateurs creating their first series of photos will find it useful.

Auto Dust Removal
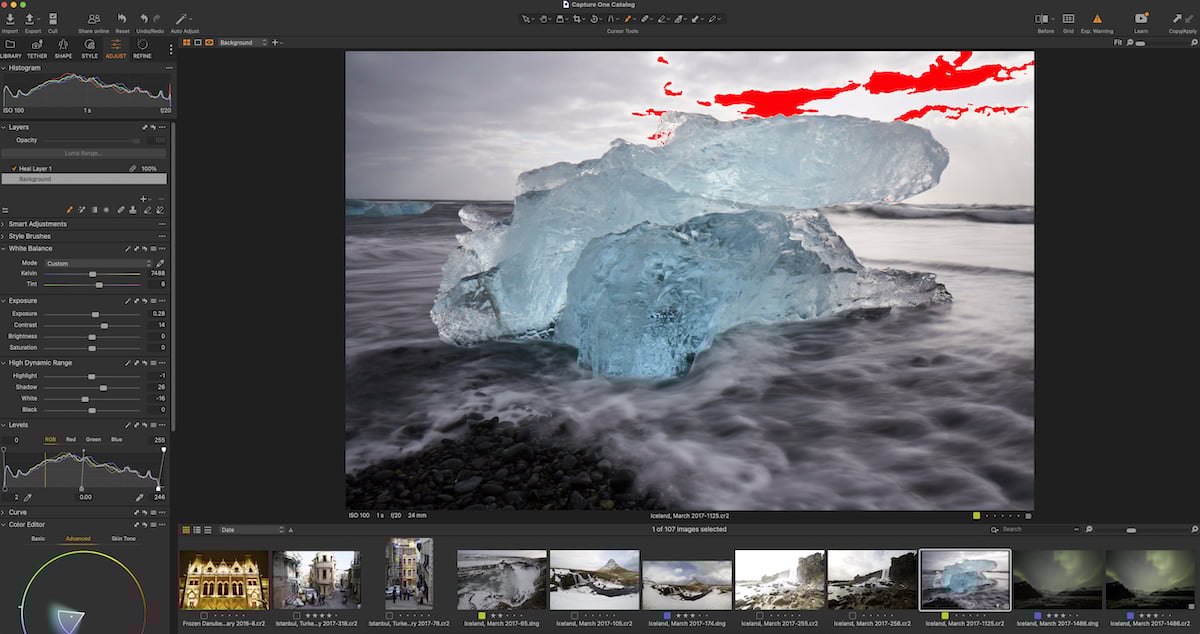
Auto Dust Removal is a feature Capture One is constantly refining to be as accurate as possible. It is a tool you can add to the Adjust panel by right-clicking and selecting it. The drop-down includes a single button that reads your image, identifies the dust, and removes it in roughly 10 seconds.
This feature is a massive time saver and can improve an image in seconds. The tool works great on small specks of dust but struggles with longer and larger strands. This is something that needs work on.
The software will either make a remedial edit or leave the dust. The inaccurate edits it performs are normally overcomplicated textures and patterns. Luckily, you can still manually adjust these areas with the Healing Brush.
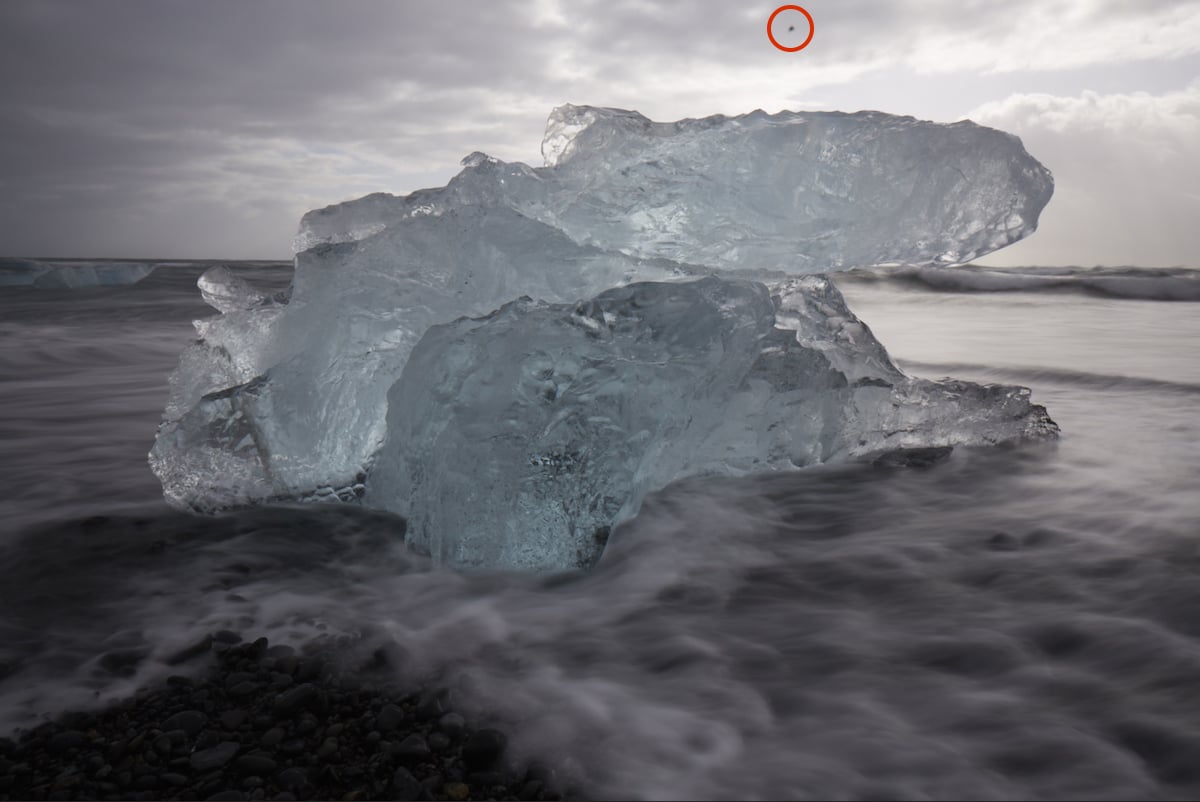
I was also surprised at the AI’s image-reading ability. I tested the Auto Dust Removal on images with small black dots like birds in the distance or other objects that could resemble dust. Capture One didn’t remove any of these items but still cleared the rest of the image.
Here is an example of the Dust Removal Tool struggling with a large speck of dust.


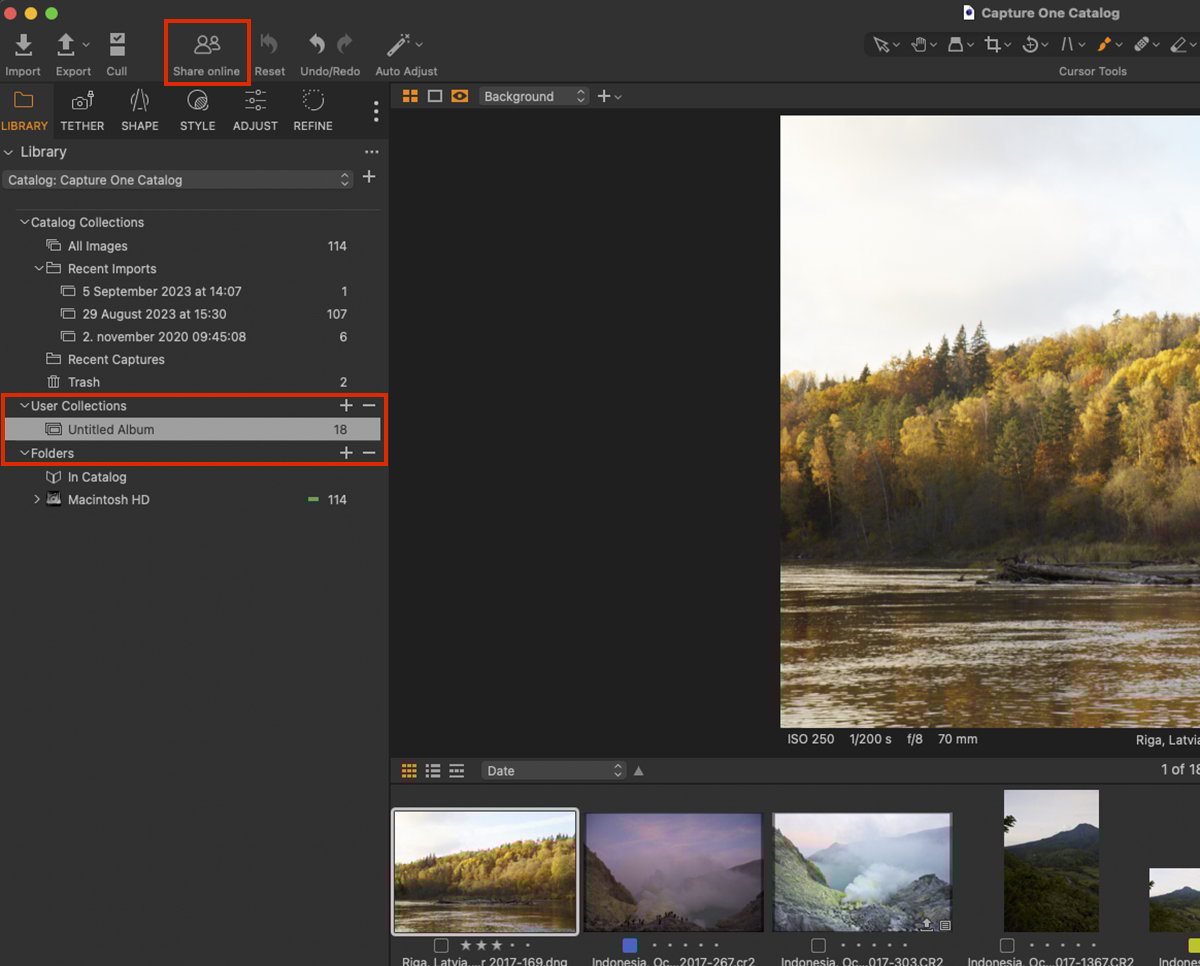
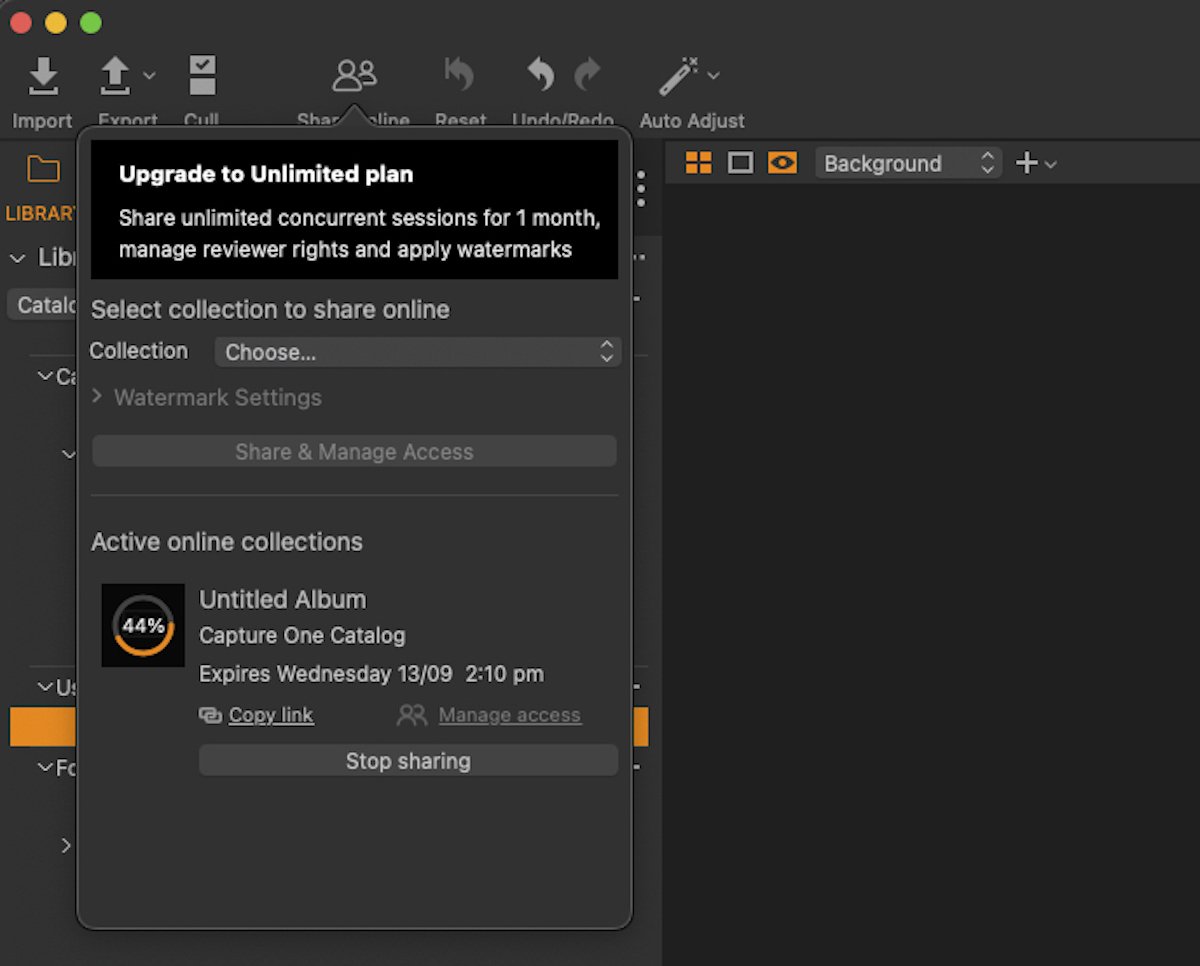
Capture One Live
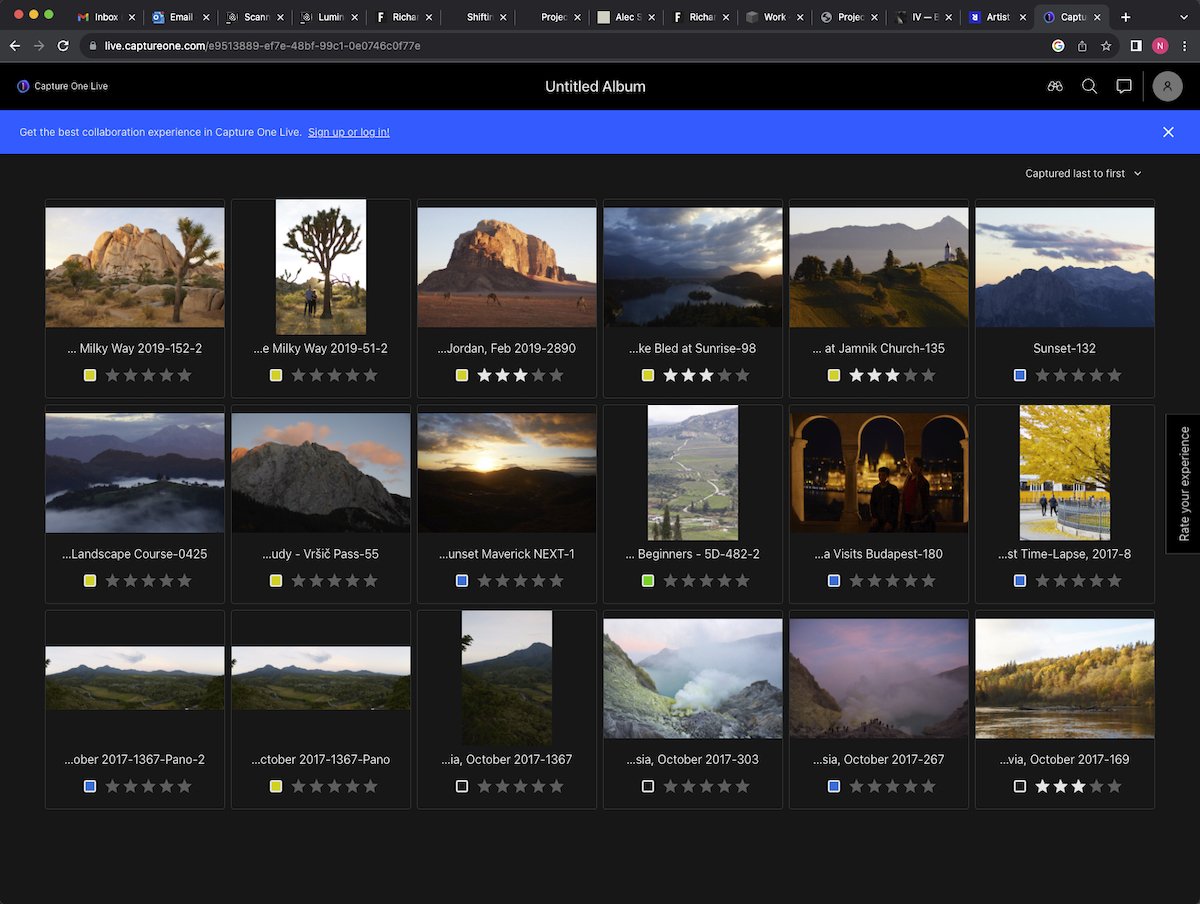
Industry professionals will rejoice at Capture One Live. This feature lets you send a link where the recipient can see your editing session live through a web browser. This means decision-makers over creative choices don’t have to be at the photoshoot. Instead, they can see the results as the shoot is happening!
The recipient gets a web address where they must confirm their email and verify their account. Added security is a nice touch here, as high-end clients are cautious about people seeing their work before it is released.
You can select how much control the recipient has over the shoot before sending the link. They can view the photos or provide ratings, comments, and tags.
These ratings, comments, and tags appear automatically on the broadcasted Capture One Live program. This means the client can tell the photographer which photos they like and don’t like quickly, non-disruptively.
Capture One Live is a game changer for some photographers. Capture One has done a great job of identifying the needs of its target audience. It’s a service that can save clients hours waiting for large files to download.
It could even save some people large amounts of money to not have certain people on location. Capture One Live is ideal for photo studios but may not benefit photographers who don’t work in editorial photography.
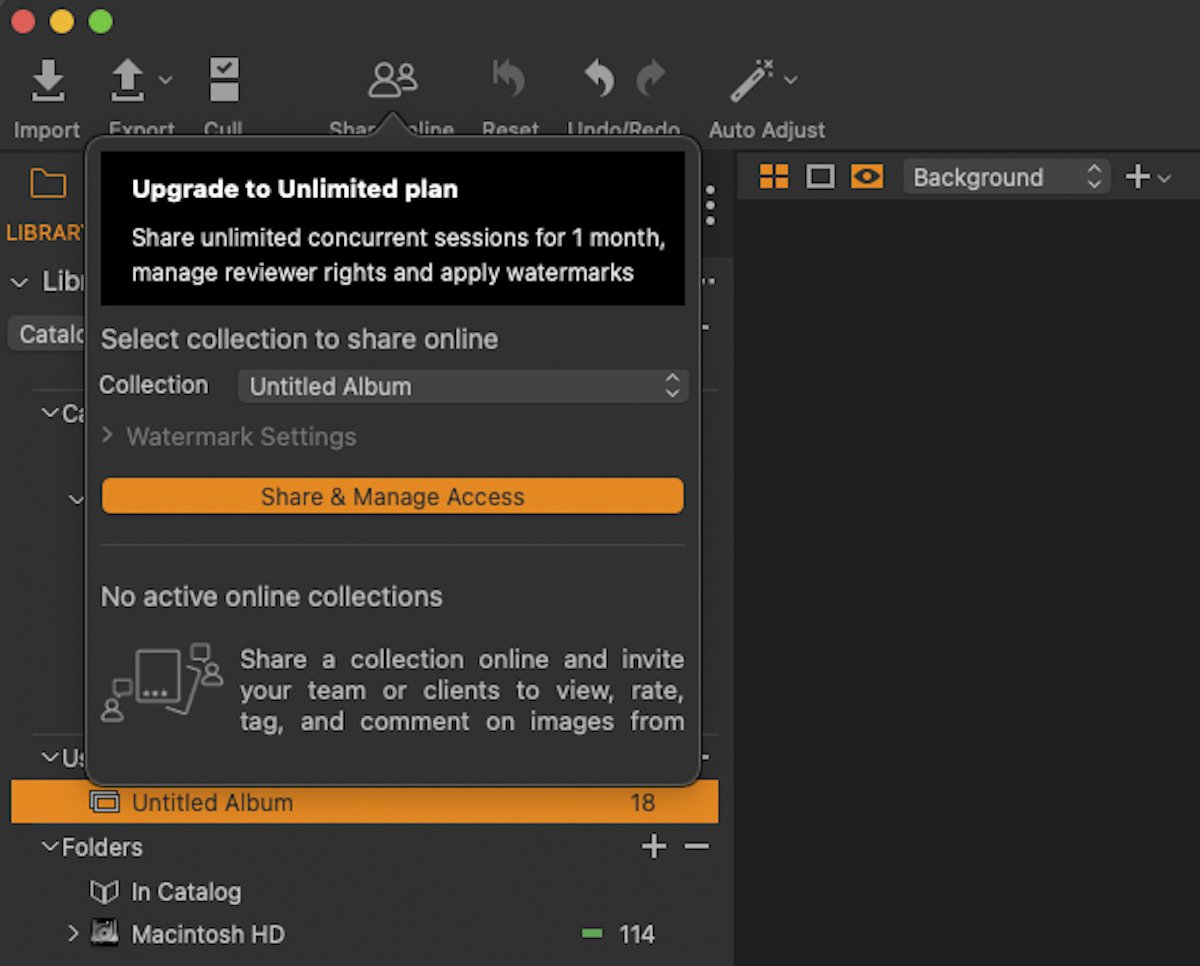
The full “unlimited” version is only available with the Capture One Pro All in One bundle. The “free” version only allows one live session at a time with basic ratings, color tags, and comments.
Exporting and Sharing Images
Exporting in Capture One is straightforward and in-depth, the best of both worlds. Capture One runs its exporting with “Recipes.” They are a way to quickly select the type of file you want without setting up the parameters each time.
Utilizing Recipes is another huge time saver Capture One has employed. Creating new recipes is easy. It lets you edit the name. So you can make an export recipe titled “Client” and set it up so it makes a reduced file size with a watermark. Exporting becomes quick and easy with custom Recipes.
Software like ON1 Photo RAW made you adjust the settings each time if you wanted to make a small change. Capture One doesn’t do this and views every small change as a one-off. I prefer this, as the former approach gets annoying after a while.
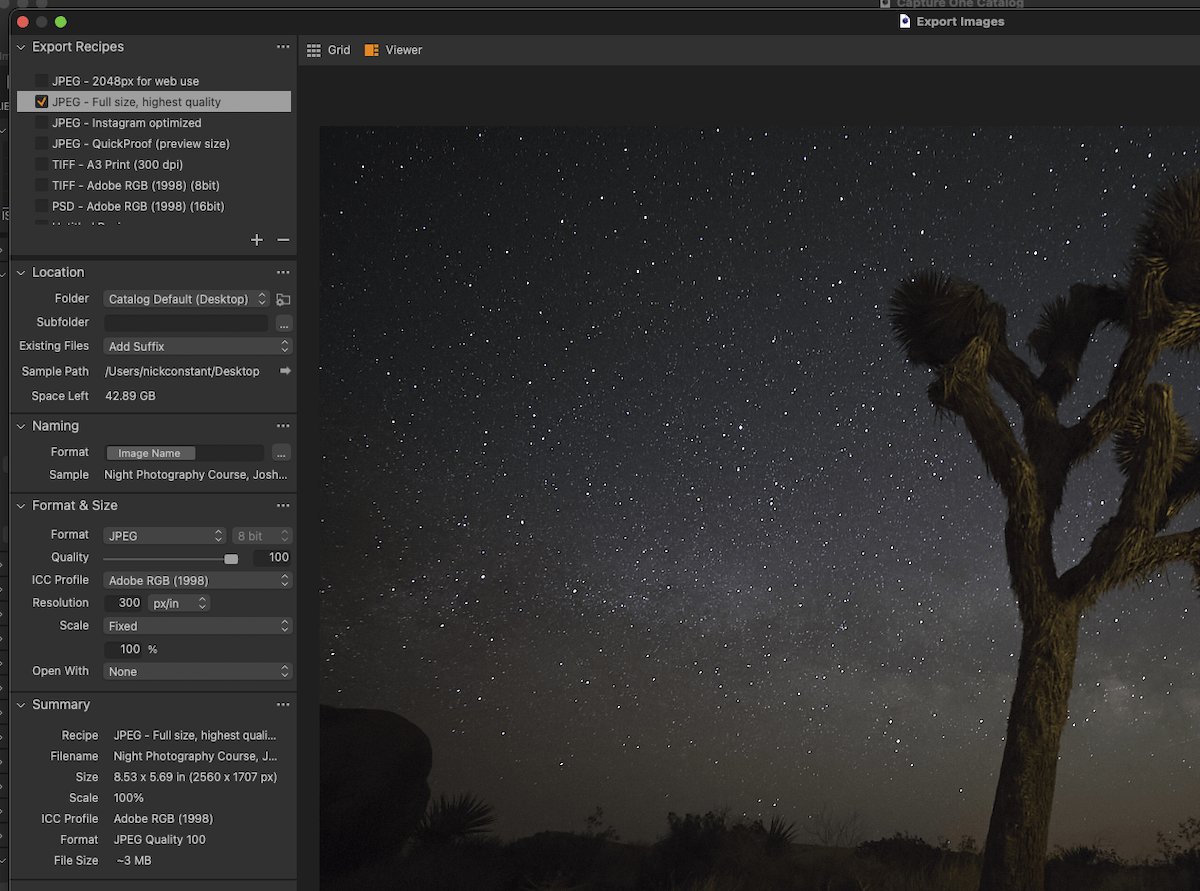
Exporting page with Recipes in the top-left of the panel with alterations underneath
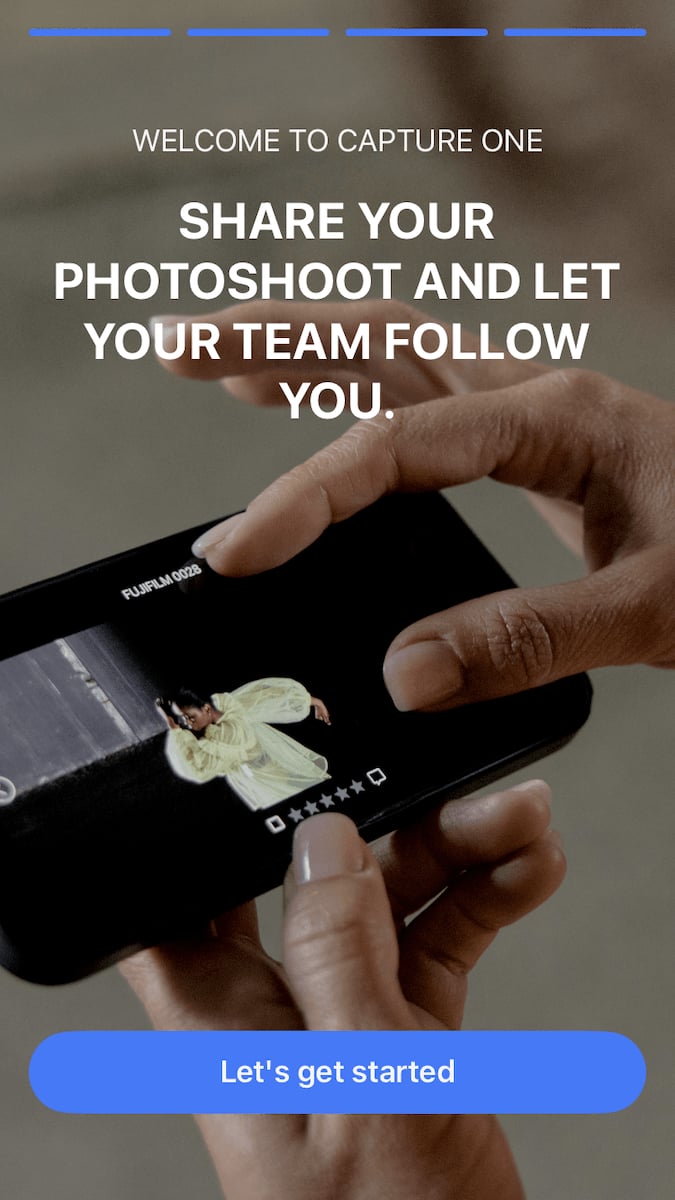
Smartphone and Tablet Compatibility
Capture One has a dedicated app for mobiles or tablets. This is an incredible app that can transform the way photographers shoot on location. Again, it particularly benefits editorial shoots over any other type of photography.
The app’s flagship feature lets you sync with your camera, automatically bringing up your current shoot on your phone or tablet. From there, you can apply ratings and edits while on the go. This is a great way to seamlessly share your images on a larger screen with people around you.
You also get a wide range of editing options and adjustments available through the app. Each adjustment is optimized to work on a touchscreen. You can even apply custom Styles you may have created on your account.
You must pay extra for Capture One mobile unless you buy the All in One bundle.
Capture One Pricing Plans
After going through all these features, it’s unsurprising that Capture One Pro is among the most expensive software on the market. Its target audience is editorial photography teams, where all the money is in photography. Getting these dedicated features in this industry comes at a high price.
Capture One makes its standard desktop app available for a monthly discounted fee billed yearly or monthly. Or you can pay a perpetual license fee. The license does not include new feature updates, but you get savings when updating the license.
With the monthly subscription, you can choose the All in One bundle. This includes the mobile version and the unlimited version of Capture One Live. You also get Capture One Live with the desktop version, but it only has simplified image sharing.
The price points of this software are targeted at companies and studios rather than individual photographers. I would not expect an amateur or photography enthusiast to spend money on this software. Capture One is software to consider if you make money with photography and work primarily on editorial shoots.
Alternatives to Capture One Pro
Adobe Lightroom
Capture One and Adobe Lightroom are similar programs. They are high-end editing software that achieves great results in the actions they perform. But Lightroom does a better job assisting photo manipulations like the Healing tool. Lightroom also provides a wider range of options for exporting formats, although these are quite niche.
Both programs approach editing similarly. You will find that sliders are the most common form of adjustment in both programs. One standout feature is that Capture One’s workspace is much more customizable than Lightroom. This isn’t a huge issue but could be crucial for photographers who know exactly what they want from their software.
After exploring Capture One software, I can see why people compare these two programs. They are both at the top of their game, providing expert RAW handling and adjustments. The main difference I came across is that Lightroom tends to cater to the individual and Capture One to teams.
Both software also have different strong points. Lightroom is superior in file management and organization. And Capture One is superior when dealing with color in your photos. Neither software supports elaborate manipulations. But this is good. Otherwise, the software would be too complex.
I would still buy Lightroom over Capture One, even if the price points were similar. My style of photography differs from editorial photography, so none of its features would help my editing process. You will have to decide which software best suits your editing style.
For more info, you can read our article that does a full review of Adobe Lightroom.
Final Verdict for Capture One Pro
[scores price="no" product="34491″ tag="expertphotog-20″ toc="no" left_title="Measurement" right_title="Score"]
After my time with Capture One Pro, I can see why it is an industry-standard software. It provides strong performance with surprising simplicity for seemingly complex software. Its flexibility is another standout feature. You can set up your workspace in your own way.
As mentioned, Capture One favors the wide spectrum of editorial photography. Individuals can make great use of this software. But it isn’t worth it when you consider its price. This is why it makes sense that you find Capture One in more high-end studios worldwide.
The winning factors for me are its great RAW processing and color management. Capture One pays closer attention to color than any software on the market. And it does this by quite a large margin.
Again, the individual will normally only need this much control if working for high-end clientele. But if color retention and tweaking is the most important factor for you, then Capture One is the software to consider
Overall, Capture One is incredible software that deserves the acclaim it gets. If money is no issue, this software won’t disappoint you.