Today we will look at how to edit details in Lightroom. Adobe Lightroom stands out for its seamless approach to fixing details. It’s more than just a tool; it’s a photographer’s perfect companion. Adobe designed Lightroom to correct common issues in photography with unparalleled ease.
Adobe Lightroom is the top editing software for fixing issues in photography. It has grown with the evolution of digital photography, consistently pushing the bar of what is possible in digital photo editing. Today, we will explore the multiple ways it can fix common photography details.
Adobe provides several dedicated ways to fix details in Lightroom. Each major issue usually has its own section, where you will usually find customizable options to make your adjustments as perfect as possible.
Each section we explore today briefly introduces the adjustments that Lightroom makes. To learn exactly how to perform these adjustments, click the link for a step-by-step guide.
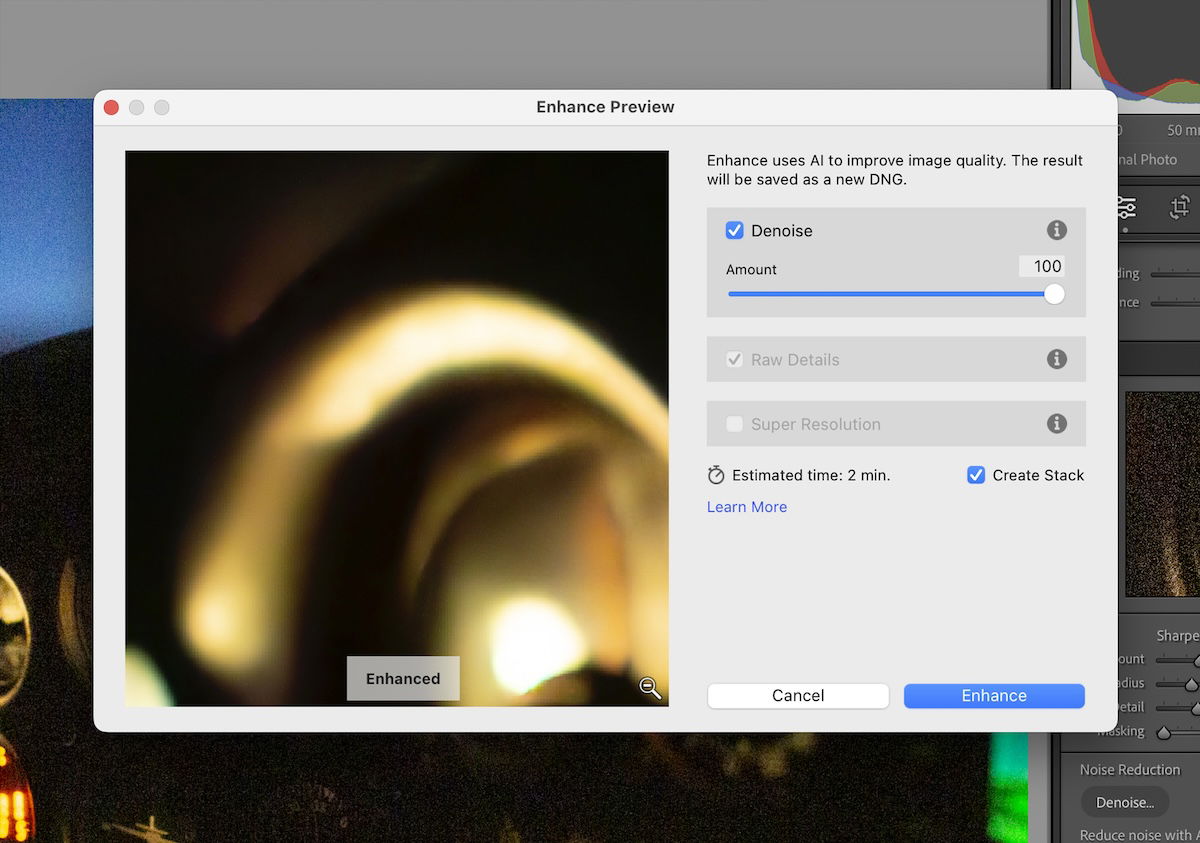
Lightroom’s noise reduction tool, Denoise, is one of the best on the market. It uses AI to expertly read an image and remove noise in a single click. This means photographers can shoot at higher ISOs without worrying about noise ruining their images.
Lightroom also provides manual noise reduction options to manage luminance, detail, and contrast. But the auto option usually produces more accurate results than messing with the sliders.
When compared to other noise reduction software, Lightroom’s Denoise tool holds up very well. It effectively removes noise while maintaining sharpness and clarity. If you want to learn more about lightroom noise reduction, there are many helpful resources available online.
Chromatic aberration (CA) is a common problem in photography that causes color fringing or purple halos along high-contrast edges. It happens when a lens fails to focus all colors onto the same point, resulting in distracting color shifts.
There are two types of CA: longitudinal (LoCA) and transverse (TCA). LoCA appears as a colored blur in front of or behind the focal plane, while TCA shows up as sharp color fringes near the edges of the frame.
To minimize CA, use high-quality lenses and avoid shooting at extreme apertures or focal lengths. In post-processing, Lightroom offers both automatic and manual tools to correct CA. The “Remove Chromatic Aberration” checkbox in the Lens Corrections panel can often fix the issue with one click. For more stubborn cases, use the Defringe sliders to target specific color fringes. With a few simple steps, you can eliminate the “devil in the details” and achieve clean, chromatic aberration-free images.

Grainy photos can ruin the quality of your images. To fix this, you can use Photoshop or Lightroom. In Photoshop, go to Filter > Noise > Reduce Noise and adjust the sliders until you get the desired result.
Lightroom also has a dedicated panel for reducing noise. In the Develop module, go to the Detail panel and use the Luminance, Detail, and Contrast sliders to minimize the grain. While you can’t remove the grain completely, these tools can help make it less noticeable.
Fixing grainy photos is an important skill for any photographer. By using the right techniques in Photoshop and Lightroom, you can greatly improve the quality of your images.

Lightroom offers several tools to sharpen and fix blurry photos. The Detail panel has sliders like Amount, Radius, Detail, and Masking that can improve sharpness. Amount controls the intensity of sharpening, while Radius makes edges look thicker.
The Detail slider makes the whole image stand out but can create noise. Masking is a handy tool that automatically detects and masks blurred areas, removing sharpening from those parts for a more natural look.
For selective sharpening, use the Adjustment Brush tool. Brush over the area you want to sharpen and move the Sharpness or Clarity slider to see instant changes. To fix blurry photos even further, try out these additional Lightroom techniques and master the art of sharpening your images.