In the realm of photography and design, a blurred background can make a world of difference. It can help draw attention to your subject, create a sense of depth, and even add an artistic touch to your images. However, achieving this effect in real life requires a high-end camera and a good understanding of depth of field. But what if you could achieve this effect post-production, using a tool you may already have? This is where Adobe Photoshop comes in. This article will guide you through the process of blurring the background of an image in Photoshop, allowing you to create stunning visuals with a professional touch, regardless of your photography skills. Whether you’re a seasoned designer or a beginner looking to enhance your images, these steps will help you master the art of background blurring.


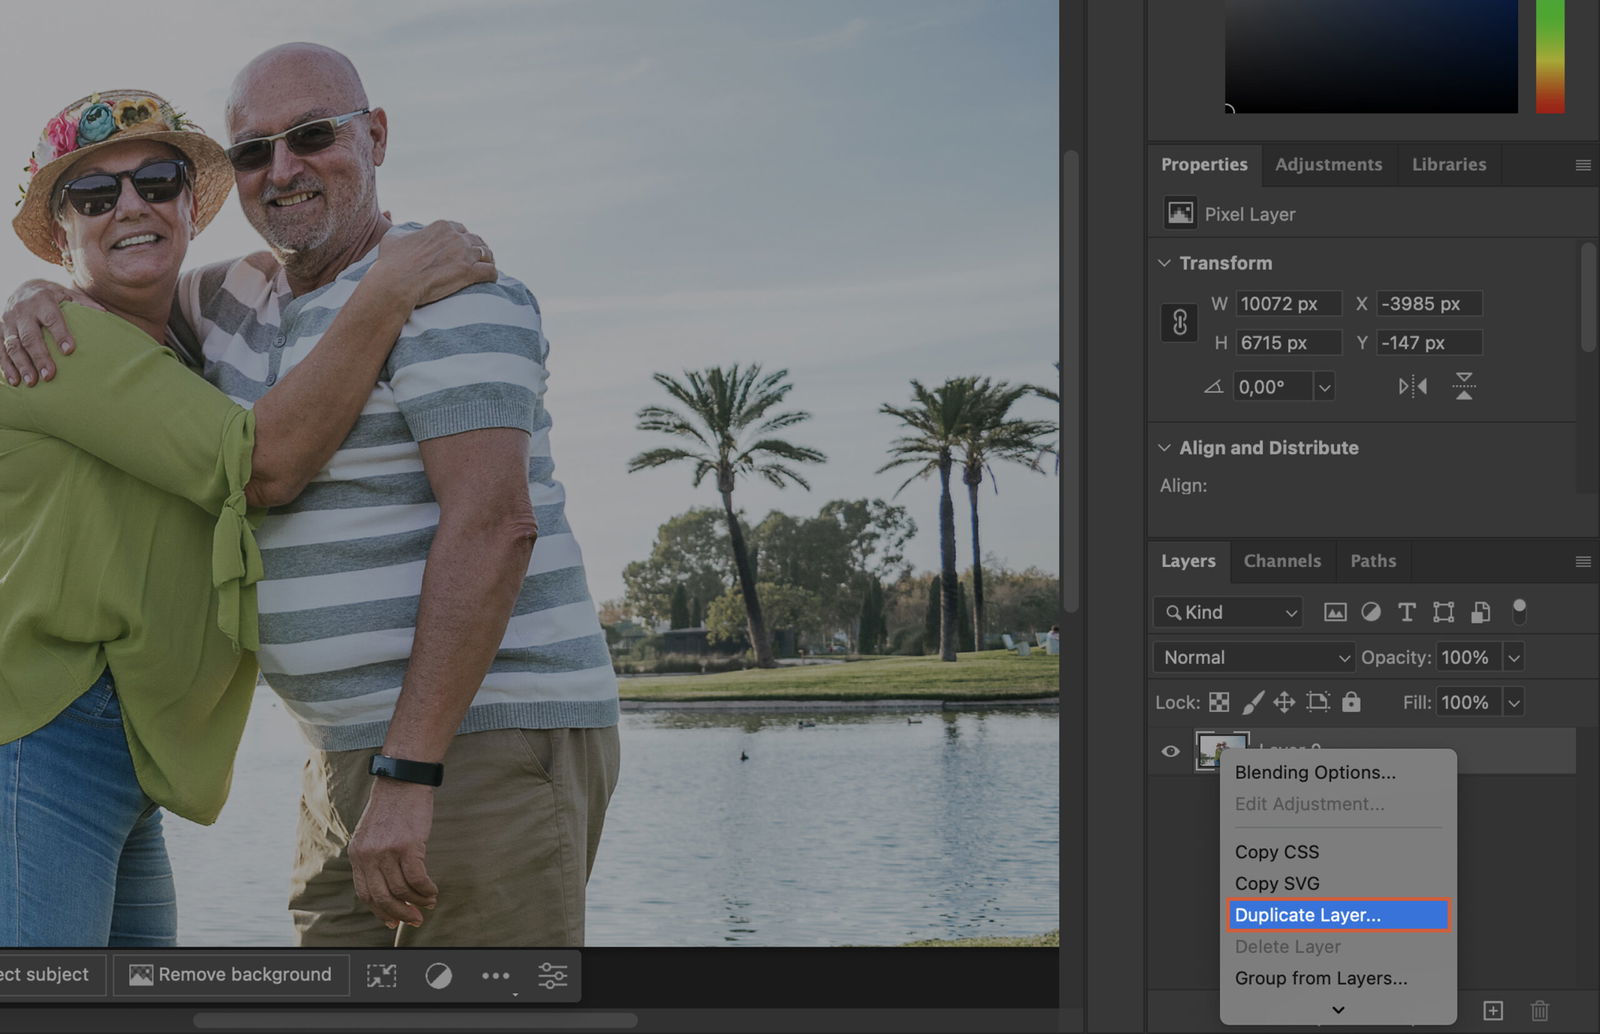
Begin by duplicating your background layer. To do this, right-click on the background layer in the Layers panel and select “Duplicate Layer”. A new layer will appear above the original.
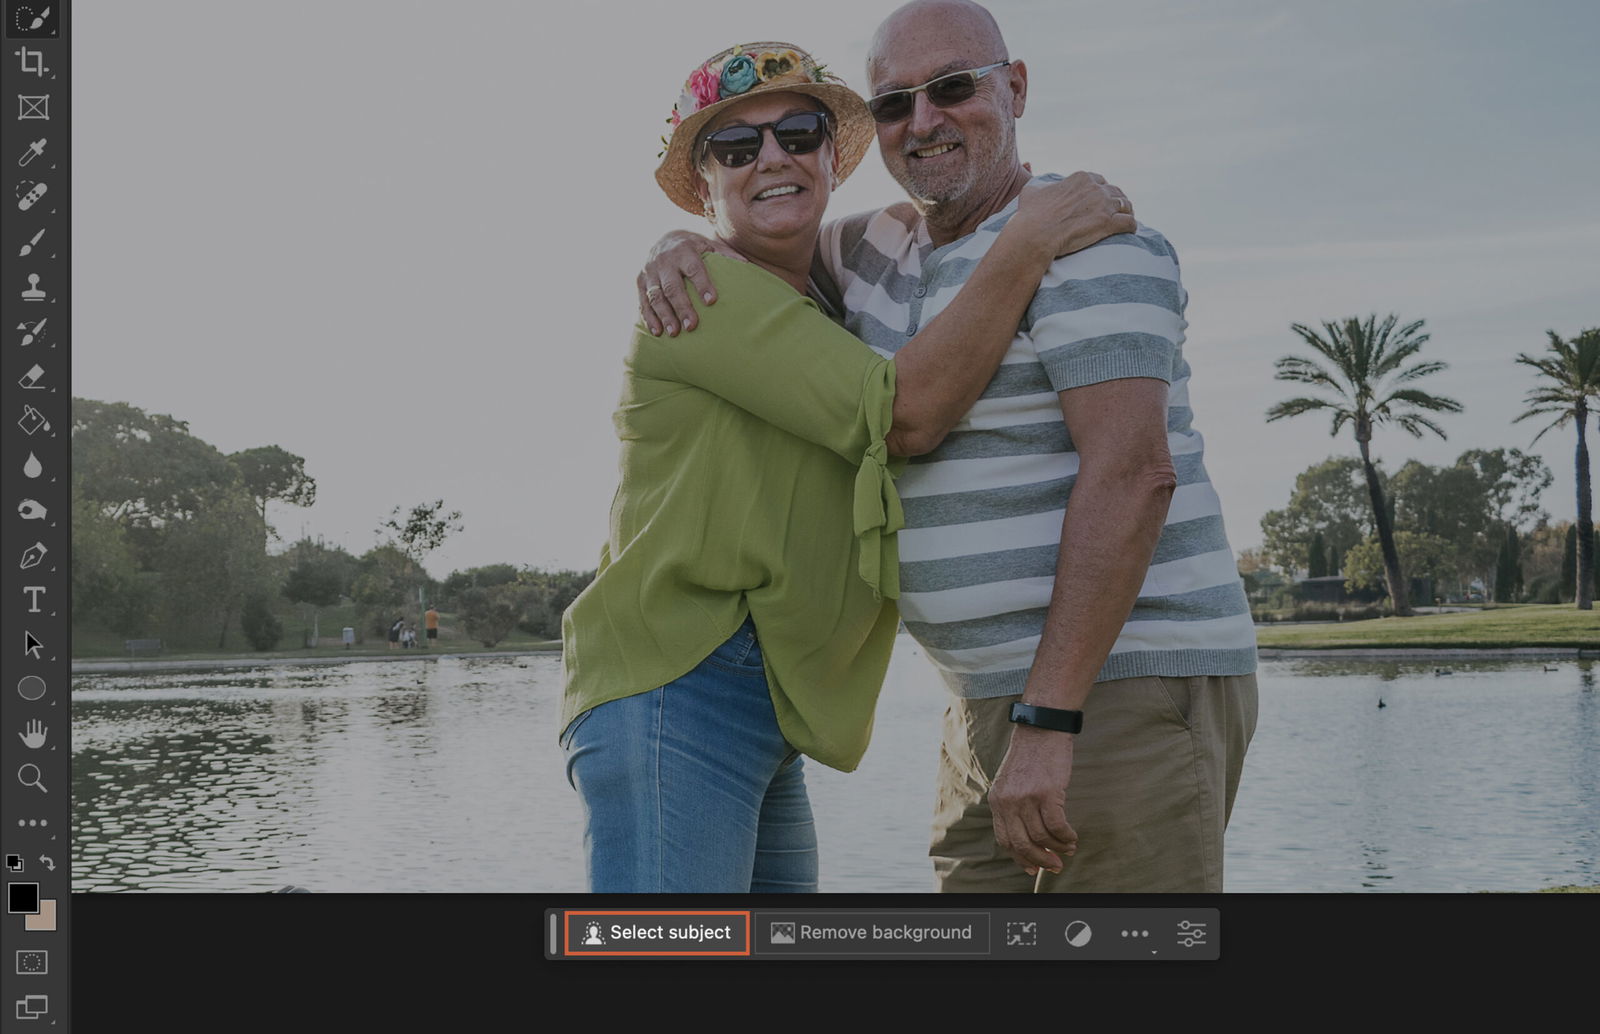
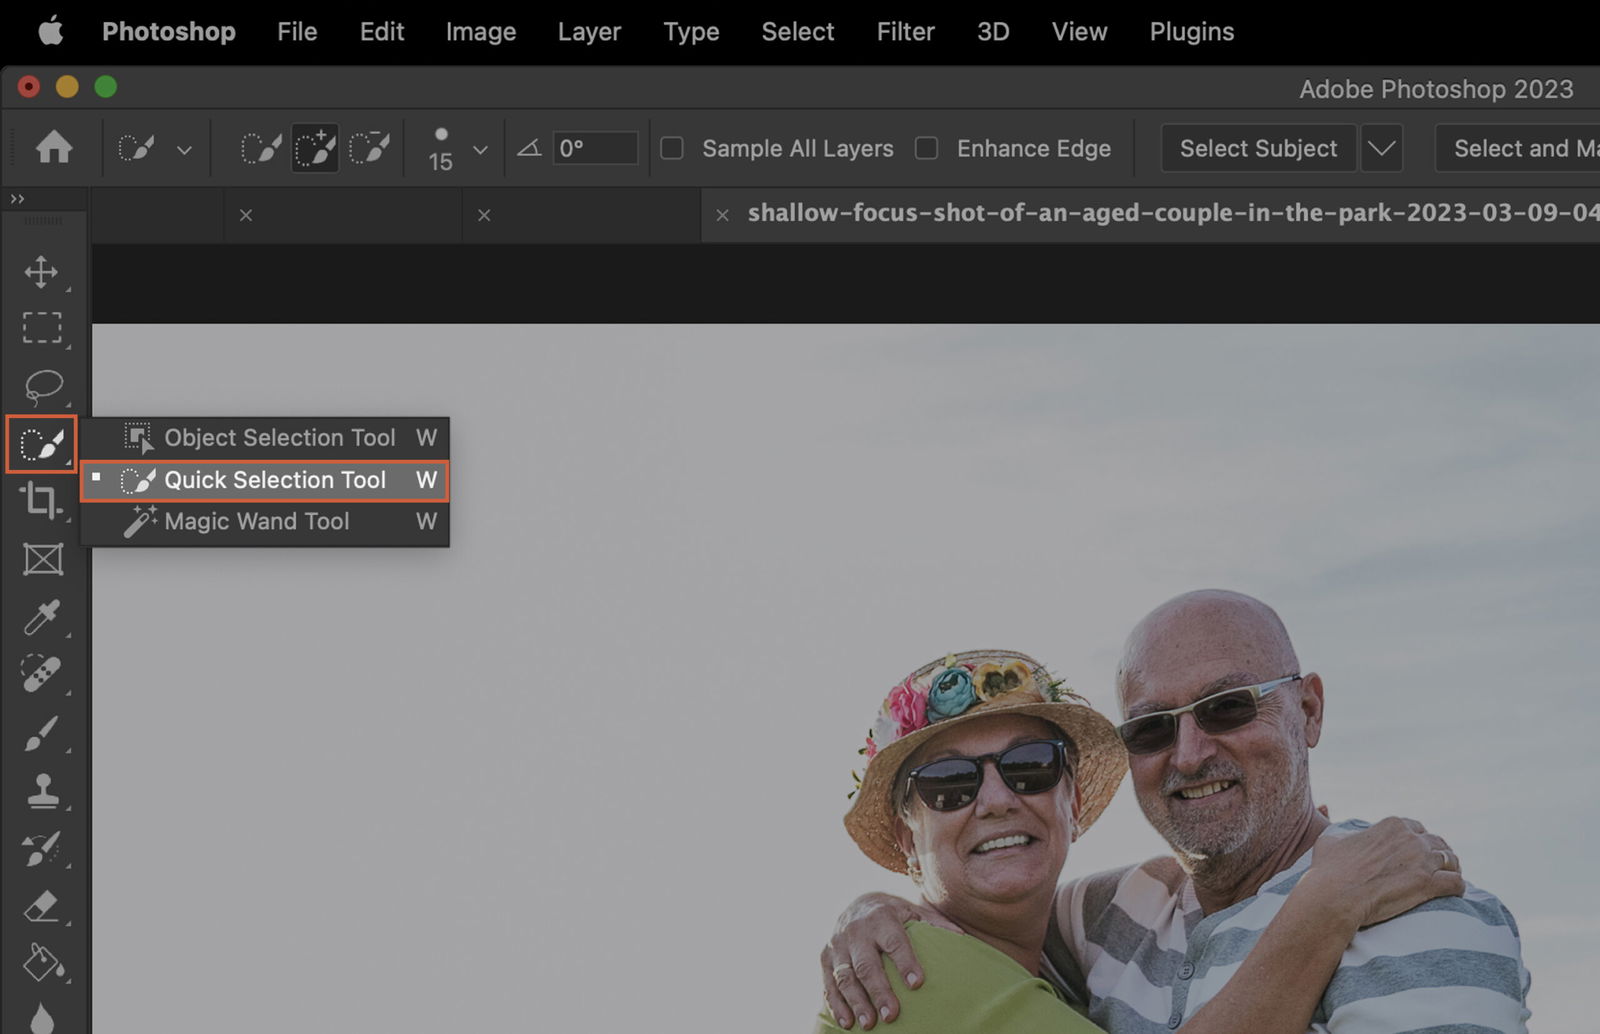
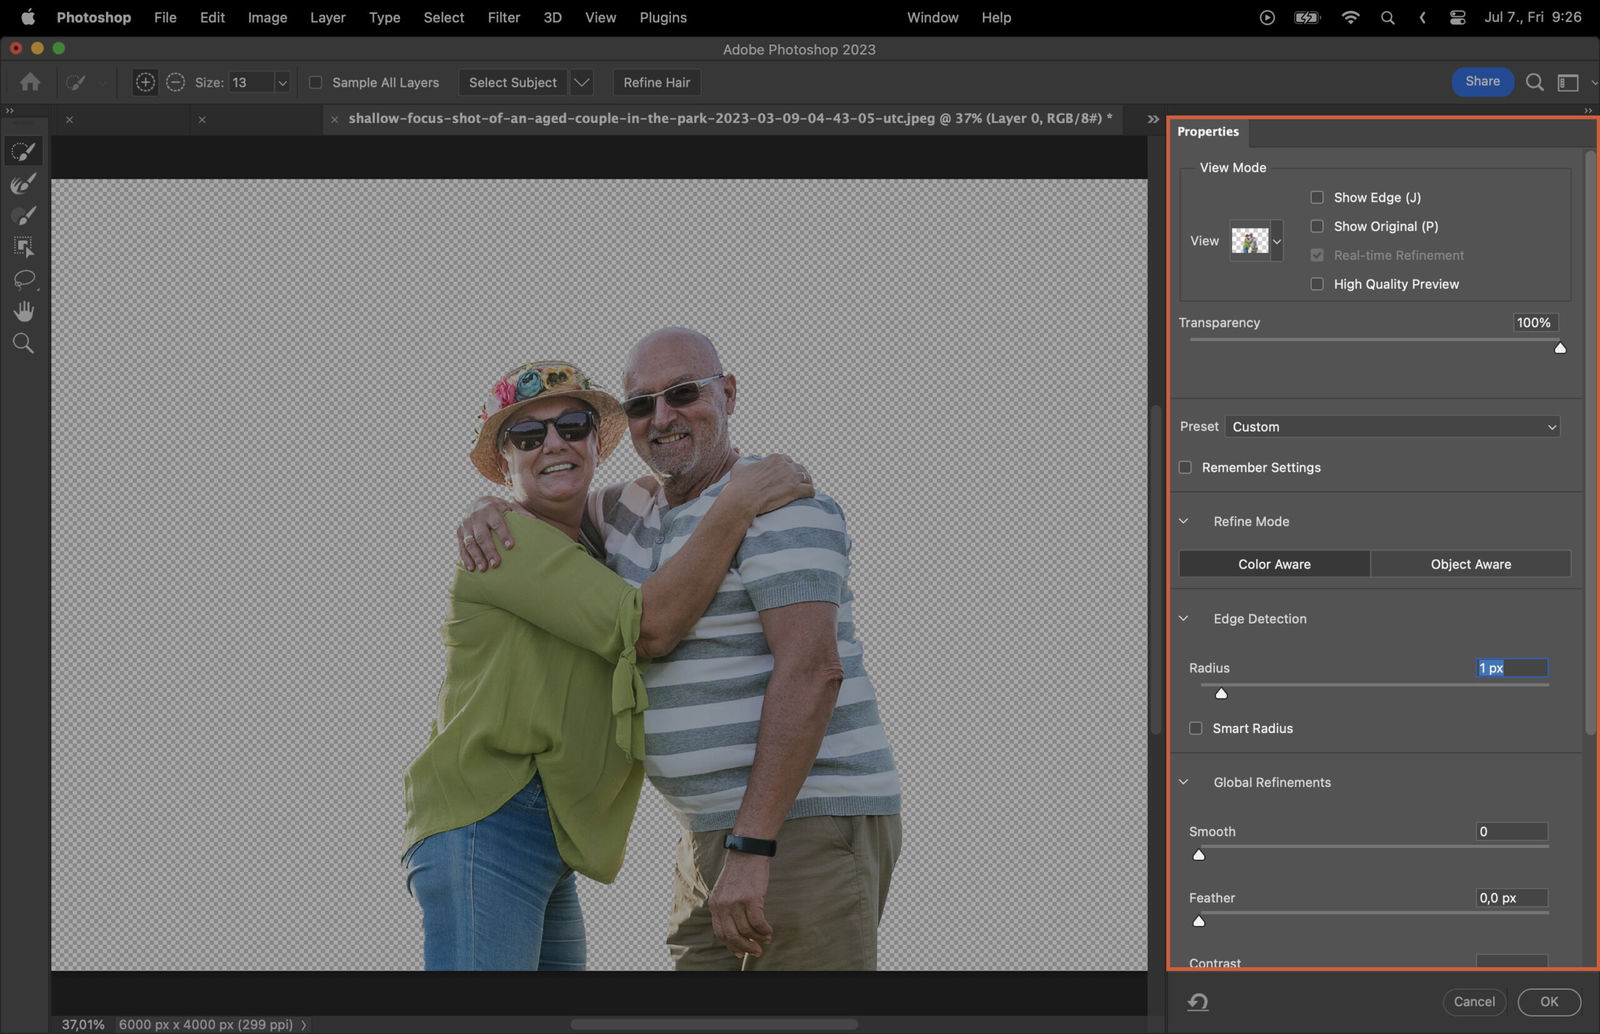
Next, you need to select the object in the foreground that you want to keep in focus. There are several tools you can use for this.
The Select Subject tool in Photoshop simplifies the process of selecting objects or subjects within an image with just one click. By analyzing the image’s content using advanced algorithms and AI, it intelligently identifies the primary subject, saving time and effort.
The Quick Selection Tool is a great option for objects with defined edges. Simply click and drag the tool over your object to select it. Photoshop will automatically detect the edges.
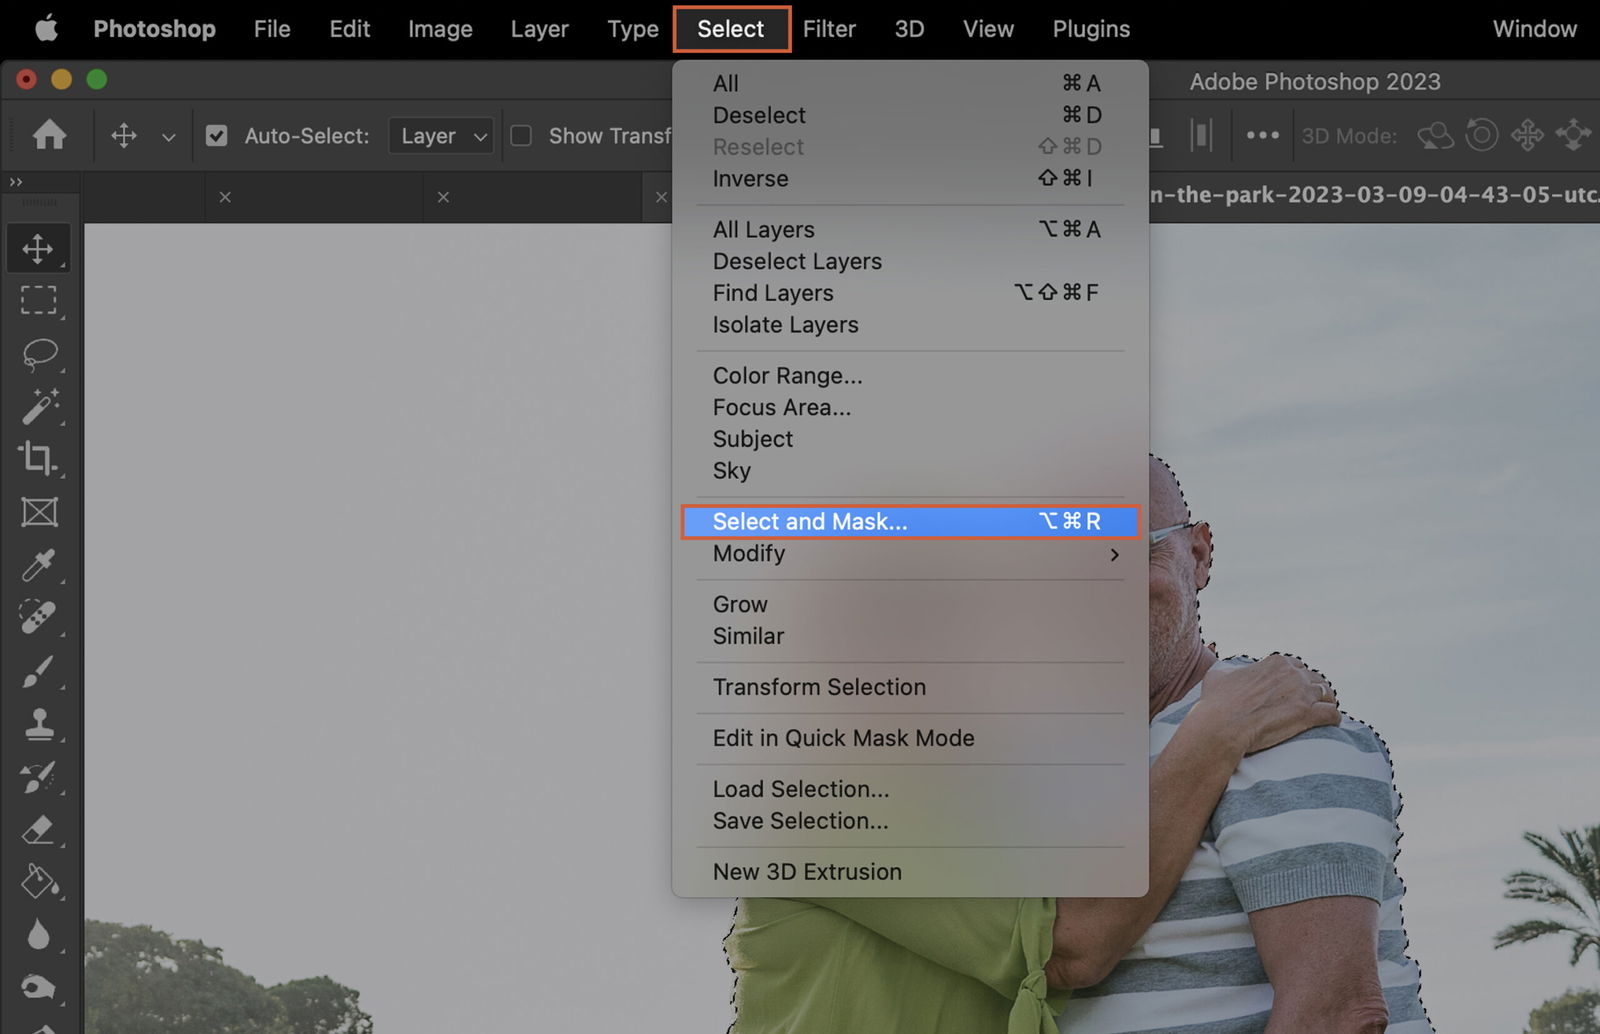
Once your object is selected, you can refine the edges to make the selection more precise. Go to “Select and Mask” in the options bar and adjust the settings to smooth, feather, or shift the edge as needed.
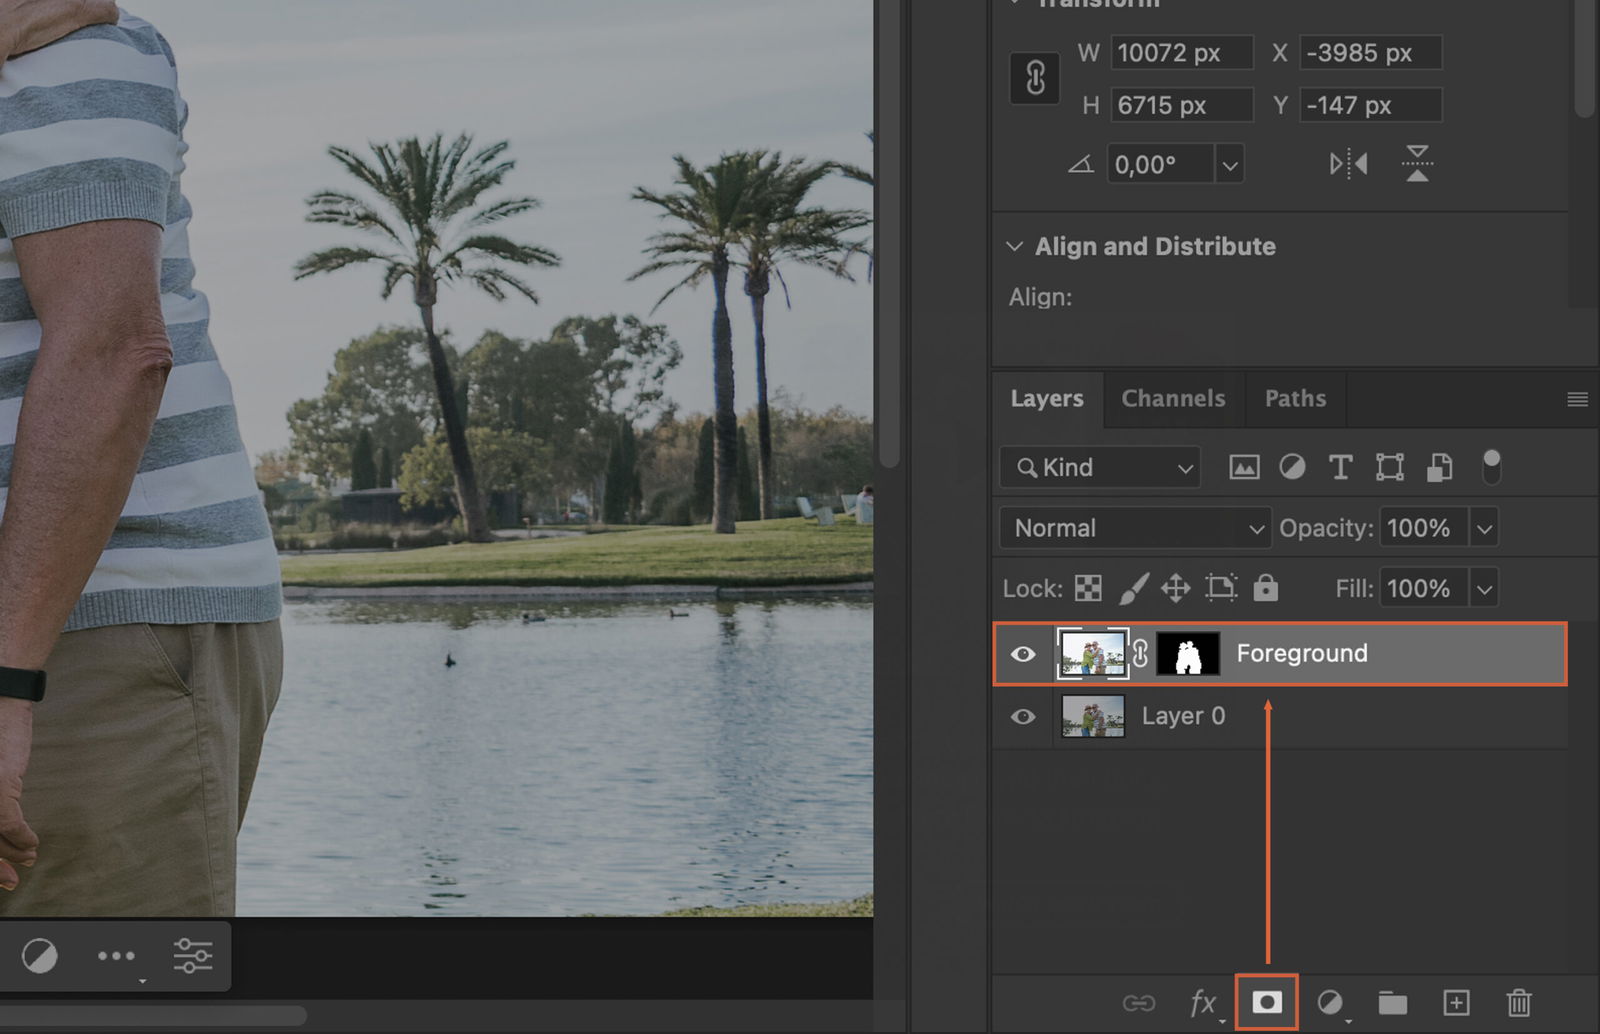
With your object still selected, create a layer mask. This will hide the background while keeping your object visible. Click on the “Add Layer Mask” button at the bottom of the Layers panel.
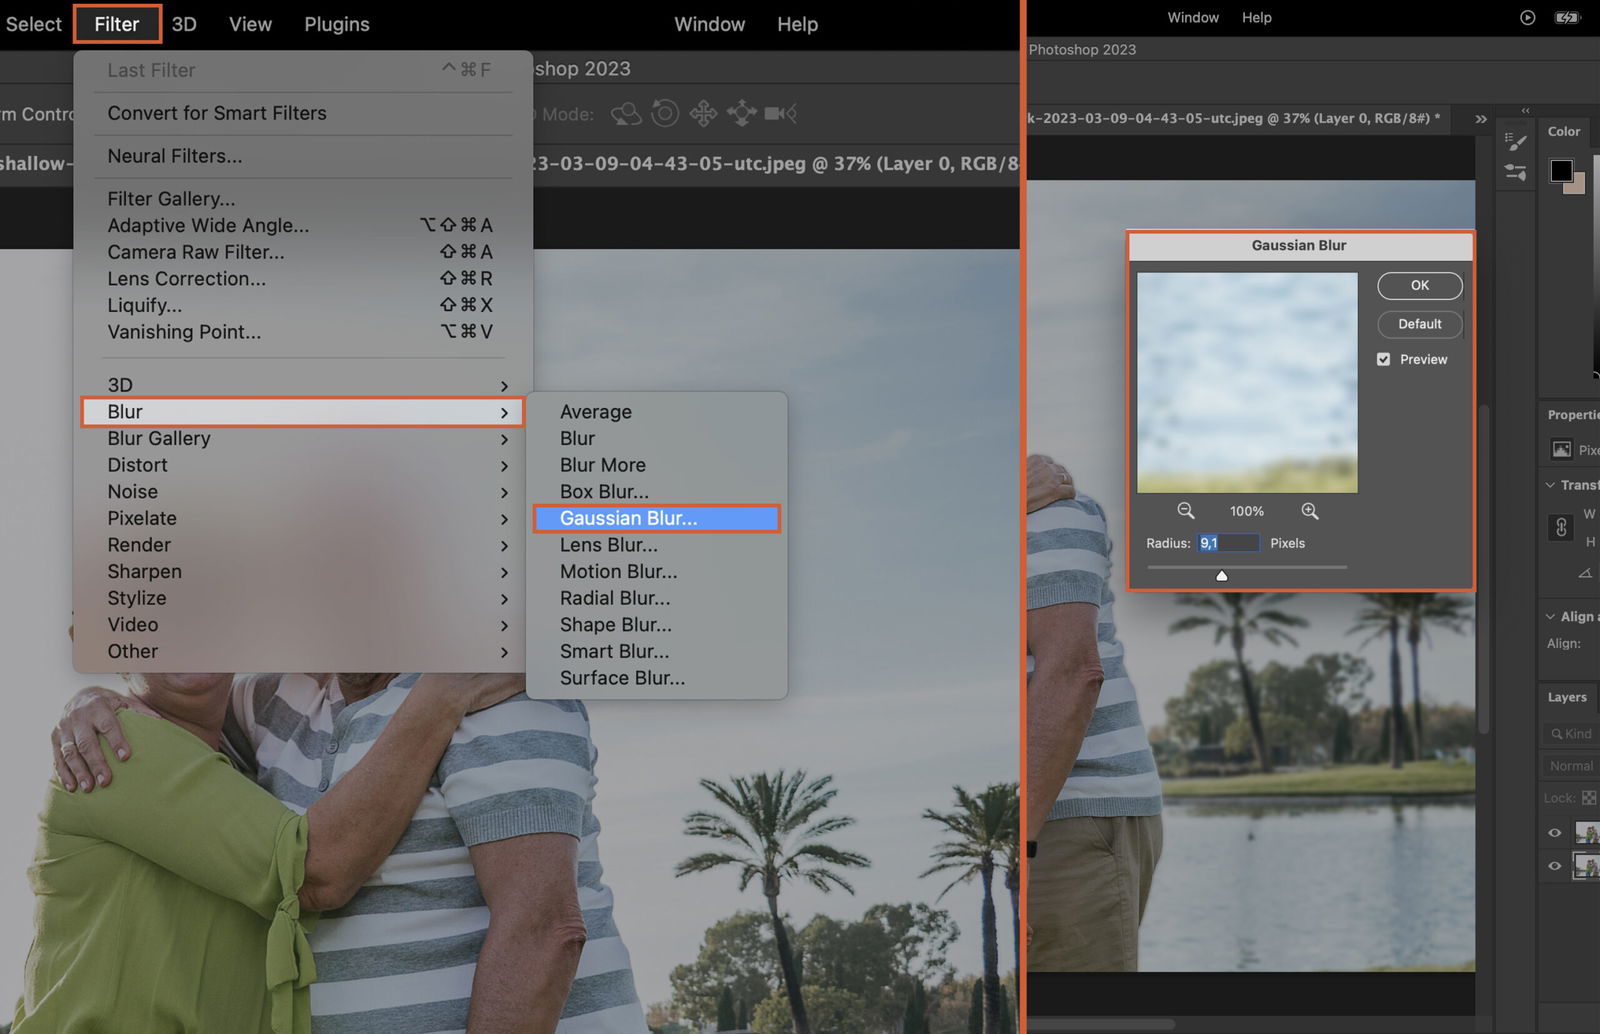
Now it’s time to blur the background. There are several blur effects you can use. We will apply this effect to the original layer.
Gaussian Blur is a popular choice for its simplicity and effectiveness. Go to “Filter” > “Blur” > “Gaussian Blur” and adjust the radius to achieve the desired level of blur.
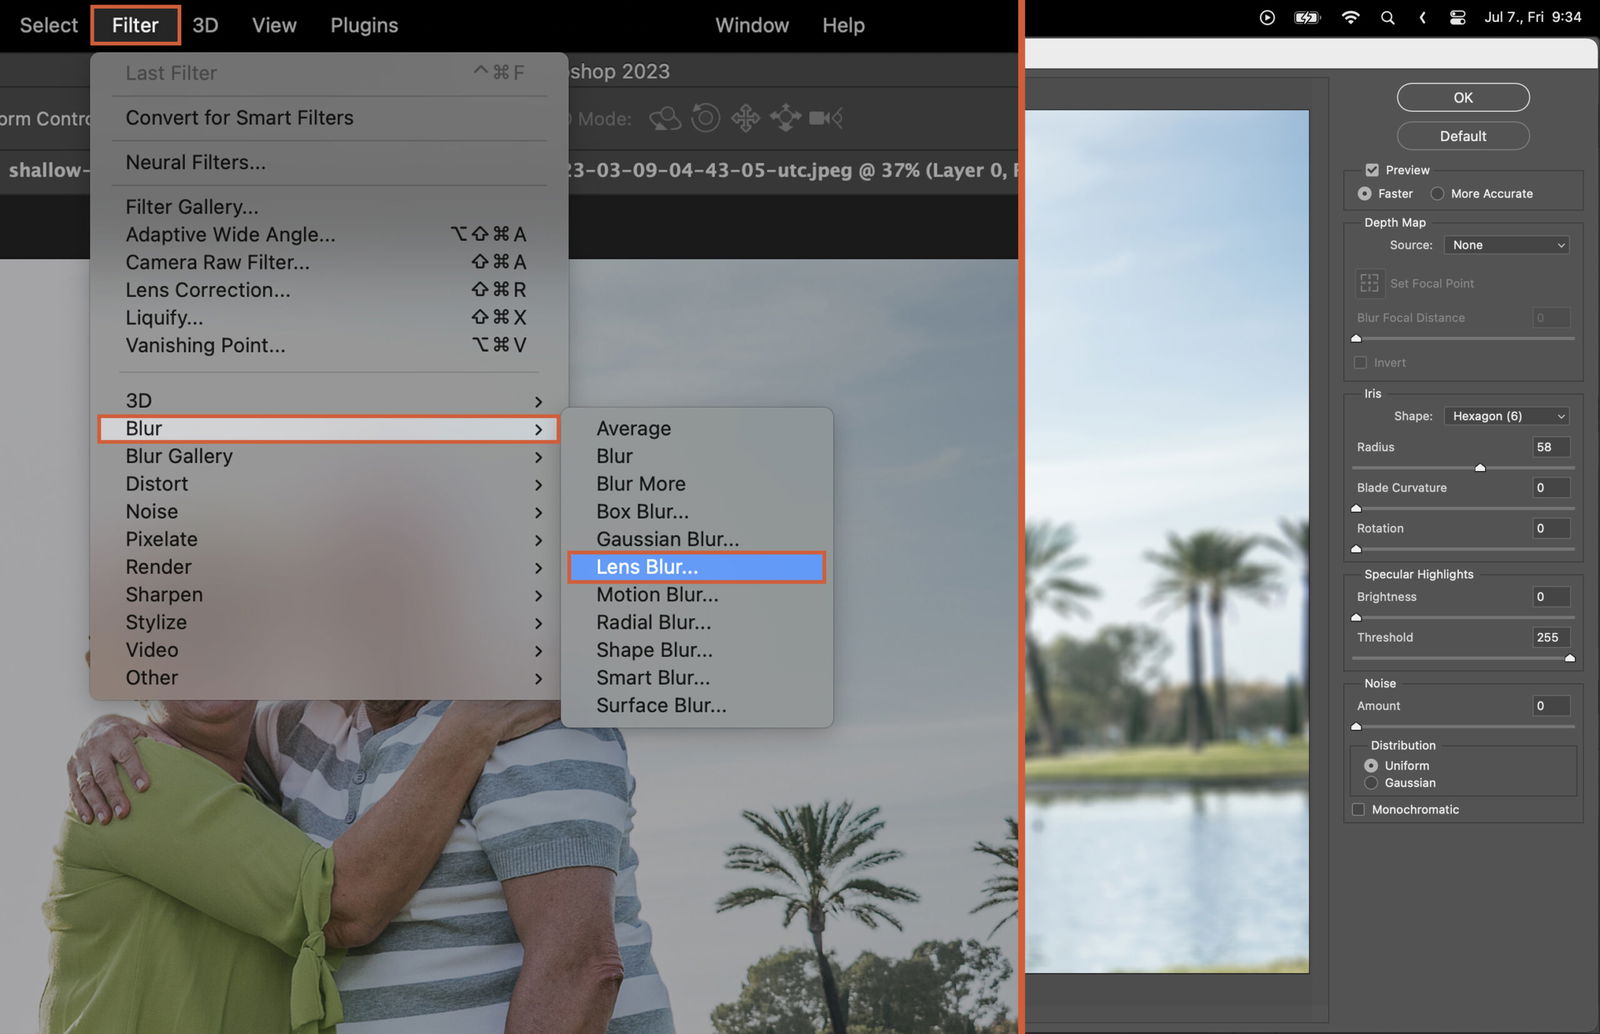
Lens Blur creates a depth-of-field effect, making it look like the photo was taken with a high-end camera lens. Go to “Filter” > “Blur” > “Lens Blur” and adjust the settings as needed.
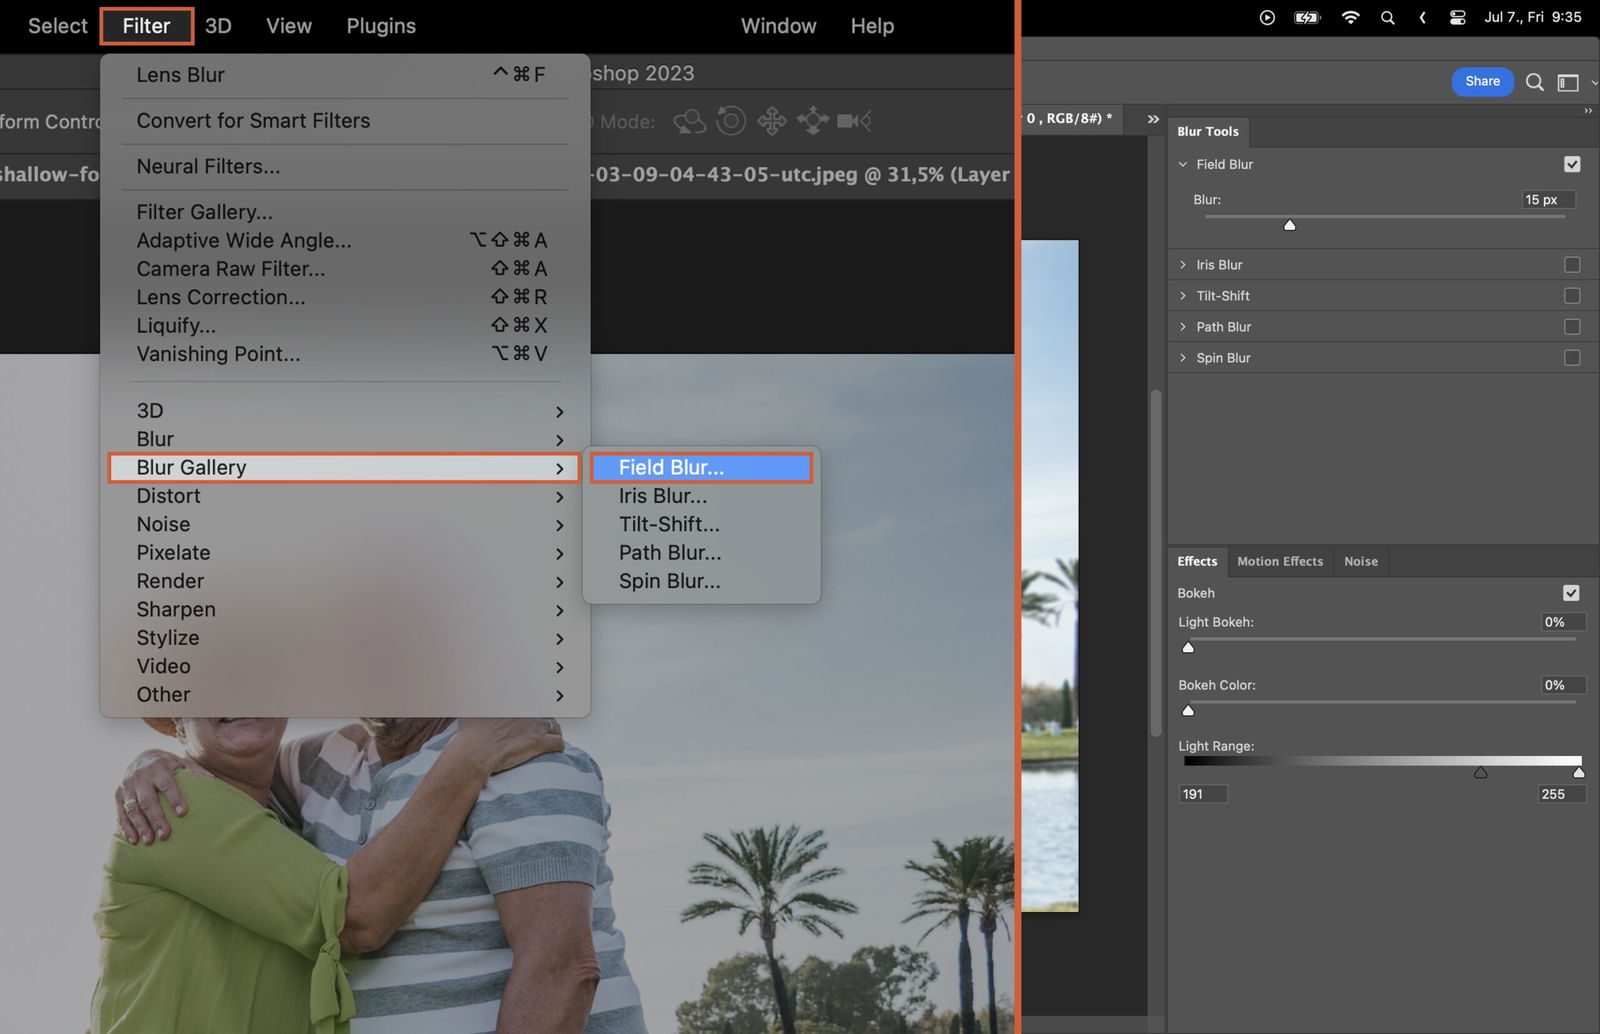
Field Blur allows you to set different blur levels for different areas of the image. This is useful for creating a more realistic depth-of-field effect. Go to “Filter” > “Blur Gallery” > “Field Blur” and use the pins to set the blur levels.
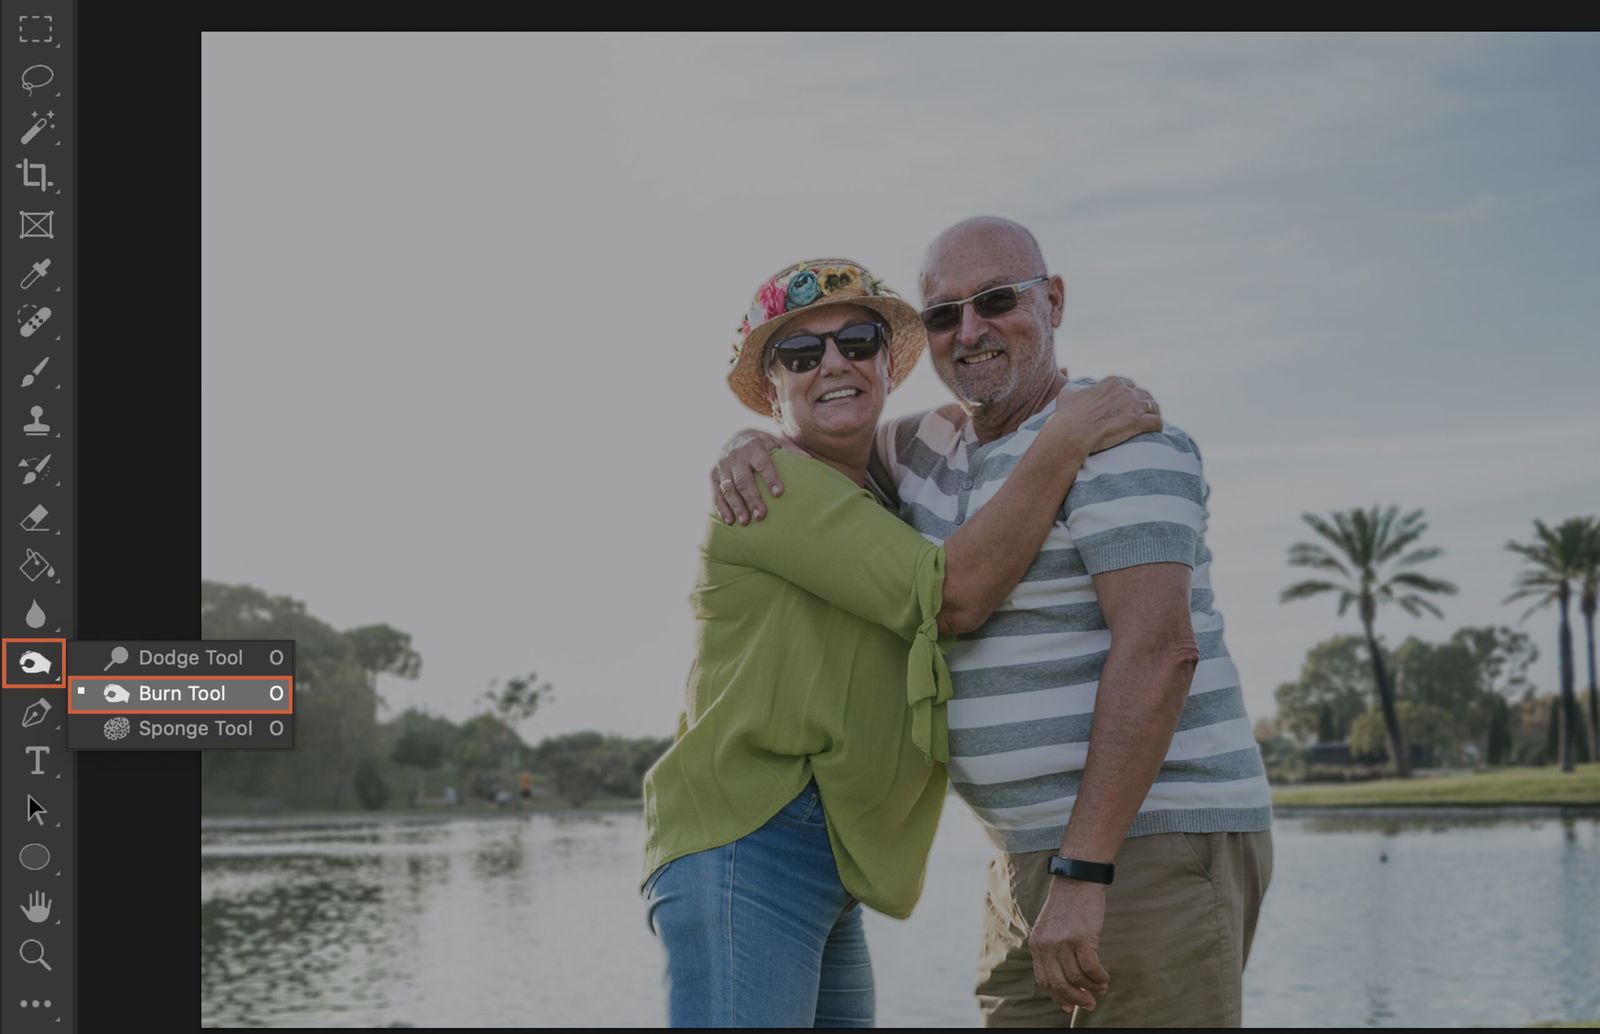
If necessary, you can fine-tune your foreground object to make it stand out more. Use the “Burn” tool to darken it, the “Dodge” tool to lighten it, or the “Sponge” tool to saturate or desaturate its colors.
Finally, merge your layers to finalize the image. Right-click on the top layer in the Layers panel and select “Merge Down”. Repeat this until all layers are merged. Now you have a beautifully blurred background!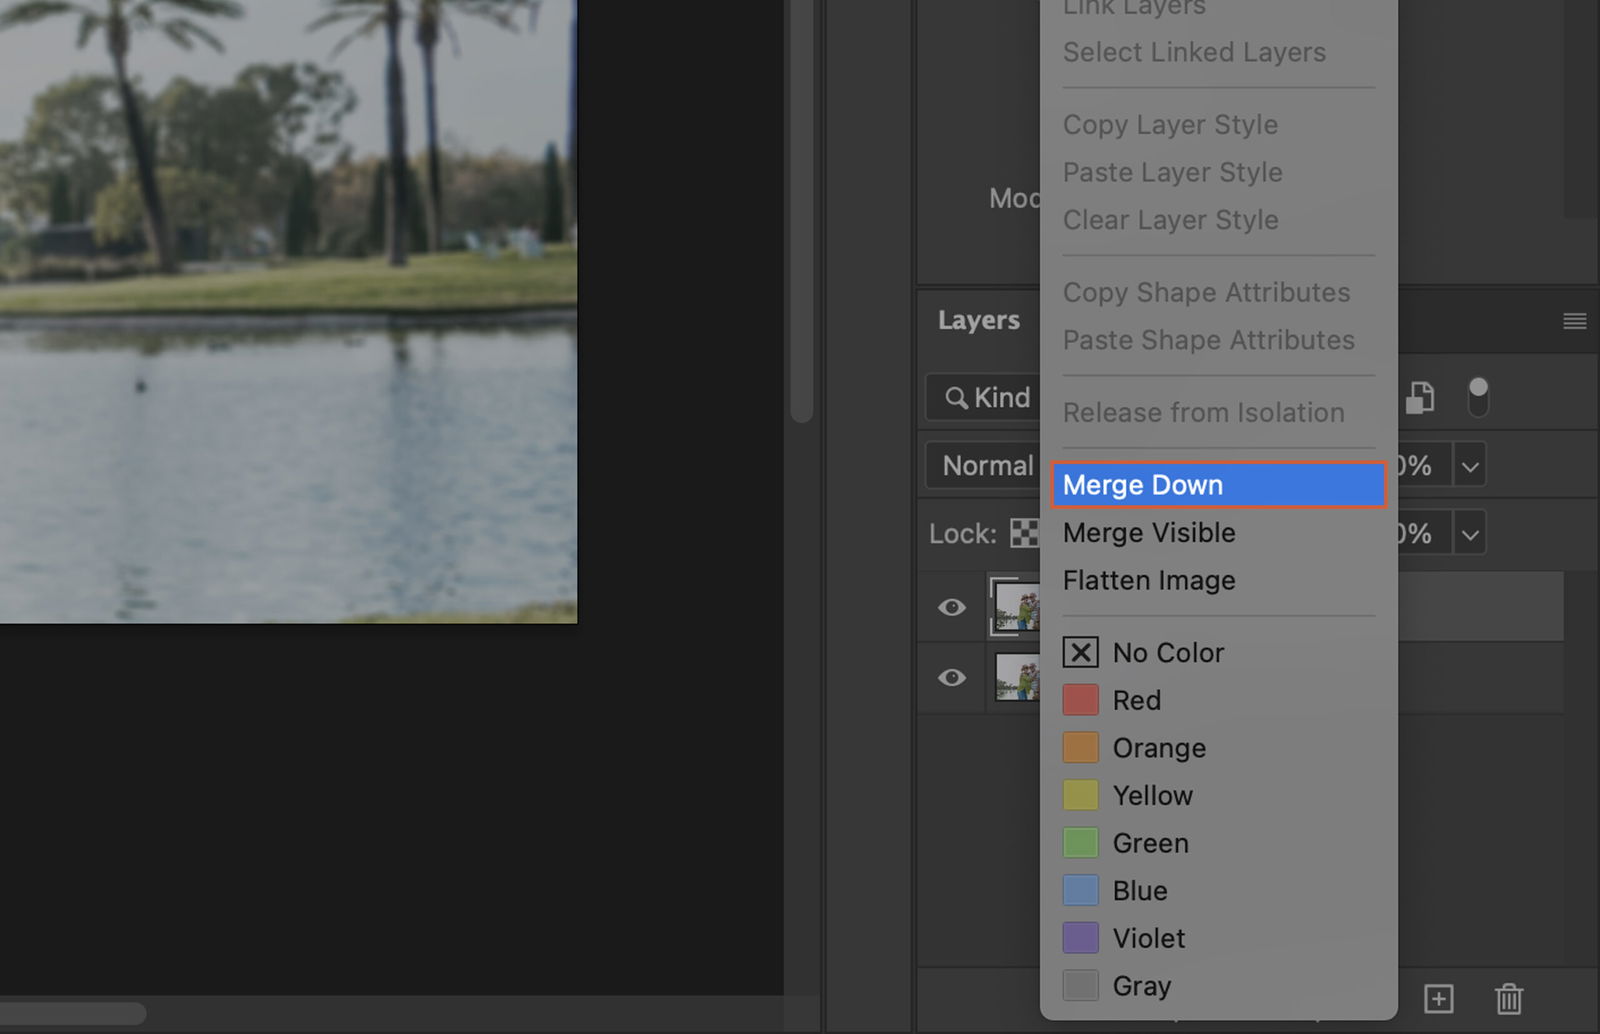
![P32 [Lead gen] sidebar banner Related ebook](https://expertphotography.b-cdn.net/wp-content/uploads/2021/10/P32-Lead-gen-sidebar-banner-Related-ebook-300x295.jpg)
![P32 [Lead gen] Sidebar Banner](https://expertphotography.b-cdn.net/wp-content/uploads/2021/10/P32-Lead-gen-Sidebar-Banner-300x245.png)
![P32 [Lead gen] Sidebar Banner 2](https://expertphotography.b-cdn.net/wp-content/uploads/2021/10/P32-Lead-gen-Sidebar-Banner-2-300x245.png)