Are you looking to breathe new life into your images by altering the color of certain objects? Or perhaps you’re trying to learn the ropes of Adobe Photoshop and are stuck on how to manipulate colors effectively? Either way, you’ve landed in the right place. This comprehensive guide will walk you through the process of changing the color of any object in your image using Photoshop. From selecting the right object to refining your selection and finally tweaking the color, we’ve got you covered. By the end, you’ll be equipped with all the skills you need to transform your images as per your creative vision. Let’s dive in!


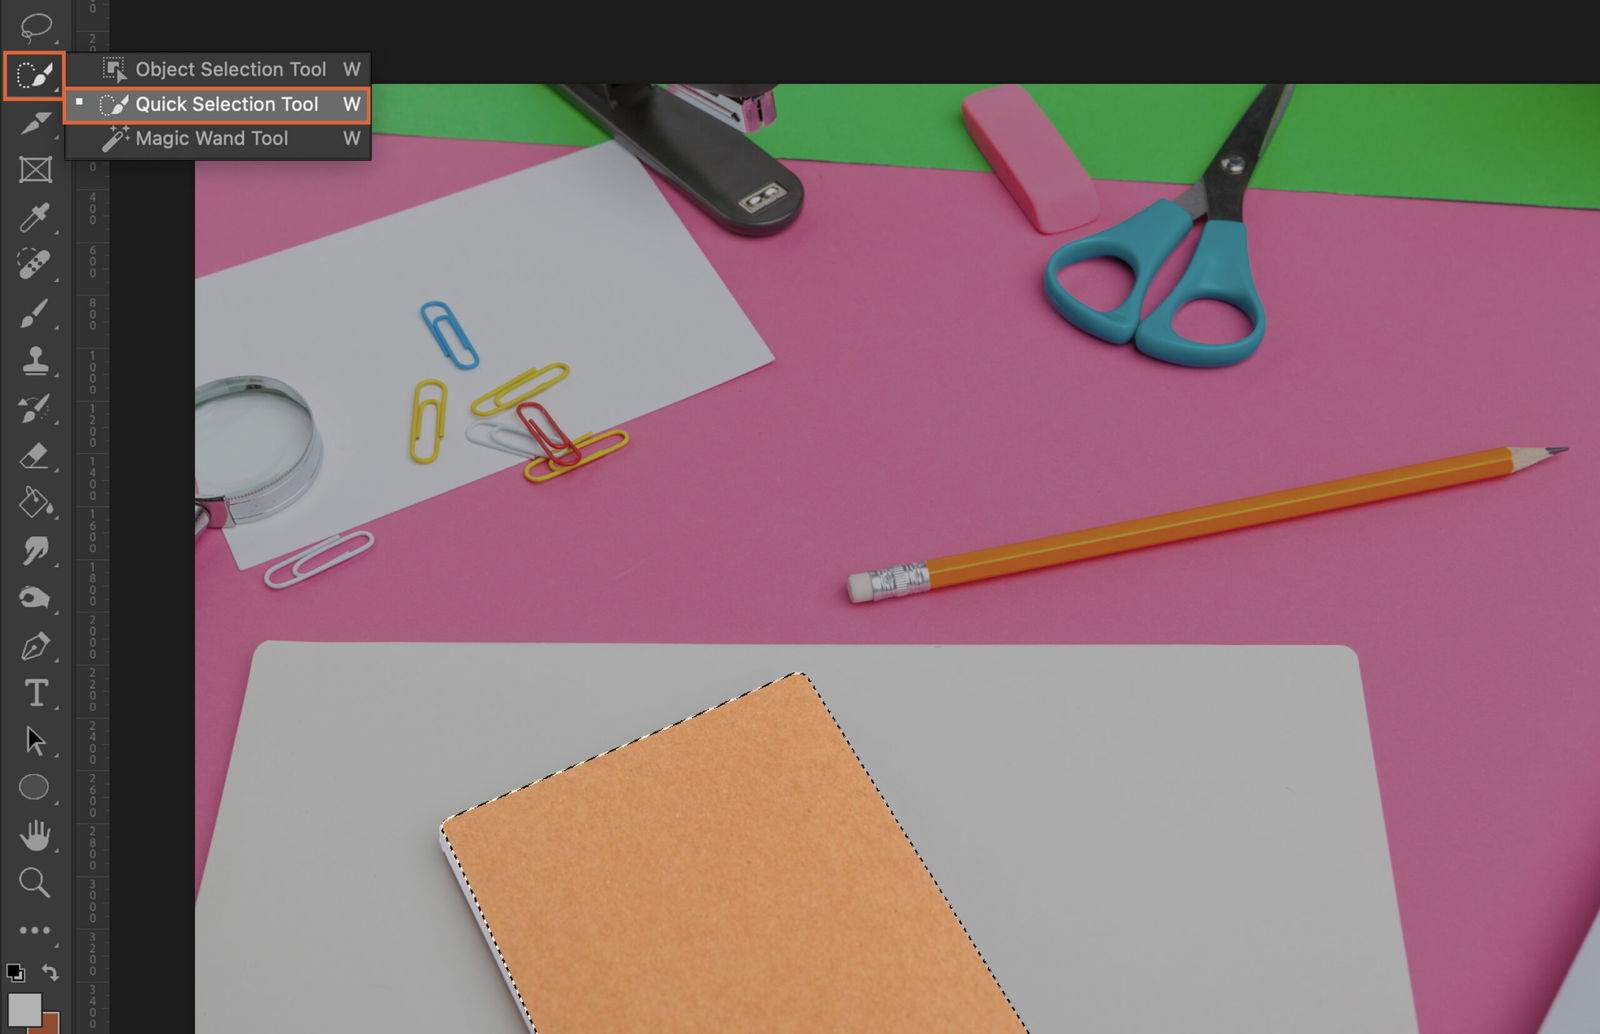
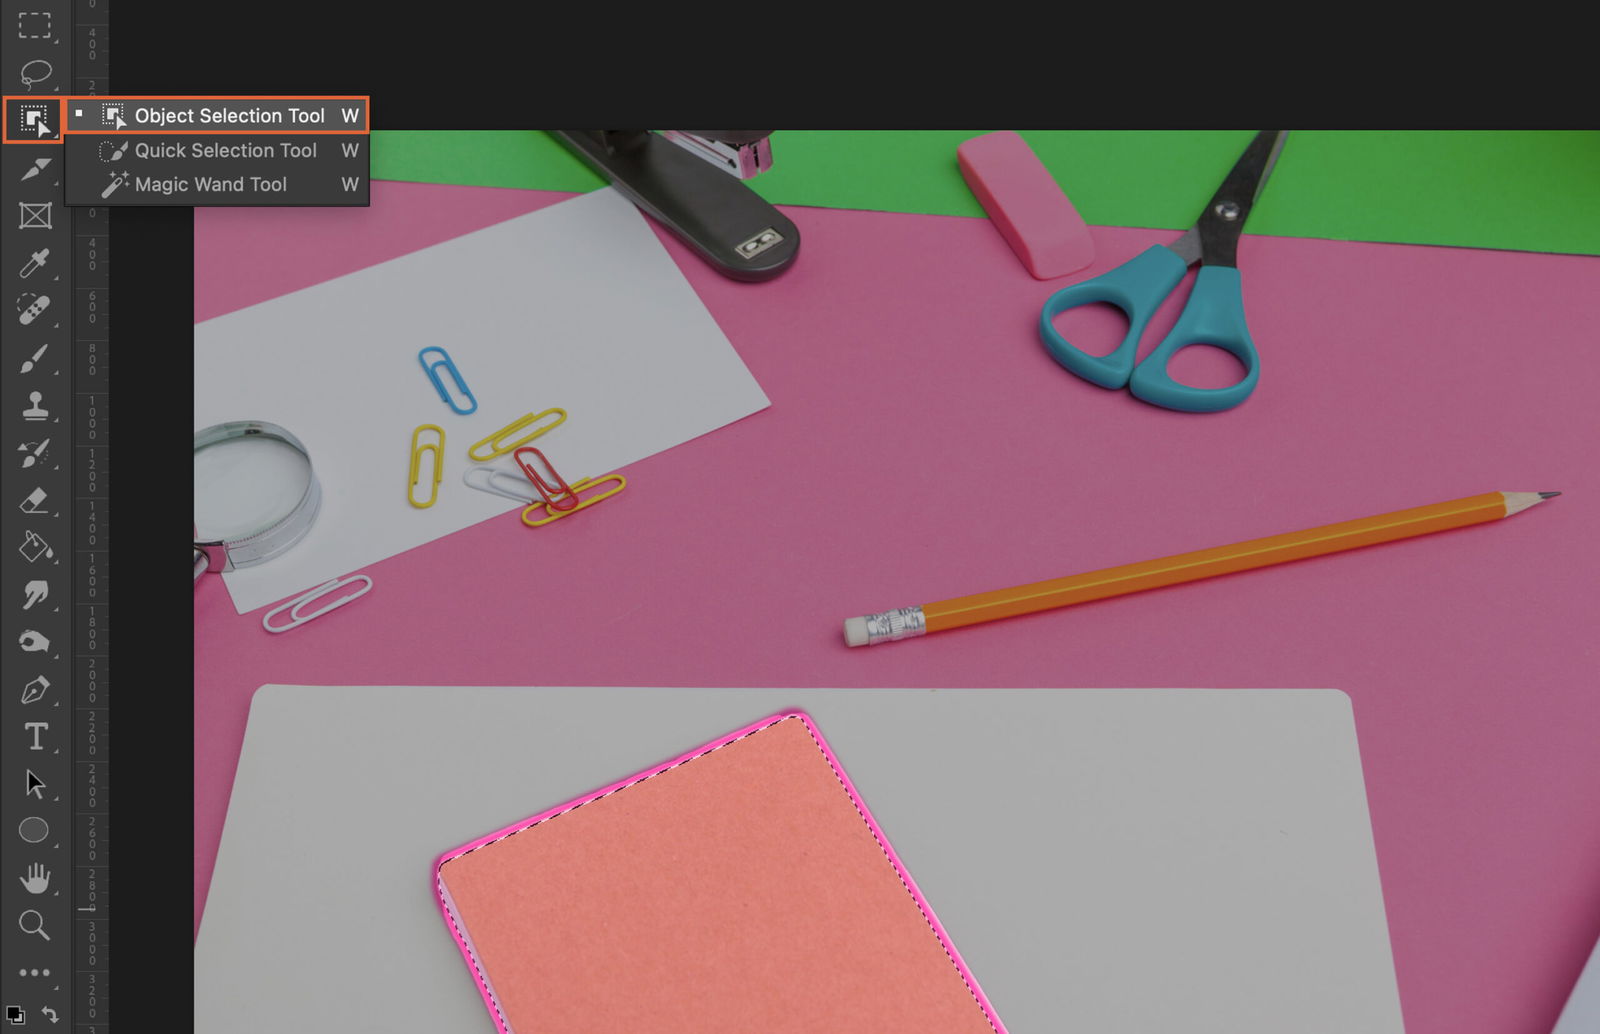
We start by selecting the object you want to change color. There are different tools you can use for this.
This tool is great when the object you want to select has a distinct edge. Click on the tool, then click and drag your mouse over the object. Photoshop will automatically select similar pixels.
The Magic Wand Tool selects pixels based on tone and color. Click on an area of the object, and the tool will select all the similar pixels.

The Object Selection Tool in Photoshop is a powerful selection tool that uses artificial intelligence to automatically select objects or subjects within an image with just a few clicks.
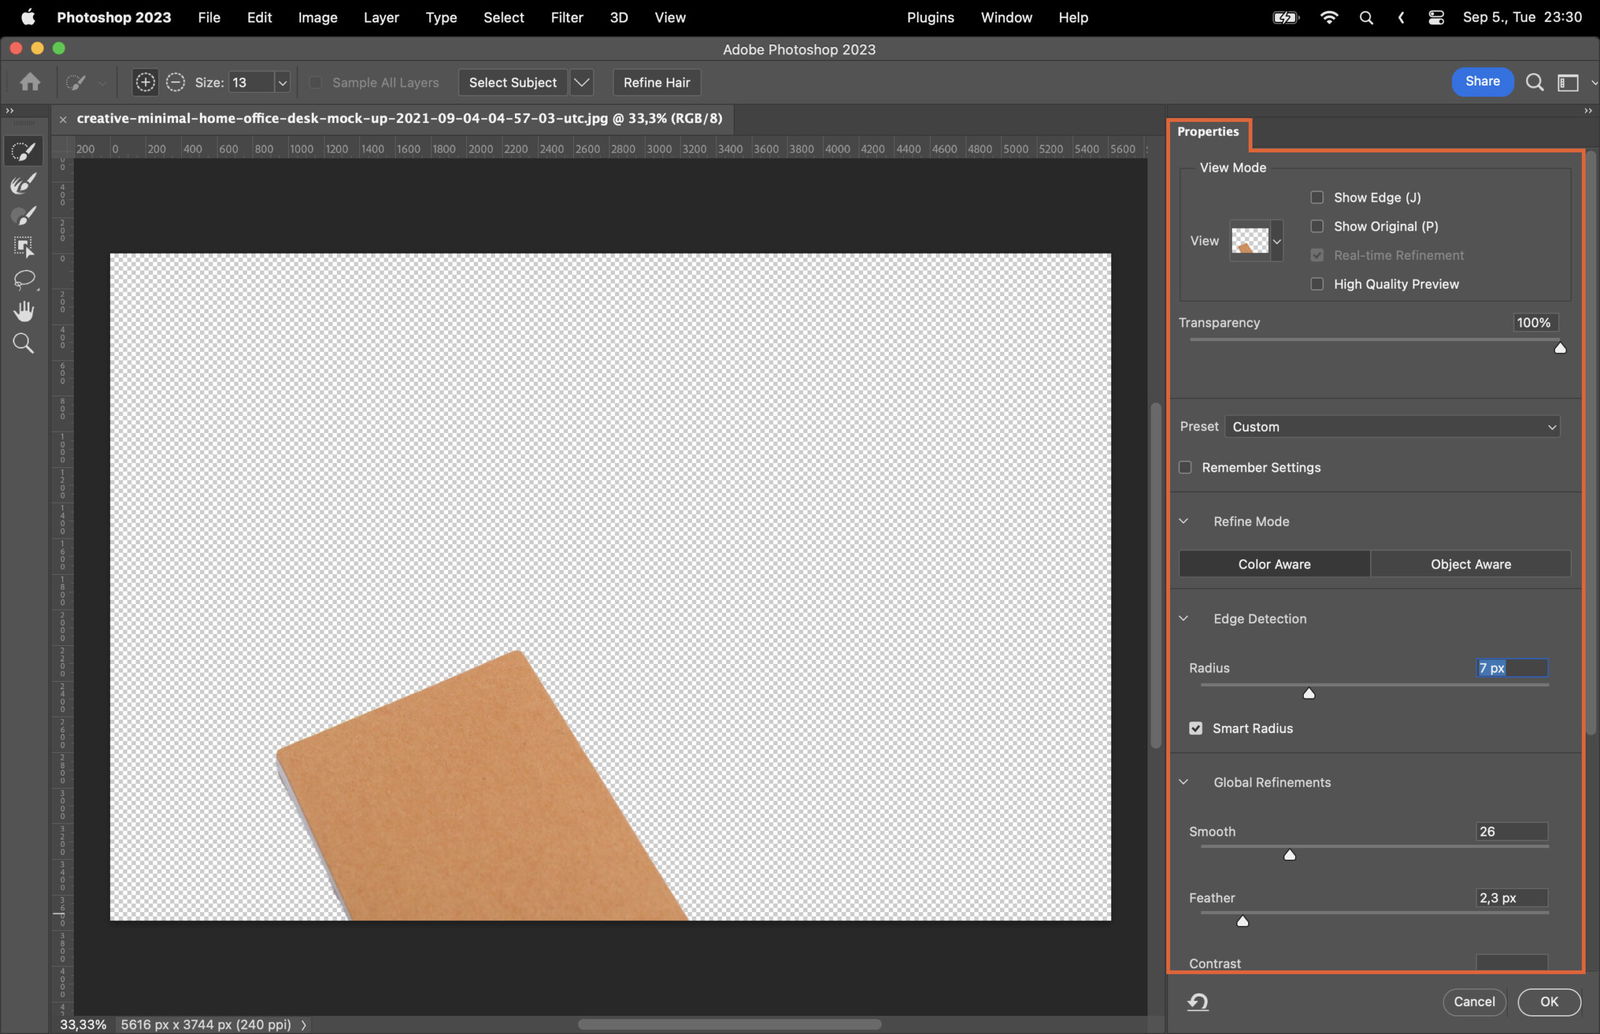
After selection, you might want to refine the edges to make them more natural.
This workspace provides tools and settings to help you fine-tune your selection. You can smooth edges, feather the selection, and more.
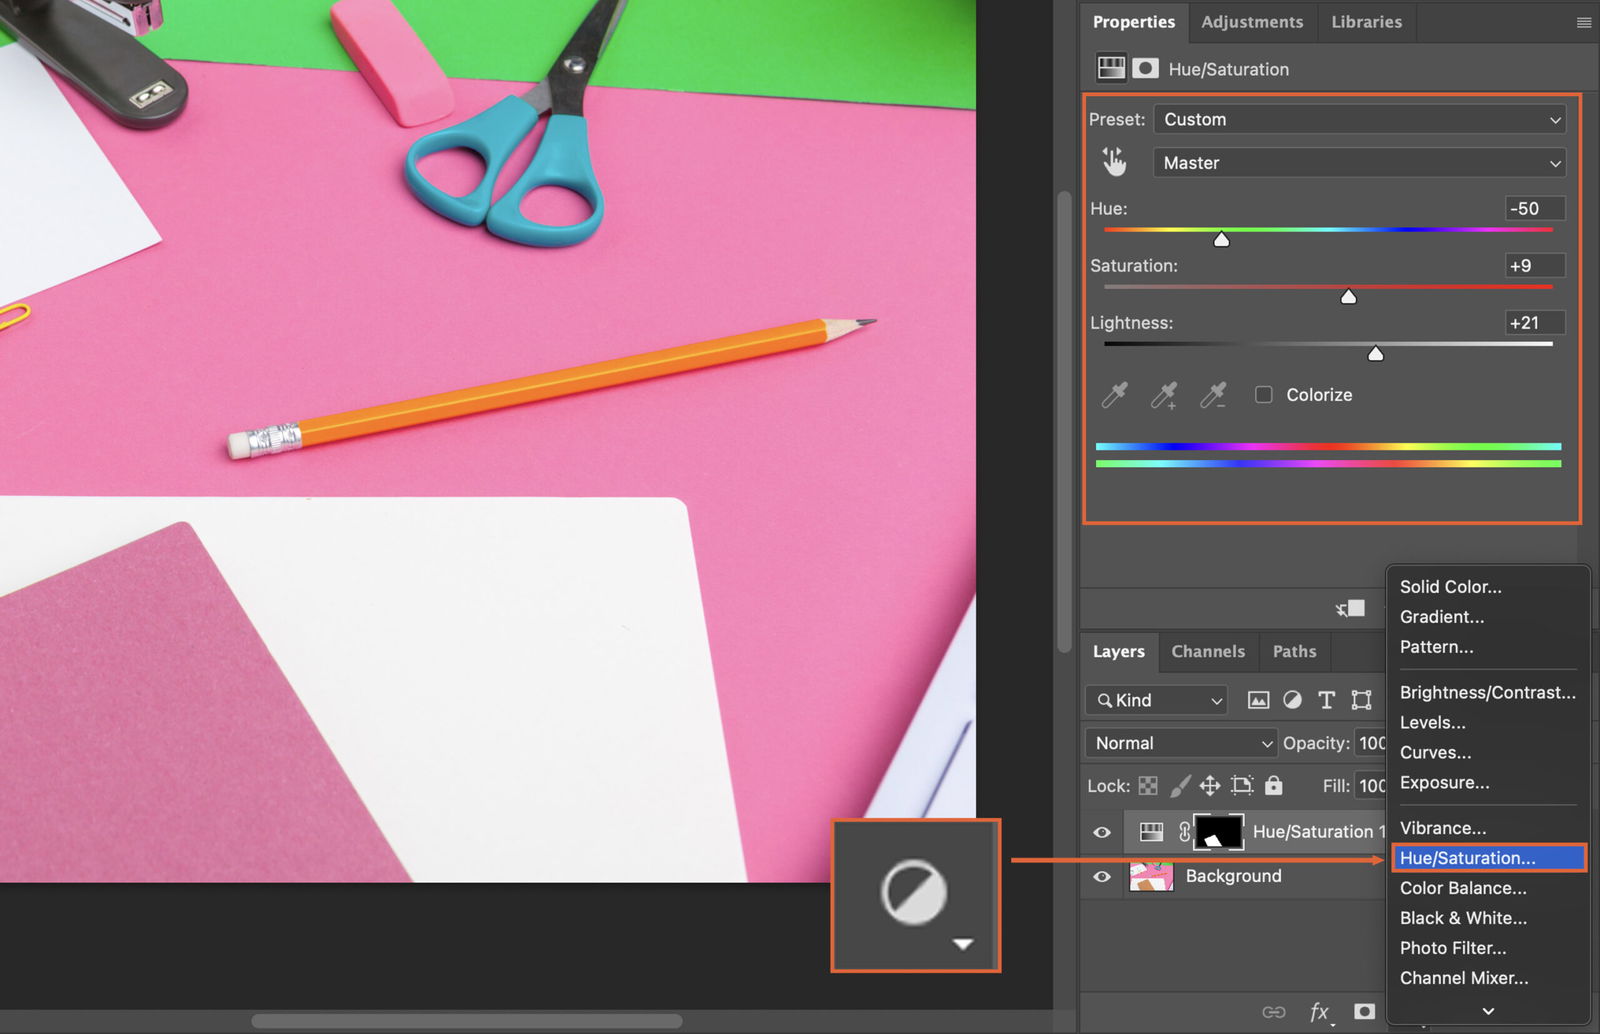
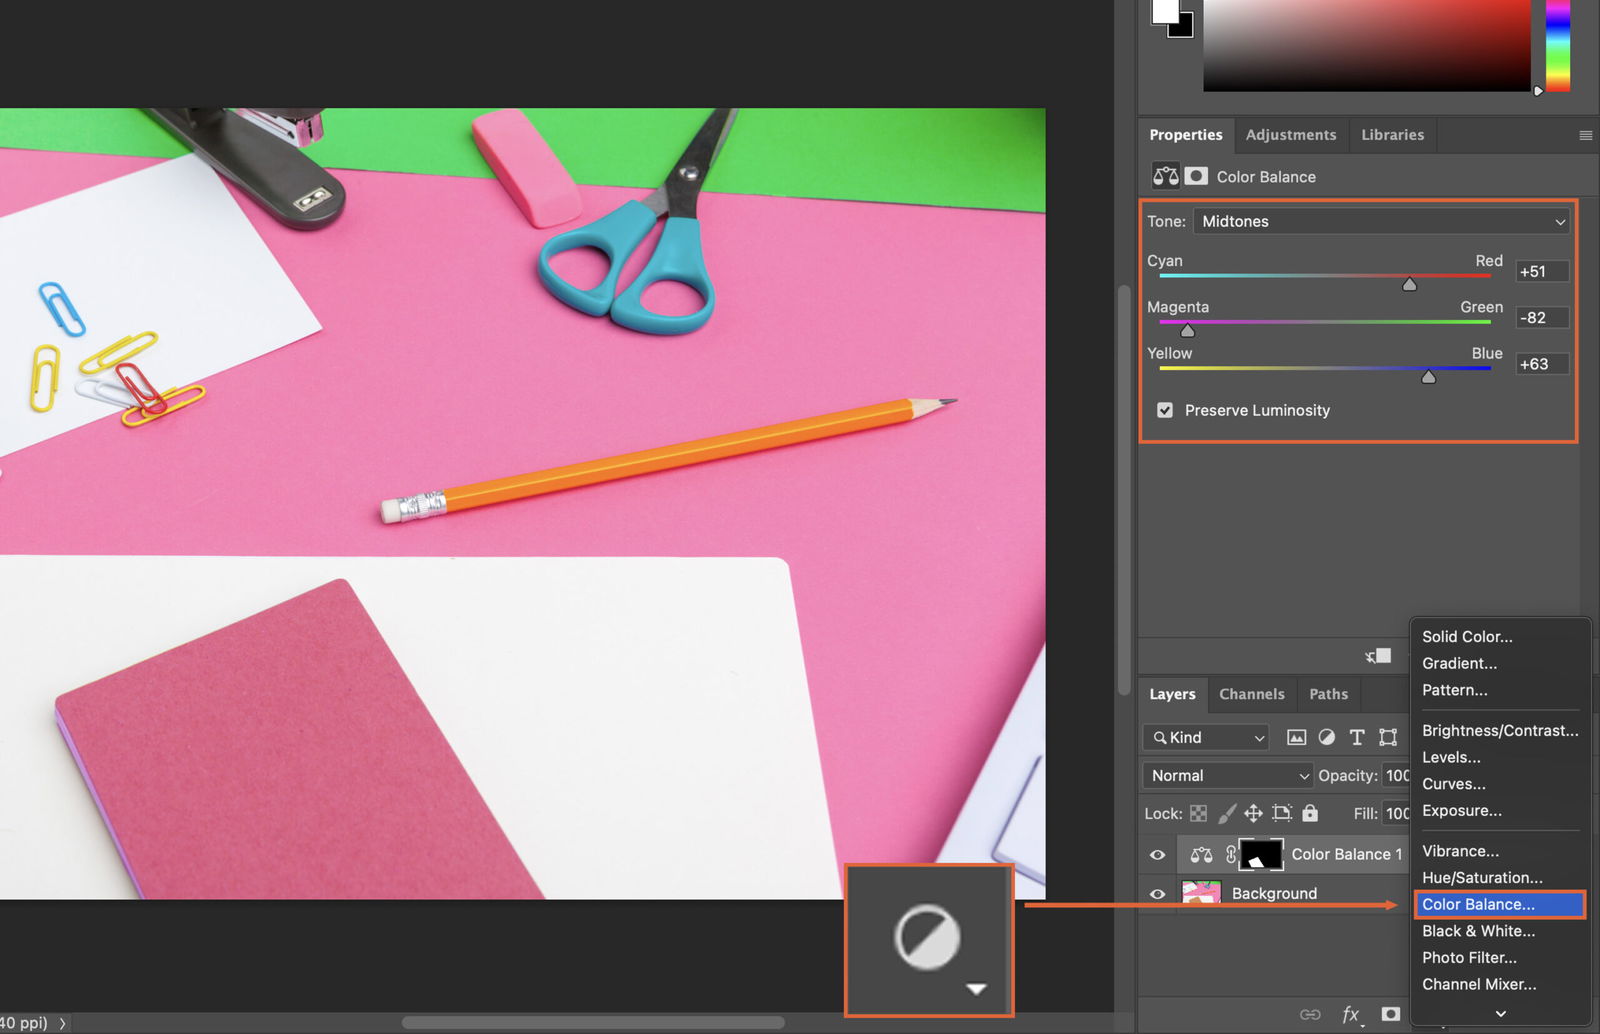
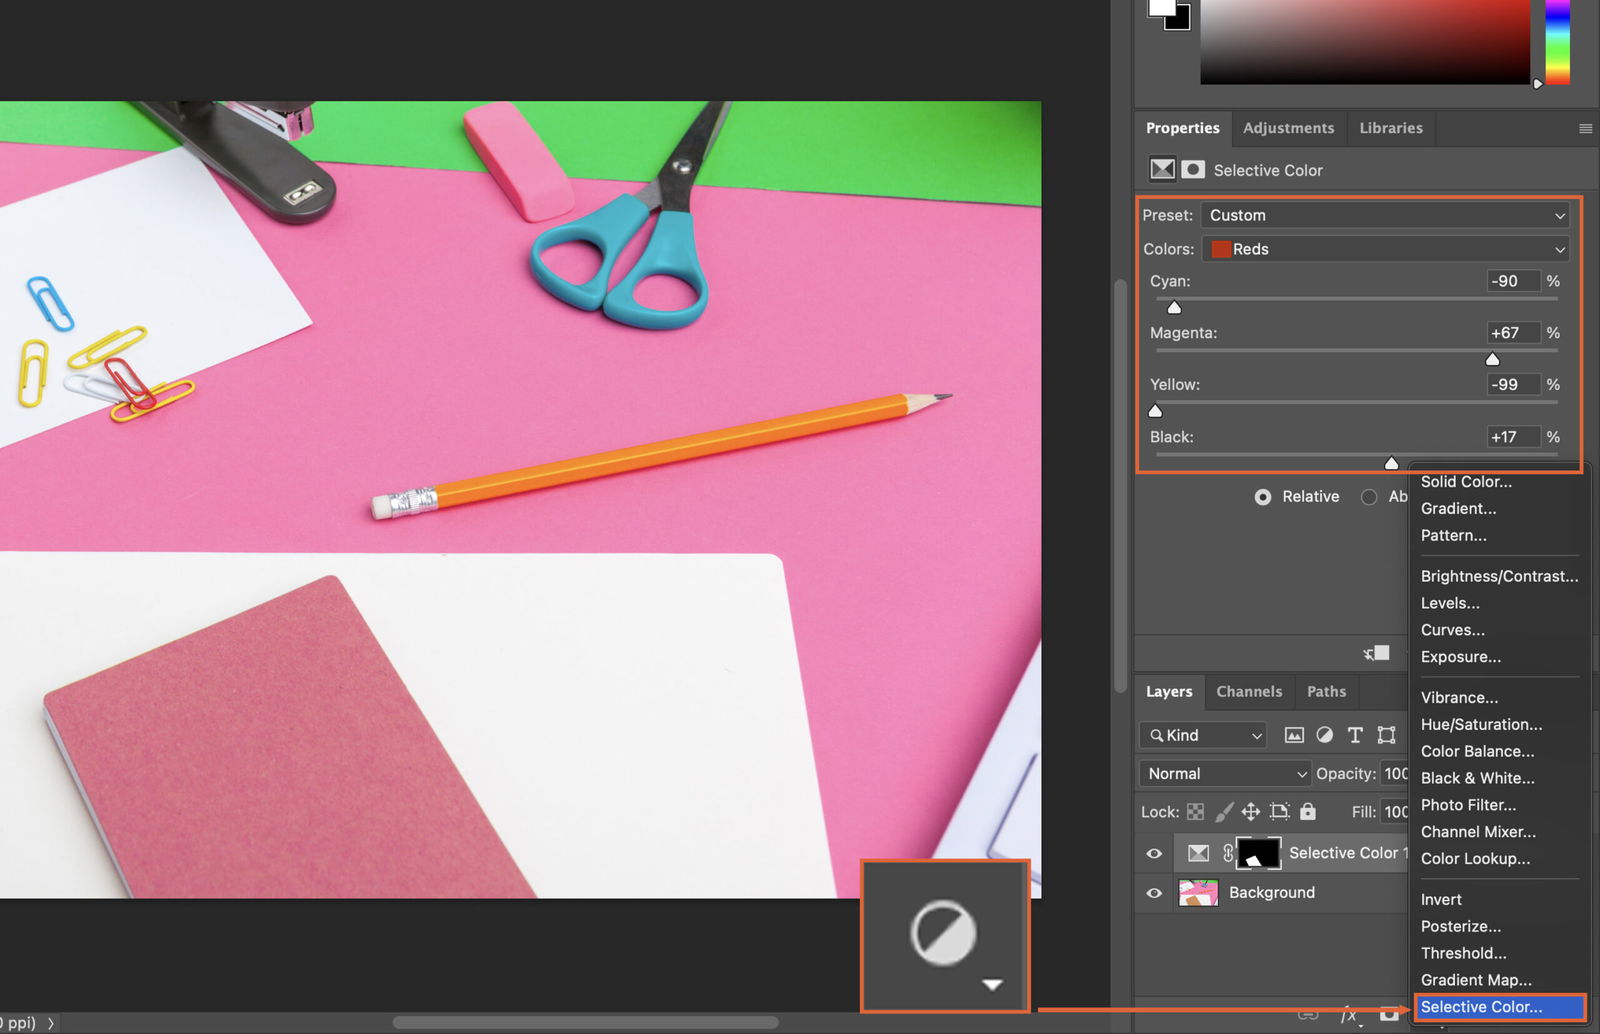
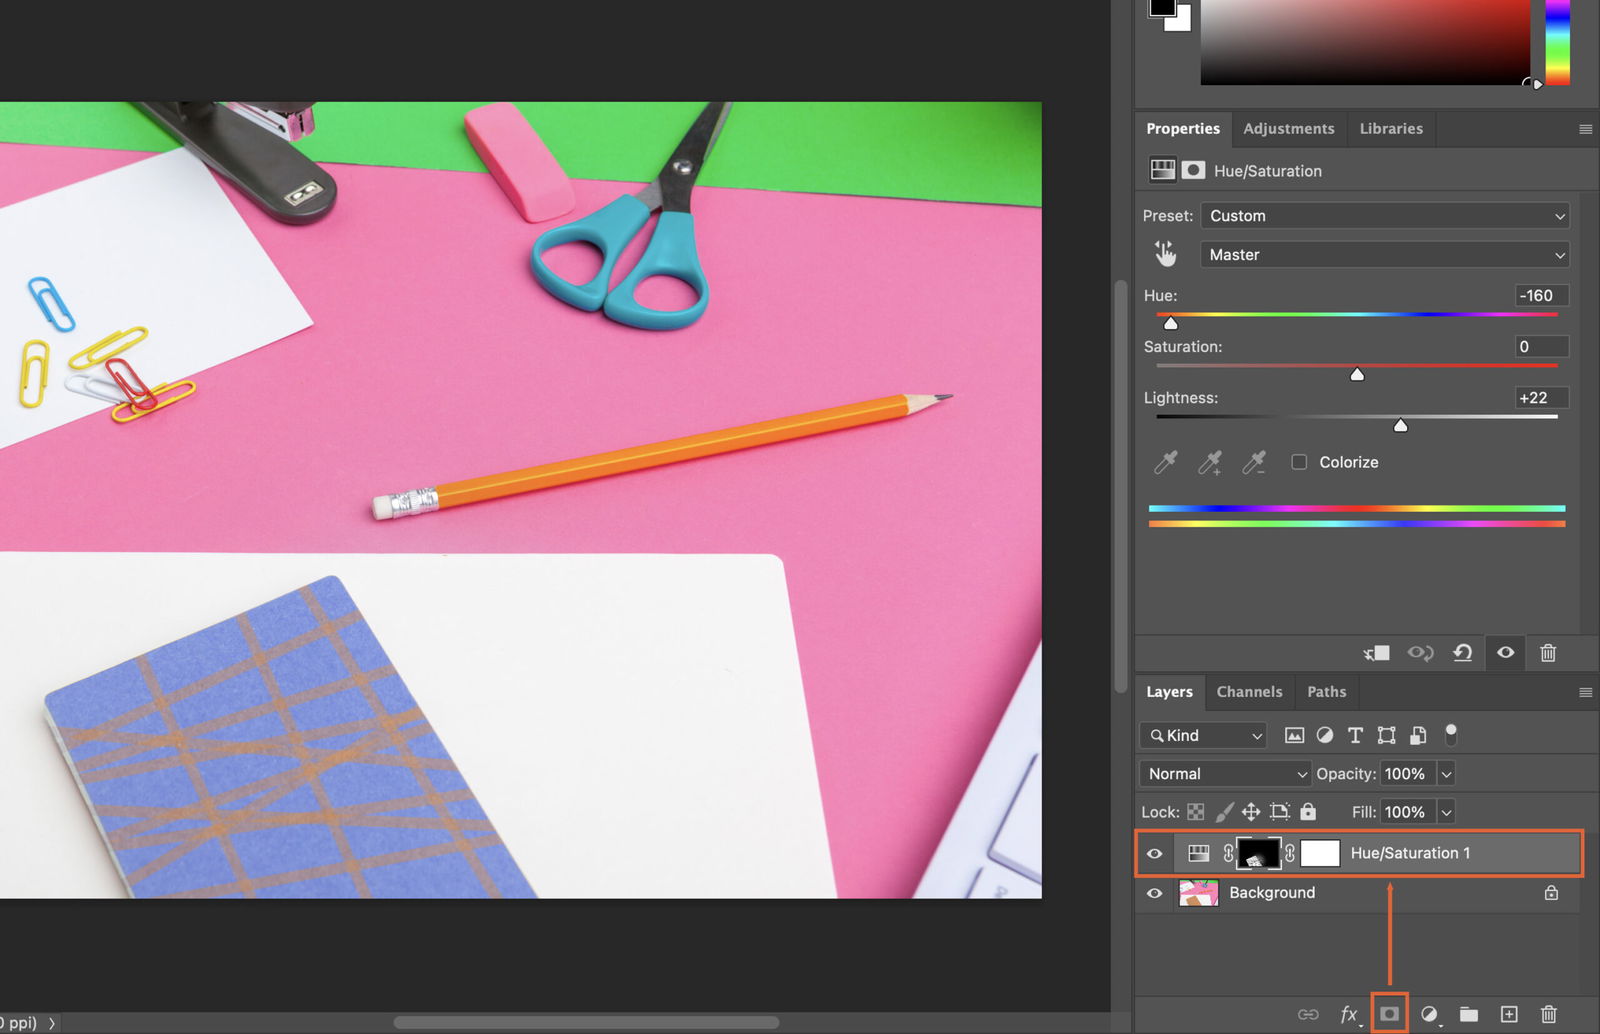
Now, let’s change the color of your selected object.
This adjustment lets you change the color by adjusting the hue. You can also change the intensity of the color with the saturation slider.
With this adjustment, you can change the color balance of your object. You can adjust the levels of red, green, and blue.
Selective Color lets you change specific colors in your object. Choose the color you want to change from the dropdown menu, then adjust the sliders.
After changing the color, you might want to fine-tune the result.
If the color change is too intense, you can lower the layer’s opacity. This will make the color change more subtle.
To make the color change blend well with the rest of the image, use blending modes. Experiment with different modes to see what works best.
To avoid damaging the original image, use a non-destructive workflow.
Adjustment layers let you apply changes without affecting the original layer. You can adjust the settings or delete the layer at any time.
Layer masks let you hide parts of a layer without deleting them. You can paint on the mask with black to hide, and white to reveal.
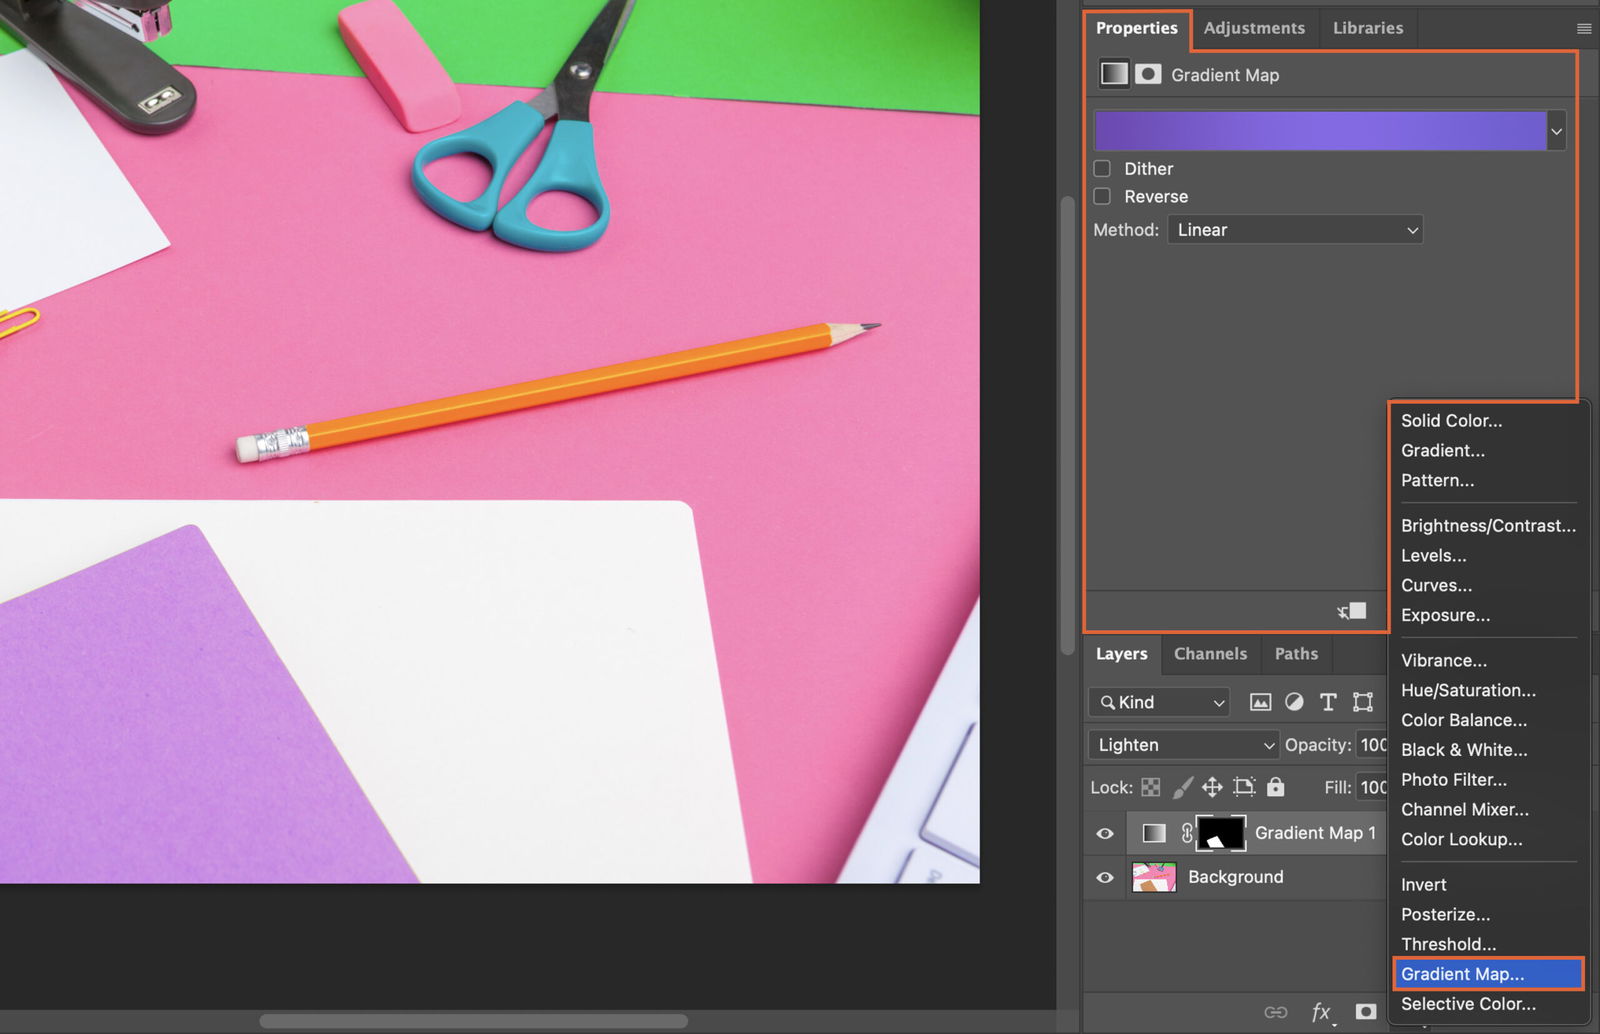
After mastering the basics, try these advanced techniques. Gradient Maps let you map different colors to the shadows, midtones, and highlights of your object. This can create interesting color effects.
![P32 [Lead gen] sidebar banner Related ebook](https://expertphotography.b-cdn.net/wp-content/uploads/2021/10/P32-Lead-gen-sidebar-banner-Related-ebook-300x295.jpg)
![P32 [Lead gen] Sidebar Banner](https://expertphotography.b-cdn.net/wp-content/uploads/2021/10/P32-Lead-gen-Sidebar-Banner-300x245.png)
![P32 [Lead gen] Sidebar Banner 2](https://expertphotography.b-cdn.net/wp-content/uploads/2021/10/P32-Lead-gen-Sidebar-Banner-2-300x245.png)