Today, we are looking at Lightroom lens correction tools. Adobe Lightroom is an all-in-one editing and organization software for photographers. This digital editing software includes various ways to correct images, from cropping to lens correction.
Lightroom lens correction is as simple as it gets. Adobe provides an automatic function and a more in-depth manual function to fine-tune your edits. This article will cover all options and adjustments for lens corrections.

What is Lens Correction?
Photographers need lens correction adjustments as optic construction has flaws. Lenses have different imperfections depending on their construction, focal length, and glass.
The most common issues you will encounter are distortion, perspective, chromatic aberration, and vignetting. These issues can distort the scene in front of the camera, making an unrealistic replication of the subject.
Should I Always Use Lens Correction?
Lens corrections are useful if you want to produce an accurate representation of the location or subject. However, you may not want to use them if you prefer the lens’s aesthetic.
For example, wide-angle lenses will produce a fish-eye look. This could be an important style choice for many genres of photography from fashion to sport photography. On the other hand, if you are an architectural photographer, you will want the scene to be as accurate as possible. Therefore, you would use lens correction.

© Ben Cheung
Lens Correction in Lightroom vs Lightroom Classic
Adobe Lightroom now comes in two different versions: Lightroom and Lightroom Classic. Both versions have many of the same functions; what differs are the approaches to editing processes.
Lightroom favors a post-processing workflow that utilizes the cloud. This allows you to work from the same set of images on any device you want. This version also prioritizes simplicity and ease of use through a stripped-back interface. This may be easier for beginners to work through.
Lightroom Classic has an interface with which any photographer who has used the past versions of Lightroom would be familiar. It provides a wide range of features, some of which you may never need to use. You will find more in-depth controls and attention to detail in Lightroom Classic.
Both Lightroom versions produce the same results as the algorithms for adjustments are the same. They both allow you to perform lens corrections. This article will outline differences in the processes we touch on in either Lightroom version.
The main difference between the two Lightroom versions is that Lightroom Classic allows you to go into more detail. Lightroom does not allow you to perform manual edits apart from Defringe controls.
How To Apply Lightroom Lens Corrections
To start your Lightroom lens correction you will first want to open your image in Lightroom. Make your way to the Edit panel in Lightroom (you must be on Detail view for your image) and the Develop panel in Lightroom Classic.
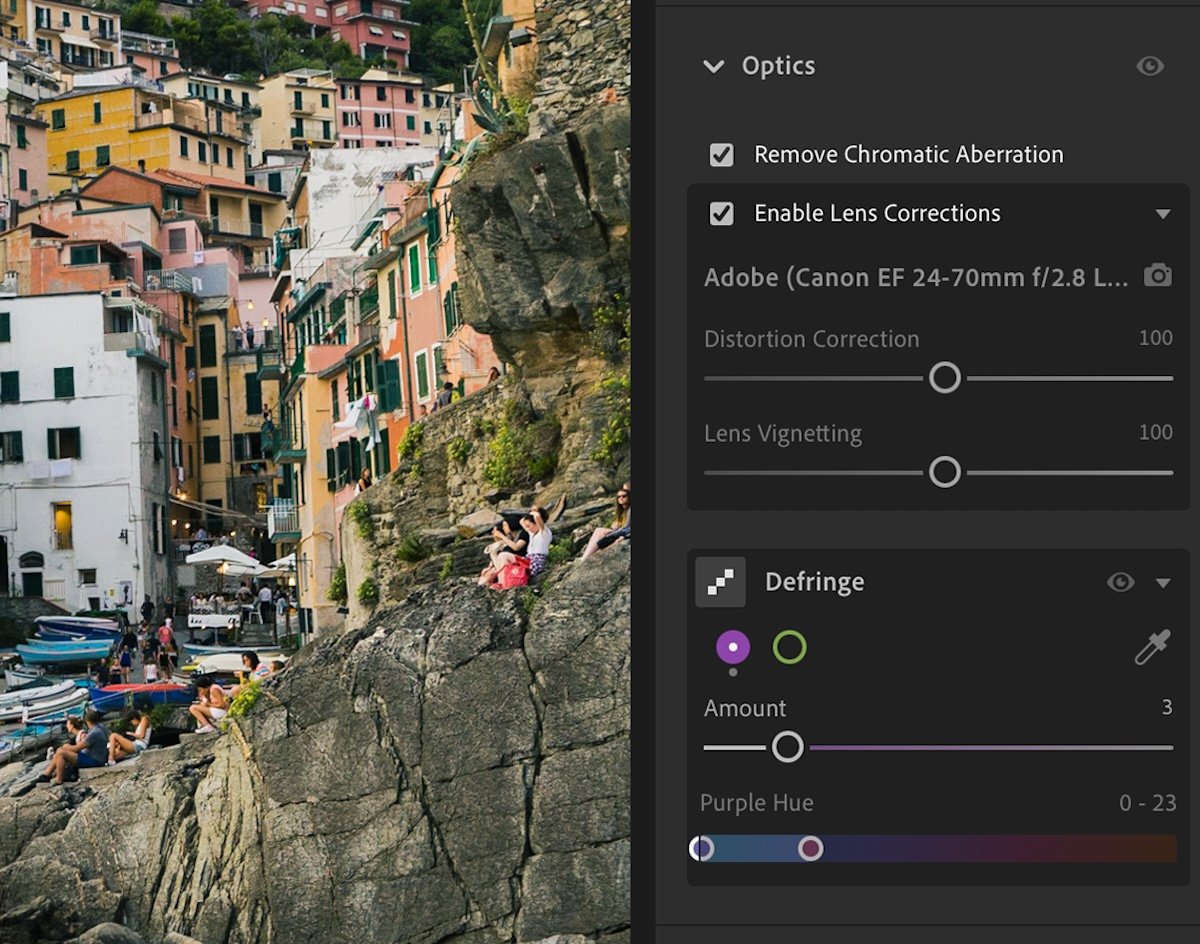
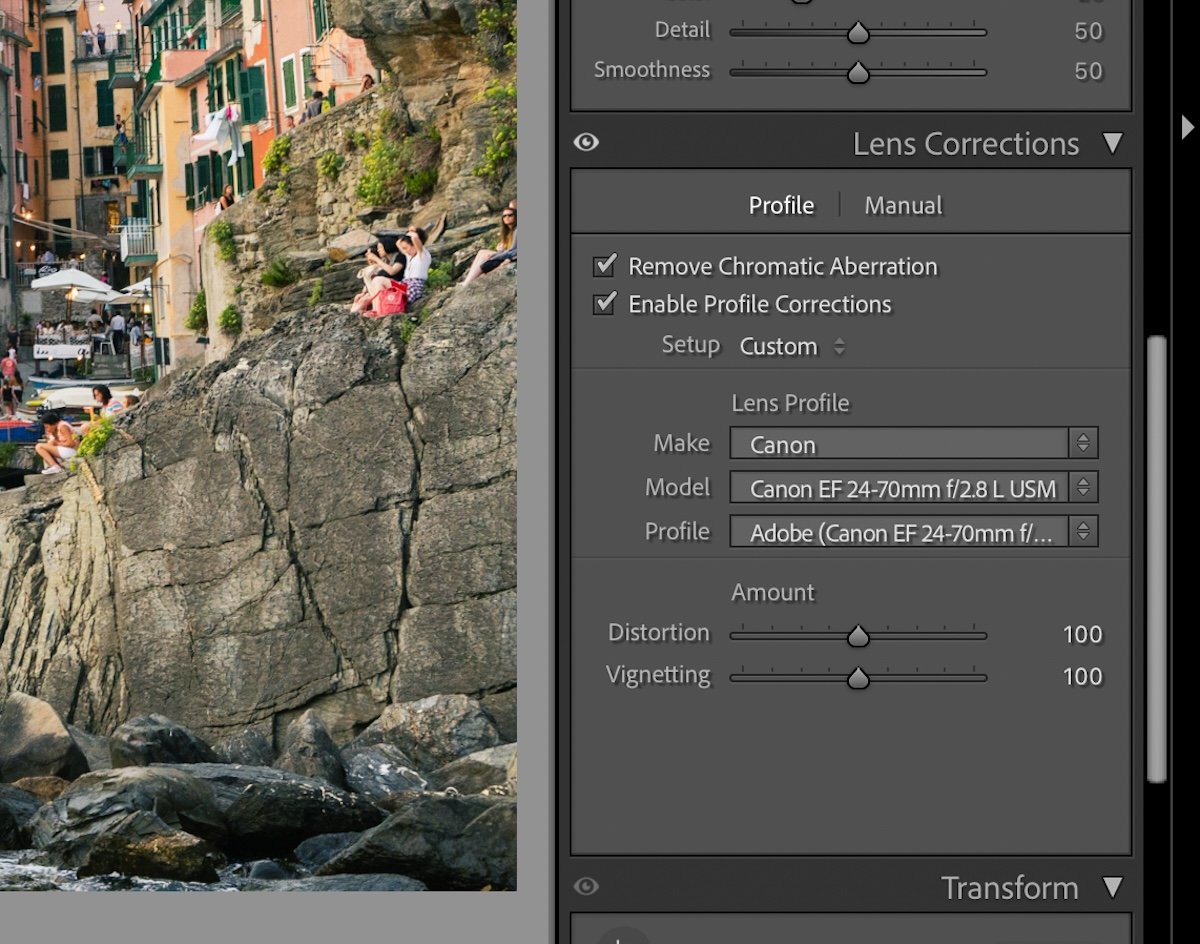
You will then want to scroll down to find the Optics section in Lightroom and Lens Correction in Lightroom Classic. These are the same sections but have different names in each version.
Remove Chromatic Aberration
The first automatic feature you will encounter is removing chromatic aberration. This is a tick box that applies the correction without any intervention.
Chromatic aberration is cause by different light waves not syncing up due to how they travel through the lens. Therefore, you often find colored lines outlining high-contrast areas. Fixing chromatic aberration can make your images sharper.
In the example below, you can see that the Remove Chromatic Aberration button removes a blue and red tint from the building’s outline. This makes the lines more defined and, therefore, sharper.
This adjustment may not be noticeable on the web, but it will make a big difference if you print the image large.


Enable Profile Corrections
Lightroom has access to all the metadata for every photo you take on a digital camera. That is how it can tell you your camera settings inside the program.
With Profile Corrections, Lightroom goes one step further. The digital editing software can read the lens that you use. It then automatically applies corrections that are custom-tuned for your specific lens.
This does not work with every lens. Adobe supports the most popular lens brands and a few other unique ones. So, if you use a niche lens, you must check to see if Lightroom has support for it.
When you click Enable Profile Corrections, your image will look distorted. This can look strange at first, but you will notice that converging lines are now straighter.


If you do not like the results you can always fine-tune the selection. You can do this through the Distortion Correction and Lens Vignetting sliders below.
Editing the Distortion Correction will increase or decrease the barrel warp of the photograph. The Lens Vignette will make the edges lighter when increased and darker when decreased.
You are also able to change the lens Profile that Lightroom uses. It will automatically select the lens you are using, but you can manually put in your lens if Lightroom does not read it.


Defringe
The Defringe adjustment is located below the Optics section in Lightroom and in the Manual part of Lens Corrections in Lightroom Classic.
This manual adjustment allows you to control any color fringing in your photograph. This is done through a purple hue and a green hue. In Lightroom, you must select the color below Defringe. Lightroom Classic displays all sliders without having to swap between the colors.
Color fringing is a type of chromatic aberration. This is normally found in purple and green tints, hence the sliders for these colours.
Different lenses produce different forms of chromatic aberrations. Lightroom provides these as manual adjustments, as its automatic Remove Chromatic Aberration may not take these colours into account. This is because it is normally bad lenses that produce this effect.
Here, Lightroom allows you to adjust the amount and the hue of the colour fringing. The hue comes with two points in the slider. These set the parameters for the colors it eliminates. Be careful, as this adjustment will also eliminate colors in other places of the photograph.

Distortion
Lightroom Classic has a dedicated distortion slider in the Manual section. This slider allows you to control the distortion manually. This is what you will have to do if your lens is not recognised.
The distortion is quite dramatic, so you want to move it in small increments. When you move the slider, you will see a grid overlay you photograph. This is incredibly helpful. Look for lines that should be straight in your photograph and match them with the grid.
The Constrain Crop button will crop your image so the stretch leaves no blank space. This is good because it makes your photo full, but you will miss out on the details on the edge of the photo.
The example below is pushed to the extreme to show you want is capable from this tool.


Vignetting
Lightroom Classic also provides an additional vignetting slider in the Manual section. This slider is more powerful and offers more control than the one in the profile correction section.
It is similar in that it increases the exposure in corners when moving right and decreases when moving left. As just mentioned, the adjustment is more drastic.
The Vignetting slider also has a midpoint slider. This allows you to fine-tune how dramatic the gradient toward the center of the screen is. This feature helps you perfect your lens correction to fine details.
These adjustments are helpful for specialist equipment that may produce dramatic vignetting. The initial Vignetting slider in the Lightroom Classic Manual section is great for expert-level control, and it can fix most lens vignetting.


Applying Lens Corrections to Multiple Images
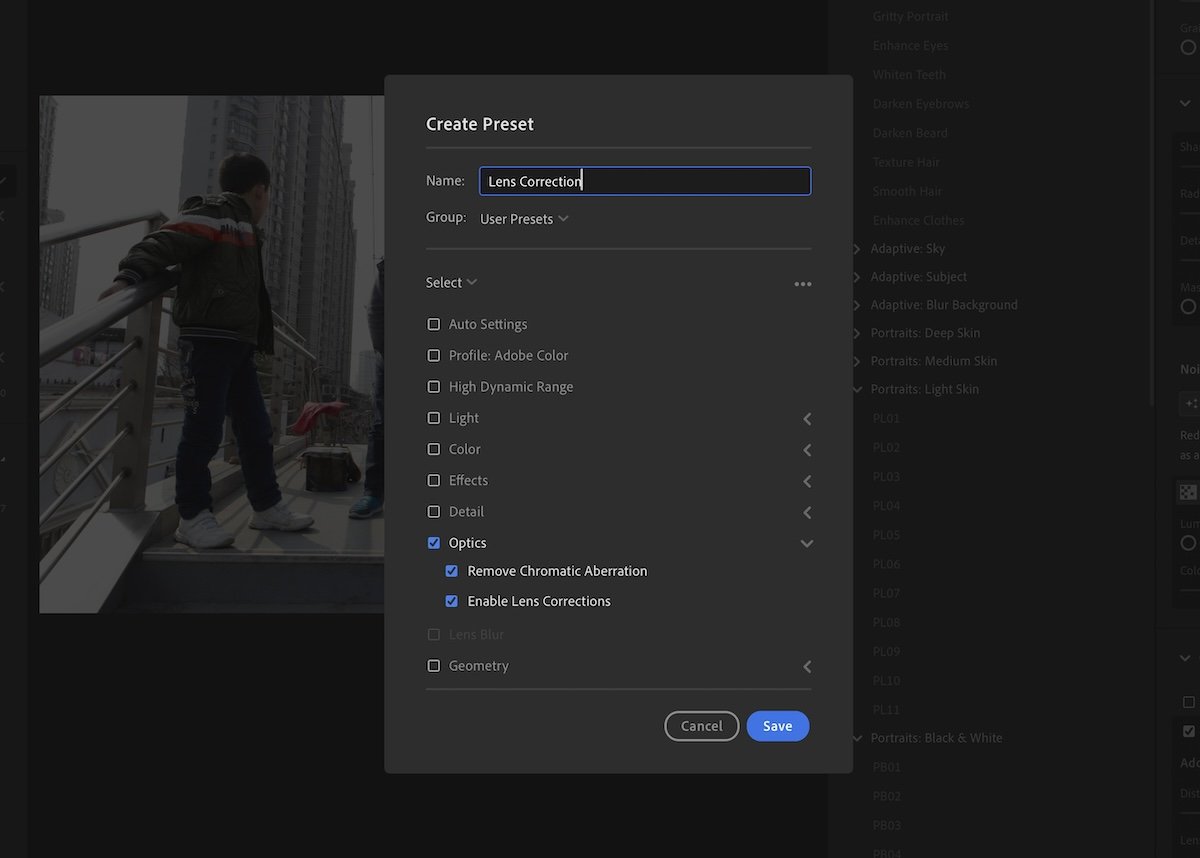
Both Lightroom versions allow you to save Lens Correction or Optics settings under a preset. First, you will want to edit the image. Then, you will want to make a preset. Read our in-depth article here for more information.
You can then apply the preset to a batch of photos or to every photo during the import process.
Remember that your lens distortion will change depending on the focal length. So, I would advise applying the preset only when looking at each image individually.

Conclusion: Lightroom Lens Correction
This guide shows that the Lightroom lens correction tools are brilliant for adjusting imperfections. Lightroom Classic offers a more in-depth approach to lens correction. But, these extra adjustments are optional for most photographs.
You don’t need to apply lens corrections to every photo, but they are crucial for some photographic genres. Try it out for yourself to see how Lightroom lens correction can improve your photography.


