Learning how to save a preset in Lightroom is crucial for digital photographers. It saves time and ensures a consistent style in a photo series. This benefits every style of photography, from wedding to landscape to street photography.
Today, we teach you how to create, use, and save your presets in Adobe Lightroom. By the end of our article, you will know how to create, set, and edit pre-made presets. So, read on to learn more about this useful technique.
In our article, we refer to Lightroom as Lightroom CC to differentiate it from Lightroom Classic. Although similar, these two Lightroom versions have different approaches, interfaces, and extra features.


Lightroom presets are pre-determined edits that can be applied to your photograph in a single click. In contrast to auto adjustments, presets always apply the same value for every change. This means an image’s color temperature and exposure affect a preset’s appearance on different photos.
Lightroom also provides its users with a wide range of preinstalled presets. A few of these presets are called Adaptive Presets. Using AI, these unique presets detect elements like a subject, portrait, or sky. The AI then applies the preset to these specific elements only.
Presets are most helpful when you have shot a big batch of images on the same day under similar shooting conditions. They are also helpful for creating your signature style. After your preset is applied, you can fine-tune each edit.
Presets can save you hours of editing time and let you share your signature style with others. Adobe Lightroom has a great preset process.


Presets in the two Lightroom programs are similar but have some slight differences. Let’s outline these differences so you can decide which version is best for you. If you ever decide to change your presets, you can always send them across the versions.
Both versions let you set the preset with a general slider. This slider ranges from 0 to 200. The preset examples are set at 100. This means you can immediately increase or decrease the preset intensity.
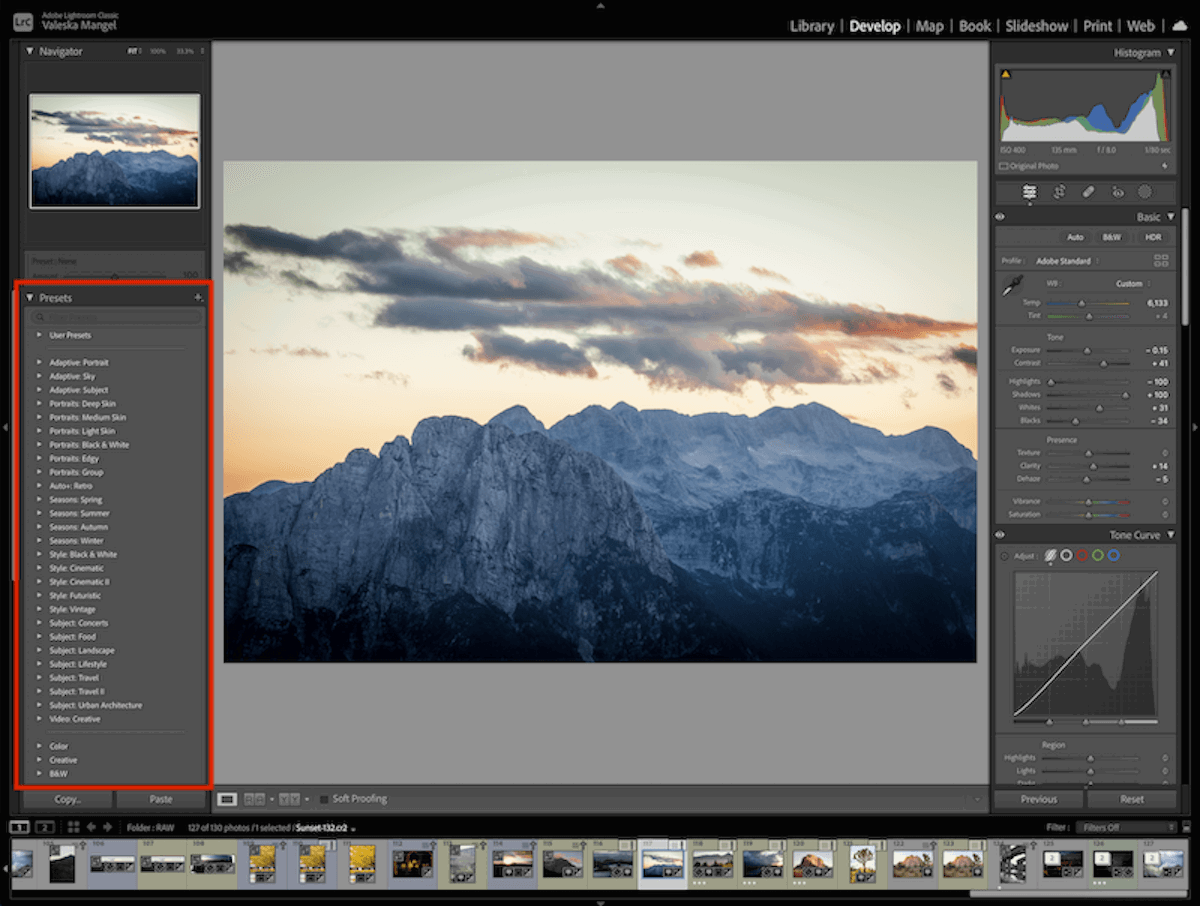
In Lightroom Classic, the main Presets panel is in the Develop section, clearly positioned in the left-hand panel. If it is not there, click on Windows > Panels > Presets in the top menu so they are shown.
The presets are divided into sections. Each section contains several click-down headings and presets.
You can hover over the different presets to see their effect on your image. This is helpful because you can quickly get a rough idea of the style best suited to your photograph.
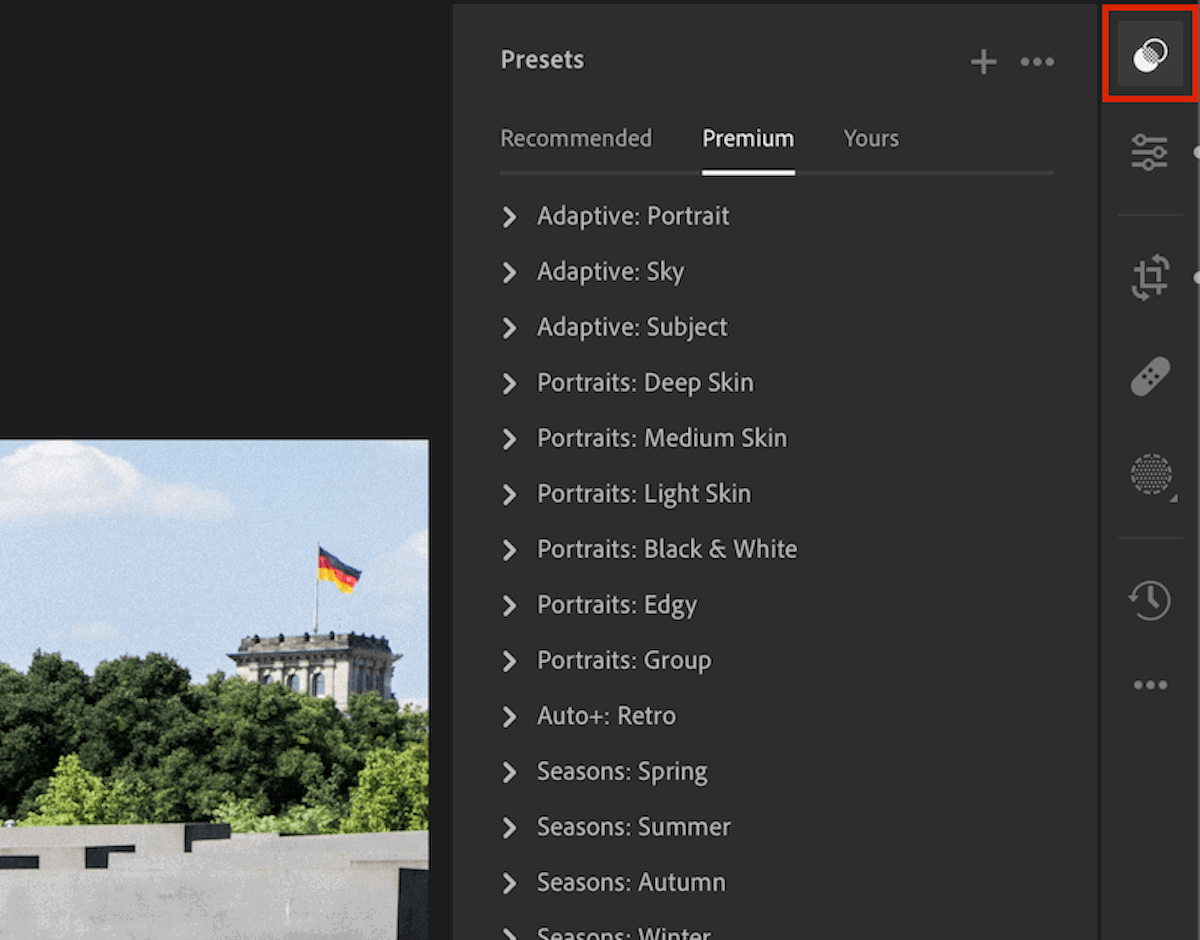
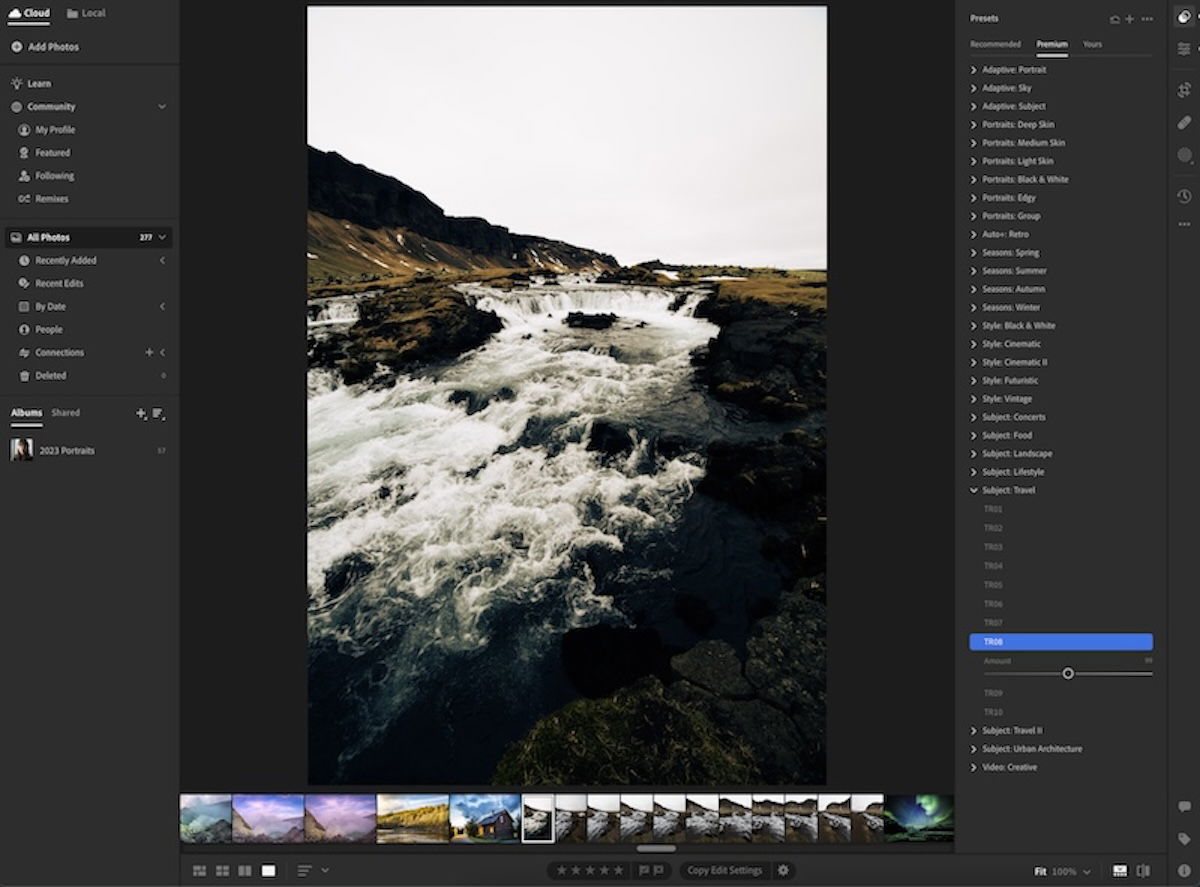
In Lightroom CC, the Presets panel is an icon along the right-hand toolbar. The icon looks like two circles slightly overlapping, like a Venn diagram. You can also click View > Presets in the top panel.
There are three different headings—Recommended, Premium, and Yours. Each one has different subheadings that can help you find the ideal preset. The Premium and Yours sections contain the same presets found in Lightroom Classic.
The Recommended section is unique to Lightroom CC. This section features a range of specific presets picked by an AI readout of your image! These recommendations are displayed in thumbnails, but you can still hover to see the effect in full size.
This AI preset feature is great. It is particularly helpful if you’re unsure about your desired editing style. In this case, you can use a Lightroom preset as a jumping-off point or solution.
We will now guide you through creating your own Lightroom preset in Classic and CC.
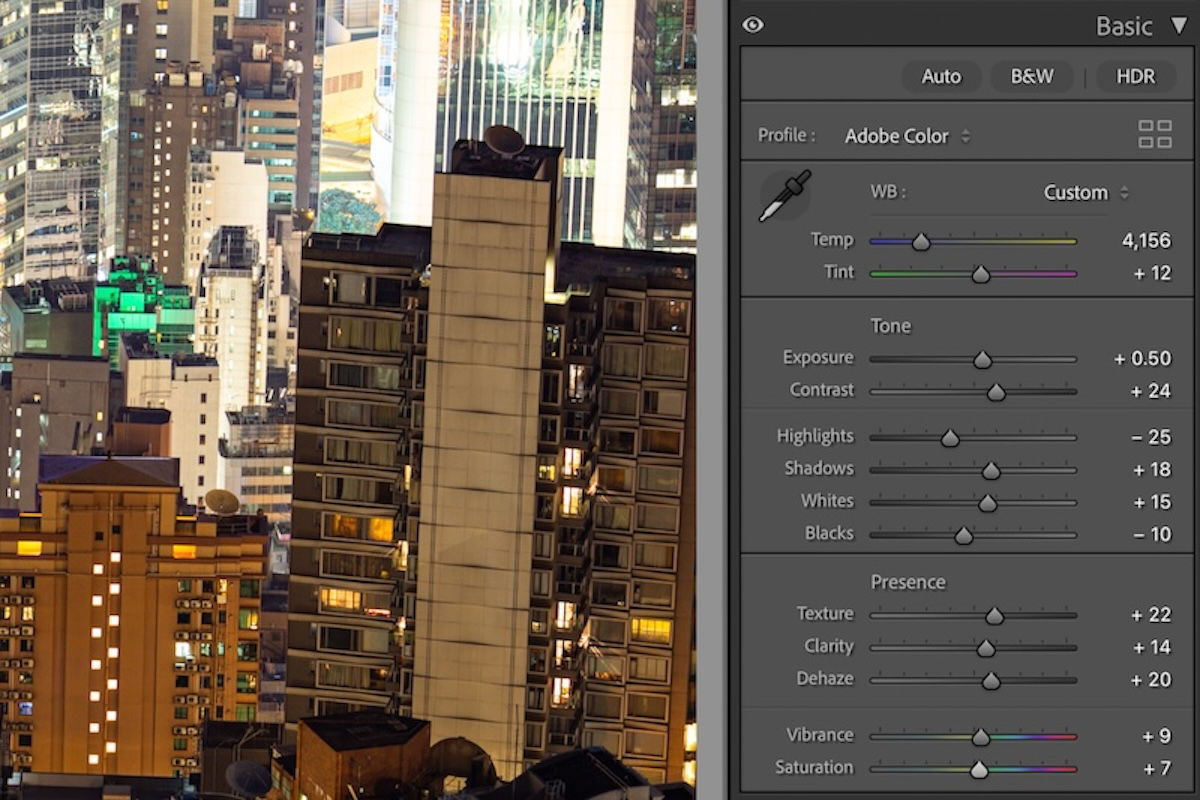
First, open your image and make the edits you want to copy to make a preset. The best way to make the edit is to work down Lightroom’s adjustment panels and change the relevant fields for you.
You can even use a preexisting preset as a starting point. Applying a preset will change all the sliders. You can then go in to fine-tune the look for your perfect preset.

You then want to go to the Preset panel and click the plus (+) icon at the top right. This is in the same location in the respective Lightroom CC and Classic panels.
You can then choose which adjustments to save to your preset. This is helpful if you only want particular options copied from a preexisting photograph.
The two Lightroom versions have different approaches to setting your preset parameters. Lightroom Classic clearly lays out your options. You simply tick all the relevant fields you want to copy over (first image below).
Lightroom CC makes this process slightly easier. It is less overwhelming because all the adjustment sub-categories are in drop-down menus (second image below).
The Select drop-down lets you choose what you want to be preselected. The Modified option is great as it only selects the adjustments you have touched. Lightroom CC also lets you copy over masks, a feature not found in Lightroom Classic.
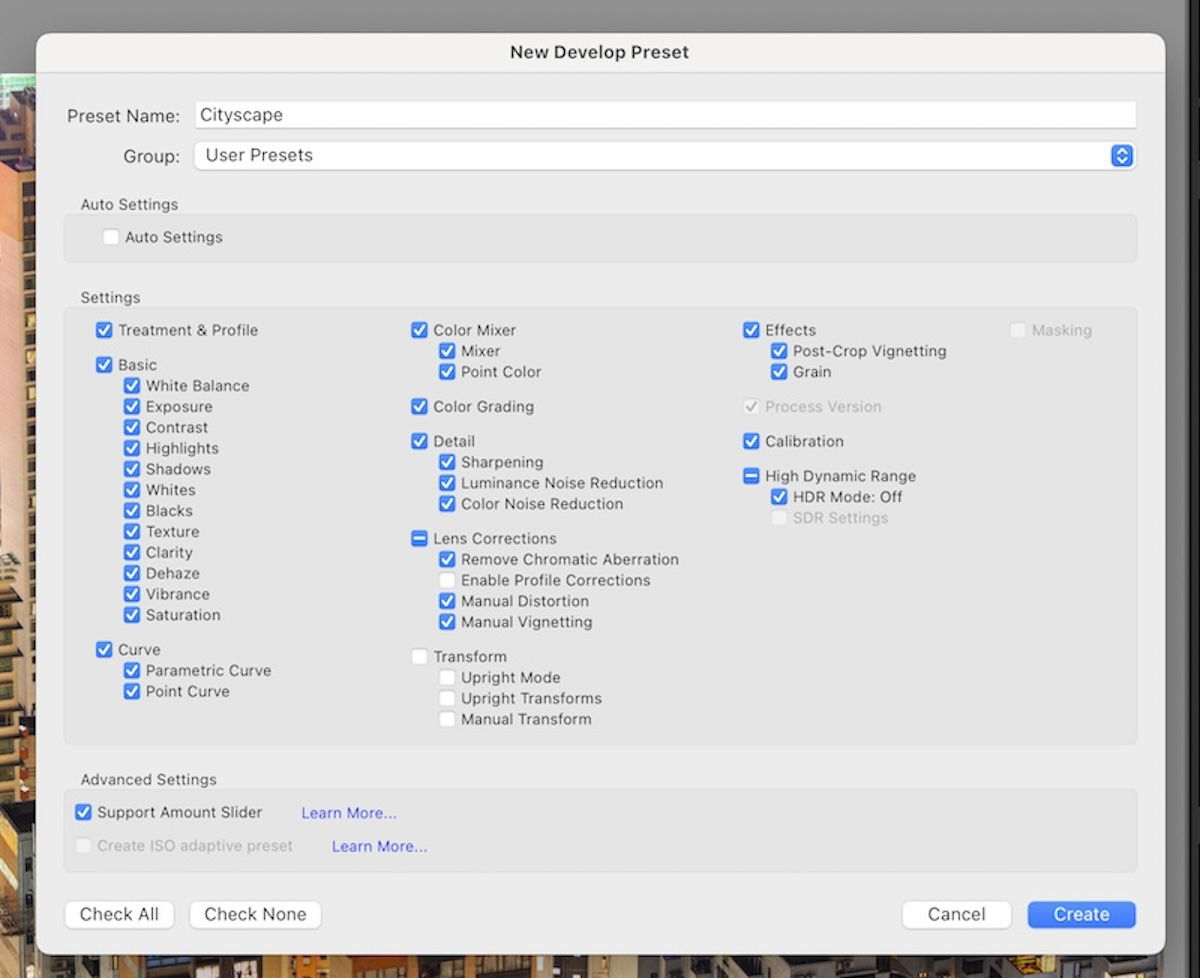
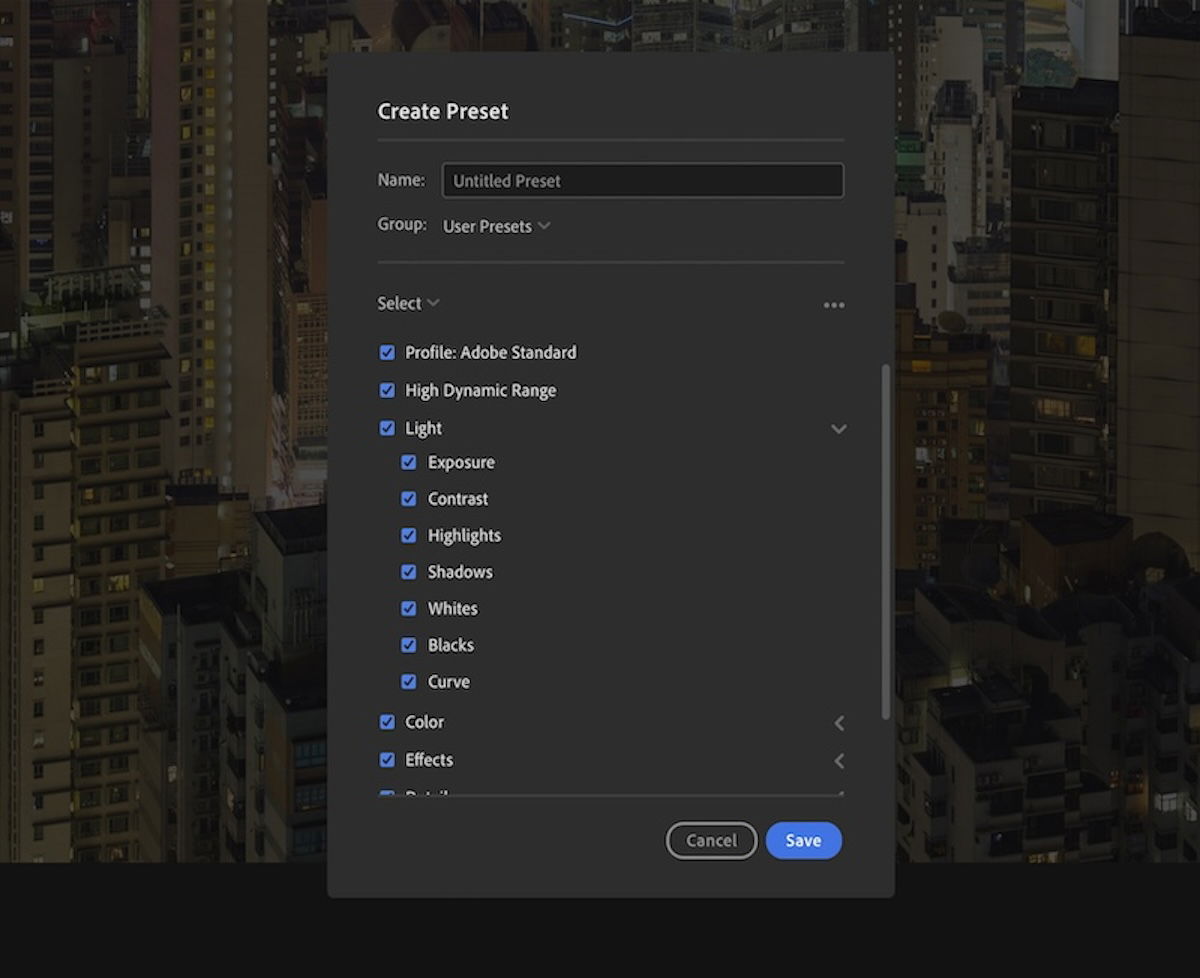
You now want to title your preset to something relevant to the actions. If it’s for a particular event, name it after the event. If it’s for a particular style, describe it in a word.
You can choose the group your preset is filed into. It is set to be in User Presets, which is normally best. But you can create your own group if you like. Click Save at the bottom, and you now have your custom Lightroom preset!


You may also want to know how to apply your Lightroom presets to multiple photos. We will now take you through the Lightroom Classic and CC processes.
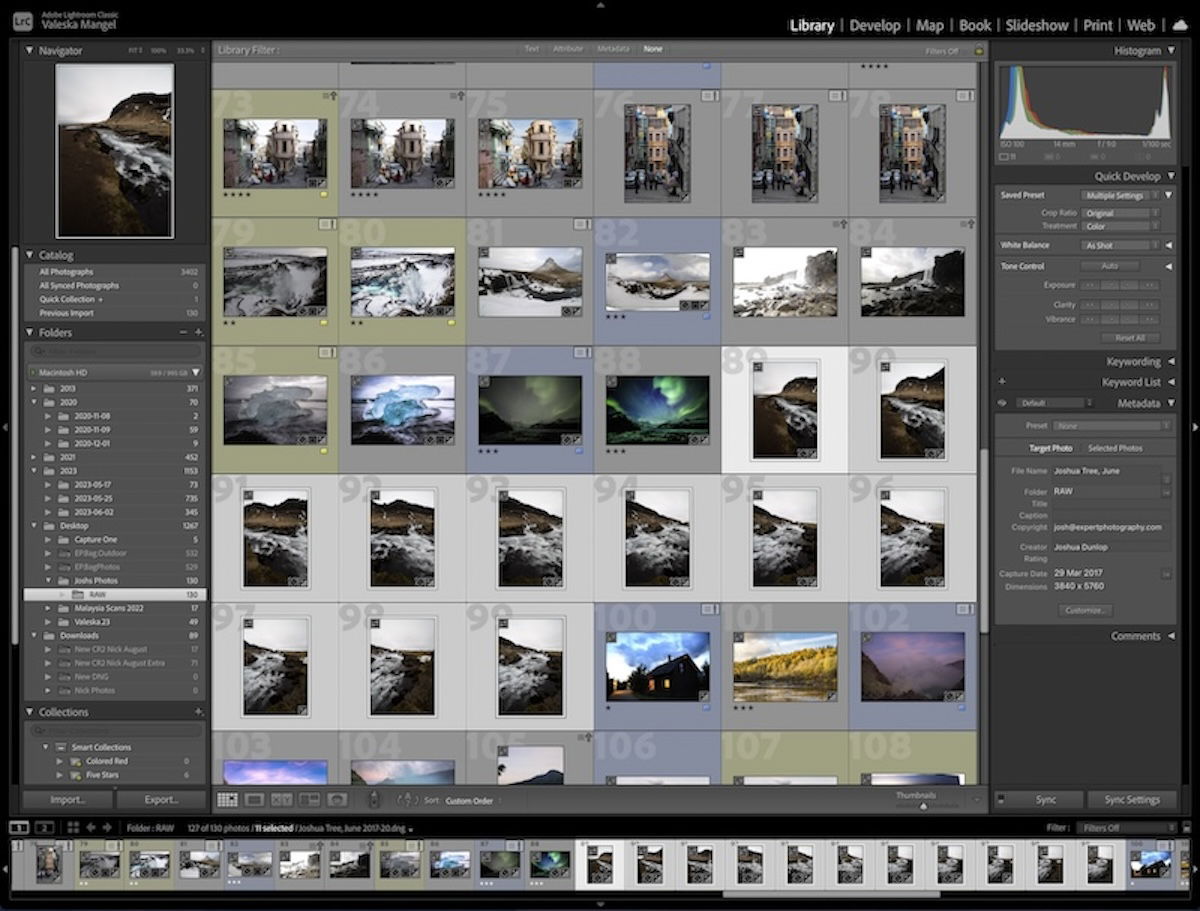
In Lightroom Classic, you can apply presets in the Library panel. To do so, select the relevant photos you want to edit. Use Command or Ctrl+Click to pick particular images and Shift or Alt+Click to pick all pictures between your first and last photograph.
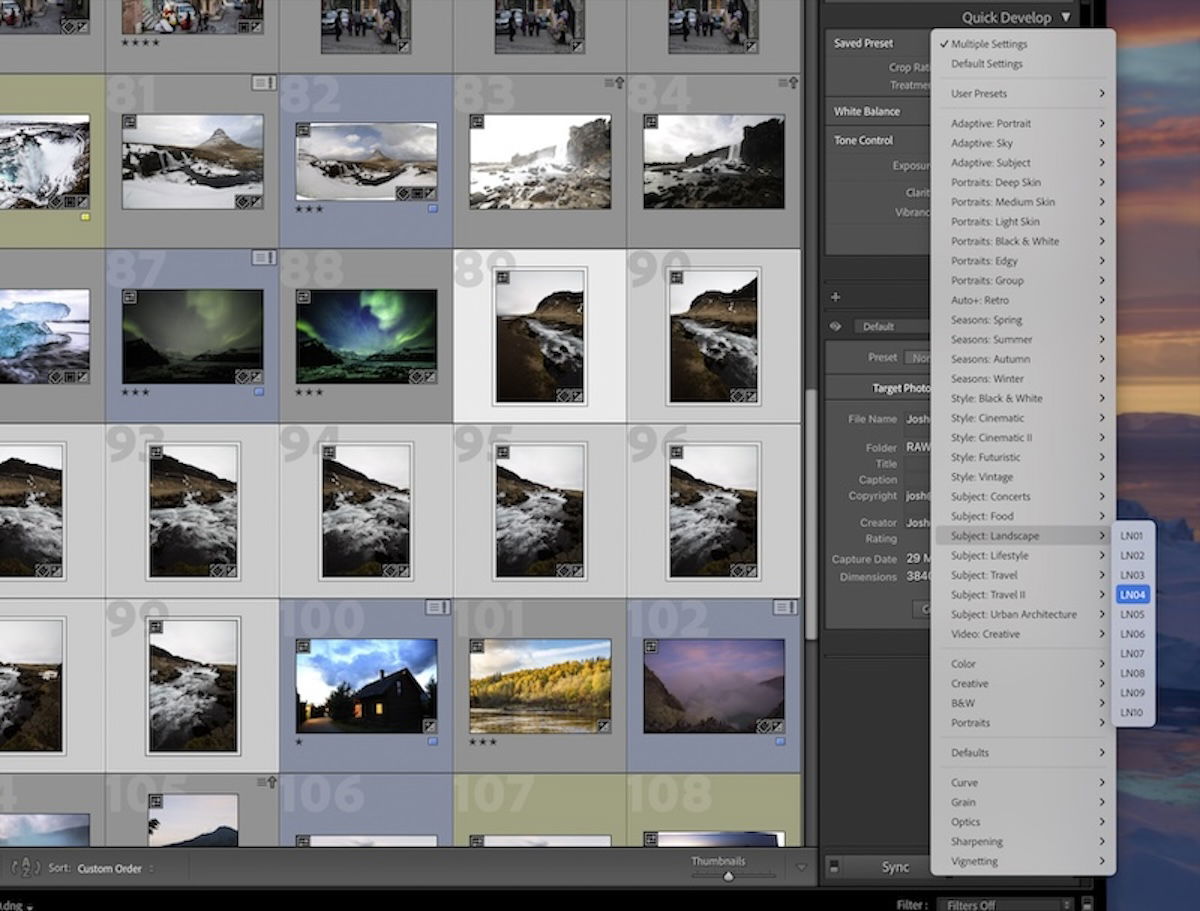
You then go to the Quick Develop section. Next to Saved Preset, you will see a drop-down menu. This menu displays all the presets you can apply to your photo.
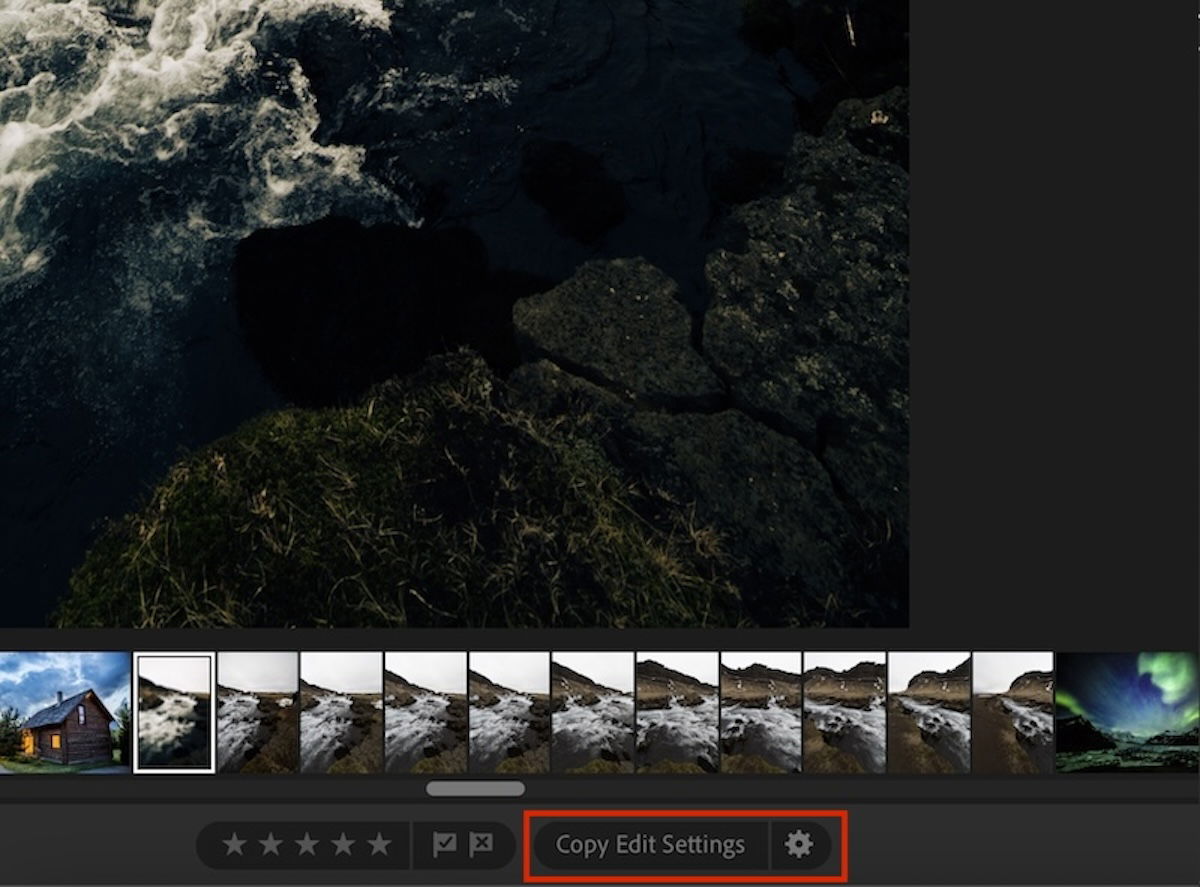
Lightroom CC does not let you edit in any viewing mode other than its Detail View (D). So, to copy over your settings, you must switch to the normal editing view (View > Detail). Then, apply the preset and any other edits to the first image.
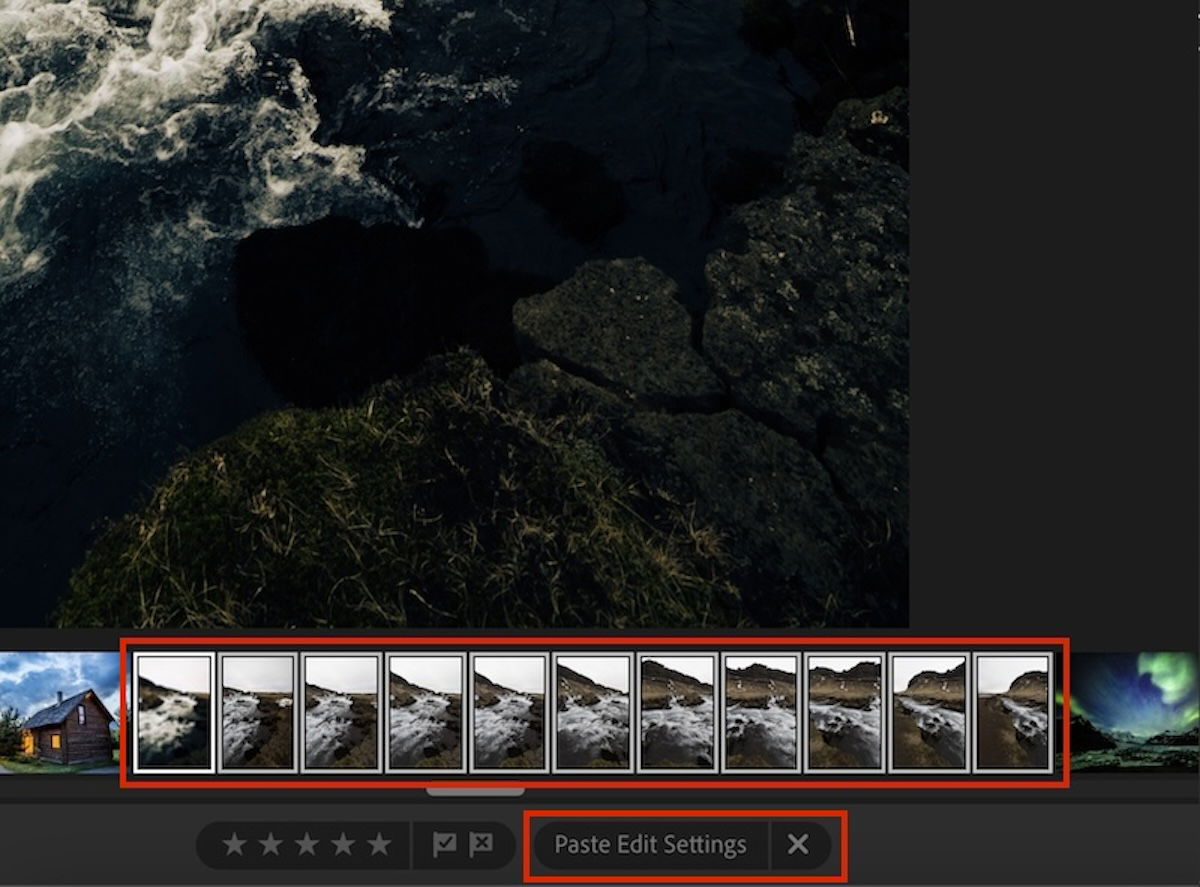
Click the Copy Edit Settings button below the filmstrip. Then, select the photos from the filmstrip to which you want to apply the same preset. The same button will have changed to Paste Edit Settings. Click this and the same adjustments will be applied to all your images.
Sharing presets is another easy action that Lightroom allows. This is great because some of your favorite photographers may sell their own presets so you can replicate their style.
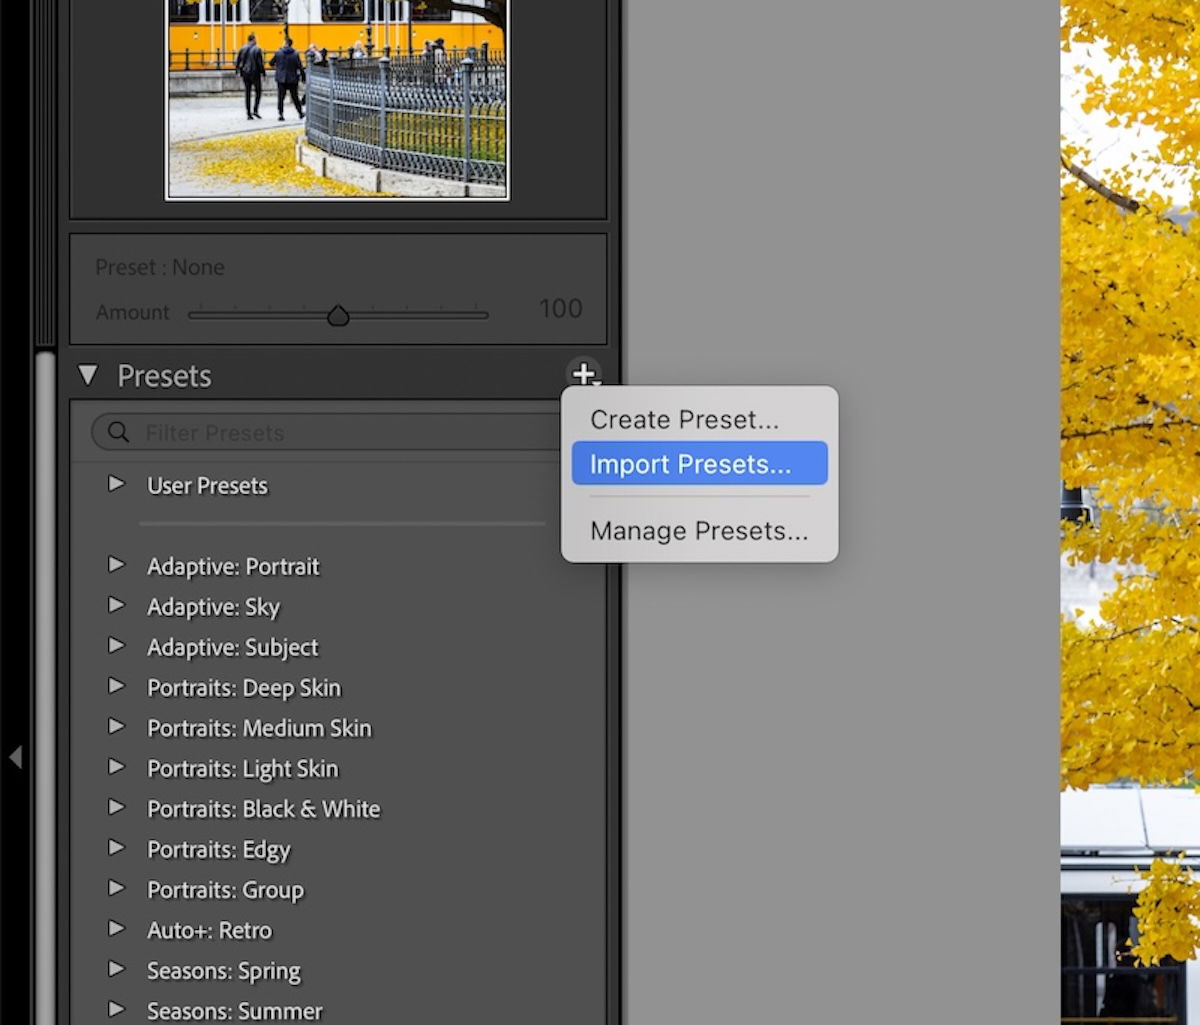
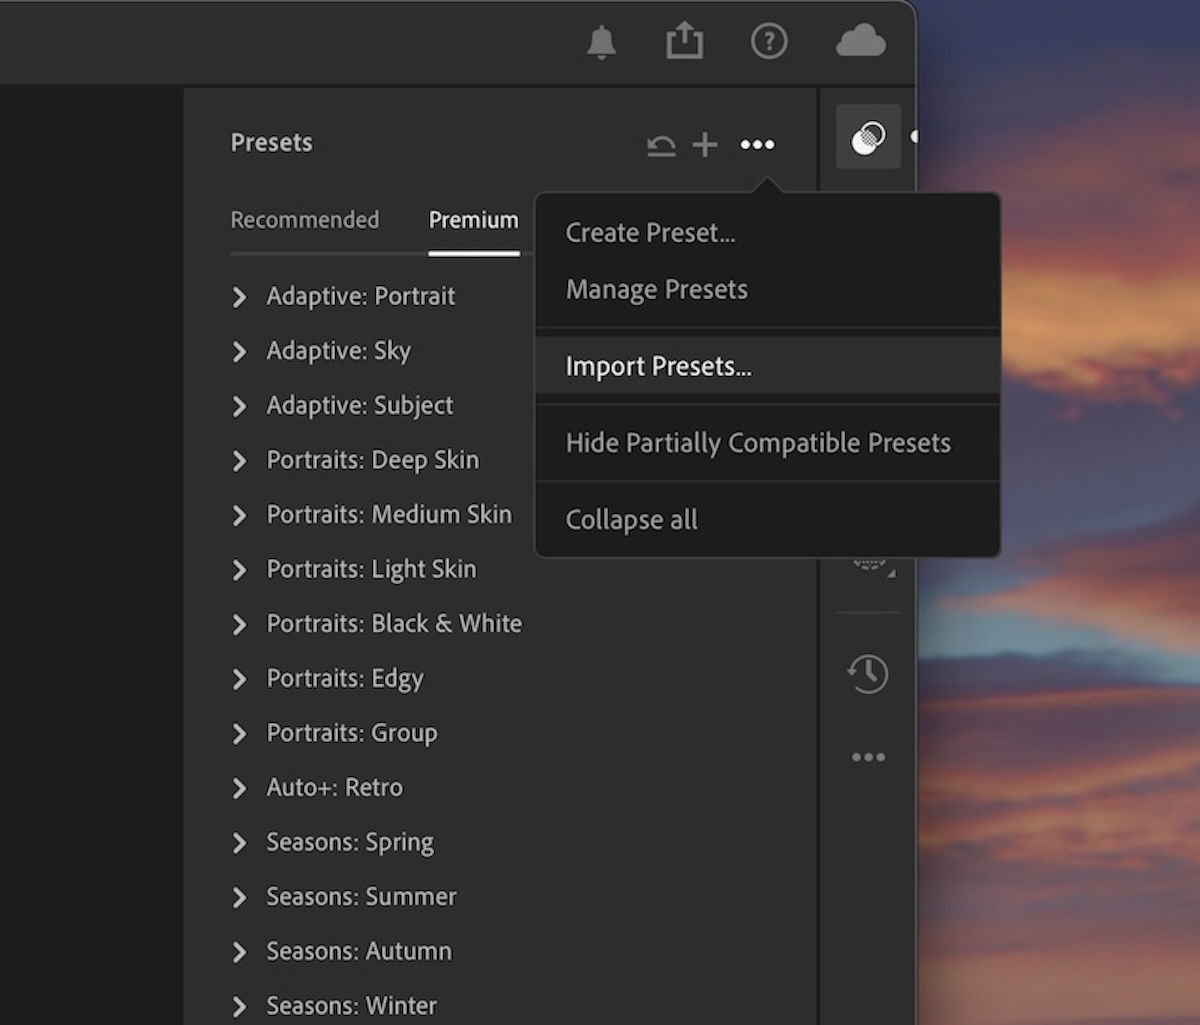
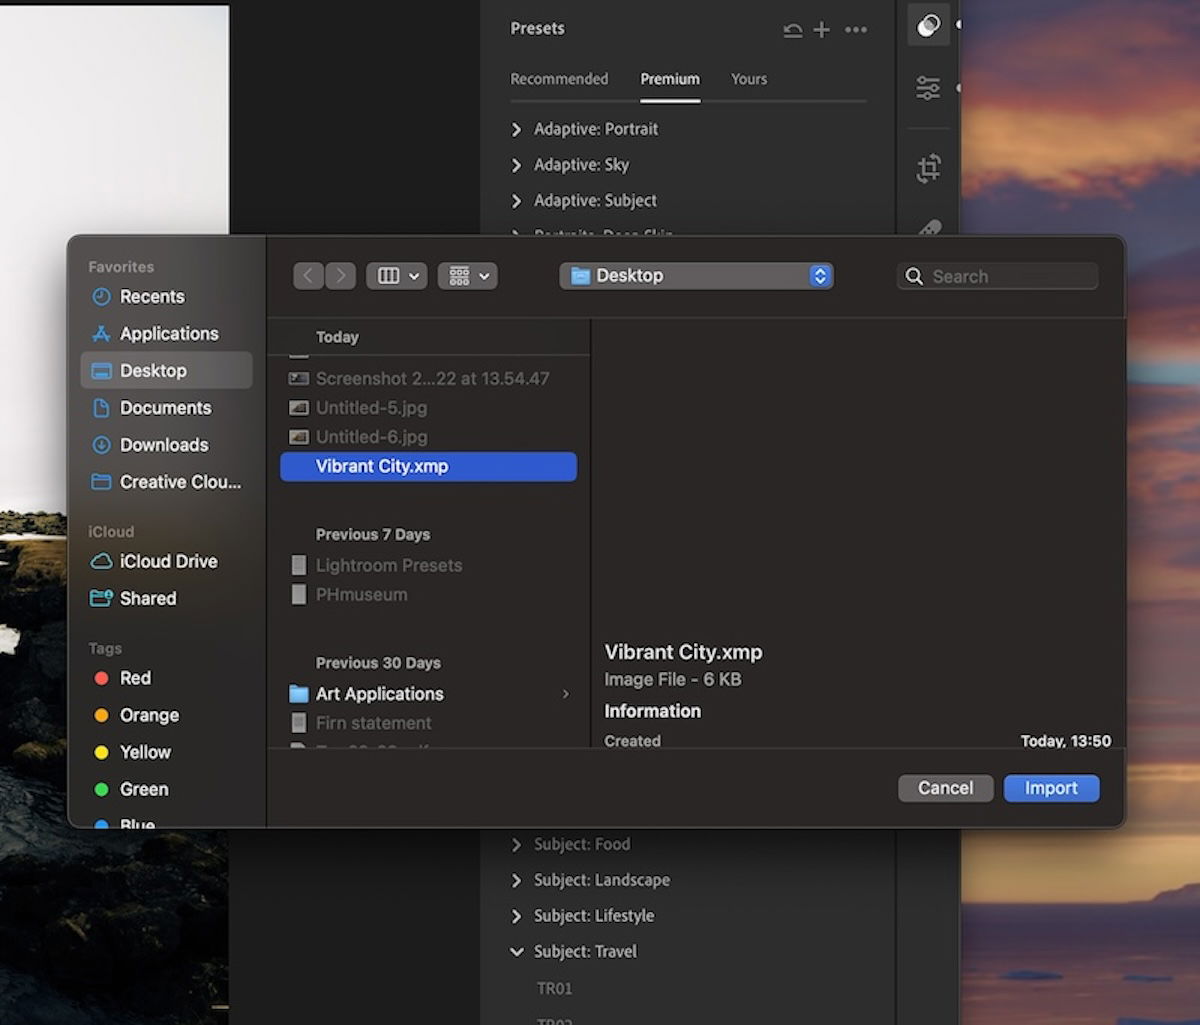
Importing a preset is easy in Lightroom. In Classic, press the same plus (+) icon and then choose Import Presets… In Lightroom CC, click the three-dots (•••) icon at the top-right of the Presets panel.
You’ll then need to select your preset from your computer. Lightroom lets you import both XMP and LRTemplate files. Your preset will be saved to the User Presets section.

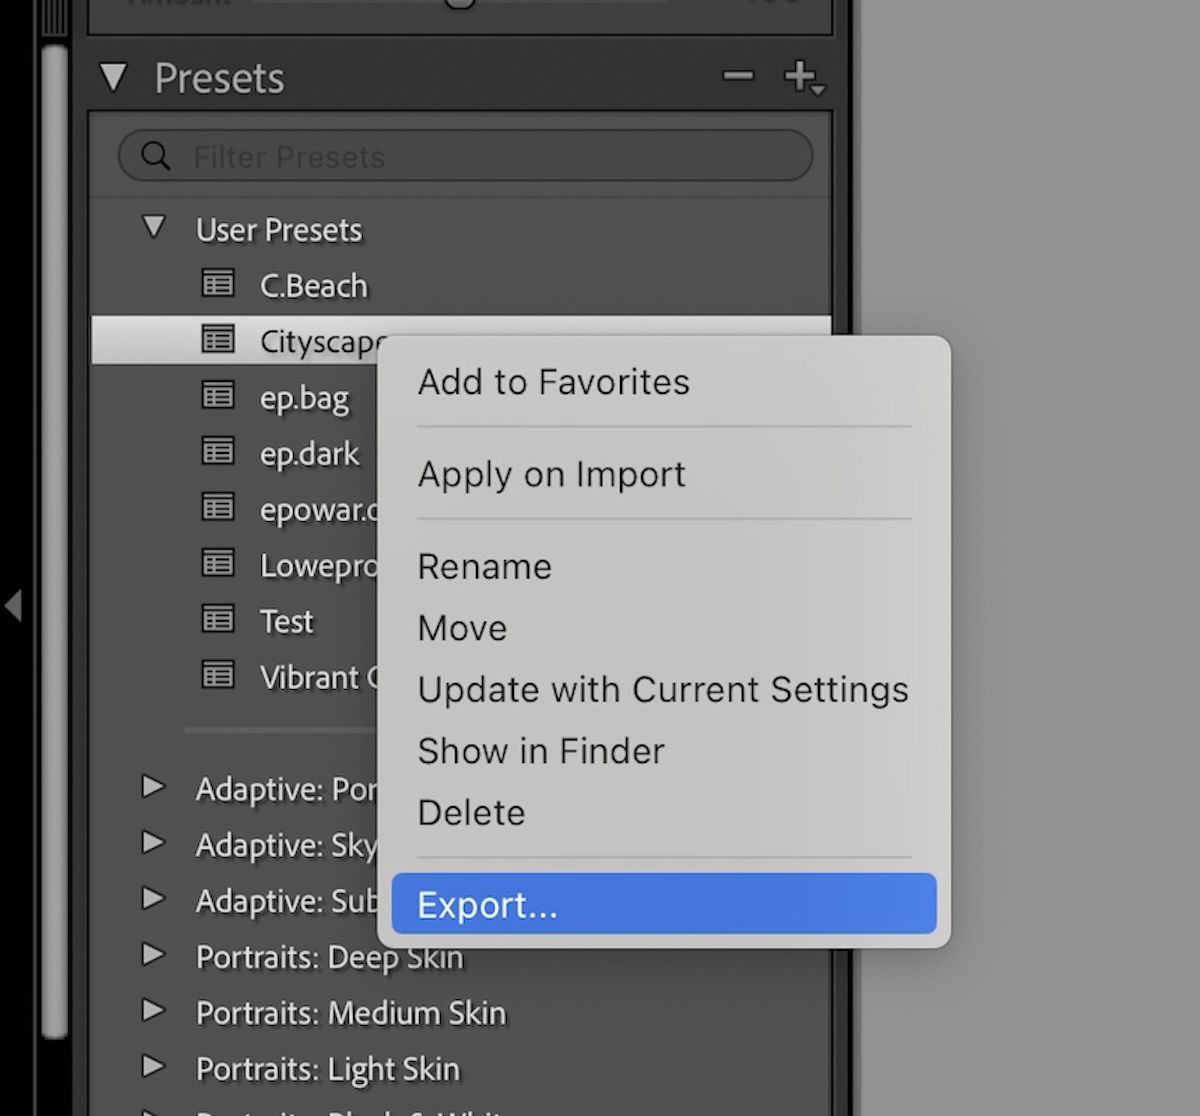
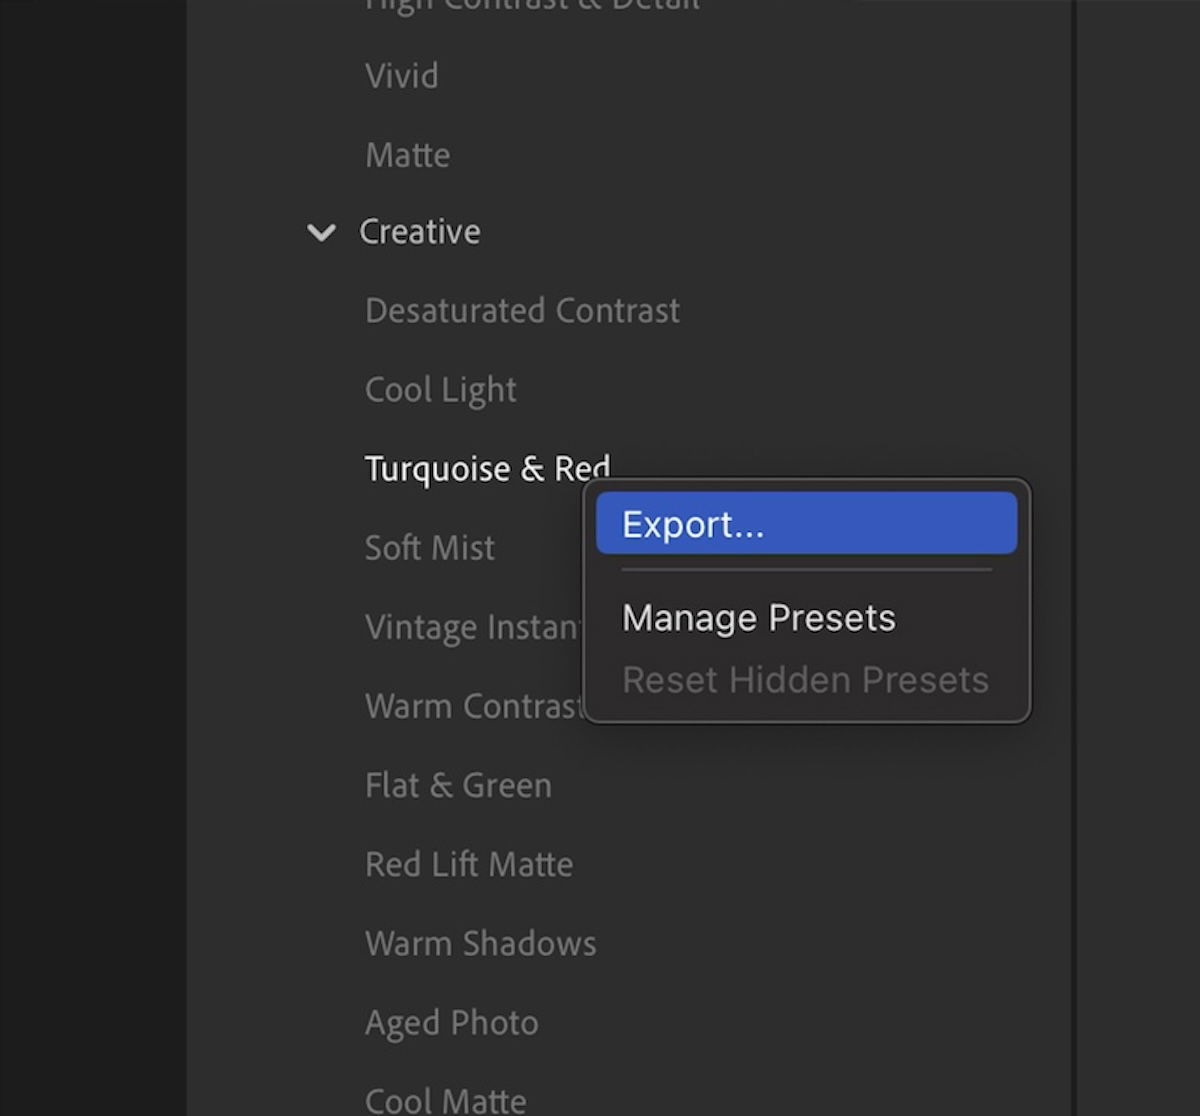
Exporting a preset is simple. Find your desired preset, right-click it, and select Export. The process is the same for Lightroom Classic and CC. You can then decide where to save the file so it won’t be lost.
Now you know how to save Lightroom presets and use all the settings the photo editing software offers. You can even sell your preset style online or share it with friends!
Using Lightroom presets can be a godsend for many photographic genres. It is particularly useful for photographers who edit big batches of images. Now, you can send a big batch of photos to a client with preliminary editing before you go into more detail.
Check out our article on the best free Lightroom presets. We also list the best presets for portraits, landscapes, and street photography. And finally, we have The Preset Collection, a simple way to drastically improve your images!
