Mastering the art of Photoshop can be a daunting task, especially when it comes to more complex techniques like creating a clipping mask. This powerful tool can transform your designs, allowing you to blend images and shapes in a way that truly captures your creative vision. However, the process can seem intimidating if you’re not familiar with it. This article aims to demystify the process of creating a clipping mask in Photoshop, providing a step-by-step guide that will have you mastering this technique in no time. Whether you’re a seasoned designer looking to brush up on your skills, or a beginner just starting out, this guide is designed to help you navigate the process with ease and confidence.
Step 1. Choose Your Base Image
Kick off by selecting the base image you want to work with. This will serve as the foundation for your clipping mask. Make sure it’s an image that aligns with your creative vision. Open it in Photoshop to get started.
Step 2. Add a New Layer
Next, you’ll need to add a new layer. This will be your clipping layer, where you’ll place the image or shape you want to clip to the base image.
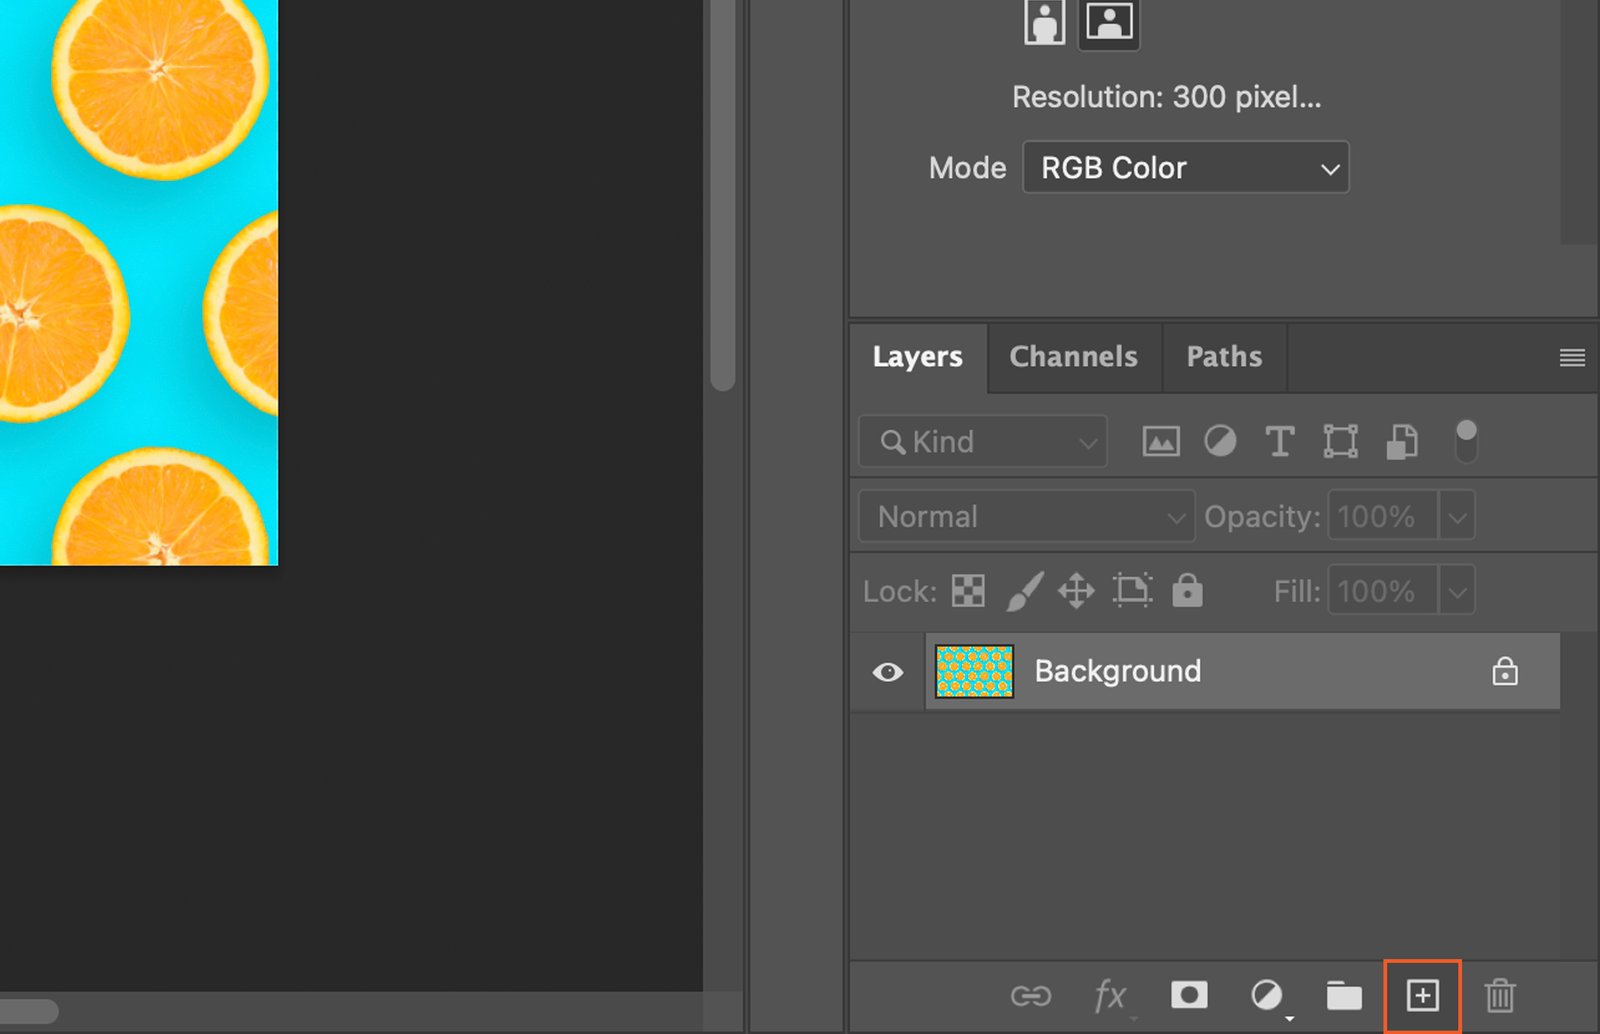
Step 2.1. Using the New Layer Button
Look for the “New Layer” button in the Layers panel. It’s the square icon with a folded corner. Click it, and a new layer will appear above your base image.
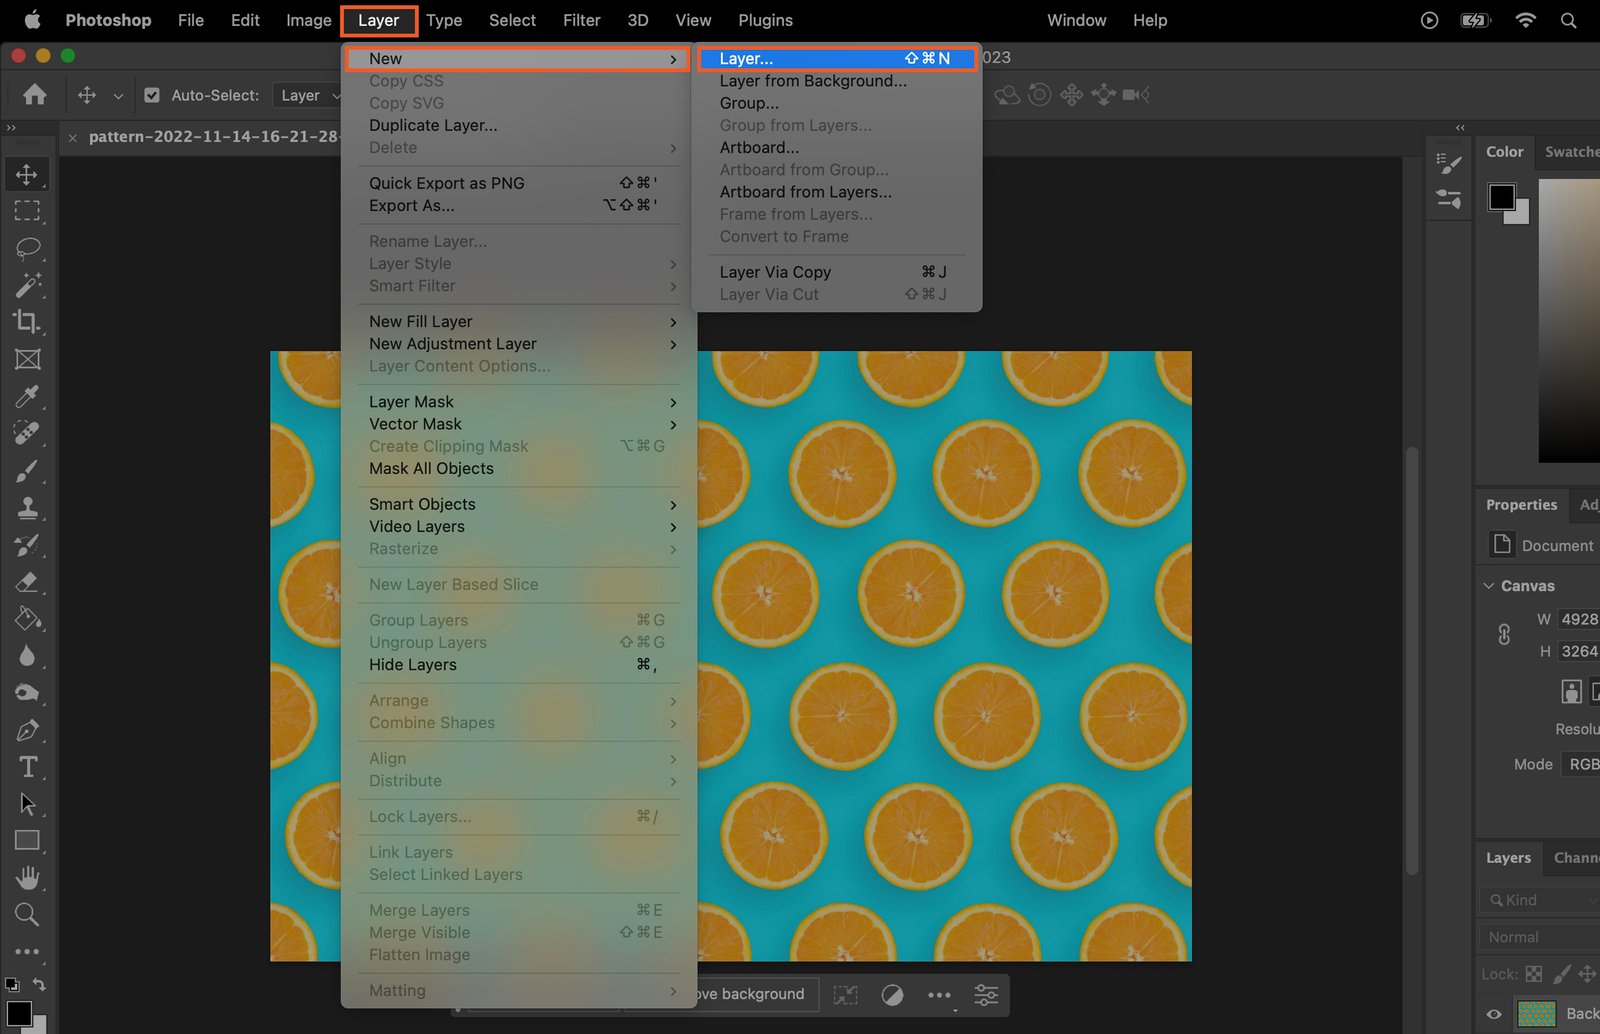
Step 2.2. Using the Layer Menu
Alternatively, you can go to the Layer menu at the top of the screen. Select “New” and then “Layer.” A dialog box will pop up. Click “OK,” and your new layer will appear.
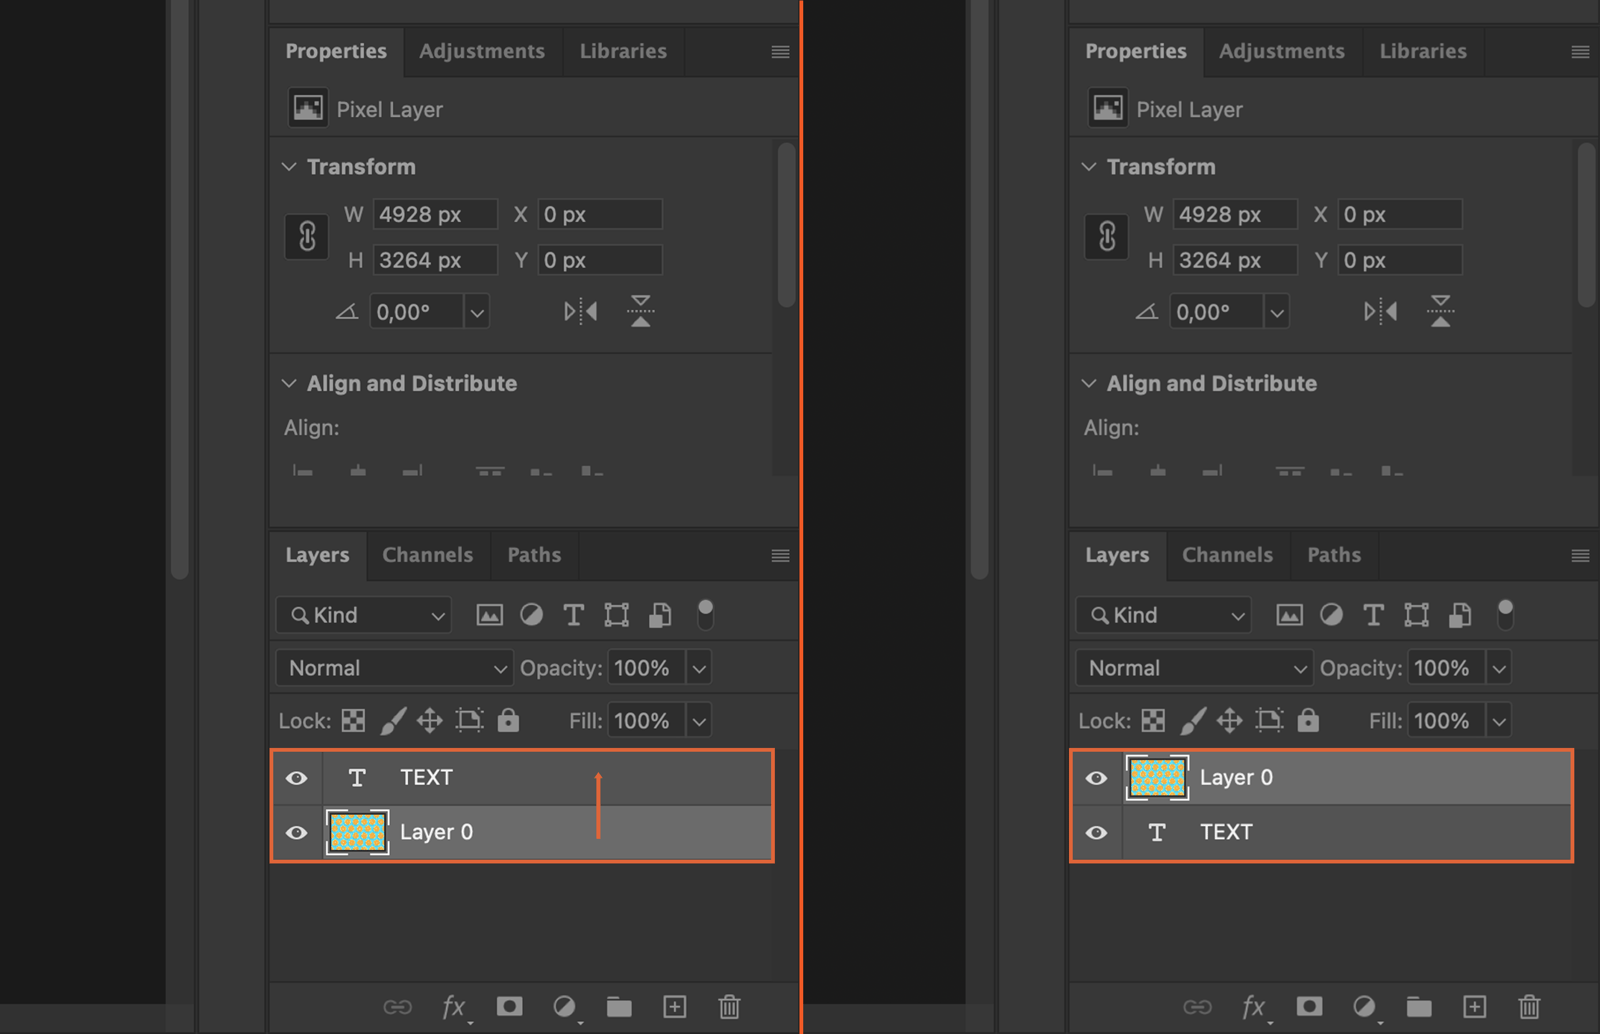
Step 3. Position Your Clipping Layer
Now, place your clipping layer. This could be a shape, text, or another image. Drag it onto the new layer you just created. Drag the base image above the Clipping Layer.
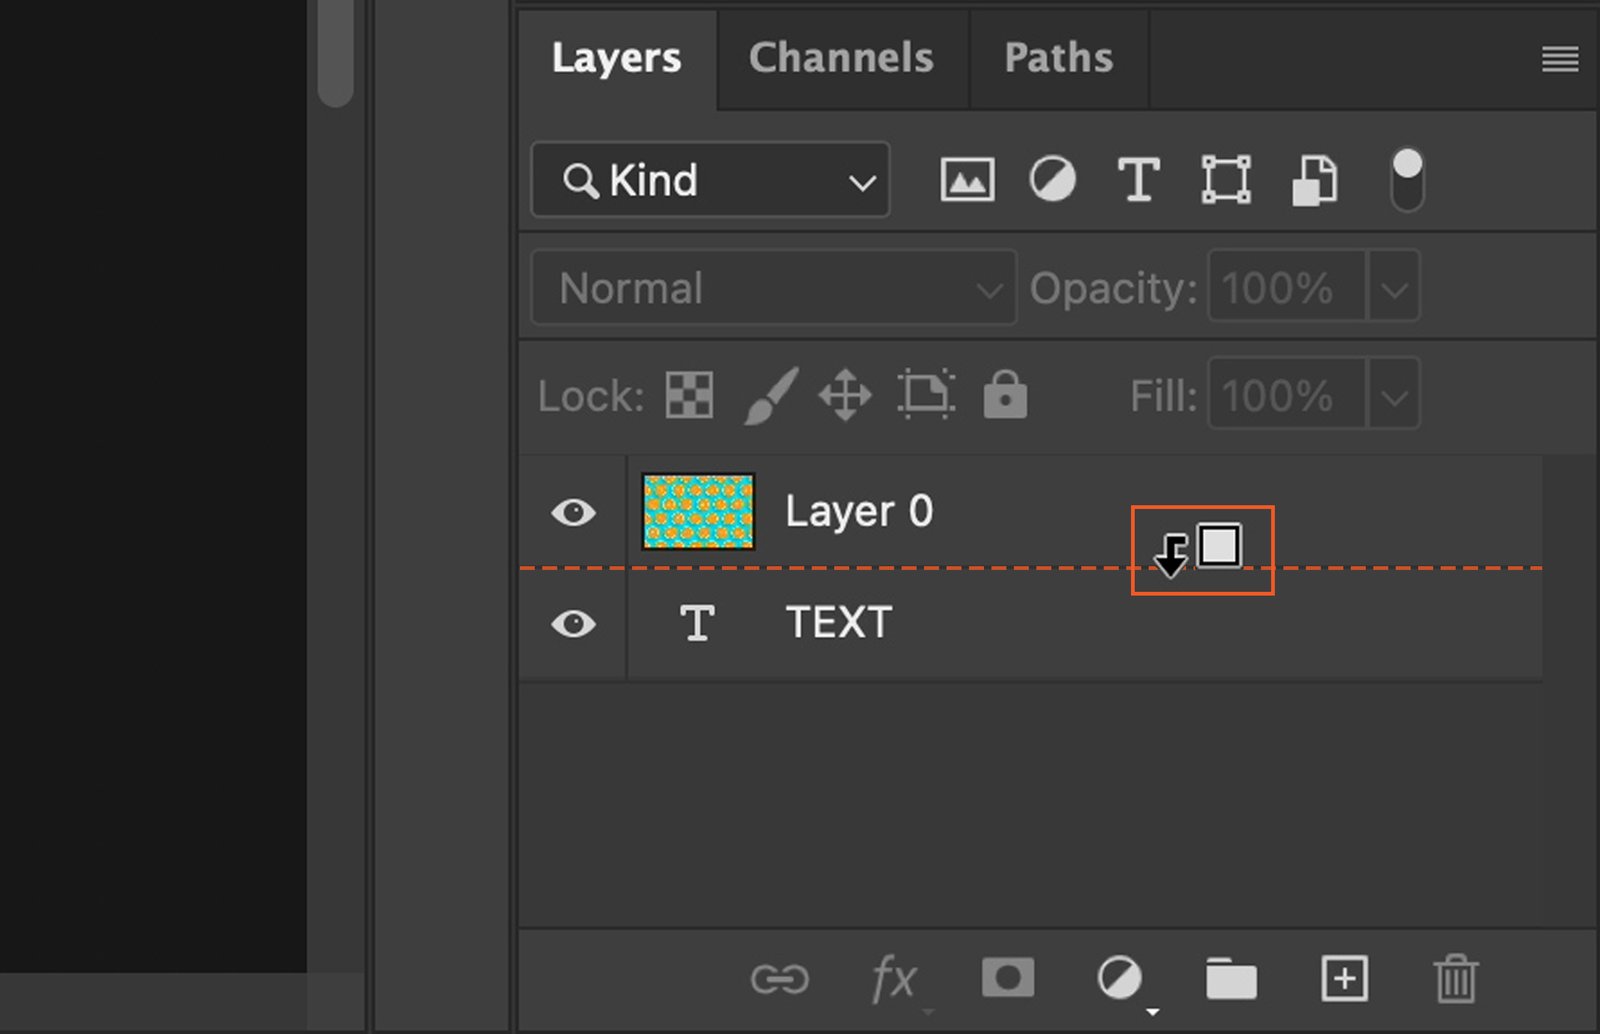
Step 4. Create Your Clipping Mask
Time to create the clipping mask. This will make your base image take the shape of your clipping layer.
Step 4.1. Using the Layer Menu
Go to the Layer menu again. This time, select “Create Clipping Mask.” Your base image will instantly take the shape of your clipping layer.

Step 4.2. Using Right-Click Context Menu
Hold down the Option (Alt) key and position your cursor between the two layers you want to create a clipping mask with. Click on the line between the layers to instantly create a clipping mask, allowing the top layer to only show through the shape of the layer directly below it.
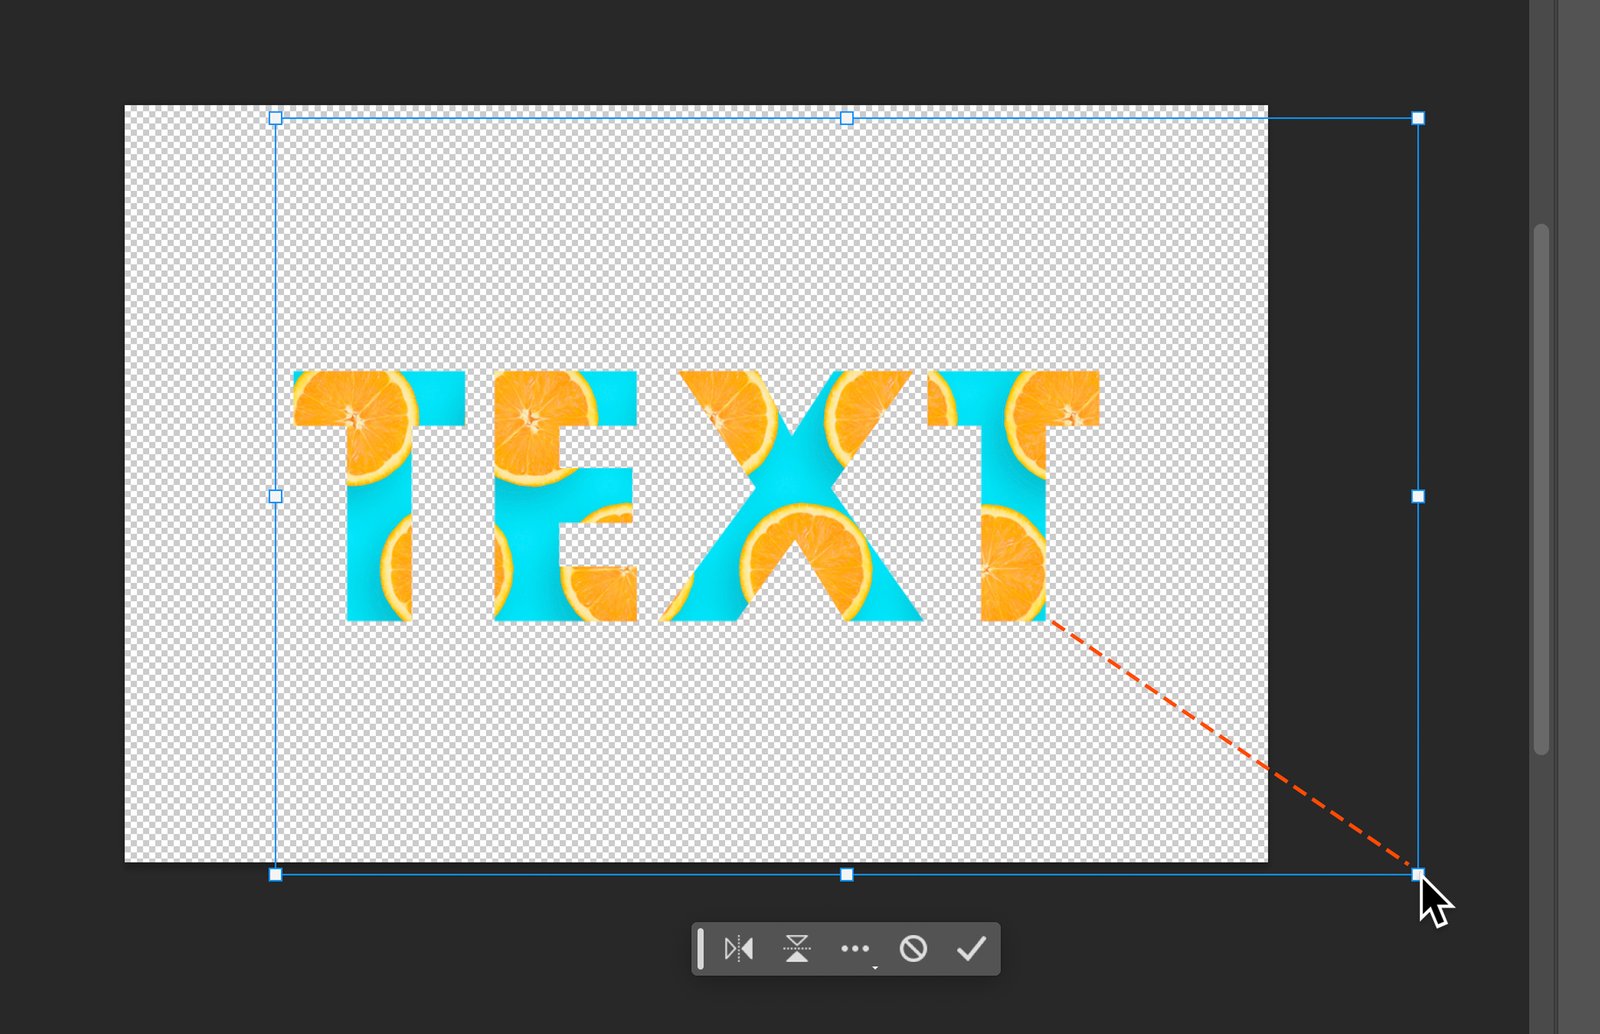
Step 5. Adjust Your Clipping Mask
Now, fine-tune your clipping mask. You can move it around, resize it, or rotate it to get the perfect look.
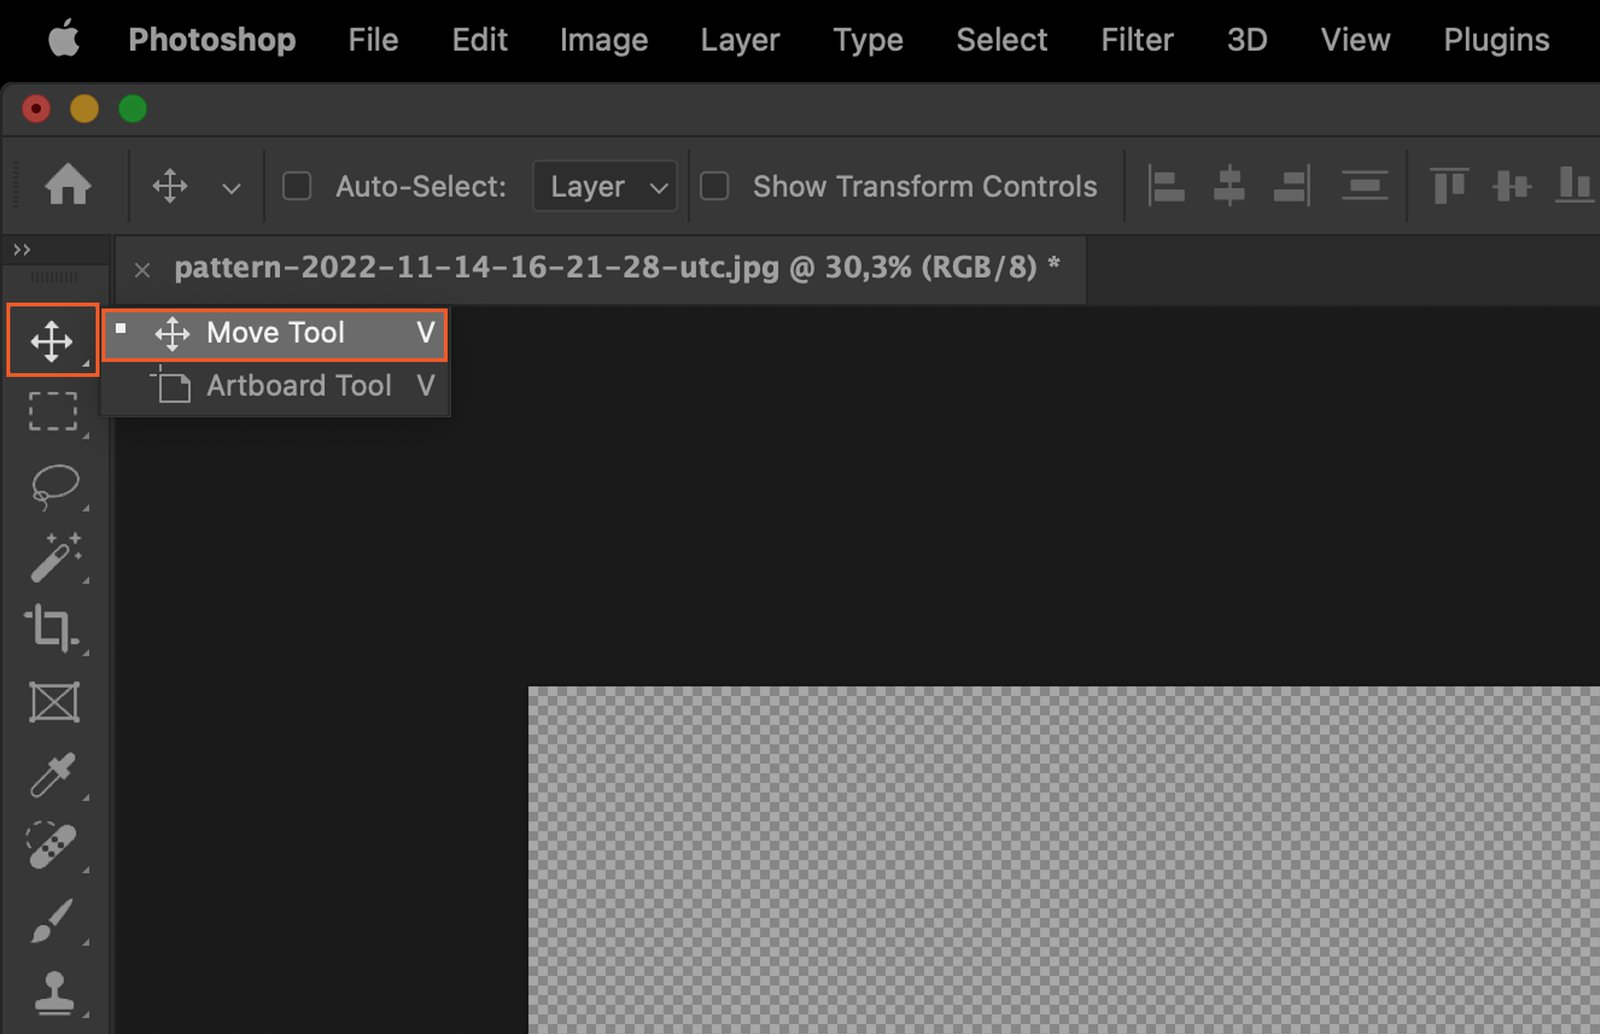
Step 5.1. Using the Move Tool
Select the Move tool from the toolbar (it looks like a cross with arrows). Click and drag your clipping mask to reposition it.
Step 5.2. Using the Transform Command
To resize or rotate your clipping mask, use the Transform shortcut Command (CTRL) + T, then adjust as needed.
Step 6. Modify the Clipping Mask Layer
You can also modify the clipping mask layer to achieve different effects.
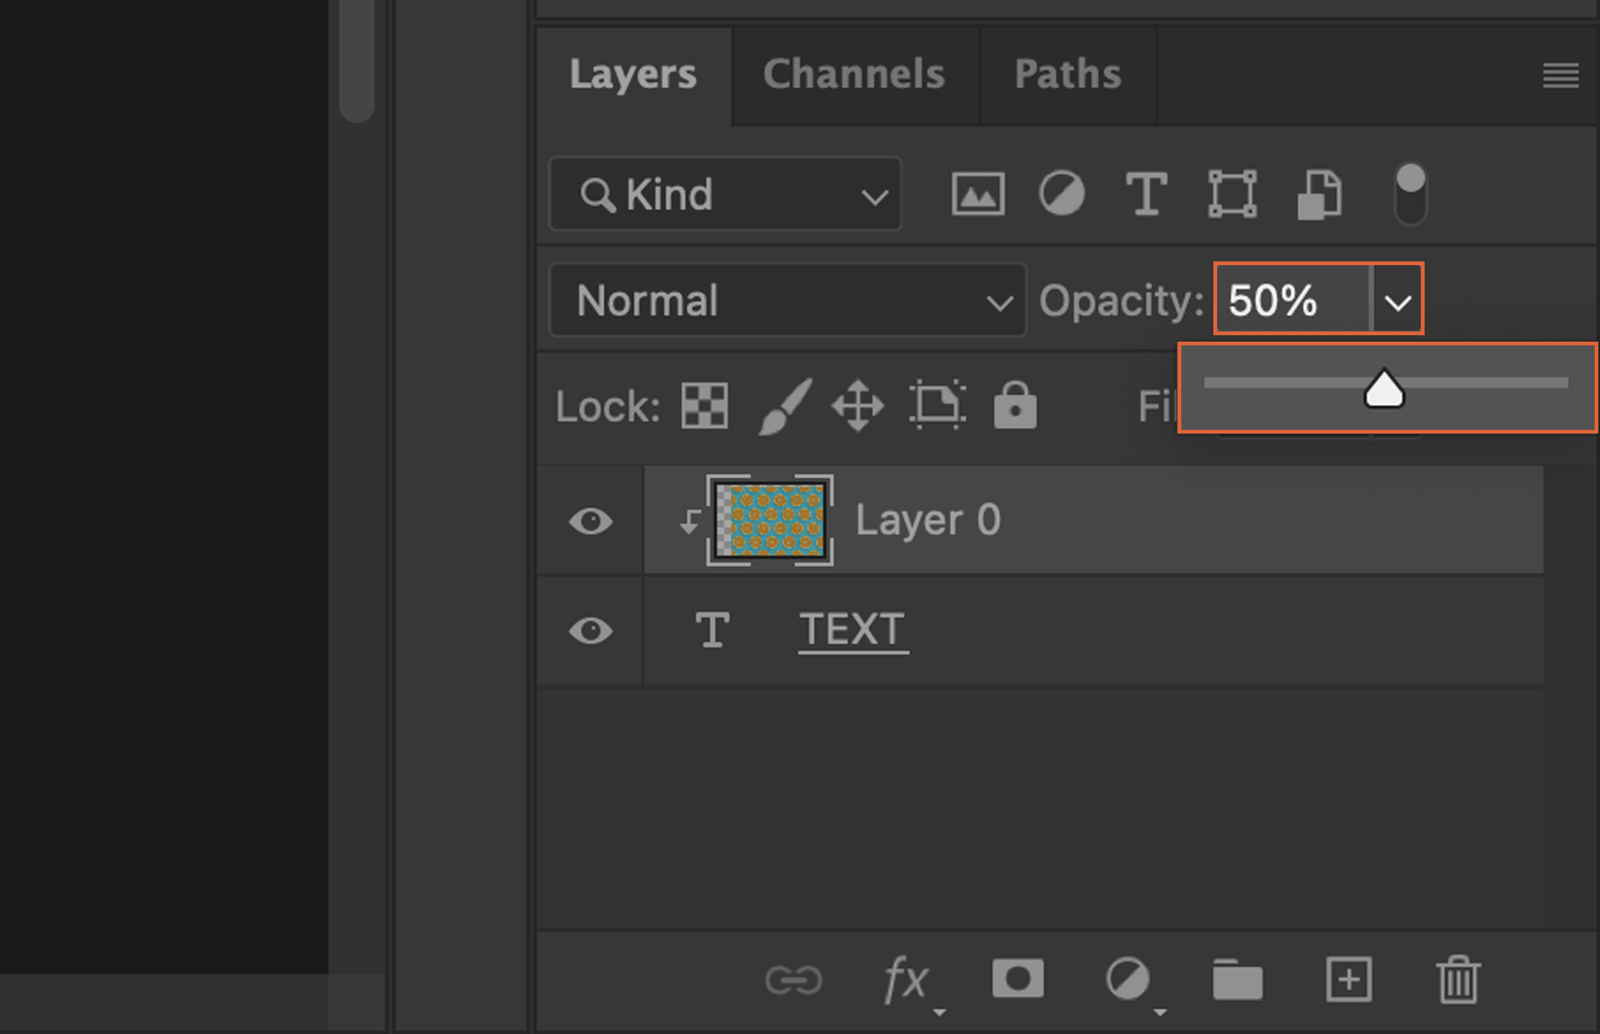
Step 6.1. Changing Layer Opacity
To change the opacity of your clipping mask, simply adjust the Opacity slider in the Layers panel.
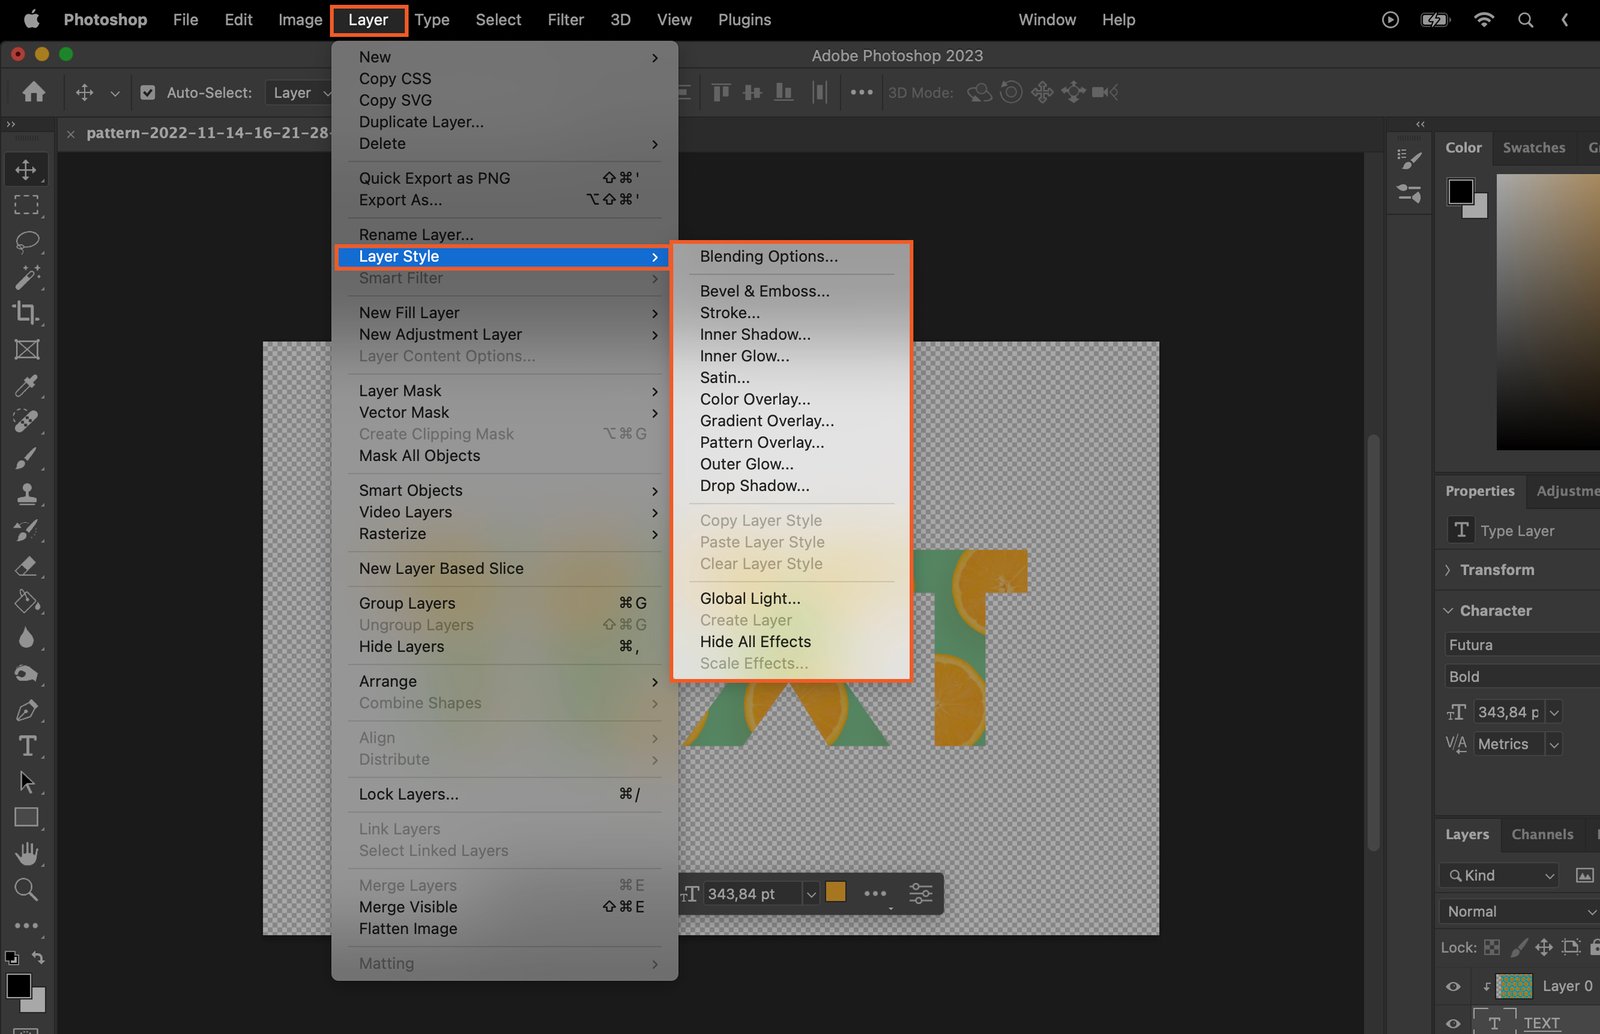
Step 6.2. Applying Layer Styles
For more advanced effects, try applying layer styles. Go to Layer > Layer Style and choose from options like Bevel and Emboss, Stroke, or Drop Shadow.
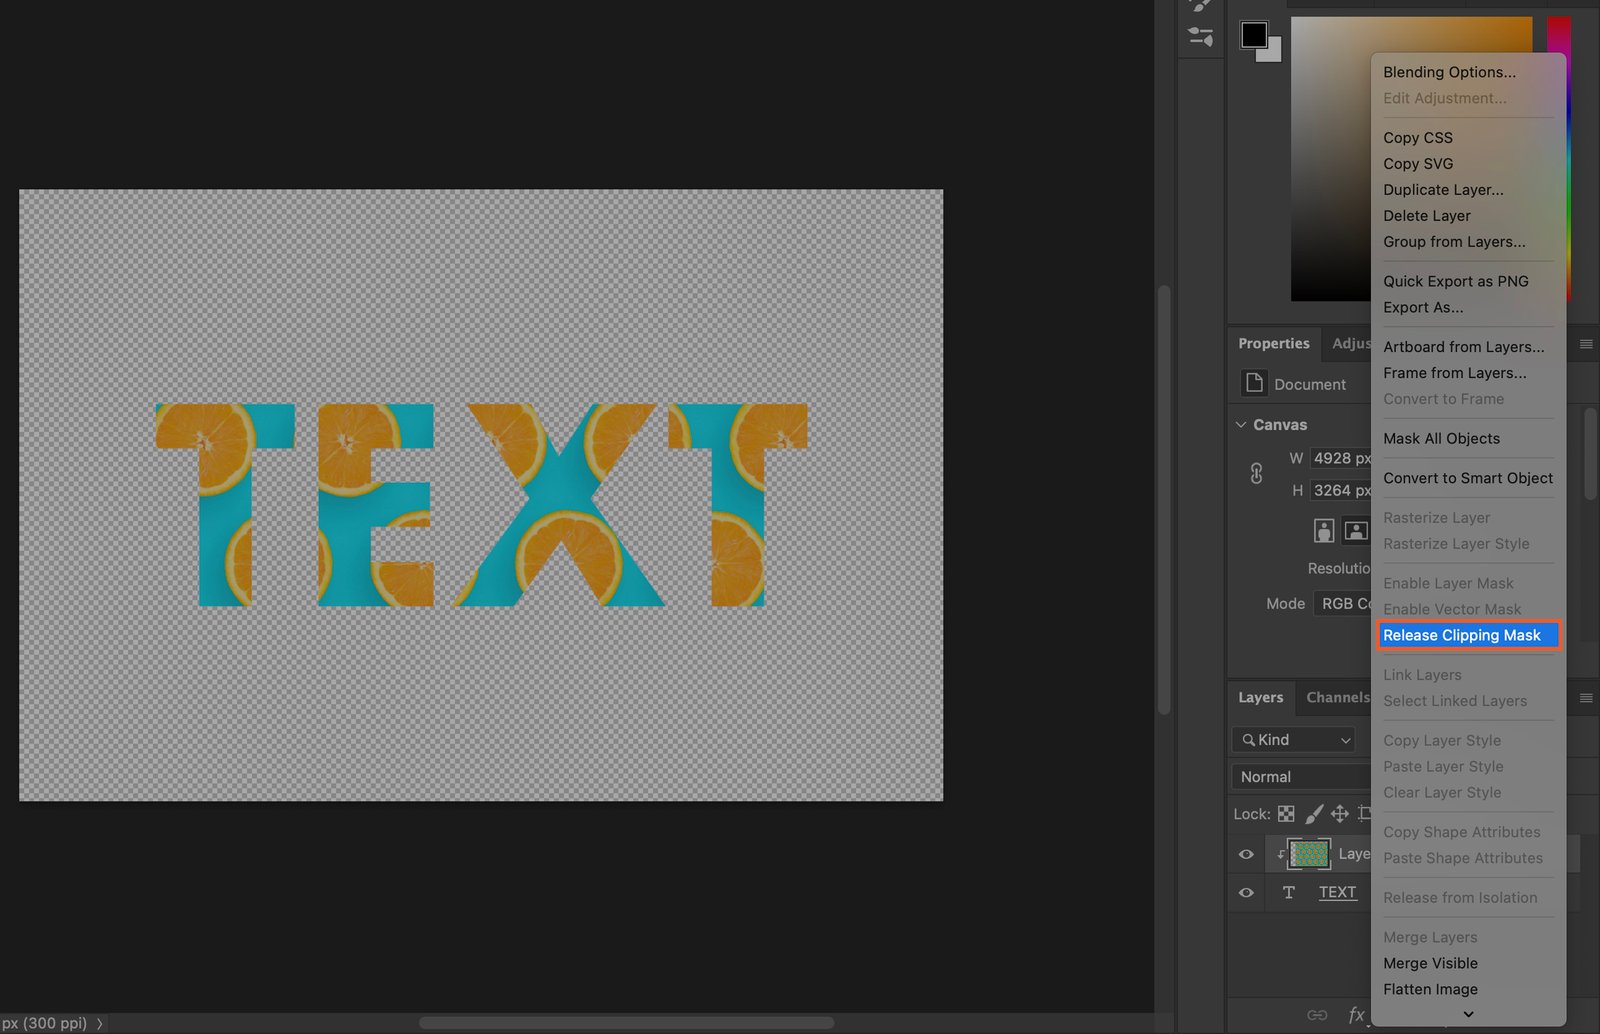
Step 7. Release Clipping Mask
To release the clipping mask, right-click on the clipping layer and select “Release Clipping Mask.”