Photoshop, a powerful tool in the realm of photo editing, offers countless ways to enhance and transform your images. One such technique is the creation of a vignette, a subtle yet effective way to draw attention to the subject of your photo by darkening the periphery. However, if you’re unfamiliar with Photoshop’s interface and tools, accomplishing this task can seem daunting. This article is designed to deconstruct the process of creating a vignette into simple, easy-to-follow steps. Whether you’re a seasoned Photoshop user or a beginner looking to expand your skills, this guide will help you add a professional touch to your photos with the vignette effect.


First, we need to select the tool that allows us to create an elliptical selection. On the Photoshop toolbar, look for the icon that resembles a dotted rectangle. Click and hold on this icon to reveal a dropdown menu. From this menu, select the Elliptical Marquee Tool.
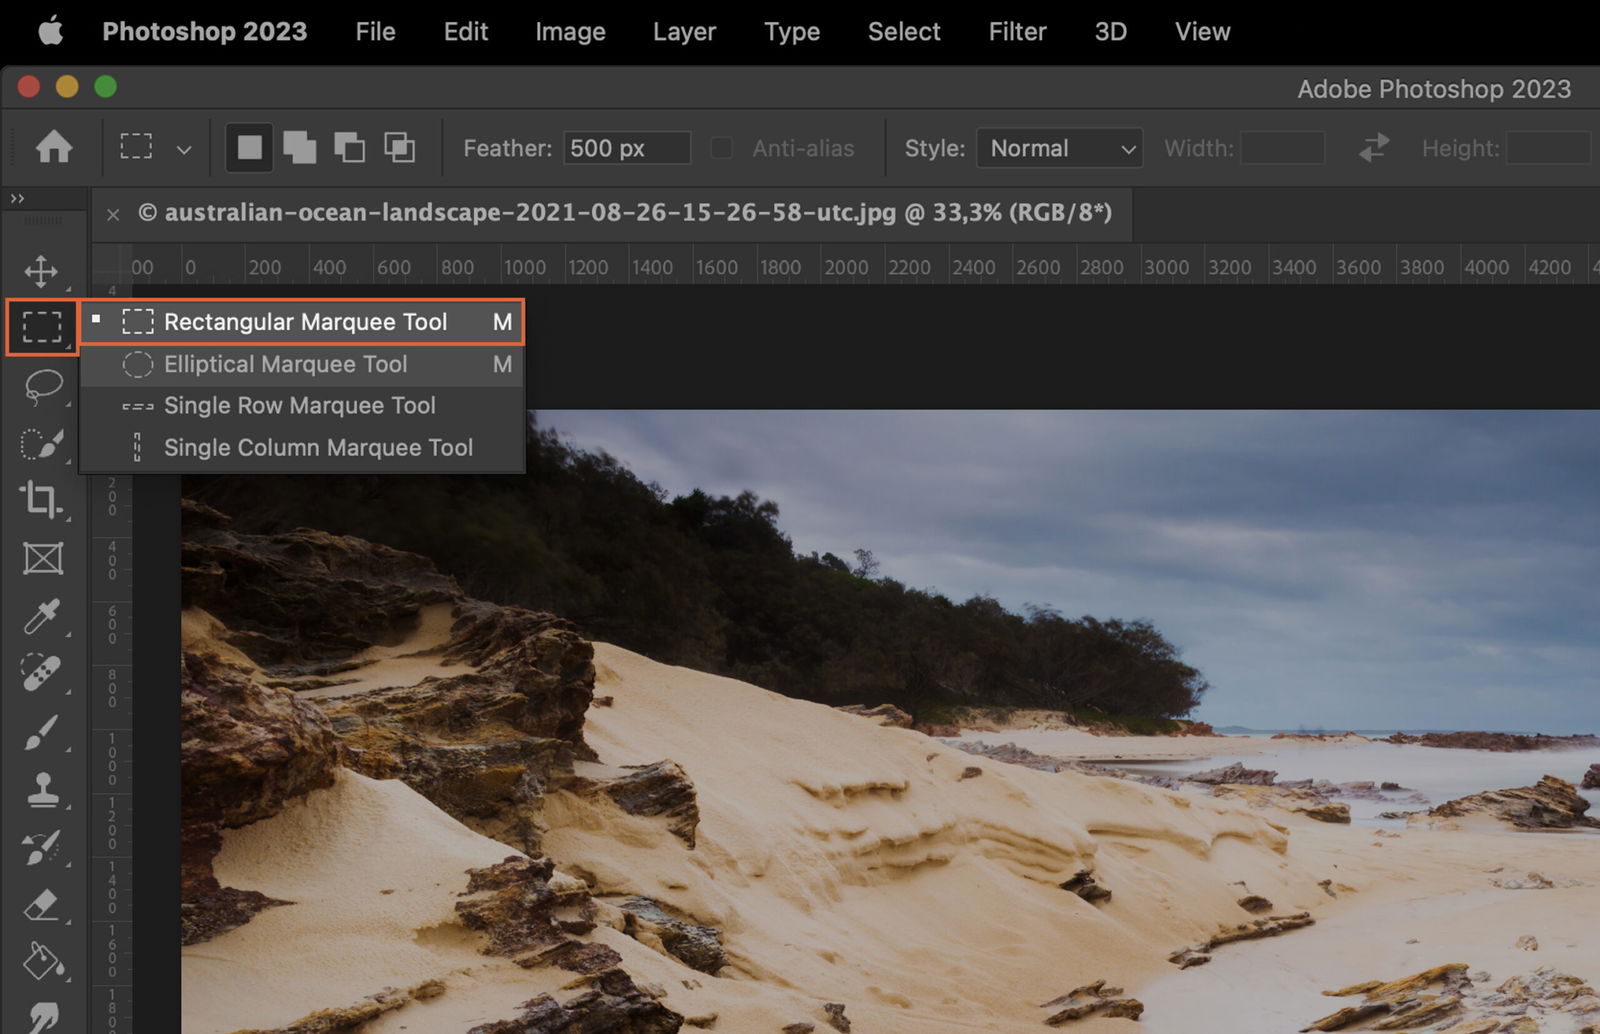
If you prefer keyboard shortcuts, you can activate the Elliptical Marquee Tool by pressing “M” on your keyboard. If the Rectangular Marquee Tool is selected by default, simply press Shift + M to switch to the Elliptical Marquee Tool.
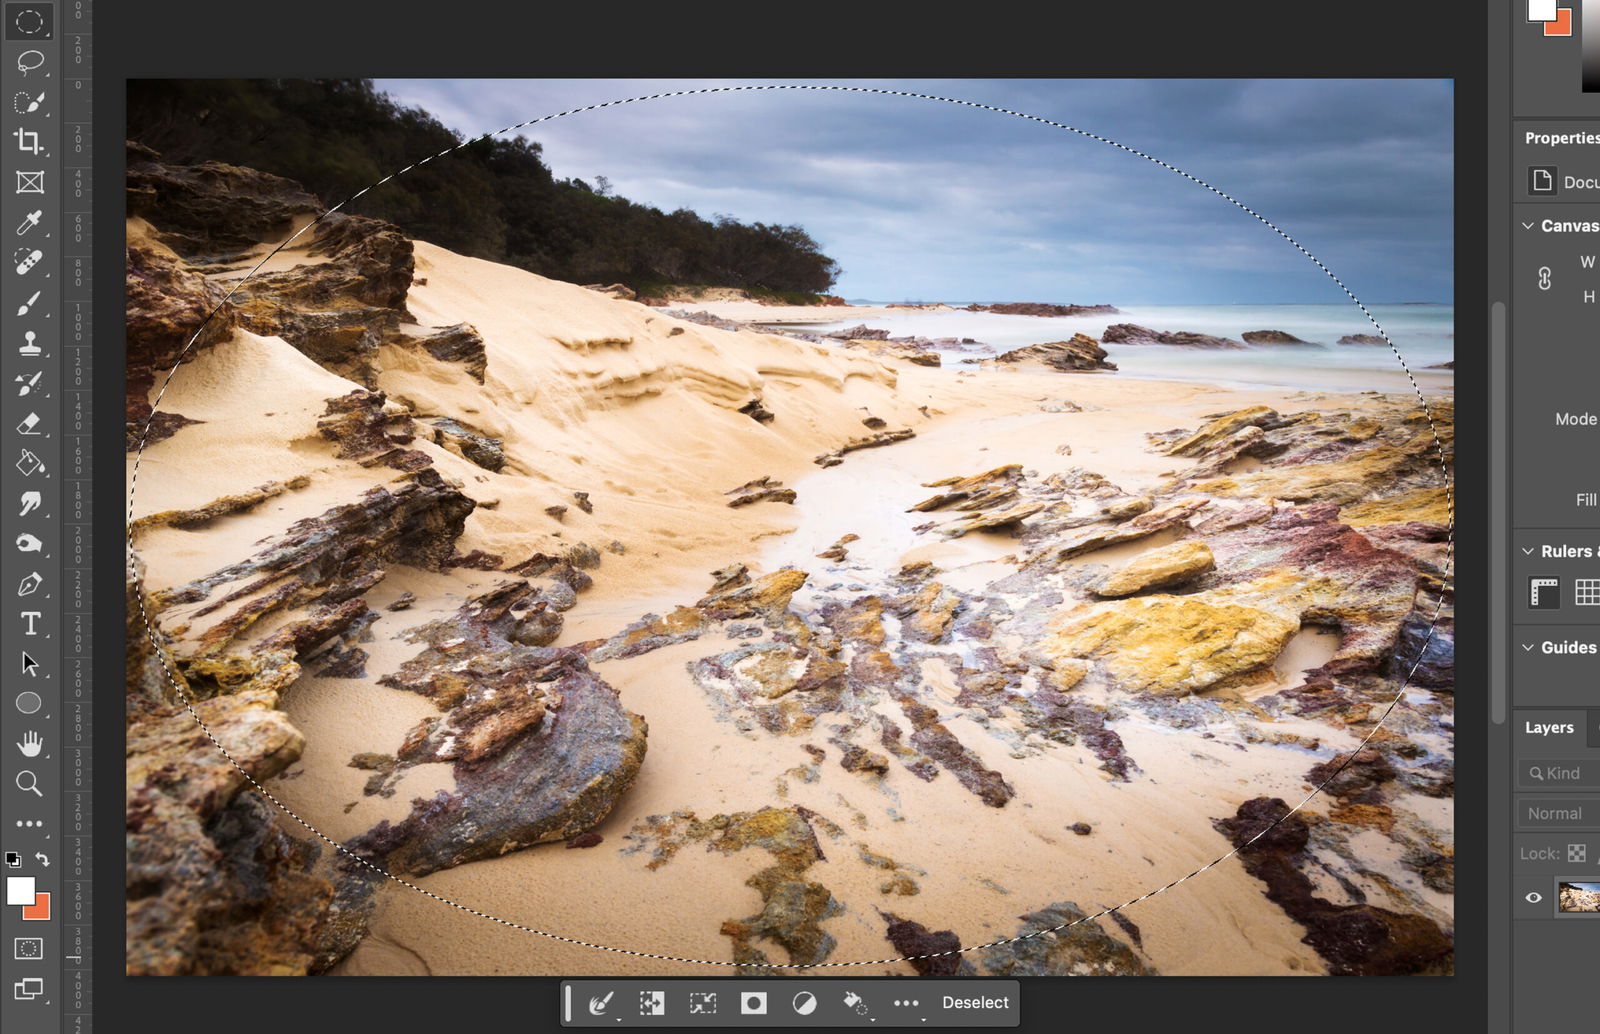
With the Elliptical Marquee Tool selected, click and drag your mouse across the area of the image where you want your vignette effect to be. This will create an elliptical selection. Don’t worry about the size or position just yet, we can adjust this later.
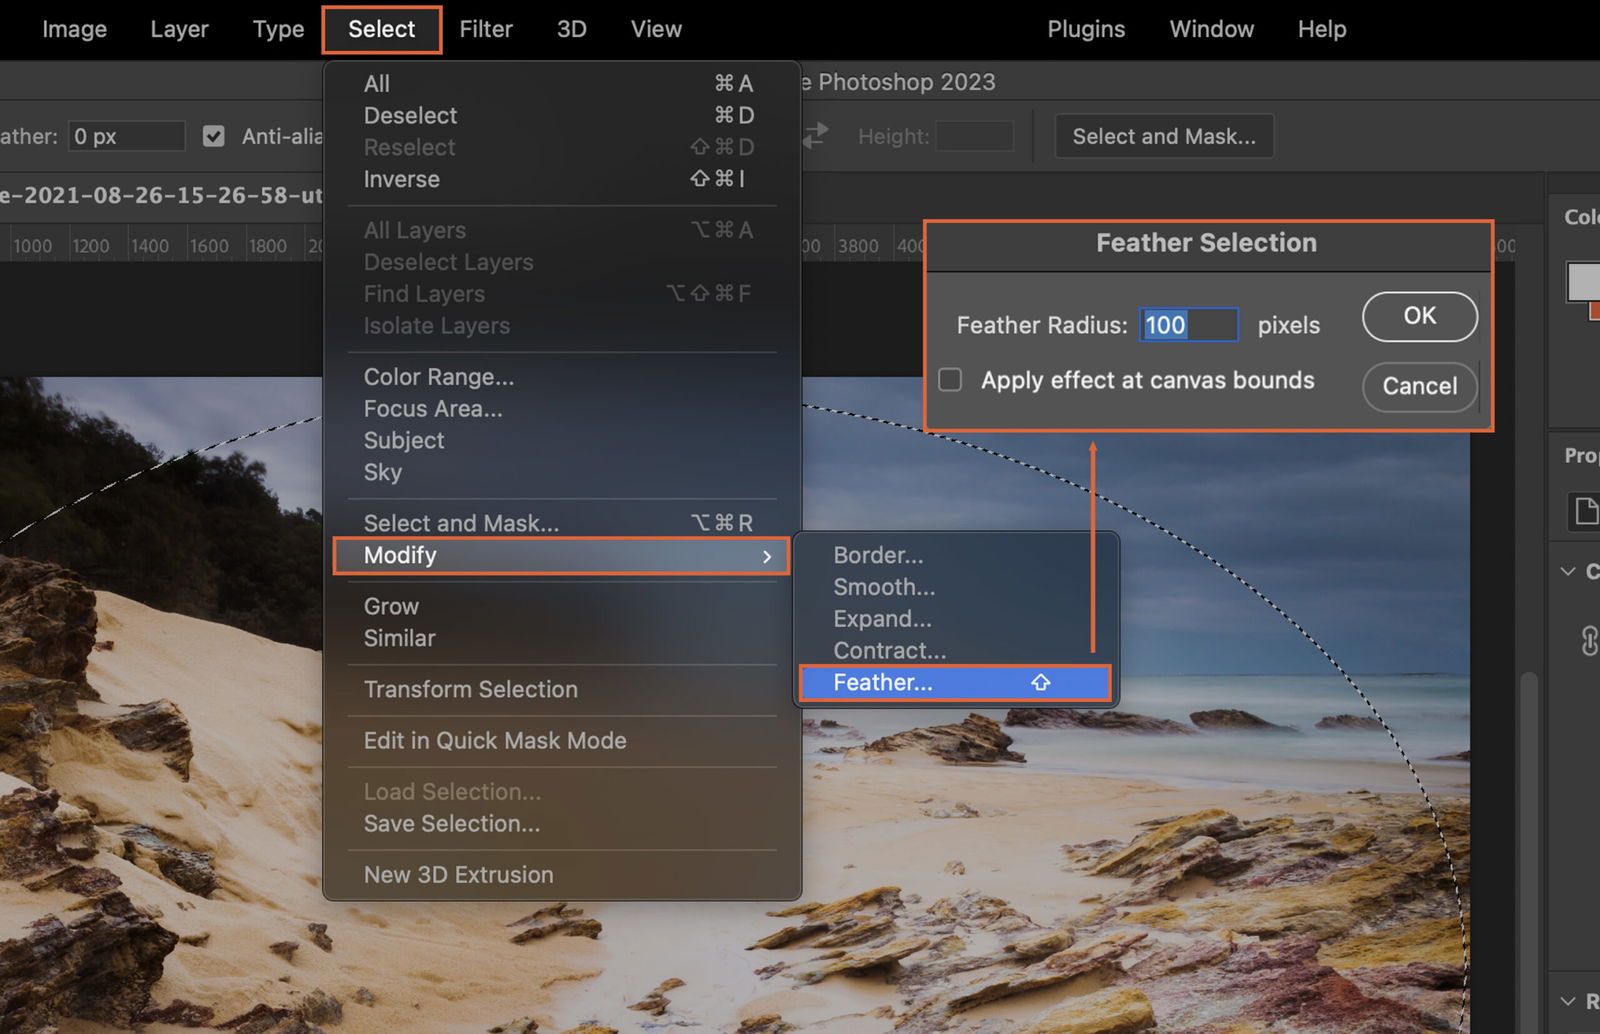
To ensure a smooth transition between the vignette and the rest of your image, we need to soften the edges of our selection. This is achieved by adjusting the feather radius. Go to the top menu bar, select “Select”, then “Modify”, and finally “Feather”. A dialog box will appear where you can input your desired feather radius. A higher value will result in a softer edge.
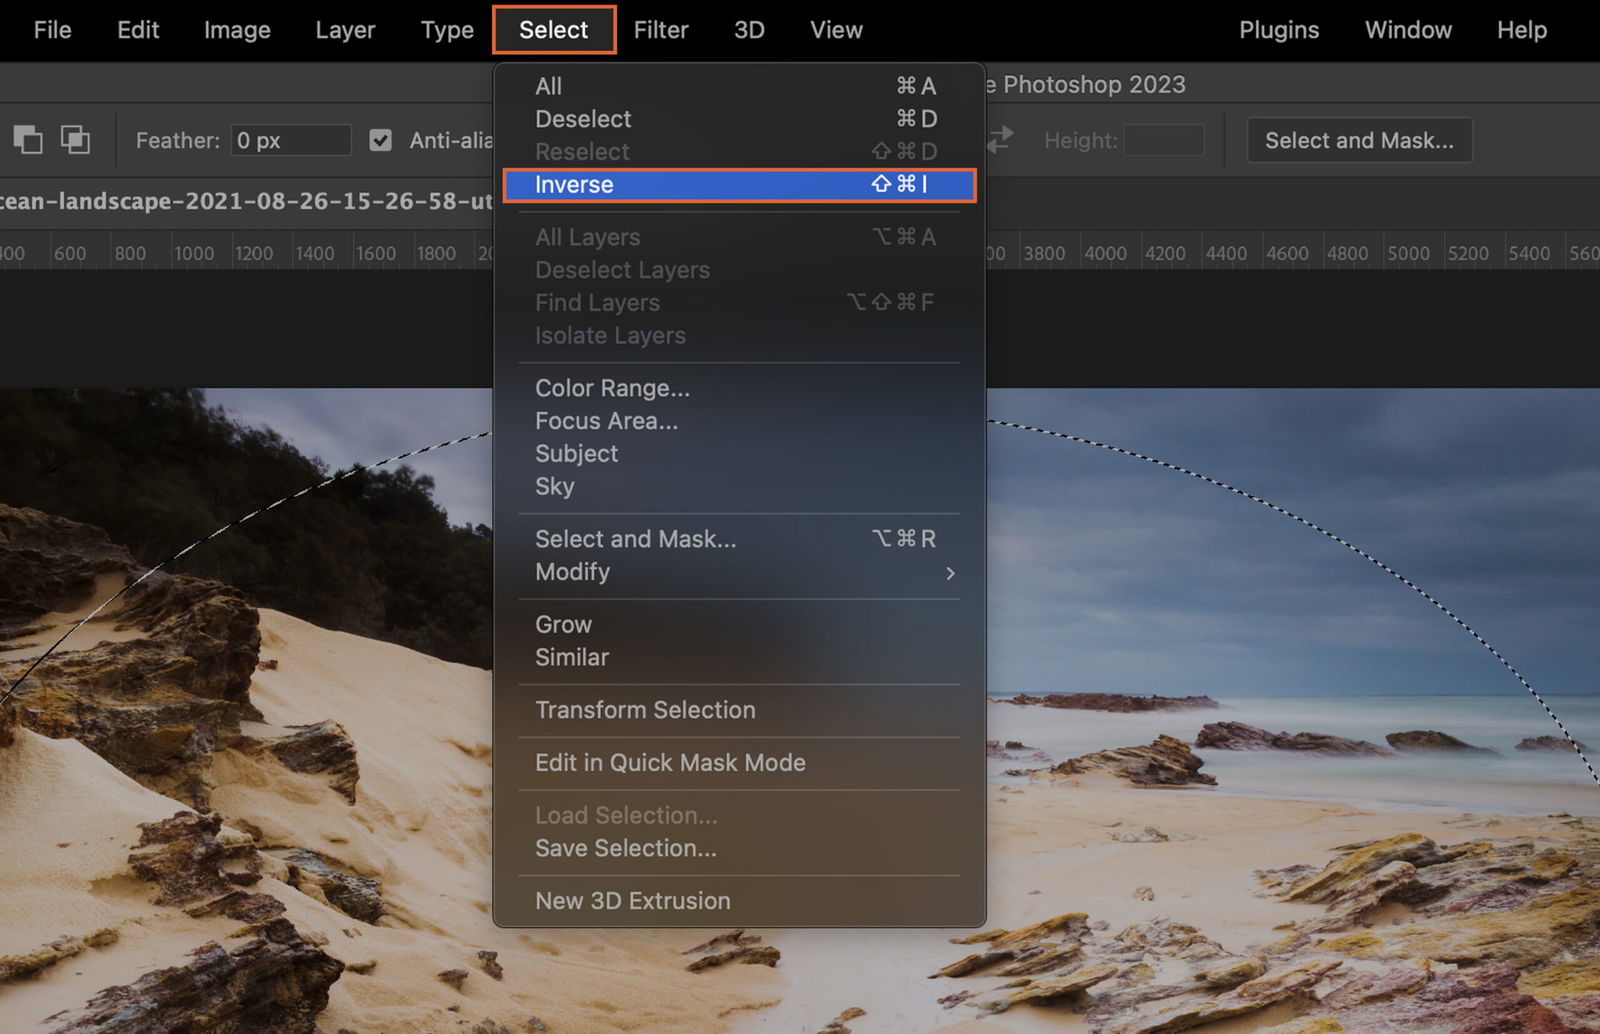
Now we need to invert our selection so that the vignette will be applied to the outer edges of the image. Simply go to the top menu bar, select “Select”, and then choose “Inverse”.
Next, let’s create a new adjustment layer. In the Layers panel, click on the icon that looks like a half-filled circle, then select either “Levels” or “Curves”. This will create a new adjustment layer and automatically apply it to your inverted selection.
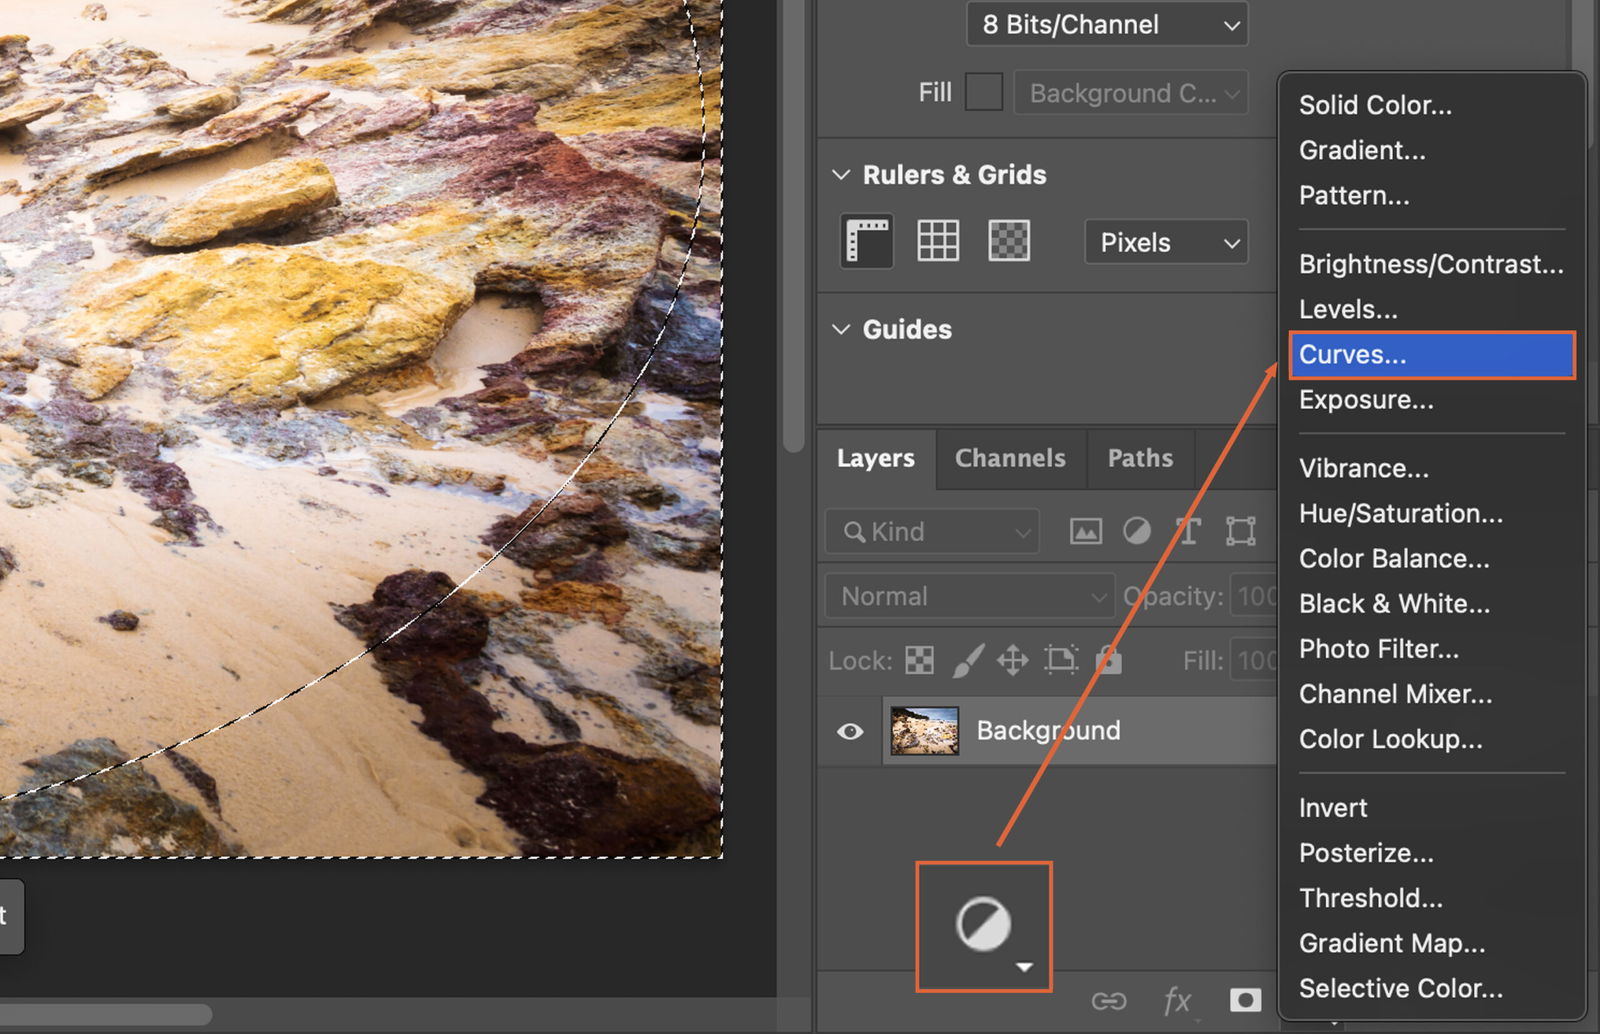
If you chose “Levels” in the previous step, you can create a vignette effect by simply dragging the midpoint of the histogram to the right.

If you chose “Curves”, create a vignette effect by clicking on the center of the curve and dragging it downwards. This will darken the outer edges of your image.
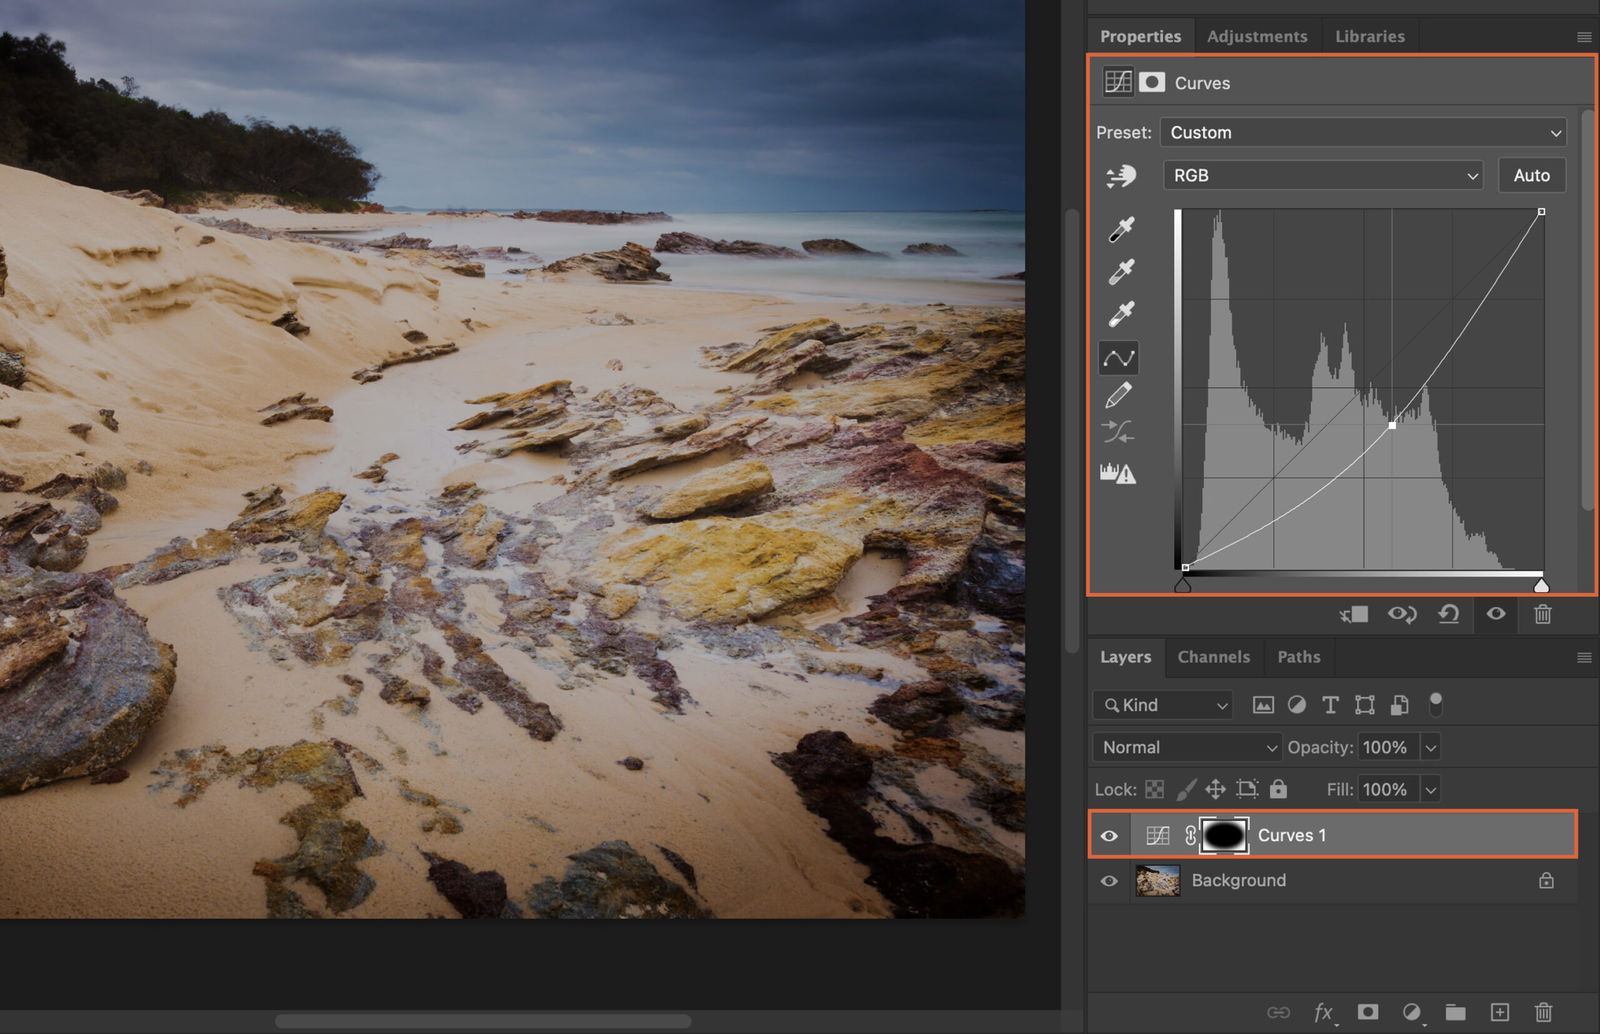
Feel free to tweak the intensity of your vignette by adjusting the “Levels” or “Curves” to your liking.
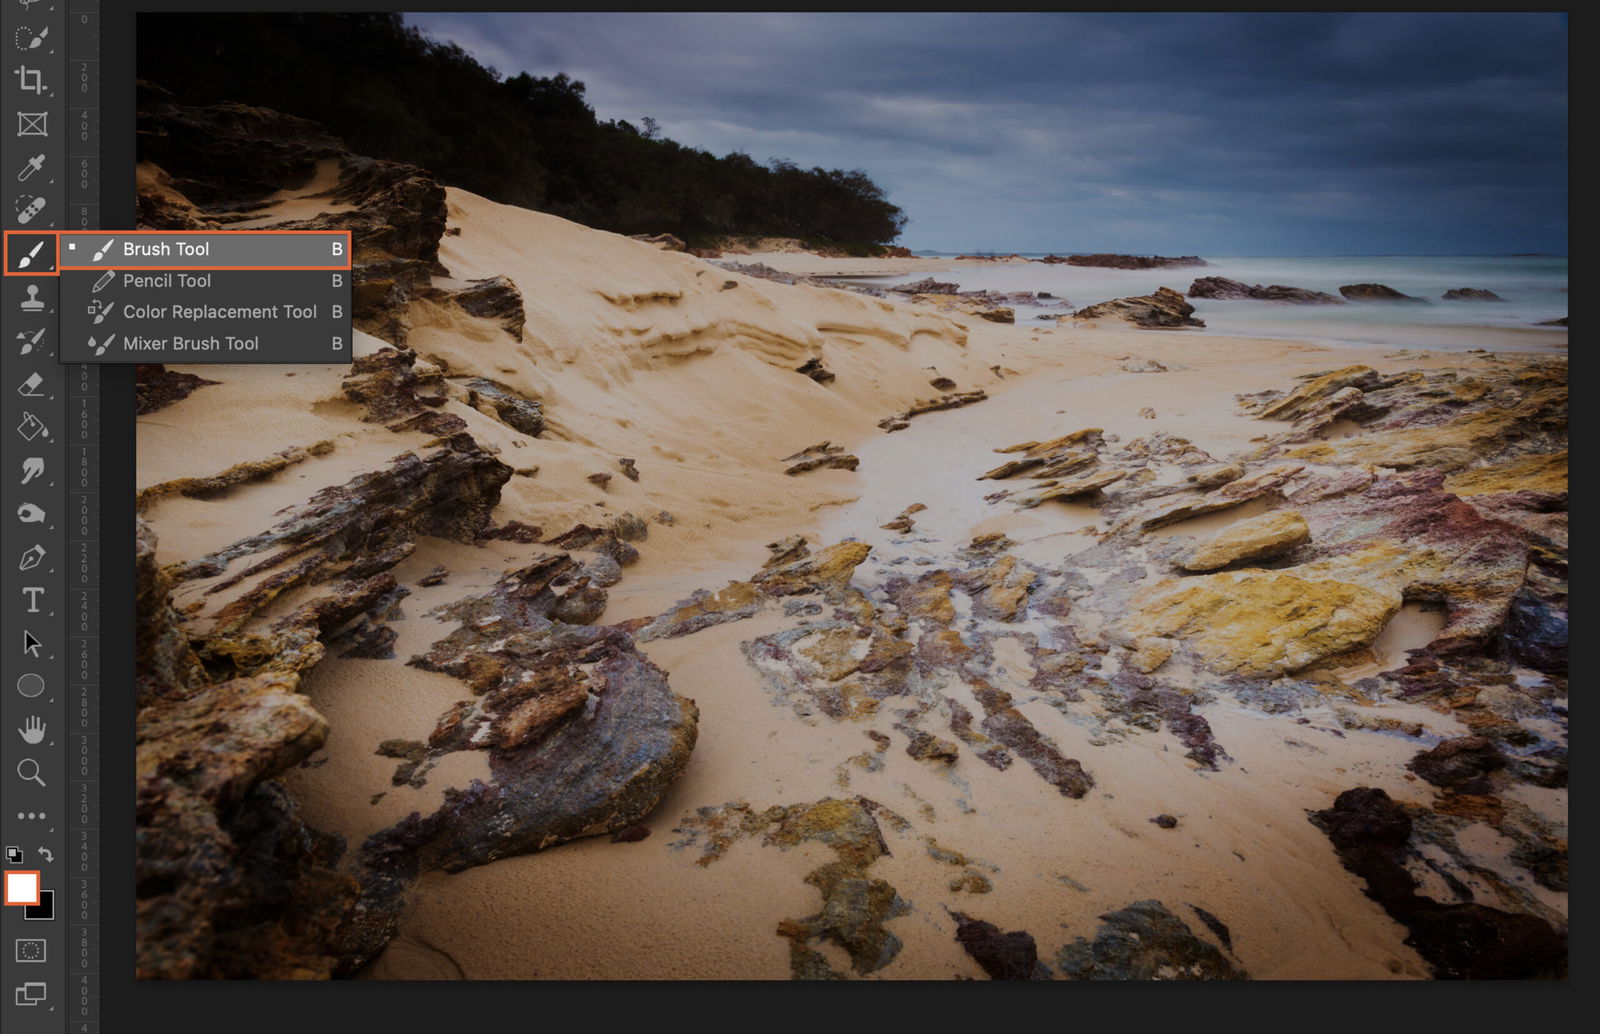
If needed, you can further fine-tune your vignette by using the “Brush” tool with a low opacity to manually darken (White color) or lighten (Black color) certain areas. And there you have it, a beautiful vignette effect created in Photoshop!
![P32 [Lead gen] sidebar banner Related ebook](https://expertphotography.b-cdn.net/wp-content/uploads/2021/10/P32-Lead-gen-sidebar-banner-Related-ebook-300x295.jpg)
![P32 [Lead gen] Sidebar Banner](https://expertphotography.b-cdn.net/wp-content/uploads/2021/10/P32-Lead-gen-Sidebar-Banner-300x245.png)
![P32 [Lead gen] Sidebar Banner 2](https://expertphotography.b-cdn.net/wp-content/uploads/2021/10/P32-Lead-gen-Sidebar-Banner-2-300x245.png)