Creating overlays in Photoshop can seem like a daunting task, especially if you’re new to the software. Overlays can add depth, highlight specific areas, or simply give your image a unique aesthetic touch. However, the process can feel complex without a clear step-by-step guide. This article aims to solve that problem. It offers a comprehensive, easy-to-follow tutorial on how to create an overlay in Photoshop. From creating a new layer to saving your finished overlay, every step is clearly explained and illustrated. Whether you’re a beginner or just need a quick refresher, this article will make the process of creating overlays in Photoshop straightforward and enjoyable.


This is your starting point. A new layer gives you a fresh canvas to work on.
Spot the ‘Layer’ panel on the right side of your workspace. Click on the ‘Create New Layer’ button at the bottom. It looks like a square with a plus sign.
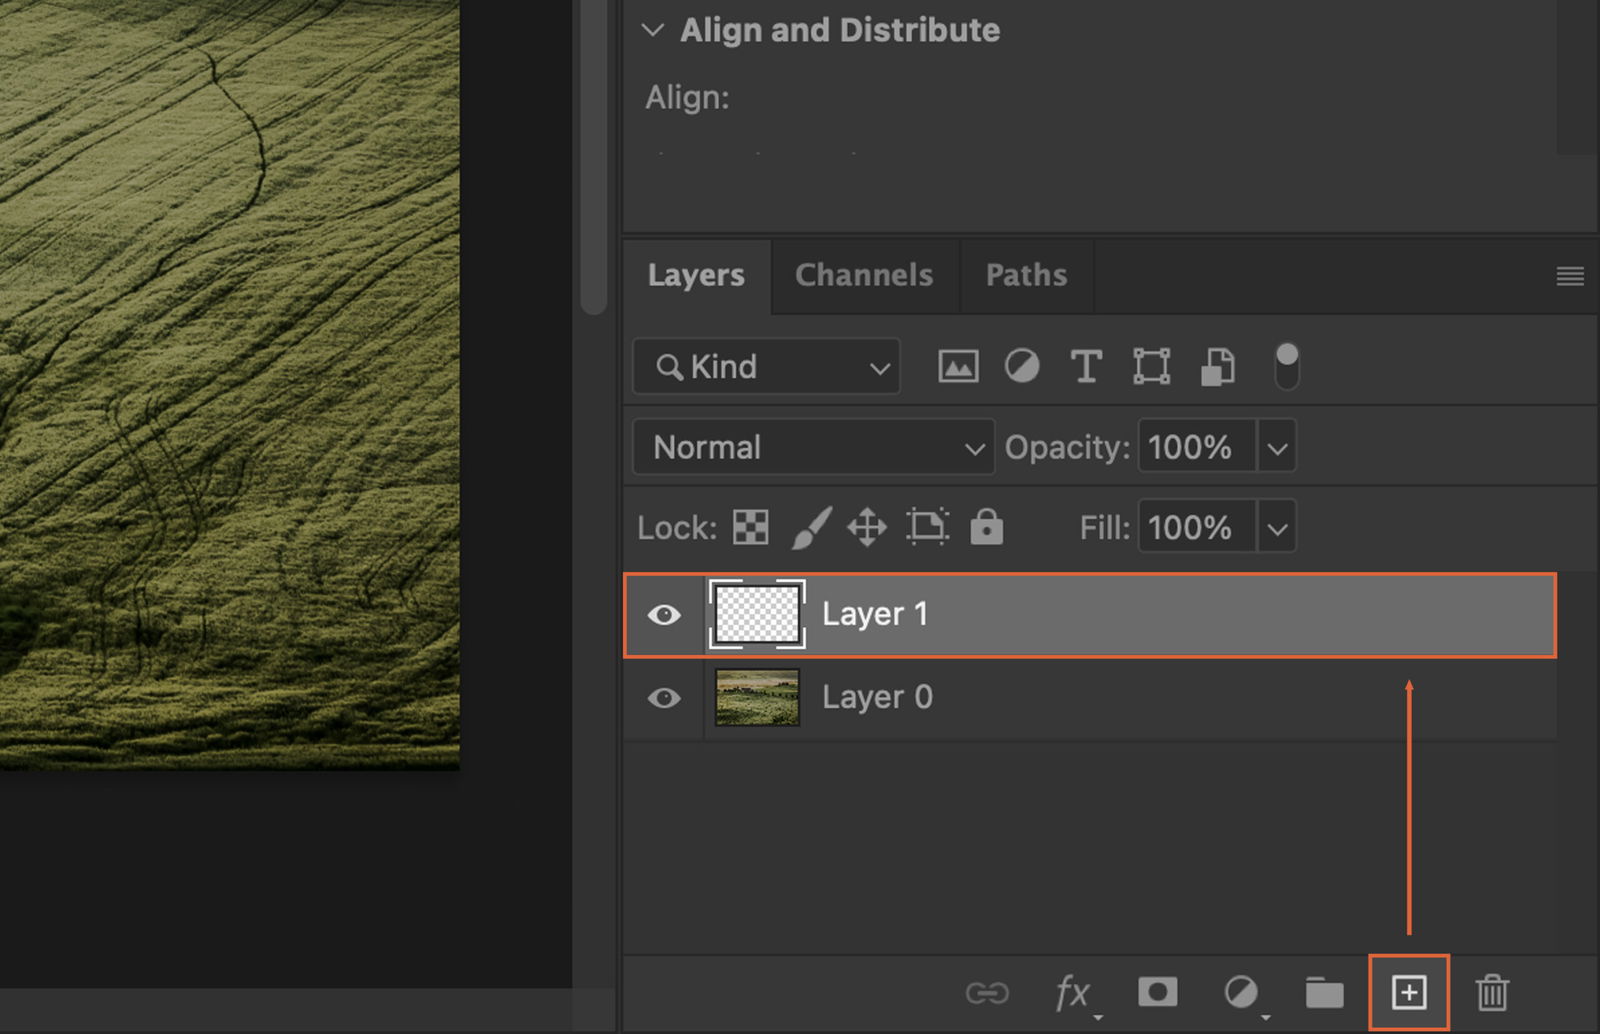
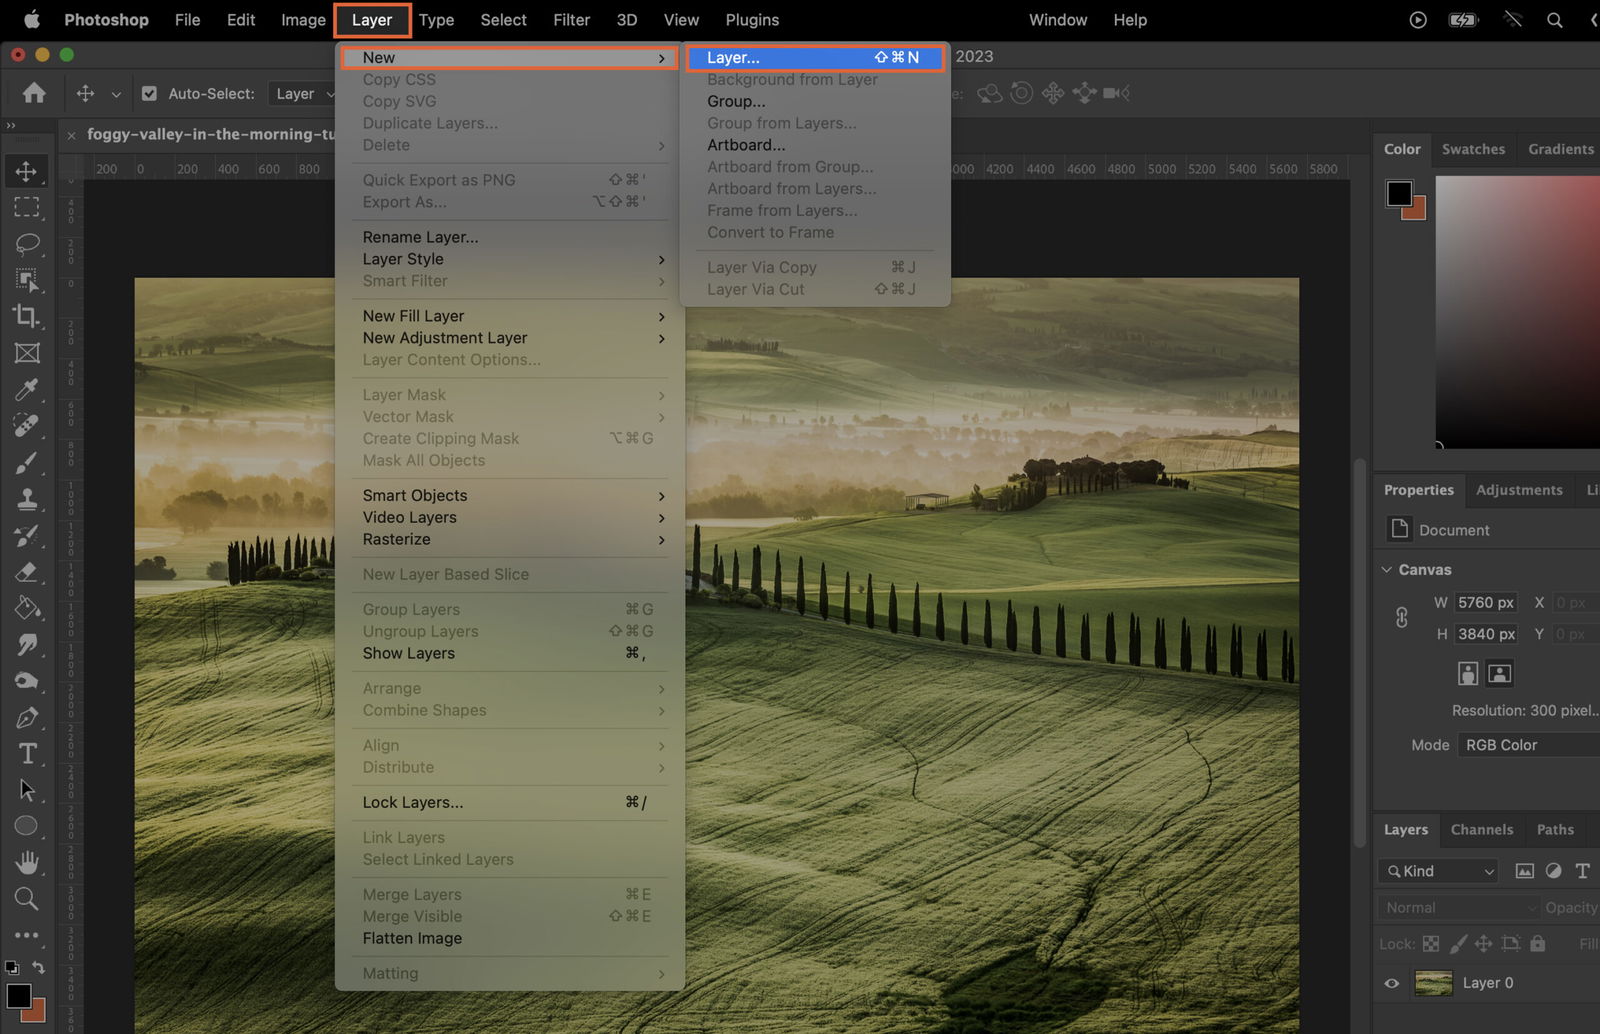
You can also go to the top menu. Choose ‘Layer’, then ‘New’, and finally ‘Layer’. A dialog box will pop up. Hit ‘OK’ to create your new layer.
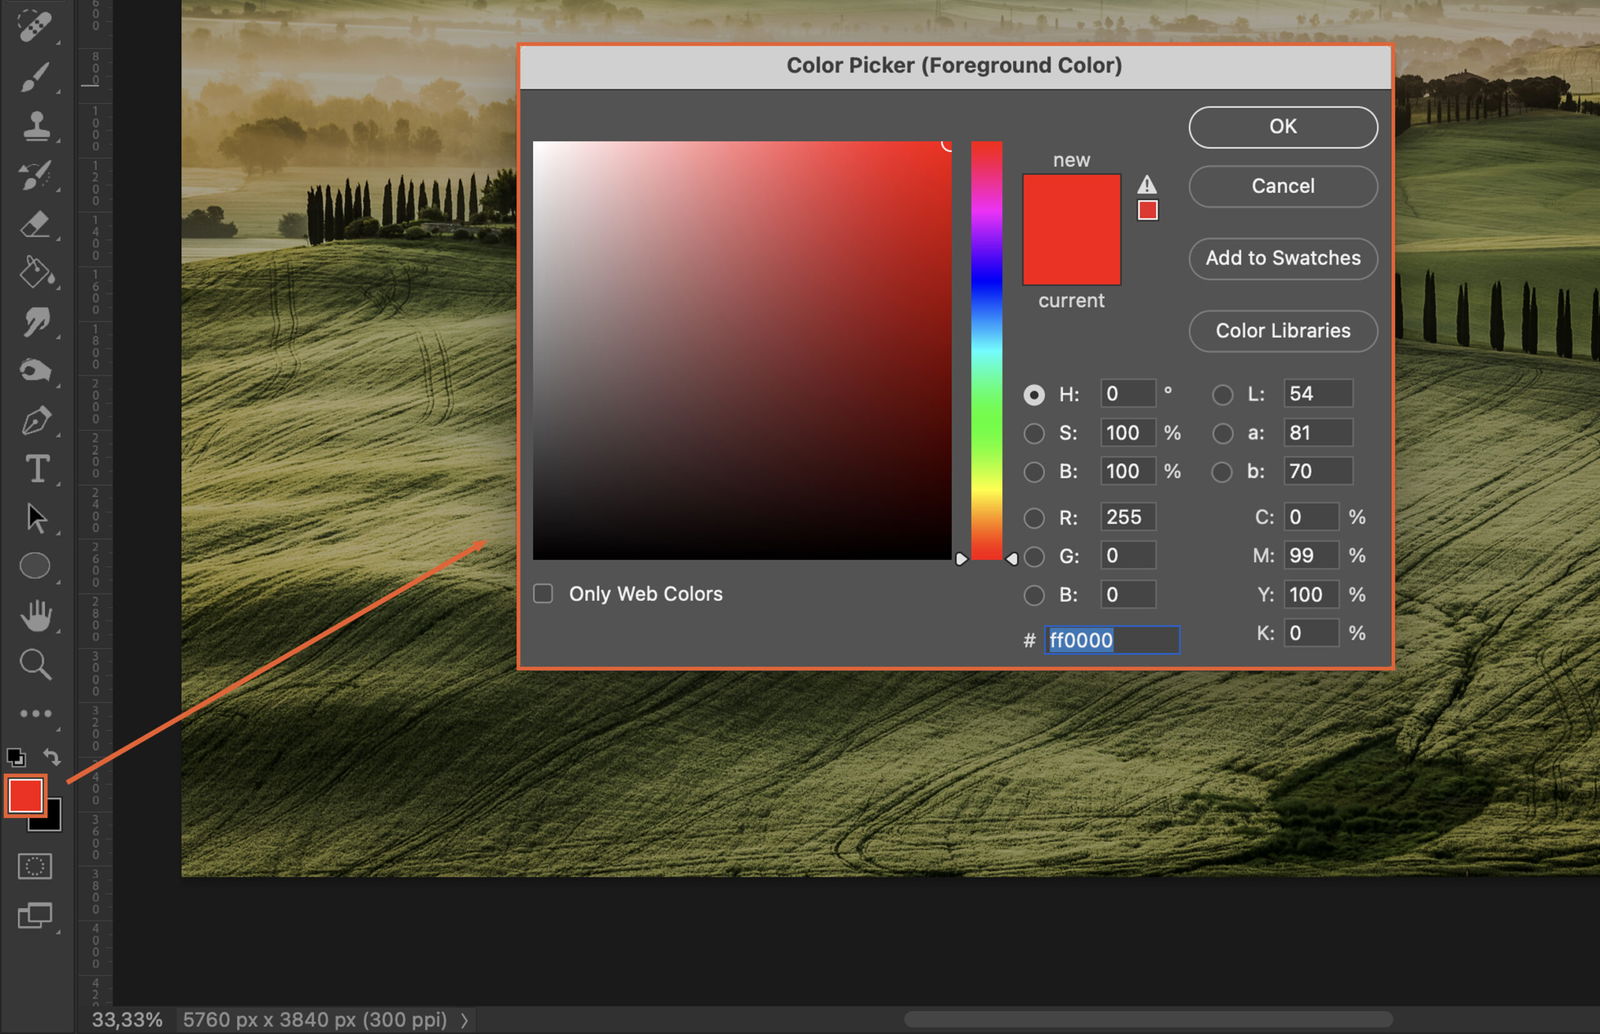
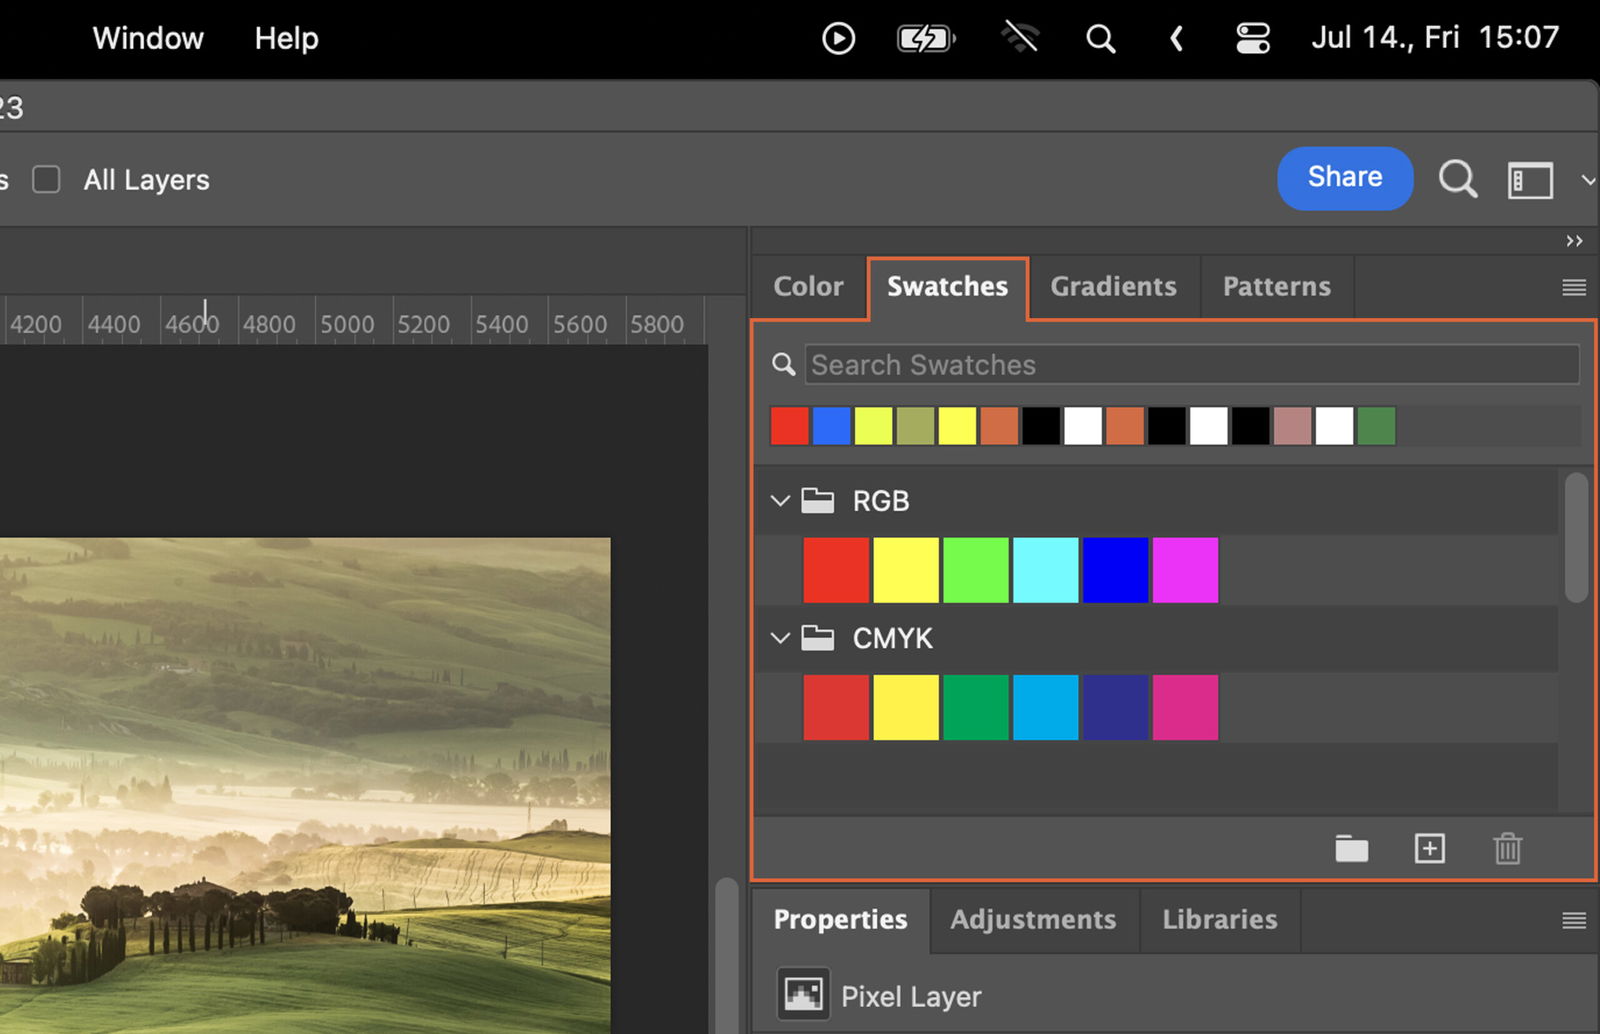
Now, it’s time to decide on the overlay color. You can use the Color Picker Tool or the Swatches Panel.
Click on the ‘Foreground Color’ box at the bottom of the tools panel. This opens the ‘Color Picker’ dialog box. Choose your color and hit ‘OK’.
Or you can select a color from the ‘Swatches’ Panel. Just click on the color you want to use.
Next, you need to fill your new layer with the color you picked.
Grab the ‘Paint Bucket’ tool from the tools panel. Click anywhere on your new layer to fill it with color.
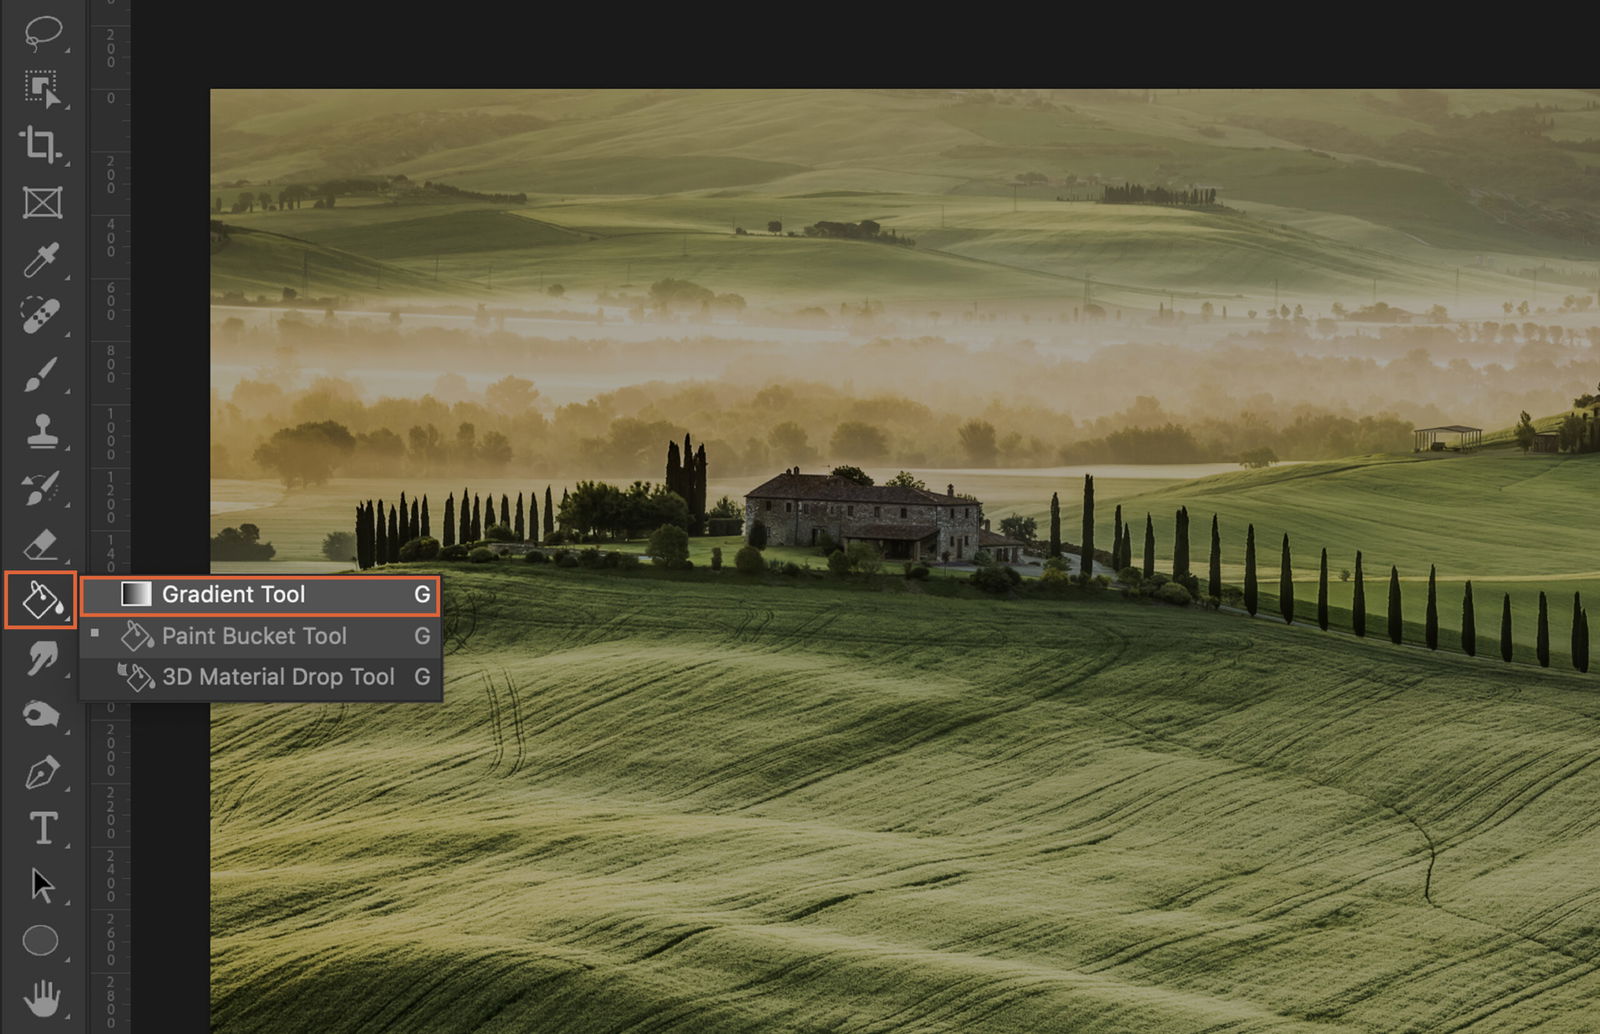
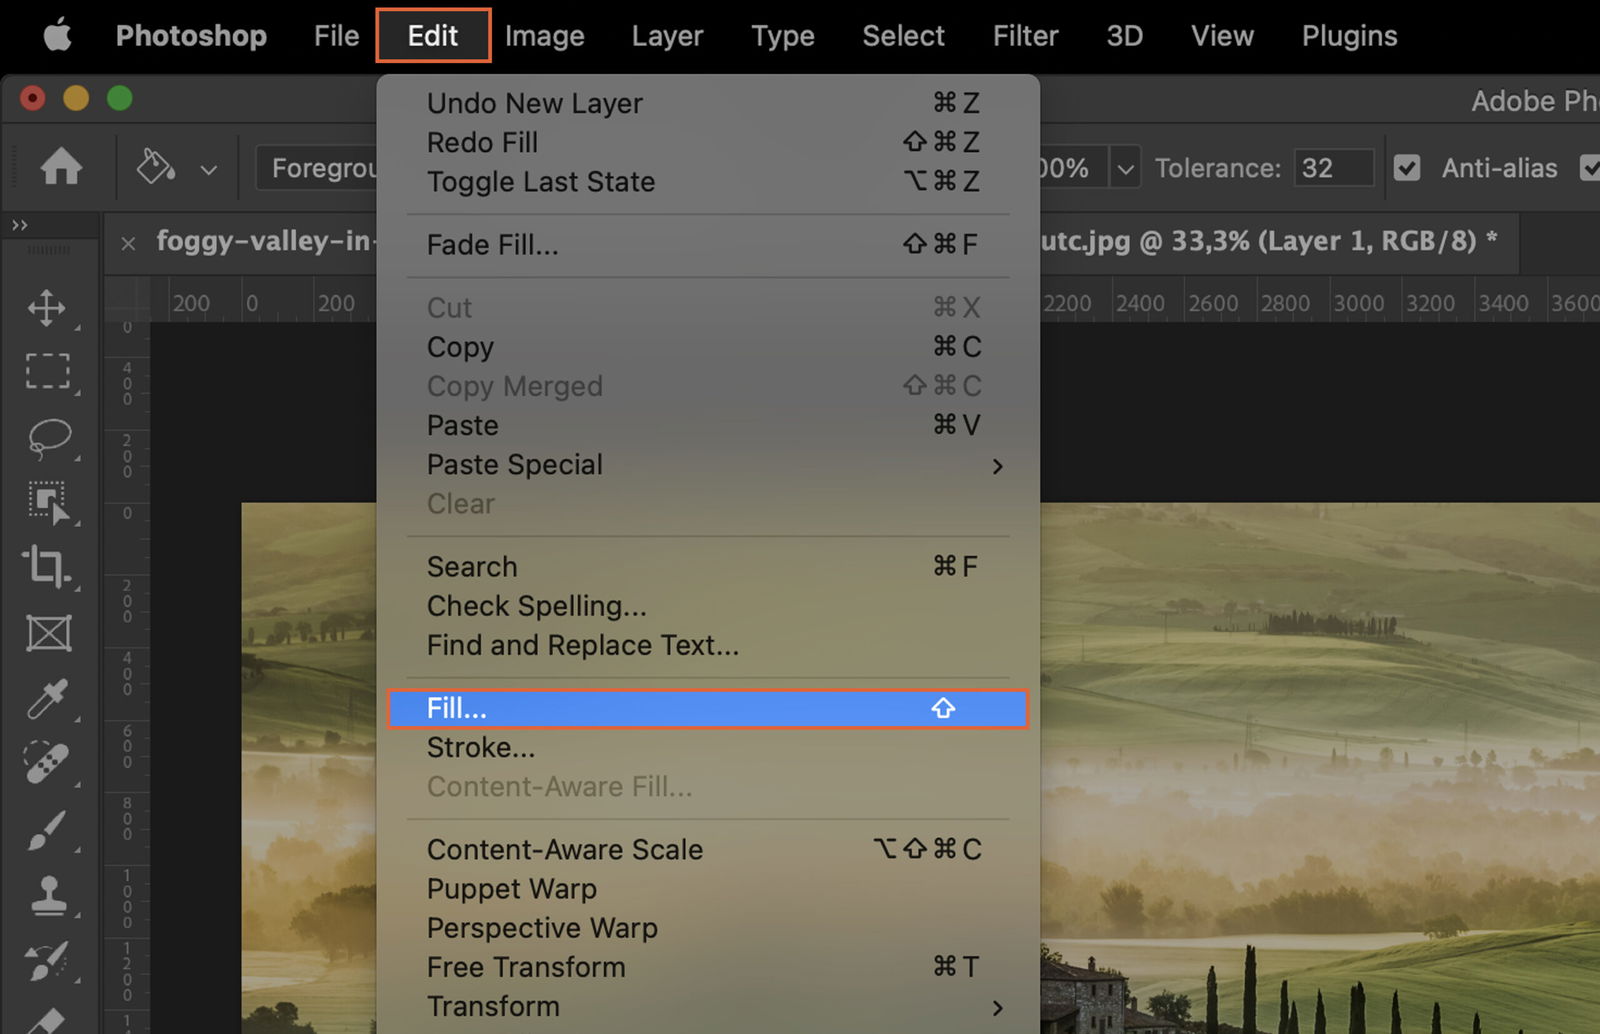
Alternatively, go to ‘Edit’ in the top menu. Choose ‘Fill’. In the ‘Contents’ section, make sure ‘Foreground Color’ is selected. Click ‘OK’.
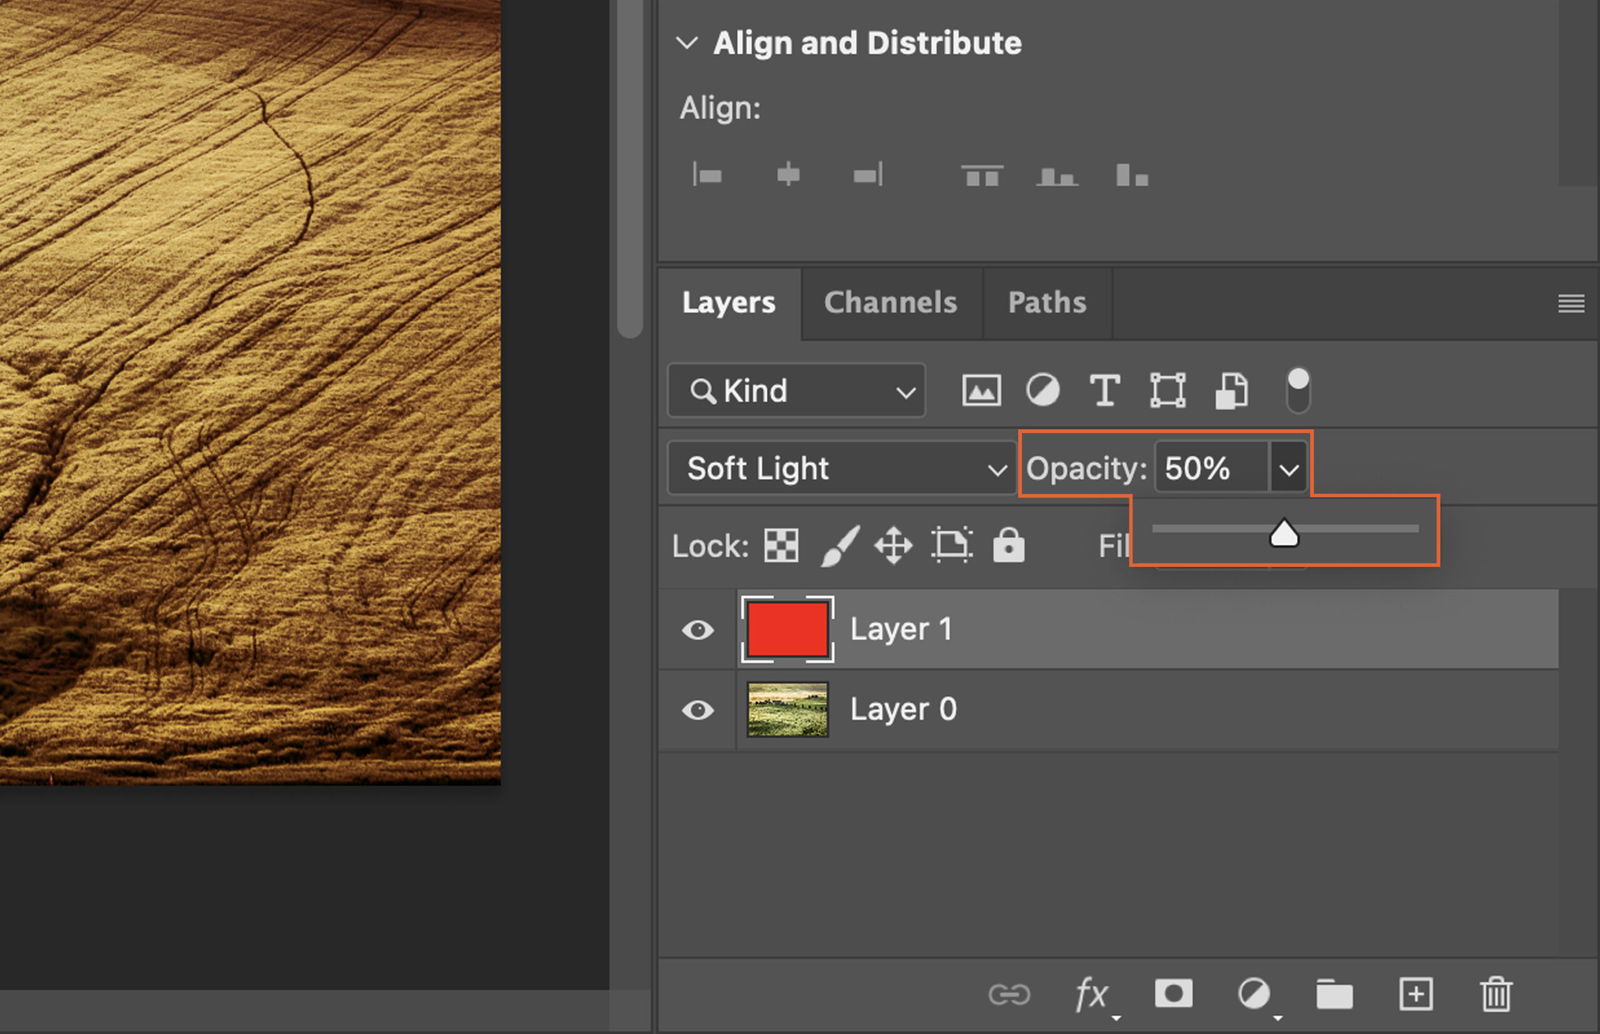
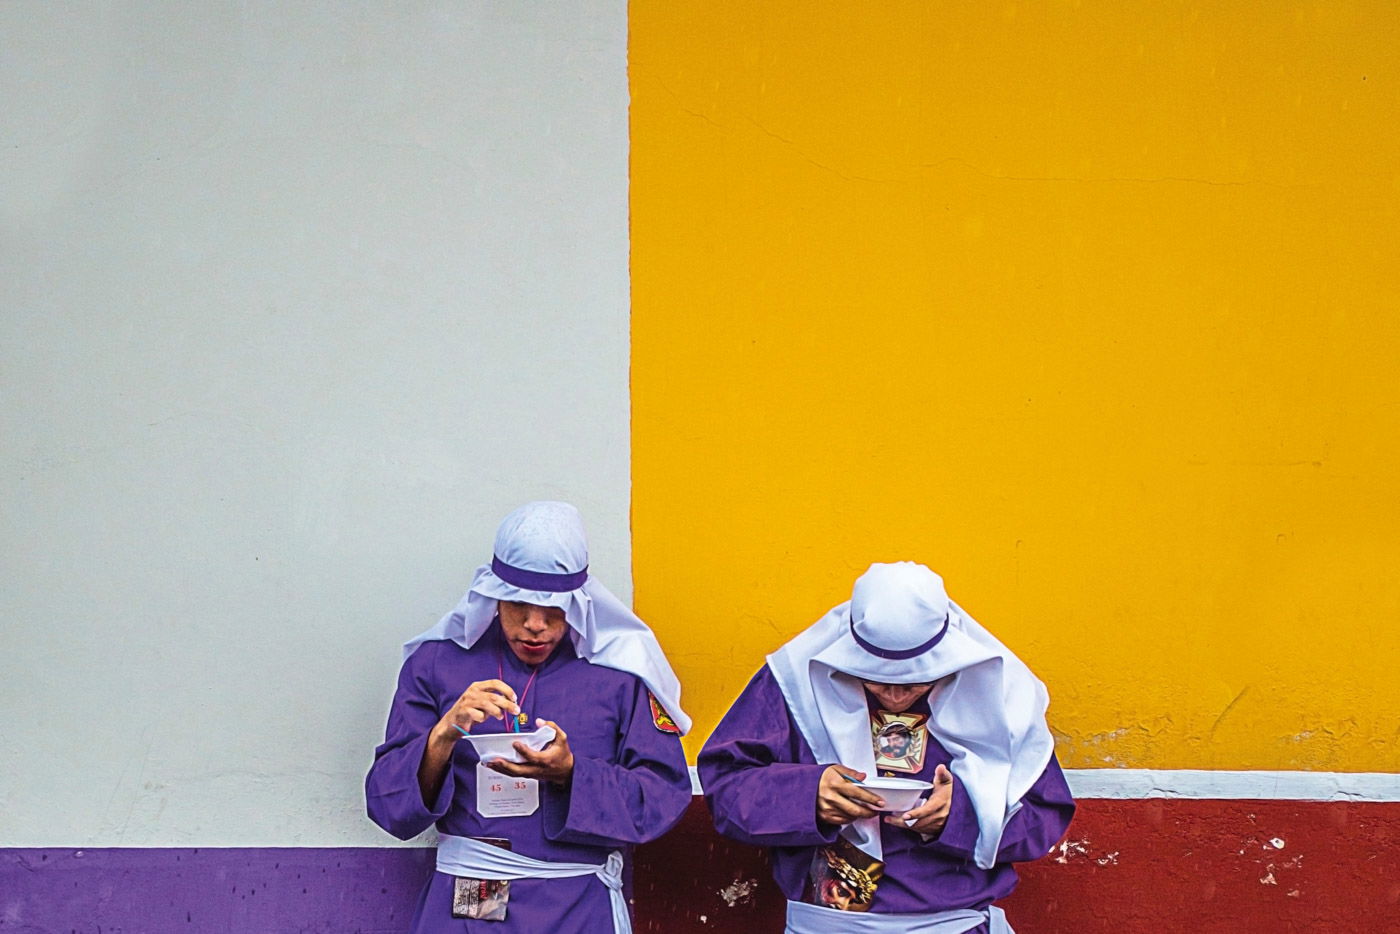
In the ‘Layers’ panel, you’ll see a drop-down box labeled ‘Normal’. Click on this and select ‘Overlay’. Your color layer now interacts with the layers beneath it, creating an overlay effect.
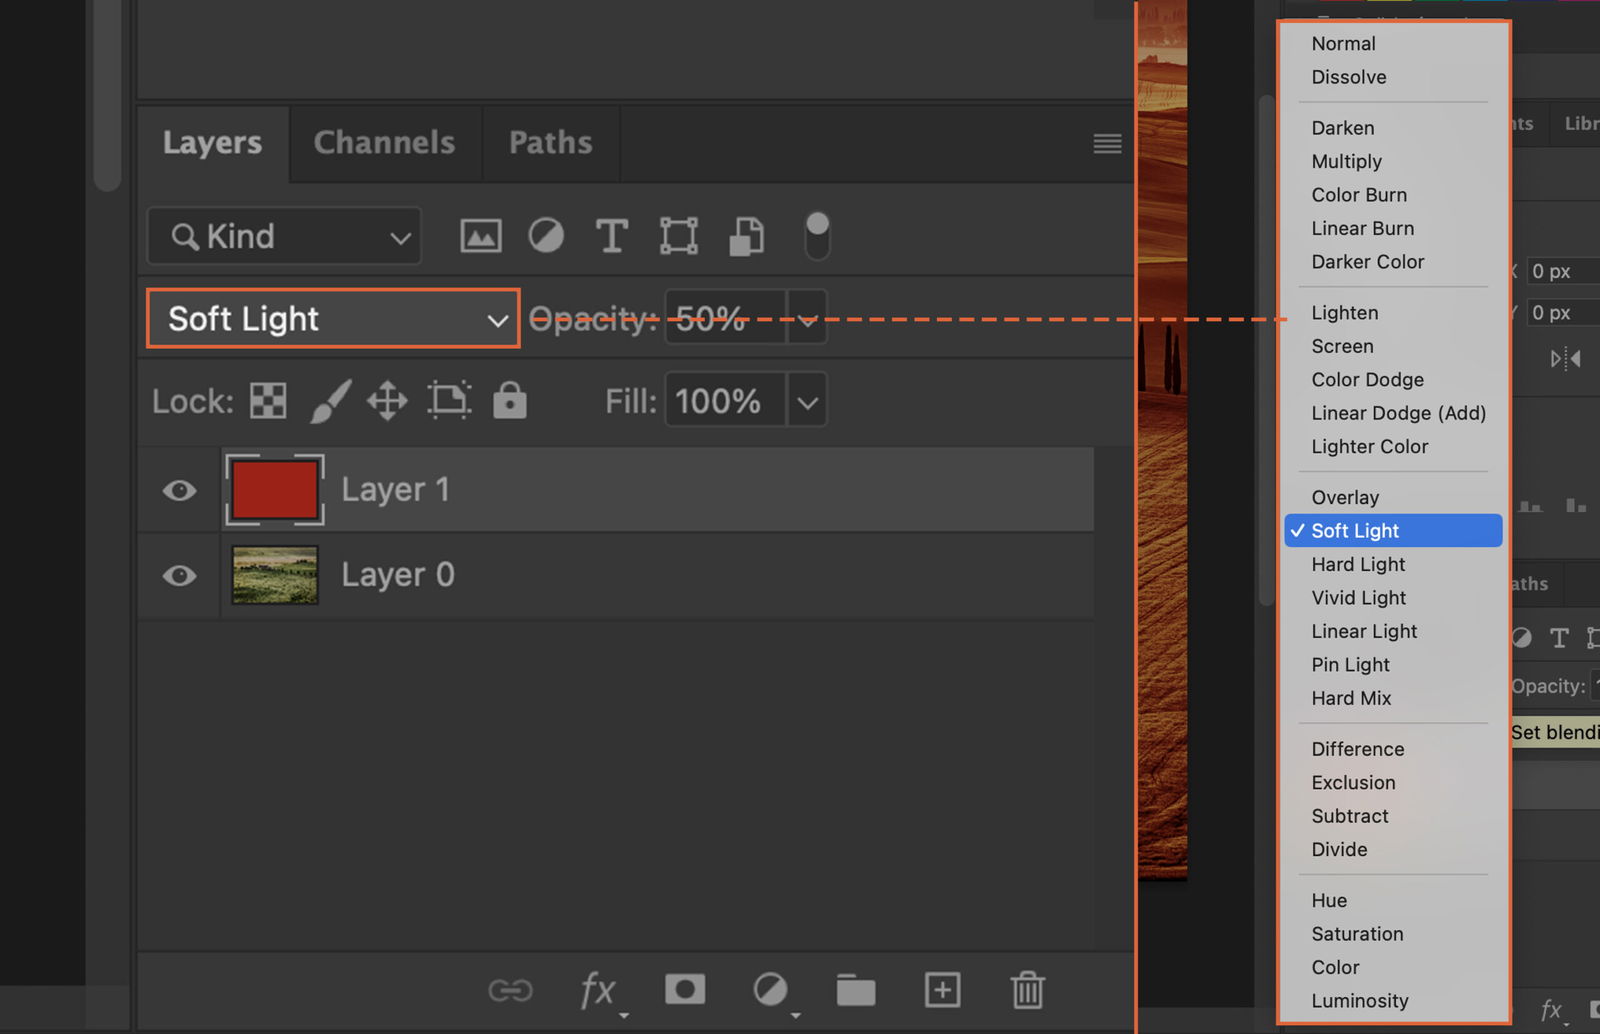
If your overlay is too strong, adjust its opacity. In the ‘Layers’ panel, slide the ‘Opacity’ bar until you’re happy with the look.
Want to add text to your overlay? No problem.
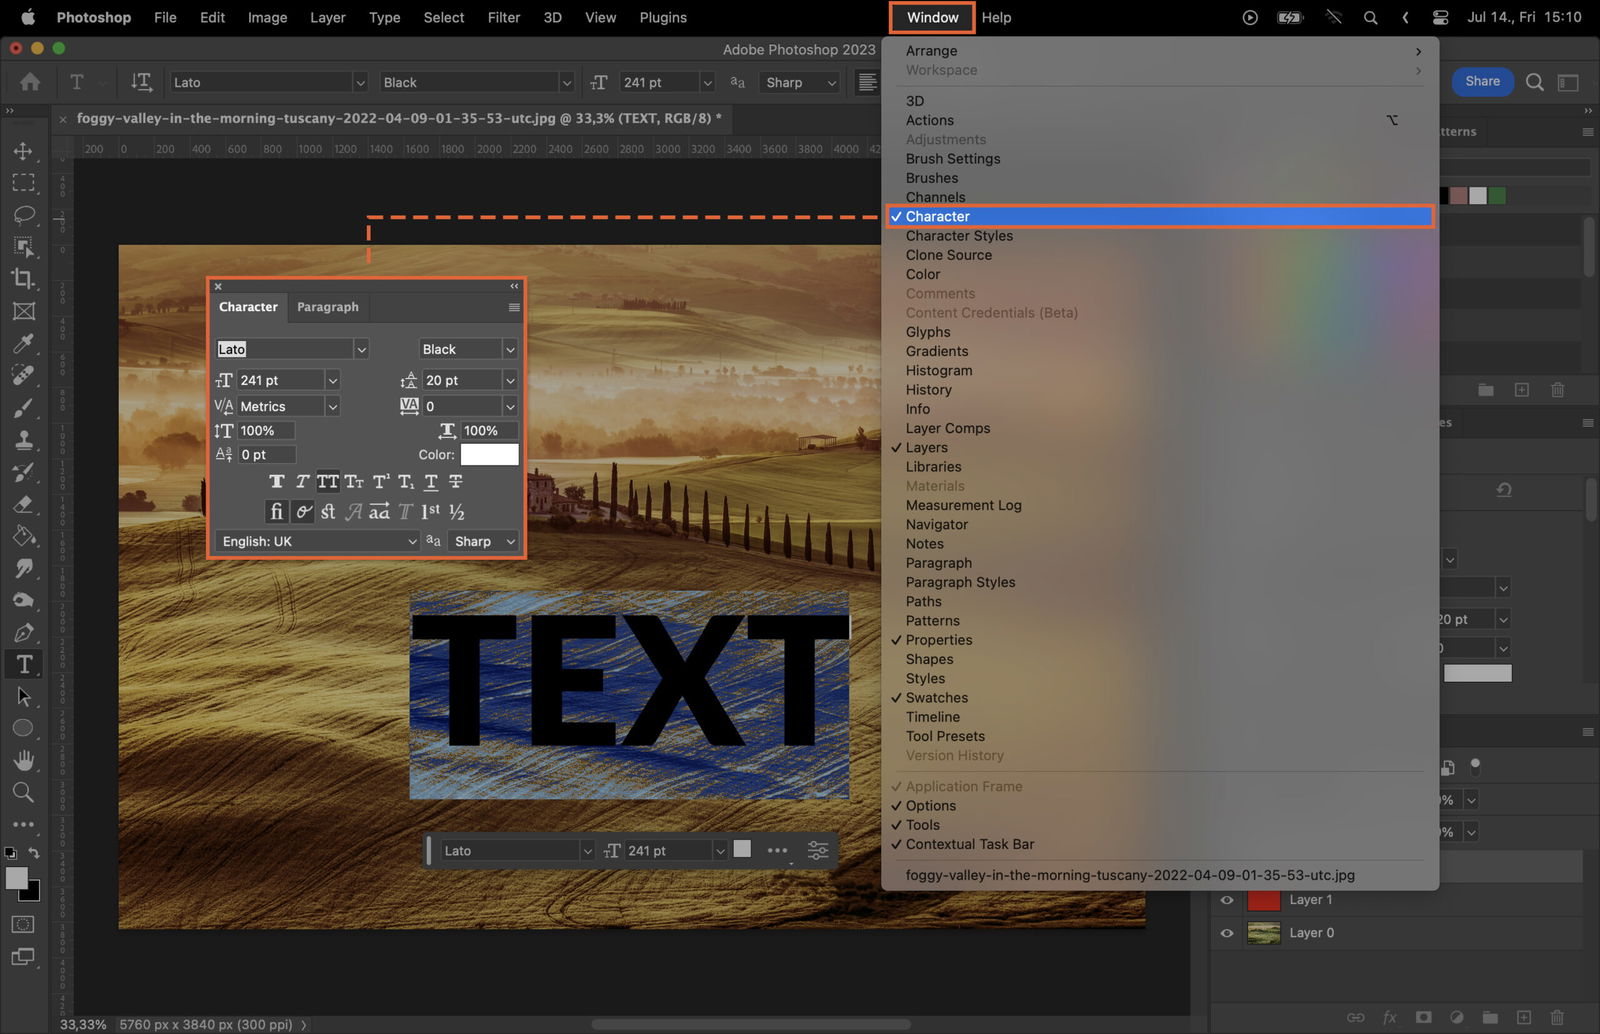
Select the ‘Text’ tool from the tools panel. Click on your image and start typing.
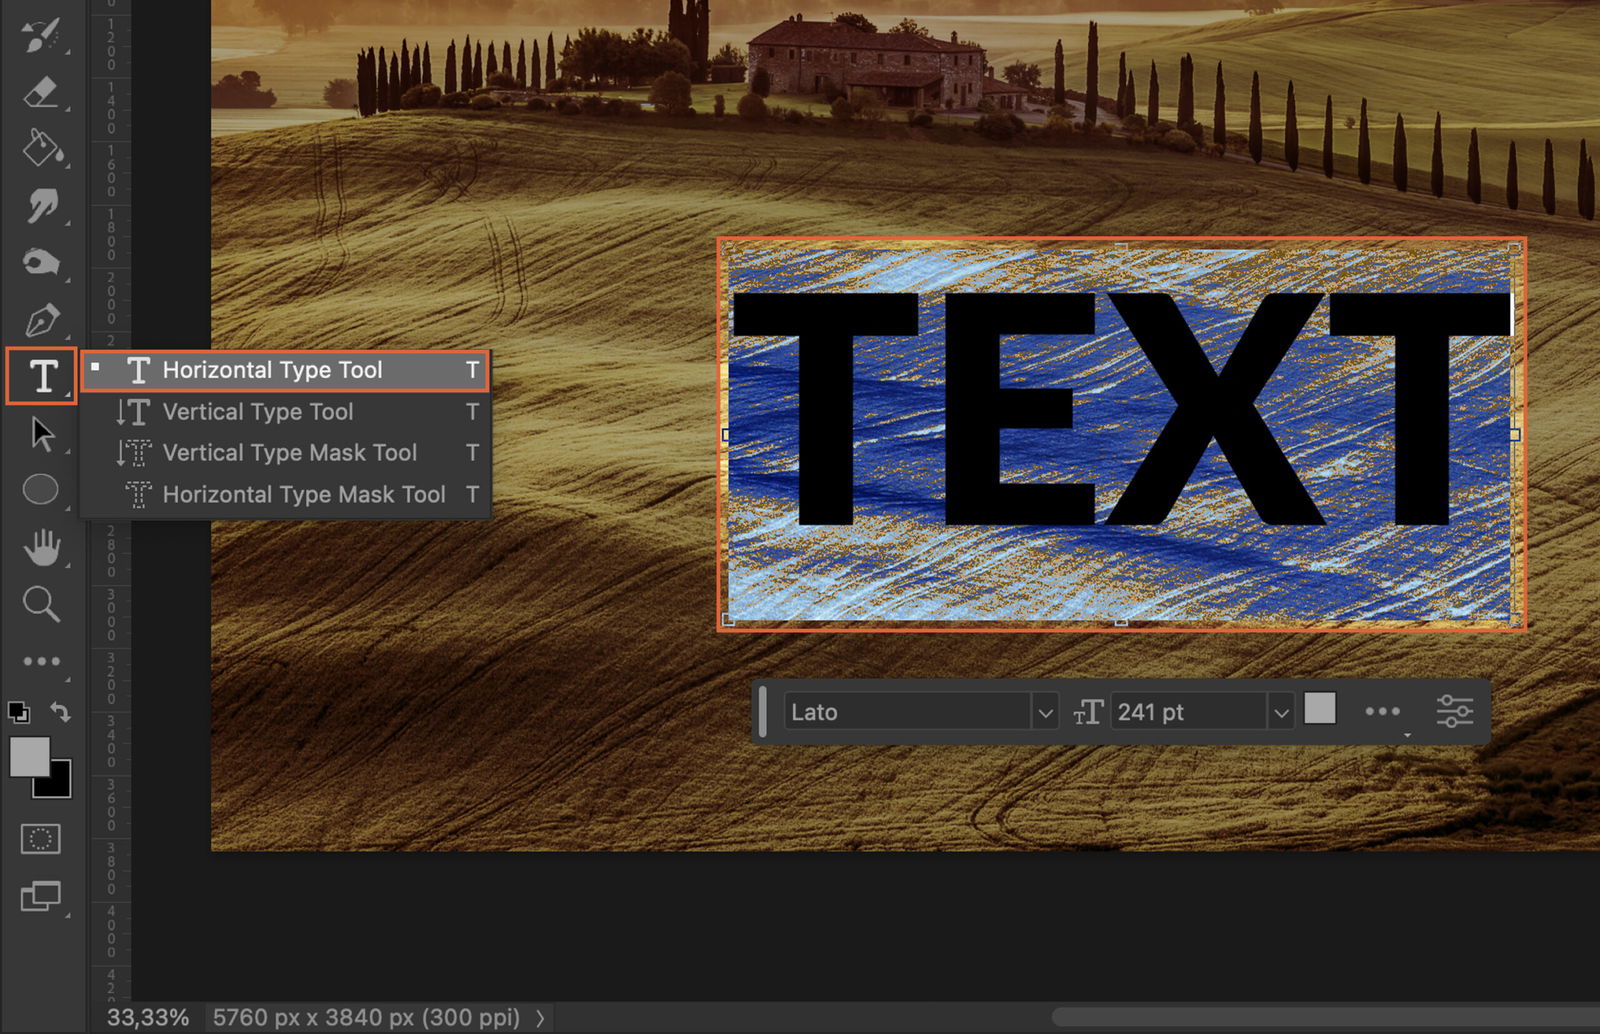
The ‘Character’ panel lets you adjust the font, size, and color of your text. It’s usually found on the right, grouped with the ‘Layers’ panel.
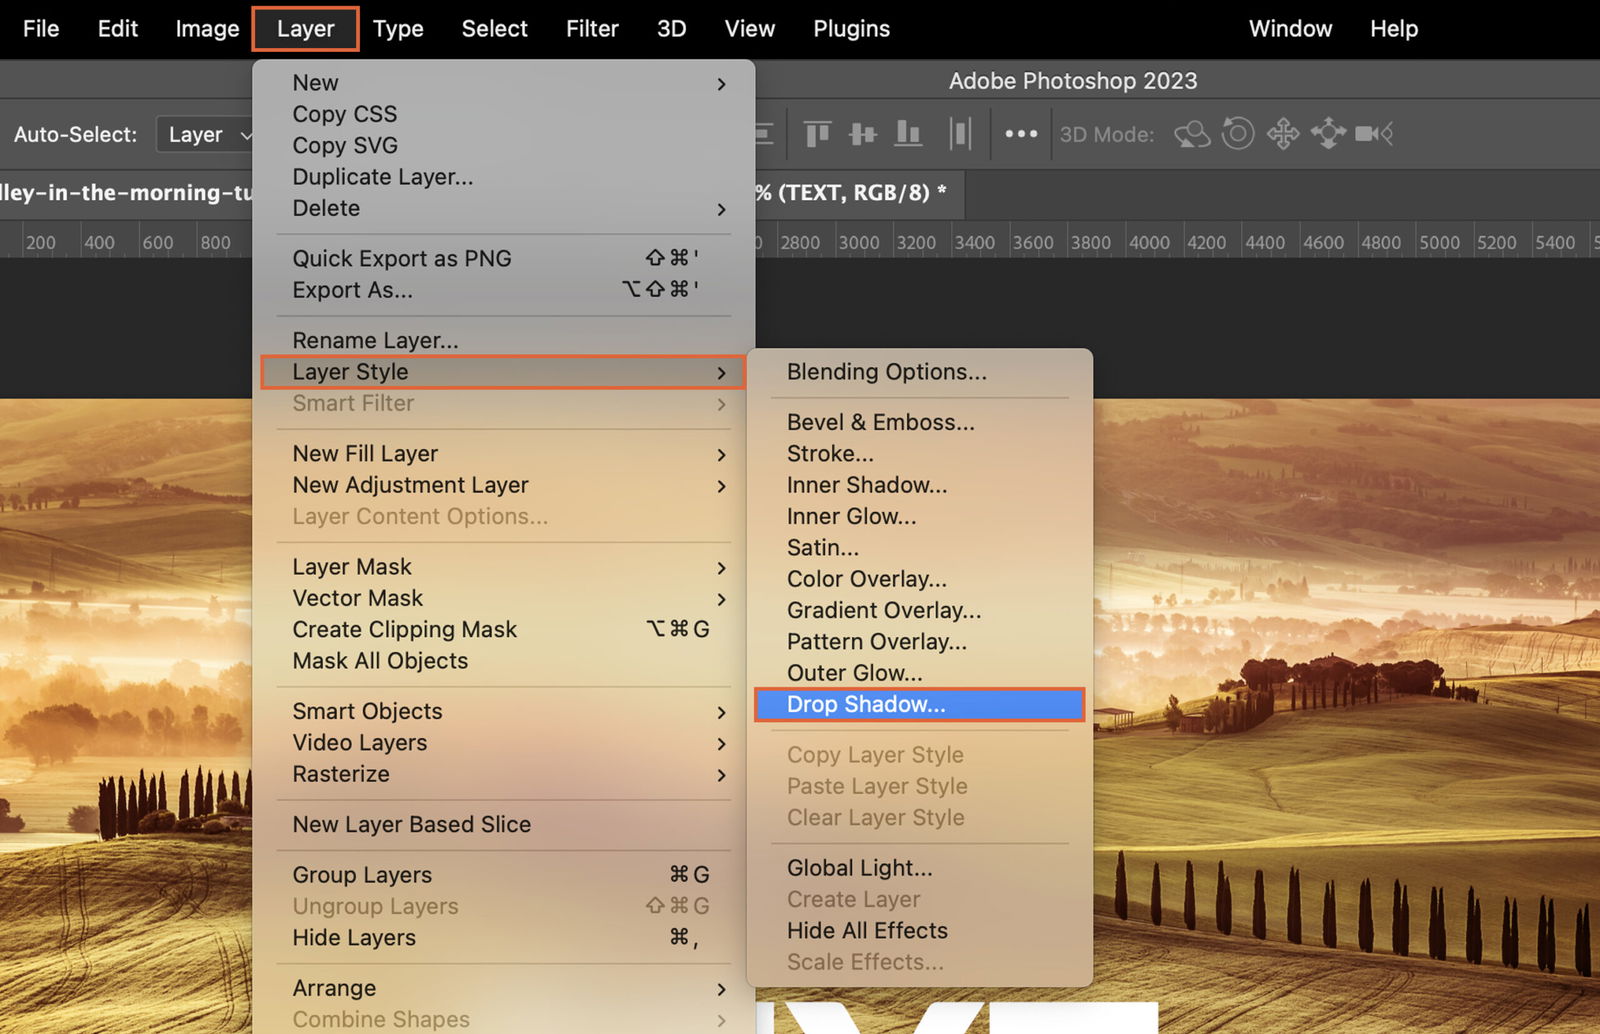
Let’s make your text pop!
With your text layer selected, go to ‘Layer’, ‘Layer Style’, then ‘Drop Shadow’. Play with the settings until you get the shadow you want.
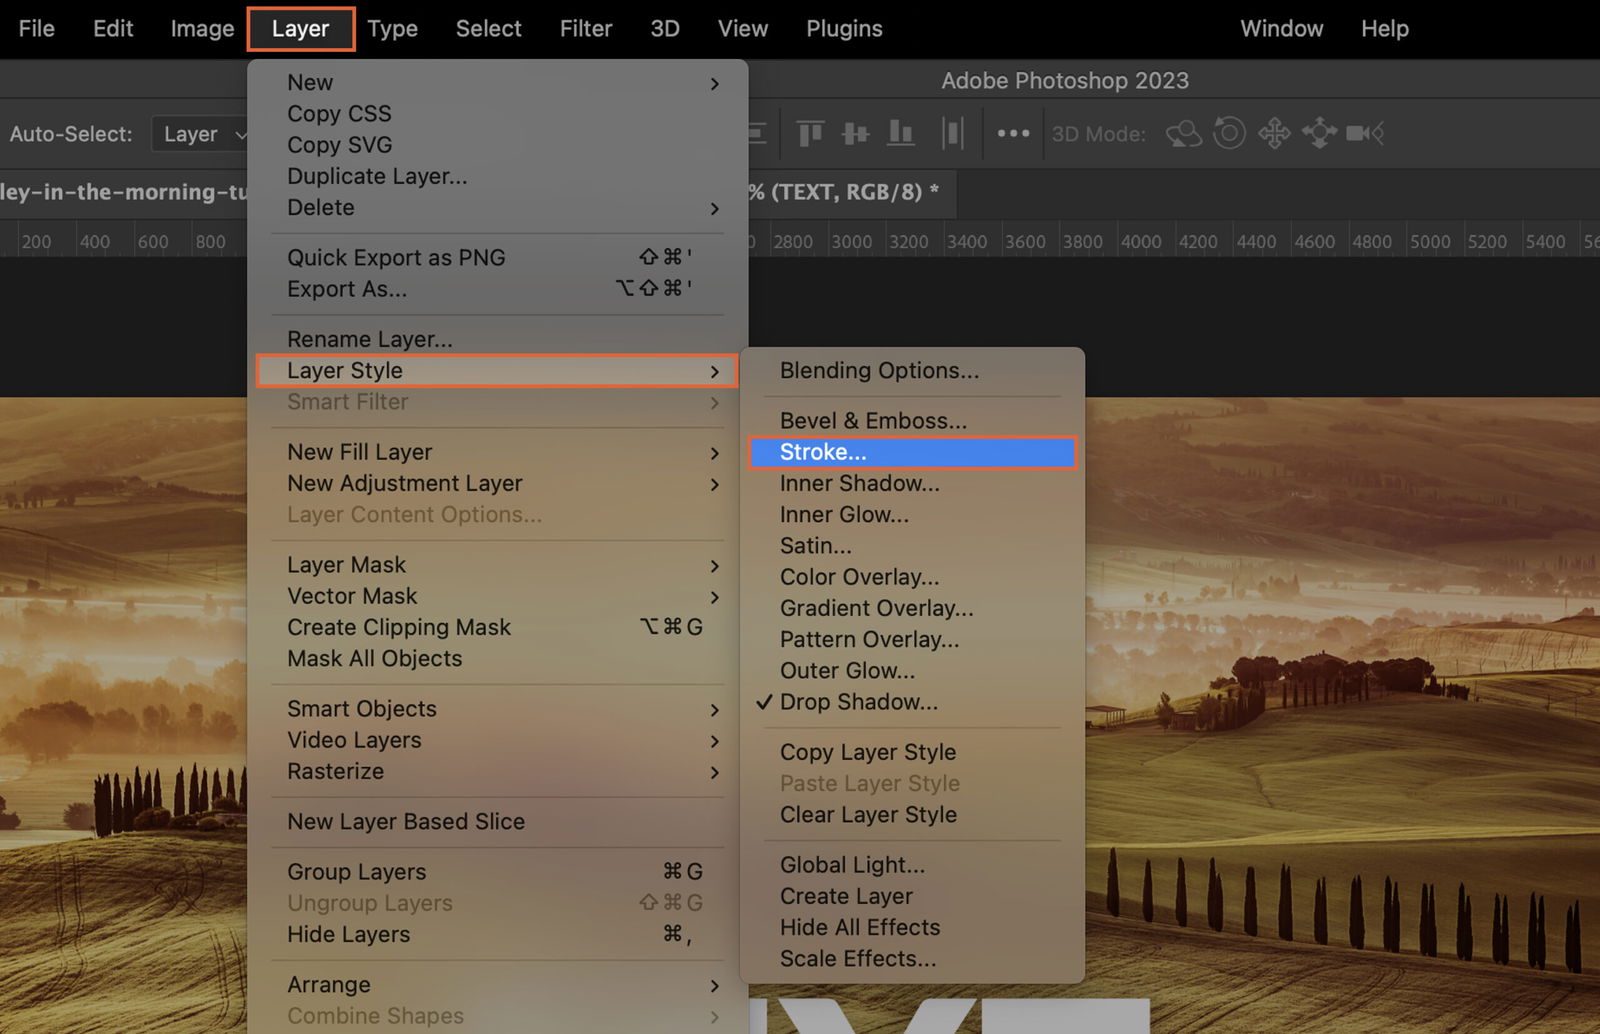
To add a border around your text, choose ‘Stroke’ from the ‘Layer Style’ menu. Adjust the size and color to your liking.
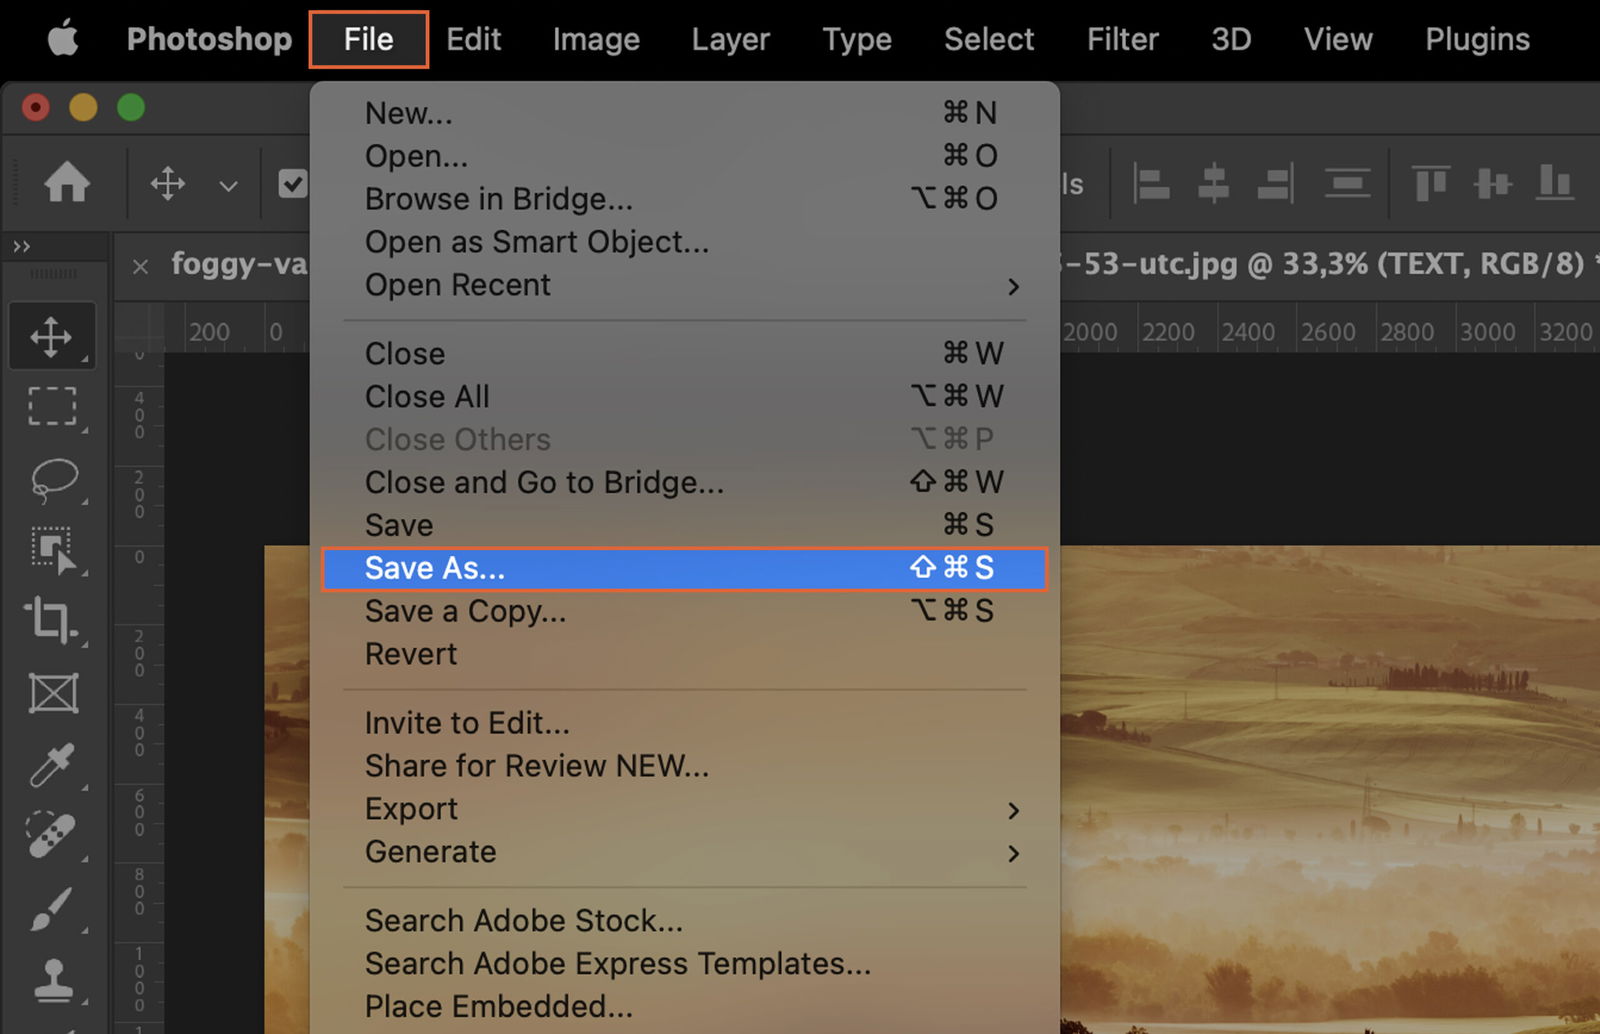
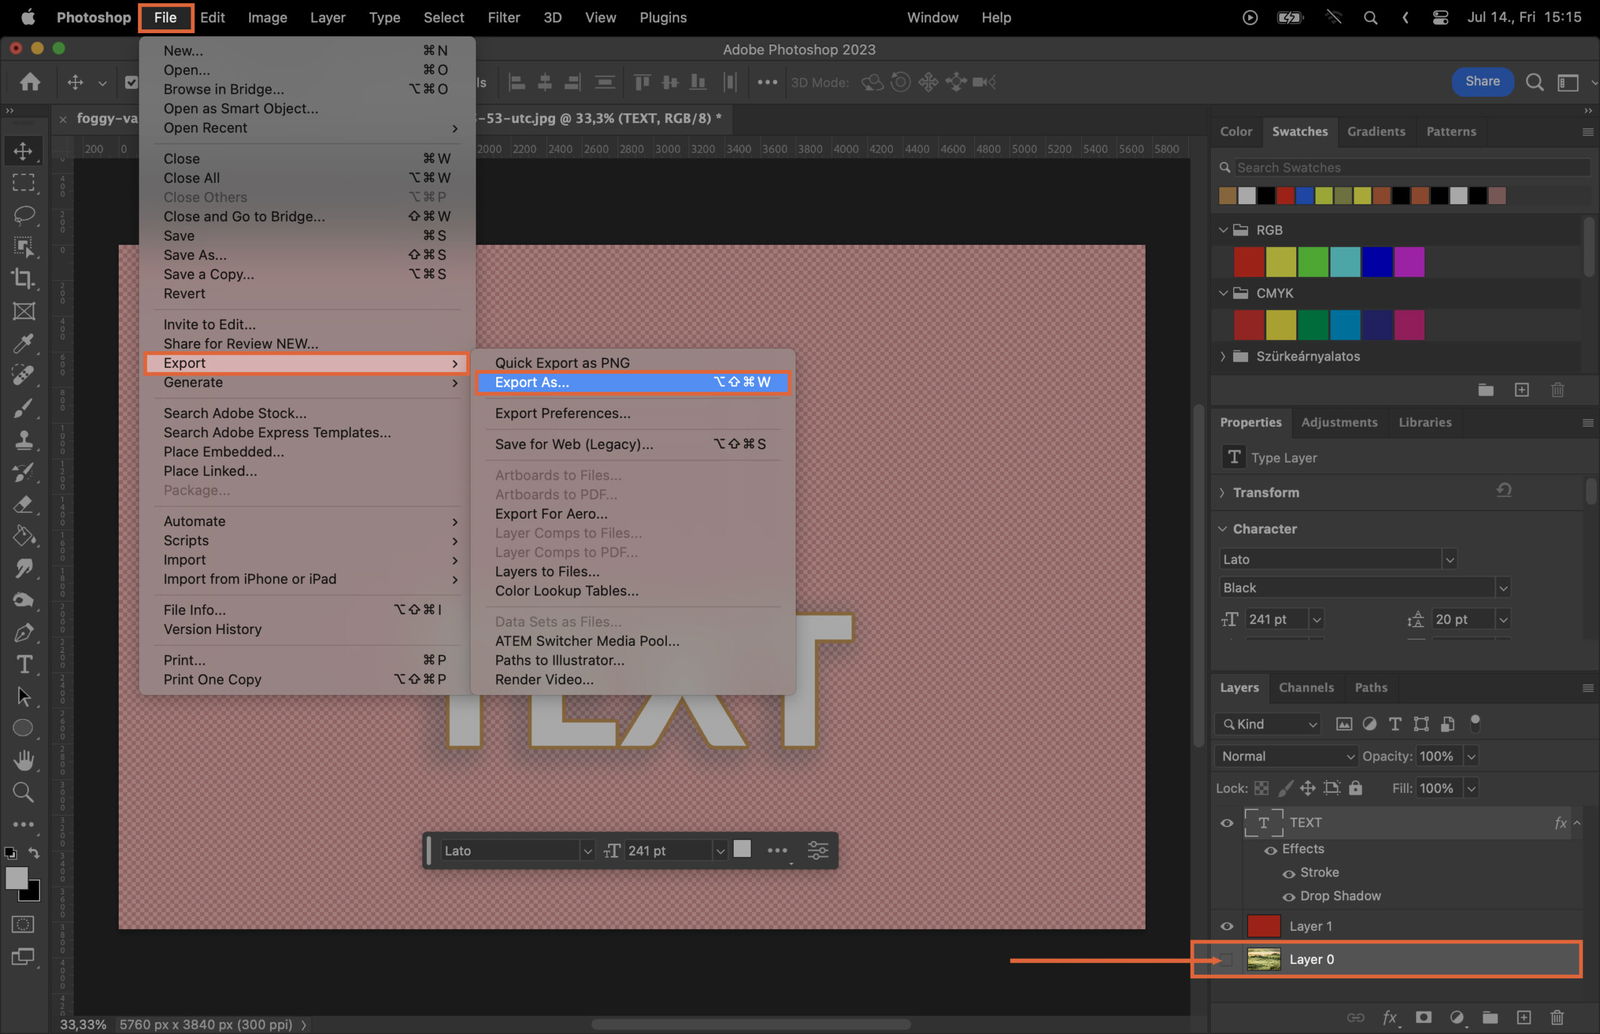
You’ve created your overlay. Now save it.
To save your overlay as a Photoshop file, go to ‘File’, then ‘Save As’. Choose ‘Photoshop’ from the ‘Format’ menu. This way, you can edit your overlay later.
To save your overlay as a PNG file, select ‘PNG’ from the ‘Format’ menu. This is useful if you want to use your overlay in other applications. Don’t forget to turn off the base layer, so only the overlay is visible.
![P32 [Lead gen] sidebar banner Related ebook](https://expertphotography.b-cdn.net/wp-content/uploads/2021/10/P32-Lead-gen-sidebar-banner-Related-ebook-300x295.jpg)
![P32 [Lead gen] Sidebar Banner](https://expertphotography.b-cdn.net/wp-content/uploads/2021/10/P32-Lead-gen-Sidebar-Banner-300x245.png)
![P32 [Lead gen] Sidebar Banner 2](https://expertphotography.b-cdn.net/wp-content/uploads/2021/10/P32-Lead-gen-Sidebar-Banner-2-300x245.png)